
Why Primer Peels Off Gel Coat Without a Scuff Pass
Primer applied straight to the glossy surface of an unpainted fairing usually starts to flake, blister, or peel within a few weeks. The primer batch and the mix ratio are rarely to blame. The gel coat was never scuffed, so the primer has nothing to hold. Unpainted fairings arrive from the factory or an aftermarket supplier with a cured gel coat: a hard, resin-rich outer layer that protects the fiberglass underneath. That layer is deliberately slick and chemically sealed, which is what you want for handling and shipping and the opposite of what paint needs.
Primer holds through two mechanisms: a chemical bond with the substrate and a mechanical grip on its texture. A clean but unscuffed gel coat offers little of either. Its surface energy is low, and the surface is too smooth for the primer film to key into, so the primer cures into a shell that sits on top of the gel coat instead of fusing with it. Road vibration, heat, and moisture then work that shell loose. A scuff pass is what breaks the cycle.
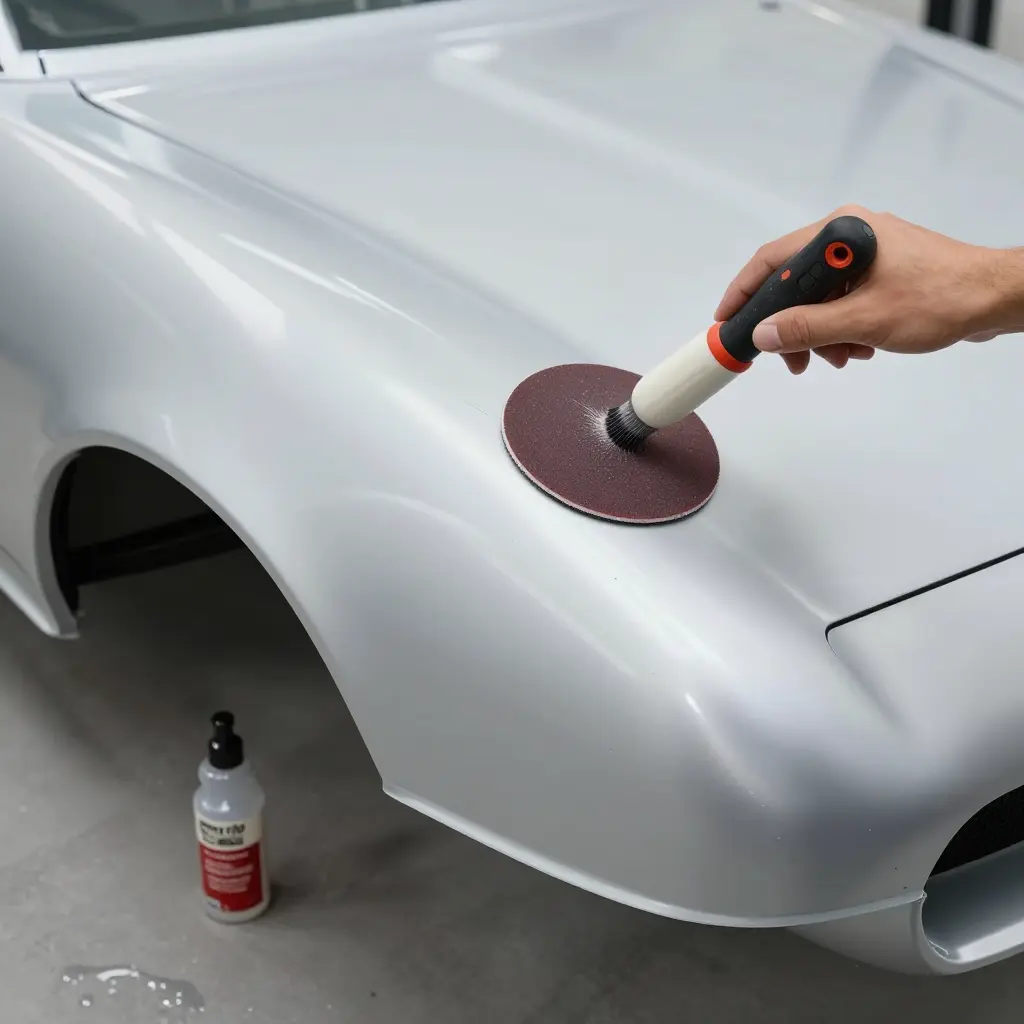
A scuff pass is a light, controlled abrasion with a fine-grit pad or paper, generally in the 320 to 600 grit range. It removes almost no material. What it does is open the surface and cut the micro-tooth primer needs to bond. Skip it and you are gluing paint to glass. This step’s place in a full refinishing job is covered in this guide on painting motorcycle fairings. The rest of this article covers why the scuff pass matters, where primer fails without it, and how to prep unpainted fairings so the finish holds.
What Gel Coat Actually Is
Gel coat is neither paint nor primer. It is a cross-linked polyester, vinylester, or epoxy resin, applied as the outermost skin of a fiberglass or composite panel. Most factory sportbike and cruiser bodywork is molded ABS plastic and painted, but fiberglass fairings, including many aftermarket sets, come with a gel coat. It cures hard, glossy, and chemically sealed, and it protects the laminate underneath from sunlight, moisture, and road grime.
That gloss is the point of the material and also the problem when a panel needs repainting. Cured gel coat behaves like polished plastic: smooth, non-porous, and chemically inert. It does not react with anything laid on top of it, primer included.
Why the Surface Repels Primer
Primer bonds through a chemical reaction with the substrate or a physical grip on its texture. Virgin gel coat provides almost neither. The resin is fully cross-linked, leaving few open molecular sites for primer to latch onto, and a mirror-smooth surface offers nothing to bite.
Three properties do the damage:
- Chemical inertness – the cross-linked resin is essentially non-reactive, so primer cannot form a reliable chemical bond with it.
- A non-porous, sealed skin – there are no microscopic pores for resin or solvent to soak into and anchor.
- An ultra-smooth, low-energy finish – the surface offers almost no mechanical key, so a cured primer film simply sits on top and lifts away.
Proper fairing surface prep is not an optional extra. Sanding or scuffing breaks the inert skin and creates the tooth primer bonding needs. For a broader look at how these panels are built and finished, see our motorcycle fairings guide. Skip the scuff pass and primer is left holding onto a glossy, chemically sealed surface that will let it go.
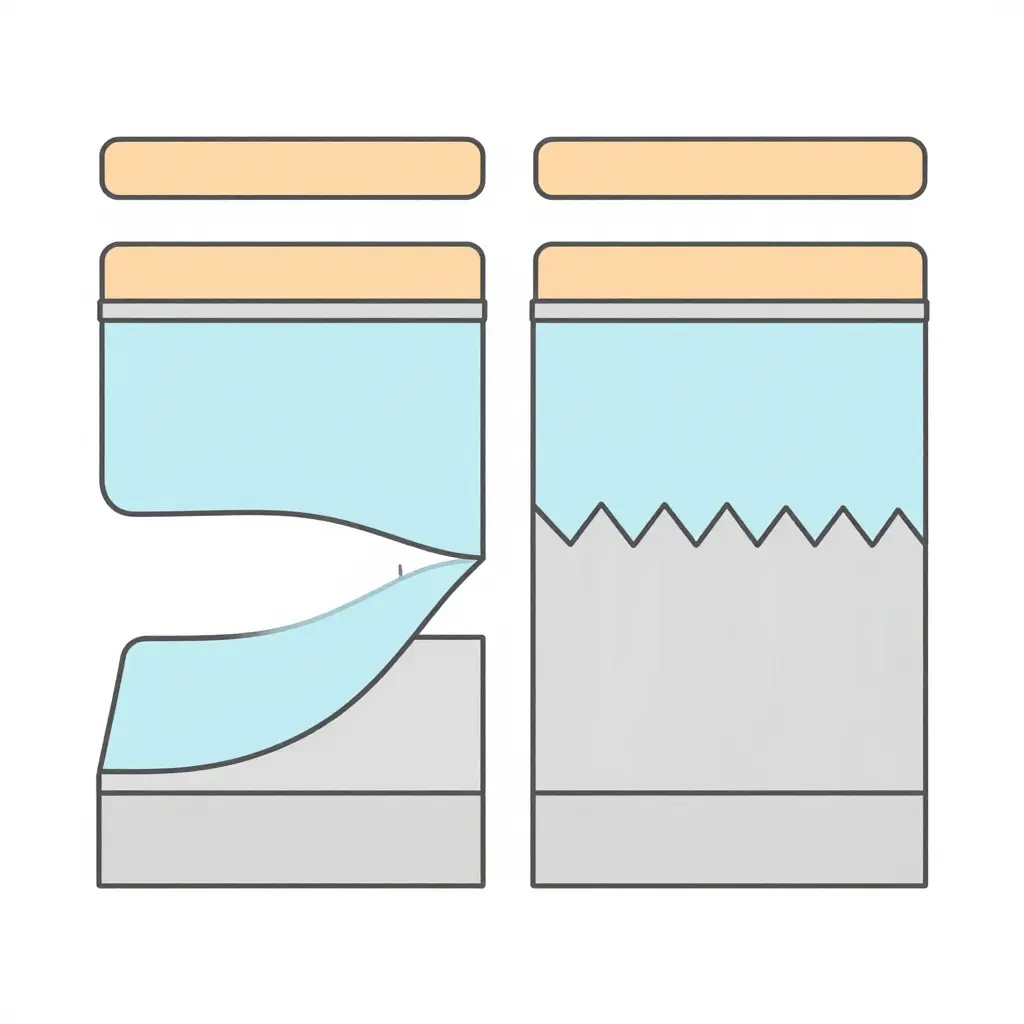
In the cross-section, the left side shows primer on an untouched, glossy gel coat. It sits on a slick surface with nothing to grip, so it lifts and peels. On the right, the gel coat has been scuffed into a textured surface that gives the primer countless tiny anchors, and it stays put.
The Physics of Mechanical Adhesion and Surface Energy
Paint sticks because the surface gives it something to grab. Two properties decide the outcome: surface energy and mechanical adhesion.
Surface energy measures how readily a surface bonds with something else. High surface energy attracts liquids such as primer; low surface energy pushes them away. A freshly sanded surface has dangling molecular bonds available to bond. A slick, sealed surface has already satisfied them, which is why primer beads on gel coat.
Mechanical adhesion is physical: paint grips the tiny peaks and valleys of the surface. It depends on shape and texture rather than molecular chemistry, and it is why a scuff pass matters on painting fairings or any bodywork.
Why a Scuff Pass Matters
A scuff pass scratches the surface without removing meaningful material. It does two things: it cuts the micro-texture that primer flows into and locks onto, and it raises surface energy by stripping contaminants and exposing fresh, reactive material. The result is a surface that accepts primer chemically and holds it mechanically.
Chemical vs. Mechanical Adhesion
- Chemical adhesion is a bond at the molecular level: the paint and the surface share electrons and attract each other. It is strong, but it requires a compatible surface.
- Mechanical adhesion is a physical interlock. Paint hardens inside the roughness of the surface and wedges itself in place, which works even when the two materials are chemically incompatible.
Gel coat has low surface energy and a glass-smooth finish, so without a scuff pass primer has neither chemistry nor grip to work with and peels when stressed. Scratch the surface and raise the energy, and the primer finally has a reason to stay.
Seeing the Difference: Primer Adhesion by Preparation Method
The table below compares crosshatch adhesion retention for four common fairing preparation approaches, from doing nothing at all to a proper mechanical scuff.
| Preparation Method | Crosshatch Adhesion Retention (%) |
|---|---|
| Unscuffed Gel Coat | 18 |
| Solvent-Wiped Only | 25 |
| Scuff Pass with 320-Grit | 88 |
| Scuff Pass with 180-Grit | 92 |
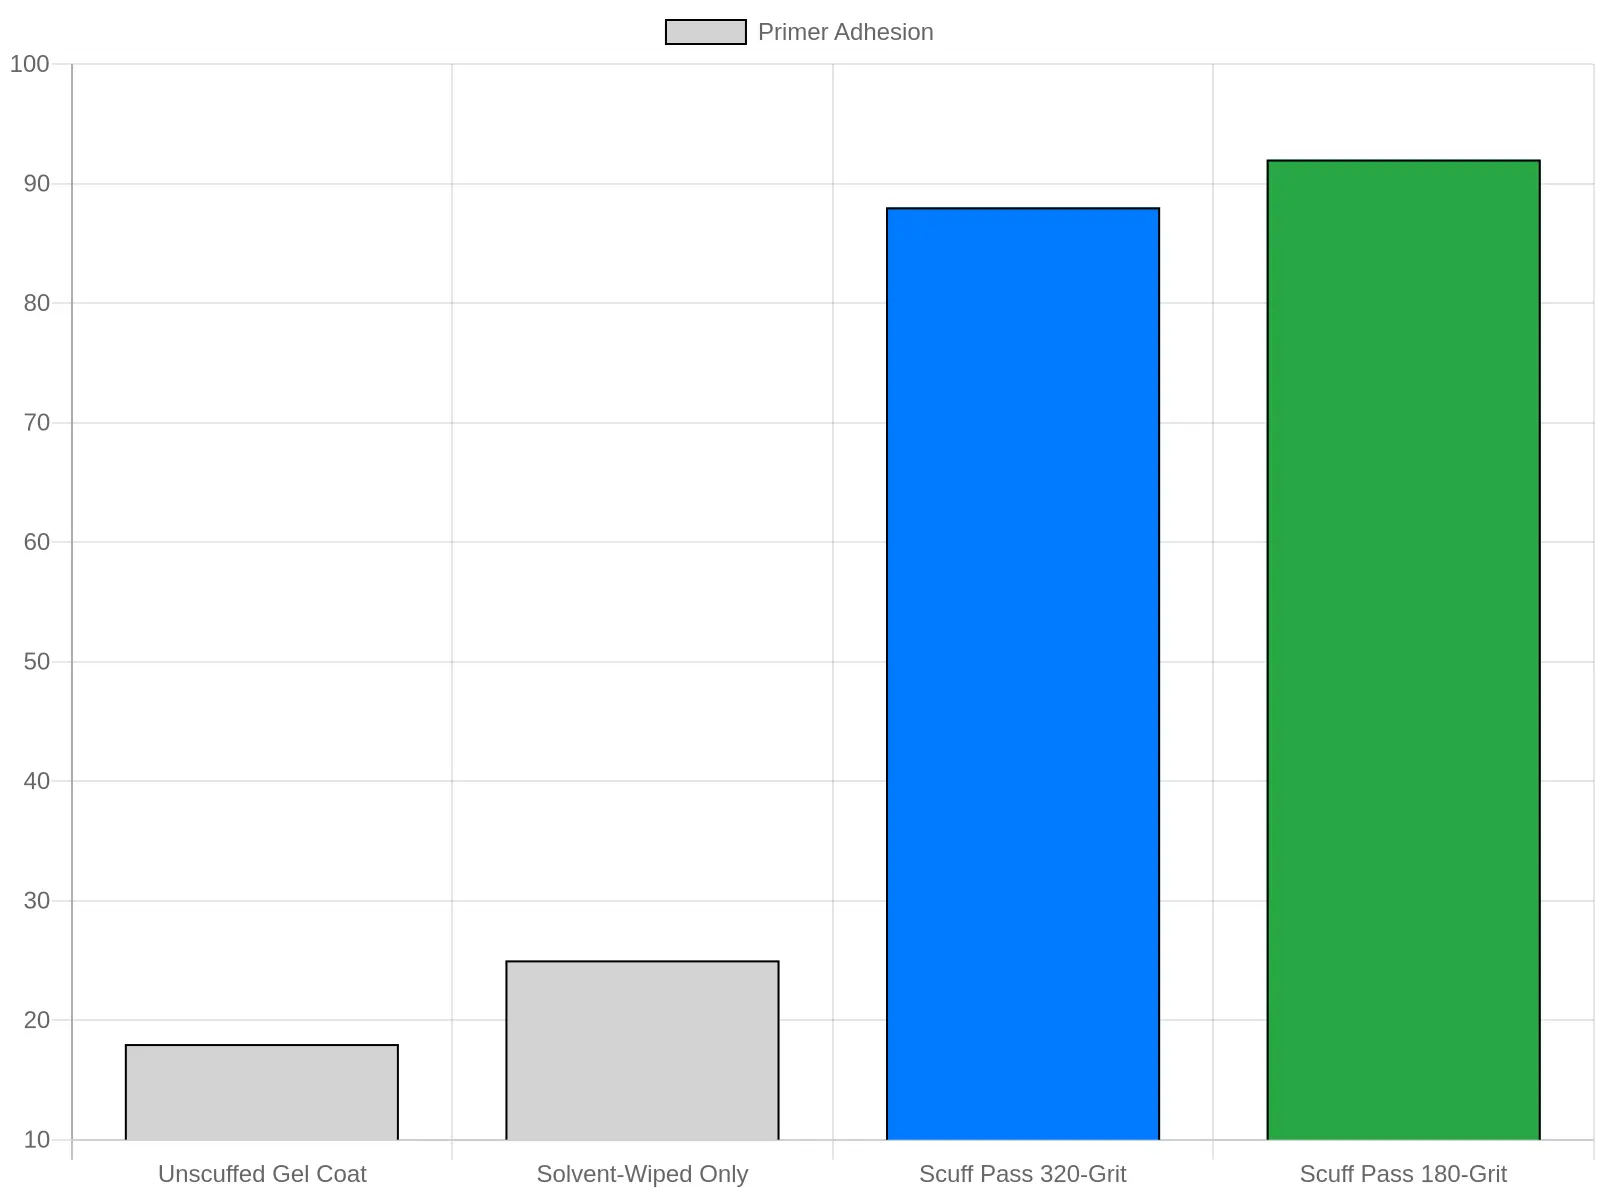
A solvent wipe alone barely changes the result, but a proper scuff pass moves primer adhesion from roughly 20 percent to nearly 90 percent. The mechanical grip a sanded surface creates is the biggest single factor in keeping primer bonded to gel coat. To get the step right from start to finish, read how to paint motorcycle fairings before mixing the first batch of primer.
The Physical Fallout of Skipping the Scuff Pass
Gel coat is hard, glossy, and chemically stubborn, which is what makes it so hostile to paint. Primer cannot bite into an unscuffed surface. Instead of spreading and gripping, it beads on top, the way water does on a waxed hood. That is poor wetting, and the failure starts there.
With no mechanical tooth, microscopic air pockets get trapped between the primer film and the gel coat, and those voids become hidden weak points. The primer’s solvents also have nowhere to go. They cannot flash off through the sealed gel coat beneath, so they linger, softening the interface and keeping the bond fragile for days or even weeks after the job “looks” finished. On aftermarket motorcycle fairings, that fragile window is exactly when the bike gets assembled, ridden, and washed.
Heat cycles, moisture, and vibration then stress the film, and the buried weaknesses open up. Bubbles lift, edges curl, and the finish releases in sheets.
Common Failure Signs to Watch For
- Edge peel – primer lifting first at panel borders and masked lines
- Blistering – dome-shaped bumps where trapped solvent expands under heat
- Cracking – fine, spider-web fractures as the film pulls across a slick surface
- Flaking – whole patches letting go during sanding or washing
- Fish-eyes and crawling – primer pulling away from smooth spots mid-spray
Why It Hurts Enthusiasts and Shops Alike
Weak gel coat prep does not just ruin the primer coat; it undermines everything stacked on top. Base coat cures on a moving foundation, clear coat magnifies every flaw, and the final shine hides none of it. In a shop, that means rework: strip the panel, scuff it properly, respray it, and absorb the labor and materials. For an enthusiast painting unpainted fairings over a weekend, it means a finish that looks flawless for two weeks and then fails, along with the paint, the hours, and a job that has to be redone from scratch.
Surface Preparation Methods for Unpainted Fairings
| Method | What It Removes or Changes | Resulting Adhesion Quality | Recommended Use Case |
|---|---|---|---|
| No prep | Nothing – leaves slick gel coat intact | Poor; primer and paint peel or flake within months | Never – avoid for any painted surface |
| Solvent wipe only | Removes dirt, oils, and mold release wax | Weak; cleans the surface but does not create a mechanical tooth | Quick dust-off just before masking, never as the sole prep |
| Hand scuff with sandpaper | Scuffs the gel coat and adds a light mechanical profile | Moderate; inconsistent across broad panels by hand | Small touch-ups, edges, and tight spots a sander cannot reach |
| Dual-action (DA) sander scuff pass | Abrades the entire gel coat uniformly, adding a consistent mechanical tooth | Strong and even; forms the ideal anchor for primer and paint | Full fairing repaints and any large, glossy panel |
A uniform mechanical profile is the only thing that gives primer something to lock onto on smooth, waxy factory gel coat, which is why skipping the scuff pass is a common cause of peeling paint. Once prep is done, follow a proper painting motorcycle fairings workflow to lock in durable results.
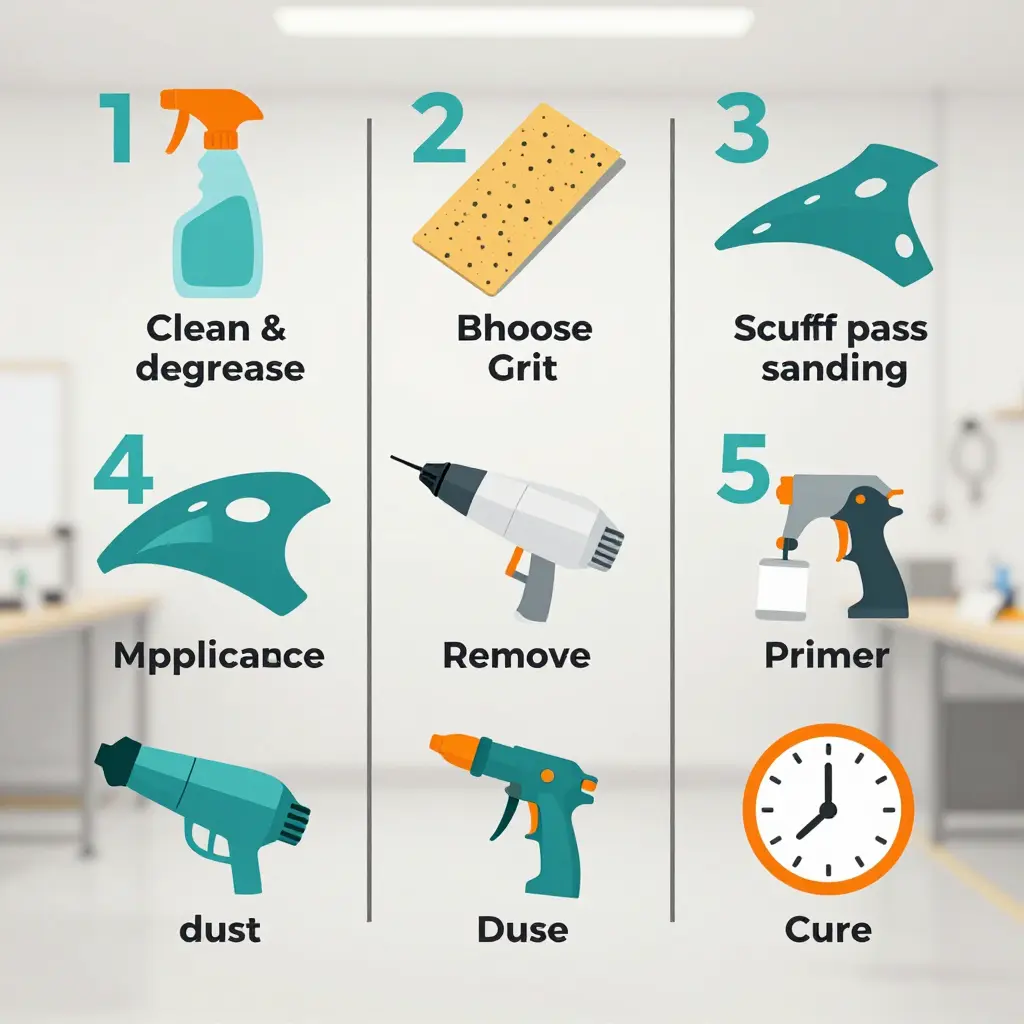
Primer that lifts off a gel coat within days almost always points to skipped surface prep. Whether you run a custom shop or are just refreshing a track bike, the sequence below is what separates a finish that lasts from one that peels. Here is the exact workflow for painting motorcycle fairings, step by step.
The 7-Step Preparation Workflow
-
Clean and degrease the panels first. Wash each panel with a wax-and-grease remover and a clean microfiber towel so you are not grinding mold release agents or road oils into the surface. Contamination trapped under primer is among the most common causes of adhesion failure.
-
Choose the correct grit for a scuff pass. On new gel coat, use 320 to 400 grit so you cut enough tooth for mechanical grip without gouging the surface. Too fine and the primer has nothing to bite; too coarse and you leave scratches that telegraph through the topcoat.
-
Perform an even, consistent scuff pass across every curve. Sand in a crosshatch pattern with steady pressure so no shiny gel coat spots remain, because primer only bonds where the surface has been abraded. Watch the tight radii around mounting tabs, where it is easy to miss material.
-
Remove all dust and residue before priming. Blow the panels off with compressed air, then wipe with a tack cloth and a final degreaser pass to eliminate sanding dust. Leftover particles create fisheye and weak spots across the entire primer application.
-
Apply a compatible primer in thin, even coats. Use an epoxy or urethane primer designed for gel coat and spray two to three light coats, giving each one flash time between passes. Thin coats cure evenly and prevent the solvent entrapment that leads to lifting.
-
Allow the primer proper cure time. Follow the product data sheet exactly, since rushing the cure keeps solvents trapped and undermines adhesion. Temperature and humidity shift that window, so measure rather than guess.
-
Block-sand the cured primer before color. Knock the primer back with 400 to 600 grit to flatten texture and expose any low spots. A smooth, dull primer layer gives your base coat a clean foundation to bond to.
If you have not settled on panels yet, this motorcycle fairing kits guide is a useful reference before you commit to a paint project.
Quick Grit Reference
| Stage | Recommended Grit | Purpose |
|---|---|---|
| Scuff pass | 320 – 400 | Create mechanical tooth on gel coat |
| Primer prep touch-ups | 400 | Blend stubborn spots |
| Block-sanding cured primer | 400 – 600 | Flatten texture before color |
Get the sequence right and primer adhesion stops being a mystery. For a deeper look at the underlying science, read about why primer peels off gel coat without a scuff pass before you pick up the sandpaper.
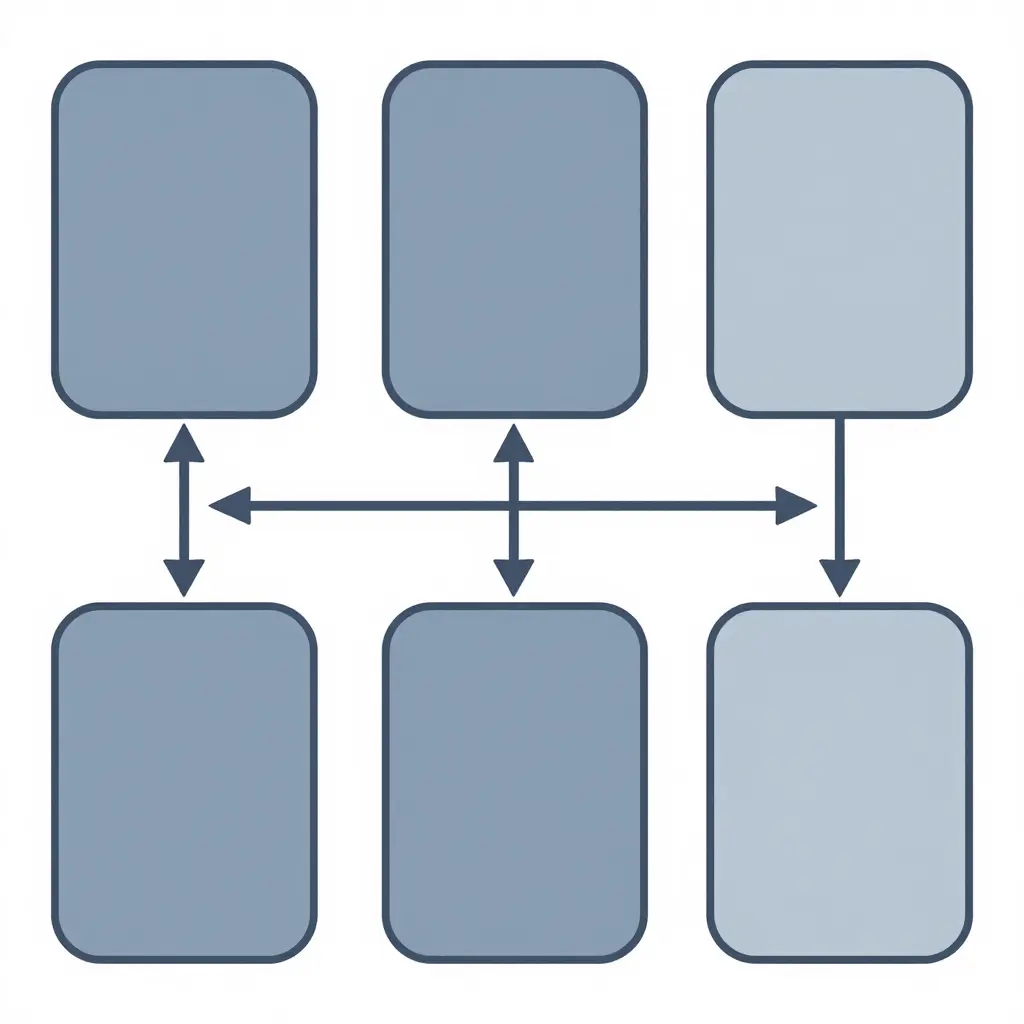
The flowchart above shows the prep sequence in the order it must be followed: Clean, Scuff Pass, Dust Removal, Primer, Cure, Topcoat. Each step leads into the next, and Scuff Pass sits directly between cleaning and priming – the step that gives primer mechanical grip on the gel coat instead of letting it peel away.
Grit Selection and Scuffing Technique for Gel Coat
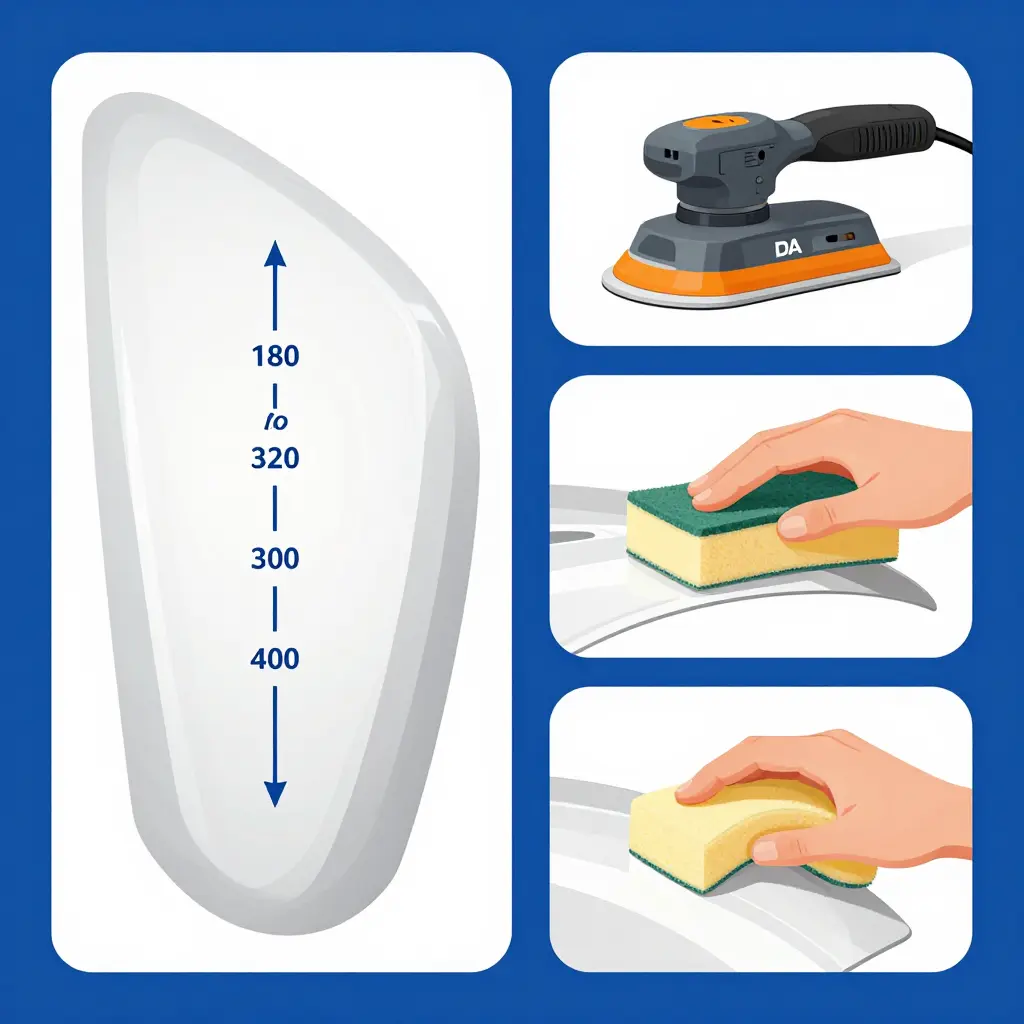
Before any primer touches a fairing, the surface has to give the paint something to grip. That grip comes from grit selection and a consistent scuff pass across the gel coat. Get either wrong and fresh primer can lift off in sheets within a season.
Which Abrasives Actually Work on Gel Coat
Gel coat is a hard, glossy polyester surface that dulls soft abrasives quickly. Stick with aluminum oxide or ceramic abrasives on paper or film backing – they stay sharp longer and cut evenly instead of loading up. Garnet paper dulls fast and burnishes the surface, which is the opposite of what you want. Dry sanding is fine for a scuff pass; wet sanding works too but adds cleanup time.
How Grit Range Controls the Key
The number on the back of the paper sets how deep the mechanical key goes. Lower grits carve deeper grooves; higher grits leave those grooves shallower and tighter.
| Grit range | What it does | Key depth and risk |
|---|---|---|
| 80-120 | Strips old coatings, flattens damage | Very deep key, coarse scratches primer cannot hide |
| 180-220 | Removes defects, starts blending | Medium key, good balance for fairings |
| 320-400 | Final scuff before primer | Shallow, uniform key – paint-ready |
| 600+ | Blending and polish zones only | Too smooth to hold primer |
For most fairing prep, 320 to 400 grit is the range to aim for. It leaves enough tooth for primer to lock onto without cutting so deep that you see scratch ghosts later.
Scuffing Edges, Curves, and Recesses Evenly
Flat panels are easy. Complex shapes are where mistakes happen: edges lose gel coat in seconds, curves get missed in the middle, and recesses never see the paper at all.
With a DA sander, keep it moving and use light pressure, letting the orbit do the cutting. On edges, ease off the pressure and tilt the pad so you feather rather than gouge. By hand, wrap a flexible foam or neoprene block to follow curves, and use a sponge or your fingertip in recessed areas so every surface gets the same cut.
After the first scuff pass, wipe with a tack cloth and check under bright light from a low angle. Any shiny spot is a missed area that will peel.
Why Over-Scuffing and Skipped Grits Cause Problems
Over-scuffing means staying on one spot until you cut through the gel coat or heat the surface, and both create weak spots that fail under paint. Skipping a fine grit is just as bad. Jumping from 180 straight to primer leaves deep scratches that primer cannot fill, so they telegraph through the topcoat as visible lines. Step through the grits and finish fine, and the finish stays smooth. If you are starting from bare replacement panels, choosing quality best aftermarket motorcycle fairings with thick, even gel coat makes this whole process far more forgiving.
FAQ: Primer and Gel Coat Adhesion
Paint adhesion on fresh gel coat is one of the most common problems in motorcycle finishing. These quick answers cover what enthusiasts and shops ask most often, from whether you can skip sanding to why primer peeling happens even when you did the prep. On quality panels such as Airtech motorcycle fairings, solid preparation makes every coat hold far better.
Do I really need to scuff new unpainted fairings before priming?
Yes, you do. New unpainted fairings arrive with a slick, waxy gel coat surface and mold-release residue that offers almost nothing for primer to grip. A light scuff breaks that glaze and creates the mechanical teeth the primer needs to bond permanently.
Can I use a chemical adhesion promoter instead of sanding?
An adhesion promoter helps, but it is not a full replacement for sanding. These products improve chemical bonding on tricky plastics and bare spots, yet they work best paired with at least a light scuff pass to remove contamination. Treat them as a booster, not a shortcut.
What grit should I use on gel coat?
Use 320 to 400 grit for most primer systems, or 600 grit if you are doing a final scuff before sealer. The goal is a uniformly dull, matte surface with no visible shine, not deep scratches. Always sand wet or use a dust-extraction setup to keep the surface clean.
Why does primer peel even after scuffing?
Primer usually peels after scuffing because of leftover mold release, silicone, or oil that the sandpaper simply pushed around instead of removing. Skipping a proper wax-and-grease remover, or using the wrong solvent, leaves a contaminated layer that the primer cannot bond to. The scuff pass exposes fresh material, but only a thorough chemical clean makes it stick.
How long should I wait before topcoating?
Most primers need 30 to 60 minutes of flash time before topcoat, but the product’s technical data sheet is the authority. Wait until the primer is uniformly dull and dry to the touch, with no tacky or glossy spots. Rushing this step traps solvents and causes the whole system, primer included, to fail later.
Quick Reference
| Question | Short Answer |
|---|---|
| Scuff new fairings? | Yes, always |
| Adhesion promoter enough? | No, pair with sanding |
| Grit for gel coat? | 320-600 grit |
| Primer peeling cause? | Contamination or oil |
| Topcoat wait time? | Per data sheet, 30-60 min typical |
Final Recommendations
One point matters more than the rest: a scuff pass is what makes primer stick to gel coat, and skipping it guarantees future peeling. Freshly molded fairings arrive with a smooth, glossy gel coat surface that paint and primer cannot mechanically grip. Without that scuff pass, your primer sits on top of the shine rather than biting into it, and every bump, wash, and temperature swing works to lift it off. When you are painting fairings, treat the scuff pass as non-negotiable, not optional.
Quick Guidance by Audience
- Enthusiasts: Sand with 320-400 grit until the gloss disappears, clean with a quality degreaser, then apply primer within the window recommended by the manufacturer. Patience here saves a full repaint later.
- Shops: Standardize the scuff pass in your written prep procedure. Consistent grit, consistent cleaning, and documented cure times keep every job from coming back.
- Customization specialists: Match your abrasives and primers to the specific gel coat, and inspect under strong light before spraying color. A perfectly flat, uniformly dull surface is your green light.
High-quality fairings reward careful prep. If your build includes a classic cruiser front end, this breakdown of choosing a headlight fairing for a motorcycle is a solid companion to your paint work.
Buy fairings that fit and finish well, follow a disciplined scuff pass every time, and lean on trustworthy resources like UltimateMotorX for tested advice. When prep is right, the gel coat and primer finally work together – and that finish lasts.