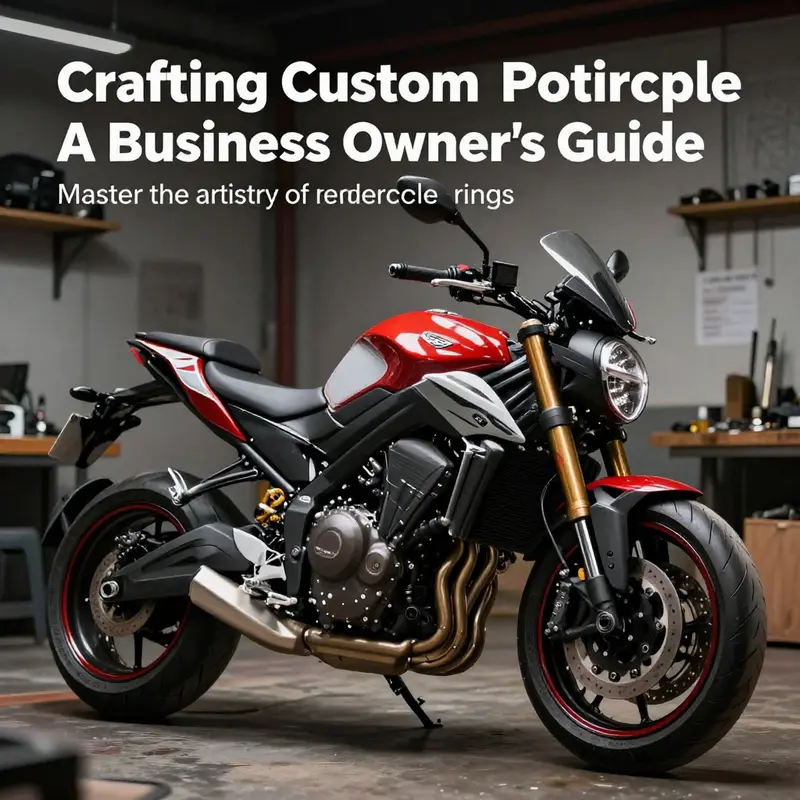
In the world of motorcycle customization, creating your own fairings offers an incredible opportunity for business owners to enhance their product offerings. Custom fairings not only elevate the aesthetic appeal of motorcycles but also contribute to their aerodynamic performance. However, engaging in this detailed venture requires an in-depth understanding of design principles, mold creation, and compliance with safety standards. Each chapter of this article will take you through a crucial aspect of fairing creation, from innovative design techniques to the critical safety considerations, ensuring that your venture is both successful and compliant with industry standards.
Shaping the Wind: Design, Modeling, and the Craft of DIY Motorcycle Fairings

Shaping the wind is as much a design philosophy as a manufacturing challenge. When you set out to make your own motorcycle fairings, you enter a space where aesthetics, aerodynamics, and structural integrity must speak with one voice. The design phase translates rider posture, bike geometry, and the flow of air into a coherent surface that will later become a protective shell. This is an iterative conversation between digital imagination and physical reality, starting long before any material is touched.\n\nFrom the outset, a strong digital core is essential. A three dimensional model is not merely cosmetic; it is a faithful, parametric representation of the bike’s profile as it relates to rider stance, controls, and instrument visibility. CAD tools are the scaffolding for fit testing and geometry refinement without cutting a sheet of material. You model the upper fairing, side panels, belly, and tails with an eye toward smooth transitions, predictable stress paths, and clearance from the rider’s boots and gloves at lean.\n\nDesign and prototyping form a loop. A lightweight prototype using aluminum sheet and mesh provides a tangible sense of mass distribution and line. The goal is fidelity of shape and gaps, not a finished paint job. Tape can help form complex curves temporarily, letting you observe fit, edge alignment, and interference with the fuel tank, radiator shrouds, or fork legs. The point is to validate geometry and mounting relationships before committing to a full laminate.\n\nAs the digital model nears production intent, material choice and layup strategy come into view. Common options include fiberglass, carbon fiber, and thermoplastics. The material drives tooling, mold making, curing, finishing, and surface treatment. The laminate schedule determines stiffness, impact resistance, and surface quality after polishing and paint. The mold release and draft angles become part of the design language itself.\n\nAerodynamics informs the model even without wind tunnel testing. Simulated airflow and pressure maps reveal how contours behave at road speeds, crosswinds, and lean angles. The model should accommodate mounting points, engine radiators, exhaust routes, and cable pathing. The result is a living document that records fastener locations, seam sealing strategies, and interior ventilation for electronics if needed.\n\nThe shift from digital design to physical reality follows the classic route: plug, negative mold, and staged lamination. The plug is a full scale replica shaped from foam or clay, capturing surface intent. The mold, often fiberglass or resin, defines the negative cavity for the final fairing. Lamination stacks layers of reinforcement with resin, tuned for where strength is needed and weight saved. A hybrid approach—structural aluminum supports paired with a skin—can offer practical strength and easier manufacture in some projects.\n\nFinishing brings the look together. After curing, the part is demolded and sanded, sealed, primed, and built up with clear or pigmented coatings that resist fuels, heat, and abrasion. The final surface should wear gracefully under sun and weather while preserving edge protection and seam integrity. The aesthetic outcome is a visible indication of a successful blend of form and function, not a mere ornament.\n\nFinally, approach the work as a safety-conscious, standards-aware endeavor. Custom fairings carry loads, affect aerodynamics, and contribute to protection in a crash. Consult established guidelines and, when possible, obtain professional input on thickness, laminate sequence, and attachment strategies. This care matters as much as speed or style, because the goal is a durable, ride-ready component that respects the bike’s dynamics and the rider’s safety.\n\nThe craft is an ongoing dialogue between aspiration and constraint. Expect to revise curves and mounting points after fit tests, adjust cable routing, and refine edge rounding for improved stability and comfort. The journey rewards patience with a final piece that integrates with the bike’s identity while meeting real-world demands.
Shaping the Skin of Speed: Mold Craft and Lamination for Custom Motorcycle Fairings
Shaping the skin that covers a motorcycle is both a precise craft and a measured gamble. The fairing is more than a cosmetic shell; it influences aerodynamics, rider protection, cooling, and even the way a bike handles at speed. When you decide to make your own fairings, you begin a journey that centers on two fundamental processes: mold creation and lamination. The mold defines the shape, the lamination gives the shell its strength. Every choice along this path—from the initial model to the final paint—echoes in the bike’s performance and in the rider’s confidence. The elegance of a well-made fairing lies not in a single clever trick, but in a coherent chain of decisions that balance form, function, and safety. This chapter threads the steps into a seamless narrative, so you can see how each action builds on the one before it, and why careful planning matters at every turn.
The journey starts with design and modeling. Before you touch a piece of material, you must translate your vision into a model that a craftsman or a shop can reproduce. Modern practice begins with CAD software that lets you draft a precise, aerodynamically informed shape. Your digital blueprint should respect the geometry of your motorcycle, including mounting points, radiator intakes, brake lines, and the electrical harness that runs beneath the fairing edge. Aerodynamics is not a distant theory here. Subtle curves and strategic vents can reduce drag, channel air to where it helps cooling, and reduce buffeting the rider’s helmet. Yet a design that looks dramatic on a screen can be impractical in real life. The fit between the fairing and the existing bodywork matters intensely. That means a robust check of clearance around moving parts, foot pegs, and the rider’s line of sight. It also means anticipating the way the fairing will mount to a subframe or bracket, because complex shapes demand accurate mounting geometry to preserve stiffness and alignment.
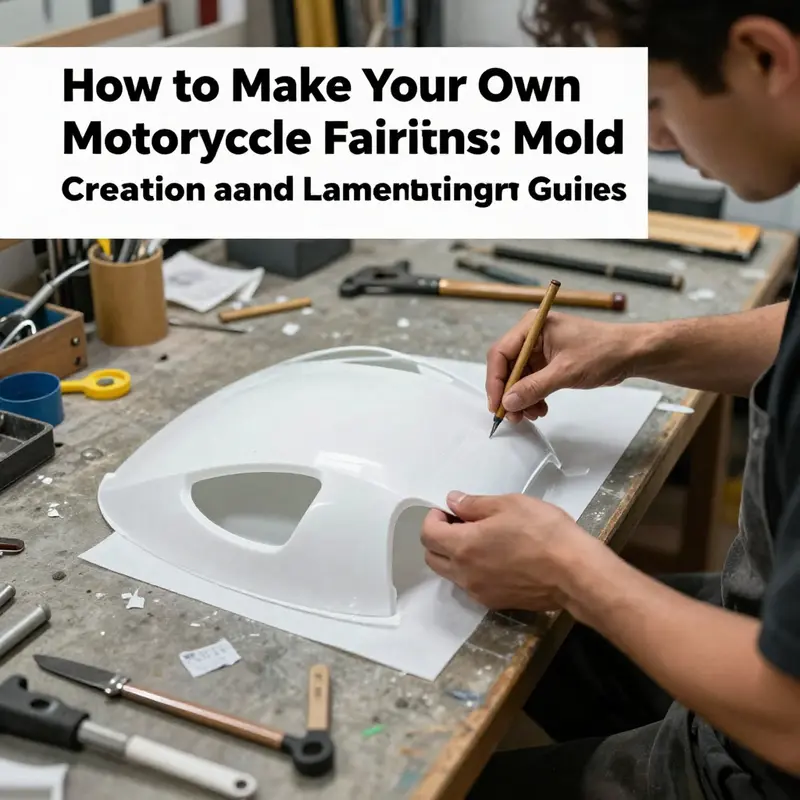
When the CAD has matured into something you trust, you move to creating a physical plug—a positive form that captures the exact outer surface you want for the final fairing. The plug might be carved from foam or shaped from wood, or even repurposed from an existing panel if you are aiming for a retrofit look. The key is to craft a surface that is perfectly smooth and dimensionally faithful to the shape you designed. Any tool marks or small dents on the plug will translate into the final piece, so the work on the plug is meticulous. On a high end project, some builders opt for CNC machined plugs carved from foam or urethane foam blocks. The precision origin matters because the mold that follows must be faithful down to the millimeter to ensure proper fit and aerodynamic consistency.
Once the plug is ready, the next step is mold making. A negative mold is formed by laying up layers of fiberglass or resin over the plug. A release agent is essential at this stage; without it, the mold would adhere to the plug and damage both components when you separate them. The mold is the blueprint for every future fairing, so it must be robust and dimensionally stable. The process often uses a gelcoat as the first protective surface inside the mold, followed by a series of fiberglass or carbon fiber layers that form the negative impression. For projects that demand tighter tolerances and tougher performance, CNC-machined molds are a common choice. They ensure roundness and edge sharpness remain consistent from one batch to the next, a crucial factor when you plan to produce more than one fairing or when you test different thicknesses and layups.
With the mold in hand, you prepare for the lamination that will transform the form from a hollow negative into a solid, ride-ready shell. The preparation begins with the mold surface: a clean, smooth base is essential to a flawless finish. A gelcoat is often sprayed or brushed onto the mold to build a layer that acts as the outermost skin of the final fairing. Gelcoat not only provides a glossy surface but also offers UV resistance and a barrier against moisture, which helps keep the composite layers from degrading over time.
Layup is where the art of lamination comes alive. You cut sheets or plies of fiberglass or carbon fiber fabric and lay them into the mold with care. Each layer has a purpose: the base plies create the fundamental stiffness; intermediate layers control stiffness distribution and impact resistance; outer plies influence the surface appearance and resistance to environmental exposure. The orientation of each fabric layer matters. You’ll see practical strength gains when carbon fibers or glass fibers are aligned along the major load paths, and you’ll avoid wrinkles or air pockets by carefully smoothing the fabric as you lay it in. The process is a balance between speed and precision. Rushing can trap air and create voids that compromise strength, while overly slow layups can introduce inconsistencies due to temperature and humidity.
Resin is critical in saturating the fabric so the fibers can carry load. The two most common resins are polyester and epoxy, with epoxy offering superior strength and environmental resistance. Polyester resins cure quickly and are easier on the wallet, but epoxy systems tend to deliver better long-term performance under stress. The choice of resin also influences the curing process and postcure handling. Catalysts or hardeners are mixed with the resin in precise ratios, and the mixture must be blended thoroughly to avoid weak spots. As you apply resin, you work to saturate every fiber thoroughly; you brush, roll, and sometimes vacuum out any trapped air. Vacuum bagging or light heat can help remove voids and pull the laminate toward the mold, improving compaction and achieving a smoother finish. The goal is a consistent wet-out that minimizes air pockets while preventing over-saturation that can saturate and weaken the gelcoat or the pocket of the mold.
Curing follows lamination and can be the most variable stage. Temperature, resin chemistry, and resin-to-hardener ratios determine cure rate and final properties. Some builders use heat blankets or controlled ovens to accelerate curing, especially in cooler environments where ambient curing would be slow or uneven. It is essential to respect the resin manufacturer’s cure window and to avoid rapid temperature swings that can induce residual stresses. In the best cases, the lamination arrives at a consistent, fully cured state with minimal tack and a surface that takes paint well. Demolding comes next, and this moment reveals both the promise and the risk of the entire process. The mold and the fairing must separate cleanly without tearing or flexing the cured laminate. If the surface has a gelcoat, you may see a fine, glassy sheen that signals a high-quality finish. Any trimming required at the edge is done with care to preserve a clean line; over-trimming can alter the shape or interfere with mounting points and breathability for vents.
Finishing the fairing after demolding is an exercise in refinement. At this stage, you sand the surface to knock down any minor imperfections, smoothing transitions and preparing for color. The exact grit sequence depends on the condition of the surface and the kind of final finish you want. A light sanding with high-grit paper brings a bright smoothness to the gelcoat or epoxy skin. If you want color, you apply a layer of color coat through the paint system, followed by clear coats that add depth and protection against ultraviolet exposure and abrasion. The finish is not merely cosmetic; it must remain stable under sun, heat, and vibration. Paint and clear coats also contribute to impermeability; moisture infiltration can lead to blistering or delamination if you are not careful. A well-finished fairing should look and feel like a single, coherent piece with the rest of the motorcycle rather than a glued-on add-on.
Throughout this saga, the importance of safety cannot be overstated. Working with resins and hardeners involves chemical exposure, fumes, and skin contact risks. Proper ventilation is essential, as is the use of gloves, eye protection, and respiratory protection when sanding or cutting cured laminates. The technical worker should follow all recommendations from the resin and gelcoat suppliers, and the shop should maintain a clean separation between work zones for different materials to prevent cross-contamination or accidental mixing of incompatible systems. Dust from sanding is not merely a nuisance; it can be a health hazard. When working with carbon fiber, the dust is particularly hazardous; it should be captured and disposed of with careful attention to local regulations. The safety mindset is as important as the craft itself because the structural role of a fairing in protecting the rider and contributing to stability during high-speed operation makes care during fabrication non-negotiable.
In practice, the resin and laminate choices interact with the mounting strategy. The fairing must anchor to a subframe or mounting points that can absorb energy and resist flex under wind and weight. A flimsy attachment can create stress concentrations that propagate cracks or misalign panels at speed, where imperfections are magnified by air loading. Therefore, when you plan your layups, you also map out how the piece will interface with the bike’s hardware. You might include extra internal stiffeners or keep certain sections deliberately a touch thicker in high-stress zones. A robust structural plan reduces the risk of fatigue and helps preserve the rider’s safety in the unfortunate event of a crash. If you intend to ride with the fairing, you must test the interface and perform practical checks for fit with the actual components installed, including the headlight housing, mirrors, and windscreen. Even seemingly minor misalignments can create creases or gaps that invite water intrusion or create buffeting that unsettles steering at high speed.
The value of experience shines most clearly in how you translate a finished shell into a practical, durable part. Some builders take a cautious approach, producing a one-off plug and a single mold to explore the concept without committing to mass production. Others, with a clear path to multiple units, invest in a production mold strategy that yields consistent results. Both paths demand discipline in measurement, grip on material behavior, and an awareness that every step you take is a chance to refine. This is why a lot of skilled hobbyists and professional fabricators alike treat the mold as a living document: the plug shape, the release agent used, the resin choice, and the exact layup schedule all live in a record that can guide future iterations. As you refine your process, you might revisit the digital model to tweak curves, adjust vent positions, or adjust the thickness in light of test results. It is common to mirror the best features of your experience into the CAD model for future projects, speeding up development and increasing predictability.
For readers seeking a concrete reference to the mold-making journey, consider a real-world, step-by-step guide that walks through plug construction to final finishing. The Motorcycle Mechanics Magazine article provides a detailed, practical look at this sequence, including how to shape the plug, build the mold, and perform the final finishing of a custom fairing. You can explore that resource at Motorcycle Mechanics Magazine’s mold-making process page. (External reference: https://www.motorcycle-mechanics.com/magazine/2023/08/custom-fairing-mold-making-process)
Within this craft, the hands-on decisions echo the bigger context of modification and customization in motorcycling. The tools you choose—whether a hand plane and sanding block or a CNC-driven mold—must align with your skills, your time, and your safety willingness. The material choices reflect a balance between weight, stiffness, and cost. Fiberglass offers forgiving workability and resilience, while carbon fiber delivers premium stiffness-to-weight ratios but demands higher skill and more careful handling. Each project benefits from a disciplined approach: document every step, test fit often, and maintain a keen eye on how your choices influence the final motorcycle’s dynamics. The final piece, once painted, is itself a conversation between the engineering decisions you made at the mold and lamination stage and the aesthetic choices you apply in color and finish. A well-executed fairing communicates a sense of unity with the bike, as if it grew from the chassis rather than being bolted on as an afterthought.
As you move from one project to the next, you may find value in comparing your build with established lines of fairings designed for specific machine classes. Internal references from reputable catalogs can serve as helpful orientation without constraining your creativity. For example, a catalog of BMW fairings offers insights into how a clean silhouette accommodates detailed cutouts, vents, and mounting interfaces while maintaining the signature stance of a modern sportbike. You can explore such options here: BMW fairings catalog. Remember, though, that your aim is not to imitate another bike but to integrate your own aerodynamic sense with the bike you own and ride.
The chain of decisions in mold creation and lamination is a reminder that making your own fairings is a demanding but deeply rewarding enterprise. It rewards patience, precision, and an honest respect for the limits of DIY fabrication. It also calls for humility: if a certain approach proves too risky or if your tooling is insufficient, the best choice may be to seek a professional shop or invest in certified components. The overarching goal remains rider safety and performance alongside personal expression. When you finally ride your machine with its new shell, the experience becomes a tangible testament to the countless choices you made along the way—the curves that cut through air, the edges that meet the mounting points with exacting fit, and the finish that makes the whole bodywork look as if it was born with the bike rather than built around it. This is the essence of the craft, and it is what keeps a hobby from becoming mere imitation and turns it into a story of engineering, artistry, and risk-managed innovation.
The next steps in your journey might turn toward finishing touches, edge detailing, and practical testing on a controlled course. You may also align with broader standards for protection and performance. Official manufacturer manuals and industry standards bodies emphasize guidelines for maintenance, modification, and safety in ways that help you preserve both warranty and rider safety. This pathway invites you to continue learning, to test, and to refine—always with the rider in mind and with the bike as your collaborator rather than a canvas for invention alone.
In sum, the mold creation and lamination process is the backbone of any serious self-made fairing project. It is where geometry, materials science, and craft converges. It is where aerodynamics and aesthetics meet the realities of weight, strength, and the way a panel will survive the inevitable encounters with the road. It is a discipline that rewards careful planning, rigorous execution, and a willingness to pause when safety risks outweigh potential gains. If you treat each step as a design decision that warrants thoughtful testing and documentation, you are more likely to end with a fairing that looks right, feels right, and performs right when it counts—under open sky, at speed, and in the long arc of your riding life.
Engineering for the Road: Safety and Compliance in Crafting Your Own Motorcycle Fairings

Building your own motorcycle fairings is a venture that sits at the crossroads of engineering ambition and rider safety. The idea of sculpting a shape that not only looks right but also cuts through air efficiently, protects vital components, and behaves predictably in a crash is compelling. Yet the practical demands behind that vision are exacting. This chapter treats the safety and compliance landscape as an integral part of the design process, not as an afterthought. It argues for a mindful path that respects material science, structural dynamics, and legal standards while offering pragmatic routes for riders who want personalization without courting excessive risk. In the end, the goal is not merely a cooler shell on a bike, but a fairing system that behaves as a coherent part of the motorcycle, supporting rider safety, performance, and legal operation rather than threatening them.
At the core of any fairing project lies a triad of concerns: material integrity, interaction with the motorcycle’s frame and systems, and the legal framework within which a vehicle must operate. Each of these dimensions is interdependent. A fairing that looks right but cannot withstand typical aerodynamic loads or an accidental impact will fail when it matters most. Similarly, a shell that interferes with headlights, turn signals, or the radiator fan can compromise visibility, cooling, or electrical reliability, which is not a tradeoff a rider should accept. The third pillar—legal compliance—ensures that the effort remains usable on public roads. In many regions, road-legal requirements extend beyond aesthetics to demand measurable performance from lighting, reflectivity, stiffness, and energy absorption under impact. Disregarding these standards can convert a passionate DIY project into a barrier rather than a benefit, since untested components may be deemed noncompliant by authorities or fail during inspection.
For most riders, the safer and more practical route starts with a decision tree that weighs customization against established safety pathways. If the goal is personal expression or optimized aerodynamics for a specific riding style, modifying existing fairings with compatible kits or using 3D-printed components designed for the bike can deliver both fit and function with far lower risk than fabricating a full fairing from raw materials. This approach preserves the structural interfaces, mounting points, and integration with lighting and electronics that OEM panels have evolved to manage. It also keeps the project closer to components that have already undergone testing and certification, or at least review by engineers who understand the mechanical and regulatory expectations for street use. By aligning with proven interfaces, you increase the likelihood that your work will be compatible with the bike’s existing frame geometry, mounting points, and airflow paths, which in turn reduces the chances of unforeseen loads that could stress the bond lines or distort the fairing under high-speed wind.
When a full-from-scratch build is pursued, the stakes rise quickly. The lamination system—whether fiberglass, carbon fiber, or a high-temperature thermoplastic like reinforced ABS—must withstand a spectrum of conditions. The resin cloth combination should resist impact energy, UV exposure, and a broad temperature range from spring rain to desert heat. The layup schedule matters as much as the material choice. A single dry spot or insufficient weave thickness can become a crack initiation point where the energy of a crash will propagate. In a windstorm or a highway gust, a fairing must retain its shape because even small deformations can alter airflow enough to degrade stability or alter the rider’s line of sight to indicators and mirrors. The risk isn’t merely cosmetic: a fairing that delaminates in a crash can expose rider limbs or interfere with the steering, footpegs, or controls in unpredictable ways. These are not hypothetical issues; they reflect the realities engineers consider when evaluating protective components under crash conditions.
Material selection is not a purely aesthetic choice. Fiberglass remains a common DIY option because it offers a forgiving hand layup, but it is not automatically sufficient for high-energy impacts without careful reinforcement and proper resin systems. Carbon fiber presents superior stiffness-to-weight characteristics, yet it can be brittle if mishandled or poorly bonded, and its failure modes can be sharp and dangerous. Reinforced plastics such as ABS offer impact resistance and impact energy absorption, but they must be designed to handle the heat buildup from engine and exhaust proximity, as well as the long-term effects of UV exposure and moisture ingress. Regardless of the material, the finished part must demonstrate a robust bond to the core mounting structure and clear, reliable integration with the motorcycle’s electrical and lighting architecture. Any misalignment can cause glare from headlights, misrepresent signaling, or even mechanical interference with the front wheel or fork during braking or cornering.
The implications for safety extend to the design process itself. Aerodynamics matters not only for speed and efficiency but for how a rider experiences stability and wind pressure at various speeds and body positions. A fairing that reduces drag may improve mileage and top-end performance, but if it generates unwanted lift at mid-range speeds or creates negative pressure around the forks, it can affect handling. Likewise, airflow management affects radiator cooling and oil cooling routes. A poorly conceived fairing can trap heat or disrupt airflow to critical components, leading to overheating or degraded performance during sustained riding. Thorough testing in a controlled environment, even at the design stage, can help identify these risks before any material is cut or bonded. In practice, this means collaborating with engineers or technicians who can translate a CAD model into a physical reality that preserves both safety margins and structural integrity under load.
The legal dimension is equally consequential. In the United States, fairings must meet Federal Motor Vehicle Safety Standards (FMVSS) related to lighting, visibility, and structural durability. In the European Union, the requirements are shaped by ECE regulations that govern conformity and safety performance for road-going vehicles. Homemade fairings that bypass or ignore these standards run the risk of failing inspection, which can result in fines, the vehicle being deemed unfit for road use, or the rider facing liability in the event of an accident. The reality is straightforward: most DIY fairings do not undergo the same level of crash testing, energy absorption, and durability validation as OEM components. Without that validation, a claim of road legality is precarious at best. Even if a rider manages to pass basic visual inspection, the absence of formal testing data can complicate insurance coverage and complicate warranty concerns if the bike remains under a manufacturer’s program. These are not esoteric concerns; they translate directly into what happens when a vehicle is observed by authorities or evaluated in the aftermath of a crash.
One practical consequence of this safety/legal gap is the recommendation to approach customization with a conservative mindset. Rather than fabricating entirely new shells, consider iterative modifications to existing fairings using compatible kits or add-on components designed for your bike’s model and year. 3D-printed inserts, mounting brackets, or display-appropriate cutouts can provide personalization without eroding core structural interfaces. When such modifications are planned, it’s essential to verify that every mounting point aligns with the frame and subframe geometry, that fasteners are chosen for the anticipated vibrational loads, and that the revised shape remains compatible with the rider’s seating position and body dimensions. A critical check is to confirm that the new silhouette does not trap heat around the engine or interfere with air intake and radiator faces. Even small misalignments can alter the intended airflow and, over time, cause thermal stress or reduced cooling efficiency. The safer path often lies in using kits that explicitly state compatibility with the bike’s make and model rather than fabricating a new fairing system from the ground up.
If the decision is made to proceed with a custom design, early-stage collaboration with a qualified technician or engineer is strongly advisable. They can help translate a concept into a testable design that takes into account the bike’s dynamic loads, vibration spectra, and the structural realities of mounting points. A professional can review the proposed laminate schedule, material thicknesses, and layer orientations to ensure they meet energy absorption expectations and do not introduce stress concentrations at critical interfaces. They can also assist in assessing the effects of added mass on the bike’s suspension balance and steering response. The goal remains clear: a fairing that remains attached and functional in a range of riding scenarios, from low-speed maneuvering to high-speed highway demands, without compromising rider safety.
Beyond the engineering specifics, the regulatory framework is not merely a bureaucratic hurdle but a practical guide to responsible design. In the United States, the Federal Motor Vehicle Safety Standards address a set of measurable criteria that relate to how a vehicle performs during routine operation and during a crash. In the European context, compliance with ECE regulations provides a similar framework with region-specific specifics. The challenge for a DIY project is that even if a fairing appears to fit and perform well in a static test, the dynamic, crash-based validation that manufacturers conduct is not something a home shop can replicate easily. This is where the conversation about safety becomes a conversation about risk management. A practical approach couples design prudence with a preference for tested, certified components whenever possible. It also means recognizing when a modification unit is a better fit for the bike’s safety envelope than a full replacement shell. When in doubt, consulting with professionals who understand both the mechanical and regulatory aspects can prevent a costly misstep and, more importantly, protect rider safety.
Even if a rider chooses to pursue a fully custom path, there is value in seeking guidance from established manuals and standards bodies. Official manufacturer manuals—many of which emphasize correct maintenance and modification guidelines to preserve safety, warranty, and performance—provide baseline expectations for mounting strategies, compatibility requirements, and serviceability. Reputable engineering standards organizations such as the Motorcycle Industry Council (MIC) and general materials standards organizations like ASTM provide additional context for protective gear and vehicle components. These sources help frame what constitutes a defensible safety posture in a custom project, even if the final components are not produced by the original equipment manufacturer. They also offer language for documenting testing and verification processes, which can be important when a vehicle is evaluated by authorities or insurers.
In this landscape, the most reliable recommendation remains clear: prioritize safety, durability, and legal compliance over novelty alone. If the primary aim is personalization, seek aftermarket options that have undergone independent verification and that align with your bike’s geometry and electrical architecture. For riders who insist on pursuing a bespoke aesthetic or performance goal, combine that aim with a formal plan for testing and verification, ideally in collaboration with an engineer or technician who understands the specific bike’s dynamics and regulatory expectations. A well-planned approach keeps the project from drifting into a realm where appearance outpaces safety and compliance, a mismatch that can turn a passion project into a risk-laden refit.
As a practical step, consider beginning with a conservative design sweep that focuses on compatibility and safety rather than aggressive aerodynamics or extreme weight reductions. Start by mapping the bike’s existing fairing geometry and noting all mounting points, edge radii, and under-lip areas where airflow interacts with the forks and radiator. Assess how changes will affect lighting, visibility, and the rider’s field of view. Build digital simulations or useCAD tools to visualize how the fairing will interact with the bike at different speeds and rake/offset configurations. In parallel, select materials with demonstrated performance under environmental exposures and mechanical loads similar to those expected in road use. When you prepare to laminate, plan a reinforcement strategy that uses multiple fabric layers in carefully oriented orientations to manage torsion and bending moments. Each layer contributes to the overall stiffness and impact resistance, and the sequence should be chosen to counter the most likely failure modes without overly increasing weight.
If your plan includes significant reshaping or new lines that interact with the bike’s lighting or indicators, you must incorporate those functional aspects into your design from the outset. Lighting integration is not cosmetic; it affects visibility to other road users and the rider’s own perception of the bike’s signals. Any modification to the fairing that covers or alters the headlight or turn signal routing must be compatible with the electrical harnesses and the bike’s control units. Inadequate clearance around the headlamp or the indicator housings can lead to misalignment during headlamp aimed adjustments, misdirected beam patterns, or moisture ingress and electrical shorts. The practical advice is to ensure that assembly tolerances, gasket materials, and sealing methods are planned and tested during the development process, not after installation is complete.
Professional testing and certification are not optional for riders seeking road legality. In many jurisdictions, a custom fairing must be demonstrated to meet crash energy management criteria and to maintain essential lighting and reflectivity standards. Because DIY projects typically do not have crash-test data, obtaining a verification or certification from an approved body is exceedingly difficult. This is not to discourage owners from creativity, but to emphasize that the road-legal route often lies in partnering with professionals who can run the necessary tests or certify that a product is compliant, even if that product is a modified fairing rather than a completely new one. If a rider chooses to advance with a fully custom piece, make a plan to document design decisions, laminate schedules, material specifications, and any informal testing performed. Documentation of a methodical approach can help improve the project’s credibility when discussing compliance with inspectors or insurers, even if it does not replace formal certification.
A major practical takeaway is the shift from building in isolation to building with accountability. That means using components and processes that align with recognized safety standards and the bike’s original design intentions. It also means recognizing when to step back and select certified aftermarket fairings that have undergone appropriate testing. There is no shame in choosing a pathway that preserves safety and legality while still offering a meaningful degree of customization. To many riders, this is not a concession but a responsible design decision that keeps the riding experience rewarding rather than compromised by avoidable risks.
In this context, if you’re drawn to a customization project, you can still realize meaningful personalization by exploring compatible modifications rather than reconstructing the entire fairing from scratch. For example, you can replace or augment specific panels, add aero-efficient appendages that are designed to fit within the existing mounting framework, or print insert components that modify air channels without altering the core structure. The goal remains maintaining structural integrity, avoiding interference with the bike’s vital systems, and ensuring that the overall assembly remains within safety margins. The use of professionally designed inserts or 3D-printed elements that comply with the bike’s geometry can deliver a custom look while respecting the baseline safety framework. For riders seeking a gateway into customization, this approach provides a safer, more manageable path that still delivers unique aesthetics and potential aerodynamic enhancements without abandoning the safety-first mindset that must govern any fairing project.
For readers who want to move forward with an option that feels closer to a guaranteed fit while still offering personal flair, exploring established catalogs and kits remains a sensible option. In practice, a rider might browse a catalog of compatible fairing pieces designed for a given model and year, ensuring the parts align with the frame, mounting points, and electrical routing. When a component is designed to integrate with a bike’s structure, it reduces the risk of misfit that could lead to vibration, cracking, or interference with moving parts. It also increases the likelihood that the assembly will maintain proper clearance to the tire and fork, reducing the chance of rubbing or contact that could be disastrous in a lean or high-speed condition. The discipline of selective substitution—choosing components that fit within the bike’s design envelope—becomes a practical analogue to a well-executed engineering project and a robust approach to personalization.
Beyond the technicalities, the social and consumer aspects of this work deserve attention. Riders who pursue fairing customization should maintain an awareness of warranty implications and insurance considerations. Modifications that diverge significantly from the manufacturer’s intended configurations may affect warranty coverage or insurance claims if a crash occurs and the fairing is a contributing factor in the damage assessment. This is another reason why the safer path often involves working within established aftermarket options or seeking professional certification for any bespoke components. A transparent approach—documenting materials, testing, compatibility checks, and installation procedures—helps preserve trust and supports safer decisions should a future service need arise. It also provides a foundation for a conversation with insurers, who may require evidence that modifications comply with applicable standards and do not introduce unacceptable risk.
To ground these considerations in practical terms, it can be helpful to connect the design process with the broader ecosystem of standards and safety resources that guide motorcycle safety and performance. The overarching message is that safety and compliance are not externalities but central criteria that shape every decision from material choice to mounting geometry to the final inspection. The aim is to create a fairing that not only reflects a rider’s personal style but also behaves as a predictable, stable, and safe component of the motorcycle. In short, the best outcomes emerge when design bets are informed by engineering thinking, not just aesthetics, and when compliance considerations calibrate the project from the earliest sketch through to final installation. This approach honors both the rider’s desire for expression and the obligation to ride—literally and legally—within a framework that prioritizes safety for everyone on the road.
For riders who want to explore further, the integration of a high level of safety-conscious design with practical customization can be supported by looking at the broader catalog of compatible fairings and components for various models. For example, you can explore a range of options within the Honda fairings category to understand how aftermarket parts are designed to maintain alignment with factory mounting points and electrical harness routing while enabling personalized styling. Honda fairings category offers a snapshot of how compatible kits are presented and documented for fitment accuracy. This kind of careful sourcing helps ensure that any modifications remain within the bike’s safety envelope and comply with the expectations of road use.
Ultimately, the path you choose should reflect a balance between creativity and responsibility. Whether you pursue a restrained, kit-based modification or a more ambitious bespoke design, grounding your work in the realities of material behavior, load paths, air-handling, and regulatory expectations will pay dividends in safety and satisfaction. The road to a successful fairing project is therefore paved not only with design intent and craft but with discipline in testing, documentation, and respect for the standards that keep riders secure. When in doubt, lean toward the conservative end of the spectrum—opt for proven components, seek professional input, and maintain a mindset of ongoing verification as you refine the aesthetic and aerodynamic goals. By weaving safety and compliance into the fabric of the project, a rider can pursue personalization with confidence, knowing that the resulting fairing is not only a statement of style but also a reliable and legal part of the motorcycle performance picture.
External resources and official safety guidance can provide a solid grounding for any decision-making process. For authoritative safety standards and verified guidance on motorcycle safety and regulatory requirements in the United States, consult the National Highway Traffic Safety Administration’s motorcycle safety resources at https://www.nhtsa.gov/vehicle-safety/motorcycle-safety. This resource offers current, official information about legal requirements, equipment standards, and rider safety best practices that can help riders assess when a DIY modification moves from creative expression to a safety-focused engineering challenge. In parallel, for ongoing learning about compatible components and model-specific fitment options, explore the Honda fairings category linked above to understand how manufacturers and retailers present parts that align with a bike’s established safety and performance envelope.
Final thoughts
Creating your own motorcycle fairings is a process that combines artistry with engineering precision. By embracing the principles of effective design, meticulous mold creation, and diligent adherence to safety standards, business owners can carve out a niche in the motorcycle customization market. Your commitment to quality and compliance not only safeguards the wellbeing of riders but also enhances your brand reputation. Engaging with professionals in the field and leveraging reputable resources can further ensure that your fairing production aligns with industry best practices.