
Painting motorcycle fairings can significantly enhance a bike’s appearance and protect its surface. For business owners in the automotive or customization industry, understanding the intricacies of this process is essential for quality service. This guide delves deep into how to paint motorcycle fairings, covering preparation, masking techniques, choosing paint, applying coats, and final curing steps. Each chapter is designed to provide a thorough understanding of best practices and technical tips that will help elevate your craft and satisfy your clientele.
From Bare Plastic to a Flawless Shield: The Preparation Odyssey of Painting a Motorcycle Fairing
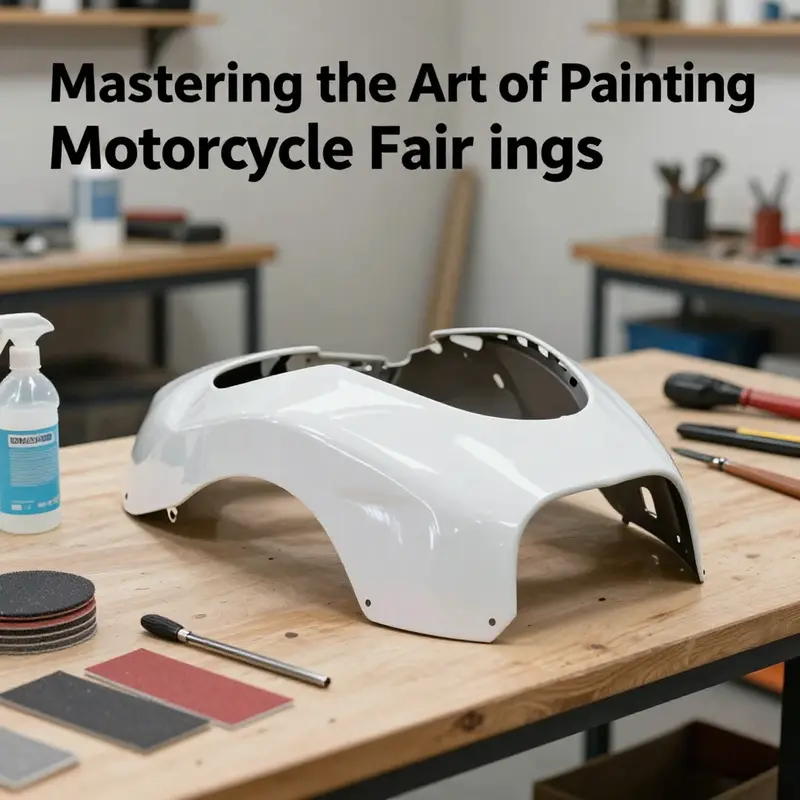
The quiet art of preparation often determines whether a motorcycle fairing ends up with a showroom finish or a flawed, peel-prone surface. This chapter follows that decisive path from bare plastic to a durable, high-gloss shield, weaving together the steps that make or break adhesion, uniform color, and long-term resistance. The process starts long before the spray hits the fairing. It demands patience, a systematic mindset, and an environment that respects the integrity of every microscopic detail. Begin by removing the fairing from the bike to grant full access and to prevent overspray from drifting onto components that should stay unpainted. A clean removal also helps with ventilation, which reduces dust and fumes in the work area. This is not merely about aesthetics; it is about creating a foundation that will hold the color for years to come, resisting UV exposure, chemical spills, and the inevitable bumps from road debris. Once the piece is separated, the surface should be scrutinized for any deformations, deep scratches, or waxy residues that could sabotage adhesion. Any imperfection becomes a potential crack path once the topcoat is laid on, so the more honest the initial inspection, the more forgiving the final finish will be. The fairing then enters a regimen of cleaning that is almost ritual in its importance. A dedicated automotive cleaner or a plastic-safe degreaser rinses away grease, oil, wax, and grime that cling to plastic surfaces and create a barrier between the primer and the substrate. It is the kind of cleanliness that seems extreme, yet it is the difference between a paint job that lasts and one that peels within months. After cleansing, rinse thoroughly and dry completely. Even a small drop of moisture trapped in the pores of the plastic can hinder adhesion or create clouding beneath a clear topcoat. The next step is to prepare the surface for bonding with a controlled texture. Lightly sanding the entire fairing with 400–600 grit paper creates a fine “tooth” that gives the primer something to bite into. This texture is not about removing material but about enhancing the mechanical grip of the coatings that follow. After sanding, wipe away all residual dust with a tack cloth or a lint-free rag until the surface gleams with a clean, dry finish. The goal is a surface that feels slightly dull to the touch, not rough enough to leave visible scratches but rough enough to anchor the next layers. Masking then becomes a careful art. The objective is precise lines and clean demarcations, so high-quality painter’s tape and plastic sheeting are deployed to protect lights, mirrors, handlebars, mounting points, and any adjacent panels from overspray. The edges and seams deserve special attention; any paint leakage here can rob a color of its crisp definition and turn a professional finish into a patchwork of blurs. While masking up, confidence should be tempered with a plan for color and base coat compatibility. If the fairing carries existing paint, the team may choose to apply a primer designed for plastics or fiberglass to both seal minor scratches and improve the surface’s uniform receptivity to the topcoat. Speaking of primers, they play a critical role in the preparation sequence. A compatible primer fills micro-scratches and provides a uniform base color that reduces the chance of mottling beneath the final layer. The primer must be selected with the substrate in mind; plastic primers are formulated to bond with smooth polymers and to cure without warping or cracking. Allow the primer to dry completely according to the manufacturer’s directions before moving forward. The working environment is another pillar of success. A clean, well-ventilated space—ideally a spray booth or a sheltered, dust-controlled area—minimizes contaminants carried by air and errant fibers that can settle in fresh paint. Excess humidity or direct sunlight can disrupt film formation, causing orange peel or longer-than-expected drying times. Temperature stability matters as well; inconsistent heat can cause coatings to cure unevenly, producing a finish that looks glossy in some spots and dull in others. At this stage, a short test spray in an inconspicuous area is prudent. This test helps ensure the spray pattern, flow, and color match align with expectations before the main application begins. When the final color is chosen, bear in mind that authentic color matching often benefits from a custom mix at a dedicated auto body shop, ensuring the hue aligns with the existing palette of the bike. For those who want a quick reference to compatible parts and color-coordinated options, you can explore Honda fairings as a starting point here: Honda fairings. The choice of topcoat demands equal care. A high-quality automotive paint system that uses a two-part polyurethane formulation is recommended for its UV resistance, chemical tolerance, and durability against chipping. This is not the time for budget sprays; the upfront investment pays off in a richer appearance and a longer-lasting finish. The color-matching step, if not done in a shop, must be approached with patience and exactness. A slight deviation in shade can become glaring once the entire bodywork is assembled and viewed from a single angle in bright light. Before any color is applied, read the manufacturer’s instructions for the region’s climate and the specific substrate. The application technique is a careful ritual of control and repetition. Begin by testing the spray pattern and color on a discreet area, then clear a space that is clean, dust-free, and free from direct sun or strong airflow. The actual painting should be performed with thin, even coats, held at a consistent distance of about 15–20 cm (6–8 inches) from the surface, using a smooth, overlapping motion. Each coat should be allowed to flash dry for roughly 5–10 minutes, depending on the product’s guidelines and the ambient conditions. The principle of “thin coats, multiple layers” helps minimize runs, sags, and texture irregularities. Patience with flash time is essential; rushing coats can trap solvent and create a dull or hazy finish. After the topcoat, follow the curing schedule prescribed by the paint system. A proper cure often requires a dust-free environment for at least 24 hours, with temperatures and times tuned to the product’s specifications. The curing phase is not the moment to handle or move parts, as even light contact can imprint fingerprints or create micro-marring on a still-soft surface. Once cured, the fairing can be refined to remove surface imperfections. Wet sanding with 1000–2000 grit paper softens orange peel and micro-scratches, bringing the surface to a glassy smoothness. This step should be performed with water and careful, even pressure to avoid exposing bare substrate. After sanding, wash the panel with mild soapy water, rinse, and dry thoroughly before applying any wax or sealant. The final protective layer locks in color depth, adds a gloss, and gives an extra shield against UV rays, road grime, and minor abrasion. The moral of preparation is that the work done here shapes every subsequent layer. A pristine base, precise masking, correct primer, controlled color application, and patient curing together form a seamless foundation for a durable, professional finish. When the fairing moves from the prep bench to the color stage, the gains derived from meticulous preparation echo in the final result, from the clarity of the color to the evenness of the gloss and the long-term resilience against the elements. For readers seeking broader guidance on fairing preparation and painting techniques, this comprehensive external resource offers detailed, practical instruction: https://www.mmi.edu/motorcycle-fairing-painting-tips. The path from bare plastic to a flawless shield is not glamorous, but it is relentlessly practical, and it pays dividends in durability, appearance, and rider satisfaction.
Masking Mastery for Motorcycle Fairings: Crisp Edges, Clean Lines

Masking is the essential discipline behind a professional motorcycle fairing paint job. It defines where color stops and where protection begins, shaping clean lines and durable edges.
When you remove masking after curing, the quality you see is a direct result of prep, tape choice, and technique. A precise mask yields crisp transitions, minimal bleed, and faster reassembly because less rework is needed. The core idea is to prepare the surface, choose the right materials, and apply them with steady control along curves and panel seams.
Start with a clean slate: remove dirt, oil, and wax; degrease; and allow the surface to dry completely. Prepare the fairing by disassembly if possible, so masking can reach every contour. Tape should follow the desired boundary with light pressure to seal edges without leaving ghost lines. Use paper or film to protect nearby areas, and consider low-tack or flexible tapes for sharp curves. For complex graphics, pre-cut vinyl masks or masking film can offer repeatable outcomes.
Application sequence matters: mask the broad areas first, then refine with narrower strips for details. Press the edges firmly, but avoid overstretching the tape, which can pull up paint later. When painting, keep within manufacturer recommended spray distances and apply thin, even coats. Allow each layer to flash off and cure enough to prevent edge lift before adding the next color. Only remove masking once the paint is tacky or fully cured, depending on the product; remove with a slow, shallow angle to preserve the line.
Post removal, inspect for micro bleeds and touch up as needed with clear coat or a fine brush. The goal is a boundary that feels natural to the eye and durable to the touch. Finally, evaluate the edge under light from multiple angles to ensure consistency across panels.
For further resources, consult automotive refinishing guides and manufacturer recommendations about masking tapes, films, and release agents. Keep a reference handy for the specific fairing shapes you work with, since curves and joins demand adaptive masking strategies.
Flexible, Durable Finishes: Choosing the Right Paint for Motorcycle Fairings
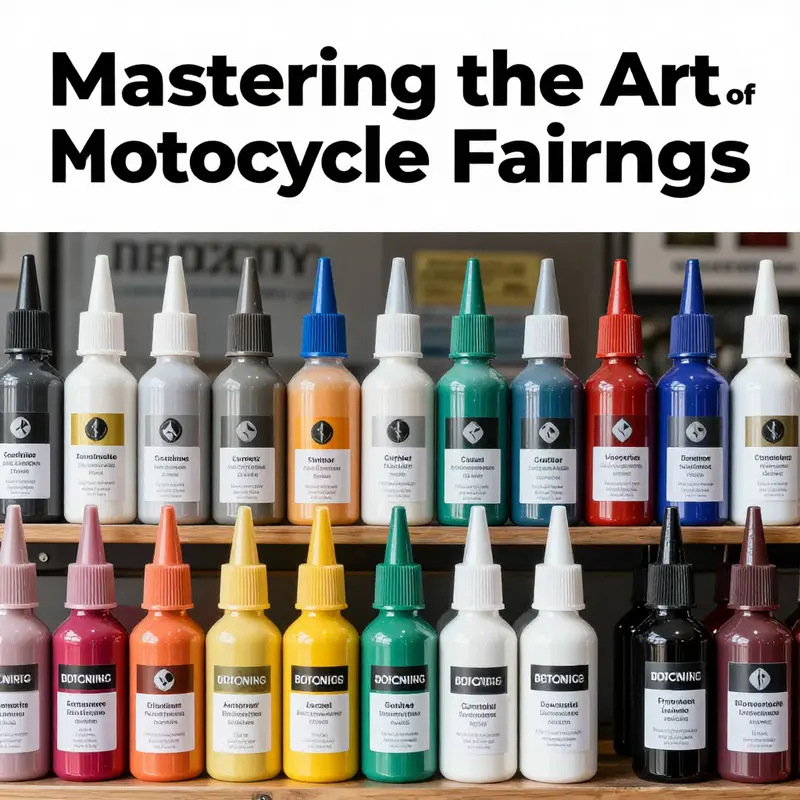
When you set out to color a motorcycle fairing, the decision about what paint to use is not just about aesthetics. It is about creating a finish that can take daily exposure to UV glare, fuel splashes, temperature swings, and the subtle flex of a plastic shell that shifts with ride dynamics. The most durable look begins long before the spray hits the surface. It starts with choosing a paint system that is specifically formulated for plastic motorcycle fairings and then follows through with careful surface preparation, appropriate primer, and disciplined application. In this context, it makes sense to place emphasis on flexibility, chemical resistance, and adhesion—factors that often outweigh the pull of a glossy color swatch. In practical terms, that means steering away from standard acrylics or single‑component sprays that were never designed to move with a plastic substrate. Instead, seek flexible, urethane‑based spray paints that are formulated for plastic surfaces. These coatings are engineered to resist micro‑cracking and peeling as the fairing experiences heat, cooling, and the inevitable vibration of a running engine. The goal is a finish that remains smooth and color‑true for years, not months, while still being amenable to color matching when a touch‑up is needed after repairs or a scuff from a track day.
Surface reality matters. Plastic paints require a different approach than metal. The chemical composition of plastics can present a slick, waxy surface that resists adhesion unless you prepare properly. Start with a clean slate: a dedicated automotive degreaser to remove grease and silicone, followed by a thorough rinse and complete drying. Any residue left on the surface will sabotage adhesion and invite micro‑blisters or solvent staining. Light abrasion is essential but careful. A 400–600 grit sandpaper creates a micro‑tooth for the paint to grip while preserving the integrity of complex curves and edges. After sanding, a tack cloth wipes away the fine dust, revealing a surface that is ready to accept a primer if your chosen system requires it. Primers for plastics are not optional in every case; some urethane sprays call for a compatible primer to optimize adhesion and hide the underlying texture. If your chosen paint specifies a primer, do not skip it. The primer acts as a bridge between the plastic substrate and the coating, filling micro‑imperfections and ensuring a uniform base color that will render true under multiple coats.
Color matching emerges as a crucial habit, not a hazardous luxury. If the fairing is repainted to restore a factory look or to harmonize with updated panels, precise color matching matters. Working with a trusted auto body shop to mix a hue that aligns with the original can prevent the jarring effect of mismatched panels when the bike is parked in the sun. Even when you are aiming for a bold, bespoke color, starting with the right base and base‑coat system reduces the risk of color shifting after exposure to sunlight and fuel. As you think about a palette, consider not just the hue but the depth and the finish: matte, satin, or gloss finishes—each camera‑ready under different lighting conditions—require different handling and clear coats to lock in the final look. If you want to tailor your project to a model you own or admire, you can explore related fairing options, including Honda fairings, to anchor your color story to a known design language.
The application technique follows the same logic of compatibility and patience. Tests in an inconspicuous area help you gauge spray pattern, color buildup, and the edge behavior around decals or seams. The environment plays a major role. A clean, well‑ventilated space free from dust, direct sunlight, and temperature extremes yields the most consistent results. When you spray, keep the can or gun at a steady distance—about 15–20 centimeters (approximately 6–8 inches)—and use thin, evenly overlapped coats rather than a single heavy blast. The rule of multiple thin coats is not just for appearance; it also minimizes chances of solvent lift, drips, or wrinkling on plastic surfaces. Allow each coat to flash dry—usually 5–10 minutes—before applying the next. Follow the paint manufacturer’s specific recommendations for recoat windows and cure times.
A common concern is how many coats to apply and how long to wait before you handle the fairing. The answer is a balance of color depth and surface smoothness. More coats improve film build and UV protection, but they also raise the risk of orange peel if the surface is not impeccably clean or if dust is present. A practical approach is to apply three to four light coats to reach the target color and thickness, with careful inspection after each layer. Between coats, cross‑move your hand to smooth any potential ridges and ensure edges smooth out rather than pooling. If your paint demands a primer, you’ll often encounter a recommended sequence of primer, color base, and clear topcoat. The clear coat is more than a cosmetic finish; it adds UV protection, abrasion resistance, and a glassy depth that makes color shift less noticeable as the fairing ages.
Drying and curing extend beyond the surface gloss. Initially, keep the fairing in a dust‑free area for at least 24 hours, allowing the solvent to fully evaporate and the film to gain sufficient set. Some two‑part systems may require controlled curing temperatures to achieve optimal cross‑linking, which anchors the coating and enhances chemical resistance. Do not handle the fairing during cure, and avoid exposure to humidity spikes that can affect the final finish. A careful drying window helps prevent issues like solvent pop or lifting around seams that can occur if heat or moisture is introduced too soon. Once dry, many technicians perform a light, wet‑sand with 1000–2000 grit to remove minor imperfections and reduce orange peel texture. Keep the surface damp and sand with a smooth, even motion, then wipe with a clean damp cloth to remove grit before a final wipe with a tack cloth. The goal is a level surface that reflects light evenly and sets the stage for long‑lasting protection.
After curing, the last leg of the journey is protection and maintenance. A coat of high‑quality wax or sealant provides an additional barrier against UV exposure, road grime, and fuel vapors. The wax also helps repel water and makes future repairs or touch‑ups easier to blend in. The true test of a paint job is not only how it looks on day one but how it ages in the sun and under routine cleaning. If you notice micro‑cracking or dulling in the high‑contact areas, it may reflect the need to adjust your surface preparation or to alter the number of coats in the next project. Troubleshooting often begins with revisiting the prep stage: ensure the surface is completely degreased, the sanding is evenly conducted, and the chosen primer or base coat aligns with the substrate and the topcoat.
The practical path to success also involves anchoring your workflow to a broader catalog of resources you trust. For those focusing on model‑specific or branded fairings, internal categories on your site can guide you to compatible components and accessories, such as Honda fairings. This kind of contextual navigation helps you select color and finish strategies that harmonize with existing panels and aftermarket parts. When you want broader guidance on the philosophy of color selection, surface preparation, and coating systems, a comprehensive external resource can be invaluable. For further guidance on selecting and applying paint, see the practical guide: How to Choose Paint for Motorcycle Fairings – A Practical Guide. This external reference reinforces best practices, offering a detailed discussion of material compatibility, surface preparation, and coating sequences that complement the steps outlined here.
In the end, the right paint choice is a blend of science and patience. It requires selecting a urethane, plastic‑friendly spray system, following a disciplined prep regime, applying layers in measured, thin coats, and respecting cure times. It also invites an ongoing relationship with your tools, room conditions, and the colors you love. When you combine robust material selection with meticulous technique, you yield a fairing finish that looks impeccable, resists the elements, and remains repairable should you choose to refresh or customize it in the future. The goal is not simply to coat a surface; it is to create a durable, glassy barrier that honors the bike’s lines and stands up to the ride, season after season.
Color in Motion: Mastering Paint Application for a Motorcycle Fairing
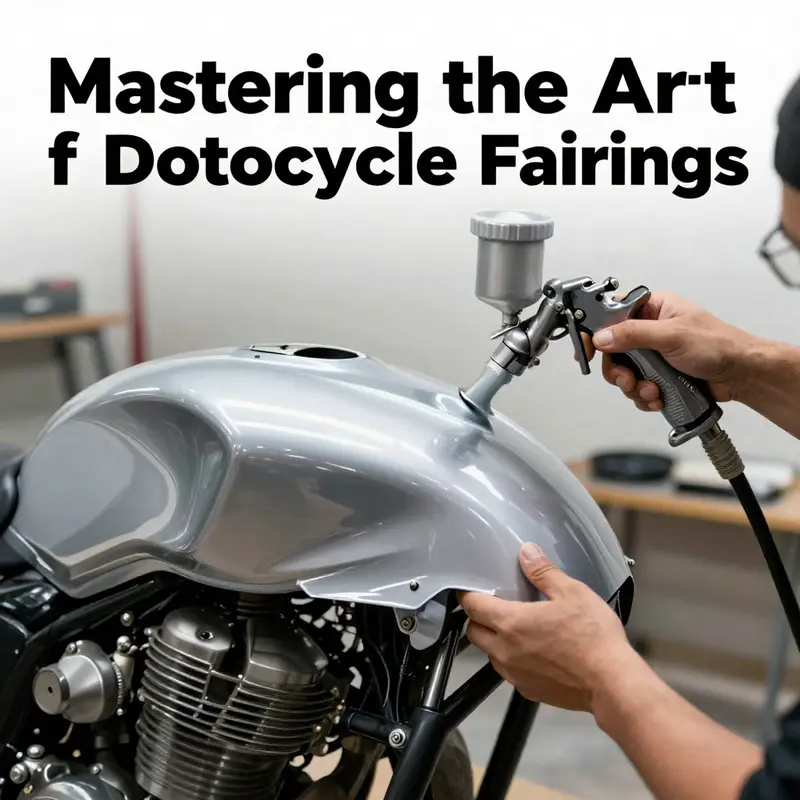
Painting a motorcycle fairing is as much about control as it is about color. It demands a calm workspace, steady hands, and a method that respects both the physics of the paint and the geometry of the plastic shell. The goal is a finish that is even, deep, and durable, with a hue that holds true across reflections and a surface that resists wear.
Preparation frames the process. Disassemble the fairing for full access, clean with automotive cleaner, rinse, and dry. Lightly sand with 400–600 grit to create a micro-roughness, then wipe with a tack cloth to remove dust. Mask edges, seams, and fasteners precisely to protect adjacent areas.
Primer helps the color bite and flow. Apply even coats, allow proper flash times, and sand any imperfections before color.
Color goes on in thin, controlled coats. Maintain a consistent gun distance and overlap strokes. Two to four light coats beat one heavy one for depth and consistency. Between coats, ventilate and avoid direct sunlight.
Clear coats protect and add gloss. Apply in thin layers and cure fully for durability. If you see dust nibs or orange peel, address them with light wetsanding after full cure.
Final steps include polishing and sealing to preserve color depth and gloss. A well-executed finish reflects light evenly across the fairing and endures sun and weather.
Locking in the Gloss: Final Curing, Finishing, and Protection for Your Motorcycle Fairing

The moment the clear coat leaves the gun, the work shifts from application to maturation. Curing is where a good paint job earns its durability, and it demands attention as carefully as any masking or color matching. In its simplest form, curing is the chemical and physical hardening that locks in the pigment, the clarity of the gloss, and the bond between each layer and the substrate. But it is more than just patience. It is a controlled process that guards against easy failures like micro-scratches, hazing, or soft spots that can invite chipping and fuel exposure down the line. The goal is an even, rock-hard finish that looks flawless not only in the moment of inspection, but under sun, rain, and the heat of a long ride. This is the stage that separates a cosmetic repaint from a finish you can rely on when the roads get rough or the bike sits in the garage for weeks at a time.
To begin, the environment you create for curing matters as much as the work you did on the spray. A dust-free, temperature-controlled space is essential. In perfect conditions, the surface can begin to reach its true hardness in as little as 24 hours, but two-part systems and other robust finishes may need longer. For some paints, seven days are necessary to reach full cure. This is not a sign of failure if things take longer; it simply means you are respecting the chemistry and the physics of the coating. During this period, avoid any contact with fuels, solvents, or harsh cleaners. Even a stray splash can mar the finish, especially right after the final coat. If a dedicated paint booth or a similar controlled space is available, that setup can help maintain consistent humidity and airflow, reducing the risk of dust settling on a still-tacky surface or sudden temperature shifts that could stress the film.
Humidity is a quiet driver of quality here. High humidity can lead to condensation on the surface that traps moisture beneath the film, while very dry air can accelerate outgassing in ways that pull pigments apart from their binder. A moderate, steady environment—roughly a comfortable room temperature with controlled humidity—offers the best conditions for a predictable cure. If you must work in a non-ideal space, use a simple dehumidifying method or a portable heater with a fan to circulate air gently, avoiding direct hot spots or drafts that could cool or heat the panel too quickly. In all cases, the goal is uniformity from edge to edge and from top coat to lower layers. The careful inspection you do before you move to the next step is your first line of defense against a disappointing result later on.
Once the surface has cured to its target stage, the real finishing work begins in earnest. A light, deliberate polish can make the difference between a gloss that looks flat and a gloss that seems to leap from the surface. This is not a chance for heavy cutting; you want a fine-grade compound and a soft pad, kept at a gentle pace and with minimal heat buildup. Work in small, overlapping circles and monitor for any holograms, swirl marks, or micro-abrasions that might reveal themselves under bright light. If you notice minor imperfections—small texture anomalies or faint orange-peel remnants—a careful, targeted pass is often enough to reduce them without dulling the overall brightness. After polishing, wipe the area with a clean cloth to remove any residue and recheck the finish in multiple lighting conditions. A well-executed polish should enhance depth and clarity, making the color seem to glow rather than sit on the surface.
Protection is the final layer of the finishing sequence. A dedicated wax or sealant applied after polishing can extend the life of the finish by resisting UV damage, chemical exposure, and environmental contaminants. The right product creates a hydrophobic barrier that sheds water and reduces the accumulation of grime during rides. Apply according to the manufacturer’s directions, allowing any curing time specified for the sealant or wax before subjecting the fairing to handling or reassembly. While some riders prefer wax for its warm, easy-to-clean feel, others opt for a dedicated sealant for longer durability. Either choice should be selected with the same care you gave to color selection and coat application. The important point is that the protective layer is uniform and thoroughly cured before you move the fairing back into service.
Reassembly is the final act of this process, and it should be treated with the same respect you gave the prep work. Gently clean all mounting points and edges to ensure there is no lingering dust or residue that could trap against the paint once reinstalled. If you disassembled wiring or fasteners, make sure each component is dry, lubricated where necessary, and aligned properly to avoid stress on the edge of the panel. When you test-fit the fairing onto the bike, inspect the join lines and seams in good light, looking for any gaps, looseness, or overhang that might indicate an alignment issue that could rub the paint during vibration. If you see anything amiss, address it before you finalize torque values or secure mounts. The aim is to prevent any post-paint interference that could compromise the finish after road use, not merely during the spray day.
In the broader scope of maintenance, the curing and finishing steps you completed set the stage for a durable, long-lasting look. The color will resist UV fade more effectively when it has been cured properly in a stable environment, and the clear coat’s hardness will help resist chipping and abrasion from road debris. The protection layer will also aid in cleaning, making routine care less likely to abrade the finish and more likely to preserve the smooth, glassy surface that turns heads when the sun catches it just right. It is a simple sequence of patience, discipline, and consistent care, but it pays dividends in the way your motorcycle presents itself on the most demanding rides or in the most scrutinizing sunlight.
If you are working on a particular make or model, you may find value in cross-referencing model-specific fairing categories for fit and finish nuances. For example, if you are restoring a Honda fairing, you can explore the Honda fairings category to view fitment and finish variations across styles and eras. Such exploration helps ensure that your final result aligns with the expectations of that design language and the practical realities of mounting points, edge shapes, and transparency of the chosen finish. This alignment, while subtle, contributes to a professional look that feels intentional rather than improvised. You can browse these options here: Honda fairings.
In the end, the chapter of preparation, application, and curing culminates in a finish that reads as both enduring and pristine. The final gloss should not merely exist as a momentary sheen but as a robust barrier against the elements and a surface that invites cleaning and inspection rather than avoidance. A fairing that has been cured with care, polished with precision, and sealed with a protective layer stands up to the realities of riding—fuel exposure, temperature swings, and the occasional encounter with road grime—without surrendering its color or depth. This is the essence of a professional repaint: a finish that endures, shines, and remains faithful to the rider’s intent.
For readers seeking a deeper dive into the complete repaint workflow, including exact curing protocols and safety practices, another authoritative resource offers a detailed roadmap from prep to protection. You can consult the expert guide linked here for comprehensive guidance: https://www.motorcycle-mechanic.com/how-to-repaint-motorcycle-fairing/
Final thoughts
Successfully painting motorcycle fairings not only enhances their visual appeal but also contributes to increased customer satisfaction and repeat business. By adhering to the detailed steps outlined in this guide, business owners can ensure high-quality finishes that stand the test of time. From the meticulous preparation and masking techniques to selecting the right paint and applying it skillfully, every phase is vital to achieving excellence. By mastering these processes, you will not only safeguard the bikes but also elevate your business’s reputation within your community.