
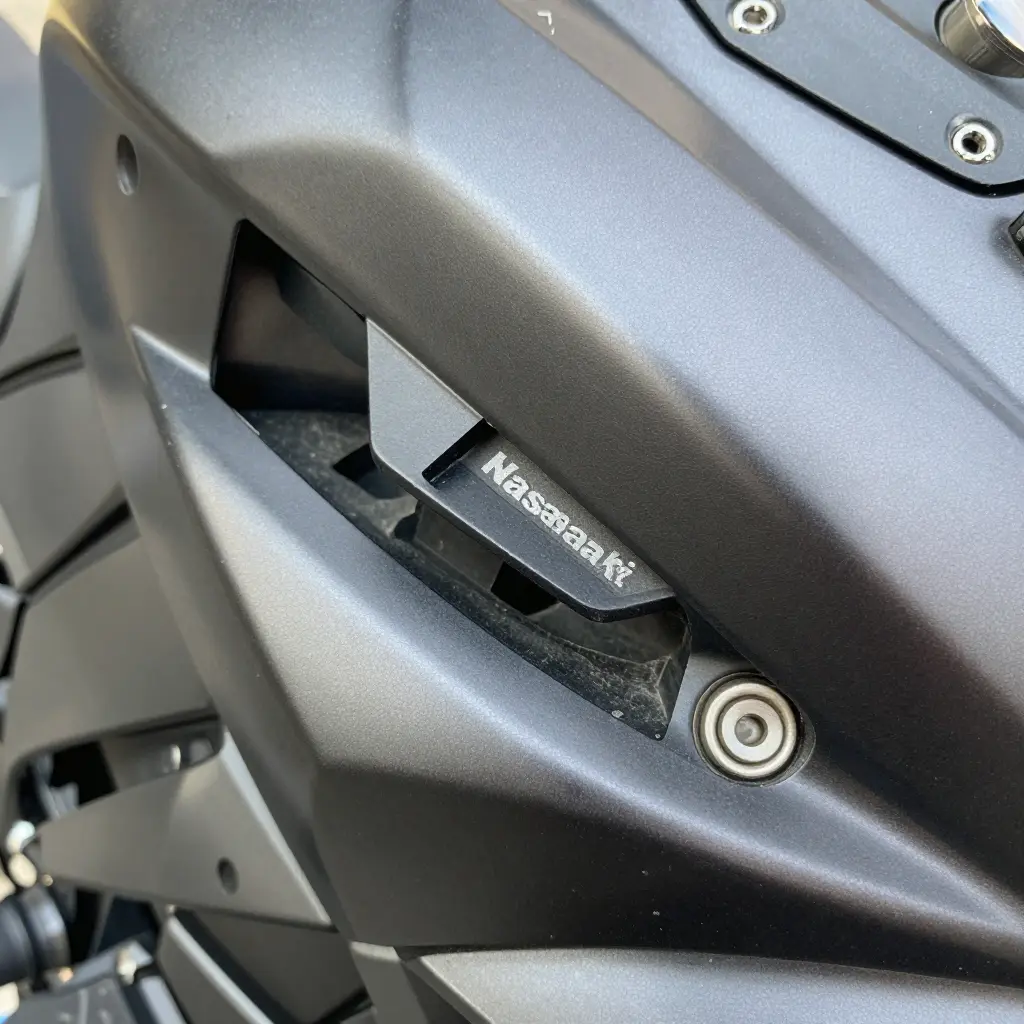
Glossy paint and clean lines can hide real problems on 2012 Kawasaki Z1000 used fairings. Fresh spray covers a cracked panel. A shine hides a mount tab that is already failing underneath. Listing photos rarely show either, which is why a close look at the bodywork matters more than the photos ever will.
The mount points are where a used panel gives itself away. Stress whitening is the milky, cloudy, or chalky discoloration that spreads through ABS plastic after the material is stretched or fatigued past its limit. On the Z1000 it usually traces back to one of three things: a past drop, vibration against the frame, or a bolt torqued well past spec. The mount tabs carry that load, so they whiten first, long before a crack shows.
The check is worth doing whoever you are. Riders want panels that sit flush and stay put at speed. Buyers do not want to pay a premium for bodywork that is already compromised and about to crack. Sellers who can read these marks can back up an asking price with evidence instead of guesswork. Knowing how the plastic fails is the difference between a risky purchase and an informed one, and it starts with a complete motorcycle fairings guide you can rely on before you meet the seller.
What Is Stress Whitening in Fairing Plastics?
Stress whitening is the pale, milky, or cloudy discoloration that forms in ABS and other fairing plastics when they are stretched, flexed, or repeatedly fatigued under load. It looks like a haze trapped inside the material, not something sitting on the surface.
It is not dirt, dust, or paint fade, and it will not wipe away or buff out. The change happens inside the material: mechanical stress pulls the polymer chains apart and opens tiny micro-voids that scatter light. That scattered light is what your eye reads as a whitish, chalky patch.
Paint can be touched up and scratches can be hidden. The plastic itself does not forget where it was forced to bend, which makes whitening one of the more reliable clues on a used bike.
What Stress Whitening Looks Like
- Cloudy, milky haze clustered around fasteners and edges
- Pale streaks that run in the direction of a bend or flex
- Chalky white “blush” radiating out from a stressed corner
- A dull, washed-out patch that survives cleaning and polishing
- Fine whitish lines that deepen wherever stress repeats
Why It Matters on a 2012 Kawasaki Z1000
On the 2012 Kawasaki Z1000, the mount tabs are where the fairing bolts to the frame, and they take the load of every hard stop, wheelie landing, and vibration cycle. Over time that constant flexing can bring on stress whitening at the base of a tab.
When you shop for used motorcycle fairings, study those zones closely. Whitening around a mount tab means the panel has been working hard and may be close to cracking, and a clean tab with its original color is the safer buy. If you want to judge panels more confidently, it helps to understand how motorcycle fairings are built and chosen.
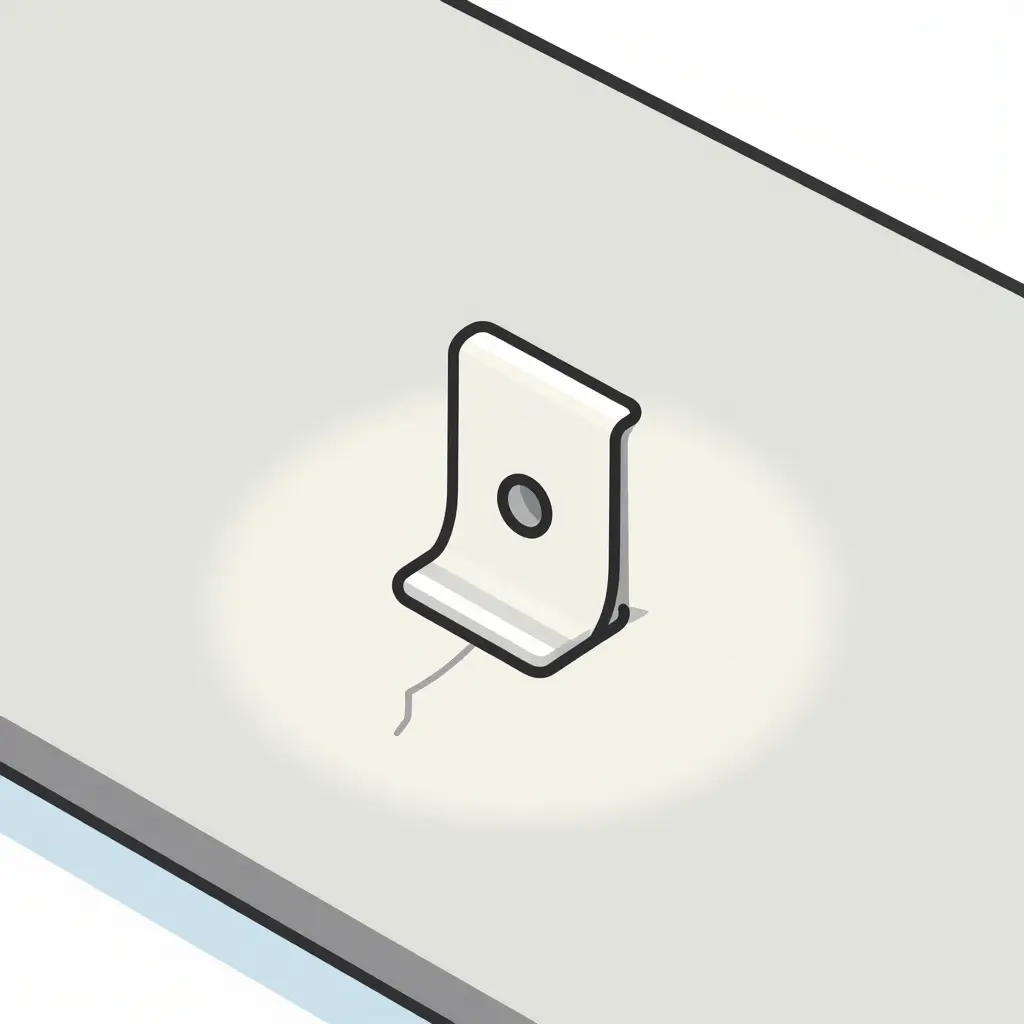
The diagram shows how whitening behaves around a mount tab. The rectangle with the round bolt hole is the fastening point. The cloud-like shading that spreads from the base of the tab is where the plastic has been stretched and worked under load until it turned pale and cloudy. The faint zigzag line branching outward is a crack, drawn for comparison, so you can see how it differs from the diffuse blush of stress whitening. How far that whitened zone spreads, and how intense it is, tells you a lot about how hard the panel has lived.
Why Mount Tabs Concentrate Stress and How Whitening Forms
The thin plastic fingers that bolt the Z1000’s side panels to the frame funnel every road vibration, impact, and ounce of bolt torque through themselves. That narrow geometry is what turns a tab into a stress concentration point.
A tab is a bottleneck. A wide panel meets a narrow mounting ear, so all the force flowing through the panel has to squeeze through that small neck. The tighter the neck, the higher the stress per square millimeter, and the faster the plastic gives out.
The Three Loads That Attack a Tab
- Road vibration: endless micro-cycles that fatigue the tab a little more each mile.
- Bolt torque: the clamping force you apply at install (or the last owner applied).
- Impact: tip-overs, curb clips, and dropped-bike moments that dump sudden energy into the panel.
How Stress Turns Into Whitening
Repeated flexing slowly stretches the plastic. A cross-threaded or over-torqued bolt locks the tab rigid so it cannot flex naturally, and it stretches in one spot instead. A minor tip-over can do in one second what vibration does over a season. Once the material stretches beyond its yield point, it does not snap right away. It turns pale and cloudy white, a sign of the internal micro-tearing called stress whitening.
Whitening means the plastic has already been overloaded. Each Z1000 side panel shares its load across several tabs, so whitening around one often comes with weaknesses in the ones beside it. Buyers hunting used fairings should treat pale tab bases as an early warning rather than a cosmetic blemish, because cracks and panel failure usually follow. Inspect the tabs before you judge the paint.
Before you hand over cash for used fairings, run this checklist on the 2012 Kawasaki Z1000’s mount tabs. A few minutes of careful inspection can save you from a panel that rattles, cracks, or never sits flush again. For background on how these panels are built, see this motorcycle fairings guide.
- Clean the tab area, wiping away road grime, chain lube, and bug residue so hidden damage on the used fairings becomes visible.
- Inspect the mount tabs under angled light; tilt each panel toward a window or a bright flashlight to catch subtle surface distortions.
- Flex each tab gently with two fingers to reveal stress whitening that only shows when the plastic is strained.
- Check for hairline cracks where the tab meets the panel body, the junction that carries the most load.
- Examine every bolt hole for elongation, since an oval or stretched opening points to past impact or over-tightening.
- Compare the left and right panels side by side, matching tab shapes and bolt-hole positions to spot any mismatch.
- Trace the surrounding plastic for spider webbing, since whitening often spreads outward from the mount tabs into neighboring areas.
- Press the panel against the bike’s frame if possible, and confirm the mount tabs line up with their receivers without force.
How to Tell Stress Whitening Apart From Cosmetic Damage
Not every white mark on a 2012 Kawasaki Z1000 used fairings set means the panel is ruined. Telling genuine stress whitening from harmless cosmetic wear is the difference between paying a fair price and either overpaying for good plastic or walking away from a solid set.
The rule of thumb is that stress whitening lives inside the plastic. It forms when the panel flexes hard near a mount point and the polymer stretches past its limit. Paint scuffs, clearcoat scratches, dirt, and sun fade all sit on top of the surface, so they behave very differently under a quick test.
Whitening also tends to cluster where the panel is bolted down: around mount tabs, screw bosses, and the seams where two fairings meet. A whitish patch that hugs those high-stress zones and refuses to budge is a real warning sign, and it often arrives with fine hairline cracks radiating from the same spot, because the movement that caused the whitening usually cracked the finish too.
Five Quick Tests
- Wipe test: a damp microfiber cloth erases dirt instantly, but stress whitening stays put.
- Fingernail test: scuffs and clearcoat scratches sit above the surface; stress whitening sits below it.
- Location check: genuine whitening clusters near tabs, bosses, and seams rather than spreading randomly.
- Crack check: run a fingertip over the area, and if fine hairline cracks sit beside the white patch, it is structural.
- Fade check: sun fade spreads evenly across the whole panel, while stress whitening forms tight, localized clouds.
Getting the diagnosis wrong costs money either way. A seller who reads a dirty scuff as stress whitening drops the price too far, and a buyer who mistakes damage for grime hands over cash for a panel that will crack later. For a deeper primer on how these panels are built and where the weak points hide, browse our motorcycle fairings buying guide before your next inspection.
Whitening Severity vs. Repair Cost
The chart below pairs the four stages of stress whitening around the mount tabs on a 2012 Kawasaki Z1000 with ballpark dollar figures, so you can see at a glance when a repair makes sense and when you are better off hunting down a clean used panel.
Figure 1: Estimated repair versus replacement cost by whitening severity. Bar values are rough estimates for a single Z1000 fairing section; light and moderate whitening are usually refinishable, while severe whitening and cracking push the math toward a straight swap.
Reading the Numbers
Three things stand out when you line up the bars:
- Light whitening is the easy repair. A spot refinish runs about $45, so there is almost no reason to replace the panel. A little heat, a polish, or a respray and you are road-ready.
- Moderate whitening is a judgment call. Refinishing runs around $130 against roughly $340 for a fresh used panel, so repair still wins by a wide margin, provided the plastic has not started to craze.
- Severe whitening or cracking flips the math. Plastic welding plus a full color match lands around $275, within striking distance of a replacement, and a welded tab is never as strong as the original.
The white haze is the plastic yielding under stress long before it tears. Catching it early keeps you in the cheap left-hand columns of the chart.
Quick Cost Comparison
| Severity Level | Repair / Refinish (USD) | Full Replacement (USD) |
|---|---|---|
| No Whitening | 0 | 0 |
| Light Whitening | 45 | 160 |
| Moderate Whitening | 130 | 340 |
| Severe Whitening / Cracked | 275 | 620 |
If you are still learning how these panels are laid out and where the tabs tend to fail, it is worth a few minutes with a solid motorcycle fairings guide before you commit to any purchase. Knowing the anatomy makes it far easier to spot whitening in the first place.
The Bottom Line: Look at the Tabs First
When you size up used fairings for a 2012 Kawasaki Z1000, do not let a glossy finish do the talking. The fastest, most reliable way to judge condition is the stress whitening around the mount tabs. That chalky haze is not cosmetic wear; it is the visible signature of internal fatigue, the plastic telling you it has been flexing, vibrating, and absorbing impacts it was never meant to survive. A whitened tab is a weakening tab, even if the fairing looks flawless from ten feet away.
Buyer or seller, make the tabs your first stop. Inspect each one, flex it gently, and let the whitening tell the real story before money changes hands. To choose the right complete set, our motorcycle fairing kits guide walks you through everything that matters.
At UltimateMotorX we think riders deserve gear as dependable as the machines they ride. Check the tabs, trust what you see, and ride away confident.