
Motorcycle fairings play a crucial role in both aesthetics and aerodynamics. As a business owner, knowing how to effectively repair scratched fairings can save costs and enhance customer satisfaction. This guide delves into methods tailored to different scratch severities, ensuring your team is equipped with the essential skills to restore fairings to their pristine condition. From minor touch-ups to severe damages requiring professional intervention, each chapter will provide insights and actionable steps that can be easily integrated into your repair processes.
From Subtle Scuffs to Seamless Shine: A Cohesive Guide to Minor Scratches on Motorcycle Fairings
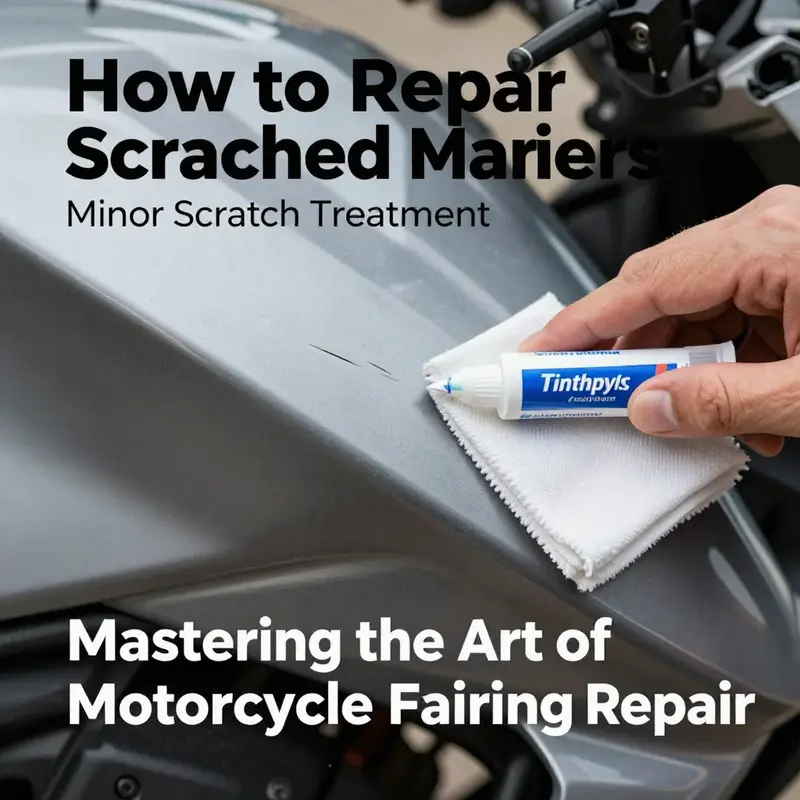
Scratches on motorcycle fairings are an almost inevitable part of riding. They arrive with brushes against parking posts, gravel kicked up by tires, or a careless turn of the wheel in a crowded pit area. For many riders, the small imperfections are more than a cosmetic nuisance; they invite a moment of practical decision-making: can this be fixed at home, or does it demand a shop visit? The good news is that minor scratches—those that haven’t breached the clear coat or shown base plastic—can often be addressed with simple, affordable methods that restore the surface without the need for a full repaint. A careful, methodical approach can yield results that look and feel like a factory finish, or at least a significant step toward that level of polish. What follows is a fluid, experiential guide to handling those shallow marks with tools you can reasonably keep in a well-appointed garage or driveway shed, without turning the repair into a major project.
A fairing’s surface behaves differently from metal bodywork. The plastic or composite that makes up most fairings responds to abrasion with a delicate balance between smoothing and gouging. The goal with minor scratches is to minimize the groove, smooth the microscopic roughness, and restore the surface’s ability to reflect light evenly. The path to that goal typically starts with two decisions: what you’ll use, and how you’ll apply it. The choice isn’t about chasing a miracle cure but about choosing the most appropriate level of intervention for the scratch’s depth and the size of the affected area. For shallow scratches that only skim the surface and do not penetrate the clear coat, two broad options exist: a purpose-built scratch repair kit designed for automotive plastics, or a high-quality wax or polish that helps fill and level micro-grooves. Each method has merits, and you can even combine them if the kit alone does not yield the finish you want.
The repair kit route is popular for good reason. These kits are designed with the plastic in mind. They come with a fine polishing compound, a microfiber applicator pad, and often a color-matching wax or sealant to help lock in the improvement. The process is straightforward but benefits from discipline. Begin by cleaning the damaged area and its immediate surroundings with a gentle cleanser or a dedicated plastic cleaner. Dirt, grease, and dust act like tiny abrasives when you rub the surface, so a clean slate is essential. After washing, allow the area to dry completely. A damp surface can dilute the compound and muddy the finish, so a dry, dust-free patch of fairing is ideal as you begin.
With the surface prepared, apply the compound in very light pressure. The recommended technique is circular motion, not aggressive scrubbing, because the circular motion helps to even out micro-scratches by smoothing the surface at a microscopic scale. Move slowly, for about 20 to 30 seconds, allowing the polishing action to do the work rather than brute force. The microfiber pad should be soft and clean; using a textured cloth or an abrasive pad can worsen the scratch by introducing new micro-scratches. After the polishing pass, wipe away any residue with a clean, dry microfiber cloth. If the scratch remains visible, you can repeat the process once or twice, but pause to assess after each pass. Over-polishing can dull the gloss or remove more than intended, so it is better to perform conservative applications until you reach a satisfactory result.
Once you’ve achieved a level of uniformity that reduces the scratch’s conspicuity, a protective step helps preserve the improved surface. If your kit includes a color-matching wax or sealant, apply it according to the manufacturer’s instructions. The idea is to fill micro-grooves and restore a smooth reflective surface that catches the light evenly. Buff lightly with a clean microfiber to blend the repaired area with the surrounding paint, then step back and evaluate the overall balance of shine. In many cases, this is enough to restore a nearly-new appearance for shallow defects, with the finish matching the existing gloss level and color tone.
If you prefer a less kit-centric approach, a high-quality car wax or polish can accomplish much of the same work. The wax’s fillers and oils fill very fine scratches, creating a smoother visual plane as you buff. The key is to choose a wax or polish that is appropriate for automotive plastics and compatible with clear coats. Clean the fairing area again to remove any dust that might settle into the wax, apply a small amount to a soft, lint-free cloth, and knead it into the surface with slow, circular strokes. Work a small patch at a time, taking care not to leave streaks or smears. Buff in the same direction as the surrounding paint to minimize the appearance of any swipe marks, and then refresh the area with a final pass of polish to restore a uniform gleam. The result should be a subtle, even sheen that makes the scratch fade rather than shout for attention.
It’s worth noting a traditional, more aggressive approach that some riders consider for very shallow, stubborn marks: toothpaste as a polishing aid. This is a frail and somewhat controversial option because toothpaste is mildly abrasive and is not engineered for automotive finishes. If you choose to try it, use a plain white, non-gel toothpaste, and apply a pea-sized amount to a clean, soft cloth. Rub the area in gentle, circular motions for about 20 to 30 seconds, then rinse with a damp cloth and dry thoroughly. This method is best reserved for the lightest surface scratches that have no base coat exposure. If you test it, do so in a discreet spot first to ensure there is no unintended dulling of the gloss or whitening of adjacent paint. And always avoid using whitening toothpaste, which contains stronger abrasives that can be more damaging over time. The toothpaste tactic should be seen as a last resort, not a first-line fix, especially on newer fairings where the finish matters and any deviation in gloss could be more noticeable.
Even with diligent care, not all minor scratches are created equal. If a scratch is deeper than a mere surface abrasion and has begun to show through to the base plastic, primer, or a color layer, a simple polish or wax will not suffice. In such cases, you’re venturing into repair territory that benefits from professional attention. The reason is straightforward: once you’ve breached the clear coat or reached the base material, the aim shifts from refinement to structural and color restoration. A professional detailer or body shop has access to controlled lighting and consistent color-matching capabilities, along with primers, binder coats, multiple base and clear coats, and proper curing environments. They can effectively blend the repaired area with the rest of the fairing to achieve a seamless appearance, often with a finish that resists UV degradation and maintains gloss over time.
In practice, a well-executed minor-scratch repair leaves you with a surface that looks uniformly smooth and reflective, with the scratch fading into the background of the overall paint job. The environment matters as much as the technique. Work in a clean, dust-free area with stable lighting, and protect the surrounding paint from accidental contact. If you’re performing multiple touch-ups or if the fairing has intricate curves or texture, take an extra moment to re-clean the surface between steps, ensuring no residue carries over to the next stage. Allow sufficient drying time between steps, especially after cleaning and applying any wax or sealant. Drying is when the film forms its final bond with the surface, which helps prevent streaks and ensures the finish is as even as possible.
A practical note for integration with the broader repair workflow: minor scratch repairs are most often a matter of maintenance and cosmetic upkeep, not replacement. They sit within a continuum of care that includes preventing new scratches, protecting the surface with proper coatings, and addressing deeper damage only when necessary. If you’re unsure about the scratch’s depth, or if you notice a crack, chip, or significant color mismatch after a repair attempt, it’s prudent to consult a professional. The internet is full of anecdotal fixes, but the safest path to maintain the integrity and value of your fairing is to align your approach with the scratch’s actual depth and the material’s needs. For many riders, the most economical and satisfying results come from a combination of a dedicated plastics-friendly repair kit, a careful waxing regimen, and an occasional professional check when the lines between minor and moderate damage blur.
For riders who want to explore options for replacing or matching new panels while maintaining a cohesive look across the bike, a visit to the dedicated BMW fairings catalog can be instructive. It offers a sense of how manufacturers and suppliers present compatible pieces that blend with the original color and finish of the bike’s overall aesthetic. Finding a compatible panel or color-match resource can help you achieve a seamless result should you ever decide that a patch repair isn’t enough and a full panel replacement becomes appealing. You can browse options here: https://ultimatemotorx.net/product-category/bmw-fairings/.
Ultimately, minor scratch repair is as much about technique as it is about patience. The hands that perform the work should remain steady, the mind focused on keeping the surface clean and balanced, and the eye trained to detect subtle inconsistencies in gloss and color. When done with care, a shallow scratch can retreat from view, and the fairing can resume its role as a protective skin that also reflects the rider’s pride in the bike’s condition. This approach keeps the process approachable, affordable, and within reach for riders who prefer to handle maintenance without sending their bike to a shop for every small blemish. The result is a bike that not only looks sharp in photos but also carries the quiet confidence of a well-kept machine.
External resource for broader context: For a broader, external guide that expands on various strategies for addressing scratched fairings, you can consult the following in-depth article: https://www.bikeexif.com/2019/05/how-to-fix-scratched-motorcycle-fairings/
From Grit to Gloss: Mastering Deep Scratch Repair on Motorcycle Fairings
Scratches on motorcycle fairings are more than cosmetic blemishes; they test both patience and technique. A deep scratch can expose the underlying material, inviting moisture, UV exposure, and further wear. The aim of this chapter is not to promise a miracle fix, but to guide you through a deliberate, multi-step process that restores both appearance and structural integrity. When done with care, a repaired area can blend with the rest of the fairing and stand up to road life for years to come. The path from grit to gloss begins with honest assessment, moves through careful surface preparation, and ends with a finish that feels smooth to the touch and looks almost factory-new in bright light. The method is practical, repeatable, and designed to minimize risk to the surrounding paint and plastics, so you can approach the project with confidence rather than trepidation.
Deep scratches demand a plan that respects the layers involved. Fairings are often made of tough plastics, with a paint system that includes a base coat and a clear layer. If the scratch has penetrated down to the plastic or even to the primer, you’ll need to rebuild not just color but the surface itself. Begin with a thorough cleaning to remove oils, waxes, and dust that could undermine adhesion. A clean surface is the foundation of any durable repair. Isopropyl alcohol or a dedicated plastic cleaner is ideal because these solvents evaporate quickly and leave little residue. After cleaning, inspect the scratch closely. If you can feel a ridge or a gouge, or if you notice the base color or the texture of the plastic is disrupted, it’s a sign that more material is required than a simple polish or paint touch-up.
The preparation phase is where many DIY repairs either succeed or fail. For deep scratches, the edges of the damaged area must be softened so that new material can bond seamlessly. Start by coarse sanding to create a uniform edge that won’t catch or peel away. Use a 320–600 grit paper and work with a light touch, holding the sandpaper or sanding block flat against the surface. The goal is to remove loose particles, smooth the transition from undamaged to damaged areas, and avoid creating waviness in the surrounding paint. Keep the area well lubricated with water, which reduces heat buildup and prevents clogging of the abrasive. After this initial pass, switch to a finer grit—1500 to 2000—so you’ve created a flat, satin-like surface that gives the filler and the paint a smooth canvas. Wet sanding remains essential here; it minimizes dust, reduces heat, and leaves a more consistent finish.
With the edges deemphasized and the surface flattened, it’s time to rebuild the damaged volume. For deeper scratches that expose the plastic, a two-part plastic filler or body filler designed for automotive plastics is the correct companion. Apply the filler with a plastic spreader, pressing it into the scratch and building it slightly above the surrounding skin. This extra height is deliberate; when you later sand, you’ll remove the peak and leave a perfectly flush plane with the rest of the fairing. Allow the filler to cure fully per the manufacturer’s instructions; rushing this step invites micro-cracks once you begin the re-sanding. When cured, re-sand with 1500–2000 grit paper, paying attention to staying level with the adjacent surface. Wet sanding again helps to keep particles from embedding in the surface and prevents gouging the newly filled area.
Priming follows as the bridge between the repaired surface and the color you’ll apply. Use a plastic-specific primer that is compatible with the base coat you plan to use. A thin, even coat is enough to provide adhesion and to seal the repaired zone from moisture. Allow the primer to dry completely; even a slight tack or residue can cause micro-peeling later on. Priming is less glamorous than painting, but without a solid primer, color richness and long-term adhesion quickly degrade. Once the primer is dry, perform a light, final sand with a very fine 2000 grit to ensure the surface is perfectly even. At this stage, you should be able to run your fingertip over the repair and feel no noticeable high or low spot.
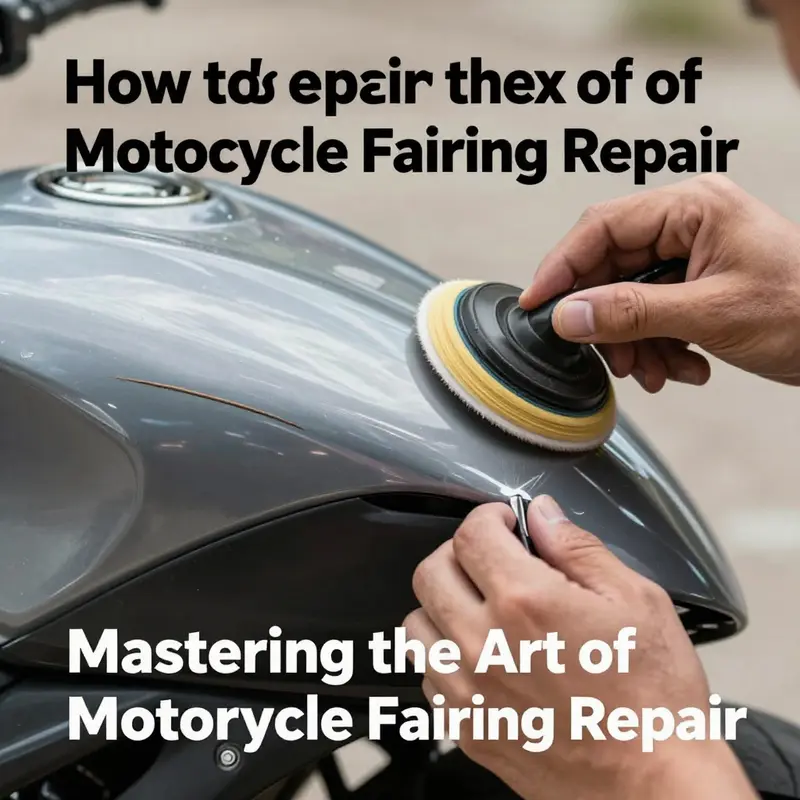
Color matching is the heart of a believable repair. The key is to approach color with restraint: the goal is not a perfect color match on the first try, but a match that becomes undetectable as you blend the edges into the surrounding paint. Select a base coat that matches the original shade exactly and test it on a scrap piece of plastic or on a hidden area of the fairing. When you’re confident in your color, apply multiple thin coats rather than one thick layer. Hold the spray or brush at a consistent distance—typically eight to twelve inches from the surface—and sweep across the area in even passes. Let each coat dry to the point of tack before applying the next; this reduces the chance of runs and helps the pigment settle evenly. Patience in this stage is worth its weight in gloss.
After the base color has cured, the next step is clear to protect the pigment and to restore depth. A clear coat adds UV resistance and a glossy finish that helps the repair blend with the rest of the fairing. Apply several light layers, again mindful of distance and evenness. Between coats, allow sufficient curing time so the layer beneath is fully set. A common mistake is applying the final coat too soon, which can cause solvent entrapment and hazy results. When the last clear layer has cured, you’ll likely notice some subtle differences in gloss or texture at the repair site. A careful polish can help remove those telltale signs. Use a fine polishing compound with a soft cloth or a low-speed dual-action polisher set to a gentle cadence. The objective is to draw the repaired area into harmony with the surrounding paint without creating heat or swirl marks that betray the repair.
The final phase is practical protection and meticulous refinement. A light, targeted polish around the repair will help the blend, while a broad wipe-down across the whole panel reduces any micro-contrast that might draw the eye. If the transition still looks flat or the color edge appears too sharp in sunlight, consider another ultra-fine pass with a 2000 grit wet sand followed by a second round of polishing. In some cases, a very subtle re-application of a thin color layer—applied in the same restrained manner as before—can be the difference between a repair that reads as an illusion and one that reads as a repair you can be proud of.
All this talk of steps can tempt a rushed approach, but the most critical factors are environment, cleanliness, and patience. Work in a clean, dust-free space where temperature and humidity are stable. Dust and lint trapped in fresh paint are a quick path to blemishes that betray the repair, and even small air currents can introduce contaminants during spray or wipe stages. Wear protective gear to avoid inhaling fumes or exposing skin to solvents. The best results come from calm, methodical work, not from speed.
In some cases, the damage runs deeper than a surface scratch and into the base material itself. If you observe cracks in the plastic, structural deformation, or gaps that go beyond the repaired area, it’s prudent to step back and consider professional assistance. A shop with a dedicated paint booth, proper ventilation, and experience with automotive plastics can evaluate whether the fairing requires more substantial repair, panel replacement, or even a new coat of base material to restore strength and aesthetic appeal. Remember that a DIY repair can save money and restore appearance, but long-term durability depends on correct material selection, adhesion, and finishing—areas where professionals excel.
If you’re navigating model-specific panels or scanning options for compatible replacements, model-category pages can help you compare shapes, fits, and finishes. For a practical model-linked path, you can explore a relevant internal catalog page here: fairings for a common panel subset.
Finally, to deepen your understanding of the principles behind deep-scratch repair and to access a broader set of techniques, consider consulting an established technical guide that covers the full spectrum of plastic repair, primer selection, color matching, and finish optimization. External resources provide a structured, illustrated walkthrough that complements this chapter’s hands-on approach. External resource: https://www.mmi.edu/motorcycle-repair/deep-scratch-repair
Beyond the Surface: Navigating Severe Scratches on Motorcycle Fairings and the Path to a Seamless Repair
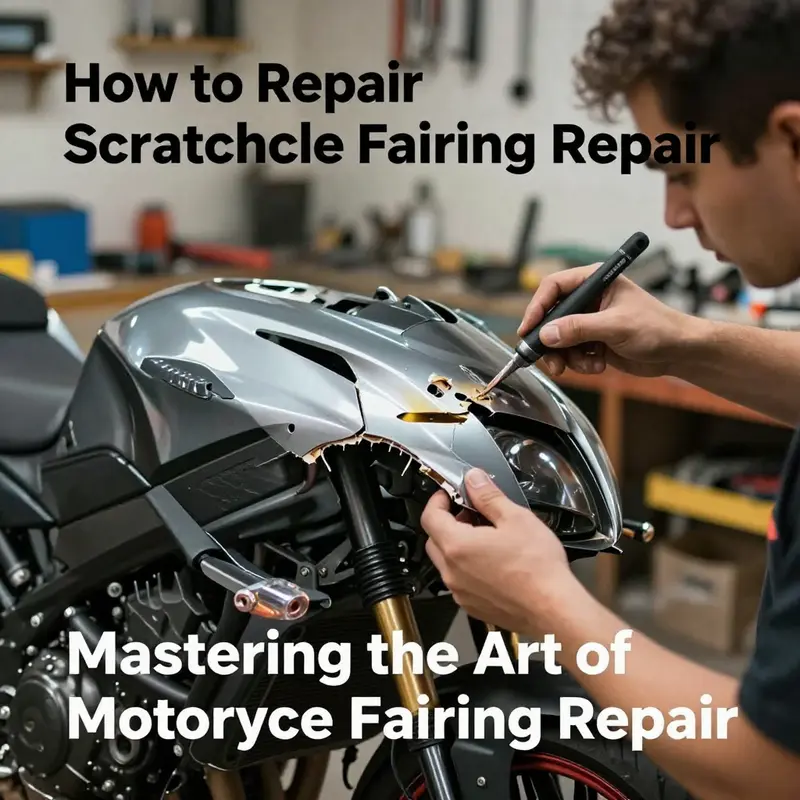
When a scratch on a motorcycle fairing runs deeper than a cosmetic line, it isn’t just about hiding a blemish. It becomes a question of structure, adhesion, and the long-term integrity of the panel. Severe damage—where the paint penetrates through to the plastic or composite beneath, or where cracks, holes, or warping appear—tests both your patience and your skills. The approach shifts from quick cosmetic fixes to a considered process that weighs safety, cost, time, and how closely you want the repaired area to match the rest of the bike. This chapter walks through that path with the goal of producing a repair that is durable, visually coherent, and respectful of the fairing’s original geometry. It is a practical guide that acknowledges the realities of rough rides and the limits of DIY, while giving you a clear framework for deciding when to push through with a repair and when to call in a pro or consider part replacement. The principles here align with established repair practices for plastic and composite motorcycle components and are designed to blend with the broader topic of repairing scratched fairings without losing sight of the end result: a fairing that protects the machine and looks like it belongs on it, not a patchwork you dread riding past the first line of sight.
Start with a truthful assessment. Severe damage often manifests as more than a superficial scratch. If the scratch exposes the base material—visible white or gray plastic beneath the faded color—or if you see hairline cracks, larger splits, or a warped surface, you’re dealing with more than a touch-up job. In such cases, a simple repaint is unlikely to hold or to align with the original contour. Some damage is best addressed by replacing the affected fairing section, particularly when the panel bears complex curves or mounting points that influence safety and aerodynamics. If you’re not sure whether the surface can be repaired convincingly, pause and gauge the repair’s feasibility against the cost of a replacement panel. The decision is rarely purely aesthetic; it rests on durability, how the repair will stand up to weather and vibration, and whether the color and texture can truly be matched after a full cure.
If you decide to proceed DIY, prepare for a meticulous process. Begin by cleaning thoroughly to remove grease, wax, and dust that can compromise adhesion. A degreaser or isopropyl alcohol is ideal for this stage, followed by a careful wipe with a lint-free cloth. The goal is a surface that behaves like new plastic under the repair materials. Next comes careful surface profiling. Sanding initiates with coarser paper—180 to 220 grit—to break the gloss and create a textured “key” that the repair compound can bite into. The aim is not to flatten the surface but to roughen it enough to hold the filler and primer. Light, controlled passes are essential; don’t over-sand and risk cutting through too far into the plastic. After this step, wipe the area clean again. A dust-free canvas is crucial for a smooth, level repair.
Filling deep scratches or cracks is where the repair becomes a craft. For deep gouges or structural cracks, use a two-part epoxy putty or a specialized plastic repair compound designed for automotive or motorcycle bodywork. These products are formulated to bond with plastic and to sand flat once cured. Apply the filler slightly over the surrounding plane to allow room for shaping. Cure time is product-dependent, often several hours to a full day. Patience here pays off later in the process: a properly cured filler is easier to sand flush and reduces the risk of telegraphed imperfections through the paint. Once cured, begin with a sequence of progressively finer grits—starting around 400, then 600, then 800—to bring the repaired area into flush alignment with the surrounding surface. Sand in a consistent direction to minimize swirl marks that would otherwise show through the finish. The goal is not only a smooth surface but one that respects the fairing’s curvature and line flow.
Priming now becomes the critical intermediary step. A primer formulated for plastic provides a uniform base and helps color layers adhere evenly. The primer also helps seal the repaired area and reduces the risk of future delamination in high-stress zones where fairings experience flexing or contact with air and road debris. Once the primer has cured, you approach color matching with care. The most reliable aesthetic result will typically come from color-matching spray paint that is designed for plastics and tuned to the specific color family of the fairing. In practice, this means multiple light coats, each allowed to dry to a touch before applying the next. Build the color gradually—thin layers, not one heavy coat—to minimize runs and clouding. Depending on the shade, you may need several passes to achieve a seamless blend with the adjacent panels. It is important to note that factory-match excellence can be elusive with a generic spray can. If you’re aiming for a flawless look on high-visibility areas, you may eventually want to bring the part to a professional body shop for precise color matching and application.
After color, the finishing stage completes both the look and the durability of the repair. A plastic-appropriate clear coat over the color layer provides gloss, depth, and UV protection, which helps prevent the new paint from fading or cracking with exposure to sun and temperature changes. Once the clear coat cures, you can perform a gentle polish with a finishing compound and a microfiber pad or, for a more refined result, a dual-action polisher. The polishing step is essential; it helps to erase micro-swirls and micro-unevenness introduced during sanding, bringing the repaired patch to visually disappear into the surrounding area. The final appearance should reveal a harmonious transition rather than a patch that stands out. If any haze remains after polishing, a light, targeted buff with a fine compound can restore clarity and depth without removing substantial material from the surface.
Beyond the technical steps, the repair process benefits from a measured approach to tools, workspace, and safety. Work in a clean, dust-free environment and ensure proper ventilation when sanding, priming, and spraying. Use personal protective equipment—gloves, eye protection, and a respirator or equivalent for paint aerosols—to guard against exposure to solvents and particulates. The weather and temperature can influence curing times and paint behavior, so plan accordingly and allow for additional drying time in less-than-ideal conditions. The aim is a repair that stands up to the realities of riding—vibration, wind, moisture, and sun—without delaminating or cracking prematurely.
When the repair path grows too complex, or when you observe ongoing substrate damage, alignment issues, or mounting concerns, professional help becomes a prudent choice. A qualified body shop can assess structural integrity, perform color matching with controlled lighting and shade measurement, and apply finish coats in a controlled environment such as a paint booth. In some cases, replacing the damaged fairing segment is the most reliable long-term solution. This approach preserves safety and performance, ensuring that mounting points, fasteners, and aerodynamic contours return to their designed specifications. If you’re considering replacement, the decision is not merely cosmetic. A misaligned or weakly bonded panel can affect ride dynamics and protection in a crash, so reliability remains paramount.
For readers who ride Hondas or other popular makes, the availability of original or aftermarket fairings can influence your choice between repair and replacement. If you’re exploring options for a specific model, you can explore corresponding parts through the platform’s dedicated fairings categories, such as the Honda fairings collection, which groups compatible panels and accents by model family. This streamlined access helps you compare pricing, fitment, and finish options before committing to a repair strategy. Honda fairings provide a practical touchpoint for understanding the scope of what a replacement panel might entail and how it aligns with a repaired surface in terms of color, texture, and contour.
Ultimately, the decision to repair or replace hinges on a balanced assessment of damage severity, the likelihood of achieving a near-perfect color and gloss match, and the long-term reliability you expect from the panel. If the damage is extensive enough to compromise structural integrity or if the repaired area cannot convincingly blend with the rest of the fairing, replacement becomes the most sensible path. If you pursue the DIY route, treat it as a careful craft rather than a quick fix. Each stage—cleaning, abrasion, filler, primer, color, clear, and polish—creates a progressive convergence toward a repaired surface that performs as well as it looks. The process demands patience, a steady hand, and the willingness to pause when the quality no longer meets the standard you expect for a machine that rides on real roads.
For readers ready to extend their knowledge beyond the core steps, a broader, professionally oriented resource can offer additional insights into the nuances of plastic repair and paint finishing. A well-regarded external guide consolidates best practices around adhesion, curing, and color matching across plastic substrates, helping you refine your approach and make informed decisions about whether a DIY repair suffices or a pro is warranted. While this chapter emphasizes practical steps anchored in established repair principles, it also recognizes that not every scratch is created equal and that the ultimate goal—safe, durable, and aesthetically coherent fairings—depends on choosing the right path for the specific damage you confront. For those who want to explore more deeply, the following external resource can provide a complementary perspective on the repair journey: https://www.autobody101.com/content/tech/paint/repairing-scratches.html
Beyond the Scratch: Navigating DIY Refinement and Professional Repair for Motorcycle Fairings
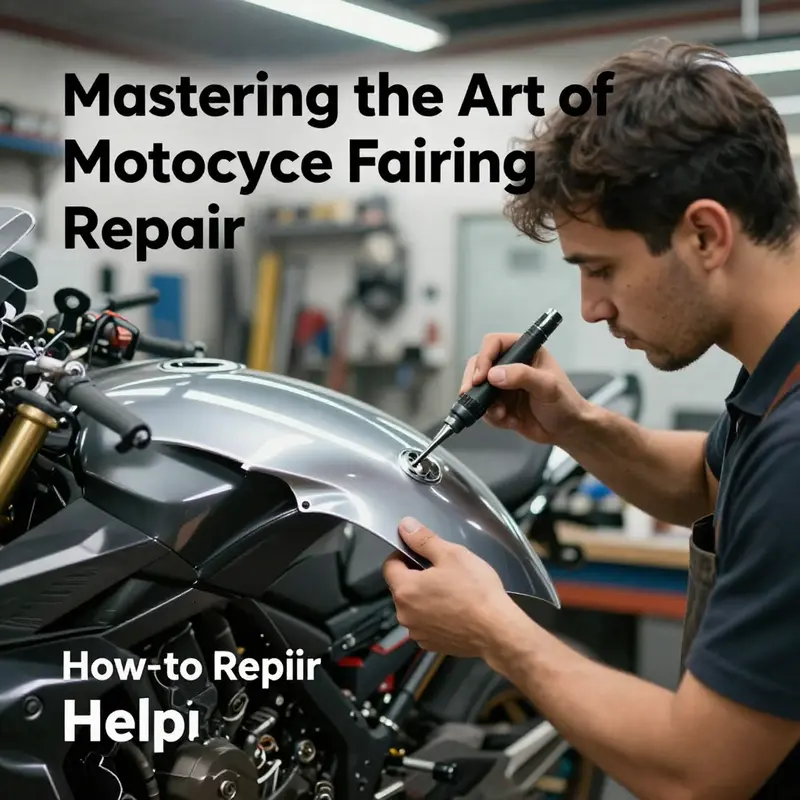
A motorcycle’s fairings are as much about aerodynamics and protection as they are about style, and a visible scratch can feel like a small wound on a larger machine. The first step in turning that wound into a fadeback to factory-like smoothness is honest assessment: how deep is the scratch, and what lies beneath the finish? Scratches run along a spectrum. Some kiss only the clear coat, leaving a faint line that catches the light but doesn’t break color. Others breach the clear coat and reveal the base paint, while more severe marks expose the plastic or even the metal beneath. This chapter follows a triage approach, not as a lecture on rigid rules, but as a practical, real‑world guide that helps you decide when a DIY touch‑up is reasonable and when professional help is the wiser route. What matters most is not turning every problem into a flawless paint job, but restoring the panel’s integrity, look, and resilience against moisture and further damage. In that spirit, let’s explore how to gauge the damage, apply careful, stage‑matched repairs for minor imperfections, and recognize when a visit to a skilled technician becomes the most economical path over time. If you’re browsing for parts to replace or harmonize a repair with the rest of your bodywork, you may find options tailored to specific makes, such as the Honda fairings for CBR line, which can help you plan color and fit as part of a broader restoration project. The decision to repair rather than replace hinges on the damage’s reach and the fairing’s visibility, so the following thoughts are offered as a practical framework rather than a prescriptive rulebook. Minor scratches, the ones that affect only the clear layer, often respond best to gentle, noninvasive methods. A small amount of non‑gel toothpaste or a mild polishing compound can be worked into the scratch with a soft, lint‑free cloth in a slow, circular motion for a short period. The goal is not to erase the mark with brute force but to polish the surface enough that the light reflects more evenly, diminishing the line’s visibility. After a careful wipe with a damp cloth and a thorough dry, you may notice a subtle improvement. This approach rests on a simple truth: if the underlying color and plastic aren’t compromised, light abrasives in combination with patience can restore uniform sheen without introducing new scratches. For more deeply etched lines where the base coat is exposed but the underlying material remains intact, the repair requires a slightly more deliberate sequence. Begin by cleaning the area with isopropyl alcohol or a dedicated plastic cleaner to remove any grease, wax, or debris that could interfere with adhesion. Then, using very fine grit sandpaper—typically in the 1500 to 2000‑grit range—gentle, linear motions should be used to blend the edges of the scratch into the surrounding paint. The key is consistency: sand in one direction to minimize swirl marks and create a smooth transition zone. After cleaning again, apply touch‑up paint that matches the fairing’s color exactly. This is not the moment for a single heavy coat; instead, spray in multiple thin layers, allowing a moment or two for each to set before applying the next. Keeping the spraying distance around six to eight inches helps avoid drips and ensures a more even finish. Once the final coat has dried thoroughly, a light pass with a polishing compound can help to mellow any micro‑texture differences and bring the repaired area into harmony with the adjacent surface. The logic here is simple: color is a shell, but texture is the heart of a seamless look. When the damage runs deeper, and the surface shows a real breach into the resin, base paint, or even the plastic substrate, the challenge shifts from leveling and tinting to rebuilding the skin. The recommended path is professional repair, particularly if the damage is sizeable or located on highly visible areas like the front fender or the upper side panels. A reputable shop will typically begin with meticulous cleaning and surface preparation, then move through a controlled process that includes primer, body filler where gouges exist, careful sanding for a level plane, and multiple layers of base coat and clear coat to achieve a finish that matches both color and gloss. The advantage of a trained technician lies not only in color fidelity but in the long‑term durability that comes from proper primer chemistry, proper filler compaction, and the controlled environment of a paint booth. Dust, humidity, and temperature swings can all undermine a DIY finish, especially in the critical stages of base and clear curing. In a shop, the area is kept dust‑free and climate controlled, allowing for a more consistent laydown and a smoother overall result. It’s here that professional practices—precise sanding, measured primer coats, and meticulous clear coats—translate into a repair that stands up to washing, rain exposure, and the flexing of panel joints. It’s also worth noting that attempting an advanced repair without the appropriate experience can be costly in the long run. Misjudging the depth of the scratch, choosing the wrong filler, or applying paint in inconsistent layers can create seams that show under bright light, or result in mismatched color tones that persist even after a finish is applied. For those reasons, high‑visibility panels often justify a professional approach. The decision is not about pride in a self‑repair but about investing in the bike’s long‑term protection and the owner’s time and expense. If you decide to proceed with a DIY path for deeper scratches, several practical considerations help you manage expectations. Work in a clean, dust‑free area, ideally with soft lighting that reveals texture. Use proper safety gear, including a mask and eye protection, when sanding or spraying. Test color matches on a small, inconspicuous area before applying anything to the scratched region, and be prepared for color variance if the paint is a metallic or pearlescent shade. It’s rarely enough to match hue alone; you must also consider gloss level, metallic fleck alignment, and the way the factory clear coat reflects light. In the end, the goal is not invisibility but a convincing blend that allows the repair to breathe with the rest of the panel. A well‑executed DIY repair can yield a finish that’s nearly indistinguishable from factory work, especially on panels that are medium to low visibility or on fairings that are not subjected to heavy sun exposure or abrasion. When the damage is more substantial, professional help becomes a pragmatic choice that preserves both aesthetics and structure. A skilled technician will not only repair the surface but also assess for any micro‑cracks, unresolved undercuts, or substrate damage that could worsen with road vibrations and weather cycles. Their approach often includes a primer that prevents rust if metal is exposed, a filler to address gouges, and a well‑matched base color followed by a clear coat that seals and adds depth. The result is a panel that not only looks right but also resists moisture infiltration and impact over time. It is not simply about cosmetic perfection; it is about integrity and protection for the fairing’s core materials. Throughout this process, a sober evaluation of the fairing’s role on your bike—whether it’s a sport premier, a touring shell, or a cosmetic front for a weekend rider—helps set expectations. If you ride in climates with heavy rain or high humidity, or you frequently park outside, the case for a professional, sealed finish grows stronger. The right choice blends practicality with your goals for appearance. If you’re curious about best practices and industry standards, you can consult comprehensive analyses from established repair resources, such as standards and practices for motorcycle body repair, which provide a foundation for understanding the steps outlined here and the rationale behind them. For readers who want to explore parts compatibility and color matching in the context of a broader restoration, remember that the repair mindset should align with the bike’s overall aesthetic and resale or value goals. A scratch that seems minor in the moment can become a persistent eye‑catcher if the finish ages differently from surrounding panels, so the timing of a repair matters as much as the method. In sum, a measured approach to scratched fairings—recognizing when a simple polish might suffice, when a careful touch‑up can restore color continuity, and when professional intervention is warranted—offers the best balance between cost, time, and long‑term durability. The road to a seamless repair is as much about judgment as technique, and the most reliable outcomes often emerge when you combine cautious DIY work for superficial flaws with the precision and control available in a dedicated body shop for deeper damage. Whether you choose to pursue a DIY refresh or to entrust the repair to trained technicians, the aim remains the same: recover the fairing’s smooth, uniform appearance and protect the panel from moisture, UV, and impact so that your ride looks and performs its best ride after ride. For more detailed guidance on professional standards and industry practices in motorcycle fairing repair, you can refer to authoritative resources in the field, which provide validated workflows and safety considerations that support the approach described here. Finally, keep in mind that the best repair outcome often begins with honest damage assessment, a clear plan, and a steady, patient approach—especially when the clear coat and base color lie beneath the surface you see at first glance.
Beyond the Scratch: Finishing Touches That Restore and Guard Motorcycle Fairings
A scratch on a motorcycle fairing is never just a blemish; it is a signal that the surface’s defenses and the eye’s perception must be restored in one cohesive process. The repair path you choose hinges on how deep the damage runs, but the real craft lies in the finishing touches. Those last steps determine whether the repair fades into the surrounding paint or stands out like a primer patch under bright sun. When you approach finishing touches as a seamless continuation of the repair, you not only restore color and smoothness but protect the fairing from the next encounter with rocks, rain, or road grime. The philosophy is simple: feather the edges, blend the tones, seal the surface, and then defend it from future wear with a durable barrier that still looks natural under daylight and streetlights alike.
To begin, assess the scratch with a careful eye and a steady hand. Surface scratches—those that only kiss the clear coat without breaking into the color layer—are the easiest to address in a way that feels almost invisible. The goal is not to remove every micro-scratch but to reduce their visibility and restore a uniform sheen. In these cases, polishing is your primary tool. A gentle, well-executed polish uses mild abrasives to smooth the tiny imperfections within the clear layer. Work in small, overlapping passes with a soft cloth, maintaining steady pressure and avoiding circular swirls that can exaggerate the effect of the damage. The aim is a micro-level refinement that lightly clears the surface so the scratch becomes less apparent when light hits it from any angle.
When the color coat shows through—meaning the paint layer is damaged, but the underlying primer or base shade remains intact—a slightly different approach becomes necessary. Thorough cleaning is essential before you begin. Any residual oil, wax, or dirt creates a barrier that can trap contaminants and lead to poor adhesion. Isopropyl alcohol or a dedicated plastic cleaner can help you get a pristine zone around the scratch. Then comes careful feathering: you want the transition from repaired area to original paint to be gradual and almost imperceptible. Light, deliberate sanding with very fine grit sandpaper—typically in the 1500-2000 grit range—helps create that feathered boundary. The key here is directionality. Sand in long, even strokes rather than circular motions; this minimizes swirl marks and erases hard edges from the repair process. After sanding, wipe away the dust so you can see the true blend under clean, bright light.
Next, apply the touch-up color with patience. If you’re using a spray can, apply several ultra-thin coats, allowing each layer to dry just enough to set before the next. If you’re using a touch-up pen, apply with short, careful bursts that lay color down evenly without pooling. The objective is to match the color and sheen as closely as possible to the surrounding area. Too thick a coat risks drips or an obvious ridge; too thin a coat can leave the color unclear or patchy. Once the color has cured to a uniform surface, a light buff with a polishing compound can help integrate the repair into the wider panel. The final pass should reveal a continuity of gloss and a consistent microtexture that mirrors the adjacent paint. In this context, the fuzzy line between repaired and original surfaces is what the eye reads as “natural,” not as “patched.”
For more severe damage—areas where the primer shows or the plastic or metal beneath is exposed—the horizon shifts toward a more involved repair. This is where the wisdom of professionals often becomes clear: the scale and complexity of the repair exceed what a DIY touch-up can responsibly accomplish without risking rust, warping, or a noticeable mismatch. If you’re facing large stretches of missing paint, dents, or substantial exposure of the base material, approaching the repair as a full panel refurbishment is prudent. The process typically starts with a thorough cleaning and may involve applying a primer to protect exposed metal and improve adhesion for subsequent layers. Fillers or putty can be used to address dents and irregularities, followed by careful sanding to a perfectly smooth plane. Then comes multiple coats of base color, and finally a clear coat to seal and add depth. This sequence builds not only a finish that looks like factory paint but also a protection layer that resists UV damage, moisture intrusion, and micro-scratches. The pro approach recognizes that some repairs are not just cosmetic; they are structural to the fairing’s surface integrity and long-term performance.
Beyond the mechanical steps of repairing color and texture lies a set of finishing touches that marketers rarely call out but that skilled technicians insist upon for longevity and appearance. Polishing remains central, but the tools and methods become more refined. A dual-action (DA) polisher, used with a quality finishing compound, can produce a level of gloss and smoothness that hand polishing cannot achieve. Work in micro-sections, letting the machine do the heavy lifting while you steer the outcome with light, even pressure. The objective is to remove any tiny surface imperfections created during sanding and to re-create a uniform glaze that flows with the curvature of the fairing. The result is a reflected highlight that reads as a single, continuous surface rather than a patchwork of angles and edges.
Protection serves as the logical next chapter after finishing. A wax or a ceramic coating provides a barrier that reduces UV degradation, repels water, and offers a sacrificial layer against future scratches. The timing here matters: you want the paint to be fully cured before you apply protection so that nothing traps into curing solvents or creates haziness. A typical waiting period around the cured state is a few days, depending on the product guidelines and environmental conditions. When you finally apply wax or ceramic coating, you’re not just adding a glossy layer; you’re sealing the finish from road salts, exhaust residues, and the grit of daily riding. This protective layer plays a crucial role in how forgiving the repaired area will be against future encounters with debris, rain, or brushing against rough surfaces. When done properly, the repaired area wears like the original, with a uniform luster that remains consistent as the fairing ages.
In parallel with finishing and protection, consider how you manage the broader care routine. Regular washing with mild soap and water preserves the surface without introducing harsh abrasives that could reintroduce micro-scratches. Harsh cleaners, steel wool, or aggressive brushes should stay in the toolbox of deglazing chores and out of the paint zone. Patch the habit of gentle drying with a soft microfiber to avoid water spots that can highlight uneven textures. Park strategically when possible, choosing spots that reduce the chance of incidental bumps against walls or other vehicles. A breathable protective cover can be a wise investment for storage, as it shields from dust and weather while allowing moisture to escape. Finally, keep an eye on the repaired area after rides in challenging conditions—construction zones, gravel roads, or automatic car wash passes can test the resilience of the finish, especially in the weeks immediately following the repair. Early detection of any new micro-scratches or dulling allows you to address issues before they become noticeable flaws.
As you contemplate the path from scratch to seamless surface, the flow of the work becomes a narrative of progressive refinement. The initial repair aims to stop the damage and restore an even surface. The finishing touches then coax the surface back to a near-perfect appearance, with attention to texture and light interaction. The protective layer finally cements the result, turning a repaired panel into a resilient part of the bike’s aesthetic. This is not merely about fooling the eye; it is about constructing a surface that behaves like a continue of the original finish, resisting the next encounter with the elements and road debris. And as with any craft, consistency matters. The more you follow a deliberate, repeatable sequence—clean, feather, color, gloss, protect—the better the outcome will be, and the more durable the repair will feel over time.
If you’re seeking a more bike-specific framing or want to explore options tailored to a particular model, there are resource hubs that curate parts and fairing options by brand. For riders working on Hondas and wanting to compare fairing choices or replacement paths, a dedicated category helps you navigate the spectrum from OEM-inspired replacements to aftermarket refinements. This path keeps your repair logic unified with the bike’s overall appearance and build quality. See the Honda fairings category for a sense of the available options and how different finishes can harmonize with your existing paint and decals. Honda fairings category.
To complement the traditional liquid and solid paints, contemporary fast-spray methods are increasingly popular for their speed and precision. The light-curing or UV-cured spray approach can reduce cure times and deliver a tight, professional-level finish with fewer hot spots and edge issues. This method is not a universal replacement for all scenarios, but it represents an important evolution in repair techniques. If you want to see a detailed demonstration of surface prep, application technique, and curing in real time, a recent expert tutorial on a reputable repair channel offers a clear, practical walk-through. It showcases how modern, airless or light-curing systems can be integrated into DIY workflows for quick, durable results. External resources like this can provide a visual complement to the principles outlined here.
The arc of repairing scratched fairings then returns to a simple, pragmatic practice: approach the process with a plan, execute with care, and protect with intention. A well-executed finish is not cosmetic luck; it is the sum of clean surfaces, precise feathering, accurate color matching, and deliberate sealing. When you combine these elements, your bike carries not only its original sheen but a shield against the inevitability of future scrapes. The ride becomes safer, the look more cohesive, and the investment in the bike’s appearance preserved for longer. The goal is not a one-off fix but a durable, maintainable standard that you can apply again and again as needed, with confidence that the fairing will respond in kind to the next encounter with a gravel road, a driveway edge, or a careless gust of wind. In the end, the chapter you are writing on your fairing’s surface is a chapter you’ll enjoy riding through as well, every time you pull into the sunlight and catch your reflection as a rider who treats skin-deep scratches as part of a larger, ongoing art of maintenance.
Final thoughts
Understanding how to properly repair scratched motorcycle fairings is not just about restoring aesthetics; it enhances customer loyalty and boosts your business’s reputation. By equipping your team with the techniques covered in this guide, from minor touch-ups to more extensive repairs, you’ll ensure that your customers leave satisfied. Adopting these practices not only minimizes costs associated with outsourcing repairs but also strengthens the skill set of your workforce in an industry where visual appeal matters significantly. In a competitive market, offering exemplary repair services will give your business a distinct advantage.