Painting motorcycle fairings with spray cans is an accessible way to achieve a custom look without the professional price tag. For business owners in the motorcycle industry, understanding this DIY approach can help provide valuable guidance to customers looking to personalize their bikes. This article delves into the critical phases of preparation, choosing the right paint, and application technique—each essential for a successful finish. With careful planning and execution, the painting process can yield results akin to professional airbrushing, ensuring riders have the best possible experience.
From Primer to Perfection: Mastering Prep for Spray-Can Motorcycle Fairings

The quiet foundation of a great paint job often gets overlooked in the rush for a bold color or a flawless gloss. Yet when you work with spray cans, the finish you see on a fairing is born long before the color hits the plastic. It is born in the careful eyes of preparation, in the patience you invest before you even press the nozzle, and in the discipline to keep the surface clean, the environment stable, and the technique consistent. Preparation, practiced with intention, becomes the invisible hand that guides a sprayed layer from a muted, dull primer to a smooth, durable, showroom-like finish. In this chapter we move through the steps that transform a rough, ordinary shell into a surface ready to receive color with spray cans. We begin with the basics of clean, treated skin, then move through masking, environment, paint readiness, and the mechanics of application. All along the way, the aim is not merely to lay color, but to create a finish that adheres properly, resists wear, and looks like it belongs on the bike rather than in a garage experiment. The process is iterative and forgiving only if you respect the limits of aerosol technology and the nature of plastics. If you measure twice and spray thin, you can achieve results that feel surprisingly professional, even when you are working with budget-friendly tools.\n\nThe first breath of any successful paint job is cleanliness. The fairing needs a clean canvas free of oils, waxes, and dust. Start with a dedicated cleaner or degreaser designed for plastics and consider the kind of residue that tends to cling to fairings—finger oils from handling, road grime that clings after a long ride, and the faint sheen of old wax that can disrupt adhesion. Apply the cleaner with a microfiber cloth, using light, circular motions to lift contaminants without scratching the surface. After cleaning, wipe again with a dry microfiber to remove any moisture. The goal is a dry, pristine surface with no slick film left behind. A clean surface not only helps paint adhere but also reduces the chance of dust and lint sticking to the wet paint as it dries.\n\nSurface preparation does not end with cleanliness. The next step is to create a texture that gives the new paint something to grip. Mild sanding accomplishes this and helps erase gloss that can hinder adhesion. A 400- to 600-grit paper is a good starting point for most modern motorcycle plastics. Light passes are all that’s needed; the objective is to remove the glossy topcoat or any unevenness, not to chew away material. After sanding, a tack cloth should be used to remove fine dust and fibers. The tack cloth’s sticky surface captures particles that may otherwise ride the air onto the wet paint. The state of the surface after sanding often determines how even the final coat will look, so take your time with this step and resist the temptation to rush to paint.\n\nMasking is a discipline. The fairing is a curved landscape of edges, seams, and nearby components that you don’t want to color to match the new base. High-quality masking tape and painter’s plastic are your tools for this job. Precision is crucial at the edges where the paint must stop, and where it would otherwise creep into places that would be difficult to clean after spraying. For a clean line, press the tape down firmly, seal the edges, and consider burningish the edge with a fingernail to ensure there is no lift that could create a bleed. When masking, imagine the finished edge and work slowly to outline areas you want protected—from switchgear to fasteners, from the inner sides of fairings to the underside of panels that might reflect light and show imperfections in the paint. A common plan is to mask off the areas around headlights, vents, and trim pieces before any color is laid down. A well-executed mask ensures you can evaluate the color and surface without worrying about accidental paint on places that should remain untouched.\n\nThe environment in which you spray matters nearly as much as the technique itself. A controlled, dust-free space reduces the chance of particulates landing on a wet surface. An ideal spray booth is a dream described in many shop guides, but a clean, sheltered garage or a calm day outdoors can do the job if you manage the elements. Avoid direct sunlight, which accelerates drying and can cause orange-peel texture or crusting as solvents flash off too quickly. Drafts should be minimal, and dust should be controlled with maintenance of the area—close the doors, turn off fans that blow dust around, and consider a simple dust containment approach such as a tent or a clear plastic enclosure if your environment is prone to dust. Temperature control helps, too; a target range around 20 to 25 degrees Celsius is comfortable for most paints and reduces the risk of runs or sags caused by rapid solvent evaporation. If a spray booth is not available, you can still achieve good results by selecting an open but calm day with light, even air movement and by laying down a clean surface to set the fairing on when painting.\n\nPreparation also extends to paint readiness. Before you even pop the lid, shake the can vigorously for a minute or two until you hear the ball inside rattling. The ball is not a mere agitator; it’s a signal that the pigment, resin, and additives are mixing properly, which is essential for consistent spray behavior. After shaking, test spray on a scrap piece of cardboard or butcher paper. This helps you confirm color, flow, and pattern, and it gives you a chance to tune your distance and technique before the fairing sees paint. When you are ready to apply, hold the can perpendicular to the surface at a distance of roughly 15 to 20 centimeters (about 6 to 8 inches). Closer than this, and you risk drips and sags; farther away, and you may encounter a patchy finish with visible stippling. The aim is to deliver a disciplined mist, not a heavy puddle.\n\nTechnique is the artist’s brush without a brush. Apply color in short, controlled bursts rather than long, continuous sweeps. Each pass should overlap the previous one by about 50 percent; this overlap ensures even color and minimizes streaks that can appear when coats dry unevenly. Do not hold the can still in one spot, as that creates a pool and a run. You can break the work into sections if the fairing is large or complex, but maintain consistency across the whole surface by adhering to the same distance, angle, and overlapping pattern. The core rule is to apply multiple thin coats rather than a few heavy ones. The recommended approach is three to five thin coats, with 10 to 15 minutes of dry time between coats. The exact timing depends on the product you’re using, the temperature, and the humidity, so consult the can’s instructions as a baseline, then adjust conservatively in your environment. Each coat should look dry to the touch before the next is applied; this reduces the likelihood of trapped solvents that can cause sags later.\n\nThe idea of working in sections can help with large fairings, but it is not a license to rush the process. When you break the task into top, bottom, left, and right segments, you create a mental map that helps you maintain even coverage and consistent drying across complex shapes. It’s not necessary to reveal the entire plan in a single glance, but the discipline of moving from one area to another with the same approach—short passes, steady distance, 50 percent overlap—will yield a uniform film. A subtle but important point is to keep the air around the surface calm while you spray. If you can, close the shop door, keep the area free of fans, and avoid blowing air directly onto the panel. Any breeze can carry dust onto the surface while the paint is still wet, which would mar the finish with micro dust particles.\n\nAs you progress through the layers, you begin to sense the relationship between coverage and color depth. The base color is not merely about how bright it looks in a can; it is about how the pigment settles, how the solvents flash, and how the texture of the surface behaves once the pigment hits it. Several light coats give you the opportunity to refine color matching with the underlying primer or the next coat that will be applied. In practice, you may find that you need to adjust your technique slightly to accommodate the specific quality of the paint you’re using. Some aerosols have slightly thicker viscosity, others dry faster. A slower, more deliberate application can reduce orange peel in the early passes, while a quicker motion may help you achieve a more even layer in less time. The key is consistency—your hand should feel familiar with the process, not fidgety and uncertain.\n\nDrying time is a delicate balance. The final finish depends on drying each coat to a point where it does not crowd the next coat’s solvents, yet remains pliable enough for subsequent coats to blend. In optimal conditions, you would wait 10 to 15 minutes between coats, testing the surface for tack before moving on. In practice, environmental factors can shorten or lengthen this window. The surface should be firm to the touch but not fully cured. Pushing too soon can result in dragging from the previous coat, while waiting too long invites dust or debonding between coats. The final goal of the base color is to have a smooth, uniform field that shows no telltale stippling or silvering. The finish should feel coherent and seamless, like a single, continuous layer that belongs on the bike rather than a layer of paint sitting on a plastic shell.\n\nAfter you complete the color base, you may elect to apply a clear coat for protection and gloss. A clear coat does more than just shine; it adds durability, helps resist UV degradation, and can make a color pop with a deeper, more liquid appearance. When you choose to apply a clear, follow the same principles as with color—multiple, thin coats with controlled overlaps and careful drying times. The same distance, the same motion, and the same respect for the material. A clear coat also has its own set of environmental considerations. It can be more forgiving of minor imperfections, but it can also magnify them if applied too thickly or in poor conditions. If you opt for a clear, practice the test spray on a scrap before committing to the fairing, and ensure the base color is fully cured before you begin.\n\nCuring is the final, patient act that completes the transformation from a painted fairing to a durable, ride-ready surface. A base color that dries for a full 24 hours in a clean, dust-free environment is a good rule of thumb. Temperature stability is helpful during curing; sharp temperature swings can cause microcracking or uneven drying. After the color has cured, you can perform a light, controlled polish to remove minor imperfections and enhance the gloss. A microfiber cloth and a plastic-safe polish can bring out the depth of the color and smooth slightly rough patches left by drying or handling. It’s important not to rush this stage, as polishing on an under-cured surface can pull pigment and reveal scratching that would otherwise be hidden. The overall feeling you want is a glossy, even surface that mirrors the line work of the body and the curves of the fairing rather than a flat, dull field.\n\nWith the technical steps outlined, there is also a practical cadence that many riders discover only through trial and repetition. The first layer you lay down may be imperfect—this is not a failure but a signal to proceed with another light coat. The second or third coat often reveals the true potential of the base color—whether it matches the original hue, whether there is enough depth, whether the texture looks uniform across the entire surface. The beauty of spray cans is in their forgiving nature when used with discipline. They allow a hobbyist to achieve a professional-looking result with patient, repeated passes and careful handling. This is why the preparation phase matters so much. In the painter’s discipline, the quality of the final color square does not hinge on a single heroic spray but on how reliably the painter can reproduce the same controlled strokes, distances, and comfort in the same section of the fairing across several hours.\n\nThe choice of color and the final look can be influenced by the way you start the process. If you are trying to approach a factory color or a close approximation, you may want to select a base color that maps well to the color you see in the can and then build up the hue with subtle adjustments across coats. If exact matching isn’t possible from a single can, you can consider color-matching services that some providers offer. This approach is particularly helpful when you want a precise, factory-like finish or when you are attempting to replicate a color that is available only through specialized palettes. It’s a reminder that even with spray cans, color control matters and can be achieved with careful planning and a willingness to test and refine. When you have settled on a color and approach that feels comfortable, document the distance you used, the number of coats you applied, and the approximate drying intervals. This log becomes your personal playbook, guiding subsequent projects and helping you refine your toolbox of techniques for future fairings.\n\nAn often-overlooked detail that can make a meaningful difference is the choice of masking strategy and the care taken to protect edges. If masking is rushed or poorly applied, you may end up with paint along edges, drips joining panels, or unintentional color bleed into areas that should remain pristine. A careful, patient masking pass ensures that lines stay crisp. When you return to reveal the masked areas, you want to see clean edges, not ragged paint remnants. In some cases, you might choose to spray a light coat over masked areas to help seal edges before removing tape. This careful step can reduce the risk of bleeding when you finally peel away the masking.\n\nColor matching, technique, and masking all matter, but so does the willingness to revisit and revise. If you discover a seam or edge that shows a slight variability in color, you have a couple of options. You can perform a very light, targeted touch-up after the full coat has dried, using the same spray technique. Alternatively, you can apply a very thin, final mist coat across the entire surface to help even out any minor disparities, provided that the underlying coats are fully cured to prevent lifting. The goal in every case is to achieve a uniform appearance that reads as a single, cohesive color across the entire fairing. It’s a delicate balance of patience, observation, and measured action.\n\nFor readers who want to see how the broader world thinks about color and replication in plastic parts, the Honda fairings category can be a useful reference point. It can offer a sense of how color choices translate across different designs and how color families behave on plastic surfaces that many riders use for custom work.\n\nIf you’re curious about specific examples and want to explore a catalog that aligns with the kind of parts discussed here, you can explore the Honda fairings collection. It provides a practical sense of how color choices are applied to real-world parts across a range of models and eras. The link below is offered as a practical point of reference and is not a product endorsement. Honda fairings page\n\nInternally referenced source for further context on color and surface finish can be found here: Honda fairings collection.\n\nAs a closing perspective for this prep-focused chapter, remember that the surface you start with governs the journey you take with each spray pass. The better you prepare, the more forgiving the subsequent layers will be. Spray cans reward consistency: the same distance, the same motion, the same overlap, and the same patience between coats. When you commit to that consistency, the final result becomes less a product of chance and more a consequence of a well-executed plan. The surface you defend with one minute of mindful cleaning can become the canvas for a finish that lasts the ride, and the quiet foundation you build today will translate into a color that looks as good after a season of sun and wind as it did when you first peeled back the tape. The chapter that follows will move from this solid base into the dynamics of color, texture, and the finishing steps that complete the transformation, including the optional but highly recommended glaze of protection that can elevate a spray-can finish to something that feels durable and polished rather than temporary and DIY. In the meantime, carry with you the discipline of prep: it is the difference between a paint job that looks like a temporary fix and one that endures the miles with grace and shine.\n\nExternal resource for broader context on automotive paints and plastics: https://en.wikipedia.org/wiki/Automotive_paint
null
null
From Primer to Gloss: Mastering Spray-Can Techniques for Motorcycle Fairings
Paint can days have a certain romance for riders who want individuality without the shop bill. The spray can is a humble tool, but when used with discipline it can deliver a durable, glossy, and nearly factory-like finish on plastic fairings. This chapter strands the idea that painting with aerosol cans is a shortcut only if you treat it like a full project—from meticulous prep to patient drying. The cycle of success is simple in theory: clean, abrade, mask, apply thin coats, and respect the dry time. In practice, the shine you chase is a product of small decisions and consistent technique, not a single heroic spray stroke. The goal isn’t perfection at first attempt but a reliable path to a professional-looking result that holds up to sun, heat, and a few road chips. When done well, the finish is more than color. It becomes a protective skin that can resist UV fade, resist the effects of heat cycling, and maintain that crisp edge you aimed for when you first rolled the bike into the garage to start the job.
Preparation is the foundation, and it deserves the kind of respect usually reserved for the engine rebuild. You begin with a clean slate, literally. A fairing surface that carries fingerprints, grease, wax, and dust is a hybrid invitation for adhesion failure. The first step, therefore, is to give the plastic a clean, neutral surface that can accept paint as easily as a canvas accepts pigment. Use a degreaser or a dedicated plastic cleaner that cuts through oil residues, not just dust. The goal is to remove anything that might sit between paint and plastic. Drying must be complete and thorough; a microfiber cloth helps but a clean, lint-free air can speed the process where available. If you’ve just come from a windy workshop or a dusty driveway, you may need to repeat the cleaning cycle. It is not a sign of weakness; it is the mark of someone who understands that adhesion starts at the microscopic level.
Next comes surface preparation. On plastics, you want the surface to be slightly textured so paint can grab hold. The taught gloss on fresh fairings can be a trap; you want a dull, uniform texture, not a scratchy, uneven surface. A light scuff with a fine grit abrasive works nicely. There are opinions about grit sizes, but a common, productive range is from 800 to 1200 grit for most plastics, with the option to go up to 2000 for an exceptionally smooth finish. After sanding, remove the dust with a tack cloth, the sticky kind designed to trap fine particles. This step again prevents tiny specks from becoming embedded freckles in the final coat. If the fairing includes areas that should not be painted—edges, fasteners, or trim—mask them with high quality tape and plastic sheeting; press the edges firmly to prevent bleed. You want a crisp boundary, not a messy halo of overspray.
The masking ends up being one of the most important quality-control steps. If you are aiming at a one-piece color job or a two-tone scheme, think through the layout before you ever prime. Mistakes here can change the final look more than a chip or run will. The goal is clean lines and protected areas. Remember that the surface you paint will be the surface you live with on the road, so any bleed or imperfect edge is a constant reminder of a rushed job. A careful masking layout and sturdy tape that won’t lift in a breeze are non-negotiable. This is where preparation meets artistry; a well-masked fairing yields a crisp color separation that reads like a factory standard rather than a café-custom sketch.
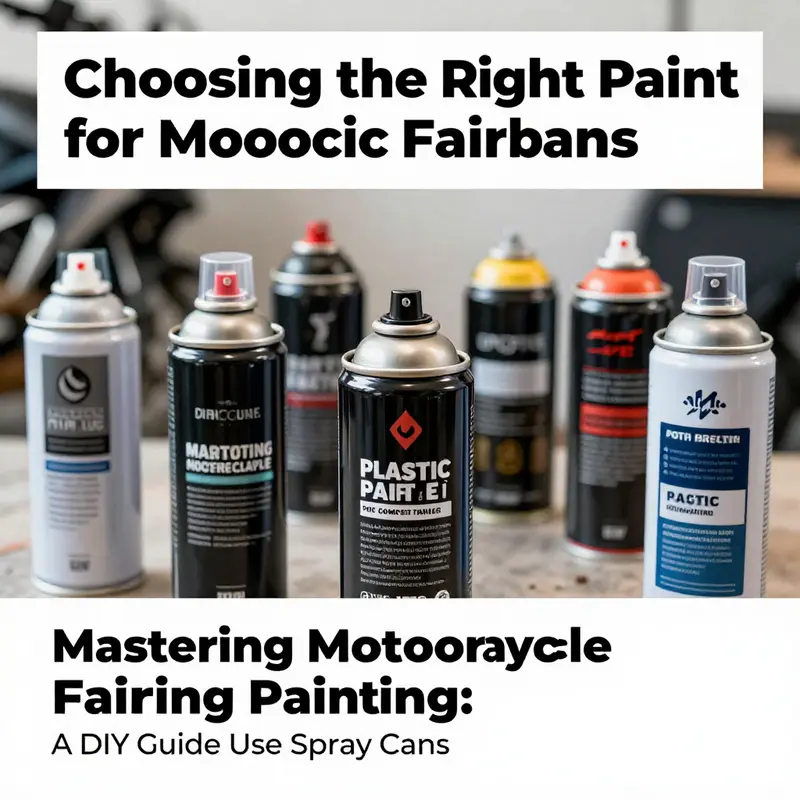
With the surface ready, the right paint becomes the next hinge point. Choose an automotive-grade spray paint that is designed for plastics or composite materials. The chemistry matters: plastics-friendly formulas, UV resistance, some flexibility to handle the constant vibration and small flexing that fairings experience, and good durability against temperature swings. The conversation about color is practical as well as aesthetic. If you can, match the factory color as closely as possible. If an exact match isn’t available, you can often rely on a color-matching service from a paint supplier or a local shop. Color matching is not cosmetic theater; it helps ensure that the finished look blends with the bike’s other panels and mood. The more work you invest into choosing the right color at the outset, the less you’ll regret the result when the panel sits back on the bike and catches the light.
As you settle on a color, you’ll also decide whether or not to add a clear coat. Clear adds depth and protection; it’s a shield against UV and minor abrasions. If you’re after a durable, glossy finish, a clear coat designed for plastic surfaces is a strong ally. The two-step approach—base color followed by a clear coat—parallels professional methods, but with the spray can’s constraints considered at every turn. If a matte look is desired, you’ll want a matte clear coat or a paint that’s compatible with matte finishes. The label will tell you what’s possible. And do not overlook the environmental footprint of your finish; choose products that acknowledge plastic compatibility and UV stability for long-term results.
In addition to the color, consider the environmental setup. You can work in a garage or covered outdoor area that is well-ventilated, away from dust and wind gusts. Temperature and humidity shapes how paint dries and whether you’ll see issues such as orange peel or sags. Aim for a controlled environment around 20 to 25 degrees Celsius with moderate humidity. These are not rigid rules but practical guidelines that align with the chemistry of spray paints. If it’s too hot, the paint can dry too quickly and form a rough texture; if it’s too cool or damp, it can slow drying and increase the chance of dust settling into the finish. A fan or a dedicated vent can help circulate air without blasting dust across the surface. In small spaces, even small changes in airflow can make a surprising difference. The broader idea is to establish stable, predictable conditions for the material to behave as designed.
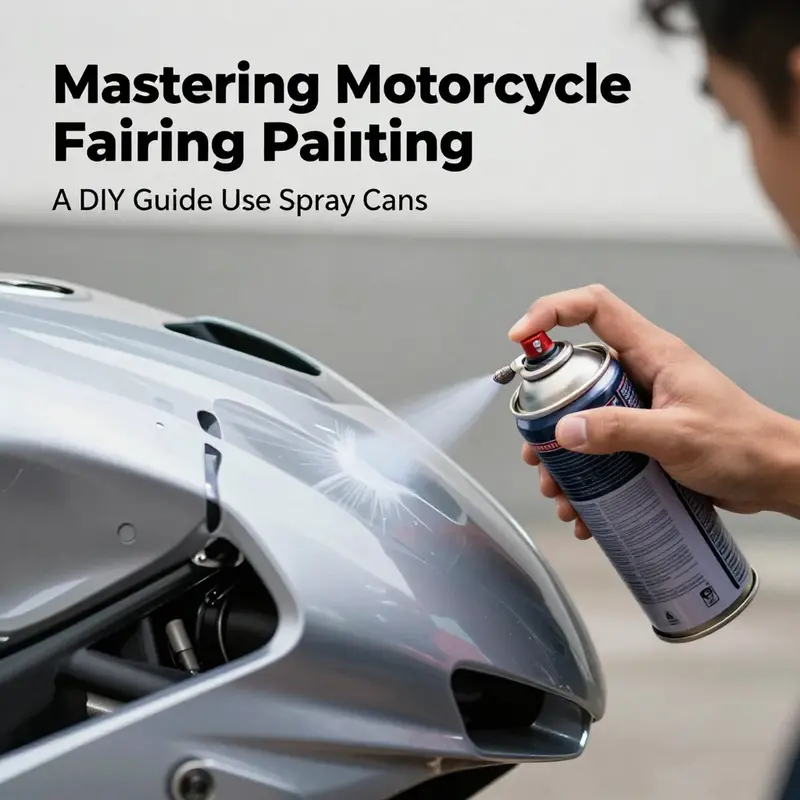
When you’re ready to begin actual spraying, a method emerges that separates novices from seasoned painters: test spray and a patient eye for the first passes. Shake the can vigorously for at least a minute or two until you hear the internal ball rattle. You’re listening for the right stirring action; it’s a sign that the pigments and solvents are properly suspended. The test spray is for flow, pattern, and spray angle. Use a scrap piece of cardboard to check how the coating will behave when laid down on your fairing. You want a consistent, slightly atomized mist, not a thick stream that drips. The distance is a practical variable that many guides treat differently, but the logic remains similar: maintain a steady distance that yields a smooth, even layer. A common range is roughly 15 to 20 centimeters (6 to 8 inches) from the surface. Some painters prefer a slightly longer reach for broader coverage or more gentle compaction of the paint on the plastic. The key is to avoid direct contact with the surface and to move in smooth, controlled motions.
Movement is your instrument here. Employ long, overlapping passes rather than short jittery strokes. Each pass should overlap the previous one by about 50 percent. This overlap is not just a detail; it’s the engine that prevents streaks, patchy areas, and texture anomalies. Short, abrupt sprays invite ridges and variation in color density; long, controlled strokes yield a uniform color field with fewer sags. You should think in terms of layers, not a single blast of pigment. The paint should feel almost film-like in its transparency when it dries; you’ll appreciate the look of three to five light coats cascading onto the fairing rather than a couple of heavy coats that fight gravity and create drips.
The approach above is more than a sequence; it is a discipline. Work in logical sections on the fairing to avoid drying in one area while you finish another. Break the piece into top, bottom, sides, and any contours where attention to detail matters. When you’re painting complex shapes, you’re training your arm to move predictably around curves and edges rather than chasing hard-to-reach corners. If you have a large single panel, you can still apply the same principle by treating it as a set of smaller panels in your mind, with corners and edges giving you natural reference points for consistent coat thickness. It helps to pause briefly between sections to avoid an accidental pooled coat that might dry with a heavy texture.
After you’ve laid down the base color, give each coat a moment to dry. The recommended window before applying the next coat is typically around 15 to 30 minutes, depending on the product and the environmental conditions. If you’re uncertain about dry time, test the tackiness of the surface: touch it gently with a gloved finger. If there is a soft imprint, it’s too early; if the surface feels dry and resistant, you’re ready for the next pass. Allow at least 24 hours of drying in a clean, dust-free environment before considering a final coat or reassembly. The base color should be fully cured before the clear coat is introduced. A careful patience here pays off with color depth and resistance to UV light.
For many riders, the optional clear coat is the crown jewel of the spray-can finish. The principle remains: multiple thin clear coats beat a single heavy one. Apply two to three clear coats, letting each layer dry for about 15 to 20 minutes. The clear should be compatible with the base color and the same plastics-friendly formulation you used for the color. Clear coats contribute to gloss, color depth, and of course durability against weathering and stone chips. In practice, you’ll see the fairing achieving a depth of shine that can rival a factory finish when the light catches it just right. If you want a matte look, you will seek a matte clear or a paint with a matte option, taking care to confirm compatibility with the base layer. The choices you make here influence not only the aesthetics but the longevity of the finish under heat and sunlight.
Another practical consideration is the final polish after full cure. Once the paint has cured—usually after 72 hours and sometimes longer depending on temperature and humidity—you can bring out the surface with a light pass of plastic polish and a microfiber cloth. The goal is not to erase the texture entirely but to remove the micro-marrings and fine dust that settled during the drying window. Gentle polishing can restore a showroom-like gloss rather than a harsh, abrasive look. When done correctly, polishing leaves you with a coherent and resilient surface that maintains its color integrity through the second riding season and beyond.
In pursuing a high-quality result with spray cans, you will encounter a few common pitfalls. Runs and sags are the most visible errors; they occur when a single coat is too thick or when the surface temperature fluctuates during drying. Orange peel—where the finish has tiny, warrior-like depressions—often results from inconsistent spray technique or from painting in a breeze that disrupts a uniform film. Dust and debris are the stealthy saboteurs of a flawless finish, and the only reliable defense is to work in a clean, low-dust environment and to shield the project from air currents and nearby activity. If you see dust settled on the surface after the final dry, a careful, very light re-wipe with a clean microfiber may be enough, but you should not attempt heavy polishing over dust-laden paint. If you encounter an issue after complete cure, the remedy typically involves a targeted fix: wet-sand with very fine grit, recoat, and re-polish—always testing on a scrap panel first.
When planning a project, remember that your choice of tools matters as much as your technique. A quality spray can with a nozzle designed for automotive plastics helps achieve a finer spray pattern with less effort. A tack cloth between prep steps ensures surface cleanliness and helps prevent dust from re-introducing itself before the final coats. A clean, dedicated space with minimal airflow that moves dust away but doesn’t disrupt the painting rhythm can make the difference between a good-looking result and a great one. Even the small decision to use masking film instead of loose plastic sheeting can reduce edge bleed and protect delicate finishes that might otherwise catch stray paint.
As with any DIY automotive project, a good practice is to think of the fairing as part of a broader system—your bike’s aesthetic language and its functional integrity. You want the color to complement the bike’s lines, the shading to reflect how light falls over the curves, and the finish to endure the road. If you are exploring a color scheme inspired by another model or a custom concept, consider the palette in stages: the primary color for the larger panels, a secondary tone for accents, and a protective clear that keeps the look vivid after months of riding. If you are making a bike-specific modification, you might look into an internal reference such as the Honda fairings category, which provides ideas on shape and material handling for plastics-based panels. The link below points to a resource that helps connect color and fit with a rider’s aesthetic goals, serving as a useful waypoint for readers who want to explore more examples and panels before committing to a color plan. Honda fairings category.
Ultimately, the process is a balance of discipline and imagination. The spray can method is approachable, but the road to a professional-grade finish is paved with patient coats, clean lines, and careful environmental control. The tactile reward—the smooth glide of the fairing’s surface beneath your gloved hand, the even reflection of light across the panel, the sense that you’ve breathed life into a component of the bike—comes from paying attention to what truly matters: the prep, the technique, and the time spent letting each layer cure. When you lean into the idea that every coat is a step toward a cohesive whole, the result will feel more like a custom artwork than a quick color change. The finish will not be a miracle of the can alone, but rather the product of a method you can repeat, adjust, and improve with each project.
For those who wish to ground their practice in broader guidelines, consulting manufacturer resources can provide a technical context for working with plastics and automotive finishes. A widely respected reference is the technical documentation from major paint manufacturers, which includes application guidelines, data sheets, and specific recommendations for plastic surfaces. These resources complement hands-on practice by explaining base chemistry, adhesion considerations, and long-term durability expectations, which can help you plan the project with confidence and clarity. You’ll find a comprehensive set of standards and procedures in professional automotive refinish documentation, which can enhance your understanding of how different formulations behave and how environmental factors influence outcomes. As you explore these guidelines, you’ll gain a deeper appreciation for why certain steps matter as much as the final color choice. External resources such as the automotive refinishing guidelines can be a practical bridge between at-home experimentation and professional expectations.
In sum, painting motorcycle fairings with a spray can is a craft that rewards patience, precision, and a calm, methodical rhythm. The spray can is not a shortcut but a tool that, when wielded with disciplined prep, careful color selection, and disciplined application, can deliver results that stand up to light, weather, and heat cycles. The finished surface should feel like a single, coherent skin over the fairing, with color that reads cleanly across curves and edges and a gloss that catches the light rather than fighting it. Treat preparation as the contract with the surface, treat technique as the path to consistency, and treat drying as the test of your resolve. If you approach the work with this mindset, you’ll find that the most satisfying aspect of painting with spray cans is not the speed with which you complete the job but the care you invest in each step, knowing that each decision, however small, translates into a finish you can be proud of on the open road.
External reference for broader context and guidelines: https://www.ppg.com/en-us/automotive-refinish/Pages/default.aspx
Final thoughts
Successfully painting motorcycle fairings with spray cans offers a cost-effective and rewarding experience for business owners and their customers. By following a structured approach that emphasizes thorough preparation, careful selection of materials, and proper application techniques, the end result can rival professional finishes. This guide aims to empower motorcycle enthusiasts by providing them with the knowledge they need to take control of their customization journey. Ultimately, demonstrating expertise in this area can enhance customer satisfaction and loyalty, making it a worthwhile endeavor.