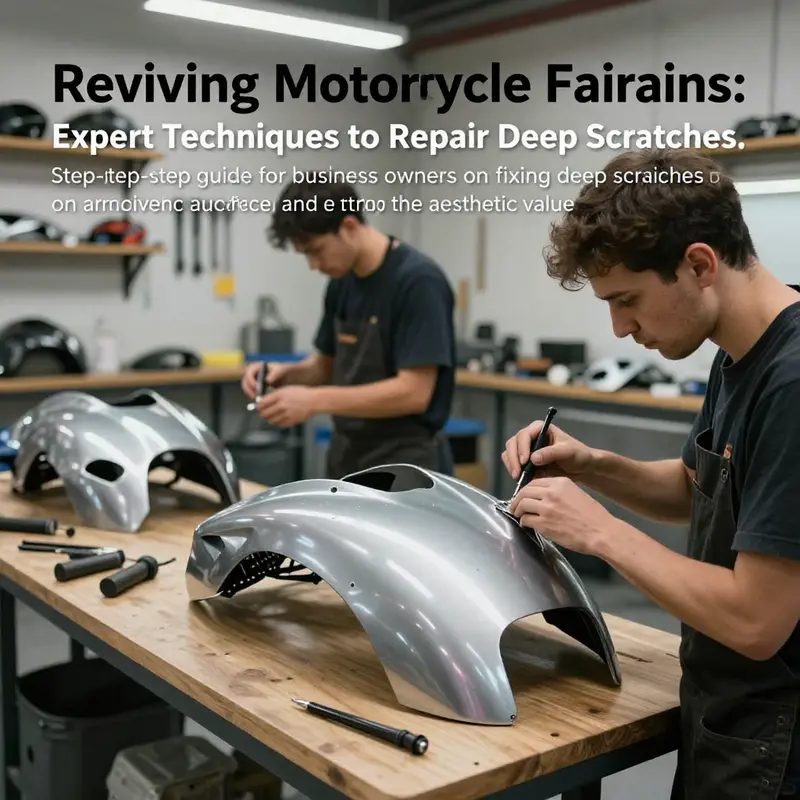
Deep scratches on motorcycle fairings not only mar the aesthetic appeal of a bike but can also lead to greater damage if left unaddressed. For business owners, understanding the repair process is crucial to maintaining the value and safety of their vehicles. This guide will explore the essential steps to properly assess damage, prepare for repairs, fill scratches, apply paint, and conduct final touches for a seamless finish. Each chapter will provide key insights and actionable steps to help repair teams restore motorcycle fairings to their former glory effectively.
Reading the Damage: How to Accurately Assess Deep Scratches on Motorcycle Fairings
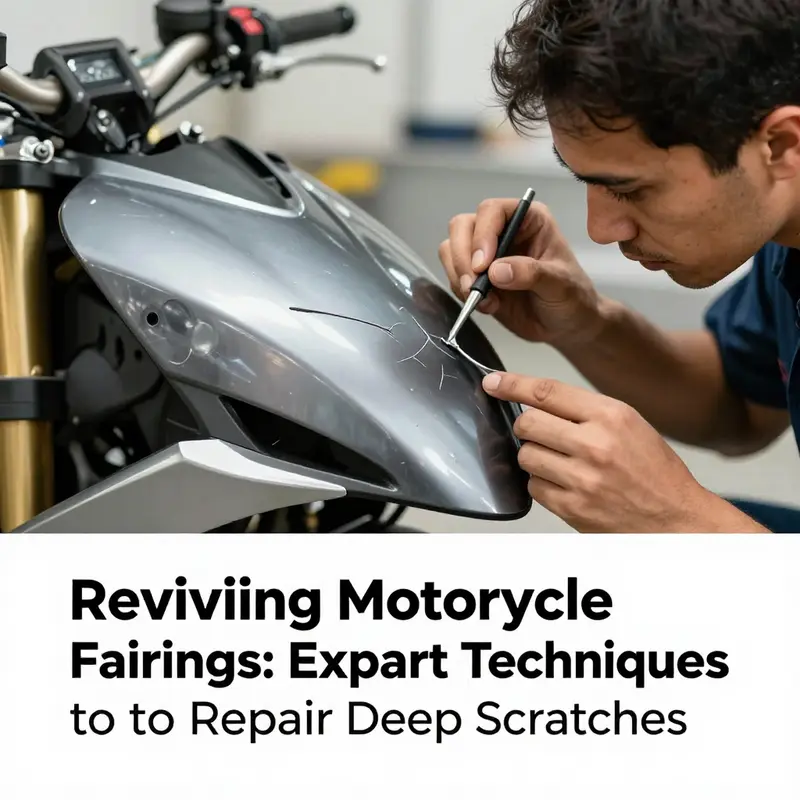
Knowing what you’re looking at is half the repair. When a motorcycle fairing carries a deep scratch, the decision between a quick cosmetic fix, a more involved restoration, or a full replacement depends on a clear, systematic assessment. This chapter guides you through a unified approach that combines careful inspection, simple measurements, and practical judgment so you can choose the right path forward and plan the repair with confidence.
Start by stepping back and taking in the whole panel. A single long, deep cut may look worse up close than it is from a distance, while a cluster of shorter gouges spread across a curve can weaken the fairing more than a single linear scratch. Visual context matters: note how close the damage is to mounting points, seams, vents, or structural ribs. Scratches that intersect seams or bolt bosses often signal a higher likelihood of cracks or stress concentration and should be treated with more caution.
Next, move in for a tactile and visual inspection. Run your fingertip gently along the scratch to feel changes in depth and edge sharpness. A scratch that stops at the surface clear coat will feel smooth to the touch after a quick wipe; a scratch that cuts into primer or bare material will catch your nail. Look for color changes along the groove: the presence of a different color suggests you’ve gone through one or more finish layers. If you can see the underlying plastic, fiberglass, or metal, you’re no longer dealing with a surface blemish — you’re dealing with substrate exposure that requires material-specific repair.
Depth is the decisive factor. Cosmetic techniques like polishing, rubbing compounds, or simple touch-up paint only work when the scratch is limited to the clear coat or topcoat. Once primer or base material is exposed, those methods will fall short. For a precise read, use a depth gauge if available; it will quantify how many microns or layers have been removed. If you don’t have a gauge, a steady visual and tactile check combined with a fingernail test will give you a reliable practical assessment.
Length and orientation matter too. Long scratches that follow a panel’s contour may be easier to feather and blend during sanding and repainting, because you can establish a gradual transition. Shorter, deeper gouges concentrated in one area often need filling and contour rebuilding before the painting stage. Consider how the scratch runs relative to air flow and stress points: scratches perpendicular to a panel’s natural flex lines are more likely to develop into cracks over time.
Beyond the immediate scratch, inspect for hairline fractures or delamination. Small radial cracks that start at the ends of a gouge indicate stress that has propagated into the material. Shine a light along the panel at a low angle to pick up fine cracks; a UV lamp can reveal fractures and bonding failure that are otherwise invisible. If the fairing is composite, look for signs of separated layers or a soft, spongy feel behind the affected area — those are red flags that the panel’s structural integrity has been compromised.
Mounting points deserve special attention. A scratch that runs into a mounting boss, bracket, or clip can hide a crack where the fastener meets the plastic. Remove nearby fasteners if safe to do so and check the back side of the panel for splits or movement. If the mounting interface is damaged, a repair will need to restore strength as well as appearance; sometimes a replacement panel is the smarter, safer option.
Material identification is an early practical step. Motorcycle fairings are most commonly made from injection-molded thermoplastics, ABS blends, or molded fiberglass. Each demands a different filler, primer, and bonding method. If the substrate is plastic, a plastic-specific primer and an epoxy or plastic weld filler will be required to achieve a durable repair. If the substrate is metal or fiberglass, use products formulated for those materials. Incorrect filler selection leads to poor adhesion, future cracking, or visible repair lines once painted.
Once you’ve mapped the visible and hidden damage, prepare the immediate area for test sanding. Cleaning the scratch with a degreaser or isopropyl alcohol removes contaminants that could interfere with your inspection. Lightly sand the edges of the scratch with a fine grit to reveal how the layers transition without removing excess material. This controlled feathering helps reveal whether the surrounding paint is well-adhered or flaking. It also shows whether the underlying material is consistent and solid, or has voids and weak points.
If you find material loss or a deep gouge, plan to rebuild the contour. For plastics, two-part epoxy putties and plastic-specific body fillers are the norm; they bond to the substrate and can be shaped to match the original curve. For fiberglass, a resin and cloth layup may be necessary before finishing with filler. Always overfill slightly and sand back to strike the final contour; this reduces the risk of low spots and allows for accurate priming.
Color matching is a separate but integrated consideration. Even a structurally sound repair will look obvious if the color and gloss aren’t matched. Use the manufacturer’s paint code or digital color matching resources for best results. If the motorcycle has complex graphics or metallic flakes, plan for additional steps like blending adjacent panels or using a scuff-and-feather technique to create a smooth visual transition. Accurate color matching early in the assessment prevents wasted time and materials later in the process.
Decide whether repair or replacement is the most practical outcome. Small-to-moderate deep scratches on single flat or gently curved panels are often cost-effective to repair. However, if the damage compromises structural ribs, mounting points, or complex molded shapes, replacement may guarantee better safety and longevity. Consider the invisible costs: a repaired mounting point that fails on the road is riskier than a slightly higher upfront cost for a new panel.
When planning a repair workflow, account for environment and tools. Deep repairs require clean, dust-free conditions for priming and painting. If you lack a suitable space, consider professional help for the paint stage. Evaluate your tools: do you have a proper sanding block, a depth gauge, the right fillers, and—critically—a matching primer? Without these, the assessment may identify repairs you can’t execute to a durable standard.
Finally, document what you find. Take clear photographs from multiple angles, note measurements, and record material type and paint codes. This documentation helps if you consult a professional later, and it ensures you purchase the correct filler, primer, and paint. It also makes it easier to compare before-and-after results to judge whether your repair reached the desired standard.
Throughout this process, safety and realism must guide decisions. Err on the side of caution with structural concerns. If a scratch crosses a mounting hole, or if you discover delamination or significant material loss behind the surface, replacement or professional structural repair is the prudent choice. For purely cosmetic but deep scratches, a careful assessment followed by the right filler, primer, and blended painting will restore both appearance and utility.
If you need additional technical references on advanced prep and repair methods, a dedicated repair resource provides step-by-step guidance and material selection tips. For a comprehensive professional-level reference on prepping fairings and finishing techniques, see the Cycle Pro technical documentation cited below.
External resource: https://www.cyclepro.com/
For sourcing replacement or matching panels, find options tailored to specific models and brands. If you determine a replacement is necessary, browse the relevant fairings category for your motorcycle to locate compatible panels and compare quality and fit options. For example, fairings for specific models are available from the Ducati category, which can help when replacement is the best course of action: https://ultimatemotorx.net/product-category/ducati-fairings/
This assessment framework keeps the repair focused on safety, durability, and aesthetics. It prevents wasting time on surface fixes when deeper work is required and helps you plan materials, tools, and the right environment for a professional-looking result.
From Rough to Resolved: The Essential Prep That Restores Deep Scratches on Motorcycle Fairings
Deep scratches on motorcycle fairings demand more than skin-deep remedies. When a scratch breaches the paint and primer, revealing the underlying material, the fix must build a solid, lasting foundation. The goal is not only to hide a flaw but to restore the fairing’s integrity and gloss so it behaves as a single, cohesive panel once again. This chapter follows the thread of preparation, where decisions about restoration are made and the stage is set for every subsequent step. The process begins with a careful assessment. If the fairing is merely cosmetic with a shallow mark, light prep and color-matching paint might suffice. But when the scratch digs through clear, color, and primer to bare plastic or metal, the repair becomes a structured audition of adhesion, coverage, and finish. If there are cracks, distortions, or the panel integrity feels compromised, replacement may be the more prudent path. The judgment here matters, and it guides the level of effort invested in repair versus replacement. Within the spectrum of deep scratches, the preparatory phase remains the same: create a clean, level, and receptive surface that welcomes each subsequent layer. The value of preparation cannot be overstated. Without it, even the best filler and paint will eventually peel, chip, or fade, betraying the repair at the first exposure to sun, rain, or abrasion. The aim is to give the repair a link to the surrounding fairing that is as natural as possible, so the eye reads a single plane rather than a patch that catches a light differently.
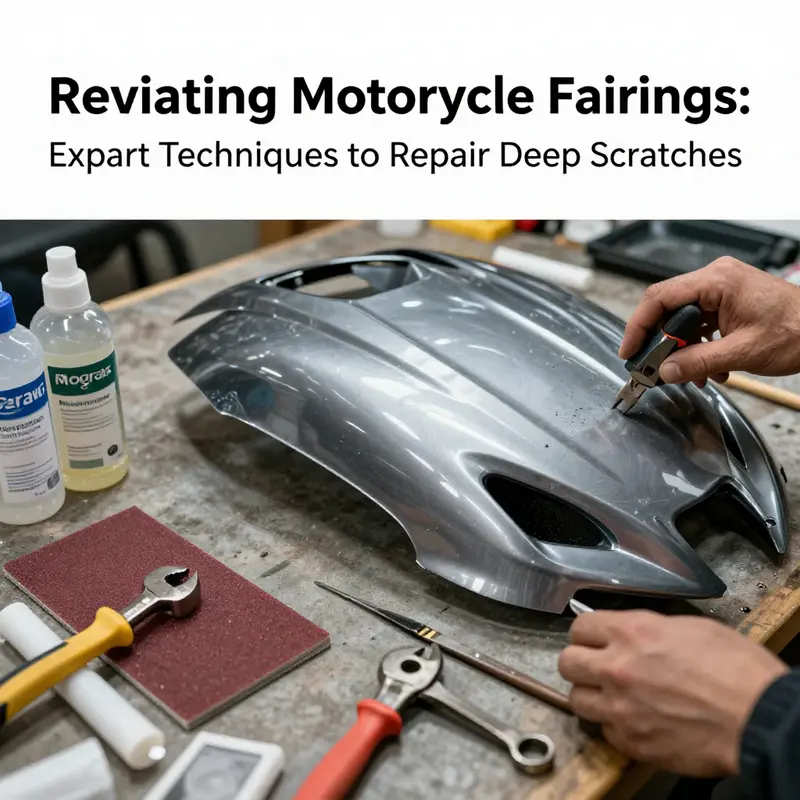
Preparation begins with meticulous cleaning. Dirt, grease, wax, and silicone residues are stealthy adversaries that undermine adhesion. A degreaser or isopropyl alcohol applied with lint-free cloths will shift the surface from grime to a ready canvas. This cleansing is not a hurried wipe but a deliberate scrub that reaches into the edges of the scratch, around the surrounding texture, and along any relief lines. The cleaner should evaporate cleanly, leaving no film that could impair bonding. It is not unusual to repeat the cleaning step after sanding, since roughening the surface can attract micronized dust and fibers that would compromise the next layers. Once the area is dry, visual inspection resumes. The assessment now involves a tactile check: run a gloved finger over the scratch and the surrounding surface to feel the edges and any unevenness. If the surface still feels tacky or tacky in a way that suggests residual wax, another wipe is warranted. The goal at this stage is a surface that behaves as if it were untouched by the event that caused the damage, so the repair materials can adhere confidently.
Sanding is the shaping of the repair, the mechanical quiet that prepares the fairing for filler and primer. The approach uses progressively finer grits to remove rough edges, level the transition, and create a uniform base. Start with a coarser step that removes loose paint and high spots around the scratch, then move toward finer abrasives that refine and polish the surrounding area. A practical progression is to begin with a moderate grip like 320-grit, which excises rough edges without aggressively cutting into the surrounding paint. This step is not about removing material from the intact surface; it is about creating a clean edge where the filler can bite and float. Following that, a finer pass with around 600-grit helps water-polish the area, promoting a smooth, even surface. Water-based sanding with a light touch reduces heat buildup and minimizes the risk of creating new digs that catch the eye. The objective is not to erase the scratch entirely with sanding but to create a level plane where the filler, primer, and paint can be laid down with minimal notice of a repair. A sanding block or a small orbital sander, kept steady and perpendicular to the surface, helps maintain a consistent plane. After each sanding pass, a clean cloth wipe removes the dust, revealing the true texture beneath the debris. The result is a surface that looks, feels, and behaves like the original fairing area once the repair is completed.
Filling the gouge is the next stage, and it requires patience and discipline. A body filler designed for plastic fairings or a comparable epoxy putty is pressed into the scratch in thin layers. The technique mirrors how one would repair a dent or gouge: apply a thin coat, allow it to set, then add another, building up in shallow steps rather than a single thick fill. Two to three layers are typically sufficient to fill the deepest portions without creating an overbuilt mound that will require excessive sanding. Between each layer, allow adequate cure time as defined by the filler’s instructions; this often means waiting up to a full day in stable conditions. The key is to let each layer cure fully so the next can bond cleanly without lifting or cracking when sanded. Once the filler has cured, re-sand the area, first with 600-grit to flatten the surface and then with 1000-grit for the final flush. The goal here is to achieve a surface that is indistinguishable in contour from the surrounding panel. The use of a sanding block helps preserve an even plane, which is especially important near edges or transitions where the fairing meets other parts. A thorough final cleaning at this point removes the fine dust that could otherwise disrupt primer adhesion, ensuring a pristine starting point for the primer stage.
Priming is a pivot point that transitions the repair from “filler work” to “coat and color.” For plastic fairings, plastic-specific primers create a robust bond that resists peeling and delamination. The primer’s job is twofold: seal the repaired area to prevent resin or paint bleed, and create a compatible surface for the color coat. Apply the primer in light, even coats, using a controlled spray technique that delivers a uniform film without runs. The distance from the surface and the spray’s technique matter as much as the product choice. Allow the primer to dry completely according to the manufacturer’s guidance before proceeding. A well-executed primer sets a smooth, predictable base for color and adds a buffer against moisture intrusion. It is the quiet guardian of the finish, ensuring that when color meets surface, adhesion remains steadfast and the final appearance remains true to the original panel.
Color matching is not an optional flourish but a core requirement when repairing deep scratches. The base coat must harmonize with the rest of the fairing, not only in hue but also in gloss and texture. A two-stage paint system—the combination of a base color with a clear protective topcoat—offers durability and a professional look. The color can be matched by test-spraying on a scrap piece of plastic or by obtaining a color code from the original manufacturer or dealer, then mixing in the appropriate shade. In practice, this means setting up a controlled spray environment, free of dust and with consistent lighting, and applying multiple thin coats rather than a single heavy layer. Each coat should flash dry for a few minutes before the next coat begins. This patience yields an even, rich color that blends with the adjacent panels, and it reduces the risk of visibility at the repair seam. When choosing paints, look for systems designed for automotive or motorcycle plastics; these formulations are made to flex with temperature changes and resist chipping better than generic enamels. A practical tip is to test the color blend on a small, inconspicuous portion of the fairing or on a scrap piece to ensure the shade matches before proceeding to cover the repaired area fully.
The paint layer is followed by the protective clear coat, which is highly recommended for long-term durability and gloss. The clear coat seals in the color, adds depth, and provides a shield against UV exposure and moisture. The application mirrors the color step: several thin coats with ample dry time between passes support an even, glassy finish. The final clear layer’s smoothness is the cue for the polishing stage, which is the last major bridge between repair and seamless appearance. A cautious approach here prevents the clear from sagging or creating a pool that reveals a surface mismatch when viewed at certain angles. This polishing phase is where the repair begins to disappear from sight, thanks to careful removal of micro-imperfections and a talent for blending the repaired patch with the surrounding gloss.
Final polishing is a refinement, not a repair in itself. Once the clear coat has cured, typically after 72 hours for a thorough cure, a polishing compound paired with a dual-action polisher brings out the finish’s luster and blends the repaired patch with the rest of the fairing. The technique uses gentle, steady passes to minimize heat generation while encouraging the clear coat to shine and the color to sit evenly on the surface. The aim is to produce a near-invisible transition between the repaired area and the unfixed portions, achieved by controlling the polish’s pressure, speed, and duration. A soft cloth can then be used to wipe away any residue and reveal a uniform, high-gloss surface that stands up to the daily trials of riding and weather. The final result should read as a continuous contour rather than a repaired segment interrupted by a different sheen or texture.
Despite the thoroughness of this approach, there are times when professional intervention is prudent. If the damage encroaches on seams, affects the structural strength of the panel, or if color matching remains stubbornly off after multiple attempts, seeking a specialist’s help is sensible. High-end or custom paint jobs demand perfection that may justify external expertise and equipment, especially when the goal is a flawless finish that mirrors the original artistry of the fairing. In cases where the project involves premium materials or a unique finish, a professional shop can offer controlled environments like spray booths and calibrated lighting that make color matching far easier and more precise. A seasoned technician can also ensure the repair withstands environmental stressors and continues to perform under temperature shifts, UV exposure, and road debris. The decision to escalate to professional help is not a concession but a strategic move to preserve the bike’s aesthetics and resale value.
A few practical tips help bridge the gap between DIY enthusiasm and professional-level results. Color-matched paint kits tailored to the motorcycle’s manufacturer or model can simplify the process by providing a ready-to-mail match, sometimes aided by VIN-based color matching services. It is worth noting that these services exist for a reason: they reduce the friction of finding the exact shade and finish that suits the specific fairing. For riders who want a precise match without lab equipment, these options can be a viable middle ground between a DIY fix and a full respray. The preparation and repair steps described here are designed to be scalable; small, shallow scratches may be handled entirely with surface sanding, primer, and color touch-up, while deeper gouges require meticulous filling, priming, and multiple coats to ensure the final product is indistinguishable from its surroundings.
As you refine your approach, consider the broader ecosystem of your bike’s exterior. A well-executed repair not only hides the scratch but also contributes to the long-term health of the fairing by preventing moisture ingress, which can lead to delamination or corrosion at the repair site. The importance of a clean, dust-free environment during painting cannot be overstated. Even a single dust mote can ruin a clear coat’s smoothness, undermining the gloss and the seamless appearance that is the hallmark of a quality fix. This awareness shapes how you plan the project, from the preparation room to the curing period. If the repair touches areas near seams or fasteners, extra care in masking and ensuring that adjacent panels remain unaffected will minimize downstream issues. The nuanced balance between technique, products, and timing defines the success of a repair that looks as though it never happened.
For readers looking to deepen their understanding or expand their toolkit, consider exploring related resources that discuss plastic bodywork repair more broadly. One particularly useful external reference provides guidance on scratch repair in automotive contexts, which often translates well to motorcycle plastics given the shared material behaviors. While the specifics of vehicles differ, the principles—thorough cleaning, careful leveling, proper priming, measured painting, and deliberate finishing—remain consistent. You can review a detailed guide on car scratch repair as a foundation for your method, keeping in mind the differences in scale, finishes, and equipment that apply to motorcycles. This additional context can help reinforce the discipline of prep that underpins lasting repairs.
As you integrate the steps, remember that the most reliable outcomes stem from patience and precision. Preparation is not a quick sprint but a measured sequence of actions that creates trust between the repair materials and the fairing’s original surface. The better you prepare, the more forgiving the subsequent layers will be, and the more seamless the final finish will appear. When the end result reflects careful planning, consistent technique, and respect for the material, the bike’s aesthetic and value endure long after you’ve closed the spray booth door. And while the temptation to rush a repair can be strong, it’s the patient, methodical approach—the one that begins with a clean surface and ends with a perfectly integrated gloss—that consistently yields the most satisfying results. If you want to explore a broader catalog of fairings that might pair with a precise color match or replacement panels for specific models, you can browse the Honda fairings category and specifically the page for CBR models here: Honda fairings for CBR.
External reference for broader context on scratch repair techniques can be found here: https://www.autocar.co.uk/article/how-to-repair-a-car-scratches
From Gouge to Gloss: A Cohesive Restoration of Deep Scratches on Motorcycle Fairings

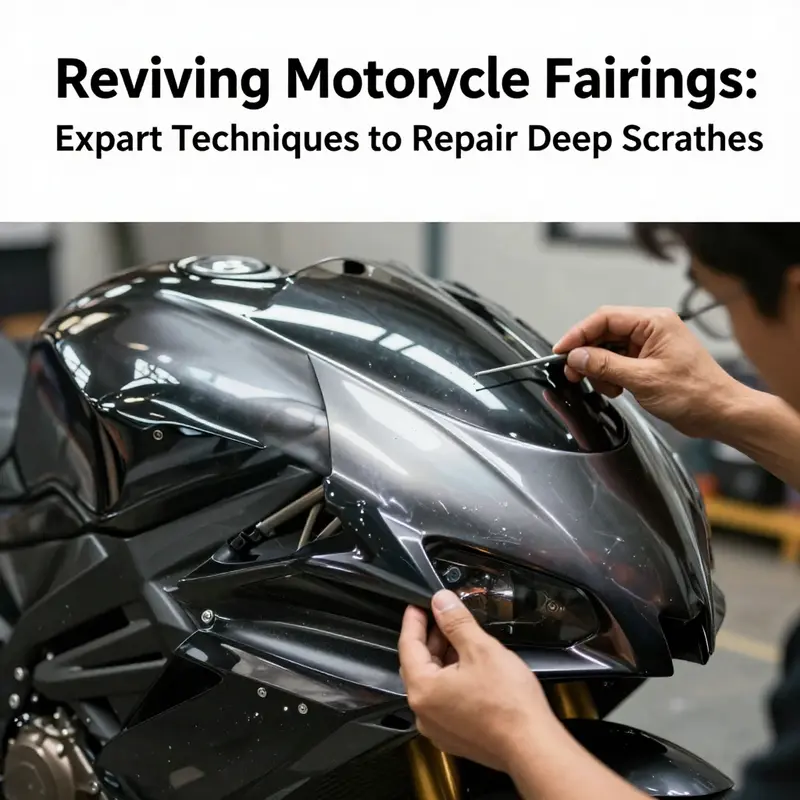
Painstaking care turns an unsightly gouge into a seamless panel once more, and the best restorations begin long before the paint meets the primed surface. When a deep scratch crawls past the pigment layer and into the primer or substrate, the repair process becomes a careful conversation between integrity and appearance. The fairing, often made from plastic or composite materials, carries both the aesthetic identity of the machine and the structural nuance needed to protect vulnerable components. A successful fix must address not only the color but also the bonding of each layer and the geometry of the panel. The journey from rough scar to smooth finish is a disciplined sequence, yet it remains one fluid narrative: assess, prepare, fill, prime, sand, paint, clear, and polish. Each step builds on the last, and a confident technician moves with deliberate, small refinements rather than hurried, broad strokes. The aim is a repair that feels native to the bike, with a finish that looks and behaves as if the damage never happened, even under close, second-sight inspection.
The very first moment you inspect the damage sets the tone for the entire project. Deep scratches that expose the base material signal a greater commitment than minor surface scuffs. A quick glance can reveal whether the scratch is superficial, merely through the clear coat, or truly penetrant—reaching the primer, the underlying plastic, or even the metal substrate in certain composite builds. Cracks or deformations add another layer of complexity, often nudging the decision toward replacement rather than repair. This early, honest assessment saves effort and avoids compromising the fairing’s structural integrity. It also frames the expectations for color matching, as the more layers that must be recreated, the more critical the fidelity of the final match becomes. Undertaking a repair with realistic expectations prevents the disappointment that follows a glossy finish that looks right from a distance but reveals seams and color shifts under sunlight.
Preparation begins with cleanliness, because adhesives and fillers cling only as well as the surface to which they are applied. A dedicated plastic cleaner or isopropyl alcohol strips away oils, grease, wax, and any residue that could undermine adhesion. The next stage is roughening the edges around the scratch. Beginning with a moderate grade—roughly 320 grit—one carefully harrows the edge to create a mechanical key for the repair materials. This is not about removing material so much as inviting the repair compounds to anchor securely. Progressively finer grits follow, typically moving through 400 or 600 to establish a smooth boundary that won’t telegraph through the final finish. Importantly, sanding should be a controlled, circular motion aimed at avoiding the creation of new, visible lines. Dust control is essential; between grits, wipe the area clean with a lint-free cloth to prevent abrasion debris from embedding in the surface.
When the damage goes deeper, a filling stage becomes necessary. Two-part automotive body filler, designed for plastics and composites, is spread over the gouge with a flexible plastic spreader or squeegee. The goal is to slightly overfill the area so that subsequent sanding can flush the repair with the surrounding panel. The filler’s chemistry is forgiving enough to accommodate minor texture differences, yet it requires patience to cure fully before the next touch. Cure times vary by product and temperature, but a typical panel demands several hours of stabilization, sometimes closer to a full day for larger repairs. Through this stage, the practitioner remains mindful of maintaining the panel’s curvature and contour. A successful fill won’t sag or slump; instead, it creates a flush plane that accepts primer without raising the impression of a patch.
Once the filler has cured, the smoothing process resumes with wet sanding. Beginning with 400 grit keeps the filler from rounding the edges too aggressively, while a progression through 600 and then 800–1000 grit refines the surface to a near-mirror finish. Wet sanding helps control dust and reduces heat buildup, which can otherwise soften edges and undermine the repair’s precision. A sanding block or a small orbital sander can maintain a consistent plane, ensuring the transition from repaired area to surrounding fairing reads as one continuous surface. The objective here is not to erase the scar in one aggressive pass but to bring the repaired patch into alignment with the panel’s micro-contours. After each sanding pass, a damp wipe clears away particles, letting the eye judge whether the texture and height match the adjacent material.
If the scratch has removed the paint or primer entirely, a primer layer becomes essential. For plastics and composites, a primer or adhesion promoter tailored to the substrate boosts the bond between the repair filler and the topcoat. The primer stage is small in scope but large in consequence; a well-chosen primer not only improves pigment coverage but also minimizes the risk of future adhesion failures. After primer application, a light re-sand with very fine paper—around 1000 grit—helps create an even, tack-free base. Primer must be fully cured before paint is introduced, or the final color and gloss will be compromised. The primer’s role is quiet but foundational: it creates the stage on which color and clarity can perform without fear of flaking or micro-peels.
Color matching remains one of the most nuanced aspects of fairing repair. A two-stage paint system, conceptually similar to automotive practice, is commonly employed. The base color is laid down after the primer, followed by a clear coat to seal and enhance gloss. The process is a dance of timing and technique. When applying the base coat, the painter works in a clean, dust-free environment and delivers many thin coats rather than a few heavy ones. A spray technique—holding the gun at a consistent distance, at about six to eight inches, and moving with a steady, perpendicular angle—helps avoid runs, sags, or uneven pigment. Each coat should flash-dry within five to ten minutes in typical shop conditions before the next is added. The color-matching phase often benefits from a test on a scrap piece of plastic or a dedicated test card to confirm how the hue interacts with the primer, the ambient light, and the bike’s overall scheme. An incorrect match is more than cosmetic; it can demand a complete repaint to maintain consistency across panels.
The decision to apply a clear coat marks the transition from color to protection and depth. A clear coat, when properly applied, preserves the integrity of the color by forming a hard, glossy layer that resists UV radiation, chemicals, and minor abrasions. The same disciplined approach—thin coats, even coverage, controlled environment, and proper curing times—applies. Several thin layers often yield the most forgiving and durable result, allowing the clear to flow over the color without creating orange-peel or surface imperfections. The timing between base and clear coats is crucial: the base should be dry to the touch and free of dust, but not so aged that adhesion is compromised. After the final clear coat has cured, typically over 24 to 48 hours, the surface achieves a high-gloss luster that can once again be in harmony with the rest of the fairing. In some cases, a final color check under different lighting conditions reveals minor variation; the fix then becomes a fine-tuned polish rather than a new layer of pigment.
Polishing is the last hero’s act in this restoration, a deliberate effort to erase the tiny imperfections that linger after curing. A quality polishing compound used with a dual-action polisher brings back uniform gloss and helps blend the repaired area with the surrounding panel. The polishing stage removes micro-scratches and micro-level irregularities that may be invisible at first glance but are detectable at close range or under direct sunlight. The goal is not to erase all evidence of the repair but to reduce it to a whisper—enough to convince the viewer that the bike’s fairing is a continuous, well-executed work of art. A careful hand with the polisher, coupled with controlled pressure and speed, ensures the surface remains free from haze and burnishing, while still delivering a bright, even finish.
The decision to pursue professional help is a practical one. When color matching is uncertain, or when the damage reaches critical seams or structural zones, or when the owner demands a flawless premium appearance, professional services become a prudent choice. A shop with climate-controlled booths and appropriate ventilation can tightly control dust and humidity, both of which influence the final appearance. For those repairing high-visibility areas like the front fairing, an expert touch is often the most economical choice in the long run, because it reduces the risk of future repainting or touch-ups that might otherwise arise from a DIY approach.
Even for seasoned DIYers, color-matching complexities can be a trap. A color-matched kit supplied by the manufacturer or a reputable auto-body supplier, often using the vehicle’s VIN or color code, provides a reliable pathway to accurate replication. The principle here is consistency: every panel should read as one when viewed from a normal distance, and a small deviation in shade can become obvious only under certain lighting. In the end, the repair embodies a balance between artistry and engineering. It requires a calm, methodical hand, a willingness to invest time, and a respect for the fairing’s material realities. The final test comes not from a mirror-like finish alone, but from the panel’s resilience under the typical conditions of road use—washing, gravel, sun exposure, and the occasional impact that does not exceed the repair’s capacity to endure.
Internal resources can provide valuable guidance as you navigate color, texture, and finish. For riders working with a particular model family, the following category can be a practical starting point: Honda fairings. This link points to a collection of fairing options that share common construction methods and paint logic, which can help inform color match decisions and finish expectations without needing to reinvent the wheel with every project. You can explore these options here: Honda fairings.
As a final note, the repair journey presents a careful, layered discipline. It is not the flash and thunder of a quick repaint but the quiet, deliberate craft that restores both the beauty and the backbone of the bike’s exterior. When done well, the repaired panel stands as a testament to patience, measurement, and restraint—the same qualities that keep a rider confidently connected to the road. For an expanded, visuals-led guide that delves into the step-by-step procedures and nuances of deep-scratch repair on motorcycle fairings, consult expert demonstrations and structured methodologies from established automotive repair resources. These insights emphasize principles of surface preparation, adhesion, and finish management that translate across vehicle types and help riders protect their machines for miles to come.
From Gouge to Gloss: The Long, Meticulous Path to Restoring Deep Scratches on Motorcycle Fairings
A deep scratch on a motorcycle fairing does more than chip color. It exposes the layers beneath, sometimes revealing plastic or metal and even compromising the smooth, aerodynamically tuned surface that helps the bike cut through air. The repair journey begins with a clear-eyed assessment, but it culminates in a cautious, almost surgical finishing phase. That final phase—wet sanding, polishing, and the careful reapplication of color and gloss—will determine whether the repair looks integrated or merely patched. The best repair stories are built on patience and discipline, not shortcuts. When a scratch has punched through the paint and primer, the road to invisibility runs through a sequence of deliberate steps, each designed to restore not just color but the knife-edge finish that makes a fairing look as if nothing happened at all. The process begins with alignment with reality: is the damage limited to the skin of the paint, or does the scratch creep toward seams, or even the underlying structure? If the fairing is cracked or deformed, replacement may be the only viable option. But when the damage is a deep gouge rather than a fracture, the repair becomes a blend of material science and artisanal craft, a choreography of preparation, filler, color, and gloss that pays off in a seamless transition from damaged to harmonious.
Preparation sets the tempo for everything that follows. The area around the damage must be clean, free of grease, wax, and dust, because adhesion is everything when you reconstitute the surface. Degreaser or isopropyl alcohol does the work of stripping away any stubborn film that could undermine bonding. Once the surface is clean, the sanding begins. Start with a coarse grit—roughly 80 to 120—just enough to remove loose paint and to roughen the surface so the subsequent layers can grip. The goal is not to erase the dent with brute force but to create a workable plateau where filler and primer can adhere. As progress is made, move through finer grits—220, 400—carefully smoothing the edges so the transition from repaired to original skin is as invisible as possible. Sanding should be a controlled, circular motion to avoid creating swirls or crosshatch lines that will haunt the finish later. A clean, damp cloth wipes away the dust, revealing a true picture of what remains to be rebuilt.
If the scratch has unveiled bare plastic or metal, primer becomes a necessary ally. A primer designed for plastics or metals, chosen to match the underlying substrate, provides the essential bite for subsequent layers. Primer is not a cosmetic layer; it is a foundational one that guarantees that the next steps—filler and paint—stay put where they belong. The primer should dry fully according to the manufacturer’s instructions, which means resisting the urge to rush the process even when impatience nudges you toward a quick, warm-dry cure. Deep gouges require more than a skim of filler. Here, a plastic body filler or epoxy putty forms the backbone of the repair. The filler must be mixed and applied in a way that mirrors the surrounding curvature, with a slight overfill to compensate for the inevitable sanding that will bring the surface back to level. A plastic spreader or palette knife helps the material to settle evenly, and the aim is to build a surface that becomes indistinguishable from the original when it is sanded smooth.
The curing phase is quiet but crucial. Most fillers require a full cure, often around 24 hours, before any sanding resumes. Once ready, the sanding resumes with a careful sequence of grits designed to erase the evidence of the repair while preserving the original geometry of the fairing. Begin again with a 400-grit or 600-grit to level the surface, then glide toward 800 to 1000 to achieve a micro-smooth contour. A sanding block or a small orbital sander helps maintain an even contact and avoids creating low spots or halos around the repaired area. Dust must be wiped away between steps so you can see the true texture as you refine it. At this stage, the surface should feel uniformly smooth to the touch, and the differences between the repaired area and the surrounding paint should be barely perceptible under gentle light.
With the bodywork leveled, it’s time to consider color. If the scratch reveals bare substrate, the next steps will require a primer layer and a carefully matched paint system. The color-matching task can be exquisitely challenging because modern motorcycle finishes are composed of multiple layers that interact with light in complex ways. The classic two-stage paint system—primer followed by the topcoat—still governs most professional repairs. The primer is not merely a base shade; it is a color-holding layer that provides consistent adhesion and a uniform canvas for the color coat. When the time comes to select a topcoat, the alignment with the bike’s original color is critical. A color-matched topcoat should be applied in thin, even layers, allowing each coat to dry with its own flash time. The trick is to avoid heavy applications that can lead to runs or a patchy finish. Instead, think of the paint as a sequence of whisper-thin veils, each one evenly laid down and meticulously dried before the next is added.
A practical reminder for those pursuing color together with the repair is the value of a color-matching kit. Such kits offer a route to a precise shade, often using a VIN-based color code or a manufacturer-matched shade. The benefit of a matched kit is not only color accuracy but also the consistency of the pigment and the ability to replicate it if the fairing ever needs a retouch. If you’re new to color matching, practice on a scrap piece of plastic in a well-lit area before committing to the bike. The goal is to minimize the chance of mismatches that are noticeable at the most common viewing angles.
Once the base color has achieved its intended depth, a clear coat becomes the protective and cosmetic seal that restores gloss and guards against micro-scratches. The clear layer gives the paint a depth that can vanish the very traces of the repair when properly applied and cured. The same disciplined approach used for the base coat—thin, even layers with ample drying time—applies to the clear coat as well. The clear can be as forgiving as the base coat is precise, but it demands patience. If the environment is not ideal, such as a dusty shop or a room with fluctuating humidity, the risk of micro-dust inclusions and solvent haze grows. A clean, dust-free space, ideally a spray booth, greatly increases the odds of a flawless finish. Clear coatings are not merely about gloss; they protect the pigments, add resilience against UV exposure, and help harmonize the repaired patch with the surrounding paint by achieving a consistent reflection, color depth, and edge clarity.
After the clear coat has dried sufficiently, the repair enters the polishing phase. Curing times vary, but many manufacturers reserve a window of 24 to 48 hours for the clear to set before any polishing begins. Polishing is where the repair really comes alive. A polishing compound, used with a dual-action polisher, becomes the artist’s tool for elevating the corrected area to match the lustre of the surrounding paint. The approach here is measured: small, overlapping passes with light pressure let the compound do the work without burning through the clear or heating the paint. The polish removes any micro-scratches from the final finishing layer and reveals a surface that feels uniformly smooth and mirrors the surrounding panel. At this stage, the eye and the hand work in harmony, and the goal is not simply to create shine but to achieve a tactile and visual continuity that makes the repair invisible to routine inspection.
A word of caution runs through this entire chapter of restoration: even with careful execution, the complexity of color and finish often means the best results emerge from professional hands. Deep scratches that involve body panels, or those that sit near seams or joints, carry a higher risk of color shift or paint adhesion issues if attempted by a less experienced amateur. The disciplined professional knows how to time the multiple coats, how to dial in the color to the exact factory shade, and how to plan the sequence of layers so that adhesion and curing are optimal. They also have access to controlled environments, such as dust-free spray rooms and precise color-matching equipment, which significantly reduces the chance of mismatches that can become glaring under direct sunlight. When the repair matters aesthetically, when the intention is for the bike to look pristine at a glance and under close scrutiny, turning to a seasoned technician becomes the sensible choice. A professional knows the art of multi-layer wetting, the technique of using light, even passes in a calm environment, and the science of how the paint and clear interact with the substrate to deliver durability that endures road use and time.
For riders who want to stay hands-on yet recognize the limits of their skills, there is a middle path. You can perform the initial dent fix, the sanding, and even the base color application on your own, but then hand off the complex color matching and final gloss work to a shop with the right tools and environment. A note of practical wisdom appears here: the cost of a premium paint job or a flawless color match is often offset by the value of protecting the fairing’s integrity and maintaining resale value. If you do pursue a DIY finish, keep meticulous records of everything you do—the products used, the number of coats, curing times, and the environmental conditions. These details will prove helpful if you decide to consult a professional later or if you need to blend future touch-ups with the original finish.
In these decisions, there is also room for thoughtful product choices that support long-term results. Look for color-matched paint kits designed for motorcycles and consider a clear coat that emphasizes durability and UV resistance. The procurement of tools matters too. A good spray gun, a reliable air supply, and a spray booth-style environment are not luxuries but practical assets when the aim is a seamless finish. If you pursue this route, you might revisit the concept of a two-stage system and the discipline of applying thin coats that cure properly between applications. The endgame is to achieve a surface that, to the casual observer, looks as if the scratch had never occurred yet retains the original depth and warmth of the surrounding color. In short, the final touches must respect the line, contour, and gloss of the fairing, not merely cover the defect.
For those curious about how professional shops approach similar challenges, consider exploring the broader world of motorcycle fairing maintenance and repair through sources that discuss the underlying principles of paint, adhesion, and finishing. A practical example accessible online offers insights into the durability and cost considerations of automotive repainting, principles that translate well to bikes. If you want to inspect related components and options, you can explore a catalog such as the Honda fairings category to understand the scale and scope of authentic parts that might be used in a longer-term repair plan. For a direct path, you can browse this link: Honda fairings.
In the end, the deep scratch repair on a motorcycle fairing is less a single act than a choreography. It moves from a diagnostic assessment to careful surface restoration, then to color and finish, and finally to gloss and polish. A truly successful repair feels like a return to the bike’s original self: the lines are crisp, the shine even, and the transition between repaired and intact skin invisible. The most important outcomes—the uniform texture, the consistent color, and the durable gloss—depend on patience, precision, and, when needed, the informed judgment to bring in professional help. The goal is not merely to fix a cosmetic flaw but to restore the bike’s integrity, ensuring the fairing behaves and looks as it did before the incident, under the sun, under street lights, and in the eyes of riders and passersby alike.
External resource for broader context on professional repair considerations and cost analysis can provide additional perspective on the decision between DIY finishing and hiring a specialist: https://www.bbc.co.uk/news/uk-england-48937526
Final thoughts
Repairing deep scratches on motorcycle fairings requires a systematic approach, from damage assessment to final polishing. For business owners, investing time and resources in learning these techniques can enhance the aesthetic quality and longevity of their motorcycles. By following best practices in preparation, filling, painting, and final touches, you not only restore the visual appeal but also retain the value of your motorbikes. Always consider seeking professional assistance for complex damages to maximize the quality of the repairs undertaken.