Scratches on motorcycle fairings can be a common hazard for both riders and business owners who manage motorcycle repair and maintenance services. These marks can detract from the overall aesthetic appeal and value of the motorcycles being serviced. Understanding how to fix scratches not only ensures customer satisfaction but also upholds the reputation of your business. In the upcoming chapters, we will explore various techniques for addressing both minor and deep scratches, followed by the necessary finishing touches to achieve a polished look. Additionally, we will discuss when it may be beneficial to seek professional help, ensuring that you are equipped with knowledge to handle any situation.
Gentle Restoration: Mastering Minor Scratches on Motorcycle Fairings
Gentle Restoration: Mastering Minor Scratches on Motorcycle Fairings
Scratches on motorcycle fairings are almost inevitable. They arrive from brushes with branches, dust kicked up by the wind, or the everyday drama of parking lot near misses. When the damage is minor, it can feel almost cosmetic, but even shallow marks can catch the eye and dull the bike’s overall presence. The craft lies in reading the skin of the fairing—the clear coat, the paint beneath it, and the plastic beneath that—and choosing a path that restores gloss without deepening the flaw. The approach is practical: assess depth, clean the surface, and then apply a sequence of gentle, controlled refinements. This chapter weaves those steps into a cohesive practice you can perform with common materials. It stays honest to the material and mirrors how a rider would repair a fairing in a garage, not in a paint booth. It threads a careful philosophy through every decision: keep a clean space, test in a discreet spot, and favor methods that preserve color and clarity over speed alone.
The first move is observation. Scratches that have not pierced the clear coat sit on the surface as faint lines or cloudy patches. They respond to mild abrasive polishing, not to aggressive sanding or priming. A simple, steady hand and the right gentle material will fade the blemish until it blends with the surrounding shine. But when you inspect the area under good light and you can still see the scratch after you wipe it, you have crossed a threshold. The repair strategy shifts from polish to a more deliberate method that respects the layers and aims for a finish that matches the surrounding area. It is not a leap to consider color and gloss matching at this stage; it is a careful, methodical conversation with the surface.
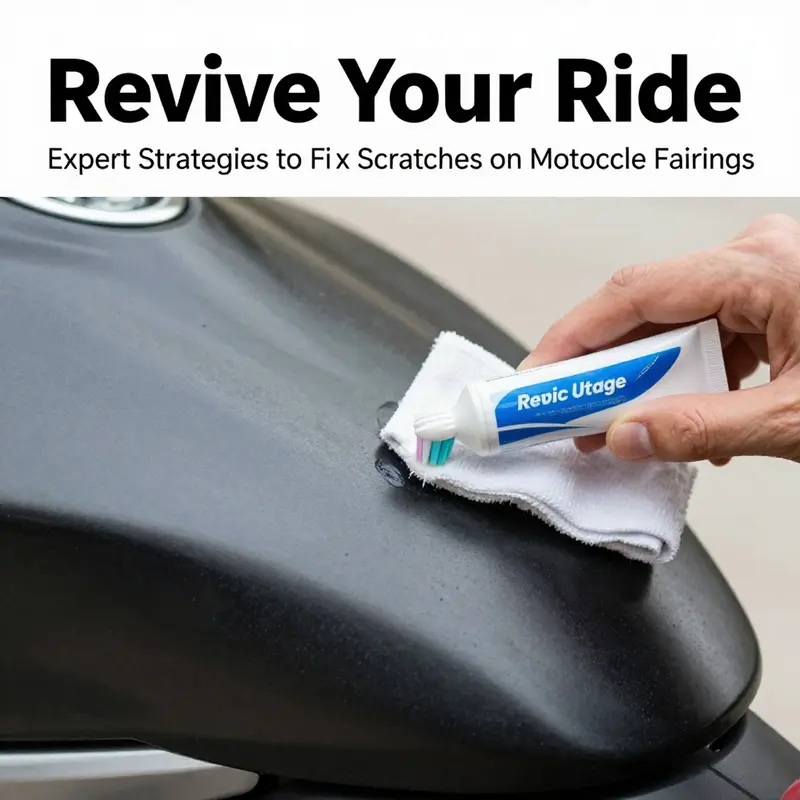
Among the most accessible tools for shallow scratches is a non gel white toothpaste. The idea is simple: toothpaste contains mild abrasives that can gently polish the surface, removing infinitesimal layers of the clear coat that scatter light and emphasize the imperfection. The technique is modest in ambition and gentle in execution. Apply a small dab of toothpaste to a soft cloth and work the area in a circular motion. Keep the pressure light and steady; you are not sanding aggressively but coaxing the clear coat to even out light reflecting irregularities. Thirty to sixty seconds is a reasonable window to measure progress. Afterward, wipe away residue with a clean damp cloth and dry the area. The improvement is typically noticeable but modest, offering a sense of truth without removing more material than necessary. This method is most effective for hairline scratches that never penetrated the clear coat and for avoiding swirl marks or new scratches in the process. If you do not see meaningful change, that signals that the depth or distribution of the scratch exceeds the toothpaste ability to remedy.
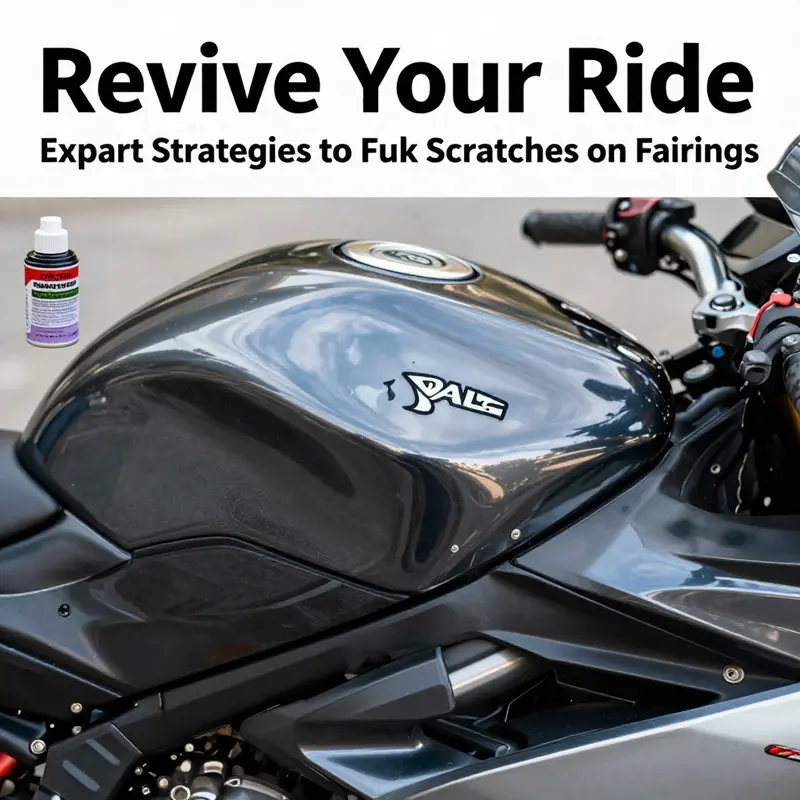
If the scratch is a touch deeper but still confined to the clear coat, you can consider a slightly stronger approach: a polishing wax or a dedicated rubbing compound designed for automotive surfaces. This step follows careful cleaning with soapy water and thorough drying. The wax or compound introduces milder abrasives that can smooth the surface while also depositing a protective layer to resist future scuffs. Start with a small amount on a foam applicator pad. With gentle, even pressure, work the product into the scratch using back and forth motions, not circular—this helps minimize new swirl patterns. Allow the product to haze as directed. When ready, buff the area with a clean microfiber cloth. The goal is to erase the line of light refraction that makes the scratch visible while leaving a balanced finish that blends with the surrounding paint. This approach generally yields a more durable and lustrous result than toothpaste, because it is designed for automotive finishes and adds a protective layer over the repair. If you seek smoothness and sheen, this is often the sweet spot between the simplest method and the more involved options described below.
There are times when a minor scratch is slightly deeper, yet not a full breach of the base paint. In those cases, a sanding step can be used to level the surface before polishing. The key is to introduce a controlled abrasion with very fine grit paper, typically in the 1500 to 2000 grit range. Keep the surface damp to minimize heat and prevent contamination. Sand in one direction, maintain a steady motion and check progress often by rinsing away dust and looking for an even surface that has lost the distinct linear scratch. The aim is not to remove significant material but to flatten the unevenness so that polishing can produce a uniform finish. After this, return to the wax or rubbing compound as the final polish, letting it refine the surface and restore the original luster. The result should be a subtle seam between repaired and unrepaired areas, with light catching the surface as if the scratch had never been there.
These approaches toothpaste, wax or rubbing compound, and fine sanding with a careful polish form a continuum of options for minor scratches. They are complementary rather than mutually exclusive. Often, a repair begins with toothpaste, advances to wax or compound for better durability, and may culminate in a gentle pass with a fine sanding block if the scratch is just enough to catch the eye in bright light. The sequence is not a rigid ladder; it is a flexible toolkit applied in the order that best respects the condition of the fairing and the aim for a discrete correction rather than a dramatic fix. The overarching principle remains consistency and care: work methodically in a clean space, and with materials appropriate for the bike’s paint system.
Color matching becomes the unsung partner in minor scratch repair. If the scratch has altered the hue or brightness around the area, a modest, color-consistent refresh may help. This may involve a light layer of wax or a small amount of touch up polish applied in a controlled manner. It is not about repainting but restoring uniform appearance so the eye does not pick up a mismatch in tone. In practice, many riders find that minor surface scratches fade from view as light plays across the repaired area when the surrounding paint is evenly sealed and polished. The elegance of minor scratch restoration lies in restraint: done well, the fairing retains its factory gloss and color depth.
If you are seeking color matching options or accessories for your bike, a practical route is to examine resources that discuss finishes and compatibility. For example, exploring fairings that match your model can help you understand color and finish choices that align with the original look. This broader context guides how aggressive you can be with polishing and whether a partial repaint could be warranted in the future. When exploring options, you can inspect model specific finishes to gauge gloss, depth, and color alignment across panels that may vary with age or exposure. The aim is to learn the finish family you are working with to inform your approach to polishing and potential refinishing.
As you progress through minor scratch work, cultivate a habit of testing your approach on a discreet patch of the fairing. A small, inconspicuous area allows you to gauge whether a method yields the desired effect without risking a conspicuous misstep. This discipline aligns with the broader ethos of bodywork repair: patience over impulse, control over force, and observation over assumption. If a repair repeatedly looks patchy or uneven, or if the scratch is part of a larger pattern of micro-scratches, it may be time to seek a professional touch for a more seamless result that matches the bike’s finish.
The practical endgame is not merely removing a blemish but restoring harmony to the surface so the bike’s lines can be appreciated as designed. The result should feel like a single plane of gloss and color, with light playing across the curves rather than revealing a scar. When you achieve that balance, you improve the bike’s appearance and preserve the integrity of the underlying materials. Sustaining the finish—by keeping it clean, protected, and polished—extends the interval between major refinishes and helps you enjoy the motorcycle’s aesthetics longer between rides.
In the broader arc of this article, the minor surface scratch chapter serves as a bridge to deeper repair discussions. If a scratch reveals the base paint or the plastic beneath, the repair demands a different set of tools and steps, including thorough cleaning, priming, and potentially filling. Those more extensive repairs share the common thread: surface preparation and careful application. The sooner you isolate the problem, the sooner you can tailor your approach to the exact condition at hand, avoiding wasted effort and preserving your bike’s finish. Keeping this mindset encourages a practical, patient method that respects the fairing’s material complexity while empowering you to act with confidence when a scratch appears.
External resources can be informative for riders seeking guidance on finishes and compatibility. For broader context on coatings and color options, you may explore resources that discuss matching and maintaining automotive coatings in a workshop setting. This can help calibrate expectations about gloss, depth, and color alignment across panels that may differ due to age or exposure. Engaging with such resources can illuminate the path to a more resilient finish, especially if you someday decide to revisit larger areas or pursue a partial refinishing of a fairing panel. The techniques in this chapter center on gentle, home-based methods, while the underlying principles—patience, surface preparation, and disciplined application—remain constant across repair scales.
In closing, minor scratches on motorcycle fairings are a solvable challenge when handled with a calm, measured hand. The toothpaste approach, wax or rubbing compound, and fine sanding with careful polishing form a continuum of options that respect the fairing’s layers and the rider’s skill. The guiding sequence—clean, polish, refine, and repeat as needed—keeps you in control of the result. The goal is not perfection but faithful restoration: clarity, color, and gloss so the bike remains a vivid expression of its owner’s care. And when in doubt, pause, re-evaluate, and consider whether a professional touch could deliver a more seamless result that matches the bike’s overall finish. The fairing’s surface is a canvas, and your approach to minor scratches is the brush that keeps its image as striking as the ride itself.
Rebuilding Deep Scratches: Using Primer and Filler to Restore Motorcycle Fairings

Rebuilding Deep Scratches: Using Primer and Filler to Restore Motorcycle Fairings
Repairing deep scratches on motorcycle fairings requires a steady hand and a clear plan. When paint and clear coat are gone and the substrate beneath is visible, the fix moves from cosmetic polishing to reconstruction. This chapter walks through the professional approach to rebuilding those deeper damages so the repaired area blends with the surrounding surface and stands up to the elements. It treats the process as a single, continuous workflow—prepare thoroughly, fill and shape accurately, and finish carefully—because rushing or skipping a step is what turns simple repairs into recurring problems.
Begin with a disciplined preparation routine. Clean the entire affected area with a degreaser or isopropyl alcohol to remove wax, oil, and dirt that would prevent adhesion. Use a lint-free cloth and change rags as they become contaminated. Dry the area with compressed air if available, because trapped moisture under paint layers causes adhesion failures later. Next, examine the scratch from multiple angles under good light to identify its true depth and to check for cracks in the plastic or signs of corrosion on any exposed metal. If bare metal is exposed, address corrosion risk immediately; a rust-inhibiting step must be included before any filler goes down. For plastic fairings, confirm the material type if possible, because flexible substrates demand fillers and primers rated for plastics to avoid cracking when the fairing flexes.
Once the surface is clean, move into sanding to create a reliable bonding surface. Start by feathering the paint edges around the scratch. Use coarser sandpaper at first—80 to 120 grit—to remove loose paint and to shape the gouge. Be deliberate: sand only until you have solid, consistent edges and a slight bevel for the filler to adhere to. Avoid digging deeper into the substrate than necessary. For stubborn edges, a small sanding block provides control and keeps contours even. After the initial work, switch to progressively finer grits to eliminate deep sanding scratches; 220 to 400 grit will remove coarse marks and create a smoother base for filler adhesion. Throughout sanding, keep the strokes even and, where possible, sand in the same direction to minimize cross-scratch patterns that are hard to remove later.
With the area sanded and cleaned, select an appropriate filler. Two-part body filler works well for rigid fairings and metal, while specialized plastic repair compounds are better for flexible ABS or polypropylene panels. Carefully read the manufacturer instructions for mixing ratios and working times; accurate mixing is crucial to curing performance. Mix only as much as you can shape before the compound begins to harden. Using a plastic spreader or a flexible squeegee, apply the filler slightly above the surrounding surface. A small overfill gives room for sanding and shaping and prevents pulling the filler flush too early, which can leave low spots.
Allow the filler to cure completely. Temperature and humidity affect cure rates, so follow the product guidelines and avoid forcing the process with heat that exceeds recommendations. When cured, start shaping with a block and medium-grit sandpaper to remove the bulk of the excess. Work patiently; getting the filled area roughly level with the surrounding surface before moving to finer grits saves time and preserves material. Progress through grits—220 to 400, then up to 600—until the fill blends smoothly into the panel. Where contours are present, maintain the panel’s shape by checking the curvature frequently. A small flexible sanding pad helps maintain curves without creating flat spots that will be obvious after painting.
After shaping, clean the repair zone thoroughly with a prep solvent to remove dust and oils. It is essential to remove even microscopic dust, because trapped particles under primer can telegraph through paint. Mask off the surrounding fairing with quality tape and paper to protect existing paint. If the panel is detachable, consider removing it entirely and working in a controlled, dust-free environment; this often yields the best finish and avoids accidental overspray onto nearby parts.
Applying primer is the next critical step. Choose a primer compatible with the fairing material—plastic primer for plastic substrates and an appropriate auto body primer for metal or fiberglass. The primer performs two functions: it seals the filler and provides a uniform base for the topcoat. Apply thin, even coats and allow proper flash time between layers. Multiple light coats avoid runs and trap less solvent in the substrate, which reduces the risk of bubbling or soft spots later. Inspect each coat under good light and sand lightly with 600 to 800 grit between coats if the surface develops small imperfections. The goal is a uniform, smooth skin that will accept color evenly.
Color matching is one of the tougher facets of fairing repair. Factory paints vary in formulation and age, and slight differences in sheen or pigment can make touch-ups stand out. When possible, obtain paint codes for your motorcycle and source touch-up paint formulated for that code. If an exact match is unavailable, consider blending the repair into adjacent panels or using a professional color-matching service. Spray application generally produces the most uniform finish. Apply multiple thin coats of base color, allowing appropriate drying time between layers. Thin coats minimize runs and allow the paint to level, creating a smoother finish.
After the color layers have built to the desired depth and coverage, add a clear coat for gloss and protection. Clear coats protect the color from UV and abrasions and help replicate the factory finish. Like primer and base coats, clear should be applied in multiple thin passes. Allow a generous cure period before attempting any polishing steps. For the highest-quality sheen, let the clear cure fully according to the manufacturer’s schedule; some clears gain hardness over several days or weeks.
Finishing is where the repair becomes invisible. If the clear coat shows minor orange peel or dust nibs, wet-sand lightly with very fine grit—1500 to 2000—to level the surface without cutting through the clear. Use consistent, light pressure and plenty of water. After sanding, buff the area with a fine polishing compound and a soft pad to restore gloss. Work gradually and inspect frequently under different lighting angles to ensure the finish matches the surrounding panels. Polishing will also blend the transition between old and new paint, making the repair seamless at normal viewing distances.
Throughout every step, cleanliness and control of the environment matter. Dust, insect debris, or lint trapped during painting telegraph through the finish and are difficult to remove without sanding and redoing coats. If possible, perform paint work in a clean garage with minimal air movement, or use a portable spray tent. Wear appropriate personal protection—gloves, eye protection, and a respirator—especially when sanding fillers and spraying paints. Ventilation prevents buildup of fumes and protects your health.
Addressing special cases helps prevent frustration. If the fairing is cracked in addition to scratched, consider reinforcing the repair from the inside with a fiberglass patch or plastic welding before adding filler. For flexible plastics like polypropylene, choose adhesives and fillers designed for flex; rigid filler on a flexing substrate will crack. For exposed metal, prime with a rust-inhibiting primer before applying filler, and ensure no corrosion remains beneath the filler. If multiple adjacent panels are badly damaged, replacing the panel may be a smarter long-term choice than repeatedly repairing large areas.
When evaluating whether to proceed yourself or seek professional help, weigh visibility and your confidence. Repairs on low-visibility panels tolerate some imperfections, but repairs on high-visibility fairings—tank shrouds and upper cowls—benefit from professional attention for the best color match and finish. Professionals have controlled spray booths and color-matching systems that are difficult to replicate at home. That said, methodical DIY repair following the steps above can return many fairings to an excellent finish with durable results.
Finally, consider ongoing care after repair. Fresh paint needs time to cure fully; avoid aggressive cleaning and harsh chemicals for several weeks. Regular waxing and gentle polishing maintain gloss and protect against UV and grime. If a repaired fairing is particularly valuable or visible, exploring replacement fairings can be cost-effective when labor, materials, and the risk of a mismatched finish are considered. For riders with model-specific panels, replacement fairings are often available; for example, a range of replacement and aftermarket fairings exists for many popular models and brands, including Honda fairings that can be sourced if a full panel swap is a better option than repair.
This approach—clean, sand, fill, prime, paint, and finish—turns a deep scratch repair into a controlled restoration. Each step builds on the previous one, and skipping or short-changing any stage increases the chance the repair will fail or look out of place. When you take the time to prepare properly, select compatible materials, and finish with patience, repaired fairings can regain both their strength and their showroom appearance. For a reliable professional reference on repair materials and techniques, consult manufacturer guidance from established automotive repair resources: https://www.3m.com/automotive/en/us/products/repair-and-refinish/.
Final Finishes and When to Call a Pro: Making Motorcycle Fairing Repairs Last
After you’ve removed scuffs, filled gouges, or blended touch-up paint into a damaged area, the final phase determines whether the repair looks and performs like a temporary fix or a lasting restoration. This chapter walks through the finishing steps that deliver a seamless appearance, explains how to protect the work you’ve done, and helps you decide when a professional body shop is the smarter option. The goal is practical guidance: how to get a durable, gloss-matched surface that resists the elements and blends with the rest of the fairing.
Start with the simple but essential principle: patience. Paint, filler, and coatings need time to bond and harden. Skipping or rushing curing stages is the single most common cause of visible repair flaws—edges that lift, dull patches, or a mismatched sheen. After prepping and applying paint or filler, keep the bike in a clean, dust-free area and avoid moisture and direct sunlight until layers have fully set. Read the product directions for recommended cure times and then add at least 24 hours more for good measure, particularly if you live in a cool or humid climate where solvents off-gas and cross-linking slows.
Once layers are cured, move to final polishing. For mild repairs where you used compounds, toothpaste, or a light polishing wax, the objective is to remove haze and restore the surrounding gloss without abrading fresh paint. Use a soft microfiber cloth and a gentle, non-abrasive polish. Work in small, circular motions and apply light pressure. This step does two things: it lifts leftover compound residue and it micro-blends the repaired pocket into the surrounding clear coat. Be conservative—aggressive buffing can thin a new clear coat and re-expose imperfections. If you applied touch-up paint that was allowed to dry, begin with a very fine abrasive polish or a 2000–3000 grit wet sanding followed by polishing; this evens very small height differences and removes the “orange peel” texture that sometimes forms with spray or touch-up tips.
For deeper repairs that required filler and primer, the finishing process is more involved but follows the same logic: establish a smooth, level surface, then build the correct optical layers. After sanding filler flush with the surrounding plastic or fiberglass, clean thoroughly with isopropyl alcohol to remove sanding oils and dust. Apply a primer specifically formulated for the fairing material—plastic primers for ABS or special adhesion-promoting primers for composite materials. Let the primer cure and then wet sand with very fine grit to create a uniform base. Thin, even coats of color are next; apply several light passes rather than fewer heavy ones. This prevents runs and produces a more even finish.
Achieving a correct color match is often the most challenging part. Factory finishes are applied under controlled conditions with specific pigments, metallic flakes, or pearls that affect how light reflects. If your touch-up paint is an exact match in still photos but looks wrong in sunshine, consider that metallic and pearl paints require clear coats of different thicknesses to produce the intended depth. When mixing is necessary, do test sprays on a scrap material and view them at different angles and light levels. If the fairing is a small panel, sometimes replacing the piece with a pre-painted replacement is the most reliable way to get a perfect match; for popular models there are ready-made fairings available, such as a curated selection in the Honda fairings collection, which can be a time-saving alternative to attempting complex paint blending on the bike.
After the color is correct and the paint layers have fully dried, apply a clear coat. Clear coats protect pigments from UV, chemical exposure, and abrasion while adding deep gloss. Use a clear coat rated for automotive applications and apply it in light, even layers. Allow tack periods between coats as specified—this prevents solvent trapping and ensures each layer bonds properly. Once the final clear coat cures to a firm state, you can wet sand lightly at very high grits (2000–3000) to remove any tiny dust nibs, followed by a careful polishing sequence: a fine polish to remove sanding marks and then a finishing polish for high gloss. For best results, polish with a machine buffer at low speed or by hand with a high-quality microfiber pad, watching temperature to avoid heat buildup.
Sealing the repair with a protective finish reduces the likelihood of premature fading and helps resist future minor scratches. Traditional automotive wax will add shine and a sacrificial layer that takes the brunt of small abrasions. If you want longer-lasting protection, consider a ceramic-style coating formulated for plastics and painted surfaces. These coatings create a harder, more chemically resistant layer that repels contaminants and simplifies cleaning. Apply them according to instructions in a clean, dust-free environment. Note that ceramic coatings seal the look of the repair and can amplify any imperfections left under the clear coat, so only use them after you’re satisfied with the visual match.
Maintenance after repair matters. Newly repaired panels are more vulnerable in the initial weeks. Avoid automatic car washes that use harsh brushes and strong detergents. Hand washing with mild soap and a soft mitt is recommended until the coating has fully cured. Periodic inspection will let you catch small chips early before they develop into corrosion or larger cracks. Keep a small kit of touch-up paint, clear pen, and polishing cloths for quick fixes on the road.
There are practical limits to what DIY methods can achieve. Extremely deep gouges, structural cracks, or damage that disrupts mounting points or internal ribs often require professional repair. A body shop can restore not only the cosmetics but also the structural integrity of the fairing. They have access to specialized tools like controlled environment paint booths, professional spray guns, plastic welding equipment, and color-matching systems that sample factory formulations. A technician can also repair or reconstruct mounting tabs and reinstate hidden reinforcements, ensuring the piece fits and performs as it did before the damage.
Budget and value considerations also figure into the decision to hire a pro. For an iconic or high-value bike, investing in a professional finish preserves resale value and the original factory look. Conversely, if the fairing is badly cracked or warped, buying a replacement pre-painted panel may be more cost-effective than repeated DIY attempts. Many riders find that parts for popular models offer an off-the-shelf replacement that saves time and delivers a strong color match. When in doubt, compare the estimated labor and material costs of a professional repair against the price of a replacement fairing and factor in your time and skill level.
Choosing the right shop matters. Look for shops with experience in motorcycles rather than general auto body shops when possible. Motorcycle fairings are thinner and more flexible than auto panels and require specific techniques. Ask to see before-and-after photos from previous repairs, request references, and inquire about warranties. A reputable shop will discuss the steps they plan to take, the materials they will use, and any expected limitations—such as potential differences in metallic sheen or shade variation that sometimes occur when only part of a bike is repainted.
A pragmatic approach blends DIY and professional help. Use your own skills for light polishing, scratch removal, and small touch-ups. Reserve professional services for structural repairs, complete panel resprays, or when a flawless color match is required. This hybrid strategy keeps costs down while ensuring the bike looks its best. For example, you can perform initial cleaning, sand and fill small chips, and then bring the bike or the detached panel to a shop for final color spray and clear coat in a controlled environment. That splits the workload and leverages professional tools for the most visible and critical steps.
Safety and environment are part of finishing well. Paints, primers, and solvents emit fumes and particulates that are hazardous without proper ventilation and protective equipment. Even in small repairs, wear a respirator rated for organic vapors, use nitrile gloves, and work outdoors or in a ventilated booth. Dispose of used rags, thinners, and containers responsibly to avoid fire hazards and environmental harm.
Finally, document the repair. Take detailed photos of the damaged area before work begins and after each stage. Note product names and batch codes for paints and coatings. This record is useful if you later sell the bike, need warranty work, or plan to perform matching work on another panel. If you ultimately take the bike to a professional, sharing your documentation helps the technician understand what has already been applied and prevents redundant or conflicting treatments.
Whether you opt for a careful DIY finish or professional intervention, the key is to respect the finishing steps: allow adequate cure time, create smooth layers, match color and sheen conscientiously, and protect the repaired area with an appropriate coating. When in doubt, use expertise: a shop experienced with motorcycle bodywork will restore appearance and function in ways that casual fixes cannot. For detailed professional guidance and techniques, see the Motorcycle Body Repair Guide for expanded reference and advanced methods: https://www.motorcyclebodyrepair.com/guide
Final thoughts
Mastering the techniques to fix scratches on motorcycle fairings is an invaluable asset for any business owner involved in motorcycle maintenance. From minor surface scratch solutions using basic materials to comprehensive repair methods required for deeper scratches, understanding these processes can enhance your repair skills and client satisfaction. Always prioritize the visual appeal of motorcycles, as it reflects the quality of your service. Whether it’s tackling a simple scratch or relying on professional help, ensuring that motorcycles leave your shop looking their best will solidify your reputation in the industry.