
The motorcycle industry continuously seeks innovative solutions to enhance performance, aesthetics, and safety. Among various components, the fairings play a crucial role in reducing drag, improving aerodynamics, and providing stylish appearances to motorbikes. Understanding the intricacies of making fiberglass motorcycle fairings is essential not only for enthusiasts but also for business owners aiming to tap into this niche market. This guide breaks down the entire process, from design to post-processing, ensuring that even those new to composite materials can confidently engage in production. Each chapter will delve deeper into the stages involved in creating fiberglass fairings, emphasizing methodologies, tools, and best practices crucial for achieving outstanding results in a business environment.
Shaping Aerodynamics: Fundamentals of Crafting Fiberglass Motorcycle Fairings

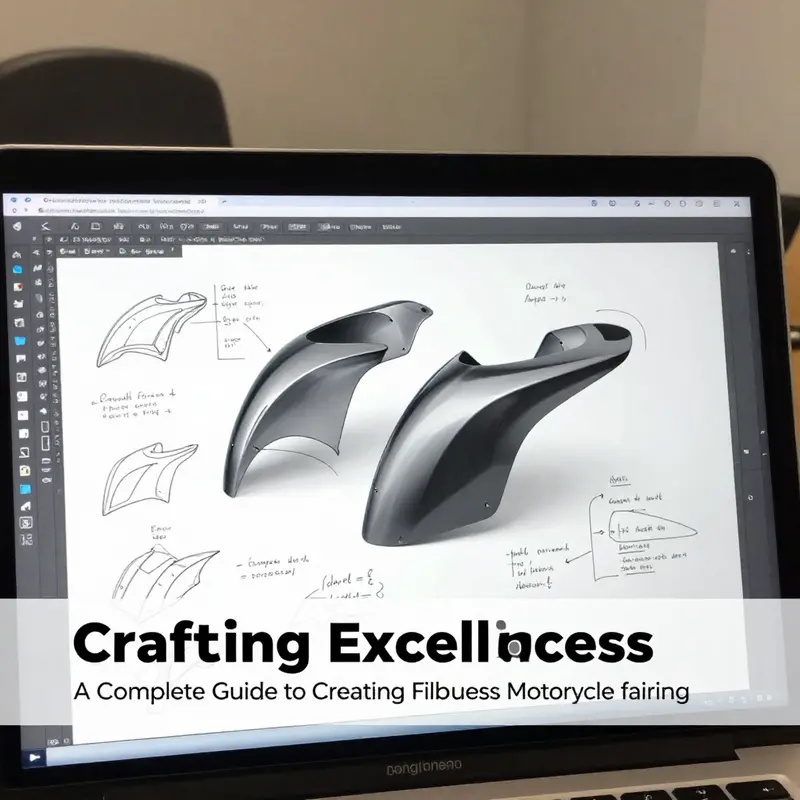
Fiberglass motorcycle fairings sit at the crossroads of artistry and engineering. They are not mere shells to hide a rider from wind; they are aerodynamic surfaces that influence stability, cooling, weight distribution, and even the tactile feel of a motorcycle as it slices through air. The material choice—glass-reinforced polyester resin—combines rigidity, lightness, and moldability in a way that lends itself to complex, sports‑bike contours and race-inspired shapes. The craft rests on a simple premise: design precision and disciplined workmanship at every stage, from the first sketch to the final polish, so that the finished shell not only fits the bike perfectly but behaves predictably in real-world riding. Understanding this foundation makes the difference between a fairing that looks right and one that actually performs as intended on the road or track.
The journey begins with a precise sense of dimension and form. A fairing’s shape must respond to more than aesthetics; it must manage airflow to reduce drag while guiding cooling air to the engine and leaving room for components, brakes, and rider movement. The process is iterative by its nature. Typical practice relies on a prototype model—either a physical positive model carved from foam, wood, or similar material, or a detailed digital replica produced in modeling software. The choice often depends on the project scale, available tools, and the desired measurement fidelity. A careful prototype anchors every subsequent step. If you work from a digital model, you can translate every curve into a production process with fewer surprises later on. If you begin with a physical prototype, you gain an intuitive sense of how the surfaces feel in three dimensions, which can illuminate subtle refinements that software might overlook.
Design accuracy is the single most important determinant of final fit. A tiny discrepancy in the mold stage becomes a noticeable misalignment where the fairing meets the frame, trailing edges clash with the radiator, or mounting points fail to align. This is why the mold’s precision matters as much as the final resin cure. In practice, designers build a two-stage reality: a positive model that captures the intended form, followed by a mold that faithfully reproduces that form with enough dimensional stability to endure multiple production cycles. The readiness of the mold also dictates how many layers of reinforcement can be added without warping, which in turn affects stiffness, impact resistance, and long-term durability.
Mold preparation is a quiet but essential ritual. Surfaces must be smooth, consistent, and free of residue that could imprint onto the final part. A release agent—often a specialized wax or polymer coating—lays a barrier between the mold and the resin. Without it, the cured fairing would cling stubbornly to the mold, making demolding difficult and risking surface imperfections. This step also creates a predictable surface finish on the inside of the fairing, which can shorten finishing work later. In high-precision work, technicians refine the mold surface with fine sanding or polishing to minimize friction during release and to set the stage for a uniform layup.
The actual layering of fiberglass follows. Sheets of fiberglass cloth are laid into the prepared mold, each layer carefully oriented to align with the fairing’s structural demands. The resin, typically a polyester or epoxy system, is applied to saturate the fabric thoroughly. The goal is full wet-out with no dry patches or trapped air pockets. Air bubbles act as stress concentrators; they compromise stiffness and can create fatigue points that crack under vibration or impact. Therefore, resin application is deliberate: a combination of brushing, rolling, and sometimes light squeegeeing to coax resin into every weave and to expel air as the layers are built up. Most fairings use two to four layers, depending on the desired balance of rigidity and weight. Thicker, stiffer sections are placed where mounting points and lower edges experience more load, while thinner sections keep weight down elsewhere. In some workshops, vacuum bagging is introduced to improve resin distribution and reduce excess flash, though this is more common in higher-end or production environments.
Curing marks the transition from wet layup to solid form. Curing time depends on resin type, ambient temperature, and resin formulation. A typical room-temperature cure might run 24 hours or longer for polyester systems, with additional time for temperature-controlled accelerations. Temperature affects resin viscosity and curing kinetics, so a stable, controlled environment produces more uniform results. Once cured, the raw fairing exits the mold as a cohesive shell, but not yet a finished product. Demolding demands care; rough handling can mar the surface, especially along the edges where resin may be a touch more brittle after cure. The moment of release is a practical test of the mold’s integrity and the layering process’s consistency. If the surface shows unexpected waviness or a faint imprint from the mold, it signals that either the mold preparation or the layup technique needs refinement before committing to a production run.
Finishing is the art of transitioning a functional shell into a professional-looking piece that can withstand road and track use. The first tolerances to address are edge trim and surface uniformity. Edges are often heavy with excess resin or flash that must be carefully trimmed. After trimming, sanding begins with a coarser grit to flatten ridges and then moves progressively to finer grits. This step is not cosmetic alone; it serves as the bridge to the next stages where filler materials and primers create a flawless base for paint. Fillers fill small depressions, gaps, or pinholes that appeared during the layup or demolding. The aim is a smooth, glass-like surface that reflects light evenly and accepts coating evenly. Sanding dust is managed with vacuums and protective measures to prevent contamination of the finish. Only when the surface is consistently smooth and free of blemishes does priming begin. Primer layers improve adhesion, provide an even tonal base, and reveal any remaining surface flaws that need addressing before color application.
Color and finish follow, often encapsulating both form and function. The final paint system not only delivers aesthetics but also protection from weather, UV exposure, and road debris. Clear coats, when used, add depth to color and enhance gloss, turning a pale, matte finish into something resilient and vibrant. The sequence from base coat to clear is deliberate; each layer must cure before the next is applied to avoid incompatibilities or fisheyes that mar the finished look. The result is a surface that can resist micro-scratches, sustain minimal color fading, and provide a consistent appearance across the entire fairing.
Beyond technique, the material decision remains central. The standard fiberglass‑reinforced polyester resin combination is popular for its ease of use, cost-effectiveness, and sufficient strength for many street and race applications. This is not to say the polyester system is the end of the road. Modern practitioners sometimes explore epoxy resins or carbon fiber composites for higher performance demands. Epoxy often offers better moisture resistance, heat resistance, and bond strength, while carbon fiber dramatically reduces weight and can introduce a different stiffness profile. Kevlar, woven or in hybrid forms, brings excellent impact resistance and energy absorption but at a higher cost. For beginners, the path typically starts with fiberglass cloth and polyester resin, gradually moving toward more advanced materials as confidence and requirements evolve. The core idea remains constant: the operator must respect the material’s chemistry, cure profiles, and the interaction between resin, cloth, and mold geometry.
A practical way to frame the learning curve is through an apprenticeship mindset. Start with a simple, small fairing or a mock-up that integrates only basic contours. Build the safe, repeatable process around a controlled mold and a modest weight target. As skills grow, you can pilot more complex shapes, add different cloth weights, and adjust the resin system to tune stiffness and surface quality. The value of practice is not merely in producing a single panel but in understanding how each decision—mold surface, layup schedule, curing condition, sanding sequence, and paint regimen—affects the next, from mounting alignment to aerodynamic performance. This integrated perspective helps prevent over-automation from eroding feel and control, and it keeps the project grounded in the rider’s goals for handling and appearance.
The journey also invites a broader look at the ecosystem around fairings. Materials science informs choices about resin compatibility with chosen cloth, which in turn guides processing tolerances and surface finishes. The formulation of release agents and mold coatings influences demolding and the surface’s ease of finishing. Tools matter as well: high-quality brushes and rollers, proper ventilation, protective gear for resin fumes and fiberglass dust, and reliable clamps or fixtures to stabilize the mold during layup. Having a well-planned workflow reduces rework and accelerates the path from concept to a ride-ready shell. The emphasis remains on achieving a reliable fit against the motorcycle’s frame while preserving the rider’s ergonomic space and the bike’s overall balance. The aesthetic payoff emerges from a patient, methodical process that respects both physics and artistry.
For readers seeking a broader catalog of compatible fit and style references, exploring a specialized fairings catalog can be informative. A well-curated collection demonstrates how forms translate across models and how different styling lines influence the mold strategy. As one practical example in the broader ecosystem, you might explore the Yamaha fairings collection to observe typical contours, mounting points, and surface transitions that engineers expect when integrating into a production bike. This kind of reference can illuminate how small shape decisions ripple through to performance considerations, even if you are building a custom piece rather than purchasing a ready-made kit. See the Yamaha fairings catalog for a sense of real-world variations and mounting logic that informs your own mold design and layup decisions. https://ultimatemotorx.net/product-category/yamaha-fairings/
The discipline of fiberglass fairing fabrication, while technical, rewards disciplined craftsmanship. A steady cadence of careful prototype work, precise mold preparation, satin-smooth layups, and deliberate finishing yields results that not only look pristine but perform predictably. The knowledge arc—from basic materials and safe practices to nuanced layup strategies and finishing techniques—creates a foundation that supports experimentation without sacrificing reliability. The ethos is clear: build with intention, document every step, test fit the shell on the bike, and iterate. The chapters that follow will deepen into more specialized materials and advanced fabrication techniques, but the core principle endures: in fiberglass fairing making, accuracy at the molds, patience during curing, and meticulous finishing converge to shape an aerodynamic ally as much as an aesthetic statement.
External resource for deeper technical detail can provide a structured, design-oriented view of this craft. For a comprehensive, in-depth treatment that covers materials, tools, and step-by-step procedures, you may consult a detailed guide such as the Construction of Fiberglass Motorcycle Fairings PDF. This resource expands on the foundational concepts discussed here and offers practical illustrations of mold release, layup patterns, and finishing sequences that underpin professional results: https://www.pdfdrive.com/construction-of-fiberglass-motorcycle-fairings-e123456789.html
Chapter 2: Designing for Speed, Fit, and Form in Fiberglass Motorcycle Fairings
Designing fiberglass motorcycle fairings blends aesthetics, aerodynamics, and practical fabrication. A good design begins with a clear understanding of the target motorcycle’s geometry and mounting points so the fairing aligns with existing tolerances and service access. For example, mid-2000s sportbikes require careful accommodation of the rider position, radiator openings, and bracket locations to preserve function while improving airflow.
Material selection influences every stage of the process. Fiberglass is an accessible, cost-effective choice for prototyping and production that balances toughness and ease of repair. Higher-performance options such as carbon fiber or carbon-Kevlar offer reduced weight and increased stiffness at greater cost and fabrication complexity. Typical fiberglass practice uses multiple layers of woven glass with polyester or epoxy resin; the laminate schedule is chosen to meet stiffness and impact-resistance targets while controlling weight.
Aerodynamics is a primary driver of shape. Designers use CFD, wind-tunnel data, or iterative track testing to refine contours that reduce drag and improve high-speed stability. Well-executed fairings can produce meaningful drag reductions and more stable handling at speed, translating to better acceleration, steadier top-speed behavior, and modest fuel-efficiency gains.
The development workflow commonly moves from concept sketches to a full-scale clay or foam positive that serves as the master. The positive is prepared with a smooth finish and release agent, then a negative mold is built up using reinforced fiberglass and resin. Mold construction emphasizes accurate geometry and a defect-free surface because the mold determines the quality of every produced part.
Production layup requires consistent resin wetting, air-bubble elimination, and careful orientation of fabric layers. Cure conditions and resin selection affect demolding time and the part’s final mechanical properties. Demolding and subsequent trimming must avoid introducing stress concentrators; sharp corners are dressed and seams flushed to maintain structural integrity.
Post-processing includes filling, sanding through progressively finer grits, priming, and finishing. A durable topcoat that resists UV and thermal cycling protects the laminate and preserves appearance under road conditions. Proper workshop safety—ventilation, respiratory protection, and chemical handling protocols—is essential whenever resins, solvents, and fine particulates are present.
Designers balance lightness, stiffness, and durability: removing unnecessary material improves handling, while reinforcements at mounting points and stress locations preserve longevity. The iterative nature of fiberglass work makes it suitable for custom projects: designers can test, revise, and refine molds and lamination schedules until the part meets both fit and performance goals.
For model-specific references and examples of mounting geometries, commercial aftermarket listings can be useful starting points to understand common fitment approaches and factory cues. Example reference: https://ultimatemotorx.net/product-category/honda-fairings/.
This chapter closes with a practical invitation: combine hands-on prototyping with measured aerodynamic and structural testing, document layup schedules and fitment checks, and treat each iteration as a step toward a predictable, rideable result.
null

null
Perfecting the Surface: Post-Processing Fiberglass Motorcycle Fairings for Fit, Finish, and Durability
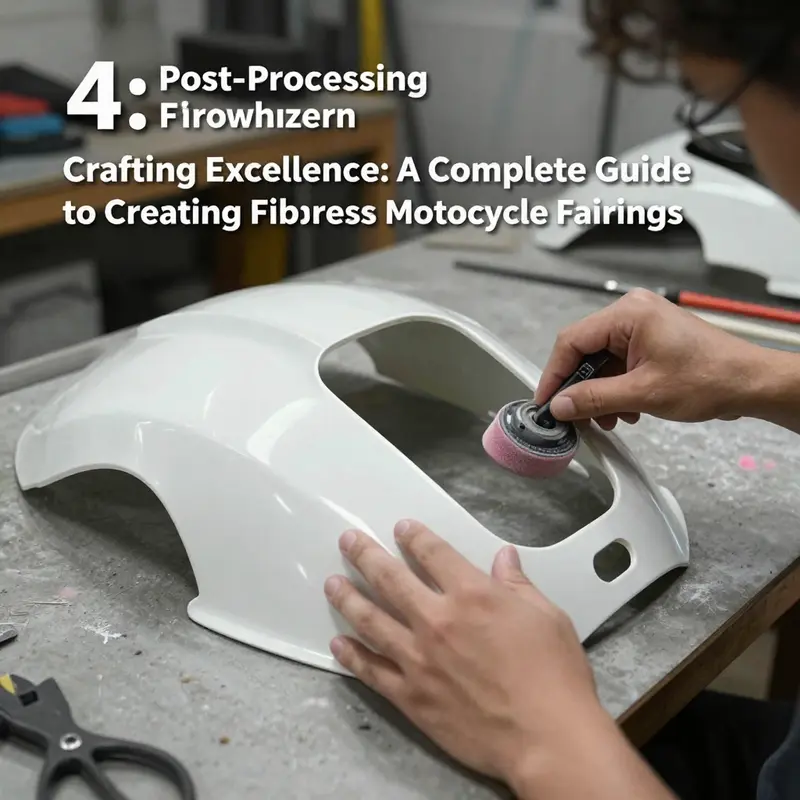
Trimming, fairing edges, filling and finishing form the bridge between a cured mold and a road-ready bodywork piece. After demolding, a fairing is structurally complete but visually raw. The post-processing sequence turns that raw part into a smooth, weather-resistant, and accurately fitting component. This chapter walks through the unified process in a practical order, tying trimming, sanding, filling, priming, painting, and pre-install checks into one continuous workflow so you can complete fairings that look professional and last.
Start where the mold left off: the perimeter and interfaces. Flash, thin burrs and irregular edges are common after release. Use a sharp utility knife to score away excess resin along seams, then switch to a rotary cutter or fine-toothed saw for larger tabs. Keep cuts controlled and shallow; remove only what’s necessary to establish the final mating surfaces. Hold the part firmly on a padded bench to prevent flexing while trimming. Once rough trimming is done, move immediately to coarse sanding to even the trimmed edge and blend it with adjacent surfaces.
Sanding should proceed in stages and with purpose. Begin with 80–120 grit to remove mold lines, drip resin, and heavy imperfections. Use a sanding block or a palm sander with light, even pressure to avoid flattening compound contours. When working compound curves, follow the shape—use your hand or a flexible foam block instead of a hard block. After major defects are reduced, step through 150, 220, and 320 grit to refine the surface. Finish the initial session at 400 grit if you plan to use body filler; otherwise stop at 320 if you will be applying a resin-based skim coat. Wet sanding becomes appropriate after primer to remove orange peel and minor texture without overheating the substrate.
Addressing surface defects requires the right materials and technique. Small pinholes and pits are common in hand-laid parts. For shallow voids, a thin polyester or epoxy glazing putty works well because it bonds to fiberglass and sands readily. For deeper gaps or torn fabric edges, use a two-stage repair: first embed a small patch of glass mat with resin, then feather a layer of putty over the repair. Apply filler in small amounts and allow full cure before sanding. Keep fills slightly proud of the surface at first; sanding removes the excess and ensures a true surface rather than sanding through to voids. When filling, avoid over-reliance on body putty to correct major shape errors—if contour surgery is needed, rework the underlying structure rather than masking it with heavy filler.
Primer selection and application are critical. A dedicated fiberglass primer seals microscopic fibers and helps prevent moisture migration into the composite. Apply primer in thin, even coats using a spray gun or aerosol if working small. Allow the primer to flash between coats according to the manufacturer’s guidelines. After primer cures, inspect under strong light for sags, runs or remaining low spots. A guide coat—sprayed lightly over the primer—reveals remaining imperfections when sanded. Wet-sand the primed surface with 400–600 grit, then move to 800–1000 grit for final smoothing before basecoat. Wet-sanding reduces heat and dust and yields a glassy surface for paint adhesion.
Painting is a balance of technique and environment. Use a controlled spray booth or clean, well-ventilated area with minimal dust. Temperature and humidity affect drying times and final appearance; aim for moderate, stable conditions. Apply basecoat in several thin passes. Thin coats reduce runs and give smoother leveling. Allow flash time between coats to avoid solvent entrapment. If you plan complex graphics, masks and stencils should be applied only after the basecoat has cured enough to resist lifting. Clearcoat is the protective layer; choose a UV-resistant, durable clear and apply it in even coats that give a full wet appearance. Multiple thin clears are preferable to one heavy coat. When the clear has cured fully, you can choose to wet-sand and polish for a factory mirror finish. Use progressively finer abrasives for wet-sanding—1000 to 3000 grit—then compound and polish with a rotary buffer and finishing compounds to remove sanding marks and restore high gloss.
Throughout filling, priming and painting, consistent inspection is essential. Use cross-lighting to find low and high spots, and rotate the part to view it from different angles. Record any areas that repeat as trouble spots during multiple coats; recurring issues often point to underlying fit or layup problems that need correction. Keep a checklist: edge fit, hole alignment, attachment points, and clearance to lights and controls. Re-check all edges after every major step, because sanding and filling can change fit dimensions subtly.
Fasteners and mounting areas deserve special attention. Reinforce bolt bosses and snap-fit zones with additional glass patches or structural inserts before final finishing. If a fastener is likely to be tightened often, consider inserting a metal or high-density plastic sleeve during the layup or reinforcement stage. When trimming around light housings or vents, leave slightly more material than the intended final cut. Verify alignment on the bike using temporary fasteners before committing to final paint. This step prevents trimming errors that can force expensive repeat work.
Finish quality also depends on managing dust, static and contamination. Clean the fairing with a tack cloth and a grease-removing solvent before priming and painting. Wear non-fuzzy clothing and minimize foot traffic in the workspace to reduce airborne particles. Static can attract dust; an ionizing blower or anti-static spray before painting helps maintain a clean surface. After painting, allow adequate cure time in a dust-free environment; moving the part too soon risks imprints or stuck debris.
Safety and environmental considerations remain constant. Sanding fiberglass creates fine particulate that irritates skin, eyes and lungs. Always wear a respirator rated for fine particulates and organic vapors when sanding or spraying. Use gloves and eye protection. Dispose of resin-contaminated paper and rags according to local regulations to prevent spontaneous combustion or chemical hazards.
Once the surface is cosmetically perfect and mounting points are reinforced, prepare for installation. Test-fit the fairing on the motorcycle to ensure accurate alignment and to mark any final trim. Install rubbers, grommets and vibration isolators that protect the fairing from chafing. Tighten fasteners incrementally and in sequence to evenly seat the part. Re-check clearances for handlebars, fork travel and exhaust where applicable. Finally, perform a functional check of lights and indicators to confirm wiring was not disturbed during finishing.
A well-executed post-processing routine enhances longevity, looks and safety. These steps are not optional cosmetic touches; they restore aerodynamic intent, protect the composite from moisture and UV, and ensure parts fit as designed. If you want reference fairings or examples for fitment and style checks, review a curated selection of manufacturer-specific fairings to compare shapes and attachment methods, such as this collection of Ducati fairings for reference: https://ultimatemotorx.net/product-category/ducati-fairings/
For deeper technique guidance on finishing sequences, advanced paints and professional shop workflows, consult further reading that expands on the methods summarized here: https://www.motorcyclecustomizationmag.com/fiberglass-fairing-post-processing-guide/
These finishing practices tie the entire fabrication process together. When trimming is precise, filler is conservative, primer is properly applied, and paint is layered with discipline, the fairing transforms from a cured shell into a durable, precisely fitting piece of motorcycle bodywork. Follow the flow described here and prioritize fit and reinforcement before aesthetics; the result will be a fairing that looks great and performs reliably.
Final thoughts
Creating high-quality fiberglass motorcycle fairings demands a blend of technical skill, precision, and insight into materials and processes. Business owners equipped with a solid understanding of the design and production methodologies outlined in this guide can significantly enhance their product offerings and market presence. Continuous innovation and attention to detail will not only yield impressive aesthetic results but also ensure that motorcyclists experience enhanced performance and safety. Engaging in this niche offers businesses a pathway to stand out in a competitive market, combining craftsmanship with cutting-edge technology.