

The Stage-by-Stage Bolt Sequence for Your ZX14 Nose
Snug every bolt first, torque second. Done in that order, the upper fairing settles evenly and no single over-tightened fastener cracks the nose.
| Stage | Bolt Location | Recommended Torque or Snug Level | Order Rationale |
|---|---|---|---|
| Stage 1 | All bolts (center nose, upper side, mid side, lower fasteners) | Hand-snug only, roughly 1-2 N.m (finger-tight) | Draws panels together evenly before any real load is applied |
| Stage 2 | Center nose (top pinch bolts) | ~6 N.m (about 4.4 lb-ft) | Establishes the reference point for panel alignment |
| Stage 3 | Upper side bolts (left and right) | ~6 N.m (about 4.4 lb-ft) | Locks the upper edges before pulling the midsection tight |
| Stage 4 | Mid side bolts (left and right) | ~7 N.m (about 5 lb-ft) | Counters flex along the widest part of the fairing |
| Stage 5 | Lower fasteners (left and right) | ~7 N.m (about 5 lb-ft) | Closes the lowest points last to prevent binding and stress |
| Stage 6 | Re-check all bolts | Re-torque to spec, ~6-7 N.m | Confirms uniform load once the plastic has settled |
Note: These are generic working values for illustration only. Confirm the exact torque specs and tightening pattern for your model year against the ZX14 service manual before you wrench, and re-check the sequence after a short shakedown ride. If a bolt fights you, stop – forcing a stubborn fastener is how noses crack.
Before you touch a bolt, get your setup right. A fairing installation guide and the correct fairing bolts only get you halfway; the bench has to be ready too. Run through these pre-installation checks first.
- Torque wrench (1/4-inch drive): Calibrated and ready – the ZX14 upper takes light values, and your wrist can’t guess those.
- Correct socket sizes (8mm, 10mm, 12mm): Test-fit each one on the bolt before turning; a sloppy fit rounds heads fast.
- Soft-tip pry tools: Plastic or nylon only – never a flathead screwdriver near painted ABS.
- Painter’s tape: Lay it along every mating edge to protect the finish while you work the panel into place.
- Fastener layout mat: Map each bolt and grommet to its location so nothing gets swapped or lost.
- Magnetic tray or parts cups: Keeps loose hardware captive when you flip the fairing over.
- LED work light and inspection mirror: Lets you see the hidden tabs most owners strip blind.
- Inspect every mounting tab: Flex-test each one for hairline cracks, then order replacements before install day.
- Check the grommets and rubber bushings: Cracked or hardened ones stop isolating vibration and amplify stress on the nose.
- Test-fit all panels dry first: Confirm alignment with zero bolts tightened before you commit.
- Clean all mating surfaces: Wipe off oil and grit so the panels seat flush and true.
Get this groundwork right and your upper will snug down without a crack – see our motorcycle front fairing resource for the full picture.
Read the Diagram Before You Touch a Wrench
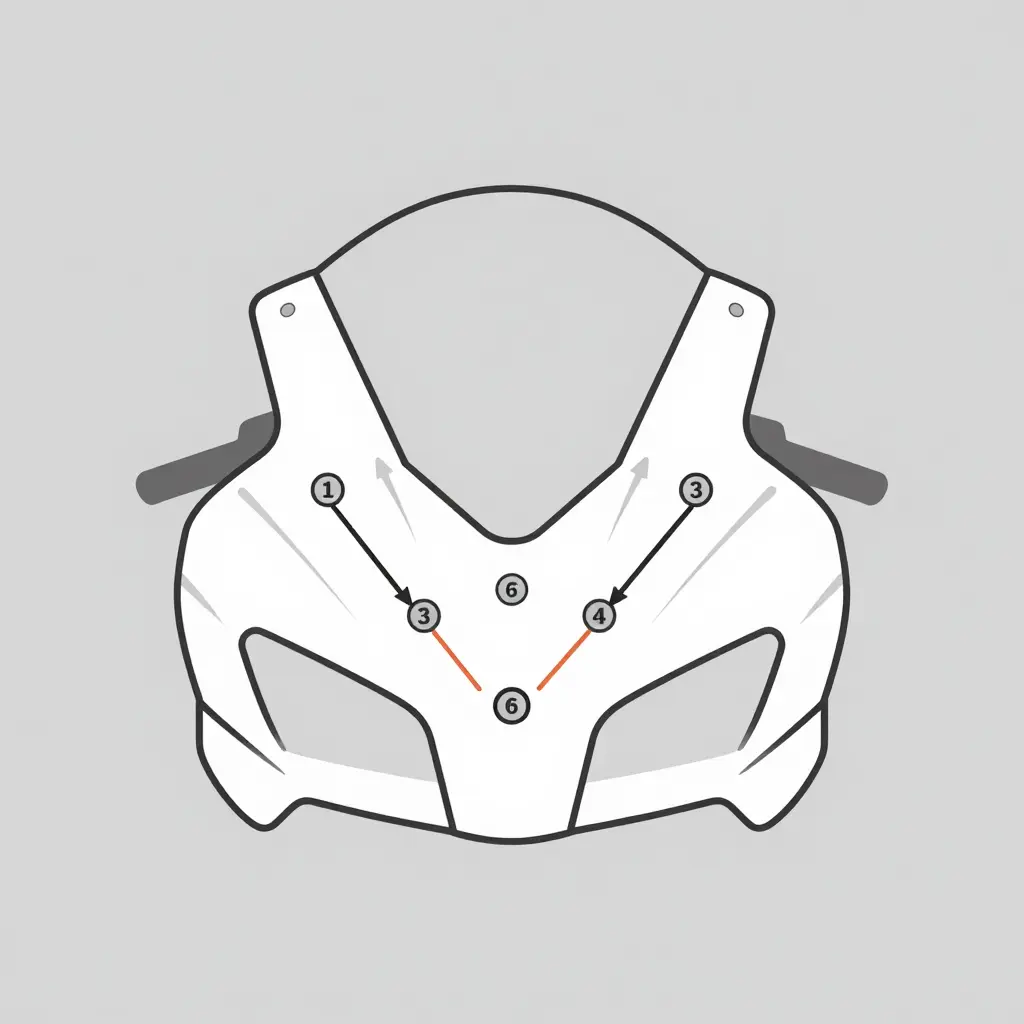
The schematic above shows how the upper fairing bolts on a Kawasaki ZX14 should be snugged: start at the center-top point (1), then work outward in a diagonal star pattern toward the lower edges. It is the same idea as torquing a cylinder head – pull the panel down evenly instead of trapping tension in one corner. Cinch one side fully before the other and the thin ABS nose flexes, and that flex is exactly what spider-cracks the paint around the headlight opening.
- Snug in stages, not in one pass. Bring every bolt to light contact first, following the numbered order.
- Then torque in a second pass, same sequence. Two light passes beat one heavy one.
- Never clamp diagonally opposite bolts tight-first. That is the single most common way home mechanics crack the nose.
If you want to know how these panels are built and why the material behaves this way, our motorcycle fairings guide walks through fairing types and mounting points in plain English.
What Happens When You Snug Bolts in the Wrong Order
Snug the nose bolts first and you lock the front of the bodywork before the side panels and lower cowl have a chance to settle. That shortcut makes the nose the anchor for every bit of misalignment still lurking in the rest of the assembly. The plastic has nowhere left to flex, so it stresses in place – and that is when a nose fairing crack starts. Usually it begins as a hairline nobody notices, spreading around the headlight surround and center mount.
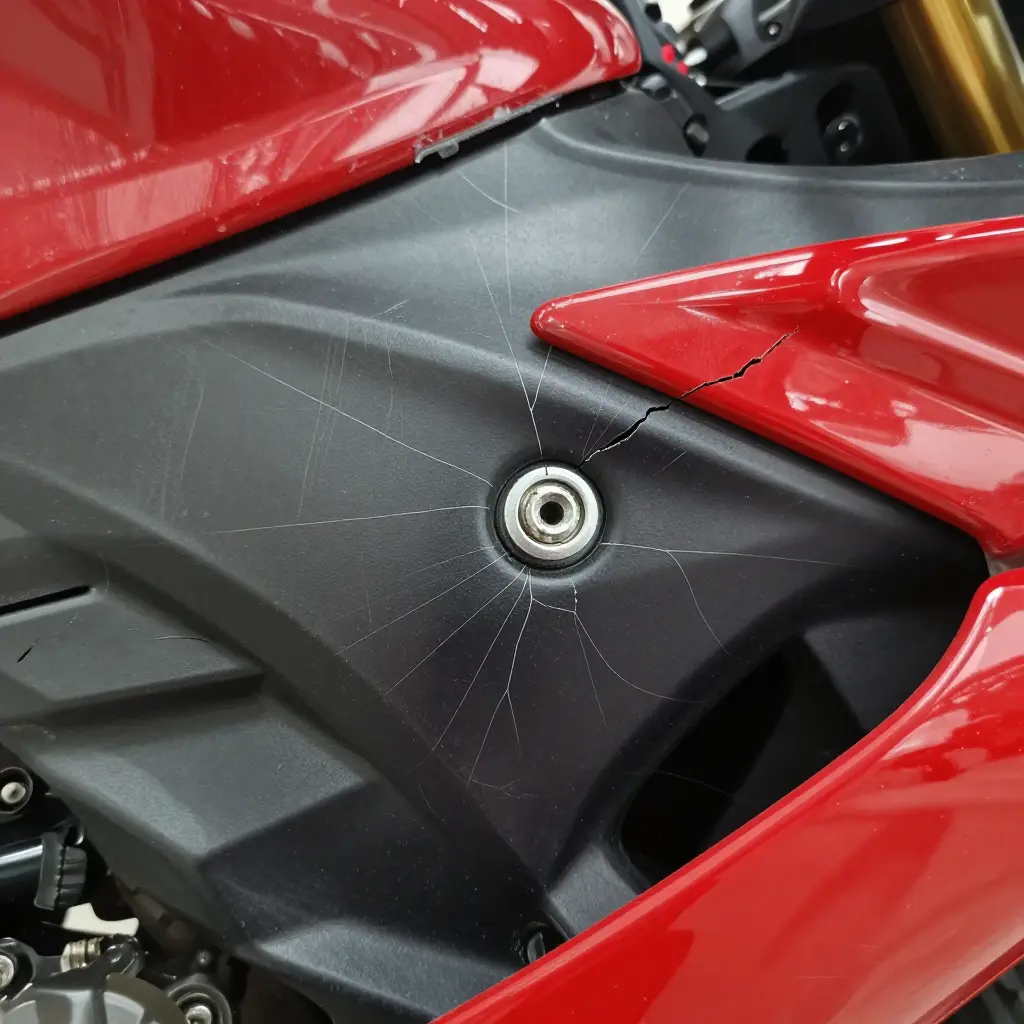
Give it a few heat cycles and a few hundred miles of vibration, and those hairlines bloom into a genuinely cracked upper fairing. The signature is a spider-web of fractures radiating from the mounting points, where the bolt was cranked down and the plastic around it absorbed the load. Thin mounting tabs surrender first, snapping clean off and leaving you with panels that never sit flush again.
Watch for these signs:
- Hairline or spider-web cracks radiating from bolt holes and mounting tabs
- A nose fairing crack that spreads along the center seam and headlight surround
- Snapped or stress-whitened mounting tabs that no longer hold torque
- Paint stress marks – cobwebbing, crazing, or flaking right around the fasteners
- Panels that buzz, vibrate, or sit unevenly even after you re-torque them
- A gap that reopens the moment you loosen a single bolt
Paint is the sneaky part. Once it crazes, you can’t simply buff it out – the damage is underneath, and it keeps spreading as the panel flexes. This kind of ZX-14 fairing damage often means replacing the whole upper instead of repairing one corner, and OEM panels are not cheap. Many riders use the opportunity to step up to aftermarket fairings and replacement panels that cost far less than dealer bodywork. Either way, you are paying in parts and downtime for a mistake a slow, criss-cross torque sequence would have prevented.
Chart: Nose Panel Stress vs. Bolt Tightening Order
(A line chart should be placed here. It plots two curves against a shared X-axis labeled “Installation Sequence Steps” (1 through 10) and a Y-axis labeled “Relative Panel Stress” (0 to 100).)
- Line 1 – “Sequential outer-to-inner tightening” (red/orange): a sharp curve that climbs steadily from about 20, then spikes dramatically to a peak near 95 around step 6, before dropping back toward roughly 28 by the final step. That violent peak is the localized stress concentration that cracks the nose tip when bolts are cinched one after another around the outside edge.
- Line 2 – “Cross-pattern staged tightening” (calm blue): a nearly flat, low curve hovering between about 18 and 24 for the entire sequence, showing that stress stays gentle and evenly distributed from the first snug to the final torque.
Caption: Snugging bolts sequentially from the outer edge inward forces all the load onto the nose tip, and the resulting stress spike fractures the plastic. A cross-pattern, staged tightening keeps panel stress low and consistent across every step.
Kawasaki ZX14 Upper Fairing Install: Snugging Bolts in the Wrong Order Cracks the Nose
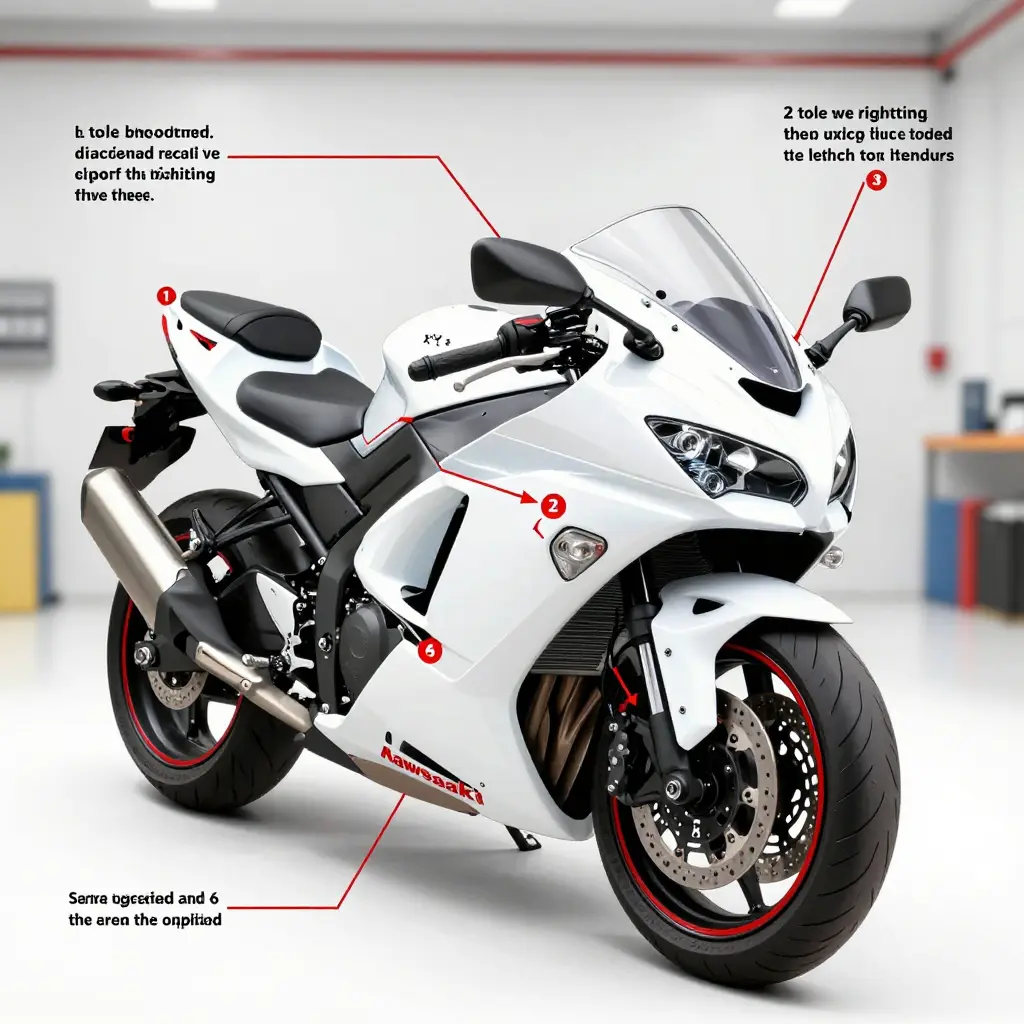
The ZX14 upper fairing is a big, curved ABS shell that wraps the nose, headlight, and mirror pods behind it. Tighten any single bolt hard while the rest are still loose, and you hand one thin mounting tab the entire panel’s stress. That is how cracked noses are born. Follow this order exactly.
Step 1 – Stage the bike and hardware
Park on level ground, kill the engine, and let the exhaust cool. Wipe every mating surface clean. Lay your bolts, well nuts, and shoulder collars on a tray in the order you removed them. Verify you have the right fasteners and panels for your model year – see our guide to compatible hardware and panels before you touch the bike.
Step 2 – Fit the panel loosely
Rest the upper fairing against the nose and hook the leading lip over the headlight housing. Thread every bolt by hand, three or four turns only. Do not snug, do not force. The panel must still float and shift by a few millimeters.
Step 3 – Align all mounting points
Slide the shell until the nose tab, headlight brackets, side tabs, and mirror mounts all line up at once. Confirm each hole is concentric with its boss. If any tab fights you, back the nearby bolts out and reset the panel – never pry or drill.
Step 4 – Hand-snug in a cross-pattern
This is the fairing bolt tightening sequence that saves your nose: work diagonally, star-pattern style – opposite bolts together (1 to 4, 2 to 5, 3 to 6) – just until each bolt kisses the panel. Hand-snug only; no wrench force yet.
Step 5 – Torque to spec in stages
Now bring out the wrench. Look up your factory value and torque in three passes – roughly 25%, then 50%, then 100% of the target – always in the same cross-pattern. A calibrated inch-pound torque wrench beats guesswork every time.
Step 6 – Final-check gaps and clearances
Sight down both sides: the gaps between the upper and side panels should be even and mirror-symmetric. Spin the bars lock-to-lock and check fork, brake-line, and steering clearance. Confirm the headlight and mirror mounts sit flush. Re-check everything after your first 50-mile ride.
Common Fairing Installation Mistakes That Crack Your Panels
A cracked nose or a stubborn panel gap is rarely the fairing’s fault – it is almost always the installer rushing a step. Before you tighten a single bolt on your ZX-14, check yourself against the most common fairing installation mistakes. Each one turns a clean install into a spider-webbed panel or a seam you can never close. If you’re new to bodywork, skim a solid motorcycle fairings guide before you start turning wrenches.
-
Over-torquing the ZX-14 fairing bolts. Cranking past the factory spec crushes the plastic around the bolt hole and starts hairline cracks. Use a torque wrench and stop at the manual’s number – most fairing fasteners are just snug, not gorilla-tight.
-
Torquing one side fully before aligning the other. Locking the left side down first forces the right side to fight the gap and stresses both bolt holes. Thread every fastener finger-tight, then snug them in a gentle crisscross.
-
Skipping the grommets and rubber washers. Those isolators absorb vibration. Leave them out and the bolt hole cracks within a few hundred miles, so seat a fresh grommet and washer behind every fastener.
-
Mixing fastener lengths. A long bolt dropped into a short hole punches through the inner panel or strips the clip nut. Sort and label your hardware by length before you start.
-
Forcing panel gaps closed with the bolt. If the fairing won’t meet flush, something is misaligned, not stubborn. Never pull it together with torque – the built-in tension will crack the panel the first time you hit a bump.
Slow down, sequence your fasteners correctly, and your ZX-14 bodywork will stay tight, quiet, and crack-free.
Frequently Asked Questions
Should I snug all bolts before torqueing?
Yes, and skipping it is one of the most common causes of cracked bodywork. Hand-snug every bolt on a single panel first, then torque them down in a criss-cross pattern. Tightening one bolt to full spec before its neighbors are snug pulls the plastic out of alignment, and when you finally force the remaining bolts home, the panel sits under tension. A nose fairing crack is often the result. Snug first, torque second, always.
What torque should the ZX14 upper fairing bolts be set to?
Most Kawasaki ZX14 bodywork fasteners call for a light 6 to 7 N.m (roughly 4.4 to 5.2 ft-lb, or about 53 to 62 in-lb). The exact figure varies by fastener location, so confirm it in your model-year service manual before you pick up a wrench. These bolts thread into plastic clips and riv-nuts, which strip or crush easily, so a small inch-pound torque wrench is far safer than a full-size foot-pound tool. When in doubt, go to the low end of the range.
Can I reuse old cracked fairing tabs?
No, and you should not try to. A cracked tab has already lost its structural integrity, and it will flex or snap the moment you apply torque. What feels like a perfect fit during a Kawasaki ZX14 upper fairing install can fail within a few miles of vibration. Replace damaged tabs with fresh clips or reinforced repair brackets. If you enjoy upgrading bodywork, explore these aftermarket fairings built with sturdier mounting points.
Why did my nose fairing crack after install?
A nose fairing crack after installation almost always traces back to the bolt tightening sequence. When bolts are torqued unevenly or out of order, the panel binds, and stress concentrates at the thinnest point, usually a tab or the nose bridge. Overtightening a single bolt against a misaligned neighbor is the classic culprit. Loosen everything, realign the panel, then retighten gradually in a diagonal pattern.
How do I know if my fairing bolts are too tight?
Three warning signs: the plastic dimples or whitens around the bolt head, the panel refuses to sit flush against its neighbor, or you hear a faint creak as you drive the fastener home. Any of these means you have gone past snug. Back the bolt off, inspect the tab for stress marks, and retorque to the low end of spec. A bolt that feels ‘done’ before the panel is seated is a bolt that is crushing plastic.
The Bottom Line: Correct Bolt Order Saves Your ZX14’s Nose
Here is the lesson worth keeping at the toolbox: bolt order protects the ZX14 nose from cracks. The torque wrench alone will not save your plastics, and neither will expensive panels – the sequence and the patience you bring to each fastener will. Get it wrong and one over-tightened nose bolt can spider the paint and split the upper fairing before you ever ride.
So, once more:
- Snug first, always. Bring every bolt to hand-tight contact in a light pass before you torque a single one. This lets the fairing settle onto the frame evenly.
- Torque in cross-pattern stages. Tighten opposite bolts in widening steps, working from the center outward, and never chase a full torque value in one turn.
- Use the correct hardware. Factory-correct bolts, washers, and rubber grommets matter as much as your technique, and the right fairing torque specs keep the plastic under controlled, even load.
A clean Kawasaki ZX14 upper fairing install depends on all three. Buy fairings that fit the way the factory intended, and hardware that matches your model year exactly. When panels and fasteners agree, the fairing absorbs vibration instead of fighting it.
That is where UltimateMotorX earns its place. We are a rider-founded shop, not a faceless parts counter, and we source premium fairings that fit right and hold their shape under real-world abuse. Alongside the parts, you get straight-talking advice from people who have wrenched on their own bikes, plus hassle-free returns if a panel is not right.
Your final takeaway: treat every bolt as part of the structure, snug them all, torque in cross-pattern stages to spec, and buy fairings and hardware you can trust. Do that, and your ZX14 nose stays crack-free for the long haul.