
Replacing motorcycle fairings is a vital modification for enhancing both aesthetics and performance. For business owners in the motorcycle industry, understanding this process is not just about improving bike appeal but also about catering to customer needs. This guide outlines the critical steps involved in replacing fairings, detailing the importance of preparation and research, providing a step-by-step removal guide, explaining proper installation techniques, and finally ensuring a thorough inspection and testing process. By mastering these aspects, business owners can offer valuable insights, increase customer satisfaction, and potentially expand their service offerings.
Gearing Up for the Swap: Thorough Preparation and Research as the First Ride Toward Seamless Fairing Replacement

Replacing motorcycle fairings is about preparation, not a quick swap of plastics. A solid plan reduces risk, improves fit, and preserves electrical reliability. Start with compatibility: ensure the replacement is designed for the exact make, model, and year, and cross-check part numbers and torque specs with manufacturer guides or trusted sources. When in doubt, confirm fit with a reputable supplier and, if possible, request a spare part diagram. Next, assemble a precise toolkit: socket wrenches in common sizes (8 mm, 10 mm, 13 mm), a torque wrench, screwdrivers, plastic trim tools, clean rags, and a degreaser. Good lighting and a clean workspace are essential. Study installation guides and videos to understand the sequence and any model-specific nuances. Watch multiple views, note clip locations, and plan harness routing. Inspect the bike beyond the fairing: frame mounting points, rust, worn threads, or bent brackets; check electrical connectors near the fairing for wear. Clean mounting surfaces to ensure the fairing sits true. Safety first: work in a cool area, support the bike securely, and disconnect the battery if you will be near electricals. Dry-fit the panels to check alignment, then tighten fasteners gradually in a balanced sequence, following torque specs. If no torque spec exists, tighten until snug and give a small quarter turn. Balance aesthetics with performance by selecting the type of fairing and windscreen that preserve geometry and rider comfort. After installation, test all lights and connectors, and take a careful ride to listen for rattles or misalignment. Recheck torques and alignment as needed. External resources can help, including model-specific catalogs and video guides. For a practical visual reference, see a reliable windscreen and fairing replacement walkthrough. Keeping these resources in mind builds a robust, repeatable approach that extends beyond a single project.
From Shell to Shine: A Thorough, Damage-Proof Approach to Removing Motorcycle Fairings
Replacing motorcycle fairings begins long before the new panels arrive. The moment you decide to swap or upgrade, the real work starts with removing the old shell in a way that preserves the paint, the mounting points, and the delicate wiring underneath. A careful removal sets the stage for a flawless fit, better alignment, and a finish that endures through miles of riding. This process is not merely mechanical; it is about respect for the bike’s architecture and the way every fastener, every clip, and every connector plays a part in the whole. When you approach removal with method and patience, you reduce the risk of cracking plastic, bending mounting stays, or disturbing electrical harnesses that, in the long run, can complicate the installation of new fairings or other bodywork upgrades.
Begin with the right frame of mind and a clean, organized workspace. The preparation area matters as much as any tool choice. A clean surface helps you see fasteners that might otherwise blend into dust or grease. You will need a set of screwdrivers in both Philips and flathead varieties, a small socket or wrench set, a plastic pry tool to protect paint, and possibly a torque wrench to check fasteners during reinstallation. Gloves are worth wearing; they keep your hands clean and reduce the chance of transferring oil or grease to pristine surfaces. A few labeled containers or small magnetic trays help you keep track of the variety of fasteners you’ll encounter. Some pieces use standard bolts, others rely on plastic clips that can become brittle with heat and age, and there are sometimes hidden screws tucked behind trim pieces or rubber gaskets. A patient, methodical approach is your best ally here.
Safety comes first. Start by disconnecting the battery and ensuring the bike is in a safe, upright position. This simple step prevents electrical shorts if a tool slips or a connector is inadvertently pulled during the process. With the power off, you can work with a lower risk of shorting lights, sensors, or the bike’s computer. Then remove the seat to access the underbody area where many fairing fasteners originate. The seat is typically secured with a few bolts or clips; take note of their positions, and store them in a labeled container so they don’t wander away during the job. The seat removal itself is straightforward, but it is a good moment to assess any wiring paths that run beneath or alongside the seat pan. You may encounter connectors or junctions that are easier to reach when the seat is lifted, so keep your work area tidy and your hands steady as you lift.
Next comes access to the fuel tank cover or any protective shrouds that shield the fairing mounting points. Some bikes rely on a handful of fasteners around the upper frame, while others require you to loosen a cover or panel before the fairings can be freed. It is tempting to push ahead quickly, but taking a little extra time to locate all fasteners helps prevent last-minute discoveries that could leave you stranded with a partially removed shell. As you uncover each fastener, note its location and type. Some may be obvious, while others hide behind rubber grommets or under small trim pieces. A precise approach means less backtracking later.
With the underbody accessible and the fuel-area covered, you can begin the systematic process of locating every visible bolt, screw, and clip that holds the fairings in place. Side panels, front sections, and the rear cowl all have their own fastening schemes, and some lines of screws may run along the edge of a panel in a staggered pattern. The goal is not to wrench everything loose at once, but to release the panel while maintaining alignment for the reinstallation of the new fairings. To this end, you typically start at the outer edge of a panel and work your way inward, removing a few fasteners to loosen the piece enough to lift it away without forcing it.
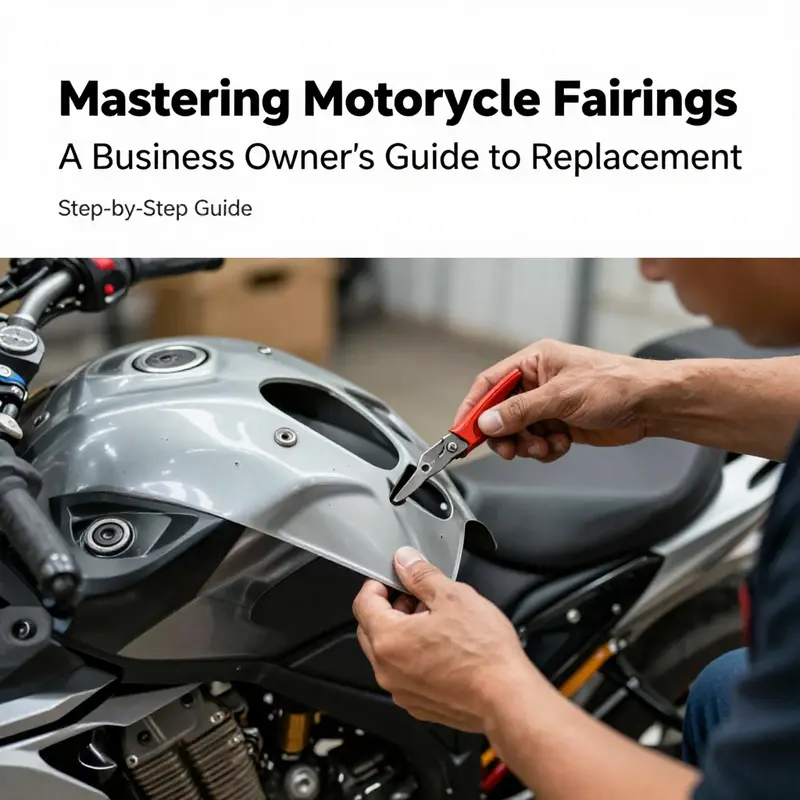
A plastic pry tool becomes your friend at this stage. Unlike metal tools, plastic tools stay gentle on the paint and on the fastener heads themselves. Use the tool to lift the edge of a panel slowly, sliding the tip between the fairing and the mounting surface, then apply a light, even pressure to release stubborn clips. If a clip resists, stop and check for an overlooked screw or another clip that needs loosening. Rushing can snap plastic tabs, which not only stretches the mounting points but can also leave sharp edges exposed or cause misalignment when the new fairings go on. Take breaks if needed; a cool head leads to a clean, damage-free removal.
As you detach each fairing piece, pay especially close attention to any wiring harnesses or connectors that may be routed through the panels. Handlebars, gauge clusters, and under-seat areas often conceal plugs that link the fairings to the bike’s lighting and sensor networks. If you encounter a harness, trace it with your gloved hand or a soft inspection wand rather than yanking on the connector directly. If a harness must be disconnected, do so by following the connector’s locking mechanism. Keep the connectors clean and dry, and when you remove a panel, gently maneuver the harness so it does not get pinched or stressed when the panel comes free.
There is a rhythm to this removal, a quiet choreography of loosening, lifting, and sliding away pieces without forcing fit or twist. When you detach a larger fairing, you may need to temporarily release adjacent panels to gain clearance. For example, two-part assemblies can be held together by shared fasteners; removing one component may require loosening another, but never removing them all at once. This careful approach minimizes the risk of warping the plastic or injuring integral mounting lugs that must bear load when you install the new fairings. A common mistake is to forget about clips tucked in places that aren’t immediately obvious. Keep your eyes on the edges of panels, inside corners, and along the seams where panels meet the frame. Some clips are small and can be easily overlooked, especially if they are the same color as the surrounding plastic and blend into the shade of the fairing.
After you have removed all the panels, you should face a slightly different challenge: ensuring the mounting surfaces on the frame are clean and ready for the next stage. The mounting area needs to be free of old adhesive, grease, and any residue from the previous installation. A degreaser or a mild solvent used with a microfiber cloth will help remove grime without abrading the paint. A clean surface helps the new fairings sit securely, with fewer gaps and less vibration once you reassemble. Take a moment to inspect the fastener threads and the alignment pins that often guide fairings into their correct position. If a post or guide pin is damaged or bent, it is wise to address that before attempting installation. You want the new fairings to find their position with ease, not fight their alignment.
As you move through the removal process, keep your organization deliberate and consistent. Place each panel on a soft blanket or a dedicated tray, ideally in the order you removed them, to prevent mixing up pieces that may have slightly different fitments. If your bike uses any unusual fasteners or clip types, consider photographing the arrangement before you begin. A quick image can provide you with a reference should you forget which clip belongs where. While photos are helpful, remember that the goal is to complete the task with a steady hand and a patient pace. The removal is not a race; it is a careful transition from old to new, and every moment you invest in accuracy pays off when it comes time to mount the fresh panels.
With the shell safely removed and the mounting surfaces cleaned, you stand at the threshold of the next phase: preparing the new fairings for install. The process you have just completed is foundational. It preserves the integrity of the frame, protects electrical systems, and ensures a clean environment for the new parts to anchor. If you are working toward a full fairing replacement, you may also need to consider how the new panels will interact with existing components like the windscreen, tank cover, or air ducting. A correct fit begins with a well-executed removal, because the best alignment is built on precise, consistent reference points rather than guesswork during reassembly.
For model-specific guidance, many riders consult official manuals or model-targeted tutorials that illustrate the precise path to follow for their bike’s unique configuration. If you seek a targeted approach to a particular model, you can explore the Honda fairings category for compatible options and guidance. This internal resource provides a curated collection of fairing panels designed to integrate with a wide range of bike architectures while helping you maintain fit accuracy and finish quality. Honda fairings category This reference supports the knowledge that each model may carry its own subtleties—clip placements, hidden fasteners, and the sequence in which panels are removed—yet the core discipline remains consistent: work with care, document your steps, and respect the bike’s electrical and structural integrity.
As you close the chapter on removal and step toward reassembly, remember that a successful fairing swap is not only about the new look. It is about preserving the bike’s integrity and ensuring dependable weight distribution, aerodynamic balance, and electrical reliability. The moments you invest in orderly removal—the deliberate loosening of each fastener, the precise prying with a plastic tool, and the careful handling of connectors—reap rewards once the new fairings are ready to slide into place. The next phase will cover how to position, align, and secure the new pieces so the ride feels as solid as the moment you first rolled the bike off the stand. It is in this continuity—from removal to refinement—that the true value of a fairing upgrade becomes apparent.
For riders who want a visual reference to supplement the written steps, consider a standard tutorial video that walks through the removal of motorcycle fairings. The demonstrations often emphasize not just the mechanical actions but also the importance of patience and care when working with plastics and electrical wiring. Watching a step-by-step guide can reinforce the sense of rhythm you have developed through hands-on practice and help you anticipate common trouble spots before they arise. External resources can provide a complementary perspective that supports the methodical approach described here. https://www.youtube.com/watch?v=3uZ9o1YsB6E
In the broader arc of a fairing project, this removal phase integrates with the subsequent installation phase, where the mounting surfaces, the alignment pins, and the ready-to-fit edges become the foundation for a precise and aesthetically pleasing result. The care you take in the beginning translates into fewer headaches during final tightening and less need for iterative adjustments. A well-executed removal reduces the risk of misaligned gaps, creases at seams, or interference with the bike’s controls where panels meet handlebars or under-seat components. It also means you can inspect the underlying frame and mounting hardware for any wear or fatigue that might affect the fit of the new panels. In short, you are not simply stripping away old plastic—you are preparing the bike for a renewed, balanced silhouette, one that honors the existing engineering while offering the potential for a fresh personality on the road.
Precision in Panels: A Cohesive, Hands-On Approach to Installing Motorcycle Fairings

Replacing fairings on a motorcycle is a methodical process that aligns fit, function, and finish to preserve the bike’s aerodynamic intent while refreshing its appearance. The steps vary by model and by the type of fairing, but the core discipline remains: prepare, remove deliberately, prep thoroughly, fit precisely, fasten securely, and test carefully. Begin with preparation and research. Compatibility goes beyond year and model; it is about contour, mounting geometry, and how the new panels meet the frame and engine cover lines. Identify the exact part numbers and confirm the replacement is designed for your bike. The goal is seamless integration so the panels sit flush and leave no gaps that catch debris or create wind noise. Sourcing quality parts from reputable suppliers matters because better parts improve tolerance margins, especially when integrating lights or complex mounting hardware. With a plan in hand, gather tools and protective gear. A standard toolkit of screwdrivers, wrenches, sockets, and a torque wrench is essential, but include panels removal aids, microfiber cloths, and a soft workspace to protect paint. Safety gear — gloves, eye protection, and a clean surface — keeps you steady as you move large plastics and delicate fasteners. Consider whether you are replacing a full fairing or only side panels and a tail section, and note any integrated electrical components or quick release tabs that demand special attention. If adhesive mounting is involved, plan for proper surface prep and curing time. Patience here prevents paint damage and helps ensure a solid bond when required. Next comes the careful removal of the old fairings. Disconnect the battery to minimize electrical shorts, and keep every fastener organized in its original position. The order matters because trim pieces and grommets can conceal screws, and misplaced fasteners can complicate reassembly. Document the process with labeled photos or sketches to ease reassembly. When components must be moved for access, do so gently to avoid bending or scratching. Your aim is to preserve the bike’s finish while freeing space for the new panels. After removal, clean and prep the mounting surfaces. Wipe away old grease, dirt, and adhesive residue so the new fairings can seat properly. Inspect frame seams for corrosion or misalignment that could affect fit. Correct any high spots or masking seams before mounting. The rule of fit first, fasten later helps you keep consistent gaps and flush interfaces, reducing rattles and paint stress in use. Installing the new fairings requires a methodical approach rather than brute force. Start with the largest panels and use provisional fasteners to hold them in place, creating a stable scaffold for fine adjustments. Align holes, pins, and slots with care, and verify even gaps around edges where panels meet. If a panel sits unevenly, recheck mounting points for bends or burrs. When tightening, follow manufacturer torque specs and apply pressure gradually and evenly to avoid cracks or edge distortion. Work from center to edge to maintain symmetry. Electrical integration and adhesives add nuance. Reconnect wiring harnesses with attention to routing, shielding from heat, and using grommets where holes pass through metal or plastic. Test lighting functions after reconnecting to confirm correct operation and to catch misrouted wires before final sealing. If any bonding adhesive is used, follow the manufacturers instructions to the letter: clean dry surfaces, proper temperature, firm, even pressure, and recommended cure time. A mixed approach of mechanical fasteners plus adhesive often yields the strongest, most durable install when executed with care. Finish with a thorough inspection and road testing. Visually inspect seams, gaps, and edge alignment; check for high spots where fasteners sit too tight. A light turn of the handlebars and a cautious wiggle test can reveal hidden fit issues. If something feels off, recheck alignment and torque the fasteners to spec. A short, controlled ride helps reveal wind noise, vibration, or clearance issues that static checks miss. Small adjustments to shield alignment or headlight position can improve comfort and performance on longer rides. Finally, consider ongoing maintenance and model specific resources. Note the importance of periodic checks on fasteners and panel alignment, especially after long rides or rough roads. For model specific guidance, consult dealer catalogs or manufacturer portals to verify fitment, finish options, and torque specifications. External references can supplement hands on practice and help troubleshoot unusual mounting arrangements across different generations of bikes.
The Final Fit: Thorough Inspection and Testing After Replacing Motorcycle Fairings

Replacing fairings on a motorcycle isn’t just about a new look or a sleeker silhouette. The last and arguably the most important phase is the final inspection and testing. This is the moment when meticulous attention pays off in safety, ride quality, and long-term durability. After hours spent researching parts, removing the old panels, and carefully aligning and mounting the new fairings, you move into a stage where precision translates into confidence on the road. The goal is to verify that every fastener is secure, every mounting point aligns with the frame, and every electrical connection for lights and indicators functions as intended. A well-executed final check reduces the chance of rattles, leaks, or misalignments that could compromise handling at speed or in emergency maneuvers. The process is practical, methodical, and deeply tied to the mechanical realities of your bike and the specific fairing kit you chose. It is also one of the moments where the discussion moves from theory to actionable, ride-ready reality.
Begin with a patient, almost clinical, review of fasteners. The tires are still cold, and the bike is settled on its side stand or paddock stands, whichever your setup requires. Start by rechecking the torque values prescribed by the bike’s manufacturer for every screw, bolt, and clip that secures the fairing. The torque values exist for reasons that aren’t merely about tightening. Over-tightening can crack plastic, strip threads in soft alloy fasteners, or distort mounting flanges. Under-tightening leaves the fairings vulnerable to loosening during vibration, wind pressure, or a brisk highway breeze. The visual cue here is not just tightness but evenness. You want a uniform feel across different fasteners and consistent seating without gaps that catch air or allow debris to creep behind panels. If you have access to a torque wrench, use it, and if not, proceed with a careful, incremental approach, tightening gradually across the main mounting points in a cross pattern to avoid warping.
Critical mounting points deserve particular attention because they bear the immediate load that keeps the fairing in place during motion. The front cowling anchors the bike’s aerodynamics and the eye line of the rider, so a misaligned upper panel can create flutter or misdirect air toward the rider’s line of sight. Side panels affect bodywork stiffness and the visual silhouette, while rear winglets, if present, influence airflow over the tail and impact stability at high speeds. During the inspection, run a fingertip check along the edges where these components meet the frame. Gaps should be minimal and consistent, not varying from one edge to another. If you notice a stubborn gap that won’t close with a gentle push of the panel, there may be a subtle misalignment at one or more mounting points or a slightly bent bracket that previously went unnoticed. In those cases, step back, loosen a few fasteners in the surrounding area, and reseat the panel with small, incremental adjustments. This is not a sign of weakness but a sign of a careful, quality-focused approach.
A thorough visual inspection is the next layer. Look for misalignment, a sense of stress on the plastic near mounting holes, and any cracks or stress fractures around the most frequently stressed zones: the radii where panels meet the frame, the lower edges near the lower fairing, and around any cutouts for wiring harnesses or coolant lines. Road debris and sun exposure can over time reveal themselves as hairline cracks, yellowing, or hazing of the surface finish. If you detect a misalignment or a hairline crack, address it before riding. The cost of an adjustment now is far lower than the risk of a high-speed panel departure or a piece breaking away in traffic. While you visually inspect, also verify that the paint line and decals align cleanly from one panel to the next. A continuous line is not just aesthetic; it is a sign that the panel interfaces have been matched with care and that the underlying mounting geometry remains true to the bike’s original design.
A separate but related area is the electrical integration. Many modern fairings incorporate lighting functions—headlights, turn signals, and sometimes integrated accent lighting. Reconnect and recheck every wiring harness, firmly seat the connectors, and route wires away from hinges, moving parts, or sharp edges. The goal is to prevent chafing and pinched wires, which can cause intermittent lighting or short circuits. After you reattach the electrical harnesses, test every function in a controlled setting. Confirm that headlights illuminate evenly and that all indicators respond immediately with proper canceling behavior. If your kit includes a new or altered tail light or turn signal cluster, ensure its brightness level and color match the bike’s legal requirements and your local regulations. It may feel tedious to perform these electrical checks after a long day of mechanical work, but the payoff is a consistent electrical system that won’t surprise you on the highway.
With the mechanical and electrical systems verified, a controlled test ride becomes the next essential step. The ride should start in a safe, low-risk environment such as a quiet lot or an empty parking area. Begin at a very gentle pace, listening for any unusual noises, rattles, or vibrations. A subtle flutter at certain speeds can indicate a panel that’s loose enough to resonate with vibration but tight enough that a quick shake won’t reveal the issue in static checks. If you hear any squeaks or grinding tones, revisit the mounting points and inspect the fit around fasteners, guide pins, or edge seals. The ride must then progress to light acceleration, moderate braking, and gentle cornering. You want to verify that the new fairings maintain alignment with the steering axis and don’t create any unexpected wind interference that could alter steering input or rider posture. Pay particular attention to handling at lower speeds where bodywork begins to interact with the air more directly and where even minor gaps can create a noticeable wedge of turbulence behind the panel.
As you move toward higher speeds, the aerodynamic behavior becomes a more relevant guest. The fairings should consistently direct airflow along the intended paths, reducing drag and maintaining heat management for components like the radiator and engine casings. A practical test is to ride through a small range of speeds, listening for rattles or loose parts that may reveal themselves only under load. The goal isn’t to push the bike to its absolute limit but to confirm that at realistic highway speeds the panels stay in place, the wind noise remains within expected levels, and the ride remains stable. If you have access to a longer, safe road with varying lanes, a gentle high-speed run can confirm that the fairings don’t induce vibrations in the handlebars or footpegs and that the rider’s view remains unobstructed by any panel movement. The moment you notice vibration, loosened fasteners, or a shift in panel alignment, circle back to the workshop. Some misalignment that is subtle at low speed may worsen with airflow at higher speeds, so don’t ignore it.
After the initial test ride, recheck the fasteners again. It’s common for vibration to gradually loosen certain hardware after the first few minutes on the road, even if everything felt secure in the shop. The quick re-torque at this stage is a wise precaution and mirrors the practice in professional service manuals. A second shorter test ride, focused specifically on confirming repeated torque integrity, can confirm that the initial adjustments have held under real-world conditions. If any fasteners loosen, reset, and re-torque them to specification. If a panel continues to shift after repeated checks, you may be dealing with a fatigue issue in the mounting hardware or a misfit between the panel and the subframe. In such cases, a more careful realignment or a bracket replacement may be necessary. The point is not to chase perfection in a single afternoon but to establish a reliable baseline that you can return to after every subsequent ride, particularly after long trips or aggressive riding.
Beyond the immediate inspection and test ride, there is a maintenance mindset that makes the entire job durable over time. Regular cleaning of the fairings helps prevent the accumulation of dirt and road grime that can degrade paint and adhesives. Use mild soap and water rather than harsh degreasers or strong solvents, which can soften plastics or strip protective coatings. When the fairings are clean, inspect for cracks, warping, or discoloration that might indicate UV damage or heat exposure. Panels near direct sunlight or exhaust heat may show signs of aging more quickly; these are the areas to monitor closely during periodic checks. A good practice is to schedule a quick visual walkaround after every wash, noting any changes in fit or finish that could signal a tiny shift in mounting or a developing stress point. If you see discoloration in the adhesive seams or a rise in a panel edge, it may be time to refresh sealants or reseal joints to preserve rigidity and weather resistance. Keeping notes about when you performed checks and any adjustments made can be invaluable for future maintenance and for communicating with a shop if professional assistance becomes desirable.
The chapter on upgrades makes the point that the end of one project is the start of another path. If you are considering improvements, think in terms of material balance, stiffness, and weight distribution. Lightweight fairings, when chosen thoughtfully, can improve throttle response and acceleration, while still maintaining the necessary strength to resist impact and aero loads. For riders who care about OEM compatibility and aesthetic continuity, it is worth exploring fairings designed for a similar model year or a closely related platform, always ensuring the mounting geometry remains compatible with the frame and subframes. In practical terms, this means assessing the mounting hardware, the location and type of brackets, and whether the fasteners can be reused or if new hardware is required. Remember that every change has a cascading effect on aerodynamics, wind protection, and even the rider’s posture. A careful, deliberate approach to upgrades complements the disciplined inspection and testing routine described here, fostering a bike that not only looks sharp but performs reliably in a wide range of riding conditions.
For riders who want to deepen their knowledge or ensure alignment with official standards, consulting the bike’s service manual remains a sound practice. The manual provides model-specific torque specs, fastener types, and recommended sequences for reassembly that can reduce the risk of introducing fit issues. It also often includes cautions about delicate areas, such as around radiator shrouds or near steering head components, where improper torque or misalignment can have amplified consequences. If you feel uncertain at any point, don’t hesitate to seek professional help. A quick check with a qualified technician can confirm that the replacement fairings are integrated with the bike’s electrical system and frame geometry as intended, and that all safety-critical aspects, like fairing bracket integrity and headlight alignment, are correct before you rely on the setup on public roads.
As you reflect on the overall journey from selecting parts to the final test ride, consider how the process stands up to the realities of different models and riding styles. The steps described here emphasize a practical, safety-first approach rather than a cosmetic one. You will likely find that some bikes require slightly different sequences for disassembly and mounting, or that certain fairings rely more heavily on adhesive mounting in addition to screws and clips. The key takeaway is to treat the final inspection as a dedicated stage, not an afterthought, and to treat the test ride as a critical evaluation of fit, finish, and function under real-world conditions. With a patient, thorough routine, you can enjoy the combination of form and function that a well-executed fairing replacement delivers. For readers seeking model-specific directions, consider exploring the Honda fairings category for a sense of how a kit might integrate with a particular motorcycle in the brand ecosystem, while keeping the core principles of safety and fitment in mind. Honda fairings category illustrates how different bikes approach panel fitment while offering a practical reminder that, regardless of the brand, the final inspection and testing phase remains the same in its core purpose.
External resource: For a comprehensive, condition-focused guide that complements this discussion with torque baselines, post-installation checks, and maintenance tips, you can consult the Fairing Replacement Guide at https://www.motorcycle-maintenance.com/fairing-replacement-guide.
Final thoughts
Replacing motorcycle fairings is a detailed process that significantly impacts both appearance and performance. By emphasizing the importance of thorough preparation and research, followed by an organized removal and meticulous installation, business owners can ensure a high-quality outcome that satisfies their clients. Moreover, a final inspection and testing phase is crucial to guarantee that everything functions correctly and meets safety standards. By mastering these elements, you can enhance your service offerings and help customers achieve their desired motorcycle aesthetics and performance effectively.