Scratches on motorcycle fairings not only mar the vehicle’s appearance but can also affect its resale value and durability. For business owners in the motorcycle industry, understanding how to remove scratches effectively can preserve customer satisfaction and ensure repeat business. Each chapter in this guide examines different techniques suitable for various levels of scratch damage, from minor surface-level abrasions to deep scratches exposing underlying material. By mastering these techniques, motorcycle service owners can enhance their offerings while ensuring their customers’ bikes remain in top condition.
null
null
Repairing Deep Scratches: Step-by-Step Restoration for Damaged Motorcycle Fairings
Deep scratches that cut through the clear coat and into paint or primer demand a careful, methodical approach. These repairs are more than cosmetic touch-ups; they restore integrity and protect underlying material from further damage. This chapter walks through the full process—preparation, sanding, filling, priming, painting, and finishing—explaining why each step matters and how to get a result that blends with the surrounding surface.
Begin with surface preparation. Clean the damaged area thoroughly to remove oil, dirt, and any wax or grease that could prevent adhesion. Use a high-purity alcohol solution or a cleaner formulated for plastics. Work with a soft, lint-free cloth and change cloths when they become contaminated. Removing contaminants is not optional: paint and filler will not bond to a dirty surface, and dust or oils will show as imperfections after painting.
Assess the depth of the scratch once the surface is clean. If bare plastic or metal is visible, you must treat the area like an open wound: protect exposed material from moisture and corrosion. Small chips that reveal substrate can be filled and sealed. Long gouges require more shaping so the repair sits flush with the fairing’s original contour. Take time now to decide whether the repair will be done on the bike or off; removing the panel gives better access and reduces the chance of overspray when painting.
Sanding is the stage where patience matters most. Start with a coarser grit only when needed to remove loose paint and feather the edges of the scratch. Common practice is to use progressive grits: begin around 600 grit to remove high spots and undercut rough edges, then move to 800–1000 grit to refine the area, and finish with 1500–2000 grit for final smoothing. Keep the surface wet when sanding to reduce heat and minimize clogging. Wet-sanding also creates a more even finish and lowers the risk of visible sanding marks. Sand in the direction of the scratch rather than across it to avoid creating small cross-grain lines that are hard to erase later.
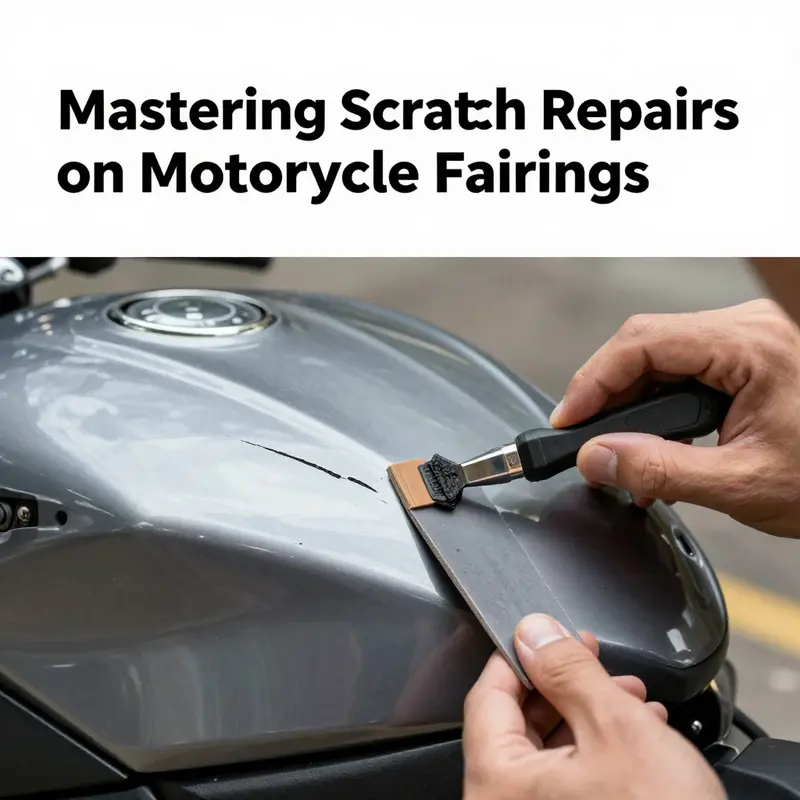
When the scratch has created a depression, filling becomes necessary. Choose a filler compatible with the fairing material—two-part epoxy or polyester putty works well on many plastics. Mix the filler according to instructions and apply only enough to slightly overfill the gouge. This ensures you can sand down to a level surface without leaving voids. Allow the filler to cure fully; premature sanding can cause clogging and smearing. After curing, sand the filler with fine grits until it is flush with the surrounding surface. Use a long sanding block to maintain flatness and preserve the original curve. Inspect for low spots by wiping the area with solvent; shiny low areas indicate where more filler or sanding is required.
Priming is the next essential layer. A primer designed for plastics will promote adhesion between the substrate or filler and the topcoat. Apply primer in thin, even coats, allowing recommended drying time between applications. Multiple thin coats are better than one thick coat because they build an even base without runs. Once the primer is dry, lightly scuff it with very fine grit paper so the paint has a slightly keyed surface to grab. If the repair exposed bare metal, use a rust-inhibiting primer formulated for that metal type before applying the plastic primer.
Color matching is the trickiest part of painting fairings. Factory colors can vary with age, sun exposure, and batch differences. For the best match, work from a code or reference if available. When using spray paint, apply several light coats rather than a single heavy one. Hold the spray at the recommended distance and use even, overlapping passes. Allow each coat to dry so solvents evaporate and layers build evenly. Temperature and humidity affect drying times and final appearance, so avoid painting in extreme conditions.
After the base color has been applied and fully cured, protect it with a clear topcoat. Clear coats restore gloss and add UV protection to prevent rapid fading. Use multiple light passes of clear rather than heavy coats; heavy application causes runs and orange peel texture. If the surrounding finish is glossy, aim to match that level of shine. Let the clear coat cure per manufacturer guidelines before any further handling.
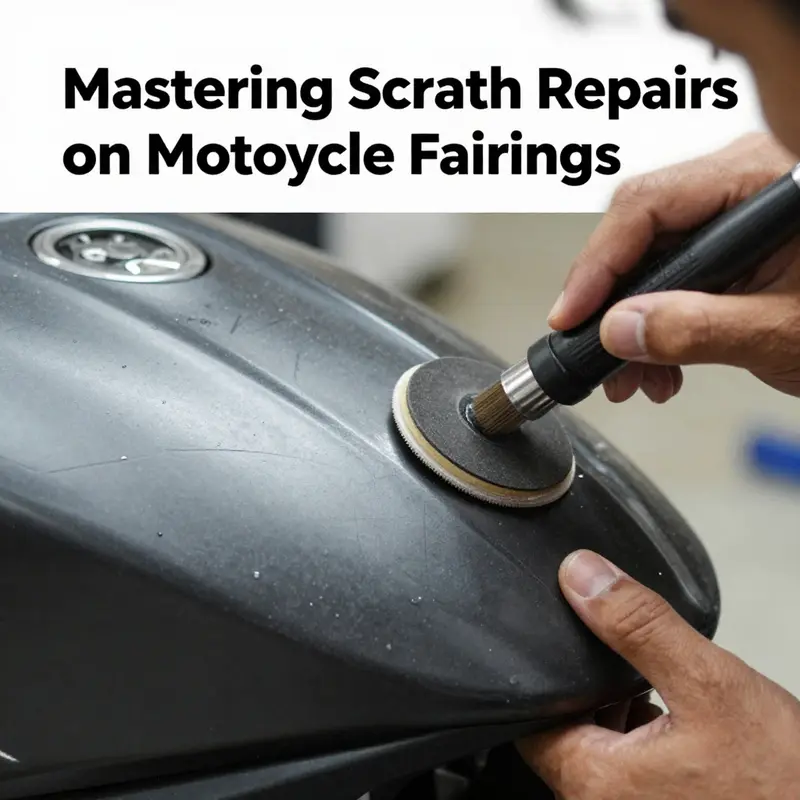
The finishing stage blends the repair into the rest of the panel. Start with a fine polishing compound and a soft pad to level minor imperfections once the clear coat has fully cured. Use a dual-action polisher on low speed for consistent results, and work carefully to avoid burning through the new clear. Progressively finer polishes will bring back depth and mirror-like gloss. Finally, apply a protective wax or sealant to the entire panel to even out the reflectivity and give the repair the same healthy sheen as the rest of the fairing.
Throughout the process, monitor for common pitfalls. Over-sanding can change the shape of the fairing. Too much filler hides structural damage and cracks. Thick paint layers are vulnerable to cracking and chipping. Rushing the drying times will trap solvents and create a cloudy finish. If the panel is heavily contoured, practice masking techniques to avoid visible transitions. Use low-tack masking tape and remove it while the final layers remain slightly tacky to prevent lifting edges of paint.
When to call a professional should be part of your decision. If structural components beneath the fairing are damaged, or if the area to be finished includes complex graphics or multiple colors, a body shop has the tools and controlled environment to ensure a flawless result. Professionals also have access to color-matching equipment that reads exact paint codes and mixes precise formulations for seamless blending.
For many riders, replacing the damaged fairing with a matched aftermarket panel is also a practical option. This avoids long repair times and the risk of imperfect color matches. If you are considering replacement, look for panels designed for your bike model to preserve fitment and mounting points. One good source for replacement fairings for sport models is the fairings-for-ninja collection, which offers panels built for common chassis and fit styles.
Finished repairs should be inspected after a few days and again after a couple of weeks. Changes in temperature and humidity can reveal issues, and small adjustments during polishing can improve the long-term look. Always follow safe curing times before exposing the repaired area to the elements or cleaning it with solvents.
If you want a deeper dive into coatings and professional refinishing techniques, a recognized automotive refinishing resource provides detailed guidance on materials and best practices: https://www.ppgrefinish.com/.
Carrying out a deep-scratch repair on a motorcycle fairing is a process of small, deliberate steps. Clean carefully, sand progressively, fill and prime thoughtfully, paint in thin layers, and finish with patience. Done right, the repair not only restores appearance but also protects the fairing and extends the life of the panel. The result will be a restored surface that looks intentional and holds up to the demands of the road.
From Gouge to Gloss: Repairing Deep Scratches and Exposed Substrates on Motorcycle Fairings
Deep scratches on motorcycle fairings can feel like a small disaster in a big ride. When the mark runs past the surface and into the substrate, the repair becomes more than cosmetic—it asks for a careful, staged approach that respects the material underneath. The decision to repair versus replace hinges on the depth, the material, and the desired finish. This chapter traces a cohesive path through the most reliable technique set for deep scratches that reach plastic, metal, or primer, without demanding a full-blown repaint. It keeps the focus on restoring integrity and gloss while preserving the original look, because the goal is not simply to hide damage but to rebuild a seamless, durable surface that won’t betray its repair under the next day’s sun or the next weekend’s drizzle.
When a scratch penetrates the clear coat but leaves the underlying material intact, you’re dealing with a boundary issue. The surface has been breached enough to disrupt the smooth reflection, but the substrate—a colored plastic, a metal panel, or a primed composite—needs careful treatment to prevent corrosion, delamination, or uneven adhesion of subsequent layers. The material dictates the plan: plastic fairings require a different adhesive and filler chemistry from metal panels, and both differ from the approach needed when the scratch has slid past the color coat and into primer or bare metal. The core idea is to re-establish a clean, attack-free edge around the damaged zone, build back a level surface, and then reinstall the protective and aesthetic layers in a controlled, gradual fashion. This is a project that rewards patience and attention to environmental conditions, not quick, heavy-handed fixes.
Plastic fairings are the most common site for deep scratches on sportbikes and street riders alike. The preparation begins with a thorough cleaning to remove oil, wax, and any silicone residue that could hinder adhesion. A degreaser or rubbing alcohol works well if you use lint-free swabs and a clean microfiber cloth. You want the area dry but cool, with the surrounding paint free of flaking or crumbling edges. The next step is to create a solid edge that the filler can grip. Gently roughen the area around the scratch with progressively finer sanding, starting with 320- to 400-grit paper to expose fresh plastic around the edges. The goal isn’t to remove material, but to create a micro-roughness that helps the filler bite. For deep gouges that extend into the plastic, you may need to sand down to the bare plastic in the surrounding zone, always keeping the surface damp to minimize heat buildup and prevent burrs from forming as you work.
Fillers formulated for plastic are designed to bond to low-energy surfaces and to cure with a gentle hardness that won’t crack as the fairing experiences flex and temperature swings. A plastic-specific body filler is applied with a spreader, not a knife, and built a touch above the surrounding surface. Curing times vary by product, but the principle is the same: give it a full cure before moving on. Once cured, the filled patch is shaped with finer grit paper—600- to 800-grit works well for initial contouring—again with wet sanding to prevent clogging and to keep the edges from lifting. The aim is a flush, smooth transition that ties the repair into the original contour without revealing a flat plateau where the repair sits. Only after this contour is established should you consider priming.
Priming on plastic adds a crucial layer of bonding chemistry. It’s not merely about color; it’s about creating a compatible surface for the subsequent coats and preventing future peeling where the repair meets the factory paint. A dedicated plastic primer is applied in thin, even coats, with attention paid to drying times so you don’t trap solvents or create a tacky surface that grabs dust. The color-matched paint then follows. Here, multiple thin coats are far superior to one heavy layer that can sag or run. Airbrushing or a consistent spray pattern helps achieve an even cap that mirrors the curvature of the fairing. After the color has cured, a clear coat applied in soft, even layers protects the finish and helps replicate the glassy look of the surrounding panels. The clear coat is particularly important in a repair of this depth, because it shields the new color from UV rays and minor abrasions that would soon re-expose the edge if left uncoated.
The final phase for plastic is where the blend with the adjacent panels is tested. After the clear coat cures, often 24 to 48 hours depending on the product and environmental conditions, you’ll perform a careful, fine blend with a polishing compound. Wet-sanding with an ultra-fine grit, typically 1500 to 2000, can help erase micro-scratches that sometimes appear after the final coat has hardened. The objective is a seamless field where light reflects uniformly across the repaired area. A soft cut with a polishing compound then brings back the gloss and blends the repaired patch into the original finish. The texture and color should read as one continuous surface, not a patch that requires a second glance to confirm the difference.
When the scratch has invaded metal or brings bare metal into view, the repair path must explicitly guard against corrosion. The first step is to remove any rust that has started to form on the exposed substrate. A wire brush or light sanding can clear loose rust and scale. Once the area is rust-free, a rust-inhibiting primer or etching primer is applied to the bare metal. The primer’s job is twofold: it chemically bonds to metal and it provides a robust base that accepts filler and topcoat without blistering later. With metal, you move through the same general sequence as with plastic—filling, sanding, priming, painting, and clear coating—but you’re safeguarding against corrosion and ensuring the etched primer can lock onto a bare surface.
Fillers for metal typically mirror those used on plastic, but you may need to adjust the curing times and sanding steps to accommodate how metal behaves under heat and stress. After the filler cures, refine the surface with progressive grits to achieve a flush finish. Then, apply primer, again choosing options that are compatible with metal. Paint must be color-matched to the existing fairing, and it’s often wise to apply several thin coats rather than a single heavy layer. The painting sequence demands patience; each coat should be dry to the touch before the next is applied, and the entire process benefits from a well-ventilated space with steady temperatures. A clear coat follows for metal repairs, and final polishing brings the repaired area back to its original luster while preserving the protection against the elements.
One practical consideration that stands apart from the surface work is the potential need for primer or filler to be sanded flush with the surrounding contour. This means you’ll be matching not only color but texture as well. A common pitfall is creating a repaired patch that feels “gritty” under a glove or when you wipe the surface with a cloth. The careful use of wet sanding and a light touch helps ensure you don’t sand through the new paint, exposing the primer again. The final polish should restore the smoothness that mirrors the rest of the fairing. In all cases, temperature and humidity play a quieter but powerful role: higher humidity or heat can extend cure times or cause finishes to behave differently. You learn to watch the clock and the surface, not just the product labels.
The question of cost and time is never far when deep scratches are involved. If the area is large, if the scratch penetrates into primer or into structural layers of the fairing, or if you insist on a flawless, factory-match finish, it may be prudent to seek professional help. A body shop can perform color matching, controlled color-saturation tests, and the precise application that only professional tools provide. There is a place for both do-it-yourself repairs and professional services, and understanding the limit of your own tools and skills helps you decide when to call for backup. In the meantime, every repair has an immediate payoff: you regain the protective barrier, you restore the surface’s coherence, and you preserve the motorcycle’s value and aesthetics for the road ahead.
If your repair journey takes you into a specific model’s ecosystem or you want to explore compatible parts and finishes suited to your bike’s visual language, you can review the relevant catalog for your fairing family. For instance, if you’re working with Honda fairings and want to see the available options, you can explore this category: https://ultimatemotorx.net/product-category/honda-fairings/ — a practical resource to gauge compatible components and finishes as you plan touch-ups and aftermarket refinements.
Beyond the mechanics of repair, there are broader principles that help you maintain the repaired surface long after you ride away from the garage. Work in a clean, dust-free environment, and handle the parts with clean gloves to avoid fingerprints and accidental oils. Test any product on a hidden area first to ensure compatibility, especially if the paint is a custom mix or a multi-layer finish. Protect the area from solvents and aggressive cleaners during the cure window, and allow the surface to fully cure before exposure to rain or high humidity. These guardrails help ensure the repair longevity and minimize the risk of new scratches during the early life of the patched panel.
In the cadence of repair, the goal is not a perfect replica of a factory line but a durable, visually coherent finish that can withstand routine maintenance and the rough-and-tumble of riding. Deep scratches that expose underlying material demand this care: you invest in proper preparation, the right fillers, primers, and coatings, and you accept that curing time is part of the process. The outcome is a fairing that looks and feels right when you glance at it in the mirror or in the pit lane before a ride. The result is more than cosmetic repair; it’s a return to the road with confidence in the panel’s resilience, and the knowledge that you’ve treated a vulnerable area with the attention it deserves. If you need a broader reference on scratch repair techniques that apply to plastic and painted surfaces, see this external resource for a wide range of methods: https://www.autogeek.net/how-to-remove-scratches.html
From Gouges to Gloss: The Professional Path to Repairing Deep Scratches on Motorcycle Fairings
When a motorcycle rider looks at a gouge that cuts through the gloss of a fairing, the first impulse is often to reach for a bottle of polish and call it a day. But significant scratches are more than cosmetic blemishes. They can threaten the integrity of the plastic, disturb the aerodynamics of the surface, and create a visible seam that becomes more noticeable with every wash and sun exposure. In many cases, restoring the fairing to a factory-like finish requires professional expertise. The journey from a deep scratch to a seamless, enduring repair is a careful, multi-step process that blends materials science with artistry. It begins with surface preparation and ends with a finish that behaves, in both appearance and durability, like the rest of the bike.
The first stage is cleansing and assessment. A technician starts with thorough cleaning using a degreaser to strip away oils, wax, and any residues that can interfere with adhesion. This step is essential because even a small amount of contamination can cause bonding failures later. The goal is to reveal the true depth and character of the damage: is the scratch limited to the clear coat, or has it penetrated into the plastic or composite base? Has the underlying reinforcement, such as ABS or fiberglass, been compromised? The answers guide every subsequent decision and determine whether a simple filler and repaint will suffice or whether a more extensive rebuild is required.
For scratches that have penetrated the clear coat but have not yet exposed bare material, professionals often rely on targeted filling and careful sanding. A specialized filler, such as a two-part epoxy putty or a dedicated plastic repair compound, is applied to level the surface and create a uniform plane. This is not a mere cosmetic patch; it is a structural step that fills in irregularities and creates a foundation for subsequent layers. After the filler cures, the area is sanded progressively with finer grits—beginning around 120 or 180 and moving through 320 to 600—until the patched region sits flush with the surrounding surface. The sanding is done with a light hand and steady strokes to avoid creating new swirl marks or flat spots. The surface is kept cool and wet during sanding to prevent clogging and heat build-up, which could warp the plastic or soften adjacent paint.
Priming follows the smoothing phase. A primer formulated for plastics or composite materials is applied to ensure optimal adhesion for the topcoat. Primers also help to even out any subtle color differences and to establish a uniform base that accepts color in a predictable manner. Without a proper primer, even the best paint job can peel, craze, or delaminate over time. This step is especially critical when repairing large areas or when the original paint layer has experienced weathering or chalking. The primer must cure fully before any color is laid down, a period that varies with the product and environmental conditions.
Painting is where the repair begins to disappear from sight. Modern motorcycle paint systems use color-matching formulations and controlled environments to guarantee a seamless blend. Technicians apply the topcoat in thin, even layers, often using a spray booth to regulate temperature and humidity. They color-match not only the hue but the finish—matte, satin, or gloss—and take into account the settling of pigments over time. The application is deliberate, with micro-thin coats that build up to the desired opacity and depth. Each layer dries before the next is applied, and technicians watch for runs, sags, or pile-ups that can ruin a panel’s contour. The objective is to achieve a transition that disappears as you move from the repaired area to the adjacent fairing.
Where deeper damage exists, or where color matching across a panel is challenging, a technique known as feathering becomes essential. Feathering is not merely a cosmetic trick; it’s a blend strategy that allows the repaired patch to vanish into the neighboring paint. The edges of the repaired area are softened by carefully tapering the paint into the surrounding finish. When done correctly, the seam is barely detectable, and the light catches the panel in a way that reads as one continuous surface rather than a patch. This is where experience matters most. The technician judges the thickness of each coat, the curvature of the fairing, and the way the light plays across the surface to ensure a natural, durable result.
Beyond color and gloss, the integrity of the underlying material must be addressed. For plastic fairings, impact and abrasion can create micro-cracks or weakened zones that can propagate with vibrations and weather exposure. In some cases, replacing a damaged section becomes the most reliable option, particularly when the structural core has been compromised or when the repair would require an excessive amount of filler to achieve a flush result. When a full section replacement is chosen, the process involves removing the damaged portion and matching the new panel to the bike’s lines. This approach preserves the original geometry, prevents hidden stress points, and often yields a longer-lasting appearance than a patch-and-paint fix.
Material compatibility remains a central concern throughout. The repair materials—filler, primer, paint, and clear coat—must work in harmony with the existing factory plastics and coatings. Incompatibility can lead to problems such as cracking, delamination, or bonding failures under temperature cycling and UV exposure. Reputable shops select materials designed for plastics or composites and verify adhesion with sample tests on hidden areas before committing to a full repair. The color-matching process also extends beyond hue to translucency and depth; the clear coat needs to be calibrated to reflect the same level of gloss and the same micro-surface texture as the rest of the fairing. A high-quality clear topcoat adds depth, resilience, and a protective shield against chips and weathering, ensuring that the repaired area ages consistently with the rest of the bike.
The decision to pursue professional repair is not merely about aesthetics. It also touches on safety and performance. A fairing that fits poorly or has been reinforced in a way that alters aerodynamics can affect handling, heat dissipation, and wind noise. A reputable professional will assess alignment with adjacent panels, consider the potential for flutter at speed, and confirm that fasteners and mounting points retain their original tolerances. In high-end or custom builds, technicians may employ more advanced techniques such as a feather-edge blend across multiple panels or, in extreme cases, the replacement of entire fairing sections to preserve symmetry and structural integrity. The goal is a result that looks right, feels right, and holds up under the stresses of street riding and track use.
For riders contemplating their options, there is value in weighing the costs and timelines of professional repair against the desire to maintain originality. A skilled repair can restore the appearance and resale value while delivering a finish that is durable and consistent, often backed by a warranty from the shop or dealership. This warranty reassures riders who want assurances that the repair will endure, that color fading will not set in prematurely, and that the repaired seam will resist cracking with time. It is also worth noting that professional work tends to offer better long-term adhesion and a more predictable color match, particularly for motorcycles that have weathered sun exposure, road salt, or friction with air streams at highway speeds.
Choosing a shop requires thoughtful consideration. Riders are advised to look for facilities with a clean, controlled environment, proven experience with automotive or motorcycle plastics, and transparent communication about process steps, curing times, and post-repair care. A good shop will outline the steps, discuss aftercare guidelines, and set realistic expectations for color matching and texture. It should also emphasize the importance of ventilation and the careful handling of chemicals, since the work involves solvents, primers, paints, and buffing compounds. The aftercare stage—careful washing, avoidance of harsh cleaners for several days, and a cautious approach to waxing—helps ensure the finish stays pristine as the bike returns to the road.
An important practical note concerns access to reference guides and professional standards. For riders who want to understand the broader landscape of repair practices, manufacturer guides and certification bodies provide insight into best practices, safety considerations, and quality benchmarks. These resources can help a customer evaluate potential repair partners and understand the expectations tied to warranty coverage and service guarantees. While it is possible to attempt at-home remedies for minor scratches, significant damage benefits from the precision and long-term durability offered by professional services. The cost may be higher, but the result is a higher likelihood of a seamless, enduring finish that preserves both the aesthetic and structural integrity of the bike’s most visible panels.
For readers who want a sense of the current market for fairings and related components, it helps to view the broader ecosystem of panels and repairs across brands. A pragmatic option is exploring category pages for fairings that cover a range of models and finishes. This provides a sense of the variety of shapes, materials, and finishes that a professional must match. For example, a rider exploring aftermarket options or OEM-related coverage may find it useful to peruse a dedicated category such as the BMW fairings collection, which illustrates how different models share compatible attachment systems and finishing approaches. This kind of reference underscores the importance of choosing repair methods and materials that respect the original geometry and aesthetic language of the bike. See the BMW fairings category for an idea of the scope of compatible components and finishes: BMW fairings category.
In sum, significant scratches on motorcycle fairings are rarely resolved by quick polish and a prayer. They demand a measured, professional approach that addresses both the visible defect and the unseen realities of plastic, paint, and curvature. The repair path blends careful cleaning, precise filling, targeted sanding, meticulous priming, deliberate color matching, and an intelligent use of blending techniques to fade the repair into the surrounding surface. When done well, the result is more than a cosmetic cure. It is a restoration of form and function, preserving the bike’s line, performance, and personality for miles to come. External resources, including certification and standards bodies, can offer further guidance on best practices, while a qualified professional shop can translate those standards into a finished product that stands up to time, weather, and the ride ahead. For riders seeking additional guidance on standards and training, consider resources from established automotive repair organizations. External reference: https://www.ase.com/.
Safety-First Shield: How to Repair Scratches on Motorcycle Fairings with Confidence and Care

A scratch on a plastic or composite fairing can feel like a small battle scar on a rider’s pride, but the way you approach the repair reveals how well you protect the bike and yourself. The path from a mere surface scuff to a durable, near-perfect finish is not just about materials or technique; it is about choices that emphasize safety, preparation, and patience. The repair process rests on a simple truth: the deeper the damage, the more deliberate the steps must be. The surface scratches that barely touch the gloss demand a light touch, while deeper gouges that threaten the base coat or the underlying plastic call for a more methodical sequence of cleaning, conditioning, priming, filling, color matching, and finishing. Across all levels, safety and best practices form the backbone of a repair that not only looks right but lasts under the sun, wind, and the occasional spill of fuel and thinners.
Begin with safety as your starting line. Ventilation is not optional when you introduce any solvent, primer, or paint into the work area. If you are indoors, open doors and windows, or better yet, work in a spray booth or an open, well-ventilated outdoor space. The fumes from paints and thinners can overwhelm quickly. Put on a respirator mask with organic vapor cartridges, don chemical-resistant gloves, and don protective goggles. Your skin, eyes, and lungs deserve the same level of protection you give your bike’s finish. Fire safety cannot be forgotten either; keep ignition sources away from any solvent-soaked rags and spray cans. A small risk becomes a bigger hazard in a garage if you disregard basic precautions. The discipline you apply to safety will echo in the quality of the repair, because a controlled environment reduces the chance of dust, runs, or improper adhesion sabotaging your work.
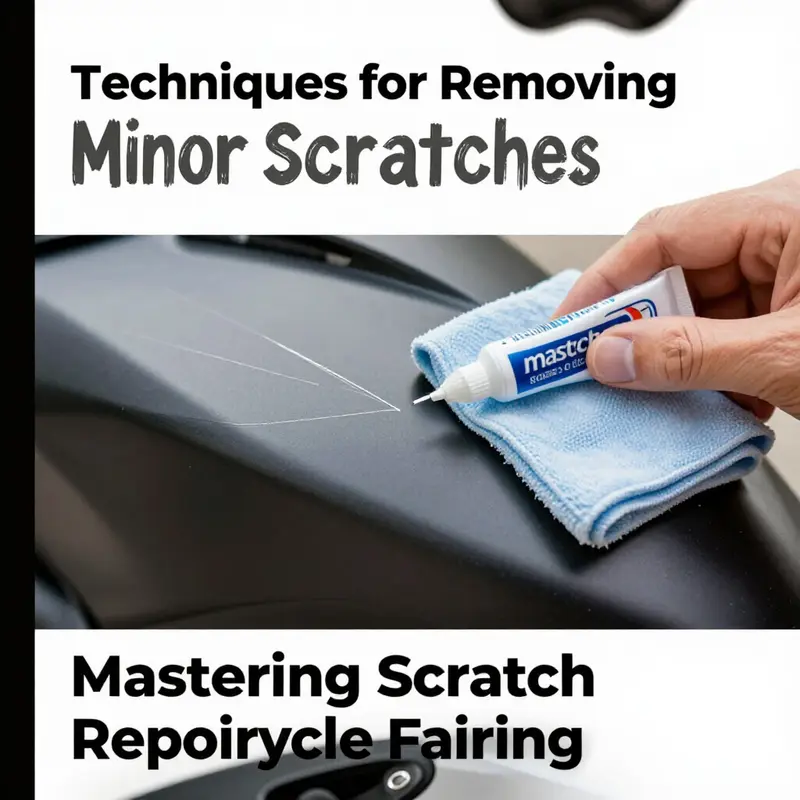
Preparation sets the stage for everything that follows. Before you even think about touching the paint, you must clean the area thoroughly. That means removing wax, oils, grease, and dust with a dedicated cleaner or isopropyl alcohol. Any leftover contaminant acts like a barrier to primer, filler, and paint, causing poor adhesion or uneven results. Scratches vary in depth, and that determination guides the repair path. If the scratch is surface-level, not penetrating to the base coat, you can opt for polishing compounds or even toothpaste as a mild abrasive polish. But for anything deeper, you will need to consider sanding, fillers, and color-matching paint. When you assess the damage, picture the layers of the fairing: clear coat, base color, primer, and the plastic or fiberglass beneath. The more layers you have to disrupt, the gentler your approach must be in the early stages.
As you figure out the correct route, the tools and materials come into focus. For surface scratches, a dedicated automotive polishing compound or high-quality wax offers a straightforward path to restoring gloss and reducing visibility. The key is to work slowly with a microfiber cloth, using light, overlapping circular motions, and to stop once you see the area blend with the surrounding finish. If you want to push the finish a notch further, a light wax or polish buff, followed by a clean wipe, can help seal the correction and add minor protection. When deeper scratching is evident but the underlying material is still protected, you shift to wet sanding with progressively finer grits: starting around 800–1000 grit, moving through 1500–2000 grit, and always keeping the patch damp to prevent clogging and overheating. Wet-sanding with the grain direction helps minimize swirl marks, and using a flat block to steady the paper ensures uniform pressure across the surface. After the sanding, a polishing compound remains essential to restore the gloss and to help the repaired area fade into the surrounding panel. The narrative of patience here matters; rushing sanding or skipping grits can lead to uneven texture or visible ring marks that defeat the purpose of the repair.
If the scratch is beneath the surface—exposing primer, or even worse, the plastic or fiberglass under the color layer—the repair path changes again. This is where you must be systematic and avoid improvisation. Start with a thorough cleaning to remove any debris from the recess. Isopropyl alcohol or a plastic-safe cleaner will do the job. Then, for plastic fairings, you would typically apply a two-part epoxy filler or a plastic repair putty to level the depression. Let the filler cure fully before sanding it flush with the rest of the panel. The next steps involve careful sanding with progressively finer grits once again, ensuring the ride’s lines are preserved and the repaired area sits uniformly with the adjacent surface. Paint matching becomes critical here: you need a color-matched touch-up pen or spray designed for plastics, and you must follow the manufacturer’s drying times and ventilation needs precisely. Thin, even coats are the rule, not the exception. It is better to apply several light layers than one heavy coat that risks runs or orange-peel texture. Between coats, allow proper drying time and avoid exposing the finish to moisture or solvents. Finally, apply a clear coat to seal the paint and restore depth and gloss. The sequence—clean, fill, sand, paint, clear—maps out a reliable path from damaged to durable.
The decision to tackle repairs yourself versus seeking a professional is anchored in depth and complexity. Minor surface scratches can be handled confidently by a DIY approach, with the caveat that you test any product on a hidden area first to ensure compatibility and to avoid undesirable reactions with the plastic or paint. Deeper scratches that cut through the clear coat or expose primer require more careful work. When you encounter damage that is structural—any gouge that weakens the panel or alters the fit of the fairing—you should consider professional help. The tools, experience, and refinishing techniques at a shop can yield a seamless blend that’s difficult to replicate in a home setting. Yet for a rider who enjoys hands-on maintenance, mastering the safe, methodical approach described here can yield satisfying results and a fairing that remains protected for miles to come.
Across all steps, the finishing touches matter as much as the repair itself. After curing, a final polish blends the repaired area with the rest of the fairing and helps restore the surface’s luster. The final protective layer—often a clear coat—should be applied in light, even coats, with attention to cure times. Do not rush this phase; allow the product to cure fully according to the manufacturer’s instructions before exposure to rain or washing. And as you plan your timing, remember the environmental considerations: avoid washing or exposing the repaired area to water and chemicals for at least 24–48 hours after the final coat, to prevent solvent attack and ensure proper adhesion.
The broader strategy here is about care, not hurry. If you encounter a scenario where the scratch is extensive or you’re unsure of the repair path, stepping back and seeking guidance is prudent. Consulting a professional detailer or body shop can save you time and prevent a repair that looks imperfect or fails early. The most resilient repairs come from a careful balance of preparation, technique, and patience, applied in a controlled environment that prioritizes safety as much as aesthetics. When you treat every step as an opportunity to protect both your bike and yourself, the repair becomes not just a fix but a safeguard for the ride ahead. If you need to consider replacement parts in the future, you can explore compatible options such as Honda fairings for CBR to ensure the new panels match color and contour.
For a deeper dive into the specifics of the process and a more granular, step-by-step walkthrough, there is a comprehensive external resource that outlines the full repair workflow from cleaning through finishing. This guide emphasizes ventilation, PPE, surface preparation, and the careful layering of primer, filler, paint, and clear coat, with emphasis on safety at every stage. It is a reliable reference if you want to augment this chapter with additional checks and tips. Motorcycle.com guide.
Final thoughts
Understanding how to effectively remove scratches from motorcycle fairings is crucial for maintaining both their aesthetic appeal and structural integrity. Each technique discussed—ranging from simple polishing methods to professional repair processes—offers valuable insights tailored for motorcycle service professionals. Ensuring a well-informed approach to scratch repair not only enhances customer satisfaction but also solidifies long-term business relationships. As motorcycle service providers, investing time in mastering these repair techniques is essential for offering comprehensive care to every motorcycle on your lot.