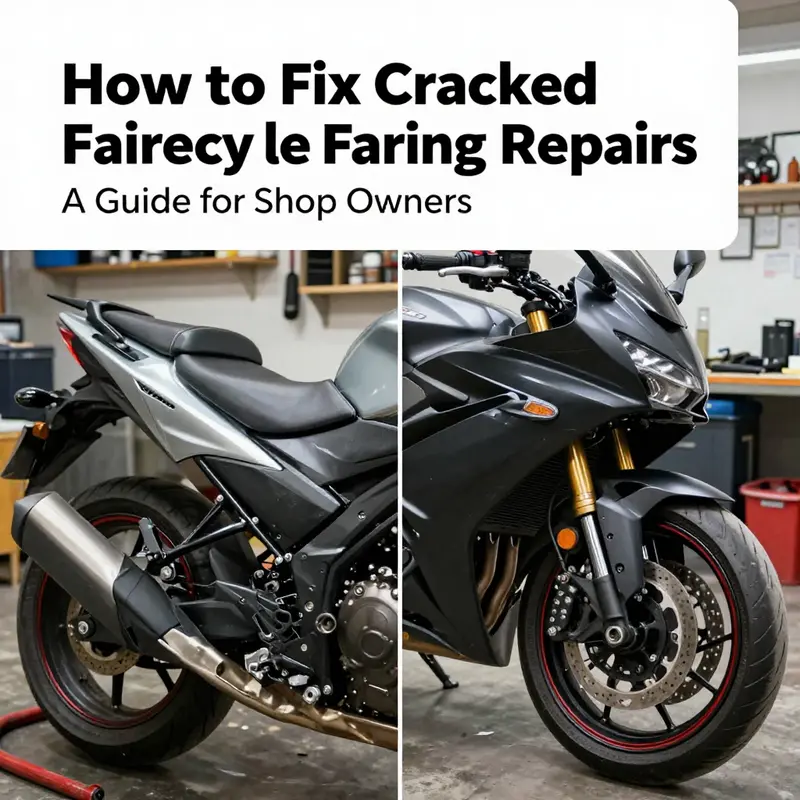
As riders value well-maintained rides, cracked motorcycle fairings can undermine safety and customer confidence. For shop owners, understanding the repair process—from assessment to final finishing—helps deliver durable, professional results. This guide outlines practical techniques for repairing both small and larger cracks, the materials and tools you’ll need, and key considerations when choosing DIY versus professional repairs. Each chapter builds on the last to equip you with a repeatable workflow that emphasizes safety and quality.
Mastering the Art of Repairing Small Cracks in Motorcycle Fairings
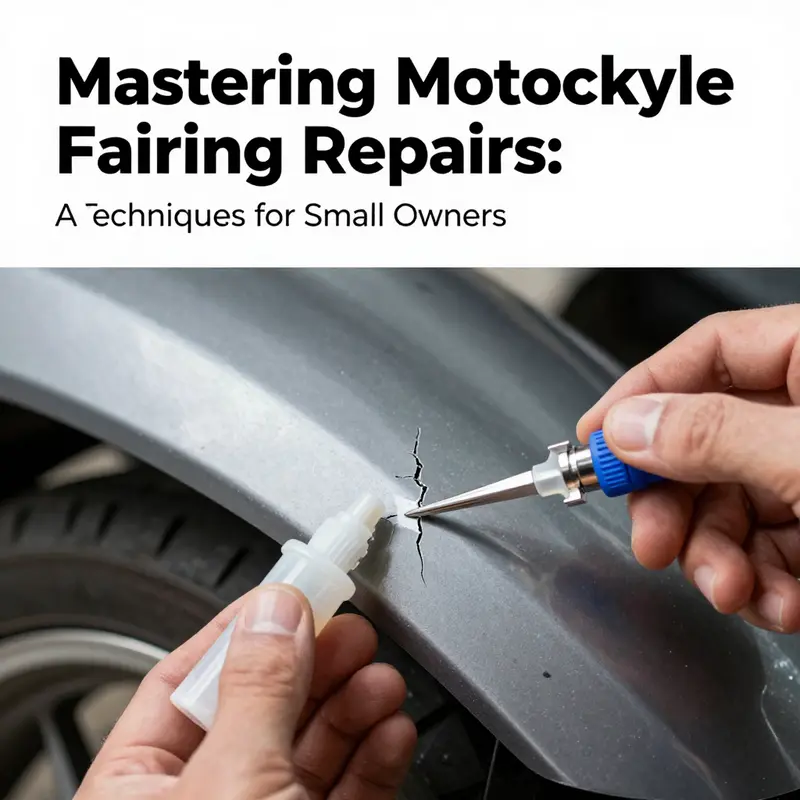
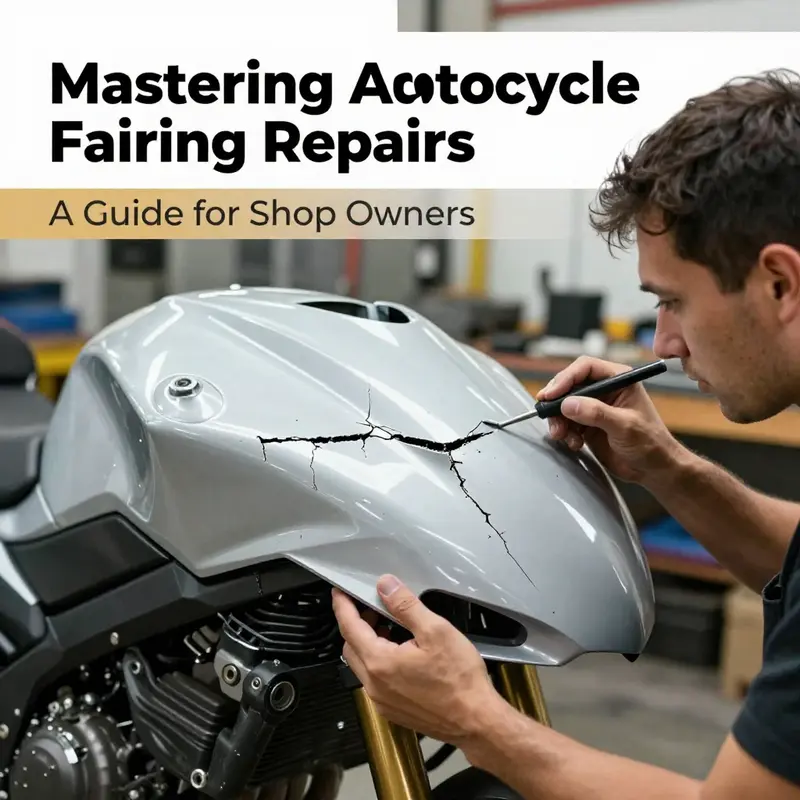
Repairing small cracks in motorcycle fairings is a nuanced process that blends technical skill with patience to restore both the integrity and appearance of your bike’s bodywork. These minor flaws, while seemingly insignificant, can compromise the strength and aesthetics of your fairings if left unattended. Understanding the most effective repair techniques, tailored to the specific fairing materials commonly found on motorcycles, enables you to achieve durable, high-quality results without costly replacements.
Motorcycle fairings are primarily crafted from plastics such as ABS or polycarbonate, and this material composition dictates the optimal repair approach. When faced with a small crack—usually defined as a fissure less than a few inches in length and not fully separating the plastic—you have options that maintain structural integrity while preserving the fairing’s original finish. Among these, plastic welding stands out as a premier solution, delivering a bond that is both strong and inconspicuous when executed properly.
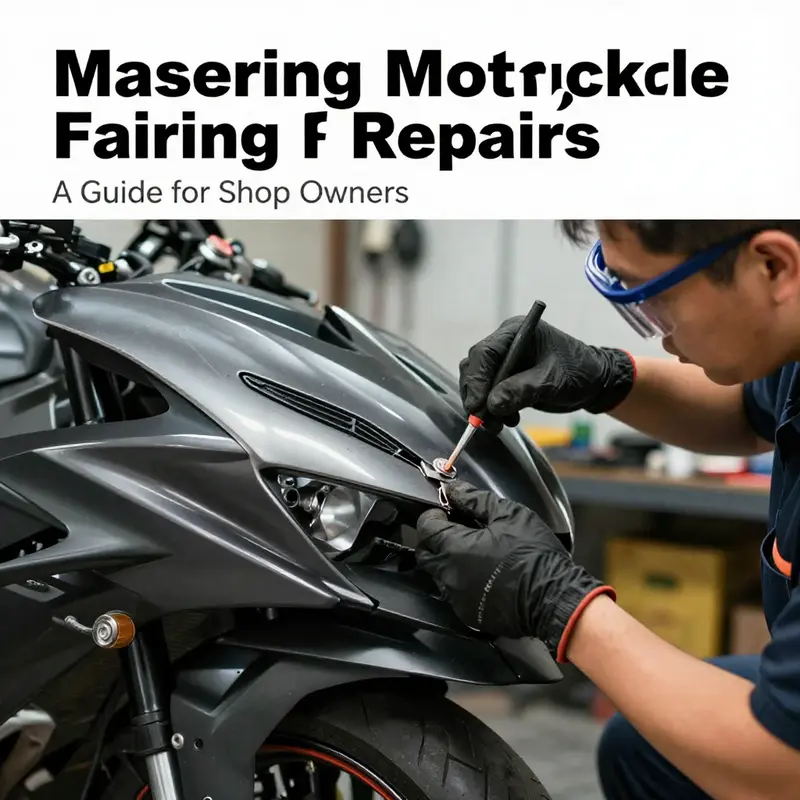
Plastic welding involves a process of fusing the broken material by melting compatible plastic rods into the cracked area. Before embarking on this repair, it’s essential to remove the fairing from the motorcycle. Not only does this facilitate access and precision, but it also prevents heat damage to surrounding components during welding. Once detached, begin with a meticulous cleaning of the cracked surface to remove dirt, oil, and residues, typically using isopropyl alcohol or a plastic-safe cleaner. This ensures a pristine bonding surface.
Next, abrade the area around the crack using fine-grit sandpaper. This step roughens the surface subtly, improving adhesion when applying the plastic rod. The welding kit should include rods made from the same or compatible plastic as your fairing—commonly ABS or polycarbonate—to ensure a seamless blend once cured. Heating the rod carefully with the welding tool, feed the molten plastic into the crack, allowing it to fill gaps evenly. This process effectively re-bonds the cracked halves into a unified, strong surface.
Patience is vital here; rushing can introduce weak spots or uneven repairs. Once the molten plastic cools and hardens, gently sand the repaired zone, starting with coarser grits and progressing to finer ones until the patch blends smoothly with the surrounding fairing. A final touch involves applying color-matched paint or plastic polish to restore the original look, masking any visible repair lines. When done thoughtfully, this method restores not just appearance but critical structural support to the fairing.
For riders who prefer a less complex or temporary fix, high-strength epoxy or specialized plastic adhesives offer a viable alternative for small, non-load-bearing cracks. These adhesives adhere well when the surface is thoroughly cleaned and dried beforehand. The cracked edges should be aligned precisely and held together while the adhesive cures fully, often requiring several hours to reach maximum strength.
It’s crucial to note that while epoxy repairs can prevent moisture ingress and slow further damage, they don’t match the resilience of plastic welding, especially over time and under the stresses of vibration and temperature shifts common in riding conditions. Additionally, avoid using cyanoacrylate glues (commonly known as superglue or 502 glue) for fairing repairs. Although convenient, they create brittle bonds that fail quickly when exposed to the dynamic forces of motorcycle use.
For those seeking detailed visual guidance and expert tips on the plastic welding technique, the Motor Cycle News tutorial offers an authoritative step-by-step approach that highlights common pitfalls and best practices. This resource complements the hands-on effort by demystifying the plastic welding process and emphasizing the importance of preparation and finishing.
When considering replacement parts after repairs, it is advisable to source fairings that match your motorcycle’s make and model. For example, fairings designed for popular brands like Honda or Kawasaki are available with precise compatibility, ensuring you maintain both function and style if the damage progresses beyond repair. Should you decide that replacement is necessary due to the severity of cracks or stress fractures, selecting quality aftermarket parts can enhance the aesthetics and performance of your motorcycle.
Overall, addressing small cracks promptly through careful cleaning, plastic welding, or adhesive bonding not only preserves your bike’s value but also guarantees safer riding conditions. A well-executed repair negates the risk of cracks propagating, which can lead to more costly interventions or compromise fairing stability at speed.
For riders equipped to perform their own maintenance, investing time in mastering plastic welding techniques pays dividends in durability and satisfaction. For larger or critical structural components, however, professional assessment remains essential to ensure safety standards are met.
For example, if you are a rider with a Honda model, exploring the range of Honda fairings can provide you with suitable replacement panels that align perfectly with your repair or upgrade needs.
To dive deeper into the specifics of plastic welding and gain confidence in your repair skills, the detailed tutorial from Motor Cycle News is highly recommended: How to Repair a Motorcycle Fairing Using a Plastic Welder – MCN.
Ultimately, mastering these techniques empowers riders to maintain the sleek, aerodynamic profile of their motorcycles, ensuring that small cracks do not evolve into bigger problems. Whether you employ precise plastic welding or careful adhesive repair, a thoughtful approach combined with quality materials and tools offers a balance of aesthetics, strength, and safety essential for the road ahead.
null
null
Selecting the Right Materials and Tools to Repair Cracked Motorcycle Fairings
Getting the repair right starts with the right choices. A cracked fairing is more than an eyesore: it affects aerodynamics, rider safety, and the longevity of surrounding components. Before you mix adhesives or reach for sandpaper, taking time to identify the fairing material and assemble the correct tools will save hours and prevent failed repairs. The common fairing materials—thermoplastic blends, polycarbonate, and composite laminates—each respond differently to heat, solvents, and adhesives. Match your approach to the material and to the size of the crack, and you’ll end up with a repair that holds up under vibration, weather, and speed.
First, confirm what you are working on. Most mass-market motorcycles use a high-impact thermoplastic for bodywork. This material sands well and bonds with specific plastic cements or two-part adhesives. Some sport and performance machines use polycarbonate for its toughness and flexibility; it resists shattering but can suffer stress cracks if exposed to the wrong solvent. High-end bikes or race parts may be carbon fiber or glass-fiber laminates. These materials require epoxies and often fabric to rebuild structure. Knowing the substrate eliminates guesswork and narrows your tool list.
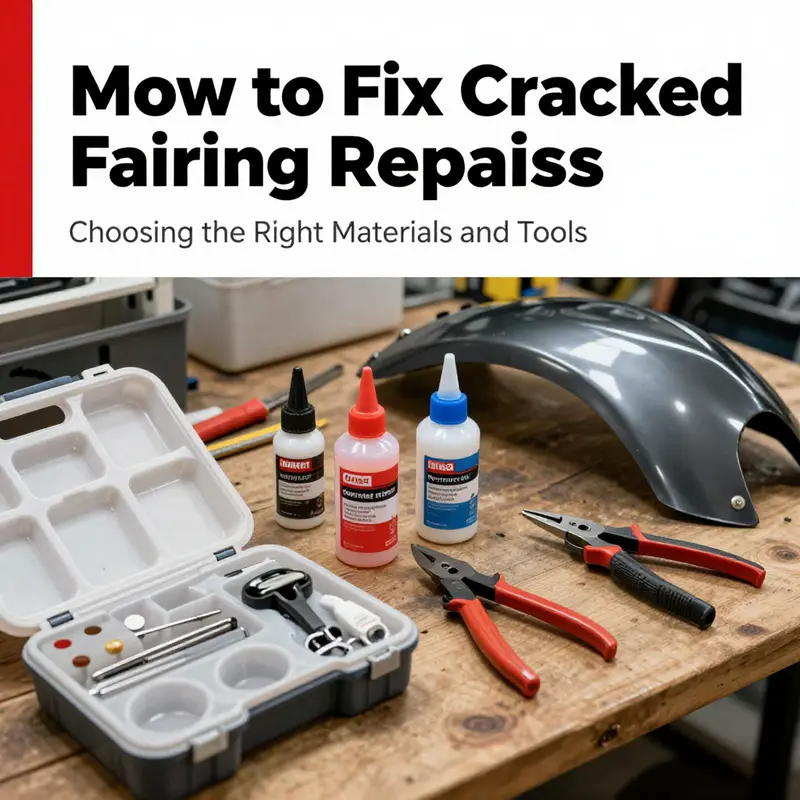
Assemble a basic toolkit before you begin. Cleanliness and control are more important than exotic gadgets. Start with cleaning supplies: a degreasing wipe or isopropyl alcohol, lint-free cloths, and a soft-bristle brush to remove trapped grit. Adhesives require precise surface preparation, so a supply of progressively finer sandpapers—80, 120, 220, 400 and 800 grits—gives you the ability to remove damaged edges, feather transitions, and finish the area for filler and polish. Mixing sticks and small disposable cups are essential when using two-part systems; inaccurate ratios weaken bonds. Masking tape protects surrounding paint and creates clean repair lines. Clamps, wood blocks, and elastic straps will hold pieces in place during cure. A heat gun is helpful for gentle reshaping of thermoplastics, but use it carefully: too much heat warps panels, too little won’t relax stresses. Protective gear—nitrile gloves, eye protection, and a respirator if you are sanding resin or working in a poorly ventilated area—must be non-negotiable.
Choose adhesives and reinforcement materials with the substrate in mind. For thermoplastic fairings, select a plastic-specific bonding system designed to chemically weld or polymer-bond to that family of plastics. These materials cure into a durable, slightly flexible joint that tolerates vibration. Avoid quick-bond cyanoacrylates for structural joints; they can become brittle and fail under repeated stress. Polycarbonate benefits from flexible, impact-resistant adhesives formulated for that material. They prevent stress concentration and resist crazing. For composite shells, use a marine-grade or structural epoxy and pair it with matching fabric—woven carbon or glass—as reinforcement. Fabric provides tensile strength across the crack and recreates the original laminate’s structural behavior.
Beyond adhesives, fillers and finishers determine the aesthetic outcome. Once the structural bond is secure, gaps and low spots can be filled with a compatible plastic filler or epoxy putty. These products sand smoothly without flaking. When you sand the repair, move from coarser to finer grits and blend the edge of the new material into the surrounding surface. A final polish or plastic compound restores sheen and diminishes sanding haze. If you expect a perfect paint match, a primer designed for plastics and a professional paint job will be required. Remember: cosmetic perfection is separate from safety. Address structure first, appearance second.
Environmental control is often overlooked. Adhesives and fillers cure according to temperature and humidity. Most systems work best in a warm, dry workspace. Follow manufacturer curing guidelines: accelerated cures may be possible with heat, but rushing can trap solvents or create internal stresses. If you must work outdoors, avoid windy, cold, or damp days. A small, inexpensive heater and a clean tarp can create a workable microclimate in a garage.
Preparation techniques make or break the bond. Clean the area thoroughly to remove oils and waxes, then sand around the crack to a uniform, roughened track that encourages mechanical adhesion. For long cracks, drill tiny stop-holes at each end to prevent propagation during repair. Where pieces are missing, create a backing support—cardboard, thin metal, or peel ply—so adhesive or resin has something to bond to while you clamp. When joining two edges, fit them as tightly as possible; an even seam requires less filler and yields a stronger repair. Apply adhesive in thin layers when possible to avoid excessive squeeze-out; thick beads take longer to cure and may shrink.
Clamping and cure time deserve attention. The quickest repairs use the right clamping pressure and a stable fixture to prevent movement while the bond cures. Use padded clamps to avoid damaging painted surfaces. Check joint alignment before the adhesive sets; small misalignments compound over large panels. Respect the full cure time—pulling clamps early introduces micro-movements that weaken the joint. After initial cure, apply any reinforcement layers: a thin patch of fabric for composites, or a bridged strip of compatible plastic on the underside for thermoplastics. These reinforcements handle bending and torsion that occur while riding.
Finishing is twofold: smoothing and protecting. After structural repairs and reinforcements cure, trim excess material and sand the area smooth. Feather the edges into the surrounding surface to avoid a visible ridge. Use progressively finer paper to remove scratch patterns, and finish with a plastic-compatible polishing compound. If painting, scuff the area slightly, apply a plastic primer, then block-sand between coats for the best adhesion and finish. If you prefer a minimal repair that keeps the original paint, a clear polishing pass can make a well-executed repair nearly invisible.
Safety and inspection follow any repair. Once the fairing is back on the bike, double-check fastener points, brackets, and clearances. Vibrations and aerodynamic forces at speed can reveal weak spots. Before hitting the road, do a low-speed test run and inspect the repair for flexing, cracking, or loosening. If the front fairing or anything near suspension or lights was repaired, prioritize a conservative test and reassess. Some repairs are perfectly adequate for street use; others, especially on high-stress components, require professional reassessment.
If a repair exceeds your tools or confidence level, consider replacement. A new or aftermarket fairing restores original strength and fit, and it may be more cost-effective than a complex repair that still needs finishing and fitting. When shopping for replacements, search by model and year to ensure correct fitment; many vendors list fairings by make and model, making selection straightforward. For example, you can find a range of replacement options for specific sportbike models linked through fairings-for-ninja.
Choosing the right materials and tools is not glamorous, but it is essential. Match adhesives to substrate, prepare surfaces carefully, allow proper cure, reinforce where needed, and finish with patience. A well-executed repair will look good, last through seasons of riding, and keep you safer on the road. For detailed technical guidance on adhesives and polymer bonding, refer to this comprehensive manufacturer resource: https://www.loctite.com/en-us/plastics-bonding-system
null
null
Safety First: A Thorough Roadmap to Fixing Cracked Motorcycle Fairings
Cracked motorcycle fairings are more than a cosmetic issue. They can alter aerodynamics, compromise protection from road debris, and affect how the bike handles at speed. When a crack appears, you want a repair that holds up under vibration, heat, and the stresses of riding, not a quick patch that might fail next week. The path you choose hinges on the material—plastic, fiberglass, or polycarbonate—and on how deep and where the crack runs. For a small surface crack in a plastic panel, repair at home is often feasible with patient prep and proper materials. But near mounting points, along edges, or when the crack extends into structural ribs, the risk of a weak repair grows. In those cases, replacement or professional repair should be your default. Treating a cracked fairing as a safety issue rather than a mere inconvenience keeps you, your bike, and others on the road safer. With that frame of mind, you can move from assessment to action in a way that preserves both performance and appearance, without inviting a surprise failure on the highway.
Assessing the damage with a clear eye is the essential first step. If the crack is visible in your line of sight or measures more than about 2–3 cm in length, the safer choice is often replacement, especially if it disrupts the front panel or windscreen area. Cracks that remain superficial, confined to a thin surface layer, or that do not compromise mounting points may be repairable. The key is whether the panel still bears load and resists flexing under wind pressure. If you can press the crack gently and observe only a slight deflection, a controlled repair can restore rigidity—provided the surrounding material is sound and the crack has not created hidden delamination. If there is any doubt about the fairing’s ability to hold together under the stresses of a real ride, it’s prudent to err on the side of replacement or professional evaluation. This conservative approach pays dividends in safety and peace of mind when you’re rolling down the road at highway speeds.
When you decide to repair, gathering the right tools and materials becomes the next safeguard. Use only materials designed for automotive or motorcycle plastics. Specialized plastic repair kits that include an epoxy resin or a UV-curing resin deliver durable adhesion when used correctly. For the finishing touch, have sanding paper in a range from roughly 800 to 1500 grit on hand to create a mechanical key for the adhesive and to smooth the surface once it cures. Masking tape is invaluable for protecting nearby areas from resin squeeze-out and dust during sanding. Safety gear—gloves, eye protection, and a mask to guard against fumes—should never be skipped. Importantly, avoid general-purpose glues that are not engineered for plastic, heat exposure, or vibrations. They can become brittle or peel under sun and engine heat, creating a hazard instead of a fix.
If you’re repairing a minor crack, the process can be straightforward and effective. Begin by thoroughly cleaning the area with isopropyl alcohol to remove oil, wax, and dirt that would otherwise prevent good adhesion. Lightly roughen the crack and its surroundings with progressively finer sandpaper so the adhesive can bite into the surface. Mix a two-part epoxy resin or apply a UV-curing resin exactly as the manufacturer instructs, then drive the resin into the crack with a clean applicator to minimize air pockets. Use a plastic spreader or a straight edge to level the material so the repair sits flush with the surrounding contour. Allow the full curing window, which is often 24 to 48 hours depending on the product and ambient conditions. After curing, re-sand with a fine grit to feather the repaired area into the original surface, then polish with a plastic-safe product to restore clarity and gloss. If the color or finish needs to be matched, apply primer and a light, even topcoat in thin layers, allowing ample cure time between coats.
Material matching matters just as much as the technique. If your fairing is ABS, polycarbonate, or a fiberglass-reinforced plastic, try to select a repair material that mirrors the original’s flexibility and heat resistance. A mismatch can precipitate a new crack along the same line or a finish that dulls in sunlight. The aim is not only to seal the crack but to preserve the panel’s ability to flex slightly with temperature changes and road vibration. After the repair and any paint layer have fully cured, inspect for warping or a ridge where the repair meets the surrounding surface. A careful, feathered transition will reduce the chance of new scratches and keep the finish more uniform over time.
There are times when a DIY fix isn’t advisable. Cracks that cut through more than half of the panel’s thickness, those that occur near mounting holes or joints, cracks in windshields or front fairing that affect visibility, and any signs of delamination argue for replacement or professional intervention. Riding with compromised aerodynamics or structural integrity isn’t just reckless; it can alter handling and stability in ways that are hard to predict. In many cases, a professional repair offers tangible benefits: advanced resins, controlled temperature environments, precise color matching, and even structural testing to confirm that the patch or insert will perform under real-world stresses. For a front fairing or other highly stressed components, consulting a certified motorcycle body shop or dealership is a prudent investment in safety and reliability.
If you choose to pursue a DIY path, maintain a mindset of restoration rather than temporary patching. The objective is to rebuild continuity across the crack so the panel acts as a single, solid piece when exposed to air flow and vibration. After completing the repair, reassemble the fairing only when you are confident that the repaired area sits flush and there are no sharp edges or protruding irregularities. Check each mounting point for security, as the entire fairing relies on those fasteners to stay aligned and stable during operation. During a cautious test ride in a safe area, listen for new rattles or any movement that suggests the repair is not holding. If you detect a shift or if the crack reappears, stop and reassess rather than pushing your luck. The bike’s performance and the rider’s safety are the priority, and saving a few minutes now should never come at the expense of long-term reliability.
Sourcing the right replacement parts is a practical consideration that deserves attention as you evaluate repair versus replacement. For model-specific options, the Honda fairings category is a useful starting point if your bike shares common mounting geometry with popular CBR, VFR, or VTR models. This category can help you locate panels that fit precisely, reducing the risk of misalignment and the need for additional modifications. See the Honda fairings category here: Honda fairings category.
As you conclude the repair sequence, performing a rigorous safety check is essential. Re-sand the repaired area lightly to ensure a smooth transition into the surrounding paint. Refinish with a clear coat or paint as required to protect the repair from UV exposure and abrasion. Inspect for gaps, warping, or any signs of moisture trapped within the resin, which could indicate incomplete curing. Confirm the fairing aligns with adjacent bodywork and that mounting hardware remains secure without play. Finally, undertake a slow, controlled ride in a safe environment to observe how the repaired surface behaves under real-world conditions. If anything feels off—unusual movement, new cracks, or odd noises—pull over, reassess, and if needed, transition to replacement. Safety isn’t a one-and-done step; it’s a continuous check as the bike returns to service.
For broader context on safety-focused repair practices, external resources provide useful perspectives on materials, curing, and long-term durability. A detailed external reference that discusses repair safety and materials can be found here: Cycle World repair guide. This external guide reinforces principles that transfer well to fairings and other plastic components, offering additional safeguards as you evaluate when to repair and when to replace. With thoughtful assessment, proper materials, careful execution, and a realistic appraisal of the panel’s role in aerodynamics and rider protection, you can keep your bike safe, stylish, and road-ready even after a crack appears.
Final thoughts
Fixing cracked motorcycle fairings is not just about aesthetics; it significantly impacts safety and performance. By adopting a structured repair process, stocking the right materials, and understanding when to DIY versus involve a professional, your shop can consistently deliver durable, high-quality results that build customer trust and loyalty.