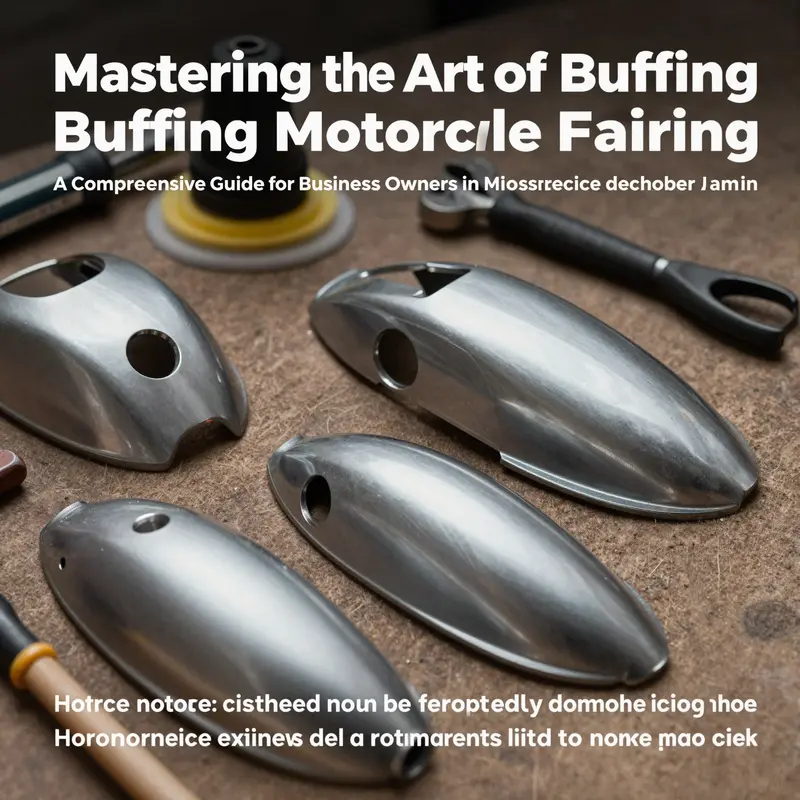
Buffing motorcycle fairings is an essential skill for any business owner involved in motorcycle maintenance or restoration. Not only does it enhance the aesthetic appeal of the vehicle, but it also protects the plastic surfaces from damage. Understanding how to properly buff fairings ensures customers receive top-notch service, increasing satisfaction and loyalty. This guide covers the vital preparation steps, the intricate buffing process, and important safety and maintenance considerations, enabling business owners to deliver exceptional results consistently.
Foundation of Gloss: Thorough Preparation Before Buffing Motorcycle Fairings

The glossy, showroom-worthy finish that makes a bike look as fresh as the day it rolled off the showroom floor begins well before a single swirl of polish touches the surface. Buffing is not a battle against rough plastic alone; it is a disciplined conversation with the fairing itself. The material is delicate, often a high‑end ABS or polycarbonate blend, and the wrong move can melt, haze, or micro-scratch the surface into a final, dull look. The path to a smooth, mirror-like gloss starts with meticulous preparation. It is the quiet, unglamorous work that determines whether the buffing will be kind to the plastic rather than harsh to it. When the preparation is thorough, the subsequent polishing steps proceed with less resistance, less heat buildup, and a far lower risk of introducing new defects. Every clean edge of the fairing becomes a clean canvas, every corner a well‑lit opportunity to assess what lies beneath the grime and the glaze of time, and every tool touch becomes a careful negotiation with the plastic’s integrity. In this light, preparation is the foundation; it carries the potential to transform a tired, scratched shell into a vibrant, durable shield for the bike’s face and a statement of personal care for the rider who commands it.
Begin with cleanliness, because dirt is not merely unsightly. Road grime, oil, wax residues, and even minor dust can behave like sandpaper once the buffing begins. A fairing that is truly clean provides a uniform starting point, allowing the buffing compound to do its job instead of fighting embedded grit. Use a dedicated plastic cleaner or a mild soap solution and a soft sponge or microfiber cloth. After washing, rinse thoroughly to remove any remaining soap film that could leave a dull film behind. Finally, dry with a lint-free towel. The absence of moisture seals a final layer of assurance: when you start to buff, you are not grinding grit into the plastic, you are guiding shine onto its surface. If contaminants linger, the pad or paper will pick them up and they will carve tiny scratches or hazing into the finish. When you are unsure, err on the side of extra cleaning rather than cutting clips and corners to finish a job that looks good in the shop but poor in the sunlight.
With the surface clean, the next task is to inspect for damage. Scratches, chips, or cracks are not always negotiable through polishing alone. A deep scratch or a hidden crack may require repair work before buffing begins; otherwise, you risk trapping the damage under a smooth layer, which can quickly reappear as the repair settles or the sun changes angle. Lighting matters here. A bright, even light reveals the true depth of any imperfection, and it helps you decide whether the defect can be minimized by smoothing, or if it needs more substantial work such as filler, primer, or professional repair. Minor flaws can benefit from buffing because the process itself can soften them and bring up a more uniform appearance. Yet deep gouges create a risk: polishing may move the defect from visible to less visible, but it will still be there, possibly showing up later as the plastic expands and contracts with temperature changes. When in doubt, treat the decision as twofold: if the damage compromises structural integrity or alignment, seek a repair before buffing; if the damage is cosmetic and shallow, proceed with caution, knowing you may need to revisit the issue after polishing to preserve the integrity of the finish.
Masking is the unsung hero of the preparation phase. The relevant idea is to protect everything you do not intend to buff while allowing the buffing to meet the targeted surface in a controlled, clean way. Use painter’s tape and plastic sheeting to seal off headlights, taillights, mirrors, chrome trim, or any adjacent panels that could be exposed to the polishing compound or the wheel’s heat. This barrier is not simply about keeping paint perfect; it is about preventing heat and friction from transferring to areas that would not benefit from buffing, such as paint-adjacent plastics or softer plastics that can deform under pressure. The goal is to create a boundary that makes the process forgiving: you can approach the fairing confidently, knowing that a stray compound will not mar something you did not intend to treat. The masking step may seem tedious, but it is the practical insurance policy that protects the bike’s broader aesthetic and structural components while you refine the specific panel under attention.
Having cleaned, assessed, and shielded the work area, gather the right tools and materials. A well-stocked preparation kit is not a luxury; it is a prerequisite for consistent results. You will need a dual‑action (DA) or random‑orbit polisher, which, by moving in a wider, irregular pattern, minimizes the risk of swirls while delivering even heat distribution. The pad choice is as important as the compound choice: a soft foam pad for light polishing and a slightly coarser pad for gentle leveling, matched with a polishing compound or rubbing compound formulated for plastics rather than metals or paints. Sandpaper may come into play if you discover surface scratches that require leveling; the general progression tends to start with 800 grit for deeper scratches, then move to 1500 and finish at 2000 to prepare a smooth stage for polishing. For wet sanding, a damp, clean water rinse between grits helps prevent clogging and heat buildup, preserving the material’s integrity. A microfiber cloth for frequent wipe-downs, a clean spray bottle for misting, and a dedicated bucket of water for wet sanding are all part of the toolkit. A bright, static-free workspace with good ventilation is the backdrop in which this equipment can operate safely and effectively. When you have the tools lined up, you are not merely ready to buff; you are prepared to respond to the surface as it reveals its needs in real time.
A point of practical discipline is to keep your environment clean and your mind focused. Grit can ride on a dirty pad, and it will scratch the surface if pressed into the material at a moment of vulnerability. Regularly inspect and clean your pads, rinsing and drying them to avoid grit buildup that can become a second abrasive. When you pause to wipe the area and check your progress, you gain a clearer view of the surface before continuing. A small learning curve appears here: you are not racing toward a perfect finish; you are listening to the surface and letting the surface tell you when it’s ready for the next step. The discipline of checking progress—taking time to wipe the area and assess the reflection and uniformity—prevents the tuck-and-roll of hurried, inconsistent pressure. A glossy result emerges from many small, careful passes rather than a few aggressive ones.
The sequence of steps in preparation can feel methodical, almost ceremonial. And yet every decision you make—how you wash, how you inspect, how you mask, and how you select your tools—builds toward a smoother, more predictable buffing process. For the work to be meaningful, the preparation must be thorough, not cursory. Each decision has a purpose: a cleaner surface accepting polish; a documented assessment guiding whether repair is necessary; a mask that keeps the finish clean and free from unintended contact; and a set of tools that distributes effort evenly and safely across the surface. When you proceed in this manner, the actual buffing step becomes less of a gamble and more of a controlled refinement, like polishing a gemstone till every facet shines in natural daylight.
If the project involves specific makes or models, like Honda fairings, you can explore parts and compatible panels that may require touch-up or customization in the future. The Honda fairings collection offers a reference point for compatible shapes and features, helping align your preparation with the intended outcome and ensuring you know what you are protecting as you work. This awareness reinforces the idea that preparation is not a generic ritual; it is a tailored approach that respects the unique geometry and material makeup of each fairing. For readers who want to explore the available options, the linked collection provides a practical reference without interrupting the flow of the process described here. By approaching each panel with this mindset, you ensure consistency across the entire bike, so the final result feels cohesive and deliberate rather than piecemeal or improvised.
With the groundwork in place, you stand at the dividing line between preparation and execution. The fairing is clean, intact, and shielded where necessary. You have your tools organized, your safety gear at the ready, and a plan that respects the plastic’s delicate nature. The next phase—careful removal of scratches, even sheen, and a lasting protective gloss—will unfold with confidence because the surface has already told you its thresholds and needs. The work you did at this stage does not vanish once you begin buffing; it continues to shape your approach by keeping the finish uniform and the process predictable. In a sense, preparation becomes the silent partner of buffing—a partner that reduces risk, increases control, and elevates the final appearance to something that endures under sun, rain, and the test of time.
For readers who want to deepen their understanding of model-specific considerations or who are curious about how to approach particular brands, a broader look at related collections can be useful. For instance, you can reference the Honda fairings collection as a practical resource to understand the contours and materials you may encounter in a real project. This awareness helps you tailor your masking strategy and pad selection to the panel you are buffing, rather than applying a one-size-fits-all approach that could produce suboptimal results. In the end, preparation is not just about making the surface ready for polish; it is about building a stable, repeatable workflow that you can trust on every job. When you adopt this mindset, you turn a potentially risky step into a reliable foundation that supports the entire process, from the first wipe of cleaner to the final wipe of a polished surface.
External resource for broader context and deeper technique: https://www.autogeek.net
From Rough to Reflective: A Masterclass in Buffing Motorcycle Fairings
The glossy surface of a motorcycle fairing is more than a cosmetic feature; it is a shield against the elements, a testament to care, and a signal to the rider that the machine has been treated with respect. Buffing isn’t about brute force or quick fixes. It is a deliberate, repeatable process that preserves the integrity of lightweight plastics while restoring a mirror-like finish. When done correctly, the fairing not only looks new again, but it becomes a durable surface that resists fading and minor abuse from UV exposure, rain, and road grime. The journey from dull to dazzling begins long before the first swipe of polish and continues long after the last wipe of a microfiber cloth. It rests on preparation, steady technique, and an understanding of how plastic behaves under abrasion and heat. In this chapter, we thread together the practical steps with the underlying why behind them, so the reader can approach a real-world buff with confidence and patience. The objective is simple in theory—the removal of oxidation, scratches, and imperfections to reveal a smooth, reflective surface. The reality, however, hinges on careful material handling, appropriate tool selection, and disciplined workflow. The result is a finish that feels as good to the eye as it is to the touch, and a finish that endures the next round of weather or highway miles with minimal maintenance.
Preparation is the quiet before the storm, and it sets the tone for everything that follows. A fairing is a delicate shell, often molded from ABS or a composite blend rather than solid metal. Its plastic composition can be sensitive to heat, solvents, and aggressive abrasion. The first rule is to clean with intention. A dedicated plastic cleaner or a mild soap solution is ideal because it dissolves road grime, grease, and contaminants without giving the plastic a chemical drink that could weaken surface tension or leave residues that haunt polishing pads. The goal is a surface free of contaminants that can clog the buffing pad or create micro debris that clouds the finish. Rinsing thoroughly and drying completely are not optional steps; they are essential to prevent water spots and residual oils from interfering with the polishing compound.
After cleaning, the surface must be assessed with a critical eye. Scratches, cracks, and dents aren’t just cosmetic nuisances; they are signals about the panel’s history and its current needs. Deep scratches and structural imperfections call for repair work before buffing begins. Sanding out a scratch without addressing a dent or a fracture can push debris into the surface or compromise the structural integrity of the fairing. If the surface shows signs of damage beyond cosmetic wear, it is prudent to defer buffing and pursue professional repair. The goal is to start with a fairing that presents as a uniform canvas. Only then can the buffing process deliver a true, even gloss. Along the way, masking off nearby paint, chrome, or adjoining panels is wise. Painter’s tape and plastic sheeting act as a protective shield, preventing stray particles or compound haze from migrating to areas that should remain pristine. This step reduces the chance of accidental burnishing on paint finishes or degraded chrome that would require another round of touch-ups and rework.
With the board cleared, the actual work of resurfacing begins. The first major decision is whether the panel needs sanding to remove deeper imperfections. For mild flaws in the finish, wet sanding with progressively finer grits is the preferred route. Start with a coarser edge of the spectrum—often around 800 or 1000 grit—to level the surface and erase the larger irregularities. The technique matters as much as the grit. A soft foam block or sanding sponge helps spread pressure evenly and prevents the formation of flat-cut lines or gouges. What follows is a measured progression: move from 800 to 1500, then 2000 grit, and in some cases up to 3000 grit for the final refinement. The trick is to keep the paper moving and the surface wet. Water acts as a lubricant and a coolant, minimizing heat buildup that could soften or warp the plastic. It also helps to rinse away the waste particles that sit in the scratches and create a halo of micro-scratches that bog down the next steps.
The sanding stage is intentionally thorough but precise. The goal is not to remove the entire thickness of the plastic but to create a level, smooth base that is ready for polishing. While sanding, frequent checks under bright light are helpful to confirm that scratches are disappearing and that the swirls from the prior finish are no longer visible. If the panel has any edges or curves, extra care is required. Flat panels respond well to broad, even strokes, while contoured areas require a lighter touch and more attention to maintain uniformity across the surface. A common practice is to rinse the area frequently to clear dust and to wipe the surface clean with a microfiber before stepping to the next grit. The micro dust left behind can act like sandpaper on the next stage, reintroducing scratches that negate the effort. This step is demanding, but patience pays off when the final gloss is achieved with fewer passes and less pressure.
After the surface has been smoothed through sanding, a thorough cleaning and degreasing sequence prepares the stage for polishing. Sanding dust, oils from skin, or residual wax from prior work can sabotage the clarity of the buff. A dedicated degreaser or isopropyl alcohol is typically employed to render the surface perfectly receptive to the compound. This final cleansing step ensures that nothing between the pad and the plastic can cause hazing or micro-marring. The pad itself should be kept clean and free of grit that could embed and later haze the finish. A quick wipe with a fresh microfiber between passes can reveal whether any contamination has remained and whether further cleaning is warranted.
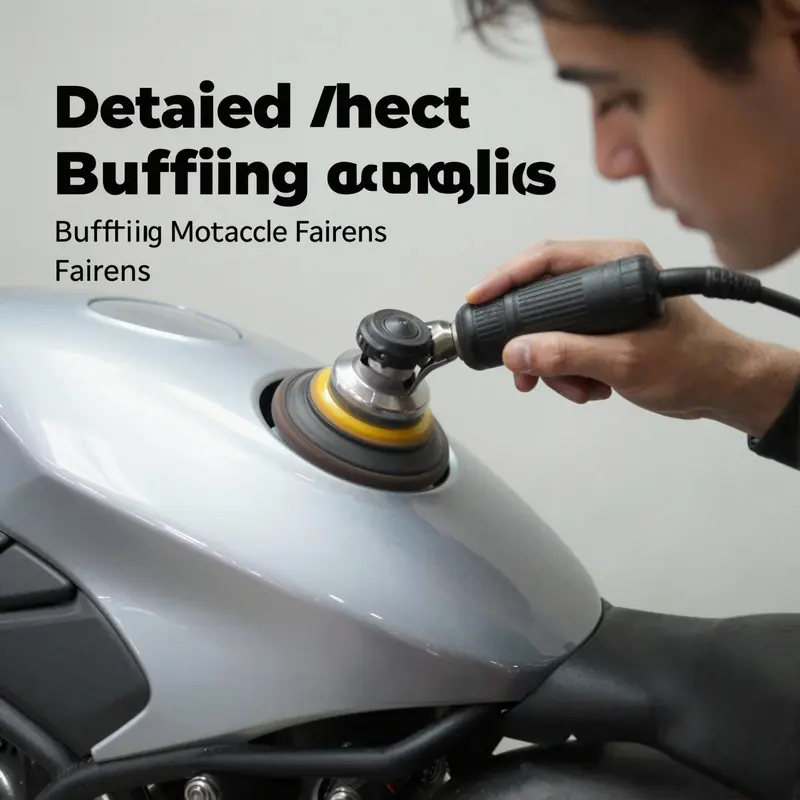
With a pristine surface, the polishing phase commences. The compound chosen should be appropriate for plastics or composite materials. Compounds intended for metal or glass are not suitable and can leave behind a scaly residue that is stubborn to remove. A dual-action (DA) sander, equipped with a soft foam pad or an appropriate wool pad, is typically the best choice. The DA polisher spreads compound evenly, reduces the risk of holograms and deep swirls, and keeps the surface cooler. The technique emphasizes working in small, overlapping sections—think a 6×6 inch square mindset—and avoiding heat buildup that can soften or warp the plastic. Light, consistent pressure is crucial; let the machine do the heavy lifting. Pushing too hard or pushing the tool faster than the surface can tolerate invites heat and deformation, both of which erase the gains of the preceding steps.
Progress is monitored by stepping back to inspect the area. A clean microfiber cloth is used to wipe away the spent compound and reveal the true gloss beneath. The aim is a uniform, mirror-like finish with no visible scratches, haze, or swirl lines. When the scratch has vanished and the panel reflects light evenly, the area can be moved to the next section. This disciplined approach minimizes the risk of over-polishing a single spot or creating halo effects that draw the eye to imperfections rather than the overall shine. The polishing sequence—scrape away the defect, refine the base, and refine again—emphasizes an iterative process: assess, adjust, reassess, and proceed. The mind-set is as important as the technique; a calm, methodical pace delivers predictable results and reduces the chance of error.
Once the major defects are eliminated and the panel gleams, the final polish and protection step seals the experience. A lighter, finer polish or a dedicated wax designed for plastics can bring the ultimate sparkle to the surface. The goal here is not only aesthetic brilliance but also protection against UV exposure and future contaminants. The protective layer serves as a sacrificial barrier, brushing off some of the microscopic abrasions and providing a barrier that resists future staining and degradation. The act of finishing becomes a two-part ritual: first create the shine, then shield it. A clean, soft polishing pad is used with the finest polish in gentle circular motions. This step should be performed in sections, with careful attention to even distribution and avoidance of rushed passes that could introduce heat or unevenness. In the end, the panel takes on a depth of color and a reflection that invites the eye to linger, as if the fairing itself were a polished window rather than a simple shell.
As the gloss comes together, a broader appreciation for the nuances of plastic behavior emerges. Unlike metal, which responds to abrasive work with a predictable set of consequences, plastics are responsive to heat and chemical exposure in subtler ways. The lacquer-like sheen on a plastic fairing embodies a balance between aggressive cut and gentle finish. If the surface is over-sanded or the compound is too aggressive, the texture of the plastic can change. The same holds true for heat: excessive speed or pressure can cause the polymer to soften, leading to a loss of tight edge definition or even warping on longer panels. Therefore, the workflow is as much about restraint as it is about technique. The operator learns to read the surface and to adapt the pressure and speed accordingly, treating the plastic as a living material that responds to a nuanced touch rather than a blunt instrument. This mindset—guarded, patient, observant—transforms buffing from a chore into a craft. And because the shapes of fairings vary by make and model, the approach can be subtly different depending on the panel you’re addressing. For instance, the curves and contouring found in some models can challenge a novice to maintain uniform pressure along a shoulder line or curve. If you want to explore model-specific nuances, consider looking at brand-specific examples such as the Honda fairings category for reference on how curves influence polishing technique. Honda fairings
The sense of accomplishment that comes with a flawless finish is rooted not only in the end look but in the longevity of the surface. After buffing, the protective layer resists UV rays, contaminants, and future abrasion. This is not simply a cosmetic upgrade; it is a maintenance strategy. The gloss helps shed moisture more evenly, reduces the tendency for dirt to cling as stubbornly, and makes future cleanses easier. Regular maintenance, including periodic touch-ups with a light polish or plastic-safe sealant, extends the life of the restored finish. When the fairing shines, it reflects not only the skill of the technician but also the thoughtful care that the rider invests in their ride. The smoother the surface, the less wind resistance is at play, and the less micro-damage occurs when road debris hits the panel. While buffing can restore a fairing’s luster, it cannot erase all types of damage. It is not a substitute for structural repair, and it does not repair a crack that compromises strength. In cases of deeper damage, restoration must proceed down two tracks: repair first, buff second.
To keep the process grounded in practicality, there are a few guardrails worth noting. Safety is not optional; it is essential. Always wear protective eyewear and a dust mask when sanding or buffing. A well-ventilated area reduces the inhalation risk from fine particles and solvents. Grit and dust can embed in polishing pads and reappear as fine scratches if not managed. Maintaining a clean workspace minimizes cross-contamination between the panel and the pads or compounds. The buffing pads themselves deserve respect; they wear down with use and collect residue. Regular cleaning of pads prevents grit from scratching the surface again in later passes. The environment matters as well. A controlled, clean, and well-lit workspace helps the technician notice irregularities that would otherwise go unnoticed in a dim garage corner. The combination of a clean space and disciplined technique reduces rework and yields a better, longer-lasting finish.
Brand-specific know-how adds another layer of refinement, especially for riders who want to keep their bikes looking showroom-new. The exact curvature, texture, and edge geometry of a fairing influence how you apply pressure and how aggressively you sand or polish. Seeing how different models respond to the same approach helps the technician calibrate technique for the next job. For example, models with sharper edges may require lighter pressure near the edge to prevent glare and to avoid overheating the plastic, while smoother surfaces might tolerate a more uniform approach. The nuance comes from experience, observation, and a willingness to adjust the workflow to the specific panel being treated. If you’ve followed the steps with care, and you’ve preserved the integrity of the surrounding finishes, you are in a strong position to tackle a broad range of fairings. And if you want more brand-specific context, exploring the Honda fairings category can provide a concrete reference point for curves and transitions you may encounter across models.
Despite the precision demanded by the process, the underlying discipline remains accessible. It is a workflow that rewards patience, attention to detail, and a respectful approach to the plastic’s limitations. The fairing emerges not only with a glossy surface but with a sense of renewed character that echoes the rider’s commitment to maintaining the bike. The final result is a testament to a careful plan, executed with steady hands, and followed by a protective ritual that keeps the shine intact for longer. For readers seeking a broader primer on the physical principle of polishing, a general external resource provides context on the polishing process and how it manifests across materials. External resource: https://en.wikipedia.org/wiki/Polishing
In summary, buffing motorcycle fairings is a disciplined craft that blends preparation, material awareness, and methodical execution. It requires the right tools, quality compounds suitable for plastics, and a patient mindset. The steps—clean, assess, sand, degrease, polish, protect—form a loop that, when performed with care, returns faded or scratched panels to their original radiance while preserving their structural integrity. The result is not only a better-looking motorcycle but also a fairing that continues to perform as the rider expects over the miles ahead. The process is repeatable, teachable, and scalable to different panel sizes and shapes, making it a valuable skill for enthusiasts who cherish both aesthetics and function. The chapter emphasizes that a successful buff is as much about restraint and observation as it is about technique. As knowledge deepens and hands become more confident, the ride of buffing becomes less about chasing perfection and more about preserving the story written on every curve of the fairing—the story of care, craft, and a bike that looks as good as it performs.
Shine with Sense: Safety-First Buffing and Long-Term Maintenance for Motorcycle Fairings

Buffing motorcycle fairings is not just about chasing a showroom gloss. It is a discipline that blends careful technique with respect for the material that shapes the bike’s first impression and, more importantly, its protective envelope. The tradeoff is not only about achieving reflection but about preserving the structural and functional integrity of the fairings over time. A glossy surface can invite admiration, yet it is the surrounding habits—safer practices, proper maintenance, and mindful inspection—that keep the finish durable and the rider secure. In this chapter, the focus shifts from the hands-on moment of polishing to the broader stewardship that follows. It is a reminder that the glow we chase is best sustained when we guard against shortcuts that might compromise the plastic, and when we anchor every decision in the realities of riding, exposure, and wear. The path to a dependable, lasting shine winds through preparation, cautious execution, and deliberate aftercare, with safety and maintenance as the twin pillars that support performance as well as aesthetics.
Safety is the primer that precedes every deliberate buff. The nature of working with plastic means that particles can become airborne, and the very compounds designed to restore luster can irritate eyes, skin, and lungs if mishandled. The first rule is unapologetic diligence: equip yourself with protective eyewear that seals around the eyes, a mask that makes sense for the dust and chemical exposure at hand, and gloves that protect the hands without compromising grip or tactile feedback. Hearing protection may be warranted if you are using power tools, especially for extended periods, since the noise of a polisher at work can mask fatigue and lead to inconsistent pressure. This is not a ceremonial precaution; it is a practical boundary that reduces the risk of injury while you work through the care routine. A well-ventilated space is not a luxury here. It is a requirement that helps avoid the accumulation of fumes from cleaners and compounds, and it keeps the air fresh enough to maintain calm, steady movements during polishing.
The materials themselves demand respect. ABS plastic and fiberglass, common choices for fairings, respond differently to heat, pressure, and abrasion. The wrong approach can thin the surface just enough to reveal a tendency toward micro-damage under stress, which in a crash could translate to reduced energy absorption or edges that crack more easily. The instinct to push harder to shave away a stubborn flaw can backfire by creating heat buildup or distortions. This is why it is essential to use only polishing compounds and tooling that are appropriate for plastics and not improvisations borrowed from metal or high-gloss automotive finishes. In practice, this means selecting a polish with the right chemical balance for plastics, and coupling it with a soft pad that can deliver gentle, even contact across the panel. The relationship between pad, compound, and speed matters as a trio; you will not get the desired uniformity, let alone a deep, long-lasting shine, if one element in that chain is misjudged.
Preparation remains the quiet, decisive phase. Any residual wax, grease, or silicone left on the surface will sabotage even the best buffing effort. A thorough cleaning with a dedicated plastic cleaner or a mild soap solution followed by a careful rinse sets a clean stage. After washing, a meticulous panel-by-panel inspection reveals any deep scratches, hairline cracks, or misaligned mounting points that may necessitate professional repair before any polish is applied. It is worth emphasizing that superficial gloss cannot compensate for a compromised structure. Even the most attentive buffing cannot fix a dent or a crack that propagates when heat is introduced or when stress concentrates at a mounting edge. Once you are certain the surface is free of debris and the panel is structurally sound, masking off adjacent areas prevents accidental contact with paint, chrome, or trim that would complicate cleanup and potentially ruin a previously pristine finish. Masking is a small step with a disproportionate payoff in precision and repeatability.
If the surface carries light scratches, you can approach them with a staged method that respects the plastic’s resilience. Start with careful, wet sanding using progressively finer grits, perhaps moving from 800 to 1500 and then to 2000, always working with a foam block or sanding sponge that maintains even pressure and helps avoid creating new ridges. The key is to keep the surface wet, to prevent clogging, and to prevent heat buildup that can soften or warp the plastic. When the base is smooth and uniform, the transition to polish can proceed with greater confidence. The polishing phase, when done by hand or with a dual-action tool, should emphasize a light touch, overlapping passes, and a slow progression across small sections. The operator’s aim is not to bulldoze a scratch away in a single aggressive stroke, but to blend the area with the surrounding surface so that the reflection becomes uniform. The gentle rhythm of work—small, overlapping motions—reduces the likelihood of swirl marks and holograms that would otherwise betray a hurried, careless approach.
The choice of machinery is not a mere convenience but a guardian of the fairing. A dual-action polisher with a soft foam pad is well-suited to this task because it oscillates while delivering a mild orbital action, distributing pressure evenly across the surface. The technique should be to begin with a low speed, apply a light, consistent pressure, and let the machine do the bulk of the work. It is easy to mistake speed for performance; in polishing plastics, speed without control often leads to heat buildup that can soften the surface or alter the panel’s shape. Progress checks—stopping to wipe the area with a microfiber cloth and evaluate the mirror-like quality—are more than a routine break; they are a diagnostic moment that helps save the finish from overworking. The final polish, following the removal of scratches, requires a clean, soft pad and a finer polishing stage or a dedicated wax that seals and enhances the shine without inviting new residues or micro-scratches. The cycle of buffing and checking is a careful dialogue between the tool and the surface, a conversation where patience yields reliability.
Safety and comportment extend into the finishing phase. The end of polishing should not be treated as the end of work but as a transition to long-term care. After the surface has achieved the desired gloss, a protective layer becomes essential. A high-quality UV-protective wax or sealant forms a barrier against sun exposure, environmental contaminants, and light abrasion from road debris. This layer is not merely cosmetic; it circumvents photochemical degradation that can dull color and weaken the surface over time. The right sealant or wax interacts with the plastics to reduce the risk of hazing while preserving elasticity and impact resistance at the edges of the fairing. It is prudent to apply this layer in a cool, shaded environment and to follow the product’s curing instructions closely. In addition to UV protection, a light cleaning regimen using a microfiber cloth should be maintained to prevent grit from embedding into the finish whenever the bike is washed or wiped down. A routine, light maintenance schedule often yields a more durable gloss than a single, intense buffing session followed by neglect.
Maintenance after buffing is about vigilance as much as it is about products. Regular inspections should become part of the rider’s routine. Cracking, warping, or signs of delamination near mounting points and edges are red flags that deserve close attention. Stress is not evenly distributed across a fairing, and the edges frequently become the most vulnerable zones where the combination of fasteners, aerodynamic forces, and vibrations can create micro-movements that accelerate wear. If a panel shows signs of stress, addressing it promptly can prevent more serious damage that would complicate future buffing efforts. The maintenance mindset should be practical and proactive: inspect after long rides, after a crash or tip-over, after exposure to extreme weather, or after any event that jostles the panels. Look for changes in color, dulling along the edges, or an inconsistency in the way light reflects off a particular area. Any hint of delamination should prompt a closer look, as it might indicate moisture ingress or a loosened bond that safety and performance could rely upon.
For riders who want to keep their bike’s aerodynamics and weather resistance at the highest level, factory-referenced maintenance guidance remains a crucial anchor. Manufacturer-level resources, when available, provide model-specific tolerances, recommended maintenance intervals, and cautions that reflect the design intent of the fairing material. Accessing official manuals can illuminate subtle distinctions—such as how certain plastics react to heat, solvents, or adhesive interactions at mounting points—and offer standardized approaches to repair and care that are aligned with the original engineering. If your project involves a Honda fairing, the Honda fairings category can serve as a practical starting point to understand how various models differ in terms of fit and interface with protective coatings. This is not a substitute for the exact manual, but it can provide useful context as you navigate the nuances of maintenance across different designs.
As the maintenance cycle continues, the rider should also be mindful of environmental conditions during buffing and aftercare. Extremes of temperature or humidity can influence both the surface and the compounds used. In hot conditions, the risk of drying too quickly or creating heat-related distortions increases, while in very cold settings, the work may become stiff and less precise. Maintaining a comfortable, controlled environment ensures a more predictable outcome. The same logic applies to storage and handling: after buffing, store the bike in a covered or shaded area to limit prolonged sun exposure on the fresh finish. Even the most robust UV protection benefits from a stable climate and regular surface care to maintain its protective properties. A disciplined approach to post-buffing care—cleaning, UV protection, inspection, and timely repairs—presents a practical path to sustaining gloss and rider safety over many miles.
It is worth acknowledging the broader purpose of this discipline. A well-maintained fairing not only reflects the rider’s pride but also preserves the integrity of the bike’s protective envelope. Clear, durable finishes minimize the risk of micro-cracks that could worsen under temperature swings and vibration. A finish that remains uniform and free of swirl marks supports predictable airflow, which contributes to both aesthetics and aerodynamic efficiency in real-world riding. When the finish is cared for with thoughtful cleaning, proper polishing materials, and safe practices, the overlap between beauty and safety becomes tangible. The rider can confidently ride with the peace of mind that the surface under the gloss remains resilient, and that the precautions taken to achieve a mirror shine do not come at the expense of long-term protection.
In closing, the philosophy of buffing fairings should center on responsibility. Before you pick up a pad, you commit to a set of practices that protect both rider and material: prepare thoroughly, use appropriate tools and materials, work with measured attention, and protect the surface after the work is done. This approach yields a finish that is not only striking but enduring. The habit of regular inspection and cautious maintenance ensures that the gloss remains honest, free from the telltale signs of hurried or careless work. The goal is a glossy, smooth surface that endures through sun, rain, and miles, while still being a reliable shield in the event of a mishap. The discipline of safety, paired with a maintenance mindset, is the true engine behind every ride that shines with confidence and stands up to the realities of road life. For the practitioner, this is not a one-off task but a continuous practice—one that earns its keep on every mile traveled and every passing season.
External resources can further illuminate the safe boundaries and proper methods that keep these surfaces technology-friendly and rider-safe. For formal, model-specific guidance, consult manufacturer resources and repair centers that endorse official care practices. A comprehensive, publicly accessible reference in this regard is the official technical manual repository, which can provide detailed instructions and cautions aligned with contemporary fairing designs. See the external resource for deeper guidance and context on material behavior, repair considerations, and long-term maintenance strategies that complement the hands-on buffing techniques described here. https://www.bmw-motorrad.com/en/owners/manuals.html
Final thoughts
Mastering the buffing of motorcycle fairings requires skill, attention to detail, and stringent safety practices. By effectively preparing the surface, utilizing the correct buffing methods, and maintaining a safe workspace, business owners can enhance the overall quality of their services. Implementing these practices not only improves the look and durability of motorcycle fairings but also builds trust and reputation in the competitive motorcycle service market. Ultimately, attention to detail and commitment to quality will lead to satisfied customers and repeat business.