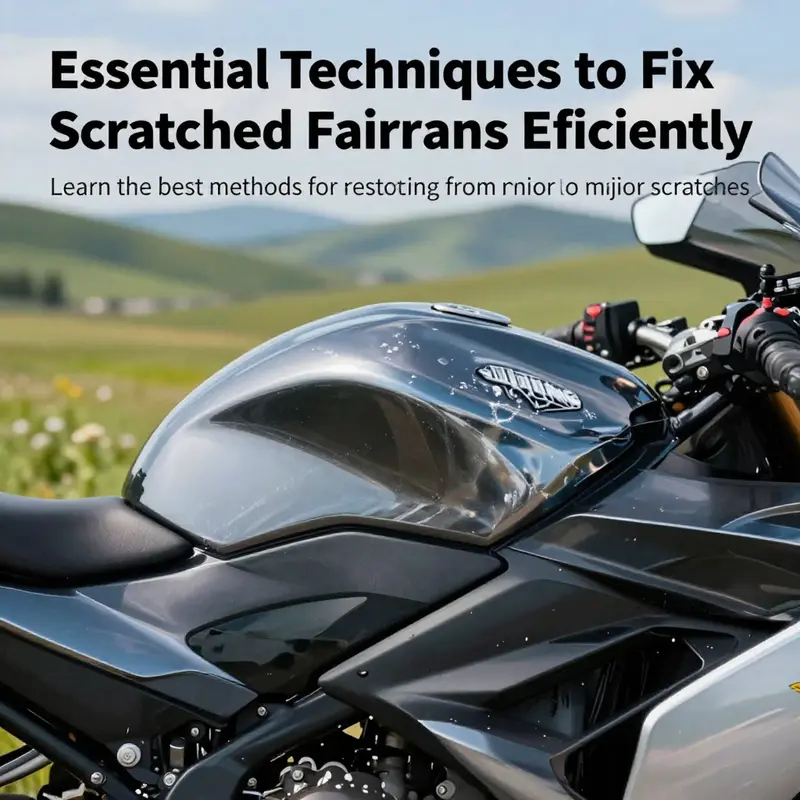
Motorcycle owners are often faced with the unfortunate reality of scratched fairings. These imperfections not only mar the aesthetic appeal of the bike but can also lead to more severe damage if left unaddressed. As a business owner in the motorcycle repair or maintenance industry, understanding the different techniques for fixing scratched motorcycle fairings is crucial. This article will delve into effective methods for minor, moderate, and deep scratches, as well as options for professional repairs. Each chapter aims to equip you with the knowledge needed to assist clients in restoring their motorcycles, ensuring satisfaction and repeat business.
Gentle Hands, Clear Coat: Minor Surface Scratch Repair Techniques for Motorcycle Fairings
Scratches on motorcycle fairings are more than cosmetic blemishes; they signal the bike’s journey and the environment it survives. For many riders, the goal is not perfection but a restoration that preserves integrity and gloss without turning a simple dent into a full re-spray. The method you choose hinges on how deep the scratch goes. In most cases, minor surface scratches affect only the clear coat, leaving the paint layer intact. When that happens, you can often restore the look with calm, methodical effort and the right materials. The key is to start with the least invasive option and proceed only if the surface clearly requires a deeper intervention. The process below sticks to that philosophy and keeps the repair approachable for a weekend project rather than a shop visit, though it remains realistic about results and limits.
Begin by assessing the scratch with a careful eye and a clean surface. Dust, oil, and old wax can magnify the defect or mask true depth. A quick wipe with isopropyl alcohol on a lint-free cloth clears the area and helps you judge how far the damage extends. If you see that the scratch does not expose color or primer and the underlying paint remains unbroken, you are likely in the minor-surface-scratch territory. You can proceed with a sequence of steps designed for this level of wear. If you notice the color of the base coat or primer beneath the clear coat, the repair becomes more involved, demanding color matching and perhaps professional tools. In that case, you may still gain a lot from careful preparation and selective touch-ups, but the final result will depend more on patience and precision.
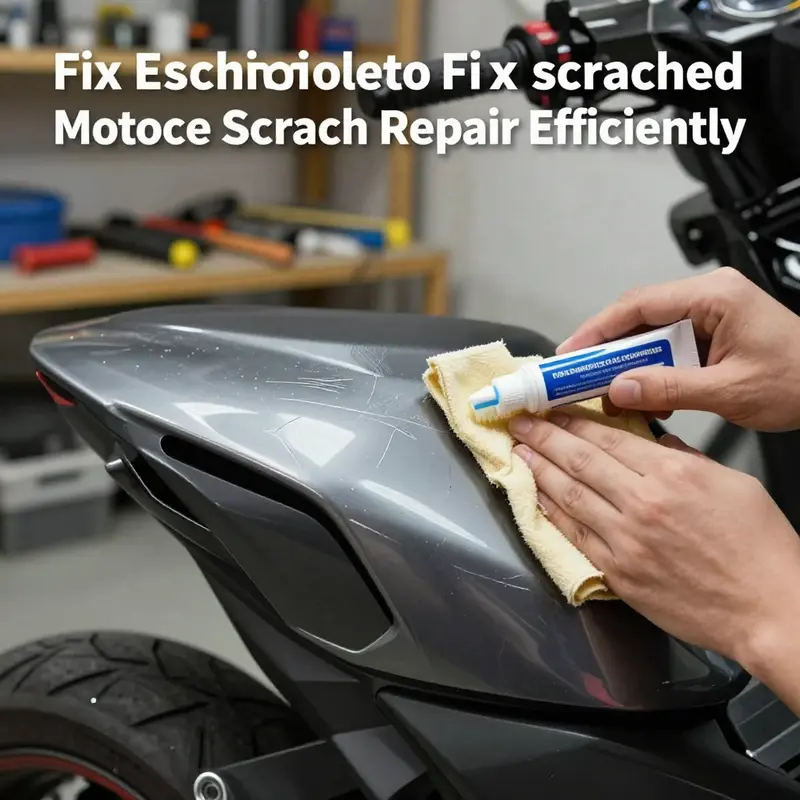
For many riders, the simplest and most accessible remedy is the toothpaste method. It sounds almost too easy, but non-gel white toothpaste contains mild abrasives that help smooth micro-scratches without harming the glossy layer. Apply a tiny dab of toothpaste directly onto the scratch. Use a soft, lint-free cloth and rub in gentle circular motions for about 30 seconds to a minute. The motion should be light enough to avoid wearing through the clear coat, yet firm enough to polish the surface. After you’ve worked the area, wipe away the paste with a clean, damp cloth and dry the spot thoroughly. The result is often a less noticeable scratch and a slight lift in clarity. It is important to temper expectations: this method can dramatically improve very light marks but may not fully erase deeper grooves. If the scratch remains visible, you can move to a slightly more aggressive, but still controlled, option.
A step up from toothpaste is a dedicated scratch remover or a polishing compound. These products are formulated to smooth the clear coat more aggressively while preserving the paint below. Follow the manufacturer’s directions, applying the compound with a microfiber cloth or a foam applicator pad. Work the area with small, overlapping strokes and keep the cloth nearly flat to avoid creating new lines. The goal is to blend the scratch into the surrounding gloss, not to erase it at all costs. After buffing, wipe the area clean and inspect under good light. In most cases, the surface will regain a more uniform reflection, and the scratch will fade into the finish rather than stand out.
If the scratch has damaged the base color—evidenced by a visible line where the color beneath the clear coat is exposed—the repair calls for a more deliberate approach. Begin with a thorough cleaning to remove any oils or residues that could interfere with adhesion. Degreasers or isopropyl alcohol work well here. Then move to a very fine sanding step to create a soft edge around the damaged area. Start with a gentle grit like 800 or 1200 and gradually move to 2000 grit. The aim is to smooth the transition so that touch-up work looks natural rather than abrupt. Sanding should be light and cautious; you’re shaping the boundary, not removing layers of paint.
After you’ve prepared the area, apply a matching touch-up paint. Use a paint pen for precision or a small spray can if you’re comfortable with spraying. Apply multiple thin coats rather than one heavy layer, allowing each coat to dry completely before adding the next. This careful layering minimizes runs and ensures a closer color match. Once the paint has cured—often 24 to 48 hours depending on the product—follow with a gentle polish to restore shine and harmonize the repaired patch with the rest of the fairing. The polish helps blend the new layer with the surrounding surface and can reduce the appearance of any slight texture differences caused by the sanding and painting steps.
If the damage runs deeper still, exposing primer or bare metal, the repair becomes more complex and is no longer a purely cosmetic fix. In that scenario, you might sand the area back to do more extensive preparation or to remove any corrosion risk. A rust-inhibiting primer is then applied to seal the metal. For any dents or gouges, body filler can be used to rebuild the surface, followed by careful sanding to achieve a smooth contour. Color matching becomes more critical here, and many riders choose to use a spray gun or professional-grade paints to reproduce the factory finish. A clear coat is essential for protection and to achieve the same high-gloss look as the rest of the fairing. The final step is a thorough polish that blends the repaired area with the adjacent panels, bringing back the vehicle’s cohesive appearance.
All along, patience is your best ally. Rushing a paint job invites runs, mismatches, and a finish that looks different under various lighting. Between coats, allow ample curing time, especially in conditions that promote faster drying, such as warm, low-dust environments. If you live in a humid climate, extend drying times and keep the area dust-free. The downtime is part of the process, not a setback, because it helps ensure the repair lasts and resists peeling or cracking.
As you work, remember that tools and surfaces matter. Use a microfiber cloth for application and polishing. Apply wax or sealant after curing to protect the repair and to maintain gloss. Waxing creates a barrier that helps resist UV damage and marks from minor abrasions. Always clean the panel before applying wax, and use a product designed for automotive finishes. A light hand with wax in the repaired area will prevent a buildup that could attract more dirt or hide the gloss you’ve just achieved. With the right products and a calm approach, your fairing can return to its former luster while preserving the integrity of the finish and keeping the color true.
In many communities, practical repairs are complemented by a broader resource pool. If you’re researching parts or looking to source compatible panels for future projects, you might explore the Honda fairings category. It provides a convenient way to assess options for replacements or upgrades that match your bike’s styling and color. For a direct route to those options, please visit the Honda fairings section here: Honda fairings.
Beyond DIY execution, it helps to have a realistic sense of outcomes. Minor surface scratches can often be corrected to near original condition with careful cleaning, polishing, and the occasional touch-up. The key is recognizing when to stop and when to escalate. If you notice that the scratch continues to show through after multiple light passes, or if the area feels rough to the touch, it’s worth stepping back and reconsidering the depth. A professional eye can provide a precise color match, a flawless finish, and durable results that withstand road wear and the elements. This pragmatic line—knowing your limits and identifying when a fix becomes a restoration—can save time, money, and disappointment in the long run.
For readers seeking additional, detailed guidance on minor scratches and broader repair strategies, the following external resource offers a thorough step-by-step reference that aligns with the methods described here. It covers toothpaste, polishing compounds, touch-up paints, and professional services as needed. External reference: https://www.bikeride.com/repair-minor-scratches-on-motorcycle-fairings/.
From Faded to Flawless: A Cohesive Moderate-Scratch Repair Journey for Motorcycle Fairings

Moderate scratches on motorcycle fairings are a common hurdle for riders who ride, park, and park again. They usually pierce the clear coat and paint layers enough to reveal the primer, yet rarely deform the plastic or compromise the fairing’s structure. Getting a seamless result isn’t about quick fixes; it’s about preparing the surface, guiding the repair through precise layering, and finishing with a gloss that looks like it never happened. The goal is not to repaint the entire panel, but to reestablish a smooth transition where the new color meets the old, so the repair vanishes from view when the bike is parked under a bright light or photographed at a stoplight. The process blends technique with patience, and the difference between a noticeable repair and a professional-looking finish often comes down to the attention you pay to edge transitions, coat thickness, and proper curing times.
Preparation begins long before any tool touches the damaged area. Start with a thorough wash to remove wax, oils, and dust. A mild automotive cleaner or even warm soapy water will do, but don’t rush through the rinse. Wax and grease left on the surface can ruin adhesion later on. After washing, degrease with isopropyl alcohol or a plastic-safe cleaner to make sure the surface is completely clean. The better the surface is prepared, the more predictable the repair outcome will be. This phase also sets the mood for the work ahead: a dust-free, well-lit, ventilated space where you can take your time without rushing to the next step.
Sanding is the crux of a successful moderate-scratch repair. It’s the stage that creates the invisible bridge between old paint and the new layer. Start with a relatively coarse but controlled disc of sandpaper—P800 is a practical option for lifting the damaged edge without biting into metal or plastic. The objective is to remove the chipped edges around the scratch and form a shallow, even depression that can accept new paint without leaving a ridge. After this initial pass, progress to finer grits—P1500 and then P2000. Sand with light, circular motions, keeping the strokes consistent, and wipe away residue with a tack cloth after each grade. The beveled edge you create is essential; it provides a gradual slope for the fresh paint to blend into the surrounding area rather than sit in a shallow dent.
If bare metal or an exposed primer layer appears, the next step is where your repair becomes durable. A rust-inhibiting primer is not optional here; it’s a protective barrier that prevents oxidation and helps the repair last. Apply a thin, even coat over the sanded area and allow it to dry completely according to the primer’s instructions. The primer doesn’t need to be thick—just enough to seal the area and create a uniform base for the color. In some cases, the scratch may not expose bare metal, and primer may not be strictly necessary. Nevertheless, having a primer layer ready gives you a robust safety net for future exposure to moisture and heat. This is also a good moment to visualize the final result: the primer’s gray or tinted surface should disappear under color and clear coat when everything is dried and polished.
Color matching is the most nuanced part of the process. It’s not enough to pick any shade that looks close in dim light; you need a color code and a methodical application plan. Choose a high-quality touch-up paint or automotive spray paint that matches your bike’s original color code. Shake the can vigorously for at least a minute or two to reincorporate the pigment and solvents. Hold the spray can or bottle at a steady distance—around 6 to 8 inches—from the surface. Apply multiple thin coats rather than a single thick layer; thin coats reduce the risk of runs and texture. Allow each coat to flash for roughly 5 to 10 minutes, then apply a total of three to four light coats. This staged approach yields a color that blends with the surrounding paint and avoids a noticeable patch.
Once the color has dried fully—often 24 hours is a prudent timeframe—the repair proceeds to the clear coat. The clear coat is more than a cosmetic top layer; it protects the color beneath, adds depth, and helps the area resist UV damage and micro-scratches in the future. Apply several thin clear coats, using the same careful technique as with the base color: steady distance, light coats, and adequate flash times. The clear coat’s gloss will become the bridge that lets the new paint visually merge with the old. After the clear coat cures, the surface may still look a touch hazy or uneven. That’s normal and something polishing can fix. A fine-grade polishing compound, used with a dual-action polisher or by hand, will remove any minor haze and restore the surface to a high-gloss finish. Work in small sections, applying just enough compound to refine the surface without removing the new paint, and then wipe away residue.
Polishing isn’t the final word on protection, though. After you achieve a smooth, glossy finish, seal the repair with a wax or sealant designed for automotive-clear-coated surfaces. This adds a layer of protection against environmental contaminants and helps maintain the shine. If you’re planning to keep the bike outdoors, a proper sealant is worth the extra effort because it reduces the chance of micro-scratches building up from road debris and washing cycles. Speaking of washing, patience remains essential in the weeks after repair. Avoid exposing the repaired area to water for at least 48 hours after painting to ensure the paint and clear coat have enough time to cure without washing-induced streaks or solvent interference.
Color matching and blending are not always exact sciences, especially on plastics with different finishes or aged panels. If your color match isn’t spot-on or if the scratch is large and irregular, the repair may benefit from a professional touch. A skilled auto-body or motorcycle detailer can access color-matching technology, professional spray booths, and controlled lighting to achieve a near-perfect blend. The decision to seek help isn’t a failure; it’s a recognition that some discrepancies are best addressed with specialized equipment and experience. If you’re contemplating replacing or upgrading your fairings in the future, you might explore options such as Honda fairings for CBR, which provide compatibility and aesthetic cohesion when the time comes to expand or refresh your look. Honda fairings for CBR.
In the end, the moderate-scratch repair is a careful balance of material knowledge and disciplined technique. Cleanliness is essential at every stage, and the transition line between repaired and original paint matters more than the color alone. Each step—careful sanding, precise priming, deliberate color application, and protective topcoats—builds toward a finish that looks like the scratch never happened. Even with meticulous work, perfection remains a moving target. The best you can do is to reduce visibility to the point where the eye meets the whole bike rather than a patch on a panel. That is what a well-executed moderate-scratch repair delivers: restored aesthetics alongside preserved value and confidence in your ride.
For readers seeking broader context on the steps described here and how professionals approach similar repairs, a comprehensive guide offers additional depth and nuance. The process outlined aligns with widely cited methods in motorcycle repair resources, emphasizing cleanliness, controlled material application, and proper curing. If you want a detailed walkthrough from a trusted reference, you can consult the Motorcycle.com guide on fixing scratched fairings, which provides supplementary context and visuals to support the steps described above.
External reference: Motorcycle.com guide.
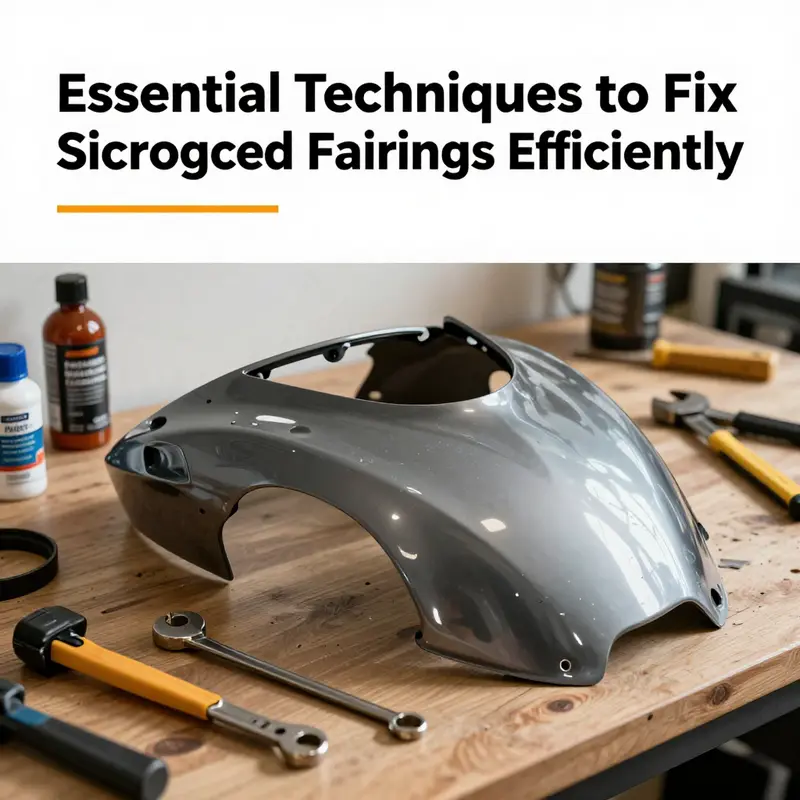
Fix Scratched Motorcycle Fairings: Addressing Deep Scratches and Damage

Deep scratches on motorcycle fairings test more than the surface of the paint; they challenge the integrity of the panel and the rider’s confidence in the bike’s look. When a scratch penetrates beyond the clear coat and into the paint layer, or worse, reaches the primer or base material, the repair becomes a careful blend of restoration and protection. This chapter follows a practical, methodical path that keeps the repair within reach for dedicated DIYers while recognizing when a professional touch is warranted. The goal is not just to hide a mark but to restore the fairing’s smooth contour, color fidelity, and resilience against future deformations. A careful sequence—cleaning, feathering, filling, priming, painting, and sealing—helps ensure the result is durable and aesthetically cohesive with the surrounding panels, especially on plastics that are prone to micro-cracking and differential flexing under heat and vibration.
Preparation is the quiet first act that defines everything that follows. Begin by thoroughly cleaning the damaged area with a degreaser or isopropyl alcohol to remove grease, wax, and any leftover solvent film. Rough edges invite failure, so the aim is to establish a clean, dry battlefield where filler and primer can adhere with confidence. As you wipe away contamination, inspect the surrounding finish for any evidence of peeling or cracking. If those symptoms exist, you’ll want to address them as part of a broader refinement rather than treating a single scratch in isolation. The clean, dry surface also minimizes dust pickup during sanding, a factor that becomes crucial once you move to the feathering stage.
Sanding follows cleaning and serves as the bridge between the damaged scar and a seamless finish. Start with moderately coarse paper, such as 320-grit, to remove any loose edges and to create a mechanical key for the filler. The objective is not heavy material removal but a controlled feathering that tapers the damaged zone into the surrounding paint. As you work, maintain the sanding at a shallow angle and keep the surface moist with water to reduce heat buildup and prevent embedding more scratches. After the initial pass, switch to finer grits—perhaps 600 to 800—progressing toward 1000 and then 2000 to achieve a smooth transition. The more you can blend the transition, the less drama the subsequent filler and paint layers will create in the final appearance.
The next act is the application of filler, chosen to match the fairing’s material—plastic filler for plastics, or body filler for metal sections. The key here is to apply in thin, conservative layers, allowing each layer to cure fully before the next. Two to three layers are typically sufficient to fill deeper gouges and rebuild the damaged plane to near the plane of the surrounding area. Work the filler into the scratch with gentle pressure, and avoid overfilling, which can create high spots that ruin the feathered edge. After the filler has cured, perform a careful dry sand to remove the surface texture and to establish a truly smooth interface with the neighboring paint.
Wet sanding marks the transition from filler to finish. Begin with about 600-grit wet paper and work slowly across the repaired area, keeping the surface damp to minimize clogging and heat. Progress to finer grits such as 1000 and 2000 to achieve a glassy smoothness that will not require excessive polishing later. The aim is not a perfect planarity by eye but a level of smoothness that can accept primer and paint without showing the repaired boundaries. If any low spots remain after this stage, apply a light touch of filler and repeat the wet sanding until the surface feels uniformly flat to the touch and looks uniform under light.
Priming is where the repair gains a solid foundation. For plastic fairings, use a plastic-dedicated primer that adheres well to polyethylene or ABS formulations common in modern shells. If the underlying metal is exposed or if you’ve sanded through to metal, a rust-inhibiting metal primer becomes essential. The primer not only enhances adhesion but also helps uniform the absorption of subsequent color coats. Apply primer in thin, even coats, allowing each coat to dry thoroughly before the next. A common practice is two to three light coats rather than a single heavy spray, which reduces the risk of sags and runs. After priming, a light, dry sanding with fine-grit paper—say 1000 to 1500—prepares the surface for color application and helps ensure that texture remains consistent with the adjacent areas.
Color matching is both science and art. The paint layer should replicate the original hue and finish, with attention to how pigments respond to lighting and heat exposure. When painting, use a spray technique that delivers multiple very thin coats rather than a single thick one. Each coat should dry fully before the next is applied, typically in a dust-free, well-ventilated area. The color can appear slightly different indoors versus outdoors; therefore, it is wise to light the panel from multiple angles and assess it under both daylight and artificial light. Multiple thin coats help minimize runs, orange-peel texture, and color drift. If the fairing uses metallic or pearlescent finishes, let the base color cure fully and apply the metallic or pearlescent layer with meticulous control to preserve the subtle shifting that gives depth to the finish. In some cases, color matching may require not only a base coat but a tailored blend that corrects for the local heat cycle the fairing experiences during rides.
With the color laid down and dried, a protective layer of clear coat becomes vital. The clear coat guards against UV damage, chemical exposure, and the micro-abrasion from gravel and road debris. Apply several lighter coats as you did with the color, allowing time between coats for curing. The final clear layer should yield a glossy, uniform surface that blends with the surrounding panels. Once the clear coat has cured, a careful polishing regimen brings back the original gloss and helps erase tiny imperfections. Use a polishing compound and a soft cloth or a dual-action polisher to work the area in small, overlapping circles. The goal is a seamless transition from repaired patch to original finish, so keep the polishing gentle and avoid overheating the surface, which can cause distortion in the paint or clear coat.
Even when the repair is technically sound, the appearance can still betray the repair if the edges of the new paint do not harmonize with the surrounding panels. A smart move is to blend the repaired area with a light feathering of clear and a final gloss polish on the entire fairing to minimize perceptible boundaries. Color matching is not merely about tone; it’s about finish, depth, and the micro-sparkle created by the clear coat. In some cases, you may find that the repaired area does not perfectly match the adjacent finish, particularly under specific lighting or after a few heat cycles from sunlight. A cautious approach is to assess the repair over a few days, looking for any color drift or edge softening that might necessitate a revisit to the clear coat or a minor color retouch.
For more significant damage where the damage is extensive, or where time, tools, and environment are limiting factors, professional intervention is prudent. A certified auto-body or motorcycle detailing shop has not only the tools but also controlled environments such as paint booths that can ensure consistent color matching, correct curing, and durable topcoats. They can also address structural concerns, such as hidden cracks that may expand if left untreated. In some cases, the cost of a professional repair may be rationalized by the long-term benefits of a flawless finish and the protection of the underlying materials, reducing the risk of rust on steel or continued plastic fatigue.
Throughout this process, several practical cautions help keep the work predictable. Work in a clean, dust-free space with good ventilation when paints and solvents are involved. Wear appropriate protective gear, including a mask and eye protection, to guard against inhalation of fumes and splashes. Be mindful of temperature and humidity; excessive heat can cause faster drying and potential cracking, while damp conditions can introduce dust and impede finish quality. Patience is not a cliché here but a workmanship principle—deep scratches demand slow, deliberate work rather than rushed patches. After finishing, allow the repaired area ample time to cure before washing or exposing it to water; a typical window is 48 hours or longer for the topcoats to fully reach their intended hardness.
If you’re contemplating whether the repair is worth pursuing or if you would rather explore options beyond repair, consider that there is a broader ecosystem of fairing options available. For example, a catalog of available fairings—including replacement panels and compatible styles—offers an alternative path to achieving a like-new appearance when repairing is impractical or cost-prohibitive. Browse a representative collection such as the BMW fairings catalog to understand the range of options that might complement your bike’s lines and color. This approach can be especially appealing when the fairing is heavily scarred or structurally compromised beyond what can be reasonably revived by filler and paint alone.
External resource: For a detailed, professional approach to deep scratches on motorcycle fairings, see https://www.motorcycle.com/repair/fixing-deep-scratches-on-motorcycle-fairings/.
Internal link (example of a relevant catalog): If you are exploring replacement panels or broader styling options, you can browse a comprehensive catalog such as the BMW fairings collection for ideas on how to restore the bike’s look with panel replacements when necessary: BMW fairings catalog.
The chapter above synthesizes a practical pathway for deep-scratch repair that honors the original design while recognizing the limits of DIY methods. The balance between restoring appearance and preserving structural integrity depends on careful material assessment, precise feathering, disciplined layering, and disciplined judgment about when to bring in professional tools and expertise. In the wider arc of fixing scratched motorcycle fairings, these steps provide a reliable blueprint for turning a damaged panel back into a seamless part of the machine’s overall aesthetic and protection system, ensuring both form and function endure on the road ahead.
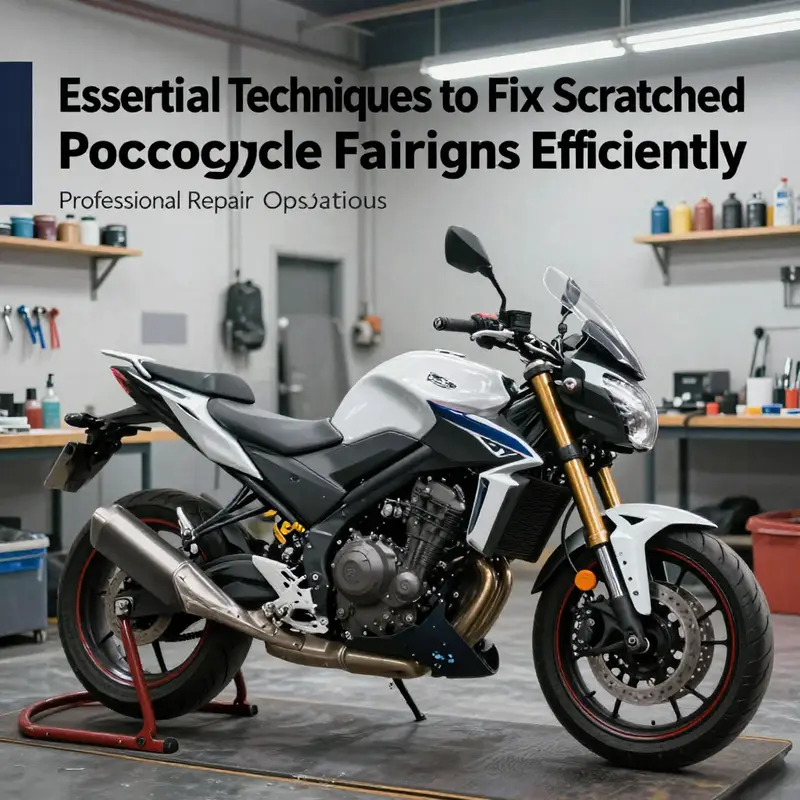
From Surface to Seamless: Professional Repair Paths for Scratched Motorcycle Fairings
Scratches on motorcycle fairings are a common rite of passage for riders who push their machines to the edge of their daily life. A tiny micro-scratch can feel like a badge of use, while a deeper nick can threaten both aesthetics and the protective layer beneath. The path from a visible mark to a near-original finish hinges on a simple truth: the depth and location of the damage dictate the repair method. In many cases, the choice is between a careful, cosmetic fix and a more involved process that rebuilds material, reshapes contours, and reclaims a true color match. This chapter threads those options into a single, practical narrative that respects the rider’s time, the fairing’s shape, and the long-term health of the surface.
When you first inspect a scratched fairing, begin with a cautious assessment of depth. Surface-level scratches compromise only the clear coat, leaving the paint and the base layer intact beneath. These blemishes often respond to gentle polishing or a targeted application of a color-matched polish. The aim is not to remove material, but to refine the micro-scratches until light reflects evenly again. For these shallow marks, a straightforward approach can restore gloss and uniformity without a heavy repair cycle. A small dab of non-gel toothpaste can serve as a mild abrasive, worked with a soft cloth in light, circular motions for a minute or two. Wipe clean with a damp cloth, then re-polish with a dedicated automotive polishing compound or wax. The key is patience and restraint; a heavy hand quickly creates haloing or clouding around the scratch, which defeats the purpose of a simple polish.
For many riders, the next step lies in a slightly more involved yet still approachable repair: clean thoroughly, prep the edges, and blend with light sanding before laying down fresh color. Moderate scratches expose the paint layer but stop short of bare metal. Here the process becomes a careful sequence rather than a single action. Start with a thorough cleansing using isopropyl alcohol to remove oils and debris that would interfere with adhesion. Then, gently sand the scratch edges with very fine-grit paper—think in the 2000 to 3000 grit range. The objective is not to flatten a ridge but to feather the transition so the repair sits flush with the surrounding finish. After cleaning again, apply thin layers of matching touch-up paint. Shake cans well or mix a pen carefully, and build up in several light coats rather than one thick one. Each layer should dry fully before the next is applied, and the final appearance should be flat rather than glossy until you reintroduce gloss with a final polish.
The moment the color has cured—often 24 to 48 hours depending on temperature and humidity—it’s time to refine. A careful buff with a polishing compound will begin to harmonize the newly painted area with its surroundings. If the color match is impeccable and the surface feels uniform, you may stop there. If not, a light pass with a high-quality wax will help restore the shared luster across the panel. In cases where the scratch sits on a curved surface or at an edge, the challenge increases because the light catches the contour differently. Patience becomes essential; multiple pale, even coats perform better than one heavy layer that can run or puddle on the curve.
But not all damage stays at the level of the color you see at first glance. Deep scratches can pierce the clear coat and reach the underlying paint or, in more severe cases, the primer or bare metal. This is where the line between cosmetic repair and structural repair becomes clear, and where a shift from DIY touchups to more advanced methods is often warranted. In such a scenario, the repair must re-create a smooth, continuous surface that can be painted and protected as a single system. Start by assessing the exposed substrate. If the metal or primer is visible, you may need to remove paint down to a stable edge and apply a rust-inhibiting primer before rebuilding the surface. If you can see through to the primer, you’ll likely need to apply a body filler to reestablish the original contour. The filler should be used sparingly to mimic the fairing’s curve as precisely as possible, then sanded smooth once cured. The goal is not merely flattening a gouge but restoring the fairing’s geometry so the paint and clear coat lay down and cure evenly.
Following filler work, the repair enters the paint phase with the careful reproduction of the original color. This often means a spray-applied color matched to the factory hue, applied in multiple ultra-thin coats with ample drying time between passes. The result should resemble the surrounding panel in both color and depth, and it should be sealed with a clear coat to preserve shine and guard against further micro-scratches. After the clear coats cure, a progressive blend of compounding and polishing returns a seamless finish across the repaired area. The entire sequence—filler, primer, color, clear, and final polish—becomes a disciplined panorama of steps designed to avoid mismatched shade, texture, or gloss that would betray a repair.
Across the spectrum of scratches, a powerful tool shifts the balance toward durability without sacrificing finish: scratch-filling compounds. These advanced fillers are designed to rebuild material inside deep scratches and gouges, creating a new, smooth surface contour that can be sanded, primed, and repainted. When properly applied, these systems deliver a repair that is not merely cosmetic but structurally reinforcing, improving how the panel tolerates future impacts and environmental exposure. In practice, a scratch-filling approach is rarely a stand-alone solution; it must be followed by careful surface preparation and color-seal application so the repaired area ages in step with the rest of the fairing. The advantages are meaningful: the fill integrates with the surrounding curvature, creates a uniform substrate for paint, and, when finished, can be virtually invisible to the casual observer. The limitations, however, are equally real. The process demands more time and more controlled steps than a basic touch-up. It requires attention to curing, sanding, and re-sealing to prevent shrinkage or texture differences that could emerge under UV exposure and temperature fluctuations.
For riders who prefer to pursue a near-perfect result, or who own bikes with high-value finishes and complex shapes, professional repair can outperform DIY fixes. A shop that handles motorcycle bodies brings a disciplined workflow and the right equipment to produce consistent color matching, precise contour restoration, and durable clear coats. The advantage is not just in aesthetics but in longevity—the repaired area can stand up to sun, rain, and repeated handling with a level of durability close to the original material. A professional approach also reduces the risk of creating new distortions on curved surfaces. When the repair involves panels with subtle radius changes or integrated shapes, massaging a filler, guide coats, and primer requires expertise that comes from experience with motorcycle-grade paint systems and the peculiarities of composite or molded plastics used in fairings. In these cases, the decision to seek a pro repair aligns with a broader goal: preserving the visual integrity of the bike across years of ownership and use.
Choosing materials and methods calls for a measured look at long-term goals. A meticulous DIY strategy, when matched with the right tools and a clean, dust-free workspace, can deliver excellent results on minor damage. The alternative—construction of a multi-step, color-accurate finish with filler and topcoat—can deliver a repair that closely matches a factory finish in both look and feel. As with any paint project, the environmental conditions matter. Work in a clean, well-ventilated space, shield the area from dust, and avoid exposing the freshly repaired panel to water or cleaning chemicals during curing. Given the sensitivity of color matching, even small shifts in temperature can alter the final shade, so plan applications for times when the climate is stable.
An implicit thread in all this is the practical balance between time, cost, and outcome. Minor blemishes can be resolved quickly and inexpensively, preserving original materials and minimizing downtime. Moderate scratches demand more care, but still stay within a DIY-friendly envelope if the rider is patient and precise. Deep scratches that exhibit primer or bare metal demand a more deliberate approach, often involving filler and professional-grade paint work. In such cases, the decision to engage a professional becomes an investment in the bike’s value and the owner’s peace of mind. A professional service, backed by standards and process discipline, is particularly compelling when color matching on high-end finishes or unique colorways is non-negotiable. The aim is not merely to improve appearance but to maintain protective integrity and structural continuity of the fairing surface.
For riders who want to explore repair options within an online catalog of fairings and color options, practical considerations also guide the route. If you are exploring color-matched replacements or panel-specific solutions, the Honda fairings catalog offers a representative cross-section of common shapes and hues that align with many sportbike models. It can be a useful reference when assessing whether a repair will produce a seamless look or when evaluating whether replacement panels might be more efficient in terms of time and finish uniformity. Honda fairings catalog provides a starting point to gauge color families and panel geometry, ensuring the repair plan accounts for curvature, light reflection, and edge transitions that influence the final appearance.
In the end, the road to restoration is a careful negotiation between the damage you can see, the damage you cannot, and the finish you want to ride with. A well-executed repair respects the fairing’s original contour, preserves its color depth, and leaves a surface that behaves under polish, wash, and UV exposure as if nothing had happened. When you decide to tackle the job yourself, approach it as a staged process: assess, prepare, repair, cure, and finish. When you bring in a professional, you align with a workflow designed to maximize color fidelity, material compatibility, and long-term durability. Either path can produce outstanding results, but the most enduring repairs arise from a thoughtful plan, steady hands, and a clear-eyed understanding of when to seek additional expertise. For riders seeking deeper technical grounding in paint repair standards and industry performance benchmarks, a comprehensive external resource offers valuable context and benchmarks to guide decisions. https://www.motorcyclerepairpros.com/motorcycle-paint-scratch-repair-analysis/
Restoring the Shine: A Practical Guide to Fixing Scratched Motorcycle Fairings
Scratched fairings are a common nuisance for riders, often the first sign that the bike has seen a few too many adventures. Yet the road-tested truth is simple: the repair approach should start with a careful assessment of depth, then flow logically from the lightest, simplest fix to the more demanding methods. This chapter invites you into a steady, methodical process that respects both the paint system and the finish you want to preserve. It’s not about shortcuts but about a disciplined sequence that keeps the fairings looking cohesive with the rest of the bike and protects against future damage. The goal is not merely to conceal a scratch but to harmonize the repaired area with the surrounding surface so it’s hard to tell where the accident occurred, even up close after a wash and a long ride. The path you choose depends on how deep the scratch goes, and that decision shapes everything that follows, from cleaning to curing to polishing. Along the way, a few pragmatic tips help you work clean, keep the color consistent, and avoid creating new flaws while you fix the old one.
The first step is always depth assessment. A quick check can save you time and money. If the clear coat only is damaged, you’re in the realm of minor surface repairs. If you can see a slight color difference with the underlying paint exposed, the scratch has breached the clear coat and entered the color layer. If you can feel a groove with your fingernail or the scratch reveals primer or bare metal, you’re dealing with a deep repair that typically requires more extensive work, or professional involvement. This ordering—surface, color, base—frames the repair philosophy and keeps you from over-solving a problem that would have vanished with a lighter touch.
For the smallest defects, the simplest remedies can deliver impressive results. Minor surface scratches that haven’t penetrated the color layer respond best to careful polishing or polishing-compatible compounds. A common, accessible option is to use a mild abrasive like toothpaste in a pinch, but the key is restraint and technique. Apply a small amount of non-gel, white toothpaste to a soft, lint-free cloth. Work the scratch in gentle circular motions for one to two minutes, letting the mild abrasives blend the micro-scratches with the surrounding finish. Always wipe clean with a damp cloth and dry before inspecting. If the look is still a touch dull, advance to a dedicated automotive polishing compound or a high-quality wax. Use a foam pad and a slow, controlled motion, either by hand or with a dual-action polisher. The goal is to reflow the finish and restore gloss without removing more clear coat than necessary. This approach is the least invasive and preserves the original paintwork while returning the shine you expect from a well-tended bike.
When the scratch deepens to the point that the color coat shows but the surface remains flat, the repair strategy shifts. Cleanliness becomes the anchor, because adhesion hinges on a dust-free surface. Begin with a thorough cleaning using isopropyl alcohol to remove grease, oils, and debris. After the surface dries, you’ll want to soften the edges of the scratch so fillers and touch-up colors blend smoothly. A very fine grit sandpaper, around 2000 to 3000 grit, is ideal for feathering the edges. The aim is not to remove material but to create a micro-smooth transition that paint or color touch-up can follow. Light, even strokes with minimal pressure prevent further damage. After sanding, apply a thin, even layer of color-matching touch-up paint. This can come as a pen or a spray, depending on the size and accessibility of the area. Shake the can or prepare the pen per the manufacturer’s instructions, and apply multiple light coats rather than one heavy layer. Allow each coat to dry completely before applying the next; patience here pays off in a uniform match. Once the color has fully cured—often 24 to 48 hours, depending on environmental conditions—buff the area with a polishing compound to restore the surrounding gloss and harmonize the repaired patch with the rest of the fairing.
Deep scratches that reach the primer or metal are a different order of repair. These wounds risk rust and structural concerns, so the approach must be deliberate. Professional repair is highly recommended when possible. The home repair path exists but demands careful execution and proper tools. If you choose the DIY route, start by sanding the damaged area down to a flat, bare surface, ensuring you remove loose paint and rough edges. Apply a rust-inhibiting primer to protect against future corrosion. If the gouge is extensive or creates a dent, body filler may be necessary to rebuild the contour. After filler cures, sand it smooth, then re-prime. Finally, apply the base color with a spray system, using multiple thin coats for even coverage. A clear topcoat seals the finish and adds durability. Each step should be performed in a well-ventilated space with dust control, because contaminants in the air will ruin a glossy repair as surely as a poor color match. After the paint cures, a final polishing session brings back the uniform sheen, and a careful inspection ensures there are no runs, orange-peel texture, or mismatches at the edges.
The realities of a deep repair remind many riders that professional assistance can yield the most reliable results. A qualified auto-body technician or professional motorcycle detailer has calibrated paint systems, perfected color matching, and the experience to contour the repair to the bike’s existing lines. If you opt for professional service, ask for a color-matched, layered approach that includes a good clear coat and a protective finish. You’ll often see more than cosmetic restoration here; a skilled technician can address any micro-cracks that may have formed around mounting points or seams, which might otherwise propagate new damage under vibration and weather extremes. In the absence of professional help, you may still achieve a respectable finish by treating the process as a mini panel replacement exercise—flat, primed, color-sprayed, clear-coated, and polished—but accept that the finish may not perfectly disappear at all viewing angles.
During any of these processes, sequence matters. Preparation, adhesion, cure, and finish quality determine how long the repair will last and how seamless it will appear over time. The environment matters as well. Work in a clean, dust-free space with good ventilation. Dust and lint will mar a fresh paint job just as surely as a sharp breeze can carry particles onto a wet surface. Temperature and humidity influence curing; too much heat can cause solvent loss and cracking, while excessive humidity can lead to blooming and moisture entrapment. A protected area shields the repair from direct sunlight, which can cause color drift as the paint cures. In addition, avoid washing the motorcycle or exposing the area to water for at least 48 hours after the final paint and clear coat have been applied. This curing window is essential to prevent wash-induced marring and to give the new finish time to bond with the substrate.
Maintenance after repair completes the work. To protect the fresh finish, consider a long-term plan that includes a protective coating or film. A ceramic coating or clear paint protection film can add an extra layer of defense against future scratches, insects, UV exposure, and chemical cleaners. The goal is not only to fix the scratch but to reduce the likelihood of future damage in the same spot and neighboring panels. Regular gentle cleaning with a pH-balanced motorcycle soap and a soft microfiber cloth helps preserve the repair. Avoid abrasive brushes or rough towels that can dull or scratch the finish. When detailing, use products designed for automotive paint systems and follow the manufacturer’s recommendations for curing times and compatibility with any protective films already in place.
If your bike happens to wear a specific fairing family, you can explore options in the relevant category pages to ensure any future replacement parts align with the repaired panel’s color and curvature. For a practical context, you can browse the Honda fairings category to see how matching components are presented and what considerations other riders have when integrating repairs with replacements. Honda fairings provide a framework for understanding how color codes and finishes can impact the overall look after a repair, especially when touch-up paint and clear coats are involved. This awareness helps you plan future maintenance and upgrades with a clearer eye on the bike’s unified appearance.
In closing, the repair of scratched fairings should feel like a careful craft rather than a hurried chore. Start with a precise assessment of depth, then apply the least invasive method that delivers acceptable results. Progress to more involved steps only as necessary, keeping in mind the risks and benefits of each stage. The right environment, proper curing times, and gentle finishing techniques all contribute to a result that remains durable and visually coherent with the rest of the bike. With patience, you can restore the fairings to near-original condition and maintain the aesthetic you designed your ride to have. For riders who want to extend the life of their repairs, keep a routine of light polishing, mindful washing, and periodic protective coatings. The road is long, and a well-maintained finish can be as much a part of the riding experience as the engine’s roar.
External resource for broader finishing and repair considerations: https://www.autobodynews.com
Final thoughts
Effective repair techniques for scratched motorcycle fairings are essential knowledge for any business owner in the motorcycle maintenance industry. By understanding how to address different levels of scratches—from minor surface marks to deep gouges—you can offer valuable services that meet your clients’ needs and enhance their motorcycle experience. Additionally, knowing when to recommend professional services ensures that customers receive the best outcomes for their repairs. Emphasizing consistent maintenance can further solidify long-lasting relationships with clients, ensuring they return to your business for their repair and service needs.