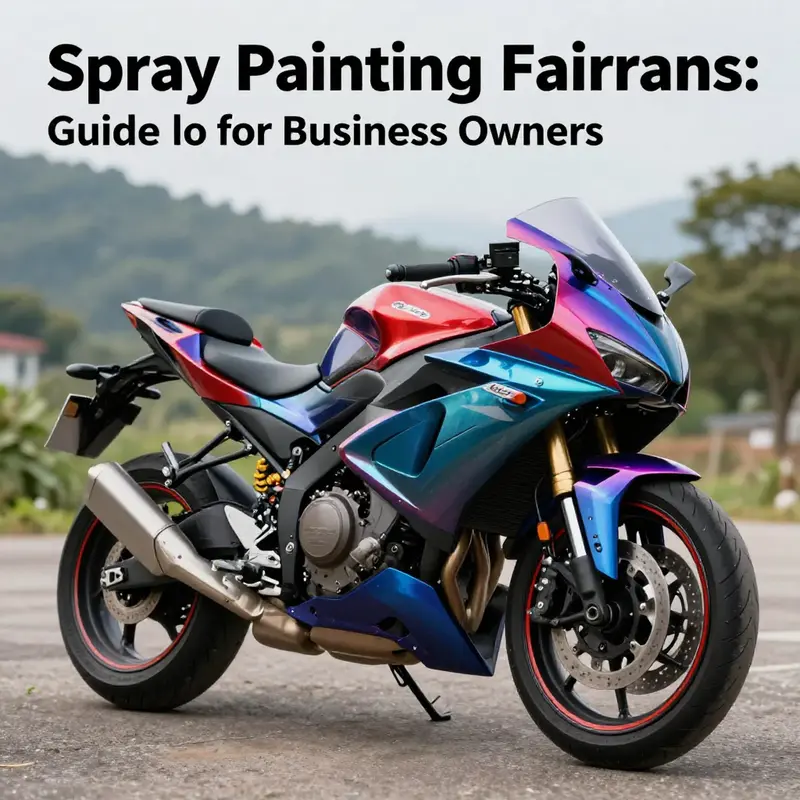
Spray painting motorcycle fairings can enhance their appearance and protect them from the elements. It’s not only a cost-effective way for motorcycle enthusiasts to personalize their bikes but also an excellent opportunity for businesses in the motorcycle industry to expand their service offerings. Understanding the key aspects of this process, such as surface preparation, selecting the right paint, and mastering effective application techniques, is essential for achieving a durable and professional-looking finish. This guide will provide business owners with the foundational knowledge and practical tips necessary to excel in spray painting motorcycle fairings.
The Foundation of a Flawless Finish: Mastering Surface Preparation for Spray-Painted Motorcycle Fairings
Surface prep is the quiet, stubbornly practical science that makes or breaks a spray-painted motorcycle fairing. It isn’t the flash of a perfect color or the gleam of a glossy coat, but it is the hinge on which durability, adhesion, and long-term aesthetics rotate. When riders ask whether they can spray paint their own fairings, the question isn’t just about color choice or tool quality. It’s about whether the underlying surface has been coaxed into a state where paint can take hold and stay put through sun, rain, wind, and road grime. The meticulous path from clean plastic to a durable, factory-like finish begins with removing the fairings from the bike, freeing the surface from any obstacle that could cloud adhesion or trap unwanted residues beneath the paint. The act of removal might seem cosmetic—a convenience so you don’t overspray the rest of the bike—but it is, in truth, a crucial step. When you take the fairings off, you gain unhindered access to every contour, seam, and edge. Dust and wax don’t hide in the small recesses, and you avoid the temptation to dodge around corners with a spray can, hoping a stubborn seam will behave. This level of access reduces the risk of uneven color and paint buildup in places you can’t reach once the bike is reassembled.
Cleaning follows removal with equal seriousness. The surface must be stripped of oils, grease, and silicone, because even microscopic residues can sabotage adhesion. A dedicated degreaser is a must, not the cheapest kitchen solvent found in the garage. You want something designed for automotive or plastic coatings, capable of dissolving wax and mold release agents that cling to the surface. A clean cloth used with the degreaser should reveal a dry, bright surface that looks nearly bare, free of smear or residue. Some technicians rinse with water after the initial wipe, then re-clean with a second pass of degreaser to ensure the surface is perfectly neutral before the next step. The aim is not merely to be clean in a general sense but to ensure that every microfilm of oil, wax, or adhesive has been removed from the plastic’s pores and the surface’s microscopic textures.
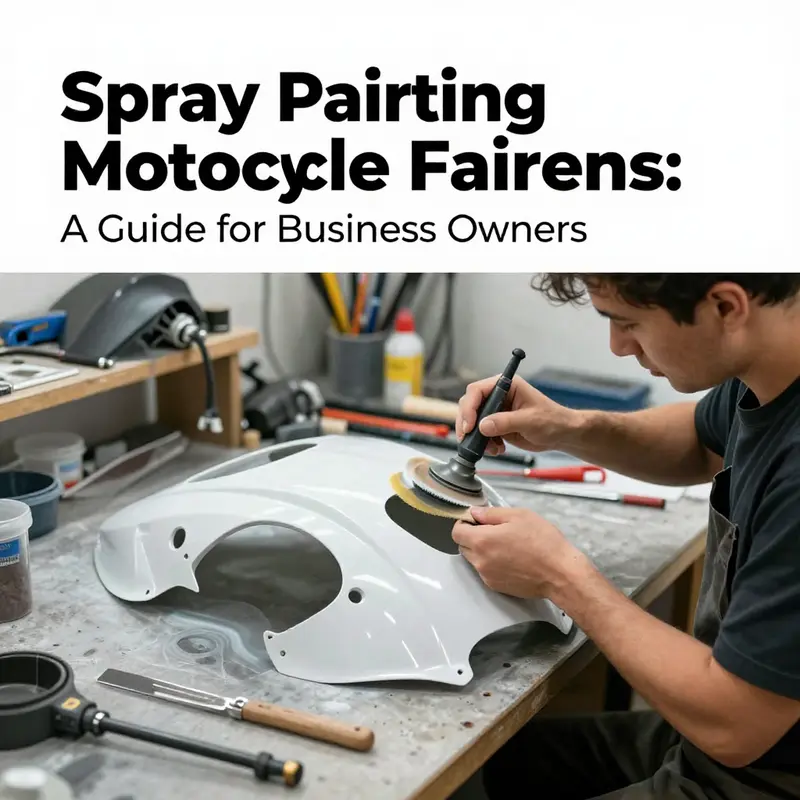
Once clean, the fairing surface is ready for the mechanical key that helps the primer grab onto the plastic. Sanding begins with a relatively coarse grit to abrade the surface enough to create that anchor. Start with around 320 grit and work in a consistent, circular motion. The method matters as much as the material here. You want to roughen the plastic enough to provide a micro-mechanical key, but you don’t want to gouge or create deep scratches that will telegraph through the paint and show up as shadows or texture irregularities later. After the initial roughing, progressively move to finer grits, finishing with about 600 grit. This two-stage approach — roughen, then smooth for a uniform finish — ensures the surface is not too rough yet not too slick for adhesion. The chance of runs, sags, or orange-peel texture diminishes when you finish with a finish pass that leaves a surface that is slightly dull to the touch rather than glossy and slick. When sanding, keep the motion steady and consistent, and avoid pressing too hard in any single area. If you inadvertently create low spots or gouges, blend them back into the surrounding area with light passes, rather than trying to fill them with paint later on. After the sanding, a meticulous wipe with a clean, lint-free cloth dampened with acetone is essential. The acetone dissolves any remaining dust and oils and evaporates quickly, leaving the surface clean and ready for primer. The clarity of this moment—before primer—sets the stage for how well the topcoat will adhere and how evenly it will sit over the surface texture.
Primer is the unsung hero in this sequence. A high-quality plastic primer, specifically formulated for automotive or motorcycle plastics, creates a base that seals the porous surface of plastics and fiberglass, reduces the risk of primer bleed, and provides a uniform canvas for the color layer. The primer should be applied in thin, even coats rather than a single thick layer. Thin coats dry faster, minimize solvent entrapment, and lessen the chance of runs. Between coats, follow the manufacturer’s drying times, which can hinge on ambient temperature, humidity, and the specific product chemistry. If you are aiming for a seamless look, lightly scuff the primed surface with a fine 600 grit to promote adhesion of the base color once the primer cures. Wipe away any dust created during this light sanding with a clean tack cloth or microfiber; you want a surface that feels almost damp to the eye, not dusty. The goal is an even, uniform base that reads as a blank slate when you place the color on top.
With priming complete and the surface fully cured, you are at the threshold of color, and this is where patience becomes a virtue. The sequence of application matters more than almost any other factor in a DIY spray job. The temptation to rush through the base color is strong, especially when you’re eager to see a finished product. However, the best results come from applying multiple thin coats rather than a few heavy ones. Each coat should be allowed to dry according to the paint manufacturer’s instructions, which usually take into account the film build of the base coat and the ambient conditions. A steady hand and consistent distance from the surface help deliver a uniform spray pattern. Move in smooth, overlapping passes, keeping the spray angle and velocity steady. Overlaps should be careful and deliberate to avoid thin patches or heavy build that can lead to runs. If you notice a blemish or an area that looks lighter than the rest, pass over it again after the initial coats have cured, not while the paint is still wet.
The choice to apply a clear coat is often debated, but it is widely recommended for durability. A clear coat serves several vital functions: it protects the pigment from UV degradation, shields the color from chemical assault from road debris and cleaners, and adds a level of gloss that makes the color depth look more vibrant. Clear coats also help to smooth micro-imperfections that remain after the color coat and can bring the overall finish closer to a factory look. Apply the clear coat in the same cautious, thin, even manner as the color coats. Allow the clear to cure thoroughly, following the manufacturer’s guidelines for recoat windows and drying time. Improper curing can trap solvents or create haziness, diminishing clarity and gloss. In a well-executed process, the fairing wakes up with depth and a reflective surface that invites a second glance.
The broader reality for DIY spray painting is that achieving a flawless, pro-level finish demands more than just the right color choice and a decent spray gun or can. It demands a disciplined sequence: clean, degrease, sand, re-clean, prime, sand again, base coat in thin layers, apply a clear coat (optional but recommended), and then allow for full cure. It is a choreography of chemicals and mechanical steps that, when done with care, yields a finish that not only looks right in the moment but holds up over time. The market does acknowledge that a professional auto body shop can deliver a near-perfect solution, and the cost, though not prohibitive for some riders, can run higher than the DIY path. In many cases, enthusiasts discover that a well-prepared, patient DIY approach yields results that satisfy the eye while keeping the budget in check. Remember, the idea is not to rush a job just to ride the bike again this weekend; it’s about building a durable surface that resists the hazards of riding and looks good on the street for years to come.
As you evaluate the path forward, consider the environmental and the practical aspects. Water-based paints are praised for lower odor and reduced environmental impact, which matters when you work indoors or in a garage that lacks a dedicated venting system. The chemistry of these paints often favors adhesion and durability on plastic surfaces, and they commonly dry to a tough film with respectable weather resistance. While they offer several advantages, the preparation steps surrounding them remain the same: the surface must be impeccably clean, properly keyed, and evenly primed. If you decide to pursue a professional finish, you’re trading some of the personal control for a high degree of predictability and polish. Shops bring meticulous spray technique, controlled environments, and multiple test panels to dial in color accuracy and texture. Even then, the foundational prep you master at home remains relevant; it informs the conversation you have with the shop and helps you understand the work that goes into replicating a factory-like finish.
In the practical world of project planning, you will likely sequence the work to fit your schedule and your climate. The steps described—stripping, cleaning, sanding, priming, color, and clear—form a pipeline that you can pace. Humidity and temperature will influence drying times and can magnify or blunt the effect of each coat you lay down. It’s not unusual to pause work to let a coat cure overnight, especially if you’re balancing a job, family, and other commitments. The key is consistency: consistent sandpaper grits, consistent cleaning routines, and consistent coalescence of coats. When you approach the job with this rhythm, the result becomes less a gamble and more a calculation of steps performed with care.
The broader takeaway is clear: if you want to spray paint motorcycle fairings, the real victory lies in the quiet, patient labor of surface preparation. This is the center of gravity of a long-lasting paint job. You can chase the ideal color, or you can chase the ideal bond between surface and pigment. The former is visible and flashy; the latter is enduring. And while there are quotes and price tags attached to professional finishes, your at-home approach, when executed with discipline, can produce results that are remarkably close to factory finishes in appearance and resilience. If you’re researching options for fairings to customize, you might explore options like fairings for CBR. This kind of page can help you understand what’s available for different models and guide you in planning a color strategy that complements your bike’s lines and geometry.
In the end, the question isn’t simply about whether you can spray paint fairings. It’s whether you’re prepared to respect the surface you’re painting. If you respect the surface, you respect the color. If you rush the prep, the color is likely to disappoint you sooner than you’d hoped. Respecting the surface means doing the unglamorous work with a steady hand and a patient mind. It means cleaning, abrading, priming, and drying with intention. It means recognizing that the best-looking, most durable ride starts with a fairing that has learned to forgive your spray and hold its own in the long ride ahead. As you move from prep to color, and then to protection, you’ll find that the finish isn’t a moment in time but a relationship between your materials, your technique, and the environment that welcomes your bike back onto the road. This is the core truth that every rider who contemplates DIY repainting should carry: when you treat surface preparation with care, you give paint its best chance to perform, protect, and impress for miles to come.
External resource: https://www.dijemey.com/
From Prep to Shine: The Art and Science of Spraying Motorcycle Fairings
Spraying the fairings on a motorcycle is a decision that sits at the crossroads of craft and practicality. It is a task that can dramatically alter the look of a bike while also testing patience, discipline, and the willingness to follow a careful sequence. The finished surface speaks not only of color choice but of the process behind it: the deliberate steps that transform a plastic or composite shell into a glossy, durable shield against sun, rain, and road grit. The beauty of this work lies in how small, well-executed decisions accumulate into a result that feels both fresh and purposeful. Yet the same care that builds a professional finish is what makes a DIY project succeed or fail. When people ask if you can spray paint motorcycle fairings, the honest answer is yes, you can. The more useful answer is this: you can, but you must respect preparation, material selection, and environmental control as non negotiables. If you approach the job with a plan, the odds of a satisfying, long lasting result rise considerably, and the ride home after your work will feel closer to a factory finish than to a flight of fancy born in a garage.
Surface preparation is the first and perhaps the most crucial phase. The fairings must be thoroughly cleaned to remove all oils, waxes, dust, and any traces of old paint that are flaking or lifting. Degreasers play a key role here, but water and a mild detergent with a thorough rinse are often enough to begin. The object is not merely to wipe away visible dirt but to strip away anything that could undermine adhesion in the long run. Once clean, the surface should be dried completely. Any lingering moisture can create micro bubbles under the coating and ruin the smoothness you want to achieve. After cleaning, a light sanding follows. A 400 to 600 grit paper is typical because it creates a shallow key that helps the paint bite into the surface without gouging through the top layer. The sanding work should cover the entire fairing in gentle passes, with the aim of producing a uniform texture rather than a raw, scratchy surface. If you encounter any residue or old primer that lifts easily, take the time to remove it fully and re-sand the area. This carefulness pays off later when you apply primer and color.
The choice of primer, while sometimes overlooked, deserves emphasis. Plastic and fiberglass fairings benefit from a primer that can bond well with the underlying material and provide a uniform, receptive base for the color coat. High quality primers improve adhesion, fill very small imperfections, and help the skin of the paint lay down evenly. For fairings that have an uneven sheen or a rough texture, a primer with smoothing properties can minimize the amount of color layers required to achieve a consistent look. This is especially important on parts that see fuel splashes, heat cycles, and temperature fluctuations. The primer is not the final layer; it is the foundation. It helps the subsequent coats blend seamlessly and reduces the risk of hides or patches appearing after the paint has cured. In the realm of primers, adhesion promoters can also be an ally when the surface proves resistant to traditional bonding. While the exact choice of primer will depend on the material and the paint system you select, the underlying principle remains constant: prime first, prime well, and let the primer cure according to the manufacturer’s instructions before moving on to color.
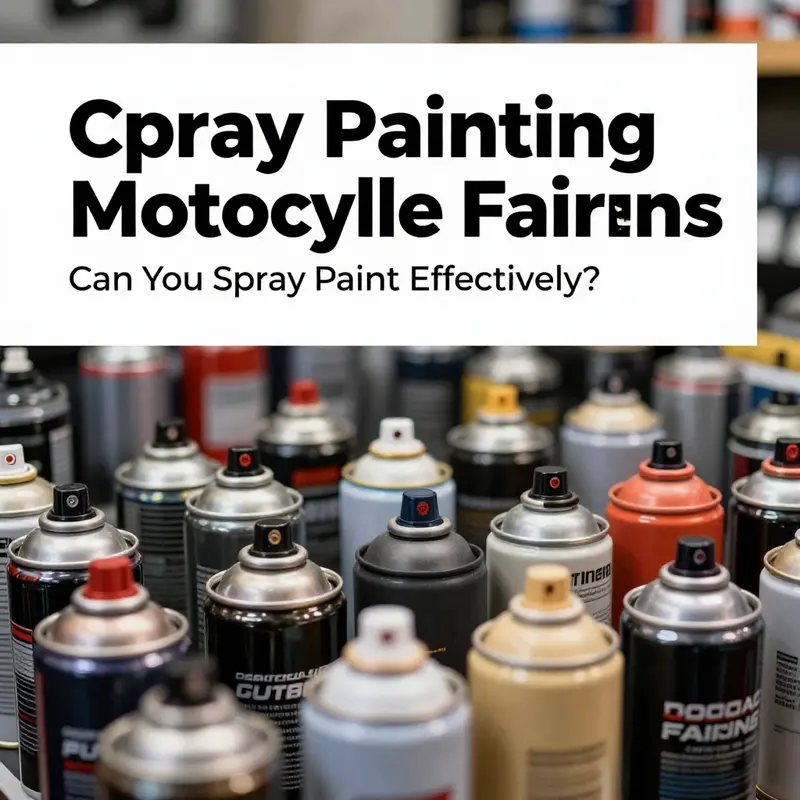
The core decision in the realm of color is the paint type. There are consumer grade, standard aerosol paints that come in a broad range of colors, but they usually lack the flexibility and chemical resistance required for fairings, which endure sun exposure, fuel exposure, and frequent temperature swings. For the best balance of durability and ease of application, most riders turn to professional two component polyurethane systems. These two part paints are designed to cure into a hard, flexible film that resists fuel attack and UV damage more effectively than single component options. They also tend to maintain color and gloss better under the test of time, given the harsh environment that fairings live in. Water based variants exist within the market, offering the appeal of lower odor and easier clean up. While water based systems can be friendlier to the environment, ensuring compatibility with the plastic or fiberglass substrate and the chosen clear coat is crucial. In all cases, the goal is a finish that not only looks the part but also resists the daily rigors of riding, from road salts in winter to sunbaked summer miles.
Color application should be approached as multiple thin layers rather than a single, thick flood of pigment. The logic is straightforward: thin coats dry more evenly and shrink less as they cure, reducing the chance of runs, sags, or uneven color. It is better to plan for three to five light coats than to chase a single heavy coat that may never settle without flaws. Each coat needs to dry fully according to the manufacturer’s guidelines before the next is laid down. Rushing this sequence invites micro runs that can ruin the gloss and chase you into endless spot repair. A common practice is to test the paint on a small, inconspicuous panel or scrap fairing to confirm flow and color depth before committing to the actual piece. This practice reduces risk and gives a chance to adjust spray technique, pressure, and distance in a controlled way. The spray technique itself matters as much as the paint. A steady, even sweep with a consistent distance from the surface — often several inches away — helps the color lay down uniformly. The pattern should be slightly oval and swept in a way that overlaps the previous pass without building up in any single spot. The motorcyclist who learns to read the spray and accept minor adjustments during the process will often reach a level of finish that looks almost professional in its evenness and depth.
After the color has dried to a firm, cured state, many riders opt to add a clear coat. This optional layer serves as armor for the color beneath. A clear coat can drastically improve UV resistance, chemical resistance, and abrasion resistance, and it contributes a high gloss that gives the finish its unmistakable depth. The clear coat should be compatible with the color system and applied in a similar manner: several thin coats rather than one heavy sweep, with proper flash times between coats. The clear can also be tuned for gloss level, wet look, and even a satin or matte effect when desired. The result is a color that not only looks good on the day of completion but remains resilient through the life of the bike. While a professional shop might offer a flawless factory look, a well executed DIY clear coat with careful drying and curing can deliver a finish that stands up to the realities of riding. It is worth noting that clear coats demand their own attention to humidity and temperature. Work in a clean, stable environment and observe the recommended cure times to avoid trapping moisture or creating hazy surfaces.
A topic that many riders ask about early in the planning stage is whether to attempt this project at home or to seek professional services. Doing it yourself can be a rewarding pursuit and can yield substantial cost savings, especially when the project is framed as a learning curve rather than a single shot at perfection. However, achieving a flawless result at home requires more than a basic spray can and a driveway. It calls for a controlled environment, proper ventilation, and a dedicated space that minimizes dust, plus a spray gun and compressor capable of delivering a steady, predictable spray pattern. Even with the right equipment, the process demands patient attention to detail, strict adherence to drying schedules, and a willingness to invest time in test panels, color matching, and finish calibration. The alternative to a DIY approach is a professional detailing service, where technicians execute the same steps with experience and equipped facilities. A professional shop can offer controlled air flow, dust filtration, temperature regulation, and a paint booth that reduces the risk of contamination. The outcome in a best case scenario is a finish that exhibits consistent color, even gloss, and a robust, long lasting surface. The trade off is cost, which can be substantial, especially for complex shapes or multi color schemes. The decision is highly personal: for some riders, the satisfaction of hand crafting a new look is worth the extra time and the risk; for others, the assurance of a factory grade result delivered by skilled technicians is more appealing. Either way, the journey through prep, paint, and protection becomes a story not just of color but of discipline and care, a narrative that mirrors the ride itself.
In navigating the realities of color and finish, it helps to frame the task as a sequence where success rests on compatibility and consistency. The substrate on which you lay color matters, and this is particularly true for plastic or composite fairings. Plastics can be sensitive to certain chemical interactions, so any solvent, cleaner, or promoter you use must be chosen with care to avoid crazing or surface softening. Compatibility between the primer, the paint system, and the clear coat will determine long term adhesion and gloss retention. If a product line recommends a certain sequence, do not skip steps or substitute similar looking products without understanding the chemistry. Adherence to manufacturer guidance for the chosen paints ensures predictable outcomes and makes the process more forgiving if something goes slightly off plan. A practical mindset for riders who want to tackle this at home is to build a small, repeatable workflow. Start with a clean sheet of practice plastic or a spare fairing piece. Practice the spray technique, test the color depth, and measure the way the surface dries under your shop lighting. Keep notes on spray distance, air pressure, nozzle size, and the number of coats required to reach the desired effect. The notes serve as a reference for the actual project, and they help you replicate success or troubleshoot if some aspect does not translate from the practice area to the bike.
For readers who are mapping a specific model or looking to coordinate color and shape with the rest of the bike, there is a practical benefit to exploring existing fairings collections for reference. Considering a model line such as Honda fairings can help you anticipate contours, curves, and how the surface interacts with light. The Honda fairings collection, for example, consolidates parts with similar geometry, which means you can better predict how a certain color or finish will appear once it wraps around a specific curve or corner. This kind of reference can simplify color matching and help you anticipate edge definition, how the color depth holds at sharp radii, and how the gloss sits on the turns and edges. It also makes it easier to plan the clear coat strategy around features like vents, scoops, and fasteners. When you are ready to explore those options, the Honda fairings collection can be a useful resource to inform your approach and ensure that the finish you aim for remains coherent with the bike’s aesthetic language.
In the broader sense of the project, there is a recognition that the final finish is a result of the choices made long before the spray hits the surface. The best outcomes come from a carefully laid plan that respects material behavior, environmental realities, and the limits of the technique you are comfortable with. The paint you choose sets a tone for durability; the primer and adhesion promoter establish the foundation for that tone to survive through sunlight and road grime; and the clear coat provides the final wrap that seals in color and gloss while pushing back against the elements. When all these elements align, the finish remains vibrant, smooth, and resilient, and the bike carries a fresh identity that will turn heads and withstand the test of time. The act of spraying becomes less a gamble and more a measured practice, one that invites patience, curiosity, and a respect for the craft.
External resources and additional guidance can help you refine technique and confirm the best practices for your climate, budget, and project scale. A detailed how to guide on painting motorcycle fairings outlines common workflows, cautions, and best practices that echo the themes discussed here. For readers seeking a broader perspective on the techniques and materials, this external resource offers a helpful companion to the steps described above and can point you toward a deeper understanding of the balance between aesthetics and durability. External links and references can provide additional context on spray distance, spray gun settings, and the subtle differences between paint systems, which in turn can help you tailor the process to your specific bike and goals. As with any hands on project of this kind, continual learning and careful observation will yield the best long term results, and the road ahead will be colored not only by your chosen shade but by the thoughtful care you gave to preparing, layering, and protecting the surface that rides along with you.
In sum, spraying motorcycle fairings is a feasible and rewarding endeavor when approached with discipline and a willingness to learn. It is a craft that rewards methodical preparation, correct material selection, and a patient, iterative approach to layering and curing. Whether you pursue a bold new color, a subtle refresh to reclaim the gloss of a factory finish, or a custom design that speaks to your own taste, the process remains anchored in the same fundamentals: clean and prepared surfaces, proper adhesion, careful application of color, and a protective clear coat that guards the work against sun and weather. The satisfaction comes not from a single perfect spray but from the confidence that your finish will endure, wrinkle free, under the daily realities of riding. And as you roll out, you will know that the fairings not only tell a story of style but also speak to a method that respects the bike, the environment, and the rider who chooses to take control of the look and the life of the machine.
Shaping the Surface: Mastering the Craft of Spray-Painting Durable Motorcycle Fairings
Spray painting motorcycle fairings is a project that sits at the intersection of craft and science. It asks for patience, a steady hand, and a method that treats the fairing as part of a larger system—one that must survive weather, sun, and road debris while still looking precise and clean. The process starts long before the spray comes out of the nozzle. It begins with a decision about how to approach the surface, what materials to choose, and how much time to invest in preparation. When done well, the result looks factory fresh and wears evenly through miles of wind and spray. When rushed or mismanaged, it can peel, crack, or fade in a season. The difference rests on preparation, the right choice of paints and primers for plastics, and a disciplined painting routine that respects the flex and surface of your fairing. The goal is a durable, flexible finish that sits comfortably on ABS or fiberglass, resists sunlight and road salts, and remains glossy and clean enough to photograph without a glare that betrays the work.
The first essential step is to see the fairing not as a simple plastic shell but as a surface with memory. Plastic, especially ABS used in most motorcycle fairings, has a natural tendency to flex. Any paint system that seals in that flex without accommodating it invites microcracks and early peeling. A robust approach starts with a clean slate: remove oils, waxes, and contaminants that would interfere with adhesion. A thorough cleaning with a degreaser is nonnegotiable. If you skip this, you invite a weak bond that shows up as dull spots, fisheyes, or peels after a few rides. Once clean, the surface must be prepared to accept paint with a key that allows the coating to grip. A light sanding with fine grit, typically in the 600 to 800 range, creates microscopic pores that act like anchors for the primer and the color coat. It is not necessary to roughen the surface to the point of visible scratches, but enough abrasion should be present to give the paint a place to grab onto. After sanding, a tack cloth helps remove the tiny dust particles—these particles, if left, can create a cloudy finish or rough texture under the paint. The aim is a surface that feels almost velvety to the touch, free of grease and debris, and ready for the primer to do its work.
Priming follows as a bridge between the bare plastic and the color you want to show off. On ABS or other plastics, a dedicated plastic primer improves adhesion and helps seal the surface, reducing the risk of plasticizer migration that can lift paint over time. The primer acts as a barrier, a slightly thicker float that fills in minor irregularities and sets a uniform stage for the color. The best practice is to apply primer in thin coats, allowing each coat to dry thoroughly according to the manufacturer guidance. Several light passes beat a single thick layer, which can trap solvents and create sags or pinholes. A well prepared primer layer also expands the life of subsequent coats by providing a more uniform base, especially important on areas that experience flex or impact, such as mounting points or edge corners that see more movement.
With the surface sealed and textured in a predictable way, the painting begins. The choice of paint is critical. For plastic fairings, urethane based spray paints designed for plastic are favored for their flexibility, durability, and chemical resistance. The color layer should be applied in multiple thin coats rather than a single heavy one. Thin coats dry faster and more evenly, which reduces the likelihood of runs, drips, and orange peel texture. The painter should maintain a consistent distance from the surface, typically within a range that keeps the spray moving in a smooth, even arc. A common guideline is about a foot, give or take a few inches, with an even sweep back and forth. The environment plays a significant role here. A calm, dust free area with stable temperature helps the paint cure uniformly. If the ambient humidity is high or the air is too cool, drying times extend and finishes may become cloudy or tacky. Between coats, a brief flash off period often 10 to 15 minutes depending on the product lets solvents dissipate enough to reduce the chance of lifting the previous layer. Patience is the painter’s most valuable tool at this stage; rushing can lead to a finish that looks good at a glance but fails under sun exposure or cold weather.
The third major element is curing and protection. Once you have achieved the color coverage you want, the finish needs time to set. Curing times can vary; many paint systems require at least 24 hours of undisturbed air for the color coat to reach its maximum hardness, while some combinations benefit from a longer cure before any handling or mounting occurs. A clear top coat is commonly employed to boost UV resistance, chemical resistance, and the overall gloss. The clear adds a protective layer that defends against sun fade, stone chips, and the occasional spill from fuel or solvents. It should be compatible with the color coat and the primer, and it should be applied in thin, even layers, just as with the color coats. The overall effect is a seamless, glassy finish that feels smooth to the touch and resists the chalky dulling that many unprotected plastics develop after exposure to the elements.
The artistry in this process is less about a dramatic flourish and more about a disciplined rhythm. The technique requires a steady hand and a consistent routine. Practice helps, but so does respect for the material. Plastic fairings behave differently from metal panels; they flex and thermal cycle more readily, which means the film must be flexible enough to accommodate movement without cracking. That is why a flexible, urethane based system is favored and why a proper primer matters so much. The painter must also consider edge treatment. Edges are where adhesion often fails first if the paint is too thick or the surface was not properly prepared. Keeping coats thin at the edges prevents buildup that can encourage cracking or peeling during flex. The underlying principles remain the same regardless of color choice: clean, abrade, prime, color, clear, cure. It is a sequence that rewards patience and meticulous attention to each step.
A broader point to keep in mind is the balance between DIY feasibility and professional practice. DIY spray painting can be a cost effective option when the goal is to refresh a rider’s look or replace a damaged panel. Yet the path to a flawless finish is paved with skill, time, and careful conditions. In many riders’ garages, the noise of a well tuned spray gun is the soundtrack of a small, patient experiment that, if successful, yields a glossy, durable result. For others, the same project becomes a bigger undertaking, one that benefits from a controlled environment, a dedicated spray booth, and the expertise of an auto body professional. The cost difference can be substantial. While a home project minimizes labor charges, you pay in the form of potential flaws that are hard to correct later—peels, sags, or color mismatches that require stripping and redoing. When a professional is involved, the results often reflect a higher level of finish and longevity, with the work carried out under controlled humidity, temperature, and ventilation conditions.
Safety and environmental considerations deserve careful attention. Working with aerosols means exposure to chemical fumes and particulates. It is essential to wear an appropriate respirator, eye protection, and gloves, and to ensure adequate ventilation. A dust free environment helps prevent particles from embedding in the fresh paint. Temperature and humidity must stay within the limits recommended by the paint manufacturer; deviations can alter the drying and curing behavior of the coatings. This is not a step to shortcut for the sake of speed. The compromises that come from inadequate ventilation, improper PPE, or rushed drying are precisely the ones most likely to undermine the paint durability and appearance. In other words, the safe, patient path is the smart path when you want your fairings to survive sun, rain, and highway speeds.
To imagine a finished result that endures, consider the life cycle of a fairing once it leaves the spray booth or the garage. A properly prepped surface with a flexible color layer and a protective clear coat will resist cracking, blistering, and discoloration for years under normal riding conditions. It will tolerate the occasional gouge from a stone or a curb, and the finish will remain relatively easy to clean. It is not unusual for riders to care for these finishes with regular washing and the occasional touch-up if a chip appears. The more you invest in careful preparation and controlled application, the longer the finish will remain vibrant. The maintenance routine matters as well: avoiding aggressive solvents and harsh brushes that can mar the surface, using a soft cloth for cleaning, and applying a fresh coat of wax or sealant as needed to keep the gloss and clarity in check.
For readers seeking a consolidated view of techniques and best practices, the core takeaway is simple: treat the fairing as a living surface that will flex and endure. Clean thoroughly, abrade lightly, seal with a plastic primer, spray color in multiple thin coats with careful distance and even motion, and protect with a compatible clear coat. Allow appropriate curing time between steps, minimize dust and contaminants, and maintain a controlled environment to the extent possible. With these steps followed, the final finish can be surprisingly durable and remarkably uniform. It is worth noting that the exact products you choose should be compatible across layers and suit the material of the fairing. Keeping the process steady and patient will yield results that satisfy both appearance and longevity.
As you consider the next steps, take the time to study the journey from bare plastic to glossy finish. The paint is not the end of the story, but the visible outcome of a careful, methodical process. The effort invested in prep, priming, and layering pays dividends in the long run, especially when you ride through seasons and miles where exposure tests the quality of the finish. If you plan to explore further, remember to refine your technique with practice panels, to keep the workspace clean, and to respect the drying and curing times prescribed by the paint system. In this way, spray painting becomes less a quick fix and more a disciplined craft that honors both the machine and the rider.
For readers who want more practical guidance on the intricacies of the process, a trusted, in depth practical guide offers additional troubleshooting steps and nuanced advice on achieving a pro level finish. Whether you are repainting a single panel or upgrading multiple fairings, this knowledge base complements hands on practice and helps you anticipate common challenges before they appear on the bike. External resources can provide a broader perspective on technique, while the hands on approach remains the gold standard for mastering the craft. If you want to continue exploring the world of fairings and their customization, you can also explore the broader category of fairing products and styles to see how different manufacturers approach the design and build quality of their panels, which can inform color and finish decisions for your project. For a broader external reference that delves into the practical steps and considerations of painting motorcycle fairings, visit: https://www.motorcyclecruiser.com/how-to-paint-motorcycle-fairings-a-practical-guide/
Final thoughts
Understanding the comprehensive process of spray painting motorcycle fairings is invaluable for business owners aiming to offer high-quality service. From meticulous surface preparation to the careful selection of paint and the application process itself, each step contributes to an end result that can delight customers and enhance their motorcycles. By mastering these techniques, businesses can not only meet customer expectations but also build a reputation for quality and craftsmanship in the motorcycle community.