Repairing motorcycle fairings is essential for maintaining not only the aesthetic appeal of a bike but also its structural integrity. For business owners in the motorcycle repair industry, understanding various repair techniques can significantly enhance service offerings and customer satisfaction. This guide unpacks key strategies, starting from basic methods for minor damage to advanced techniques involving carbon fiber. Each chapter provides insights into addressing different levels of repair, ensuring that businesses can cater to diverse client needs while elevating their service quality.
Mastering the Art of Motorcycle Fairing Repair: Essential Techniques for Minor Damage

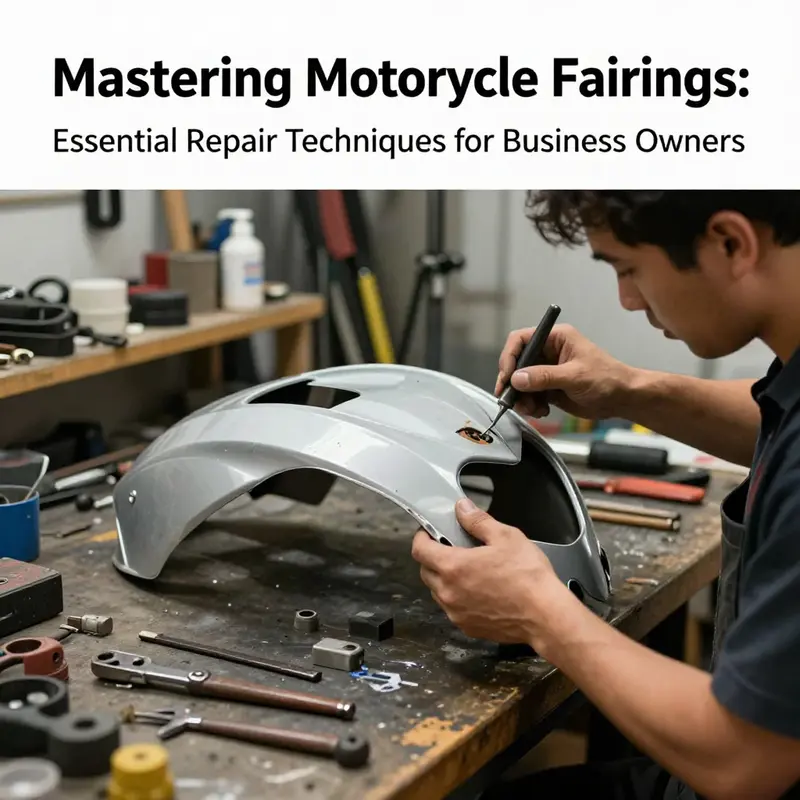
Repairing motorcycle fairings, particularly when it comes to minor damage like small cracks or chips, is a crucial skill for any motorcycle enthusiast. The aesthetic and structural integrity of your bike can significantly influence its performance and longevity, which is why learning to address these imperfections at home can be both rewarding and practical. This chapter delves deeply into the effective techniques and methods for tackling minor fairing damage, providing a comprehensive guide to restore the beauty of your motorcycle.
The process begins with preparing the damaged area. Before diving into repair techniques, ensure the workspace is clean and clutter-free, setting the scene for an effective repair process. The first step involves cleaning the area where damage has occurred. Utilize mild soap and water to wash off dirt, grease, and debris. A clean surface is paramount as it lays the groundwork for a successful repair by removing any contaminants that could impede adhesion during the repair process.
Once the cleaning is complete, the next crucial step is surface preparation. This is where you begin to assess the extent of the damage. Using fine-grit sandpaper, typically ranging from 200 to 400 grit, lightly sand around the crack or chip. This creates a rough surface that will allow the repair materials to adhere more effectively to the fairing. After sanding, wipe down the area with a cloth dampened with isopropyl alcohol. This final wipe ensures no dust or residue remains, further promoting adhesion and ultimately leading to a stronger repair.
In selecting the appropriate repair materials, several options are at your disposal. For small cracks and chips, a two-part epoxy resin is often recommended. Epoxy is known for its strong bonding capabilities and suitability for materials commonly used in motorcycle fairings, such as polycarbonate or ABS plastic. Alternatively, a specialized plastic repair kit designed for automotive or motorcycle use can also be beneficial. These specialized kits often come with everything needed for the repair, which can ease the process for those new to DIY motorcycle maintenance.
Once you have gathered your tools and materials, it’s time to apply the repair compound. Following the manufacturer’s guidelines, mix the epoxy resin—usually in equal parts—until it reaches a uniform consistency. With your plastic spreader or a simple popsicle stick, carefully apply the mixture into the damaged area. Ensure that the crack or chip is completely filled, and work on achieving a smooth, flush finish. This step is critical; too much or too little can compromise the integrity and appearance of the repair.
After filling the damaged spot, the curing process begins. It’s essential to let the epoxy cure fully, which may take anywhere from 24 to 48 hours, depending on your ambient temperature and humidity levels. Patience is a virtue here; rushing through this phase could lead to weak bonding, which may result in future repairs or reinforcements down the line. During this curing period, refrain from touching the repaired area to avoid unintentional damage.
Once the epoxy has set, you can proceed to the finishing touches. After confirming that the repair has completely cured, use fine sandpaper to lightly sand the area once again. Aim to blend the repair into the surrounding fairing material seamlessly. This preparation leads to the next step, which involves applying either a color-matched paint or a touch-up paint pen specifically formulated for use on plastics. Choosing the right color is critical to ensure that the repair does not stand out shockingly against the rest of the fairing. The final action is to seal the repaired area with a clear protective coat. This not only enhances the visual appeal but also adds a layer of protection against future damage from UV exposure and moisture.
Throughout this repair process, attention to detail at each stage is essential. Every step, from proper surface cleaning and preparation to meticulous application and finishing, requires focus and precision. Success involves not just materials and techniques but a commitment to excellence in your craft. While this guide addresses minor cosmetic repairs extensively, it’s important to acknowledge that larger structural issues or deep cracks necessitate professional evaluation. Compromising the structural integrity of your motorcycle can lead to severe safety concerns.
Additionally, fostering a community atmosphere around motorcycle repair can enhance your learning experience. Engaging with fellow enthusiasts and seeking advice from forums or local motorcycle clubs often provides invaluable insights that can make the repair process more enjoyable. Whether through tips on techniques or discussions about preferred materials, these interactions can enrich your understanding and increase your skill set.
In conclusion, mastering the art of motorcycle fairing repair, especially for minor damages, can save you time and money, while ensuring that your bike remains as visually appealing as possible. Embracing these repair techniques not only empowers you as a motorcycle owner but also helps cultivate a routine of maintenance that will benefit your vehicle in the long run. With the right tools, materials, and a methodical approach, you can restore your motorcycle’s fairings and keep it looking sharp for years to come. For more in-depth guidance on repair materials and techniques, you might find further assistance in this comprehensive guide.
Mastering the Art of Carbon Fiber Fairing Repair: Techniques for Restoration and Resilience
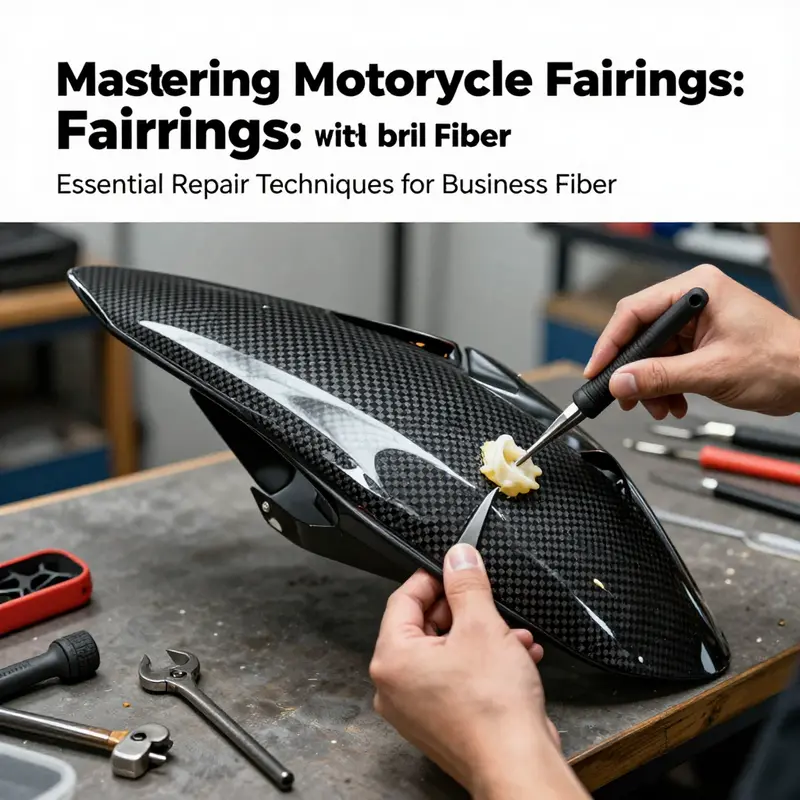
Repairing motorcycle fairings, especially those crafted from carbon fiber, is a task that demands not only precision but a deep understanding of the material itself. Carbon fiber components are highly sought after in the motorcycle community for their exceptional strength-to-weight ratio, making them a staple in high-performance sport bikes. However, despite their impressive characteristics, these components are not invulnerable; they can suffer from cracks, chips, or impact damage during regular use. Thus, the ability to effectively repair these fairings can restore the motorcycle’s functionality and maintain its aesthetic appeal.
The repair process begins with a careful assessment of the damage, which is the crucial first step in determining the appropriate restoration techniques. A thorough inspection allows the technician to categorize the damage, identifying whether it consists of minor surface scratches or more pronounced structural issues that could compromise the integrity of the fairing. For minor scratches or chips, the repair may be as straightforward as polishing the area and applying a resin coating. This method can restore the superficial look of the fairing without needing extensive reconstruction. However, if the damage is more severe—manifesting as cracks or broken fibers—the approach must be significantly more advanced and meticulous.
Surface Preparation
A successful repair begins with impeccable surface preparation. The damaged area must be meticulously cleaned to remove any oils, dust, or contaminants that could impede the bonding process of new resin. This is commonly accomplished using isopropyl alcohol and clean cloths. This preliminary cleaning is vital, as it sets the stage for a successful resin application. Once cleaned, the edges of the crack or damage should be sanded down to create a feathered edge. This feathering is critical as it helps to enhance adhesion of the new resin, ensuring a strong bond that can endure stress and strain.
Resin Application
Next, the technician will turn to resin application. A two-part epoxy or a compatible polyester resin mixed with hardener is generally used in this step. Choosing the right resin is crucial; for carbon fiber repairs, epoxy-based resin systems are typically favored for their superior adhesion properties and durability. The resin is carefully injected or brushed into the damaged area, ensuring that it comprehensively fills any gaps or voids present due to the damage. During this process, it is essential to monitor the application closely to avoid air bubbles, which can weaken the repair over time.
Fiber Reinforcement
If the damage has compromised the fairing’s structural integrity, additional layers of carbon fiber fabric may be required to reinforce the repaired area. This step entails layering pieces of carbon fiber fabric (or using pre-preg material) over the damaged site. Each layer should be carefully saturated with resin and firmly pressed into place. A vacuum bagging system can be employed to apply consistent pressure across the bonded area, which helps eliminate air pockets and ensures a tight bond as the resin cures. This multi-layer approach rebuilds the original strength of the fairing and can often exceed the integrity of the original construction.
Curing
Post-application, the repair must undergo a controlled curing process. Depending on the types of materials utilized, curing can take place at room temperature for several hours, or in some advanced cases, in a heated oven for efficiency and enhanced resin properties. Proper curing is paramount; it allows the resin to harden fully, resulting in maximum strength and durability. Rushing this process can lead to a weak bond, undermining the repair and potentially necessitating a complete replacement of the fairing.
Finishing Touches
Once the curing process is complete, the focus shifts to the finishing touches. The repaired area must be sanded meticulously to create a seamless and smooth surface. Typically, this involves using a series of progressively finer grits of sandpaper, starting with a coarser grade and gradually moving to finer options. This layered sanding process is crucial for achieving a surface that not only maintains the structural integrity of the fairing but also visually blends with the surrounding areas.
After sanding, the technician will apply several layers of primer and paint that match the original fairing color. Matching the hue and gloss of the paint is vital for maintaining the overall appearance of the motorcycle. To protect the newly painted surface and to give it that desired glossy finish, a clear coat is often applied. This final layer acts as a safeguard against environmental damage such as UV rays and moisture, which can degrade both the paint and the underlying material over time.
Opting for professional-grade tools and materials during this repair process is highly recommended. While DIY may seem a tempting prospect, lacking the requisite tools and expertise can result in inferior repairs. Missteps can lead to weak spots or cosmetic blemishes that detract from the bike’s overall appearance and performance. Ideally, the repair should be handled by a certified technician who specializes in composite repair to ensure the highest standards are met.
In summary, repairing motorcycle fairings, particularly those made of carbon fiber, is an intricate process requiring specialized knowledge and skills. By understanding the nuances of surface preparation, resin application, fiber reinforcement, curing, and finishing, motorcycle enthusiasts can take significant strides toward restoring their beloved machines to pristine condition. In the end, a well-executed repair not only enhances the fairing’s appearance but also significantly improves its structural integrity, allowing riders to get back on the road with confidence and style.
For more detailed techniques on carbon fiber repair, you can refer to the comprehensive guide provided by Motorcycle.com here.
Mastering the Art of Repair: Restoring Motorcycle Fairings from Holes and Punctures
Repairing holes and punctures in motorcycle fairings is an essential skill for any motorcycle enthusiast or owner. This task not only restores the aesthetics of the bike but also ensures its structural integrity. Understanding how to properly assess and repair damage forms the crux of this endeavor, allowing for a cost-effective solution rather than full replacement of expensive fairing parts. The process involves a series of deliberate steps designed to address damage while maintaining the visual continuity of your motorcycle’s design.
Assessment and Preparation
To initiate the repair process effectively, one must begin with a thorough assessment of the damage. This involves closely examining the size, depth, and location of the holes or punctures in the fairing, which is typically made from materials such as ABS plastic or fiberglass. Understanding the nature of the damage guides the subsequent choices in materials and methods. For instance, small punctures may only require simple patchwork, while larger holes or structural damage demand more robust solutions.
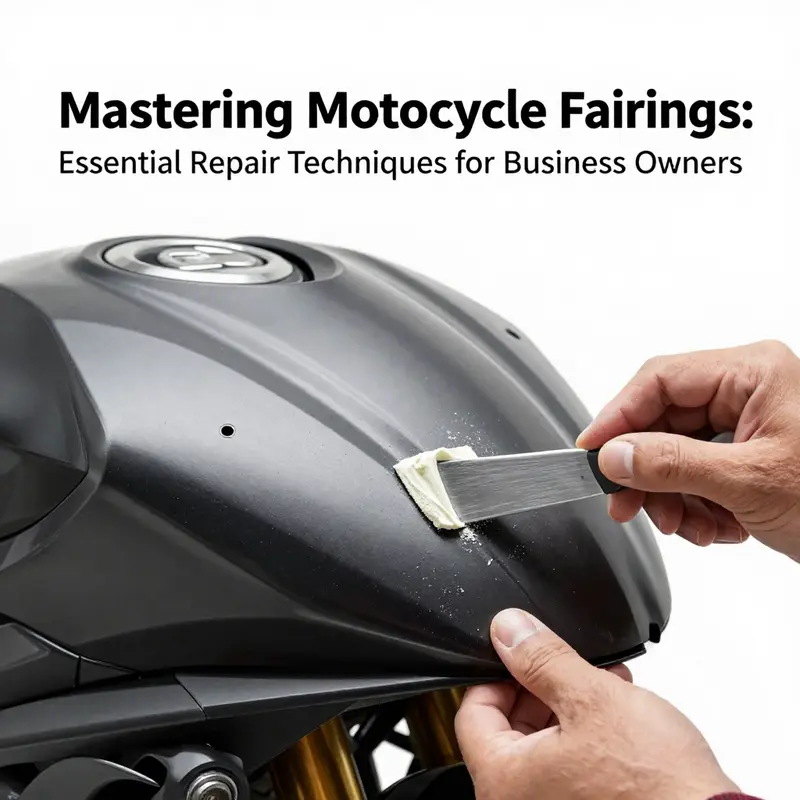
Once the assessment is complete, the next step is meticulous cleaning of the damaged area. Utilizing automotive cleaners or isopropyl alcohol, the area must be free from grease, wax, dust, and any loose debris. This preparation step is critical for ensuring that the repair materials adhere effectively. Should larger damage be present, lightly sanding the edges of the hole with coarse-grit sandpaper (80-120 grit) produces a rough surface that significantly enhances adhesion for the subsequent repair materials.
Material Selection Based on Hole Size
The choice of material for repair largely depends on the severity of the damage. For small holes and punctures measuring less than one inch, the recommended option is a high-quality, two-part automotive body filler, also known simply as “putty”. These fillers are specifically designed to bond seamlessly with plastic surfaces, ensuring flexibility and durability once fully cured. A popular choice among motorcycle enthusiasts is a body filler that is explicitly formulated for repairs on plastic materials.
Conversely, for holes sized over one inch or those that threaten the structural integrity of the fairing, employing a fiberglass patch and epoxy resin emerges as the best course of action. This technique is favored for its ability to restore not just appearance but strength as well. To execute this method, one needs to cut a piece of fiberglass cloth that slightly exceeds the dimensions of the hole. Following this, mixing epoxy resin in accordance with the manufacturer’s instructions is essential; precise mixing ensures optimal bonding and curing results. A thin layer of resin must then be applied to the back of your prepared patch, which is placed over the hole, followed by additional resin applied atop the patch to ensure it is completely saturated. This step should be vigorously monitored, especially to eliminate any air bubbles that might weaken the repair. Allow the epoxy to cure completely, which can range from several hours to a full day, depending on environmental factors and the specific product used.
Curing and Sanding
After the repair material has fully cured, the crucial step of sanding can begin. This process involves starting with coarser sandpaper (80-120 grit) to remove any excess material and bring the repaired area closer to the level of the surrounding surfaces. It is essential to sand cautiously and with intention— the aim is to create a smooth, blended transition between the repair and the surrounding fairing contours. As one progresses, using progressively finer grits (220, 400, 600, and potentially up to 800+ grit) becomes necessary to achieve a flawless, seamless finish that mirrors the original fairing’s texture.
This stage is vital; dedicated attention to detail in sanding not only guarantees that the repair is inconspicuous but also prepares the surface for the final finishing touches. Neglecting proper sanding can leave visible evidence of the repair, which detracts from the motorcycle’s aesthetic appeal.
Final Finishing and Painting
The culmination of this repair journey involves applying the appropriate finishing touches, foremost among them being painting. Achieving a color match to your motorcycle’s original fairing is paramount at this stage. Often, this requires either mixing paint to get the precise hue or purchasing pre-mixed colors from a specialist. A primer coat should be the first application on the repaired area to seal it effectively, which ensures that the subsequent base coat adheres properly.
Applying the base coat is a meticulous process in itself. It is advisable to use multiple thin layers rather than a single thick coat to avoid runs and achieve an even, uniform finish. Layering also contributes to the durability of the paint job. After allowing the base coat to dry, a clear coat is similarly applied to provide protection and enhance glossiness. Once the clear coat dries, it may be necessary to wet sand the surface with very fine paper to further refine the finish and eliminate any imperfections, thereby polishing the area to a shine that matches the rest of the fairing.
For those who seek simplicity or a temporary solution, aluminum foil tape can temporarily cover small holes, but it should be noted that this does not provide a durable fix nor does it restore the aesthetic value of the motorcycle.
Ultimately, repairing motorcycle fairings, specifically addressing holes and punctures, is a rewarding process that, when done correctly, can extend the life of your motorcycle’s bodywork significantly. It demands patience, precision, and attention to detail at every phase— from assessment through to the final paint application. Each step is interlinked, and executing them diligently will ensure that the repaired area not only functions well but also looks great, allowing you to get back on the road with confidence and pride.
For further detailed guides and materials related to fairing repairs, consult this external resource that covers various repair techniques comprehensively.
Mastering the Art of Motorcycle Fairing Repair: From Damage Assessment to Flawless Finishing Touches

Repairing motorcycle fairings, particularly those components that endure heavy strains like tail wings, is an art that hinges on careful evaluation and exceptional craftsmanship. When faced with damage, whether it be small dents or significant cracks, the path to restoration is paved with meticulous steps that demand both skill and patience. This chapter provides an in-depth look into the processes involved in achieving a seamless repair, ensuring both the structural integrity and aesthetic appeal of your motorcycle.
The journey begins with a thorough assessment of the damage. This critical step requires the inspector to evaluate the size, shape, and depth of the damage to understand its implications fully. It’s also essential to check for any rust or structural compromises beneath the surface, as neglecting these can lead to issues in adhesion and the overall durability of the repair. Recognizing the extent of the damage helps in deciding the appropriate repair method, whether it be a simple fill or a more complex reinforcement using advanced materials like carbon fiber.
Preparation is key. Once the assessment is complete, preparation becomes the focal point of the repair process. Cleaning the affected area is non-negotiable. Using a dedicated automotive cleaner will ensure that all dirt, oil, grease, and remnants of old adhesives are effectively removed. For sticky residues from factory-installed components—like heavy-duty tapes—a fine grinding bit attached to an electric drill can save time and effort compared to manual scrubs.
To further prepare the area, lightly sanding around the damage can significantly enhance the bond between the repair material and the original surface, which is crucial for a long-lasting fix. This sanding should be done delicately to avoid creating additional scratches that might be visible after the repair is complete. The goal here is to create a surface profile that maximizes adhesion, allowing the new repair materials to grip effectively.
For small holes or minor imperfections, high-quality body fillers such as bonding putty or glass fiber-reinforced epoxy serve as ideal materials. These fillers possess superior strength and resilience, allowing them to withstand the rigors of motorcycle use. The application should be carried out with a plastic spreader or specialized filler knife for an even distribution that integrates smoothly with the surrounding fairing surface.
Following the application, allowing sufficient drying time—typically several hours or according to the manufacturer’s guidelines—is vital. Rushing this step can compromise the integrity of the repair, as an insufficiently cured filler may lead to early failure.
When more extensive damage is present, especially if it impacts structural integrity, the use of carbon fiber reinforcement emerges as a superior technique. The process involves laying a sheet of carbon fiber fabric over the damaged area and saturating it with a two-part epoxy resin. Upon curing, this method not only restores but also potentially enhances the original strength of the fairing. The combination of carbon fiber and resin solidifies into a robust composite, offering a repair that can outlast the original material.
Such methods emphasize the value of knowledge and skill in DIY repairs. Many motorcycle enthusiasts have turned to these techniques, often showcased in popular online tutorials. By adhering to rigorous standards during application and ensuring the resin fully cures, the results can yield an almost invisible repair, preserving the bike’s aesthetics.
Once the filling or reinforcement materials have fully cured, the focus shifts to the finishing phase. This step is where the repair can either shine or falter based on how well it’s executed. Start by leveling the repaired area. Coarse sandpaper (120-180 grit) will help remove excess material and smoothen the surface to a degree, followed by progressively finer grits as you approach completion. Sanding should be done with intention, gradually moving up to finer grades (600-1000 grit) to achieve an exceptionally smooth finish.
Wet sanding can also be instrumental in achieving a dust-free, ultra-smooth surface. This method not only minimizes debris but also helps in achieving a finish that’s ready for painting.
A final polish with a compound designed for automotive finishes can restore the gloss to the area. This polishing process should be executed with care to ensure that the repair blends seamlessly with the rest of the motorcycle’s paintwork. A correctly polished area can convince even the most discerning eyes that no repair has ever been made.
Painting the repaired area is the moment where meticulous attention to detail truly pays off. Utilizing high-quality automotive spray paint that perfectly matches the original color and finish of the motorcycle is crucial. The application of paint should follow a methodical approach—multiple thin coats are better than a single thick layer, which can lead to runs or an uneven texture.
Each coat should be allowed to flash dry before applying the next, which helps build up the color without overwhelming the repaired area. Should a clear coat be advised, it can serve to protect the surface, adding depth and shine while safeguarding against environmental factors.
Achieving a seamless repair on motorcycle fairings requires meticulous attention to detail throughout the entire process. From the initial assessment of damage through careful preparation, filling, and finishing, every step is integral to the outcome. When executed correctly, not only can the repaired area look as good as new, but it can often perform equal to or better than before.
As enthusiasts embark on this journey to restore their motorcycles, patience and skill will yield rewarding results. Each carefully completed step not only enhances the motorcycle’s look but also ensures its performance on the road remains uncompromised. As you progress through your repair endeavors, remember that resources like this comprehensive guide can provide invaluable tips and techniques to elevate your fairing repair skills.
Final thoughts
The ability to repair motorcycle fairings effectively is crucial for business owners looking to enhance their service offerings and uphold customer satisfaction. By mastering techniques for minor damages, utilizing advanced carbon fiber repairs, addressing holes or punctures, and applying finishing touches for a seamless appearance, businesses can ensure high-quality repairs that resonate with clients. Continuous learning and application of these methods will not only improve repair skills but also solidify the standing of a business in a competitive market.
undefined
About us
undefined