Removing stickers from motorcycle fairings requires precise techniques to protect the surface while maintaining aesthetics. For business owners, understanding these methods is not just beneficial for personal use; it also adds value to customer service offerings. This guide explores the most effective and safe methods to remove stickers while avoiding damage. You’ll learn how to apply heat effectively, utilize alcohol-based cleaners, select the right commercial adhesive removers, and be cautious of alternative methods that might cause harm. Each chapter builds on the previous one, ensuring you have a comprehensive understanding of the best practices in sticker removal.
Gentle Heat, Clean Fairings: Mastering Sticker Removal on Motorcycles Without Damage
Removing stickers from motorcycle fairings is less about brute force and more about a careful conversation between heat, patience, and the surface you’re protecting. The goal is to loosen the adhesive just enough to lift the sticker cleanly, without softening or warping the plastic, and without leaving a stubborn residue that dulls the finish. When you approach the task with a light touch and a plan, you reduce the risk of micro-scratches, paint chips, or clouding of the clear coat. The process rests on a few simple ideas: heat to soften, peel at the right angle, and finish with a gentle cleanup. Start by acknowledging that every sticker is a small, stubborn lesson in surface ethics. Adhesives are designed to bite into the paint and clear coat over time, so the key is to soften the bite rather than force it. A warm, patient approach helps preserve the integrity of the fairing and preserves the chance of a flawless finish once the job is done.
Preparation is more than gathering tools. It is a mindset that recognizes the fragility of modern motorcycle finishes. You’ll want a clean workspace, a heat source that offers controlled, even warmth, a plastic scraper or a soft card for lifting, a microfiber cloth for gentle contact, and a mild adhesive remover that is safe for painted surfaces and plastics. You’ll also need a mild soap for the post-removal wash. Do not rush this part. Sort the tools, autoclaved or lint-free cloths, and a plan for testing a small, inconspicuous area before you touch the visible sections. The goal of the test is not to prove risk but to confirm that the method you plan to use won’t introduce new ones. If you’re unsure, begin with the lightest approach—heat combined with a touch of alcohol—before proceeding to stronger solvents. Heat, when used correctly, remains one of the safest doors to the adhesive’s bond.
When you begin applying heat, adopt a methodical rhythm. Set your heat source to a low or medium setting. The idea is to provide steady warmth rather than a blast. Move the heat across the sticker in a slow, even sweep, pausing to concentrate on a single area for about 20–30 seconds. This is enough to loosen the glue without raising the surface temperature to risky levels. The rule of thumb is to avoid holding heat in one spot for too long, because heat can travel beyond the sticker’s edge and affect the paint or the plastic’s structure. If the surface is richer in color or more complex than a flat panel, keep your distance consistent—usually 6 to 8 inches (15 to 20 cm) from the sticker. If you notice any change in paint sheen, color, or a softening feel under the heat, reduce the temperature and reduce the exposure time immediately. Always begin with a small, inconspicuous area to confirm that the heat behaves as expected.
As the adhesive softens, the moment of truth arrives: the peel. Lift a corner of the sticker with a plastic scraper, a credit card, or even a careful fingernail—whatever gives you a gentle grip without prying. The approach should be to peel the sticker back at a steady, 90‑degree angle. This angle minimizes the stress on the paint and reduces the chance of lifting or chipping the fairing’s edge. If you encounter stubborn areas, reapply a little heat to those spots and attempt another slow lift. Rushing the peel increases the probability of tears, micro-scratches, or a stubborn residue that resists the next step. There is a quiet satisfaction in feeling the sticker release in a controlled, deliberate way rather than tearing away in a single forceful motion.
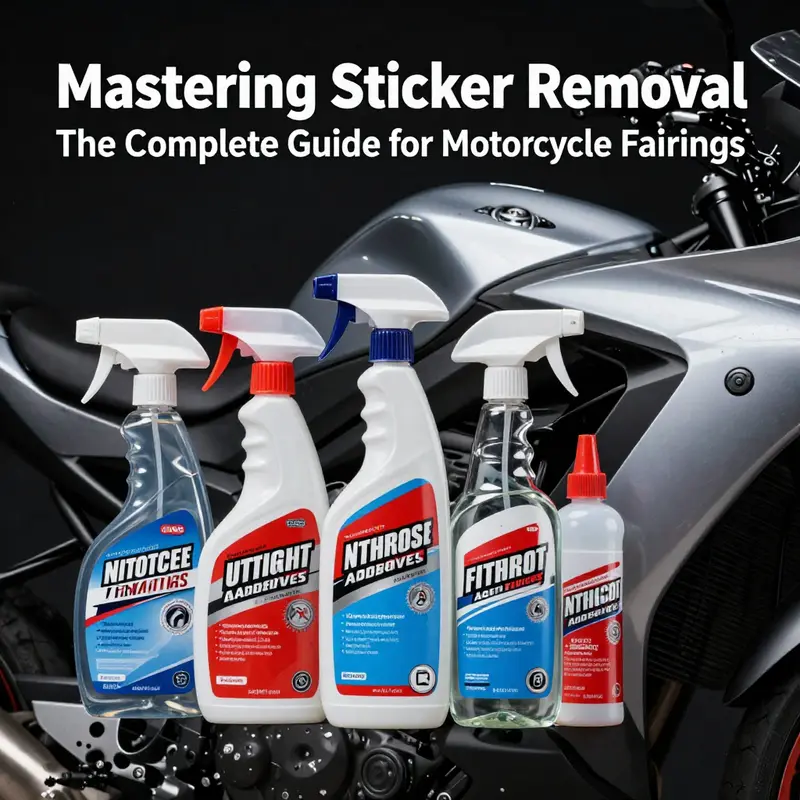
With the sticker removed, attention shifts to any residual adhesive. This is the stage where patience becomes more important than force. Apply an automotive‑safe adhesive remover to the affected area and let it penetrate the bond for a few minutes. The exact wait time can vary with the product and the adhesive’s age, but a couple of minutes is usually sufficient to soften remaining glue. Then, using a microfiber cloth, wipe away the softened residue with smooth, even motions. If the residue clings stubbornly, reapply a bit more remover and give it another minute; avoid scrubbing aggressively, which can drag across the paint or ruin the clear coat. If you have a tiny, stubborn spot, a light pass with a soft eraser can help lift it, but be careful to avoid any contact with the clear surface that could scratch it. The concept is to dissolve and lift, not to grind away.
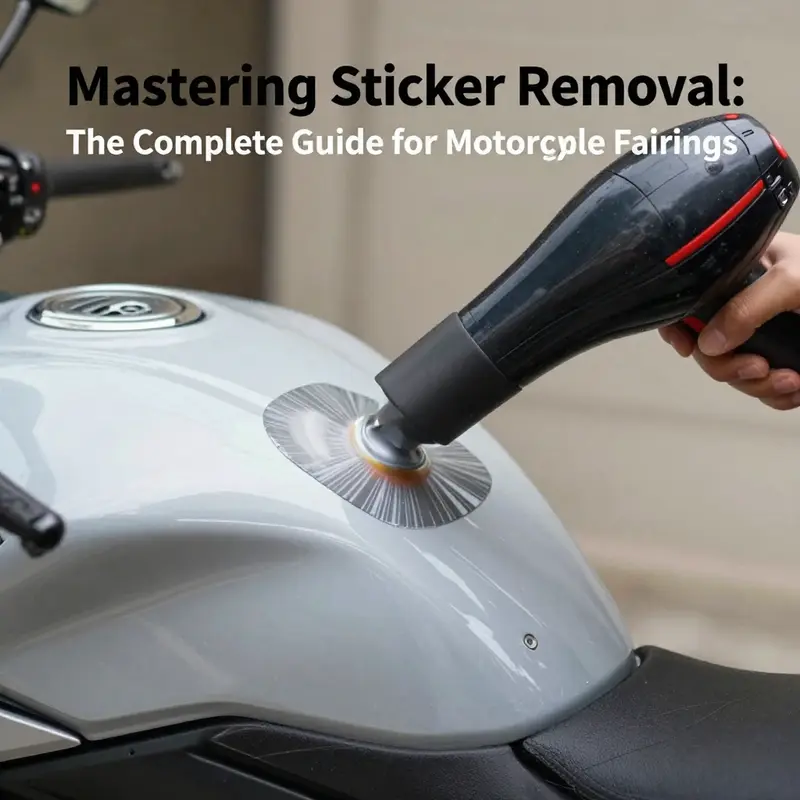
Once the surface is clean, a gentle post-removal cleansing is prudent. Rinse with mild soapy water and rinse off any chemical residues. Dry thoroughly with a clean microfiber to prevent water spots, especially on lighter colors where residue or moisture can show. The final check is visual: scan for faint adhesive traces, see-through haze, or any micro-scratches. If anything appears, a second pass with the adhesive remover and a fresh cloth can resolve it, followed by a light polish or wax to restore the surface’s gloss and protective barrier. The tiny effort in finishing is a big part of ensuring the fairing’s surface looks as though the sticker was never there—only better protected than before the sticker appeared in the first place.
There are a few additional tips that reinforce the method while staying within safe boundaries. Work in a well‑ventilated area if you’re using any chemical aids. Even mild adhesive removers release vapors that can be irritating in confined spaces, so a little airflow helps. If you’re unsure about a method, begin with the least aggressive option—heat combined with a touch of isopropyl alcohol on a cloth—and observe how the surface responds before stepping up to a dedicated remover. For alcohol, a cloth lightly dampened with 70 percent to 90 percent isopropyl alcohol works well to penetrate edges and allow the glue to loosen without leaving a sticky residue. After any chemical contact, wipe away with a clean, dry microfiber so the surface isn’t left damp or streaked.
As you gain confidence, you might think about the broader care of fairings—especially if they are older or have a recently refinished surface. The adhesive can sometimes hide micro‑imperfections in the paint or clear coat. The removal process, when done properly, can actually be a chance to assess the panel’s condition and address paint oxidization or tiny blisters before they become more serious. If you notice any bubbling or softening beyond the sticker’s edges, pause and reassess your approach. It may be necessary to reduce heat further, increase the distance, or give the area a longer curing period after applying an adhesive remover. The beauty of this work is that it is iterative; small adjustments improve the outcome and keep the fairing’s finish pristine.
For readers who ride Honda or other brands and want to explore related fairing options, there is value in recognizing how different fairings respond to heat and solvents. If you’re dealing with a specific Honda fairing—say, a model in the CBR range—you can explore compatible fairings here: Fairings for CBR. This internal reference isn’t about removing stickers directly; it’s a reminder that materials and finishes vary across models, and what works on one panel may require a lighter touch on another. The key is to keep the process adaptable, responding to the feedback your own fairing surface provides as you work.
The method described here emphasizes restraint and control over brute force. It aligns with the principle that heat is a tool, not a weapon against your paint. You’re not trying to force the sticker to release; you’re inviting the adhesive to loosen its grip so the sticker can lift away with minimal resistance. When done well, the result is a clean, uniform surface that looks fresh and protected. The same patience that serves you in peeling away a stubborn edge also serves you when you recheck the finish, re‑wipe with alcohol if needed, and finally rinse and dry. The final polish or light wax can help seal the repaired area, creating a uniform sheen that makes the absence of the sticker almost invisible to the casual eye.
In practice, the most critical moments of this process lie in the balance of heat, angle, and rest. The 90‑degree peel is a simple rule—one that respects the fairing’s paint and the clear coat’s integrity. The “20–30 seconds” heat window is a cue that the adhesive is ready to yield, not a signal to burn the surface. The adhesive remover’s role is to bridge the gap between the softened glue and a clean finish, lifting residue without erasing the surface’s texture. And the final rinse and dry guard the finish against streaks and water spots that can distract from the repair’s success. Taken together, these steps form a repeatable, reliable routine that can be applied across a range of stickers and fairing finishes, from glossy plastics to matte panels, with only minor adjustments to the heat and contact time.
External guidance can provide broader context and refinements. For authoritative, vehicle-specific guidance on protecting fairings during cleaning and modification, you can consult the detailed advice from a trusted motorcycle resource: https://www.bikeradar.com/uk/motorcycle-accessories/how-to-remove-motorcycle-stickers-without-damaging-paint/.
In short, the heat-based removal approach offers a thoughtful blend of science and craft. It respects the material, minimizes risk, and gives you a clean slate to rebuild the bike’s appearance. With patience, the right technique, and careful post-cleanup, removing stickers from motorcycle fairings can become a straightforward, satisfying part of bike maintenance rather than a source of anxiety or permanent marks. The moment you see the sticker release and the edge come free at a true 90‑degree angle is the moment you know you’ve chosen the right path, preserving the life of the fairing while restoring its original, sleek look.
Soft Touch, Clean Finish: Removing Stickers from Motorcycle Fairings with Alcohol-Based Cleaners

When a sticker on a motorcycle fairing begins to peel, the moment is as much about patience as it is about chemistry. The goal is not just to remove the sticker, but to do so without compromising the paint, the clear coat, or the plastic itself. Among the gentlest, most reliable tools for the job is isopropyl alcohol, applied with care and a light touch. This chapter focuses on using alcohol-based cleaners to loosen adhesive, lift the sticker, and leave the fairing looking as pristine as when it rolled off the factory line. It is a method that sits comfortably within a broader philosophy of maintenance: respect the surface, respect the color, and respect the decal’s history. You will move through a sequence that begins with preparation, proceeds through controlled solvent action, and ends with a tidy finish that prepares the area for protection or refinishing if needed. If your bike features Honda fairings or other plastics that demand a measured approach, you can apply the same discipline with appropriate care, and you may consult the Honda fairings category for additional compatible components and guidance as you plan any cosmetic work. Honda fairings is a useful reference when shopping for compatible panels or finishes that respond well to careful cleaning and reconditioning. The method described here emphasizes gentleness, patience, and repeatable steps, so you can repeat the process on multiple stickers or stubborn residues without introducing new problems. The logic is straightforward: loosen the bond without raising new issues, then lift away the sticker in a controlled motion, and finally remove any residual adhesive with the same solvent balance that liberated it in the first instance.
Begin with the right solvent choice. Isopropyl alcohol is widely regarded as safe for most painted surfaces when used properly. It dissolves many sticky residues without aggressively attacking the paint or clear coat. In practice, you should select a concentration in the range of 70 to 90 percent, depending on what is readily available to you. Higher concentrations work faster, but they can be slightly more drying on sensitive finishes, so monitor the effect on a small area first. Denatured alcohol or stronger solvents should be avoided unless specifically recommended by the fairing’s manufacturer; they can dull finishes or soften plastics in unpredictable ways. The next step, equally important, is a spot test. Choose a corner or an inconspicuous panel, dampen a soft cloth with alcohol, and apply a gentle rub. Observe the area for a few minutes to ensure there is no discoloration, a change in gloss, or any bubbling of the paint. If the test looks clean, you are ready to proceed with the main removal.
With your test area approved, prepare a clean, soft cloth or cotton pad. The cloth should be lint-free and free of fibers that can abrade the surface. Dampen it with the isopropyl alcohol until it is just damp, not dripping. A dripping cloth can pool liquid around edges and seep into crevices, where it might affect underlying materials or create a residue that is harder to remove later. The technique is low and patient: you want the alcohol to sit on the adhesive long enough to penetrate, not to pool or flood the surrounding paint. Begin by applying the damp cloth to the sticker’s surface, focusing on the edges where the adhesive tends to cling most tenaciously. Do not scrub aggressively; instead, use a slow, circular motion along the sticker’s perimeter, progressively widening your coverage to the center. Allow the alcohol to work for a minute or two, reapplying as necessary. The adhesive should begin to soften, and you may notice the sticker becoming slightly tacky and easier to lift.
As the adhesive loosens, switch to a gentle lifting action. A thin plastic card, such as a credit card or a dedicated plastic scraper, is ideal for this stage because it provides a firm edge without scratching. Slide the edge under a corner of the sticker at a shallow angle. If the sticker resists, reapply a small amount of alcohol around the perimeter and give it another minute to penetrate. The objective is to lift the corner with a smooth, constant motion. Do not yank or pry with metal tools, and avoid applying excessive force. When the corner is free, continue to peel slowly, keeping the card flat against the fairing and maintaining a low angle. If any resistance appears, pause, reapply alcohol, and let the solvent work for a little longer. A slow, measured peel reduces the risk of tearing the sticker or pulling up clear coat with it.
Even after the sticker comes away, there is often residual adhesive that can dull the finish or attract dust. Reapply the alcohol to the affected area and gently rub with the cloth to dissolve and lift the glue. For stubborn residues, repeat the steps once or twice, always keeping the cloth damp and the movement light. Throughout this phase, keep a consistent cadence: alcohol, wait, wipe, assess. The aim is to reach a clean surface without introducing new scratches or faint marks from the initial removal. If you notice any subtle crazing in the paint or a shift in gloss near the edges, stop and consider whether the method might be too aggressive for that particular panel. In most cases, a patient touch yields a perfectly restored surface.
Once the adhesive is fully removed, finish with a final wipe to ensure there is no remaining solvent or residue. Use a fresh portion of alcohol on a clean cloth to mob the area, then switch to a dry, lint-free cloth to remove any dampness. The alcohol evaporates quickly, leaving behind no sticky film, but the final wipe ensures there is no ghost of the residue left behind. At this stage you should inspect the area under light to confirm the underlying paint is even and intact. If the paint looks dull or if there are micro-scratches that were not visible before, you might consider a light cleansing with mild soap and water followed by a gentle drying, or you may choose to apply a protective layer such as a wax or sealant to restore depth and brightness to the finish. The protective step is optional but beneficial if you plan to apply new graphics or decals later, as it creates a barrier that makes future sticker removal easier and less risky.
Safety and technique are inextricably linked in this work. Work in a well-ventilated area to avoid inhaling fumes from solvents, even those that are relatively mild. Keep the isopropyl alcohol away from open flames, sparks, and hot surfaces since it is a flammable liquid. Do not heat the area or use heat sources to speed up the removal when alcohol is present; heat can cause rapid evaporation and uneven heating, which can lead to paint distortion or peel. In addition, avoid metal tools during the process. A metal scraper or razor edge can easily scratch the fairing’s surface, so always opt for plastic cards or dedicated plastic scrapers that are designed to disengage adhesives without scratching. If you are working on a particularly sensitive finish, you may want to test a second inconspicuous area before continuing, but the basic approach highlighted here—spot test, dampen, apply, lift at a low angle, reapply as needed, and gently wipe away residue—works consistently for most modern motorcycle fairings.
This approach harmonizes with a broader philosophy of careful cosmetic work on motorcycles. It respects the fairing’s geometry, its paint, and the decals that may be part of a team’s identity or the rider’s personal style. The step-by-step routine is designed to be repeatable and predictable, so you can tackle multiple stickers across panels or revisit a stubborn corner without reinventing the wheel each time. If you are unsure about a particular sticker or panel, begin with the mildest method and progress gradually. The smallest, least aggressive action that yields a positive result is often the wisest course. And remember that preparation pays dividends. A quick once-over with mild soap and water after the sticker’s removal not only cleans away any traces of adhesive or solvent but also reveals the true depth and color of the panel. After drying, a light wax or sealant can be applied to protect the surface and ease future sticker removals, should they be necessary. The goal is a fairing that looks as good as new, with the confidence that the method you used will not compromise its longevity.
Finally, keep in mind the differences among sticker types and years of manufacture. Some decals bind more aggressively due to aging or exposure to sunlight, heat, and humidity. In such cases, proceed with patience and consider applying multiple light alcohol passes rather than forcing a single, aggressive attempt. The surface’s resilience varies with plastic formulations and clear coats, so treating every panel as if it were slightly different after years in the sun is prudent. If you are working on a Honda fairing or other specific model, consulting the manufacturer’s guidelines or a trusted maintenance resource can provide model-specific caveats and tips. The internal link to Honda fairings serves as a practical waypoint for locating model-related advice and compatible maintenance practices that might influence how you approach sticker removal in your own ride.
In closing, the alcohol-based removal method is a respectful, reliable way to reclaim a fairing’s smooth, glossy surface without inviting new problems. The sequence—select the right alcohol concentration, perform a spot test, dampen a soft cloth, apply and wait, lift with a plastic edge at a low angle, and finish with a careful residue wipe—offers a balanced, repeatable workflow. It places emphasis on the rider’s control and the surface’s safety, rather than on brute force. By combining patience with precise technique, you restore clarity and protect the bike’s aesthetic, preserving both the value and the character of the fairing for years to come. For readers who want to explore related cosmetic care and to compare approaches across different fairing families, see the Honda fairings category linked above, and consider how a gentle, methodical hand can carry execution from sticker removal to polishing and protection.
External resource for further guidance: If you would like additional, authoritative guidelines on motorcycle surface care and decal removal, consult established motorcycle care resources online. For a comprehensive overview from a reputable automotive publication, you can review their practical tips here: https://www.motorcycle.com/ and apply the principles to your own fairing care strategy.
null
null
Gentle Heat, Patient Peeling: A Careful Guide to Removing Stickers from Motorcycle Fairings
Removing stickers from motorcycle fairings is a test of precision as much as patience. The glossy plastic, the delicate painted surface, and the engineering that gives the fairing its smooth lines all plead for a method that respects the material while loosening the grip of years-long adhesives. When a sticker comes off without drama, it feels almost like a small victory of technique over stubborn grime. Yet the process is not a battle to be rushed. It is a careful choreography where heat, solvent, and time all have a role, and where the most important rule is to start with the least aggressive approach and escalate only if needed. The reason for such care is simple: plastics and paints are porous to heat, and coatings can be finicky. A wavering decision at the wrong moment can lead to hazing, micro-scratches, or, in worst cases, a bubble on the paint or a dull patch where the gloss once sang. The aim, then, is to soften the adhesive enough to release its grip while keeping the surface cool, steady, and unmarred. This is why the heat-based method earns its place as the recommended starting point. It offers a margin of safety when applied thoughtfully and with the right tools in hand.
To begin, assemble nothing more than a heat source—preferably a hair dryer or a low-to-medium heat gun—plus a clean, soft microfiber cloth, and, if available, a small amount of mild car shampoo for post-removal cleaning. The temperature target should be modest: roughly 150–200°F (66–93°C) is enough to loosen most adhesives without inviting thermal trouble for the fairing’s plastic substrate or the paint coat. The key is not to blast the sticker with a hot stream but to move the heat source slowly and evenly across its surface for a span of about 30–60 seconds. The principle is straightforward: you want the adhesive to become tackier, not hot enough to distort the panel. Always test on a tiny, inconspicuous area first. If the paint or clear coat shows any blush or a subtle bubble, back off, wait, and reassess.
Once the sticker’s edges begin to lift with a gentle tug, proceed with the peeling. Start at one corner, using a fingernail or a plastic scraper that won’t gouge the finish. Peel the sticker back at a controlled 45-degree angle. The idea is to distribute the force along the interface rather than pulling straight up, which concentrates stress at a single point. If the sticker resists, a second pass with a little more warmth can help, but never reheat in one spot for an extended period. A slow, deliberate motion is the ally here, and patience is not a luxury but a requirement. It’s also worth noting that the adhesive sometimes clings more tenaciously in the contour areas—around rivet lines, near edge seams, or where the fairing’s curvature is pronounced. In such cases, repeating the heat pass with extra care across those zones often yields a clean release.
As the sticker’s face loosens, the next phase becomes about handling the sticky residue that may remain. Even a careful peel can leave a faint film that attracts dust and looks dull in bright sunlight. The most reliable approach is to switch to a residue-management plan that stays gentle. A practical method begins with a dampened, soft cloth moistened with isopropyl alcohol at a concentration between 70% and 90%. Alcohol is a solvent that dissolves many adhesive residues without aggressively interacting with standard painted finishes. Gently rub the sticker’s edges and the exposed surface to allow the alcohol to soak in. After a brief dwell of one to two minutes, peel any stubborn remnants slowly again, using the same 45-degree technique. Wipe away the dissolved residue with a second cloth dampened with clean alcohol. The alcohol’s fast evaporation means less risk of smearing, and it leaves behind a clean surface that’s ready for the next step. If a residue stubbornly clings, alternate with a dedicated automotive adhesive remover—applied in a light mist or dab to the patch—while remaining vigilant about the time it sits on the finish. Always test remover on an inconspicuous area first. In most cases, a short 2–5 minute dwell is sufficient for the remover to soften the glue before you lift the film away with a plastic scraper.
The notion of using a commercial adhesive remover is especially relevant when the sticker is older, and the adhesive formulation has aged into a tougher, more tenacious bond. In such cases, a remover designed for automotive surfaces, used in accordance with its directions, can be a reliable ally. The emphasis remains the same: apply sparingly, allow a brief dwell, then lift with a plastic tool and finish with a wipe-down. The guiding principle is compatibility with painted and plastic surfaces; any product selected should carry a caution about being safe for these materials. And as with the heat method, patience governs the process. Rushing through steps invites damage. The hands must move with measured confidence, never with raw urgency.
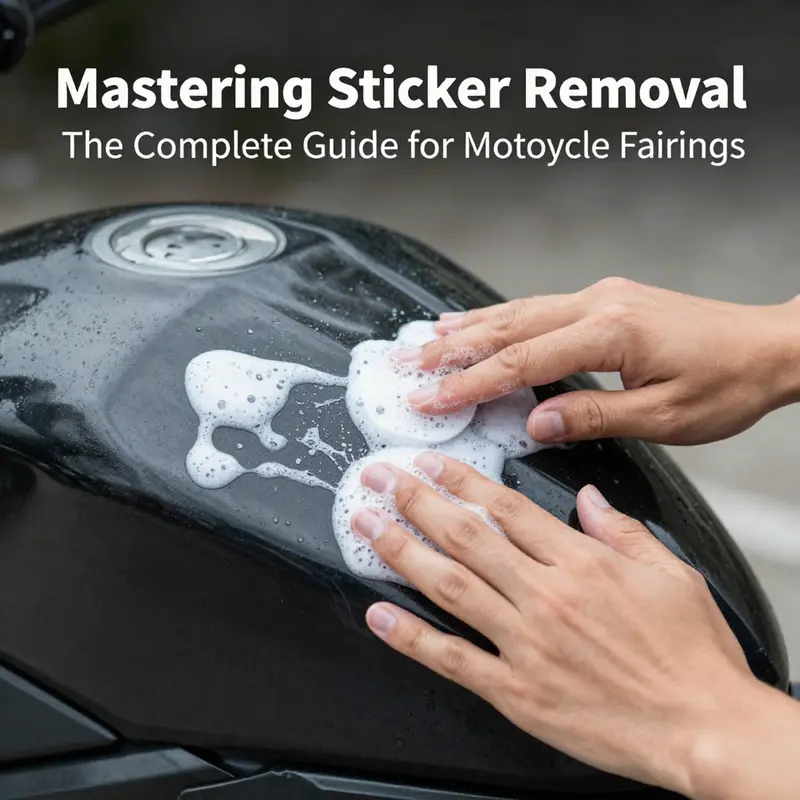
There is also room for a gentler, non-solvent route when the sticker is relatively recent or the adhesive has not yet fully set. A warm, soapy bath—made with mild car shampoo and warm water—can soften the glue and loosen its hold. The technique requires soaking the area around the sticker, then using a soft microfiber cloth to lift the edges. This approach, while slower, reduces reliance on solvents and keeps the surface in a more forgiving state. It is especially helpful when environmental concerns or surface sensitivity demand extra caution. In practice, you might switch from a warm soapy soak to a light dab of alcohol for the final residue removal, ensuring you do not overwhelm the finish with moisture or solvent.
Throughout this process, it helps to keep awareness of the fairing’s material composition. Most modern motorcycles employ plastic panels with hard coatings or paints that can tolerate mild heat and gentle solvents when used correctly. However, some coatings are thinner and more vulnerable to heat-induced distortion or chemical staining. The most reliable plan is to approach the task section by section, not as a single giant peel. If a stubborn sticker spans a curved surface or cross-stripe design, work it gradually, lifting tiny flaps rather than forcing a whole segment in one go. This reduces the risk of tearing the film or bending the plastic, and it also minimizes the chance of lifting a microscopically raised edge that would later catch dirt and degrade the finish.
In practice, you’ll encounter a spectrum of outcomes depending on the sticker’s age, the adhesive’s formulation, and the fairing’s coating. Some decals leave behind a faint halo of adhesive that’s only visible under certain light; others vanish cleanly, leaving a glossy, uniform surface. When you do see a residue halo, you can approach it with a light touch. Oftentimes a second, gentler pass with the alcohol—applied sparingly and left to dwell for a moment—will dissolve the last vestiges of stickiness without requiring heavy scrubbing. If the halo persists, consider a time-tested strategy that respects the finish: return to a mild adhesive remover with a short dwell time, then re-check under diffused light before concluding. The goal is a finish that looks untouched, as if the sticker had never been there in the first place.
The discussion would be incomplete without acknowledging a few cautions that should guide every removal job. Avoid aggressive scraping with metal tools, which can scratch or gouge the plastic. Do not rely on fast-acting, harsh solvents that claim to dissolve glue in a moment; these can strip away clear coats or attack the plastic’s surface. If you are ever unsure, pause the process and re-evaluate. Manufacturer guidelines, if available, should be your first reference. For bicycles and motorcycles, the coatings and plastics can vary, and even high-quality aftermarket fairings will respond differently to the same technique. Ventilation matters when you’re using alcohol or any adhesive remover. Work in a well-ventilated area, and consider wearing gloves to protect your skin from prolonged chemical exposure.
As a final note, many experienced riders emphasize that the simplest path is often the most forgiving. When in doubt, start with heat and a bit of soapy water rather than diving straight into solvents. The combination can be surprisingly effective, and it minimizes the risk of damage while still delivering a clean result. If you’re dealing with a Honda fairings lineup or other specific aftermarket panels, consider how the finish might respond to heat and solvents, and reference your fairing’s care instructions. For instance, you might discover that certain fairings in the Honda lineup care best with gentler, cooler air and careful edge work; exploring the dedicated section on Honda fairings can provide practical context and help tailor the approach to your specific model, ensuring you stay on the safe side while preserving the look and integrity of the finish.
When all is said and done, you should observe a uniform shine with no obvious adhesive residues catching the light. There should be no rough patching, no color fading, and no obvious swelling in the plastic where heat was applied. The surface should be clean and dry, with the protective clear coat intact. If you still see faint shadows or residual glue, repeat the gentle heat and residue steps with even more patience, always paying attention to how the surface responds at each stage. The process rewards steady hands and a measured tempo more than brute force, and it is entirely feasible to remove stickers without compromising the fairing’s aesthetics or structural integrity. With practice, the sequence becomes almost automatic: a cautious warm-up, a careful peel, a residue-dissolving pass, and a final wipe to restore the surface’s even gloss. The result is not only a clean panel but also a tactile reminder that, when respected, the materials beneath stickers reveal their true character—bright, smooth, and resilient beneath the marks of time and choice.
Internal note: for readers who want to explore the broader world of fairings and their compatibility with different brands, a curated collection of fairings can be a helpful resource. For example, the Honda fairings category provides a focused lens on how variations in surface treatment can influence removal strategies, offering practical touchpoints for approaching your own removal project. See the linked collection for more context and model-specific considerations: Honda fairings.
External resource for further guidance: for authoritative guidance on removing decals from automotive surfaces without damaging paint, a detailed feature discusses methods that align with best practices and emphasizes caution and testing. Read the Autocar guide here: Autocar — How to remove bumper stickers cleanly without damaging the paint job.
Final thoughts
Each method for removing stickers from motorcycle fairings carries its own benefits and precautions. By understanding how to manipulate heat, utilize gentle solvents like alcohol, and choose appropriate commercial products, business owners can provide top-notch care for their motorcycle clientele. Additionally, being informed about alternative methods helps ensure that even less conventional approaches do not compromise the integrity of the bike’s finish. Prioritize safe practices and enhance your service offerings by mastering these techniques today.