Understanding the intricacies of painting motorcycle fairings is essential for business owners in the automotive sector who want to provide top-notch customization services. This guide delves into substantive techniques that will elevate the artistry involved in this DIY project, from meticulous preparation methods to selecting the right paint for a seamless finish. The final chapter will offer insights into the diverse materials that constitute motorcycle fairings, emphasizing how these elements influence the painting process. Together, these chapters will equip business owners with the expertise needed to ensure superior results, promote customer satisfaction, and ultimately enhance their service offerings.
From Foundation to Finish: The Art and Science of Preparing Motorcycle Fairings for Paint
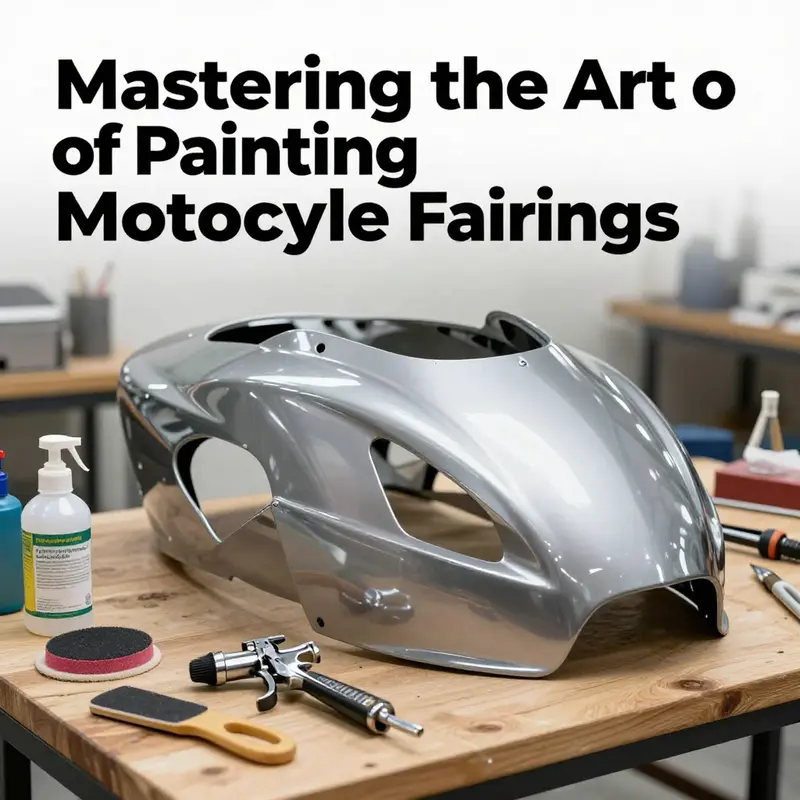
Painting motorcycle fairings is more than choosing a color; it is a careful choreography of surface preparation that determines whether the final finish will sing with depth and endure the elements. The fairing itself is often a blend of ABS plastic or fiberglass, materials that can be forgiving in shape but demanding in adhesion. In the hands of a patient maker, prep work becomes the unsung hero of a durable, glossy coat that resists chipping, cracking, and dulling. Treat preparation as a craft rather than a chore, and you set up every subsequent step for success. The foundation you create when you begin—clean, abraded, primed, and masked with precision—will reveal itself in the evenness of color, the absence of sags, and the clarity of that hard, protective clear coat that follows. This is where science meets artistry, where the wrong surface texture can turn a flawless color job into a cosmetic failure. The discipline of preparation is, therefore, the crucial first act of painting motorcycle fairings, and it deserves a measured, methodical approach that respects the nature of plastic substrates, the characteristics of modern coatings, and the realities of a working shop with dust, humidity, and temperature fluctuations.
Begin with a rigorous cleaning routine. The surface must be free of grease, wax, oil, dust, and mold release agents that can sabotage adhesion. Use a dedicated automotive cleaner or degreaser and wipe the fairing thoroughly. Pay attention to hidden recesses and crevices around the edges where oils tend to accumulate from handling and storage. A clean surface is non-negotiable because every molecule of contamination becomes a potential snag for the primer and the topcoat. After cleaning, inspect every area for remaining film or residues and re-clean if necessary. The aim is a surface that looks dull rather than shiny, because that dullness often signals the presence of matrix residues that will lift with solvents later.
Sanding is the next critical act, and it must be executed with discipline. Lightly scuff the entire surface with fine-grit sandpaper, typically 600 to 800 grit. The goal is not to remove material but to create microscopic scratches that give the primer something to grab onto. Work in consistent patterns—circular motions are common on curved surfaces, but a fine, uniform crosshatch can also be effective if used thoughtfully. Ensure every area, including edges and corners, receives attention. After sanding, wipe the surface with a tack cloth to remove all dust. You want a surface that looks matte and clean, not dusty and frosted. Any remaining particles can become embedded in primer and show as tiny specks beneath the paint. If you encounter any glossy patches after sanding, resand that area lightly and rewipe until the surface looks uniformly dull and clean. This careful prelude is the difference between a smooth, glassy finish and a final coat that looks gritty or uneven.
With a clean, scuffed surface ready, priming becomes the foundation for adhesion and film strength. Use a plastic-specific primer, ideally a two-part epoxy primer designed for plastic substrates. These primers chemically bond to the sanded plastic and provide a robust, uniform platform for the color coat. Apply the primer in light, even coats from a distance of about 12 inches. The goal is to build up a smooth, uniform layer without runs or sags. Allow each coat to flash off according to the manufacturer’s instructions before applying the next. Most practitioners find that two to three coats deliver the best balance between coverage and surface texture, but always follow the drying times specified by the primer you choose. Between coats, you can perform a very light scuff with a finer grit if you detect any graininess, but avoid overworking the primer. The idea is to create a consistent, slightly tactile surface that invites the color coat to lay down evenly rather than pool and sag.
After priming, assess the surface for imperfections. Small pinholes, dust nibs, or sags can compromise the final finish. A careful, after-primer sanding with 600 to 800 grit can help refine the surface to a uniform plane. Keep the sanding motion light and even, and be mindful around edges and curves, where the primer can build up more quickly. Wipe away all dust with a tack cloth and inspect again under good lighting. The pre-paint stage is not about chasing perfection in the moment but about creating an environment where the color can lay down in a consistent, controllable way. The better this stage is, the less you’ll fight with the color later.
Masking is the quiet guardian of precise color boundaries. Mask off all areas you do not want painted, including the windshield, headlights, taillights, chrome trimming, and any points where the fairing interfaces with other bike components. Use high-quality masking tape and masking paper to build a clean barrier. In difficult areas, such as tight corners or edges near complex curves, take extra time to seal the edges. A small amount of paint bleed can ruin a sharp line, so you may opt to seal the tape edges with a thin line of liquid masking fluid or apply a second layer of tape over the first to create an additional barrier. When masking is done well, you’ll achieve crisp lines and repeatable results without a heavy effort during the color stage.
Environmental control is an often overlooked but essential part of the preparation narrative. Work in a clean, dust-free environment with stable temperature and humidity. A dedicated spray booth is ideal, but a well-sealed garage or workshop with proper airflow and filtration can work if you control dust, drafts, and moisture. Aim for a stable ambient temperature around 70 F (21 C) and low humidity. Humidity can slow solvent evaporation and create microdrips or sags, especially with faster-drying topcoats. Adequate ventilation is critical for safety and the quality of the finish. Use a respirator when sanding or painting to protect yourself from particulates and fumes, and ensure good airflow to prevent heat buildup that can prematurely cure materials.
Paint selection and mixing appear simple on the surface but demand care in practice. Use high-quality, flexible coatings that are appropriate for plastic substrates. Acrylic enamel formulations are commonly favored for their balance of durability and flexibility, helping the finish withstand the inevitable flexing of a fairing during ride vibrations. Thorough mixing is non-negotiable. Stir the paint completely according to the manufacturer’s instructions. When thinning is required to reach the correct viscosity for your spray equipment, add thinner gradually and test on a sacrificial panel or test piece. The target viscosity should enable atomization that yields a smooth, even spray without excessive misting or orange-peel texture. Always mix to the manufacturer’s ratio with a clean cup and stir stick. The wrong viscosity is a silent contributor to runs, sags, and uneven coverage. The color coats should be built up with several thin layers rather than one heavy layer that risks runs and solvent phenon. This discipline in mixing and application underpins a durable, glossy finish that remains vibrant over time.
As you prepare to apply color, consider the practical technique that distinguishes a professional-looking job from a DIY approximation. Hold the spray gun at a consistent distance from the surface, commonly around 6 to 12 inches, depending on the equipment and the paint system. Use overlapping passes with even, sweeping motions, maintaining a smooth cadence rather than rushing across the surface. Work in light coats and allow the color to flash off between passes; the aim is to avoid pooling and sagging rather than forcing heavy pigment onto the surface in a single pass. On curved facades, rotate the bike or the panel rather than trying to bend your wrist into awkward angles. The objective is film continuity. If you see any orange-peel texture in the initial color coats, resist the urge to chase perfection with more paint; instead, let the coat cure, then lightly re-coat after proper dry time. A careful, patient approach pays dividends in a uniform, glassy result that holds up to sunlight and road debris over years.
Layering color is only half the story. Following the color, you will apply a clear protective layer. The clear coat is the shield that prevents UV fading, resists chips, and provides the deep, lustrous finish people expect from a well-prepped fairing. Apply the clear in multiple light coats, allowing adequate drying time between passes. Like color, clear coats respond best to a controlled environment and proper technique. The result should be a finish that radiates depth and clarity, with a smooth, even surface that invites the eye to linger on the lines of the fairing rather than the texture of the paint underneath.
Even with the most careful steps, issues can arise. Runs appear as unintended ridges or drips that reveal themselves when the surface looks wet or glossy. Orange peel shows up as a bumpy texture across the panel, often caused by overly rapid drying, incorrect viscosity, or improper spray technique. If you encounter runs, you can let the surface fully cure, then carefully sand with progressively finer grits, from 1500 to 2000, and polish to restore smoothness. For orange peel, adjust your spray technique, reduce your paint viscosity slightly, and apply additional, thinner coats to achieve a smooth, uniform film. Physical contamination, such as dust or lint, can become a permanent part of the finish if it’s not cleaned before clear coat application. A clean, dust-free environment, proper masking, and precise technique help prevent these issues from arising in the first place. The more you invest in prep, the fewer remedies you will need after the paint cures.
A subtle but important dimension of preparation lies in understanding the substrate and how it behaves under coatings. ABS plastic is common in aftermarket fairings and requires a primer with strong adhesion to plastic. Fiberglass, while rigid, also benefits from a primer that can bridge minor porosity and create a uniform substrate for color. Knowing these material properties helps you choose a primer, plan your sanding sequence, and adjust your technique to reduce the risk of peeling or cracking years down the road. A solid primer not only improves adhesion but also helps to minimize micro-sag during curing, producing a more uniform color film across complex curves. When you consider the long-term performance of your paint job, you realize that proper priming and careful surface preparation are more than a step in the process; they are the structural bedrock on which years of finish longevity rest.
If you’re curious about how others approach specific fairing substrates and colors, you might explore communities or product catalogs that discuss compatibility with particular shapes or bike families. For instance, you can explore a bin dedicated to Kawasaki Ninja fairings to see how enthusiasts approach color, substrates, and finishing on a popular platform such as those fairings. This kind of resource can provide practical context for your own process and help you anticipate what works best on curved, aerodynamically complex panels. Kawasaki Ninja fairings illustrates how a well-prepared surface translates into a professional-looking result across a family of panels and shapes.
Finally, the journey from foundation to finish is not merely about technique; it is a respect for process and timing. The actual cure times, environmental windows, and cross-compatibility of primers, paints, and clear coats are defined by the manufacturer’s guidelines. Your toolbox should include appropriate ventilation, a way to control heat and humidity, and patience to allow multiple layers to cure properly. It can be tempting to rush a project when a deadline looms, but the risk of a compromised finish—peeling, cracking, or hazing—outweighs the temporary savings in time. The best paint jobs emerge from deliberate pacing, careful observation, and a willingness to re-sand and re-coat when the surface reveals even minor imperfections. In this way, preparation becomes not only a technique but a mindset: a commitment to quality that honors the material, the bike, and the finished appearance you want to achieve. For a deeper dive into primers and coatings, consult external resources such as Rust-Oleum to understand the broader chemistry and recommended practices that underpin these steps.
The Coat That Defines the Ride: Mastering the Right Paint for Motorcycle Fairings
The paint on a motorcycle fairing is more than color and shine. It is a shield, a signature, and a statement all at once. When you choose the right paint system, you are not just decorating plastic; you are building a barrier that resists sun fade, road grit, and the occasional spray of gasoline or dehydration from winter air. The fairing, often made from ABS plastic or fiberglass, is a composite with its own quirks. It can be sensitive to solvents, and its complex shapes demand a coating that can flex without cracking. The right paint system turns a practical shell into a durable work of art, one that looks pristine after countless miles and seasons of exposure. In the broad world of motorcycling, the finish you apply to the fairing is a lasting impression, a tireless ambassador for your machine and your personal style. Getting it right requires both an understanding of materials and a disciplined approach to preparation, application, and curing that respects the chemistry of coatings and the physics of finishes. This chapter invites you to move beyond color swatches and shortcuts, toward a methodical practice where every layer plays a role in performance and aesthetics.
Durability begins long before the first drop of color touches the surface. The fairing’s substrate—whether ABS or fiberglass—presents different challenges for adhesion and long-term cohesion. ABS, a common choice for aftermarket and OEM fairings, is lightweight and tough but can be sensitive to certain solvents used in spot primers and topcoats. Fiberglass, while rugged, carries fibers that can telegraph through thin paint if the film build is too lean or the surface isn’t properly sealed. The central principle is adhesion: the topcoat must bond to the primer and the primer must bond to the substrate with minimal risk of delamination or micro-cracking under flex and impact. That is why the process emphasizes a robust primer system followed by a durable topcoat, with attention paid to how each layer interacts with the next. The goal is a finish that resists chipping from flying debris, resists yellowing from UV exposure, and remains glossy enough to highlight the bike’s contours and decals for years to come.
A thoughtful color story begins with the surface. Thorough cleaning is not mere hygiene; it is preparation at the molecular level. Remove any compound residues, waxes, and silicone that can disrupt adhesion. Degreasing with an appropriate solvent ensures the surface is clean enough to accept a primer. Sanding follows, not to erase the surface but to create a profile that allows the primer to anchor. A typical path uses progressively finer grits, often starting near 400 or 600 for plastics and moving toward 800 to 1200 for a smoother base before primer. The idea is to create a micro-roughness that helps the primer bite, without scratching through the surface and inviting micro-voids later in the finish. This careful scuffing also reduces the risk of peel, a common problem when a topcoat is applied over an inert, non-porous surface.
Enter the primer, the unsung hero of long-lasting paint. An epoxy-based primer remains a preferred choice for its excellent adhesion, chemical resistance, and ability to build a solid, uniform base. The epoxy forms a barrier between the substrate and the color layer, filling minor imperfections and helping to control moisture ingress. When plastics are involved, you might encounter primers designed specifically for plastic substrates. These primers improve the bond by tailoring surface energy to the coating system and by incorporating micro-fillers that level minor flaws in the fairing’s contour. The primer layer is not a cosmetic afterthought; it is the foundation that determines how well the color will lay down, how smoothly it will level, and how resistant the finished film will be to cracking under flex or temperature shifts.
Color systems for motorcycle fairings are built from layers that work together. A common architecture begins with a high-quality epoxy primer, followed by a base color coat, and then a clear protective layer. The base color provides the hue and depth, while the clear coat adds gloss, protection against UV light, and a sacrificial barrier against abrasion. The exact formulation of the base and clear coats matters; in practice, many riders and shops favor products designed for plastic substrates and optimized for thin-film, high-build applications. The finish quality hinges on how evenly the color coats are applied. Too thick a coat invites runs and sags; too thin a coat invites patchiness and uneven depth. The art is in applying multiple thin coats with careful flash times in between, allowing solvents to evaporate and the film to settle before the next layer is laid down.
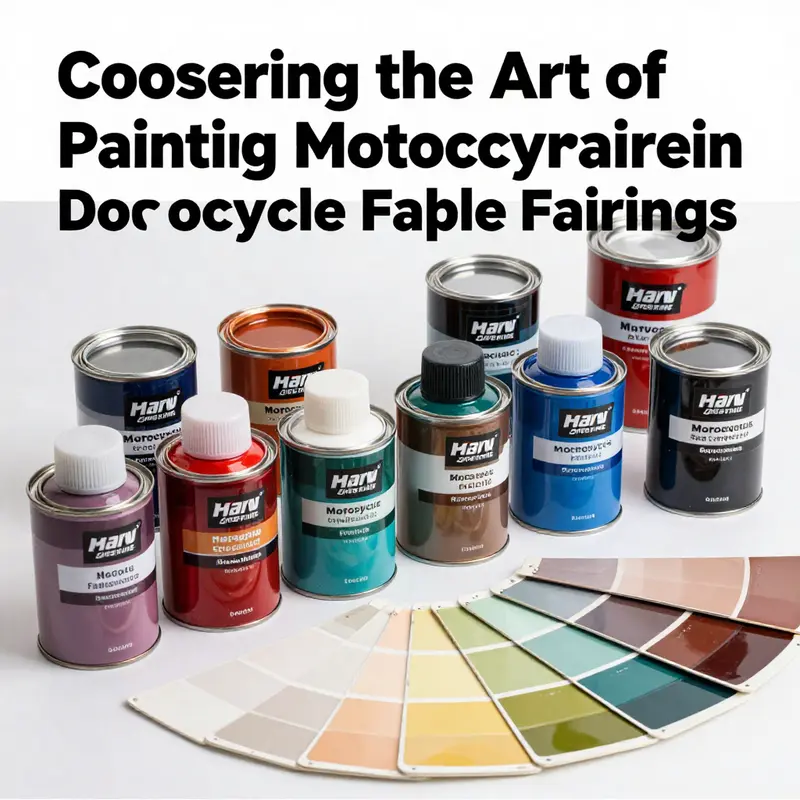
When choosing between paint types, the decision often comes down to durability, UV resistance, adhesion, and finish quality. Epoxy-based primers provide durability and adhesion, while polyurethane topcoats are known for a durable, glossy finish that remains intact under road dust and weather. Water-based paints offer a more eco-friendly option with reduced volatile organic compounds (VOC), but they may require different application techniques and curing protocols. The choice should align with the rider’s priorities and environmental constraints while preserving the integrity of the fairing’s substrate. It is not only a matter of what looks best in a shop light but what endures in sun, rain, heat, and cold. The exterior colors will fade if UV protection is weak, so selecting a topcoat with robust UV resistance is essential to maintain color integrity over time. The narrative of color permanence is a story of chemistry meeting climate, where pigment chemistry and UV absorbers work together to keep the ride looking sharp.
Practical guidance often gravitates toward OEM-grade paints or those specifically formulated for plastic substrates. While it can be tempting to lean on standard automotive paints for convenience, the substrate of a modern fairing is more complex than a sheet of metal. Plastic polymers, coatings, and primers are designed to work as a system. When you choose OEM-grade paints, you align with color accuracy, hardness, and chemical resistance that mirrors the finishing standards used at the factory. Such alignment reduces the risk of mismatches, peel, or color drift in sunlight. That said, a well-executed paint system from a reputable supplier can deliver professional results even when not labeled OEM, provided it is compatible with the substrate and applied with correct technique and curing.
Surface preparation remains the most critical stage of a successful finish. It is worth repeating: clean, sand, prime, and then paint in successive, controlled steps. Degreasing, scuffing, and moisture control are central to this practice. The environment should be ventilated and dust-free, with a controlled temperature range to prevent premature solvent evaporation. Every painter must respect the cycle of break and pause—the time it takes for each coat to cure sufficiently before the next coat is applied. This cycle is not a bureaucratic ritual; it is a chemical discipline that determines how the film will perform under real-world conditions. If you live in a humid climate, you may need longer flash times between coats and a slower, more deliberate approach to curing. If the air is extremely dry, you still need to manage solvent evaporation to avoid edge dry and solvent pop in the final coat.
The color system is not merely about pigment. Its performance rests on a precise balance of solvent chemistry, pigment dispersion, and film formation. Epoxy primers require mixing cues and curing windows that preserve adhesion while avoiding brittleness that could promote crackling as temperatures swing. Polyurethane topcoats form a tough, elastic film that resists impact and abrasion. They are renowned for their gloss retention, but their application demands careful control of solvent load and ambient conditions. When color coats and clear coats are combined, the final film should exhibit a uniform thickness, with an even gloss that reveals the bike’s lines. The radiant surface should look as though it is one continuous plane, free from texture that would catch light in a distracting or inconsistent way.
Water-based paints deserve careful consideration. They can cut VOC exposure and cleanup costs, yet they may require different spray techniques, longer cure times, and more stringent humidity control. A water-based system can still yield a high-gloss, durable finish if your technique respects the material’s needs and your equipment is calibrated for the thinner, waterborne formulation. In all cases, you should test a small panel first to confirm adhesion, color accuracy, and finish behavior before applying the system to the entire fairing. This is not merely a prudent step; it is a safety net that prevents costly mistakes on a complex surface with curves, ribs, and mounting points.
From a practical standpoint, the application involves a sequence of thin, even coats rather than a single thick layer. The first layer after priming is typically the base color. It should be applied with smooth, consistent strokes that avoid pooling or sagging at the edges and corners. The number of color coats depends on the pigment depth and the desired shade. A single solid color may require three or more coats to achieve true depth, while metallic or pearlescent finishes can demand additional layers for the right reflectivity and color travel. Each layer must be given adequate time to level and cure before the next one is introduced. When you are satisfied with the color, you will apply a clear coat. The clear coat does more than make the finish look glassy. It protects the pigment from UV, adds scratch resistance, and helps to seal the color to the substrate, forming a robust barrier against moisture and contaminants. The clear coat’s thickness distribution should be uniform, avoiding orange peel where the surface appears bumpy or dimpled. If orange peel appears, it is a signal that the film is either too thick, the air is too humid, or the solvent is evaporating too quickly. In such cases, you may need to reduce the spray viscosity, adjust the fan pattern, or alter the temperature and humidity in your booth.
Ventilation and masking are not optional accessories; they are essential. A spray booth that manages solvent fumes protects the rider, the painter, and the environment. It also helps prevent dust contamination from drifting onto wet finishes. Masking should be deliberate and precise. The most common pitfall is misalignment of masking tape against curves or edge transitions, which can result in paint bleed or tape pulls. The masking plan must account for fasteners, vent openings, and any areas that must remain unpainted—such as logos or chrome trim that you intend to protect. A quality masking tape and proper peel technique prevent lift or residue that could compromise the final appearance. In short, the final surface quality is as much about the meticulousness of masking as it is about the color and clear coats. Light, targeted finishing, including dust removal between coats, contributes to an outcome that looks intentional rather than hurried.
Color matching and documentation bring a professional touch to the process. If you are restoring a vintage fairing or customizing a modern bike, you may wish to replicate an OEM shade or craft a unique look. The trick is to reference color codes and to validate them against a panel test. In practice, you might compare the color under multiple lighting conditions and adjust recipe or mixing percentages to achieve the most faithful result. Documentation—keeping notes on the primer you used, the base color formula, the reducer ratios, and the curing times—gives you a blueprint you can repeat or revise for future projects. The practice of color matching becomes even more important when you blend metallics, candy tones, or pearlescent effects, which rely on layered optics to achieve the desired depth and shift as the light moves across the bike. A deliberate, measured approach ensures the final appearance matches the vision you started with and the bodywork projects you carry forward.
As with any craft, the proof of workmanship lies in the long view. A well-painted fairing resists chipping when exposed to gravel and water spray, stays bright under sun exposure, and remains clean enough to wipe down without dulling the finish. The care you put into surface preparation and coating selection will reduce the frequency of repaints and save time and money in the long run. Maintenance matters too. Gentle washing with a non-abrasive cleanser, avoiding harsh solvents on the seams, and protecting the bike from prolonged sun exposure will help the color stay true. If you ever need touch-ups after a stone strike or a minor ding, the same disciplined approach—clean, prime, and build up thin color layers—will ensure the repair blends seamlessly with the surrounding finish. This continuity is more than aesthetics; it preserves the integrity of the coating system and, by extension, the fairing’s resistance to environmental damage.
To connect this practical process with the broader ecosystem of fairings and customization options, you can explore the Honda fairings collection for a sense of how plastics, shapes, and mounting realities influence paint decisions. The catalog shows a variety of shapes and contours that remind us how critical surface preparation and film build are when you work with curved surfaces and tight radii. See the Honda fairings page for a sense of the different substrate geometries painters encounter and how those geometries compel specific sanding patterns and primer choices. Honda fairings demonstrates how even slight geometry differences encourage a tailored approach to masking and coating application, reinforcing the idea that one-size-fits-all solutions rarely deliver the best long-term results on a diverse fleet of bikes.
Ultimately, choosing the right paint for motorcycle fairings is not a one-off decision but a disciplined workflow that honors both science and craft. It requires understanding how plastics respond to primers, how pigments behave when thinned, and how the final film’s elasticity can withstand vibrations and temperature cycles. It is about selecting coatings that balance adhesion, cure time, and environmental considerations while remaining forgiving enough to produce a showroom-grade finish with a reasonable investment of time and care. The best outcomes come from embracing the layered truth of coatings: primers anchor, color defines, and clear coats protect. When these layers align, the fairing offers a durable, stunning surface that communicates pride in the machine and the rider who steers it. The finish then becomes a constant, a visual constant that grows more characterful with miles and weather alike, rather than a fickle glaze that fades or peels away with neglect. The ride, in that sense, begins with the coat, and the coat, when chosen and applied with intention, carries the rider into the next horizon with confidence.
External resource for deeper understanding of coatings performance and durability: https://www.sherwin-williams.com/en-us/products/industrial-coatings/motorcycle-fairing-paints
From Material to Masterpiece: How Fairing Composition Shapes the Paint Finish
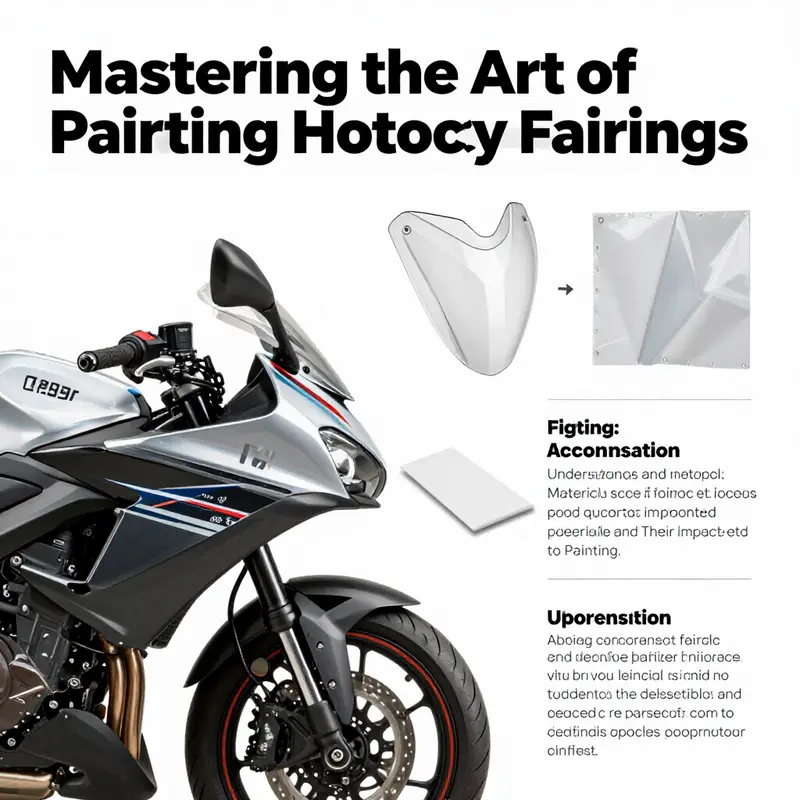
Every bike carries more than its engine and chassis; the fairings that wrap the machine define its silhouette and, more subtly, its personality. When you reach for a spray gun or a rattle-can, the material underneath your paint dictates not only how the color will look but how long it will last, how easily it will adhere, and how forgiving the finish will be to the inevitable road grit and weather. In the painting of motorcycle fairings, the material choice is more than a structural decision. It is a determining factor that informs every step of the process from surface preparation to primer selection, from the type of topcoat to the curing regimen. Understanding how ABS plastic, fiberglass, and carbon fiber each behave under paint helps you move beyond a purely aesthetic aim toward a durable, professional result that mirrors the quality of the bike itself. The journey from material to masterpiece begins with a clear-eyed assessment of the fairing’s composition, progresses through meticulous preparation, and ends with a coat that not only looks right but performs under sun, rain, and vibration.\n\nABS plastic is widely favored in modern fairings for its light weight, impact resistance, and versatility in forming complex shapes. Its surface, however, presents a unique set of challenges for painters. Unlike metal, ABS does not naturally hold paint as tenaciously without proper surface conditioning. The surface may harbor mold-release residues from manufacturing, or tiny amounts of wax that can impede adhesion. When you choose to paint ABS, you embark on a process that begins with a thorough cleansing to remove any residual oils or silicone, followed by a deliberate surface-sanding sequence that creates a micro-roughened profile for primer to grip. A common practice is to move through progressively finer grits, starting with a medium abrasion to expose fresh plastic, then refining the texture so the primer can sit evenly. The key is to avoid overheating the plastic with aggressive sanding, which could warp the surface or cause micro-cracks that become visible later as the paint cures.\n\nPrimer for ABS needs to bridge the gap between the plastic and the paint film. An adhesion-promoting primer designed for plastics is nearly indispensable here. These primers include a chemical or mechanical action that helps the film lock onto the smooth plastic and resist peeling as the fairing expands and contracts with temperature changes and road heat. In practice, the painter alternates between a couple of thin coats, letting each coat set before applying the next. The aim is a uniform, slightly tacky surface that provides a consistent bite for the base color. It is tempting to rush this stage, especially when aiming for speed, but any missed adhesion point will become a failure that appears as micro-peeling later in life. After priming, the surface is usually re-sanded with a very fine grit to produce a perfectly smooth plane before the color is applied. This is not mere vanity; it reduces orange-peel texture and yields a sharper, more even color site that will show off the bike’s lines rather than be a visual distraction.\n\nWhen the color goes down, the conventional approach is a series of thin coats rather than a single heavy application. Multiple thin coats reduce the risk of runs and sags and ensure that each layer cures evenly. The basecoat used on ABS is typically a modern automotive or motorcycle-specific system that cures to a tough, UV-resistant film. The painter must balance solvent content, ambient conditions, and the specific color’s demands. Metallics and pearls, which often rely on reflective pigments, require additional care because the underlying primer’s color and the evenness of the base coat influence the final appearance. For ABS, the topcoat often includes a clear layer that seals the color and adds gloss, followed by a careful curing period. The final clear helps protect the color from UV exposure and environmental contaminants. Even small inconsistencies in the clear coat—dust specks, unremoved imperfections, or moisture bubbles—can be magnified by the high-gloss finish, so cleanliness becomes a non-negotiable principle through the entire process.\n\nFiberglass fairings bring a different set of considerations. Fiberglass is robust and highly adaptable for shaping, but its porosity and resin-rich areas can trap moisture and thin pores if not properly treated. Fiberglass needs more initial leveling and filling than ABS because surface irregularities may be more pronounced. This requires a well-executed body filler application followed by careful sanding to create a uniform surface. Because fibers can telegraph through paint, a robust, high-build primer is often used to fill minor imperfections and create a smooth canvas. The primer must be compatible with the resin system used in the fiberglass panel, and care must be taken to ensure that the filler and primer remain flexible enough to tolerate the fairing’s typical flex and vibration without cracking the finish. In practice, a painter will often begin with a flexible filler that adheres well to fiberglass, then apply a sequence of primers and guide coats to reveal any remaining low spots to be sanded away. This process is akin to sculpting a flawless surface: the goal is a mirror-like plane that reveals the bike’s lines rather than the wall of filler behind the color. The more time invested in surface refinement on fiberglass, the more resilient the final paint will feel to road dust, temperature swings, and minor impacts.\n\nCarbon fiber, with its celebrated strength-to-weight ratio and distinctive weave, presents perhaps the most nuanced painting scenario. For many riders, carbon fiber’s aesthetic is part of the appeal; the weave itself can be a feature that some choose to preserve with clear coats or minimal color. When painting carbon fiber, the challenge is to prevent the resin matrix and the weave from absorbing solvents or becoming distorted under heat during curing. Some riders opt for a minimal approach—clear coating the carbon fiber to preserve the weave—thereby avoiding the risk of color distortion or misalignment with the weave pattern. If paint is used on carbon fiber, the preparation is even more exacting. The surface may require meticulous sanding to a feathered finish with very fine grits to avoid marring the weave. A specialized primer for carbon fiber is used to promote adhesion and to form a barrier that can withstand the stresses of vibration and ambient humidity. The primer’s formulation helps to prevent the darkening or hazing of the translucent finishes that are sometimes preferred on carbon fiber. Because carbon fiber’s surface can be more uneven where resin-rich cores or exposed fibers lie beneath, painters often opt for an epoxy-based primer that can fill micro-imperfections and provide a stable base for the color coat. In many cases, carbon fiber is left unpainted or painted with a translucent or tinted layer over a clear coat to maximize the weave’s visibility and the finish’s depth. The decision to paint carbon fiber versus leaving it bare hinges not only on the look but on long-term durability and the potential for color to interact with the resin used in the weave.\n\nAcross all materials, the preparation environment matters almost as much as the surface itself. Temperature and humidity influence how a primer dries and how a basecoat flows. High humidity can cause moisture to be trapped in the paint film, producing blemishes that only reveal themselves after the finish hardens. Conversely, overly dry air can cause rapid solvent evaporation, leading to tows of orange peel and an inconsistent gloss. A controlled space—a spray booth or a well-ventilated garage with airflow management—gives the painter the best chance at a consistent result. The ventilation not only protects the painter but also reduces dust settlement, which would otherwise settle on wet coats and demand rework. Respirators with organic vapor cartridges and eye protection are standard, as solvents and accelerants used in primers and paints present both health risks and odors that can compromise the painter’s focus and the finish’s integrity.\n\nThe choice of primer is as consequential as the choice of topcoat. ABS demands primers designed for plastics; fiberglass often benefits from high-build or multi-coat primers that can fill minor surface irregularities; carbon fiber fans of clear-based or minimal-paint strategies rely on primers that promote adhesion and do not obscure the weave’s texture. The topcoat typically follows the base color with a translucent or pigmented clear layer that enhances depth and resists sun exposure. The finish is not merely about color accuracy; it is about the degree to which the final coat can resist abrasion and weathering. A well-cured clear coat can protect the paint from UV radiation, chemical exposure from road salt, and the inevitable micro-abrasions from highway debris. Yet the clear coat is only as good as the surface preparation that precedes it. A flawless base with smooth, even color requires a final stage of polishing that reveals the true clarity and depth of the paint. This stage should be approached with patience, because aggressive polishing or improper compounds can burn through the clear to the color layer or, worse, to the primer, creating a ring of optical weakness around every impact mark.\n\nBeyond the practical steps of sanding, priming, color, and clear coats, there are strategic considerations tied to the material itself. ABS, for instance, benefits from primers that improve adhesion and provide a slightly roughened surface for the subsequent layers. The goal is to achieve a paint film that remains flexible enough to resist cracking while maintaining a high level of gloss and color fidelity. Fiberglass demands careful moisture control. Because fiberglass can trap moisture if not properly cured, painters must ensure the surface is completely dry before applying primers and color coats. A damp primer can lead to lifted edges, pitting, or a cloudy finish that undermines the overall quality. Carbon fiber, with its unique weave, invites a decision about how visible the weave should be. Some riders prefer a coloration that enhances the weave’s pattern with minimal distortion; others choose a deeper, solid color that sits over the weave as a backdrop. In either case, the practitioner must respect the weave’s physics: solvents can cause the resin to swell and the fibers to lift, so the most reliable approach is to use coatings designed to be compatible with epoxy-based resins and to cure at a controlled rate that minimizes stress on the weave.\n\nThe broader manufacturing context also informs how you approach painting fairings. Many aftermarket fairings are designed to be compatible with standard paint systems, but the substrate and finish demands can vary depending on whether the panel is ABS or fiberglass and on whether a carbon fiber layer is present beneath the color. Knowing these material properties helps prevent peeling and cracking that would otherwise occur after exposure to sunlight and temperature swings. It also helps anticipate how the fairing will age. A bright, brand-new paint job might look stunning today, but the true test is how well it withstands a year of riding in varied climates, where salt, moisture, and road debris can attack the surface from multiple angles. The painting process, then, becomes a dialogue between the material’s intrinsic properties and the painter’s technical discipline. A well-planned sequence—detailed surface prep, appropriate primers, deliberate layers, careful curing, and finishing polish—translates the bike’s lines into a durable visual statement that mirrors the machine’s performance and craftsmanship.\n\nIn practice, a comprehensive approach to material-aware painting begins with a deliberate assessment of the fairing’s composition and the conditions under which it will live. For ABS, plan on thorough cleaning, a plastic-specific adhesion primer, and a cushion of several thin color coats followed by a robust clear. For fiberglass, allow time for filler work to achieve a flawless surface, then step through a sequence of primers with ample sanding intervals to create a uniform field for color. For carbon fiber, decide early whether you want to preserve the weave or conceal it, then select primers and coatings that respect resin integrity and weave visibility. Across all materials, the environmental conditions must be controlled; solvents, heat, and humidity can dramatically affect the final appearance. The painter’s skill lies not only in the application but in anticipation—recognizing how a particular material will respond to heat, solvent exposure, and UV light and adjusting the process accordingly. The result is a finish that is not only visually arresting but structurally resilient, capable of withstanding the bike’s life on the road without surrendering to the elements.\n\nFor those who plan to undertake this work in a home workshop, the message is practical and precise: invest the time in proper prep, respect the material’s tendencies, use primers designed for the substrate, and maintain a controlled environment. If you are painting a fairing that you want to be long-lasting, you should also think about maintenance after the paint has cured. Regular washing with mild cleaners and avoiding harsh solvents will preserve the integrity of the paint film, particularly on plastics and composites that can be more sensitive to chemical attack. When you notice micro-scratches or dulling in the gloss, address them with a light polish and, if needed, a fresh coat or a targeted restorative treatment. The goal is not to chase a perfect finish at once but to build a resilient, enduring surface that remains pleasing to look at and reliable in performance over time. In other words, your treatment of the fairing’s material informs the entire lifecycle of the paint job—from preparation through cure to post-ride care.\n\nThe practical truth is that material awareness elevates painting from a cosmetic task to a discipline of durability and craft. ABS demands a primer that thrives on plastic, while fiberglass rewards meticulous filler work and robust primers that can level minor irregularities. Carbon fiber invites a respectful approach to the weave, with options ranging from preserving the texture to applying a carefully chosen color that complements or enhances the weave’s visual rhythm. The painter who internalizes these material conditions and aligns them with the chosen color, finish, and curing strategy will find that the final result is more than a color on a shell. It is a finish that speaks to the bike’s identity and its road-tough resilience. As you consider the route from raw fairing to finished paint, you are not just selecting paints and primers; you are composing a performance-ready surface that honors the material’s nature while expressing the rider’s vision. The fairing becomes a canvas that respects its own material heartbeat, translating engineering into artistry and aesthetics into endurance.\n\nFor readers looking to explore related configurations and to see how different fairing shapes and materials interact with paint in practice, a targeted reference work on fairing materials and their painting implications can provide further depth. This external resource consolidates the principles discussed here and expands on the material differences with technical specifics that practitioners will find useful when planning a project. https://www.motorcyclefairings.com/understanding-motorcycle-fairing-materials-and-their-impact-on-painting\n\nIf you are curious about how this knowledge translates into real-world options for your bike’s fairing family, consider this pathway: a detailed product-category page that compiles various fairing shells by material type and design. This page is structured to help you compare possibilities without getting lost in brand names or unrelated features. It serves as a practical companion to the decisions described above, linking you to compatible components and enabling a smoother transition from concept to color. product-category/kawasaki-fairings
Final thoughts
In conclusion, the art of painting motorcycle fairings not only serves a practical purpose but also enriches the motorcycle aesthetic experience for customers. By grasping the critical steps in preparation, making informed decisions on the type of paint, and understanding the materials used in fairings, business owners can elevate their services and build a loyal clientele. This guide serves as a foundational resource that will help you implement effective practices and stay ahead in a competitive market, ensuring both you and your customers can appreciate the true beauty and personalization that custom-painted fairings offer.