Introduction
Painting motorcycle fairings is not merely a cosmetic upgrade; it’s an essential service that can enhance the value and longevity of a motorcycle. For business owners in this field, understanding the intricacies of preparing and applying paint to motorcycle fairings is crucial for delivering a durable and aesthetically pleasing product. Each chapter of this guide delves deeper into fundamental aspects: starting from the essential steps of preparation and painting, progressing through the types of paint to use and their implications, exploring various finishes that can elevate a design, and finally comparing the merits of painting against wrapping. This holistic understanding will empower business owners to make informed decisions that could lead to increased customer satisfaction and profitability.
Tables of Contents
Chapter 1: Laying the Foundation: Essential Steps for Preparing Motorcycle Fairings Before Painting
- Preparing for Perfection: The Importance of Thorough Cleaning and Surface Preparation
- Establishing a Solid Foundation: The Critical Role of Priming and Base Coat in Motorcycle Fairings
Chapter 1: Laying the Foundation: Essential Steps for Preparing Motorcycle Fairings Before Painting
1. Preparing for Perfection: The Importance of Thorough Cleaning and Surface Preparation
When embarking on the journey of painting motorcycle fairings, the crucial first steps of thorough cleaning and surface preparation cannot be overstated. This foundational process is essential not only for ensuring optimal paint adhesion but also for enhancing the longevity and overall finish of the paint job. It involves a series of meticulous tasks designed to yield a surface that is primed for perfection.
To kick off the preparation, one must begin with a gentle cleaning of the fairing surface using a mild soap solution and soft cotton cloths. This stage is vital in removing dirt, grime, and old wax that may have accumulated on the fairing, especially after enduring long rides or exposure to harsh environmental conditions. It’s critical to use non-abrasive materials, as rough sponges or harsh chemicals can lead to microscopic scratches and damage that will compromise the painting process. After cleaning, applying a specialized wax can offer an additional layer of protection, safeguarding the fairing against incidental contamination during the remaining preparation steps.
Moving beyond mere cleaning, surface preparation must include systematic sanding to create an ideal base for paint adhesion. It is essential to lightly sand the fairing’s surface using fine-grit sandpaper. This technique serves two primary functions: it removes any gloss from previous finishes, thus helping to create a better bond for the new paint, and it smooths out imperfections, delivering an even canvas for subsequent layers of color. When sanding, the focus should be on maintaining an even pressure to avoid creating gouges or dips, which can mar the final appearance of the painted fairings.
Once the surface is prepped, the next step is priming, which acts as a bridge between the raw surface and the paint. Applying a high-quality primer specifically designed for plastic surfaces is essential. Primer not only seals the substrate but also promotes better adhesion of the paint itself. A well-primed surface reduces the chances of peeling or chipping, ensuring that the paint remains intact even under the stress of road conditions. It is important to allow the primer ample time to cure according to the manufacturer’s recommendations before moving on to the painting phase.
After priming, the process typically transitions into an even more elaborate stage involving the application of paint. Here, high-quality, durable paints—particularly urethanes—are favored for their resilience and ability to withstand the rigors of being on a motorcycle. The application requires multiple coats to achieve a consistent and vibrant finish. Each layer of base paint should be applied with care to ensure an even distribution. Spraying techniques often vary, but consistency in distance and motion can profoundly impact the texture and depth of the color.
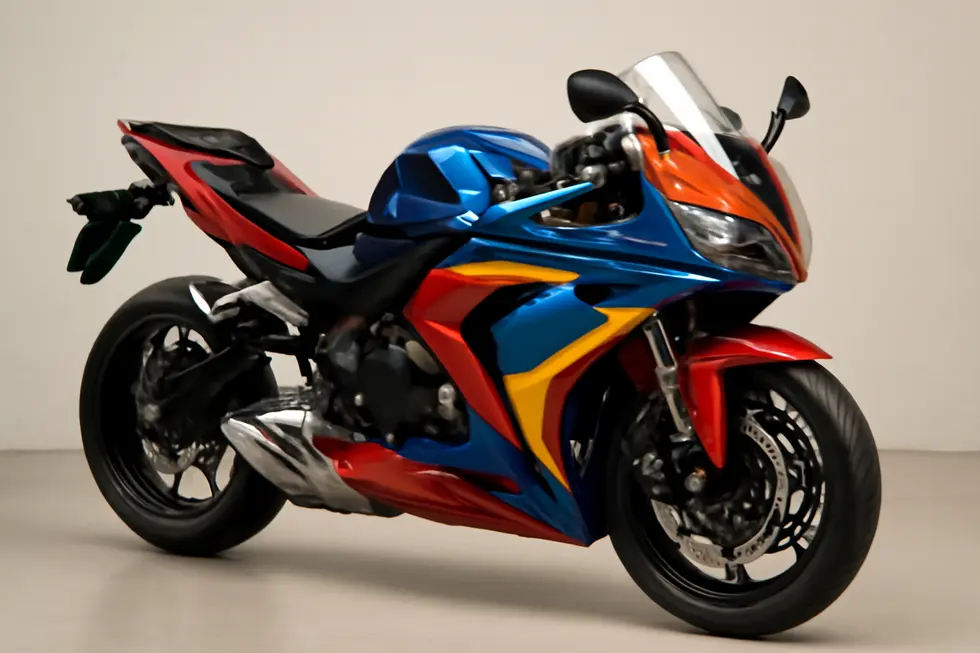
As one contemplates color choices, it’s helpful to note that certain finishes perform better than others based on specific styles and wear considerations. Gloss and metallic finishes, for example, not only provide a dramatic aesthetic but also tend to offer wash-and-wear durability, standing strong against the elements and road debris. On the other hand, matte finishes may appeal to those seeking a more contemporary look but require more gentle care to maintain their pristine appearance. When selecting finishes, it’s prudent to ensure that a clear coat is planned as the final protective layer. This layer provides a glossy sheen and serves as the ultimate safeguard against fading, UV rays, and other environmental factors that threaten the integrity of the paint job.
The discussions around paint finishes naturally lead into the realm of custom designs, where applying decals and graphics can further enhance the personality of the motorcycle. This step should be carefully timed to follow the application of the base paint—before the final clear coat is put in place. Proper stickers or graphics can give the motorcycle a distinctive look without sacrificing the paint’s protective surface. Just as with paint, ensuring the surface beneath the decals is appropriately prepared will contribute to the overall durability and aesthetic quality of the finished product.
One cannot highlight enough how vital thorough cleaning and proper preparation are to the overall success of painting motorcycle fairings. Neglecting any of these steps may lead to unsatisfactory results. For example, failing to clean residual oils or dirt can lead to poor adhesion, resulting in paint peeling off in flakes after a short period. Additionally, inappropriate sanding or skipping the priming step can cause the finish to appear uneven or patchy. This meticulous process reflects not just on the quality of the paint job but also on the motorcycle’s long-term visual appeal and value.
In conclusion, as riders gear up to transform their motorcycles, recognizing the importance of these preparatory steps fosters the creation of a result that embodies durability and artistic expression. By embracing the thorough cleaning and surface preparation phase, one sets the stage for a successful painting journey that truly showcases the motorcycle’s potential. For additional resources and guidance on enhancing the durability of your painted fairings, consider exploring comprehensive guides available on various motorcycle fairing blogs.
2. Establishing a Solid Foundation: The Critical Role of Priming and Base Coat in Motorcycle Fairings
When embarking on the craftsmanship of painting motorcycle fairings, the significance of the initial preparations cannot be overstated. Among these preparations, priming and the application of a robust base coat emerge as critical steps that set the stage for a flawless finish and long-lasting durability. A well-executed priming process creates a solid platform for the paint to adhere while simultaneously fortifying the fairings against potential damage. Therefore, understanding these processes is paramount for both DIY enthusiasts and professional painters alike.
The priming stage is not merely a preparatory activity; it is the backbone of a successful painting endeavor. Specifically designed for plastic surfaces, plastic primers provide the flexibility needed to accommodate the fairings’ movement without compromising the integrity of the paint. Unlike standard automotive primers that can crack and peel due to the flexible nature of plastics, plastic-specific primers ensure a strong bond, enhancing the lifespan of the paint job.
Before applying primer, meticulous preparation paves the way for optimal paint adhesion. Start by thoroughly cleaning the plastic surfaces to eliminate dirt, oils, and contaminants that can hinder the primer’s effectiveness. A dedicated degreaser is often best for this task, followed by a rinse with clean water. Once cleaned, employ high-quality masking tape to outline any areas that should remain paint-free. Pressing the tape firmly ensures that paint does not bleed onto these zones, preserving crisp lines and a professional appearance.
Once your surfaces are impeccably clean and masked, it’s time to apply the primer. A thin initial coat is ideal; this allows for better adhesion and helps to prevent runs or drips that can mar the finished surface. As the primer dries, many experienced painters recommend a technique known as wet sanding. Lightly sanding the dried primer with fine-grit sandpaper, followed by a thorough wipe down, helps create a smooth, even surface free from unsightly textures like orange peel. This seemingly minor step can significantly enhance the visual appeal of the final paint job.
As the primer sets the foundation, the base coat application becomes the artist’s moment to shine. The base coat, or color coat, is pivotal; it provides the visual character of the motorcycle fairings. Like the primer, application techniques play a crucial role in achieving an even and flawless layer. When applying the base coat, utilize light, sweeping strokes to ensure uniform coverage. This method minimizes the risk of runs and sags, which can occur when paint is applied too thickly or quickly.
Before diving into base coat application, preparation steps should not be overlooked. Always shake canisters of metallic or aluminum paints vigorously for 1-2 minutes prior to use. This ensures even distribution of the metallic pigments, delivering that brilliant sparkle that enthusiasts crave. It’s also wise to familiarize yourself with the manufacturer’s application recommendations, as they provide specific directions that can enhance the quality and durability of the finish.
In terms of application technique, layering is a critical principle. Applying multiple thin coats rather than one thick layer enhances adhesion and allows for better control over the finish. Each layer should have time to dry completely before the next is applied, as this not only prevents the paint from sagging but also guarantees a robust bond between layers. Patience is a virtue in painting; allowing sufficient drying time maximizes the durability and overall appearance of the fairings.
To further ensure a high-quality finish, surface preparation remains vital even after the primer and base coat are applied. For those working with fairings that have seen better days, addressing repairs before moving on to painting is essential. Cracks or damages should be thoroughly treated—this might involve plastic welding or epoxy applications, ensuring durability and a seamless look post-painting. By reinforcing the structure of the fairing, the overall paint job’s longevity is supported, warding off future issues such as fading, chipping, or peeling.
The flexibility of the chosen primer also plays a pivotal role in the overall outcome. It’s important that the primer complements the plastic fairing’s natural movements. A flexible primer will expand and contract alongside the fairing, maintaining adhesion over time. Without this flexibility, even a well-applied base coat can lose its grip, leading to unsightly failures down the road.
Concluding this critical stage in the painting process, an additional transparent clear coat is highly recommended. This layer acts as a protective barrier, guarding both the primer and base coat from the elements, including harmful UV rays and environmental exposure. For the best results, apply at least three coats of clear lacquer, allowing adequate drying time in between each application. This not only enhances the shine and depth of color but also contributes significantly to weather resistance and durability.
In essence, the significance of priming and base coat application extends beyond aesthetics—these steps form the cornerstone of a successful paint job. Skipping or rushing through these processes can lead to unsatisfactory results and increased maintenance. By dedicating time and effort to these foundational stages, motorcycle enthusiasts can ensure that their fairings not only look spectacular but remain protected for many rides to come. For those venturing into the more complex aspects of motorcycle repairs, including refinishing fairings, additional insights on typical repairs can be found at Bike Box MT Blog.
Final thoughts
In conclusion, the painting of motorcycle fairings represents a critical aspect of motorcycle customization that directly influences aesthetics, durability, and overall rider satisfaction. Business owners must prioritize every step from preparation to the choice of paint, to the finish applied, while also understanding the implications of painting versus wrapping. By mastering these details, businesses can not only enhance their service offerings but also contribute significantly to customer loyalty and satisfaction. Ultimately, investing in quality materials and skilled execution will yield long-lasting results that riders appreciate, reinforcing their purchasing decisions and enhancing brand reputation.
Upgrade your ride with UltimateMotorX’s premium motorcycle fairings—durably crafted, precision-fitted, and stylish. Meeting OEM standards for easy installation, our collection suits upgrades or replacements. Shop now for fast shipping, secure checkout, and expert support. Give your bike the ultimate quality it deserves!
About us
At UltimateMotorX, we’re rider-founded experts in top-tier motorcycle fairings. We source premium materials, partnering with trusted manufacturers for perfect fits and durability. Enjoy expert advice, hassle-free returns, and seamless shopping. Ride with confidence—style and quality guaranteed!