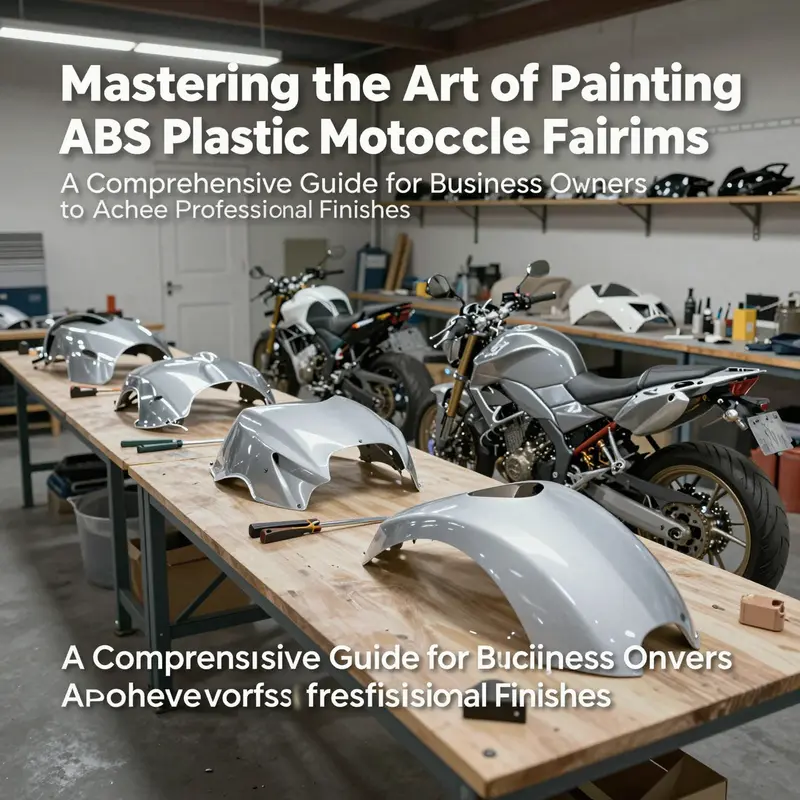
Successfully painting ABS plastic motorcycle fairings requires an understanding of surface treatment, suitable materials, and meticulous process execution. Whether you’re running a motorcycle customization shop or offering restoration services, knowing how to effectively prepare, prime, paint, and finish ABS plastic is crucial for achieving high-quality, durable results. This guide will help business owners navigate the essential steps involved in painting ABS fairings, ensuring they provide customers with impeccable, long-lasting finishes. Each chapter delves into different aspects of the painting process, from surface preparation to curing and finishing touches, equipping readers with actionable insights to enhance their craft.
From Bare ABS to Showroom Shine: Mastering Surface Preparation for Painted Motorcycle Fairings
The path from raw ABS plastic to a glossy, durable paint finish begins long before the color is sprayed. ABS is a thermoplastic known for flexibility and resilience, but its non-porous, slick surface makes adhesion a challenge. Without proper surface preparation, even the best coatings can peel, chip, or fade under sun and road grime. This chapter follows a steady, purposeful sequence that respects the material while guiding the eye toward a showroom-worthy result. The goal is not only to apply color but to create a layered bond that lasts through countless rides, weather shifts, and the inevitable knocks of every-day use. In practice, success hinges on patience and precision, with each step building on the last to deliver a consistent, durable, and visually striking finish.
The journey begins with a clean slate. Dirt, grease, wax, and processing oils act like barriers between the plastic and the primer. A thorough cleaning sets the stage for what follows. Use a mild detergent and water solution or a dedicated plastic cleaner to remove grime. After the initial wash, a wipe with isopropyl alcohol at 70 percent or higher should eliminate residual oils that washing leaves behind. The key is to leave a surface that is visibly clean and chemically inert. When you run your finger across the fairing, it should feel free of slick residues, allowing the next steps to take hold without interference. The cleaner you choose should not leave a film that could compromise adhesion; the goal is a pristine, chemistry-friendly surface that primes itself for the next stage.
Once the surface is clean, the next step is controlled abrasion. Sanding ABS is not about removing material but about creating a micro-roughness that serves as a key for the primer and paint to latch onto. The recommended range is typically 400-600 grit for initial abrasion. This level of finish leaves a fine scratch pattern that is invisible to the eye yet present under paint, which helps the primer bite and hold. Aggressive sanding can melt or burn the surface, leading to dull spots or ghosting under the topcoat. Therefore, keep your strokes light and even, and frequently inspect the sanded area for uniform texture. After you finish sanding, a second cleaning is essential. Dust generated during sanding carries fine particles that can become embedded or cause tiny runs in paint layers. Wipe the surface again with isopropyl alcohol to remove any stray dust, and consider a tack cloth for a final, meticulous pass. The combination of gentle abrasion and careful dust removal is the quiet hinge on which successful adhesion rests.
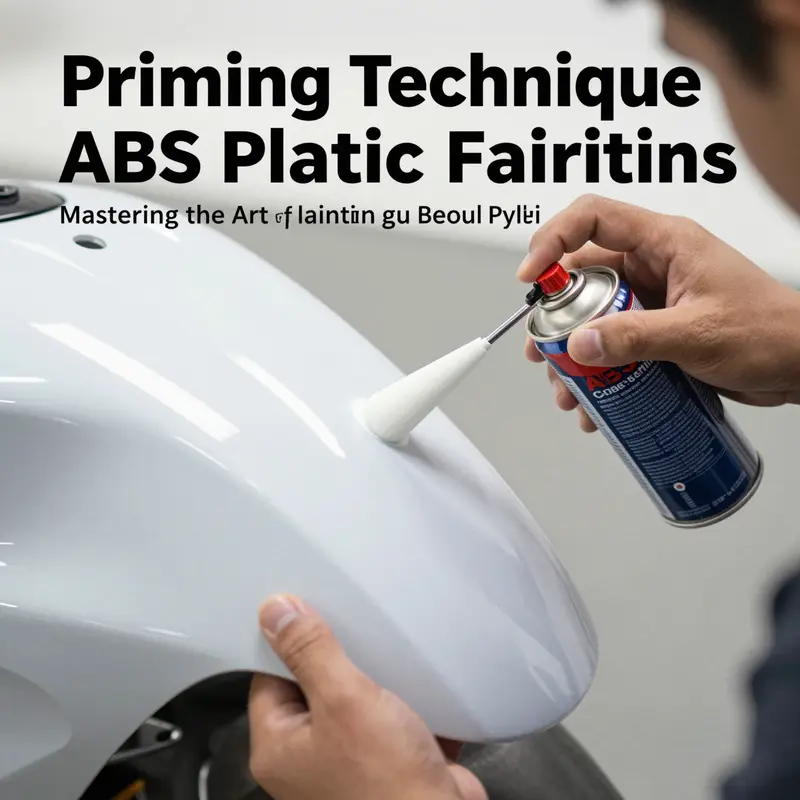
Priming is the bridge between the prepared ABS and the final color. ABS’s smooth, non-porous surface does not readily accept paint on its own. A high-quality plastic primer is the crucial next step. The primer is formulated to adhere to plastics and to create a slightly porous, even surface that can hold the subsequent coats. When applying primer, follow the manufacturer’s instructions on dry times and recoat windows; these guidelines account for environmental conditions, which will be discussed later. The goal with primer is a uniform, pore-filled bed that the topcoat can grip without chasing or flashing. Multiple light coats are preferable to a single heavy layer because they reduce the risk of runs and sagging while building a solid base. Allow each coat to dry completely before applying the next, ensuring the primer reaches full cure. A well-executed priming stage prevents peeling, chipping, and early wear, and it contributes to the long-term color fidelity of the finish.
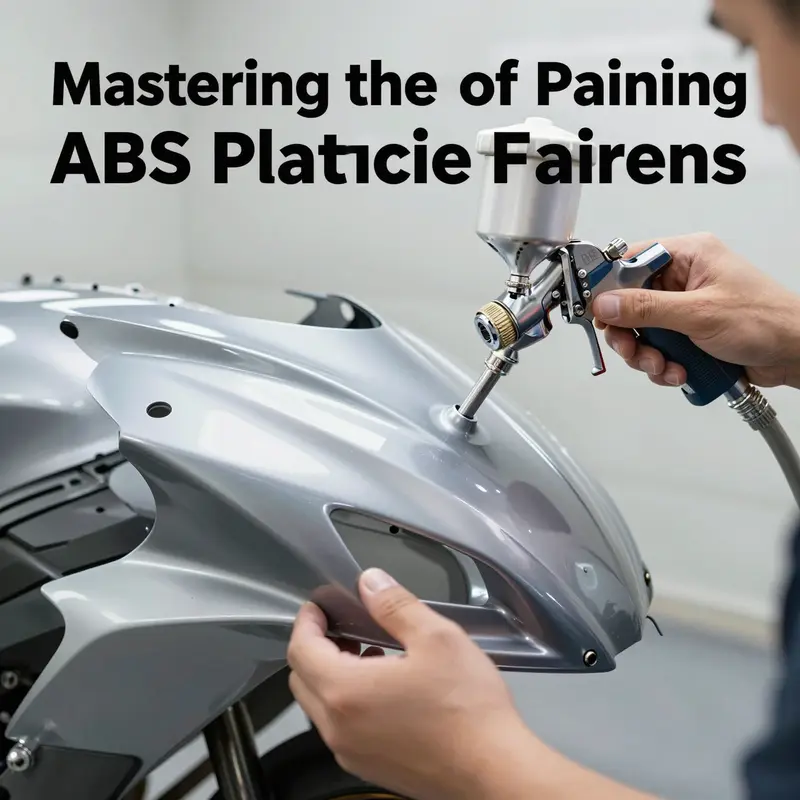
Color application follows a simple, disciplined logic: thin, even coats that build to depth without pooling. The topcoat choice typically centers on an automotive-grade urethane or an acrylic enamel designed for plastics, both of which tolerate the flex and temperature changes of a motorcycle fairing. The spray technique matters as much as the product itself. Use an airless sprayer or a high-volume, low-pressure (HVLP) gun to deliver consistent, atomized spray. The aim is to deposit multiple light coats rather than a few heavy ones. Light coats minimize the risk of orange peel and runs, while several passes provide even color and a smooth, durable surface. Between coats, observe the dry times prescribed by the primer and topcoat manufacturers. Rushing the process invites a compromised finish that will disappoint in the sun and under road grime. In a well-ventilated, dust-free workspace, you can achieve a level of uniformity that looks almost factory, yet retains the personal satisfaction of a hand-crafted finish.
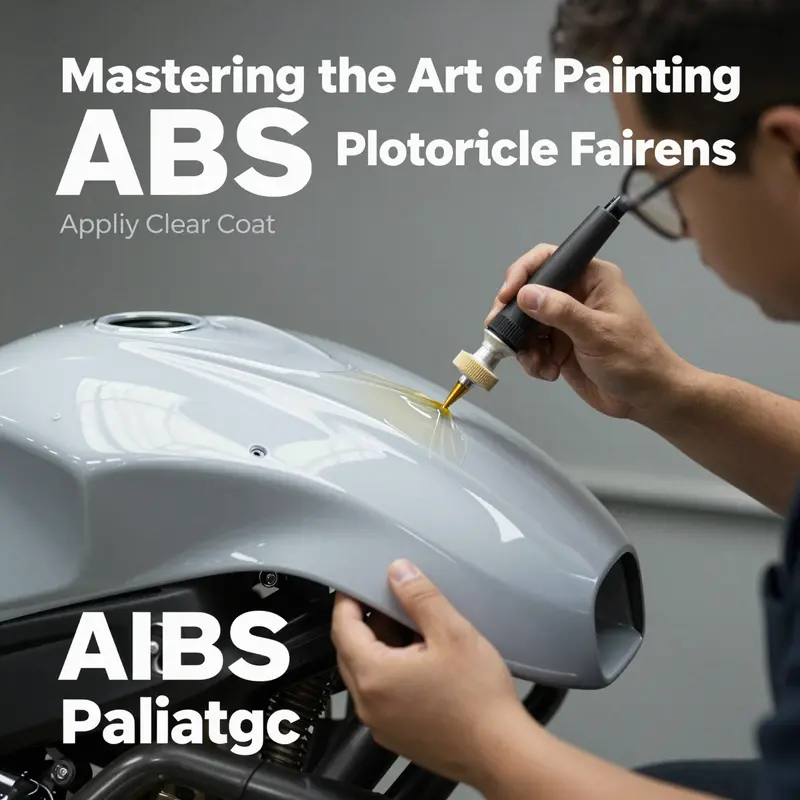
The color is not the final word in durability. A clear coat, typically a urethane-based finish, provides UV resistance, scratch protection, and a glossy depth that contributes to the overall color appearance. The clear layer acts as a protective shield, preserving the pigment beneath from environmental exposures such as sun, rain, and grit. It also enhances color depth and adds a layer of scratch resistance that is particularly valuable on fairings, where road debris and casual contact can threaten the finish. Like the color coats, the clear coat should be applied in several thin layers rather than a single heavy application. A deliberate approach reduces the likelihood of solvent entrapment, which can cause clouding or whitening under the clear. When the final coat cures, the surface develops a robust, glassy face that emphasizes the smoothness and clarity achieved through the upstream steps.
Curing is the quiet, often overlooked stage where the chemistry finishes its work. Even after the last coat feels dry to the touch, full cure can take 24 to 72 hours or longer, depending on temperature, humidity, and air flow. A patient approach yields better results, particularly for a finished look that must withstand exposure to sunlight and weather. During cure, keep the fairing away from dust and handling that could mar the finish. Temperature and humidity play a subtle but significant role in the drying and curing dynamics. A stable temperature around 20-25°C (68-77°F) and moderate humidity reduce the risk of solvent entrapment, which can cause micro-cracking or hazing in the clear. If you are painting in a garage or workshop, consider using a controlled environment or a spray booth with appropriate filtration and ventilation. The more you align with steady conditions, the more the film remains uniform, providing a factory-like gloss and a homogenous color that does not reveal the marks of rough handling during assembly.
The cumulative effect of careful cleaning, measured abrasion, thoughtful priming, disciplined topcoating, and patient curing is a finish that respects the ABS substrate. It is a finish that can flex with the fairing’s contours without cracking. It is also a finish that translates the rider’s personality into a durable, glossy surface that can endure everyday riding. When you take the time to prepare properly, you learn the value of precision over haste. You begin to see the fairing not as a simple shell but as a canvas whose longevity depends on the invisible, disciplined work that comes before any color is laid down. In the broader ecosystem of aftermarket and OEM-style ABS fairings, this disciplined preparation becomes a shared language for achieving consistent results across a range of shapes, curves, and mounting points.
The practical relevance of this preparation becomes even clearer when you consider the variability of ABS fairings in the wild. Some aftermarket pieces present surfaces with slightly different textures or residual mold-release residues that can stubbornly resist adhesion. Others may have edge radii or complex geometry where solvent evaporation rates vary, influencing how a topcoat sets. In scenarios like these, the same core sequence holds true: cleanse, abrade, prime, color, clear, cure. The key is to adapt the timing and technique to the material’s behavior without compromising the fundamental adhesion strategy. It is a balance between respect for the plastic and the pursuit of a flawless, durable finish. A well-prepared fairing looks effortless when mounted, and the satisfaction of that appearance comes from the conscientious process that preceded it. For enthusiasts who are traversing this path, the process is as important as the result, because it embodies the craft of painting ABS plastic into a finish that endures through many miles and many seasons.
If you source ABS fairings from the vibrant market of brands and styles, you may come across a wide spectrum of underlying plastics and finish profiles. In many cases, the prep remains the same, but you may encounter thinner walls and tighter curves that demand gentler handling and more precise spray control. In practice, the core sequence remains a compass: clean, sand, prime, paint, seal, cure. The result is not merely color; it is a robust, flexible, and aesthetically cohesive surface that bonds with the ABS matrix while resisting the wear of weather and road debris. For context on the kinds of ABS fairings that can benefit from this approach, you can explore broader options such as the Honda fairings category, which demonstrates how a consistent prep sequence translates into durable, show-ready finishes. Honda fairings provides a practical example of the type of surface you’re preparing and the finish you’re aiming to achieve.
In closing, the art of painting ABS plastic motorcycle fairings is, at its heart, the art of preparation. The steps are simple in concept but demanding in execution. The cleaner the start, the stronger the bond. The gentler the sanding, the smoother the ride of the primer. The lighter the coats, the more the color and clear will layer evenly. And the longer you allow curing to complete, the more resilient the finished surface becomes. The process rewards patience, discipline, and a willingness to respect the material you are shaping. Through careful surface preparation, a scraped, scarred, or dull shell can become a gleaming guardian for a rider’s style and spirit, a protective skin that stands up to the test of time and the thrill of the road.
External resource: https://www.paintandplastics.com/blog/surface-preparation-for-abs-plastic-painting/
Bonding Beyond the Plastic: Mastering Priming for ABS Motorcycle Fairings
ABS plastic fairings present a practical challenge for painters: the surface is non-porous, smooth, and quick to resist adhesion. Yet with care, the primer becomes the essential bridge that makes color possible and durable. The priming stage is not a mere prelude; it is the foundation that determines how evenly a finish lays down, how well it resists chips, and how long it keeps its gloss under sun and road grime. A meticulous approach to priming sets the tone for the entire refinishing job, turning a raw, blank shell into a canvas that can hold color and clear with confidence. The journey begins with surface cleanliness, moves through precise profiling, and ends with a primer film that’s both receptive to topcoats and forgiving of subsequent handling. The objective is clear: maximize adhesion while maintaining a surface that flows smoothly under the spray and cures to a uniform, unmarred base. Achieving this balance requires attention to both process and environment, because even the best primer will falter if applied to a surface that’s contaminated or inadequately prepared. A clean start is as important as a good primer.
First, surface preparation anchors the entire workflow. The fairing must be cleaned thoroughly to remove oils, waxes, and any release agents that cling to the surface from molding, storage, or previous finishes. A specialized cleaner or a mild detergent works well when followed by a careful rinse and full drying. Any residual grease acts like a barrier, preventing primer molecules from making intimate contact with the ABS substrate. After cleaning, a light, controlled scuffing is performed with fine-grit paper in the 800–1200 range. The key here is to create micro-abrasions that give the primer something to grab onto without leaving deep scratches that can telegraph through to the final paint. Dust must be eliminated with a tack cloth or a careful blast of clean, dry air before the primer is applied. Even a small grain of dust can become a micro-mailing list for adhesion problems later, causing pinholes or uneven film formation that ruin the finish. This is the moment where the difference between a professional job and a DIY patch job is measured in fractions of a millimeter and in minutes of patience.
With a clean, profiled surface, the next stage is the selection and application of a primer designed for ABS. The emphasis is on a primer formulated specifically for thermoplastics, because ABS’s non-porous nature requires a primer that has the chemistry to wet the surface and create a robust mechanical and chemical bond. Manufacturer guidelines should steer temperature, humidity, and spray technique. In practical terms, work at roughly 25 degrees Celsius with humidity ideally below 80 percent. The air pressure should be in the neighborhood of 0.35–0.50 MPa, and the spray distance should stay within 30–50 centimeters to balance atomization with film buildup. The goal is thin, even coats rather than a single heavy layer. One or two light coats are common, and each coat should be allowed to flash off before the next is applied. Flashing off ensures solvents begin to evaporate and the film can level rather than run or sag. The primer layer, once applied, forms the first thin barrier of moisture resistance and provides the initial anchor for the color coats to come.
After the primer has flashed off, a light sanding of the dried film with very fine grit is often beneficial. A 1500–2000 grit paper can smooth the surface just enough to remove any microscopic dust nibs and refine the finish before the topcoat. This step improves adhesion for the subsequent paint and helps achieve a surface that appears uniformly smooth under light. Once this final pass is complete, another thorough cleaning with a tack cloth removes any newly generated dust. The surface is now prepared for the paint stage, with the primer acting as a bridge that helps color adhere evenly across the contours of the fairing. Even in a well-ventilated space, the cleanliness and uniformity of the surface can become the deciding factor between a glossy finish and a dulled, uneven one.
The actual paint system relies on a compatibility chain that begins with the primer and flows into topcoat and then clear. A high-quality automotive-grade urethane or acrylic enamel topcoat follows the primer, chosen for its film-build, leveling properties, and UV resistance. The topcoat should be applied in multiple light coats, allowing each to dry to a tack-free state before the next passes over. Micro-mist layering prevents runs, sags, and solvent starvation in the primer. For ABS, a properly prepared primer ensures the topcoat has a reliable surface to lay down, flow, and cure. The color layer can be tuned to provide the level of depth and gloss desired, and the clear coat then seals and protects the finish. The clear coat is typically a urethane-based product, selected for durability, UV resistance, and heat tolerance. A two-part, or 2K, urethane clear coat offers superior hardness and gloss retention, contributing to a finish that resists micro-scratches and road grime over time.
Caring for the layers during curing completes the priming-to-paint sequence. Curing times can vary with ambient temperature and humidity, but a typical window runs from 24 to 72 hours before reinstalling the fairing. Patience here pays dividends in durability. If the fairing is reassembled while the finish is still evolving, the risk of chemical attack, stickiness, or structural distortion increases. To avoid such issues, provide a dust-free environment and avoid vibrations or exposure to direct sunlight during the cure window. The entire process benefits from a clean, controlled workspace that minimizes the introduction of dust, which can embed into the surface as the solvent is evaporating and the film is hardening.
Beyond the mechanics of preparation and application, there is a practical pace to priming that reflects the nature of ABS as a substrate. ABS absorbs nothing from the surface, so adhesion depends on creating a micro-mechanical key and a chemical bond with primer resins. The light sanding between stages is not a luxury but a necessity; without it, the finish may look flat, with micro-imperfections that become visible under the glare of showroom lighting or sunlight. The final result should read as a continuous film across the entire surface, with even color pull and uniform gloss. When this harmony is achieved, the primer’s job feels less like a barrier and more like a handshake between substrate and color. The left and right creases, the fairing curves with their sharp edges and soft radii, all respond to the primer in a predictable, even manner, enabling the subsequent paint layers to lay down as intended.
For readers assembling a project from aftermarket or OEM-like fairings, it can be helpful to consider the broader ecosystem of components that accompany priming. If you’re exploring options for replacement panels or fairings to customize a build, a catalog can be a useful reference. For example, the Honda fairings collection offers a range of shapes and profiles that can inform decisions about how to approach priming on complex curves and edges. This kind of resource helps visualize how a well-prepared surface will respond to the topcoat and how a seamless finish will behave when the bike is in motion. Honda fairings collection provides a sense of how different designs interact with surface preparation choices, though the same priming principles apply across ABS panels regardless of their exact geometry.
As the process unfolds, it is essential to recognize that the priming stage is not a standalone step but a bridging moment, linking the raw plastic to the final aesthetic. The primer’s performance depends on the quality of preparation, the material compatibility, and the discipline exerted in following the steps with consistent technique. Environmental control, precise sanding, and careful application all converge to create a foundation that will not only look good at the moment of paint application but continue to perform under the stresses of riding: heat, vibration, moisture, and UV exposure. When these elements align, the painted fairing achieves a brilliant, durable finish that endures through miles of riding and seasons of weather. The chapter on priming thus becomes a chapter on respect for materials and patience in technique, a reminder that a great color job on ABS begins with the quiet, persistent work of the primer.
External reference for further depth on priming ABS plastic and the preparation nuances you’ll encounter in modern refinishes can be found in industry-standard technical resources. For a detailed, up-to-date guide on surface preparation, primer selection, and application techniques tailored to ABS materials, consult the official technical guide from a major refinishing supplier: https://www.ppg.com/automotive-refinish/en-us/technical-resources/abs-plastic-preparation-and-painting.html. This resource reinforces the practical points discussed here and offers precise data on temperature, humidity, and spray parameters that align with best practices in the field.
From Surface to Shine: Mastering the Art and Science of Painting ABS Plastic Motorcycle Fairings
Painting ABS plastic motorcycle fairings is where science meets craft, where chemistry and patience determine whether a rider’s color feels as resilient as the bike itself. ABS, a thermoplastic, does not hold paint well unless the surface is prepared to accept it and the coating system is tuned to the material. The most reliable path blends meticulous surface preparation with a layered, chemistry-aware coating approach. In practice, this is a multi-stage process that rewards attention to the details at each step: cleaning, priming, color coating, and a protective topcoat, followed by a controlled cure. When done right, the result is a finish that not only looks vivid but endures sun, rain, and road grime with grace. The approach described here leans on a conventional, proven strategy, emphasizing adhesion, color fidelity, and long-term durability, while remaining adaptable to the variety of ABS blends used across aftermarket and OEM-style fairings.
The journey begins with surface preparation, the bedrock of adhesion. A thorough cleaning is essential to remove oils, waxes, and any other residues left from molding, sanding, or previous coatings. In professional practice, a degreaser is used to cut through hydrocarbon contaminants, followed by a water wash and a pure water rinse to ensure no residue remains that could interfere with bonding. The surface is then dried completely. Light sanding with an abrasive in the 800 to 1200 grit range creates a micro-roughened surface that acts as a mechanical key, helping the primer bite into the ABS. Dust must be wiped away with care, and the area should be shielded from dust and airborne contaminants during priming and painting. The goal is a surface that feels clean to the touch but also offers a subtle tooth that a topcoat can grab onto. This is not a cosmetic step alone; it’s a performance step that determines how evenly the color will adhere, how well it will resist lifting, and how resistance to chipping will evolve with use.
Priming follows as the crucial bridge between bare ABS and the color layer. The recommended primer, in professional contexts, is a two-component polyurethane primer, chosen for its robust adhesion to thermoplastics and its excellent sanding and filling properties. The primer is applied in multiple thin coats rather than a single heavy layer. In practice, two to three coats are common, each coat typically built to a thickness in the neighborhood of 15 to 20 micrometers. After each coat is laid down, there is a brief flow-out period—usually a few minutes—before applying the next coat. The wet-on-wet technique helps create a seamless, continuous film and reduces the risk of pinholes or edge dips that can occur when multiple coats are allowed to dry and then re-coated. This staged approach not only improves the appearance but also supports long-term adhesion by providing a uniform, well-bonded base for the subsequent color layer.
As the primer cures, the color coat—the actual pigment layer—arrives. The topcoat in this scheme is typically a two-component polyurethane. This system is chosen for its UV resistance, chemical tolerance, and ability to maintain gloss over time. The topcoat is applied in a similar fashion to the primer: multiple light coats, with careful attention to achieving a smooth, even film without runs. The airless spray gun or a high-quality aerosol can can deliver the necessary atomization, but the painter must still manage viscosity, spray distance, and ambient conditions to avoid orange-peel texture or sagging. The objective is a color layer that remains visually uniform as it cures, preserving new-vehicle vibrancy while withstanding sun exposure and road contaminants. After the color coats, a clear protective layer is often added to lock in color and bolster abrasion resistance. A urethane-based clear coat not only enhances gloss but also contributes UV protection and chemical resistance, extending the life of the finish under typical riding conditions.
Curing is the final, sometimes overlooked, phase that completes the transformation. The painted fairing can be left to dry at room temperature, which is convenient but slower, or it can be baked to achieve a faster, more controlled cure. Baking schedules in professional settings commonly involve a modest temperature around 60°C for roughly 30 minutes, though exact times depend on the thickness of the applied films and the specific product formulations. Throughout curing, environmental control matters. A moderate and stable ambient temperature around 25 ± 5°C, with humidity held below 80%, supports uniform film formation and minimizes defects such as blush or solvent pop. Allowing the fairing to reach full hardness before handling or reinstalling is essential; rushing the cure can compromise scratch resistance and the integrity of the bond between layers.
A key concept that underpins the entire process is the principle of “like dissolves like.” The compatibility between ABS and coating chemistries governs how well a film wets and adheres to the surface. ABS has dissolution parameters around 9.6, which aligns favorably with polyurethane around 10.0 and acrylics around 9.4. This alignment promotes good wetting and a stronger bond, provided the surface is properly cleaned and primed. The chemistry also explains why certain solvents or aggressive chemical strippers can soften or craze ABS if used inappropriately, while carefully chosen cleaners and compatible coating systems yield a durable, flexible finish that resists cracking as the fairing flexes with the motorcycle’s dynamics. Understanding this chemistry helps the painter predict performance, select compatible primers and topcoats, and avoid combinations that could compromise adhesion or gloss.
Beyond the chemistry, the practical craft of painting ABS fairings rewards patience, precision, and an attention to the environment. After priming, all spraying should favor thin, even coats rather than a single heavy layer, which invites runs, sags, and solvent entrapment. Finishing touch details, such as color matching and edge definition, benefit from a consistent technique across coats. Small test patches on scrap ABS or a representative off-cut can reveal how the color settles as the film builds and how the gloss level responds to the clear coat. If color matching across panels or complex shapes is a goal, a controlled, single-room workflow helps minimize color drift and shade variation. Maintaining a dust-free workshop is vital; even micro-particles can land on a tacky surface and create tiny craters that become visible only under bright light once the finish cures. The blend of technique and discipline here is what determines not just how the fairing looks in photographs but how it holds up to the realities of riding—heat, sun, moisture, and the occasional abrasion from gravel or tools.
For riders and builders chasing OEM-like fidelity or a factory-perfect gloss, the choice of surface condition and the sequencing of steps matter as much as the color itself. In some cases, enthusiasts pursue a finish that mirrors factory standards by emphasizing a pristine base and a high-build color layer that minimizes texture and micro-murface imperfections. The result can be striking, especially when color matching with adjacent panels or honoring a particular model’s lineage. For those exploring the market,OEM-inspired finishes can be pursued through a dedicated fairings category that showcases the breadth of compatible panels and configurations. See the collection here: BMW fairings.
The pathway described here is not the only route to a strong finish, but it remains one of the most reliable for consistent results. It emphasizes preparation and compatibility as the foundation, followed by a disciplined application of primer, color, and clear coat, and finally a controlled cure that locks in the work. The process is scalable: you can apply it to aftermarket fairings crafted from virgin ABS or to OEM-style panels that require careful color alignment. The same approach supports color matching across different batches of ABS, different lighting conditions, and various shapes of fairings, from large upper halves to slender belly pans. The key is to treat the process like a workflow rather than a one-off task—each stage builds on the previous one, and each stage sets the tone for the next.
As a closing thread through the narrative of painting ABS fairings, consider how the finish communicates the bike’s personality. A carefully prepared surface, a well-chosen primer, meticulous layering, and a thoughtful cure schedule all contribute to a look that remains vibrant and durable through seasons of use. This is the essence of painting ABS plastic motorcycle fairings: a disciplined approach that respects the material’s chemistry while honoring the rider’s desire for aesthetics and resilience. For further technical depth on the chemistry and processes involved, see the referenced external resource on ABS compatibility with coating systems: Scientific discussion of ABS and polyurethane/acrylic interactions.
The Final Shield: Mastering Clear Coat for Painted ABS Motorcycle Fairings
The final shield, when a painted ABS fairing emerges from the workbench, is the clear coat. It is more than a cosmetic glaze; it is a functional, enduring barrier that guards the color beneath and the structural integrity of the plastic itself. ABS plastic, prized for its impact resistance and moldability, behaves differently from metal panels. It does not hold a topcoat with the same tenacity as sheet metal unless you respect its chemistry and the environment in which you work. The clear coat on painted ABS is the difference between a vibrant, showroom finish and a finish that fades, chalks, or peels within a season. When done correctly, the clear coat adds depth and life to the color, provides UV protection to slow fading and yellowing, and creates a durable surface that resists minor scratches and chemical exposure. The goal is not merely gloss but lasting resilience, a coat that remains crystal clear and true under sun, rain, and wind while preserving the design intention laid down in the base color and any decorative graphics beneath it.
The choice of clear coat matters. On plastic substrates like ABS, two broad families are most commonly favored in professional practice: acrylic-based clear coats and polyurethane-based clear coats. Each brings strengths to the table. Acrylic clears are noted for their clarity and ease of application. They typically cure to a hard, glossy finish that resists yellowing and maintain color fidelity under light exposure. Polyurethane clears, by contrast, are renowned for their durability and UV resistance. They form a robust, resilient layer that stands up to the environmental challenges of riding—from occasional road debris to the harsher ultraviolet rays that can fade even the boldest hues. Industry standards, as analyzed in the leading automotive coatings literature, consistently highlight these formulas for ABS because of their adhesion to plastic, their long-term gloss retention, and their ability to form a protective barrier without brittle cracking. This is not a universal promise, though. The actual performance hinges on surface preparation, compatibility with the underlying paint system, the application technique, and the curing environment. A well-prepared ABS surface receives the clear coat like a canvas receives a varnish, with the paint beneath remaining visible and the texture beneath smoothed by the gloss layer rather than buried beneath it.
Preparation remains the prelude to any meaningful clear coat success. It begins with a clean, oil-free surface. A dedicated plastic cleaner or warm soapy water followed by a thorough rinse makes the surface receptive to the next steps. Dust and residual contaminants must be eliminated, because even minute particles can cause micro-scratches that show through a high-gloss coat. The surface then requires light abrasion to create a micro-roughness that the clear coat can grip. For ABS, a gentle scuffing with 320- or 400-grit paper is typically appropriate. This step is crucial; too aggressive a sanding can embrittle the surface, while too gentle an approach can leave a surface too smooth for optimal adhesion. After sanding, a careful wipe-down ensures no particles remain, and a tack cloth helps to remove fine dust that could cause fisheyes or texture irregularities in the final film. If the painted layer beneath was achieved with a paint system that differs in solvent composition from the clear, a compatible primer may be required before applying the clear. The goal is a seamless bond between the paint, any intermediate sealer or primer, and the clear coat, so the final finish is uniform and resistant to delamination.
Once the surface is prepared, the application technique takes center stage. The equipment choice—whether a high-quality spray gun or a consumer-grade aerosol system—depends on the scale of the project and the environment. The core rule remains the same: apply thin, even coats rather than a single heavy layer. Thick coats tend to run, sag, or trap air, undermining gloss and clarity. The general rhythm is multiple light coats with appropriate drying intervals. A typical sequence might begin with a light tack coat to promote wetting and even flow, followed by two to three additional coats that build depth and protection. The drying interval between coats is not arbitrary. It is dictated by the product’s instructions but commonly ranges from 20 to 30 minutes in a moderate climate. In cooler or more humid environments, longer intervals may be necessary to prevent dust pickup and solvent entrapment. Conversely, in hot, dry conditions, faster tack and cure times can risk a brittle finish if coats are applied too quickly in succession.
Always verify the surface’s readiness between coats. The surface should be dry to the touch, not tacky, and free of dust. A careful inspection under appropriate lighting reveals any waviness, dust nibs, or small runs that require immediate correction or re-sanding before the next layer. The number of coats depends on the desired depth, the color beneath, and the gloss level sought. For most ABS fairings with a standard color base, two to three coats of clear are sufficient to provide robust protection and a satisfying gloss. However, more complex graphics or very bold colors may benefit from additional coats, provided the substrate can tolerate the extra build without compromising flexibility or causing shrinkage in the film.
Curing is the quiet phase when the finish hardens and fully integrates with the underlying layers. Curing times are contingent on ambient temperature and humidity but typically span from 24 to 72 hours. During this window, it is essential to protect the fairing from dust, contact, and environmental stress. A protected, dust-free environment with stable temperature supports a uniform cure, prevents minor imperfections from becoming permanent, and ensures the gloss settles evenly. The post-cure stage is also when the chemistry of the clear coat reaches its maximum hardness, resilience, and clarity. If the environment permits, a gentle cure with controlled airflow can help avoid moisture entrapment, which could manifest as hazing or subtle whitening after full hardening.
The outcomes of a well-executed clear coat endure beyond passable aesthetics. A clean, crystal-clear surface enhances the color depth, adds a saturated, glassy look, and creates a visual impression of factory precision. The surface becomes more resistant to UV-induced fading, minor scratches, and exposure to typical road chemicals, while still allowing the base graphics to shine through. For sport-touring or aggressive-looking fairings, where glassy depth can transform a simple color into a vivid, metallic-like appearance, the proper clear coat is particularly transformative. The integrated gloss and depth reinforce the perception of quality and care in the overall finish, which is especially important for aftermarket or OEM-style ABS fairings that must blend seamlessly with existing components and lines.
In practice, the path to a flawless finish on ABS fairings often extends into the realm of subtle decisions. The compatibility of the clear coat with the paint system beneath is critical. If the base color used a system with specific solvents or a particular polymer matrix, the chosen clear coat must be formulated to tolerate those conditions without causing crazing or adhesion loss. When in doubt, consult the coating system’s guidelines or perform a small test panel to confirm compatibility before committing to the full fairing. The clean, dust-free shop environment remains a constant ally through this process. Airborne dust, especially in an environment with open bays or airflow from nearby machinery, can land on the wet clear and become embedded or create micro-scratches that mar the final gloss. A dedicated spray booth or a clean, ventilated space with proper filtration enhances consistency and reduces the need for rework.
Aesthetics aside, practical considerations govern the lifecycle of the finish. The clear coat should be selected not only for its appearance but also for its resistance to fuel vapors, solvents, and environmental exposure that fairings encounter on the road. The right clear coat offers robust adhesion to ABS, remains clear and unconstrained by heat cycling, and resists yellowing. This is why the formulation matters: the molecular structure determines how well the layer adheres to plastic, how it handles thermal expansion and contraction, and how easily it can be sanded or buffed if refinishing becomes necessary in the future. The finishing step, therefore, is as much about foresight as it is about immediate appearance. A compiled approach—cleaning, careful sanding, compatible priming, controlled application, mindful curing, and ongoing care—produces a resin-rich, high-gloss shield that honors the original design while delivering practical durability for the long highway ride.
As you consider your next project, you may encounter two common scenarios that reflect the realities of working with ABS fairings. Some riders opt for a complete color-and-clear build in one package, using a system designed to flow together in harmony. Others repaint an existing color with altered shades or new graphics, where the clear coat must accommodate potential rework or rework compatibility with the underlying paint. In either case, the principles remain consistent: prepare meticulously, apply with restraint, cure properly, and protect the final result with a durable, clear layer that lasts. If your project involves Honda fairings, you can explore a dedicated catalog for those specific components to tailor your approach to fit the form and mounting characteristics of that design. This kind of targeted reference enhances both the process and the fit when the fairing is reassembled on the motorcycle, ensuring a seamless aesthetic and functional integration.
In closing, the clear coat is not an afterthought but a decisive step in achieving durability and beauty on painted ABS motorcycle fairings. It translates the artist’s color choices into a lasting visual experience while offering real-world protection against the mechanical and environmental challenges of riding. By selecting the appropriate clear coat for ABS, preparing the surface with care, applying in controlled, thin coats, and allowing for proper curing, you create a durable, high-gloss finish that stands up to the miles and remains true through time. The result is a fairing that looks freshly painted after months of exposure, a true testimony to the craft of finishing and the science behind modern coatings. For those seeking broader context on clear coat choices and application nuances, consider consulting comprehensive automotive coating resources that discuss industry standards and practical guidance for plastic substrates. External resource: https://www.ppg.com/automotive/products/clear-coats
Curing to Perfection: Finishing Touches That Seal and Protect Painted ABS Plastic Motorcycle Fairings
The finishing phase of painting ABS plastic motorcycle fairings is more than a cosmetic flourish; it is the hinge that locks in the effort spent on surface preparation and priming. After the routine of cleaning, sanding, and priming, the appearance of a fairing transitions from a fresh color to a lasting, showroom-grade finish through a deliberate, controlled curing process. Curing is the unseen theater in which chemistry, heat, airflow, and time collaborate to transform a thin film of paint into a resilient, deeper-than-gloss reality. When approached with patience and precision, curing does more than harden the surface. It anchors the paint to the plastic, enhances resistance to the elements, and preserves the image you’ve invested so much care in creating.
The environment in which a freshly painted ABS fairing dries sets the stage for every subsequent outcome. Temperature stability is essential. The ideal range—roughly 68 to 77°F (20 to 25°C)—offers a forgiving spectrum in which solvents can escape gently and cross-linking can proceed without the stress of rapid shrinkage or uneven evaporation. Temperature alone, however, does not determine success; humidity and dust control play equally critical roles. A dry, dust-free room becomes an implicit partner, shielding a fragile, new surface from particulate interruptions that can nickel and mar the finish as it cures. In practice, this means arranging a dedicated space or at least a well-ventilated, isolated area where the fairing can sit undisturbed during the crucial early hours of the cure.
From a practical standpoint, the curing timeline for ABS plastic starts with the final coat of paint. For most urethane-based systems, the first 24 to 48 hours are the window in which surface handling should be avoided. The paint may feel set to the touch, yet the underlying chemistry continues to cure, inching toward a robust, chemical resistance that will endure daily exposure to fuel vapors, cleaning solvents, and the friction of occasional maintenance. For enthusiasts aiming at maximum durability, there is value in extending patience beyond the initial handling period. A full chemical cure can take up to seven days, during which the film harmonizes with the ABS substrate, achieving its full scratch resistance, chemical tolerance, and color stability. This extended period matters because it reduces the risk of micro-scratches or clouding caused by premature contact or heat generated by incidental conditions.
Clear coats enter this narrative as the second act in curing, a protective layer that is more than a gloss coat. The clear coat is a purpose-built barrier designed for plastics, chosen for its compatibility with the base color and its resistance to UV radiation. The application should be thin and even, applied in multiple passes rather than a single thick layer. Thin layers minimize sagging and ensure uniform adhesion across the curved surfaces, ribs, and edge radii that give fairings their aerodynamic complexity. A well-applied clear coat enhances gloss depth, but more importantly, it adds a durable shield that guards against yellowing, chemical attack, and the tiny risks posed by road debris or casual brushes with tree branches at the paddock or track day.
Once the clear layer has been applied, the curing discipline continues. At this stage, patience governs whether the finish will glitter with the sharpness of a mirror or fall back into a dull, uneven surface. This is where the step-by-step timing rules become meaningful. The initial curing phase should be honored before any handling, washing, or light polishing. Even in a well-controlled environment, the surface remains delicate for the first day or two. Temperature consistency matters; rapid fluctuations can create micro-fissures in the clear layer or encourage uneven drying that would manifest as micro-bonders or hazy spots. The guidance to allow 24 to 72 hours before re-examining the surface for handling is sound, but when possible, extending toward the upper end of the window, especially with urethane systems, yields a more forgiving surface that resists scratches and stands up to everyday exposure.
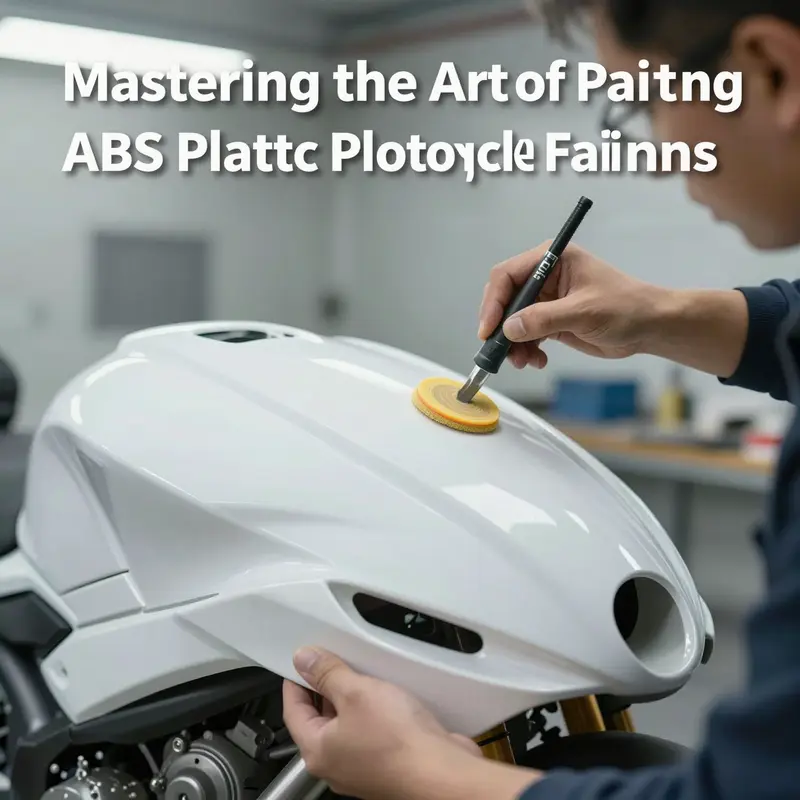
Polishing emerges as the bridge between a cured film and a flawless, mirror-like finish. When the clear coat has fully cured, typically after the primary cure period, a careful polishing routine helps eradicate minor imperfections—dust nibs, tiny dust particles that settled during curing, or faint imperfections from the spray pattern. The polishing step should be gentle and deliberate. A fine abrasive compound paired with a dual-action polisher can remove the micro-marring without burning through the clear layer or heating the paint beyond what the plastic can safely tolerate. The dual-action polisher’s orbit minimizes heat buildup while delivering consistent, uniform abrasion. The goal is not to remove material but to refine the surface until its curvature and sheen reflect a seamless, glass-like finish. Throughout this process, moisture and residue can accumulate on the surface; a light, thorough wipe with a plastic-safe cleaner between passes helps prevent embedding contaminants that could later interfere with adhesion and clarity.
Cleaning, surprisingly, is less a final step and more a continuing habit that ensures the integrity of the finish over time. After the polishing phase, a dedicated plastic-safe cleaner is recommended to remove any residual polishing compounds, oils, or solvents that could compromise adhesion or alter the surface tension of the clear film. This is a critical safeguard; even trace residues can act like micro-lubricants that reduce the performance of subsequent maintenance steps, including washings and light abrasion in the future. Regular attention to cleaning—using non-abrasive, plastic-safe products—supports the longevity of the finish, preserving depth of color and reflective clarity without sacrificing the integrity of the ABS substrate.
The cumulative effect of curing and finishing touches is a paint system that remains loyal to its plastic substrate. ABS, with its thermoplastic characteristics, does not form a chemical bond with paints as readily as metal surfaces do. This is why the cure and finish sequence matters so much: proper curing ensures the paint and clear coat set into a tough, cohesive layer rather than flaking or cracking under flex, heat, or vibration. The protective layer’s UV resistance preserves color and gloss against sun exposure; the scratch resistance helps maintain a pristine surface even after the inevitable encounters with road debris or garage mishaps. The visual payoff—clear, vibrant color that seems to glide across the fairing’s contours without a ripple—comes only after disciplined attention to temperatures, times, and the sequence of products chosen for each phase.
This is where the entire painting workflow converges. Surface preparation, primer adhesion, and the careful application of base color and clear coat culminate in a curing and finishing sequence that demands patience as much as technique. The steps are not isolated rituals but an integrated process that respects the physics of plastics and the chemistry of modern coatings. In the end, the result is a durable, professional finish that looks like a factory job, capable of withstanding the day-to-day life of a motorcycle, from daily commutes to spirited weekend rides. The right curing window and finishing protocol meaningfully extend the life of the paint, keeping color true, gloss high, and edges sharp against the wear and tear of the track and the road.
For readers who want to explore more on paint system compatibility and the recommended curing procedures for automotive plastics, consult the technical resources from major coating manufacturers. Their guidance helps ensure that the specific primer, color, and clear coat selections work in harmony with ABS. If you’re curious about how ABS fairings are presented in the aftermarket space and how these finishes translate across different brands and models, you can browse the Honda fairings category for context and examples of fitment and detailing Honda fairings for CBR.
The journey from bare ABS to a glossy, durable finish is a careful dialogue among materials, environment, and human technique. When you observe the curing window, respect the role of the clear coat, and follow through with disciplined polishing and cleaning, you gain not only a strong aesthetic but a finish that endures. In this space, where many readers are balancing performance, style, and longevity, the curing and finishing touches are the quiet champions that bring the entire painting project to a successful, lasting close.
External resource for deeper technical context:
- PPG’s technical data on automotive plastic paint systems provides specific guidance on product compatibility, drying times, and curing procedures for ABS plastics. PPG’s Automotive Plastic Paint Systems guide
Final thoughts
Painting ABS plastic motorcycle fairings involves a meticulous process that stretches from surface preparation all the way to the final touches of curing. Business owners must prioritize quality materials and dedicated methods at each step to not only meet but exceed customer expectations. By rigorously following the stages outlined in this guide, including priming, painting, and applying a protective clear coat, businesses can deliver outstanding results that stand the test of time. Ultimately, investing in these practices empowers motorcycle customization shops and repair services to build a reputation for excellence and craftsmanship.