
The aesthetic appeal of a motorcycle often hinges on the condition of its fairings. As a business owner in the motorcycle industry, understanding how to properly remove paint from these critical components can differentiate your services from the competition. This guide will explore best practices for selecting the right paint remover, effective application techniques, and crucial safety considerations, culminating in an overview of top-rated products available in the market. By focusing on these areas, you will be equipped to provide quality services that not only restore fairing aesthetics but also maintain the integrity of the materials.
Choosing a Plastic-Friendly Paint Remover for Motorcycle Fairings
Selecting a plastic-friendly automotive paint remover for motorcycle fairings is a careful balance of effectiveness and substrate safety. ABS plastic and fiberglass surfaces respond differently to solvents than metal, so the goal is to soften old coatings without swelling, hazing, or etching the underlying plastic. Look for products labeled as plastic safe, non-toxic, low odor, or specifically tested on ABS or fiberglass. These formulations are designed to dissolve paint while minimizing damage to the base material. Avoid aggressive strippers designed for metal unless they explicitly state plastic compatibility. Begin with a spot test on an inconspicuous area to confirm that the remover lacks adverse effects such as discoloration or surface softness. If the test passes, apply the product according to the manufacturer instructions in thin, even coats and work with the grain of the panel. Let the coating soften for the recommended dwell time, then lift it with a plastic scraper at a shallow angle to avoid gouging. Repeat as needed in small sections rather than forcing a thick layer. After removing the paint, wipe away residues and thoroughly degrease the surface, followed by a rinse and a thorough dry. Priming and painting should only proceed once the plastic is completely clean and dry. Safety gear such as gloves, eye protection, and a respirator should be used, and adequate ventilation maintained during the process. For best results, consult the fairing’s material guidelines or the paint stripper manufacturer for compatibility notes with ABS and fiberglass.
The Gentle Art of Paint Removal: Safe, Integrated Techniques for Restoring Motorcycle Fairings
Restoring the look of a motorcycle often begins long before laying down a fresh coat. It starts with the paint, the story it carries, and the delicate surface beneath. When fairings—those sculpted plastic and composite shells that shape a bike’s personality—must shed layers of old color, the approach has to be careful, precise, and informed by the materials at hand. The goal isn’t merely to strip away pigment; it is to expose a clean, undamaged substrate ready for new color, clear coatings, or bare, polished beauty. A well-executed paint removal process respects the integrity of ABS plastics and fiberglass commonly used in modern fairings, reducing the risk of warping, scorching, or micro-scratching that can haunt a project long after the last layer has been removed. To get there, the process is best viewed as a synthesis: a measured blend of appropriate chemical action, and controlled mechanical refinement, guided by faithful adherence to safety and best-practice testing. In this light, every stroke, every pause, and every test spot becomes a note in a larger choreography aimed at preserving the fairing’s original structure while reclaiming its surface for a flawless finish.
The first principle is material awareness. Fairings are rarely metallic bones wrapped in plastic; more often they are ABS or fiberglass composites that respond differently to paint and solvents. The chemistry of the remover matters as much as its strength. An automotive or motorcycle surface remover designed with plastics in mind tends to strike a gentler balance: it softens or dissolves the old paint without aggressively attacking the substrate. The advantage is clear when the goal is to rinse, rewash, and dry—ready to repaint or seal—without the minor, stubborn warps that can emerge from overly harsh solvents. In practice, this means seeking formulations that are water-based or marketed as low-toxicity and explicitly labeled safe for plastics such as ABS. These products are not miracles; they are calibrated tools. They provide enough action to loosen paint while offering buffers that keep the underlying material from swelling, discoloring, or crazing. The outcome of using the right formulation is not simply a cleaner surface; it is a surface that retains its original geometry, its edge details, and its subtle curves that give a fairing its aerodynamics and aesthetics.
Before any solvent sees the surface, preparation becomes the quiet, unglamorous foundation of success. Preparation is not sexy, but it is essential. The space must be ventilated, the area protected, and the adjacent components shielded. Headlights, mirrors, chrome accents, and the inner edges of panels can easily trap solvent or be softened by heat and dew, so masking and containment are non-negotiable steps. A simple, steady hand with painter’s tape and thin plastic shields becomes your first line of defense against unintended damage. The fairing must be free of surface dust and grease, which means a thorough wipe-down followed by a gentle degreasing wash. This step is not about removing paint yet; it is about ensuring that when the remover is applied, it interacts with the paint, not with oils and residues that can otherwise cause uneven stripping, streaks, or blotching. The test area is the quiet hero of the process. A small, discreet patch—perhaps on a recessed corner or a curve less visible when the bike is assembled—receives the first dab of remover. Observing how the paint responds, how the plastic responds, and how the edge lines soften guides the rest of the operation. If the patch shows dulling, hazing, or color bleed into the plastic, it is time to reconsider the chosen product or dwell time and to adjust the method before continuing.
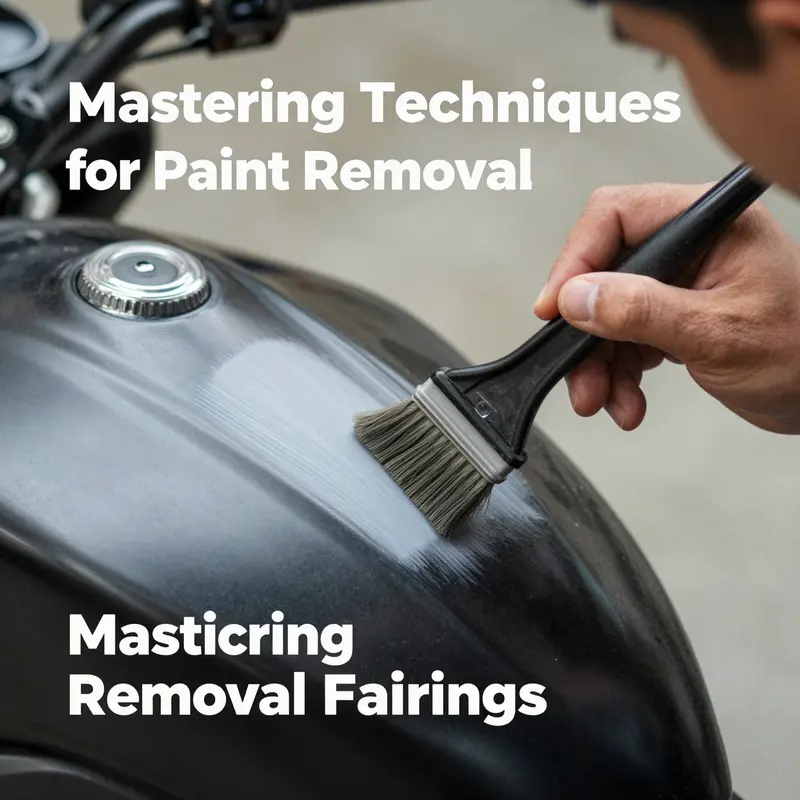
Dwell time—how long the remover sits on the paint before being coaxed away—is the fulcrum of control. The guidance that accompanies a quality remover tends toward a conservative window, typically around 10 to 20 minutes. This is enough to soften multiple coats without inviting plastic damage. It is also a time to observe a few critical cues: the color shift of the paint as it loosens, the way the edges begin to lift under a plastic scraper, and whether the surface begins to show uncharacteristic clouding. The philosophy here is patience and observation. Rushing can encourage heat buildup, which can weaken plastics and degrade surface gloss. The mechanical tools used to lift softened paint are equally important. A plastic scraper or soft spatula is preferred. Metal tools, even if seemingly sturdy, risk gouging or creating micro-scratches that become anchors for future staining or imperfections. Gentle pressure is the partner of patience; the paint should yield in small, deliberate increments rather than be pried away forcefully. If resistance remains stubborn, a second application can be considered, but only after the first layer is neutralized and the area is freshened with a light wipe of remover or a clean damp cloth. This measured, iterative approach respects the substrate while gradually loosening the old layers.
The range of application techniques reflects the art of balancing efficacy with substrate safety. Mechanical methods—the wet sanding of small, localized areas with fine-grit papers (600 to 1500 grit) soaked in water—offer a controlled, tactile path to reveal a clean surface. Wet sanding reduces friction, minimizes heat buildup, and helps prevent micro-scratches that dry sanding might induce on a plastic surface. The process is slow, but it is relentlessly precise. After gradual abrasion, a transition to a finer grit is necessary to smooth the residual scratches and to prepare the surface for the next stage—whether that stage is additional solvent use or direct repainting. In stubborn patches, a soft polishing pad attached to a low-speed drill can assist, but it demands a gentle touch and frequent checks for heat and swirl marks. The goal of mechanical refinement is not to erase every trace of the old paint with aggressive action but to harmonize the surface to a uniform base that accepts new color evenly.
Heat application offers a complementary route, one that can soften tenacious layers of old paint. A heat gun, operated at a conservative setting, can be passed over the surface at a safe distance, never lingering in one spot long enough to trap heat. The paint should respond with a slight softening and a gentle bubble that signals readiness for removal with a plastic tool. This approach can be particularly helpful for thick, multi-layered paint applications or where mechanical removal would require excessive abrasion. The risk, of course, is the unintended consequence: softened paint melting into texture features or, in worst cases, initiating distortion in the plastic. Constant movement of the heat source, constant assessment of the surface, and the readiness to back off are the hallmarks of safe use. It is not a single move but a small choreography of warmth, lift, and wipe that gradually exposes the clean substrate beneath.
Alongside mechanical and thermal methods lies the world of specialized commercial paint removers designed for automotive plastics and composites. These products are formulated to break down paint while offering a substrate-friendly profile. They are not magic; they require meticulous following of the manufacturer’s directions for dwell time, application, and rinsing. The best practice is to test in a hidden area, then scale up to nearby panels only after confirming there is no adverse reaction. The choice of remover often depends on whether the fairing is ABS-based or fiberglass. ABS, in particular, tends to tolerate water-based and low-toxicity formulations better, reducing the risk of surface swelling and micro-etching that can compromise adhesion and appearance when repainted. Given the geometry of typical fairings, with curves, edges, and recessed cavities, a solvent that behaves predictably on plastic is worth the extra planning. Even with the gentlest options, a thorough rinse and a clean, degreased finish are indispensable. Any residue left behind can act as a barrier to paint when the new finish is applied, potentially leading to peeling or uneven coverage down the line.
For larger projects or for enthusiasts who encounter a patchwork of OEM coats and aftermarket sprays, professional services remain a prudent option. The logic is straightforward: a trained technician or shop with controlled environments and the right tools can strip and re-finish a fairing with a level of precision that can be difficult to achieve in a home workshop. This is not a capitulation to complexity but a recognition that some fairings, with their curves, vents, and intricate lines, benefit from the expertise of a dedicated facility. The decision to pursue professional help should consider the scale of the project, the condition of the substrate, and the intended final finish. While it costs more upfront, the long-term payoff is a surface that retains its structural integrity while presenting a uniform, durable base for color and protective coatings.
Safety and preparation are not merely steps in a checklist; they are the ethical commitments of a cautious craftsman. The surrounding area must be protected, as solvents can travel across surfaces and leave marks on adjacent components. Ventilation is essential to avoid inhalation hazards, and the use of personal protective equipment—gloves, safety glasses, and a respirator for solvent vapors—must be non-negotiable. A small, patient test in a hidden area earlier in the process reduces the risk of mishap when you move to larger sections. After the paint is removed and the substrate is revealed, the surface should be washed with soap and water to remove any chemical residues, followed by a thorough drying. If any damage is detected during the process—softened edges, edge lifting, or hazing—step back and reassess. In some cases, the fairing may require minor filling or sanding to restore a perfectly smooth base before repainting. The emphasis remains on preserving the integrity of the fairing rather than forcing an immediate aesthetic result.
In practice, the most reliable pathway to success is a synthesis that respects both the stubborn realities of old paint and the delicate constitution of modern fairings. A calm, deliberate sequence—front-loading with a suitable remover and test spot, followed by controlled mechanical or thermal steps, then a careful rinse and inspection—produces results that are both predictable and repeatable. When done well, the process leaves the fairing’s lines and contours intact, ready to receive a fresh color, a new protective layer, or a restored gloss. The experience of observing a previously dull surface emerge as a clean, even canvas is not merely practical; it is part of the craft. The fairing’s future is now visible at the edge of the plastic, where the old paint has been softened, the texture has been evened, and the base glow is restored through patience and practice.
As with any hands-on restoration work, the journey is as important as the destination. The path requires humility, as even a cautious approach can reveal surprise challenges—curved vents or hidden fasteners that trap solvent or a stubborn seam where paint clings with unusual tenacity. The best practice is to treat each area as a unique pocket of the project, applying the same principles of safety, preparation, and test-driven methods, while adapting to the specific quirks of that panel. The result is not a single flawless wipe of paint removal but a cohesive, consistent process that preserves the fairing’s structural fidelity while laying the groundwork for a finish that looks as good as new or even better than the old look that inspired the restoration in the first place.
For enthusiasts who want a practical reference point that aligns with common practices, community discussions offer a wealth of shared experience. These conversations often emphasize careful testing, avoiding aggressive methods near edges, and prioritizing safer formulations that are compatible with plastic surfaces. They remind readers that there is value in seeking advice and learning from others who have faced the same curves and corners. If you are exploring fairing restoration and want to see how a broad community handles similar challenges, a detailed thread on paint removal from plastic fairings provides perspective on what works, what to avoid, and how to stage a project for success. For context, see the discussion at the well-known community forum where riders exchange practical tips and cautionary tales about the nuances of working with plastic fairings.
If the scope grows beyond a small touch-up or if you want to tailor a process to a specific model family, the fairing’s lineage matters. Different manufacturers have distinct shapes, thicknesses, and vent patterns that influence heat tolerance and solvent exposure. This is where an internal reference becomes valuable: a dedicated catalog of fairings by model lines can guide decisions about which techniques have historically yielded reliable outcomes for a given shell. Accessing a model-specific category such as Honda fairings, for instance, can help a project align its expectations with the geometry of a given panel, ensuring the chosen approach respects the nuances of that fairing’s curvature and attachment points. The recommended path is never a blindly applied method but a context-aware strategy that honors the unique identity of each fairing while pursuing a uniform, durable finish. To explore model-specific considerations, you can reference the Honda fairings category for context and examples of how a given shell reacts to different preparations and coatings.
In sum, the art of paint removal from motorcycle fairings hinges on restraint, knowledge, and a willingness to proceed step by step. The most reliable technique blends controlled mechanical abrasion with careful chemical action, always under strong safety protocols and thorough surface testing. When the substrate is a plastics-based fairing, as it almost always is in modern motorcycles, the priority is to protect the material while exposing a clean, receptive surface for repainting or sealing. The process is not about brute force but about a calculated sequence that respects the fairing’s geometry and the rider’s long-term goals for their bike’s appearance. With the right approach, the old paint yields to a bright, even base, and the next chapter of that bike’s story—new color, new gloss, renewed pride—begins with a single, thoughtful application. For those who want a sense of the broader conversation surrounding this craft, community discussions offer practical guidance and real-world lessons that can complement the structured advice found in manufacturer guidelines and professional recommendations.
Internal resource for context: Honda fairings. For broader community perspectives and practical anecdotes, see the discussion linked in the forum thread noted in the referenced material. External resource: https://www.motorcycle.com/forums/general-motorcycle-discussion/297831-how-to-remove-paint-from-plastic-fairings.html
Safe Passage: Navigating Paint Remover Safety for Motorcycle Fairings
Stripping paint from motorcycle fairings is as much about discipline as it is about chemistry. The fairings themselves are often made from ABS plastic or fiberglass, materials chosen for lightness and strength but that respond unevenly to aggressive solvents. The promise of a clean, fresh finish comes with a responsibility: to protect the delicate surface while minimizing chemical exposure to the rider, the technician, and the surrounding environment. A thoughtful, safety-forward approach serves not only the immediate project but the long life of the bike, because a careless hand can leave soft spots, micro-scratches, or even warped panels that undermine the very goal of restoration or customization. The core of this approach rests on three intertwined pillars: choosing the right remover, using the correct protective equipment and workspace practices, and following a precise, patient workflow that respects the material and the chemistry involved. Only when these pillars stand firm does the process reveal its true value: a fairing surface that can be refinished evenly and reliably, without surprises in the paint shop or on the road ahead.
The first decision in any safe paint-removal project is the remover itself. Look for a product designed for automotive or motorcycle plastics and fiberglass. Avoid generic solvents that advertise strength but lack compatibility with plastics. A remover labeled safe for plastics and fiberglass reduces the risk of softening, bubbling, or etching the surface. In practice, this means opting for a water-based or low-toxicity option and checking the label for explicit references to ABS plastic compatibility. This is not about choosing the gentlest chemical in the aisle; it is about matching the tool to the material. The right remover softens the old paint without aggressively attacking the substrate, which is essential when you want a clean canvas for repainting or applying protective coatings. In addition to compatibility, the packaging should offer clear guidance on dwell times and removal method. The principle is simple: the longer a remover sits, the greater the risk of material damage, especially if the film becomes uneven or starts to lift. The product label often suggests a typical dwell window—commonly in the 10 to 20 minute range—but the exact time must be tailored to the layer thickness, ambient temperature, and the specific formulation at hand.
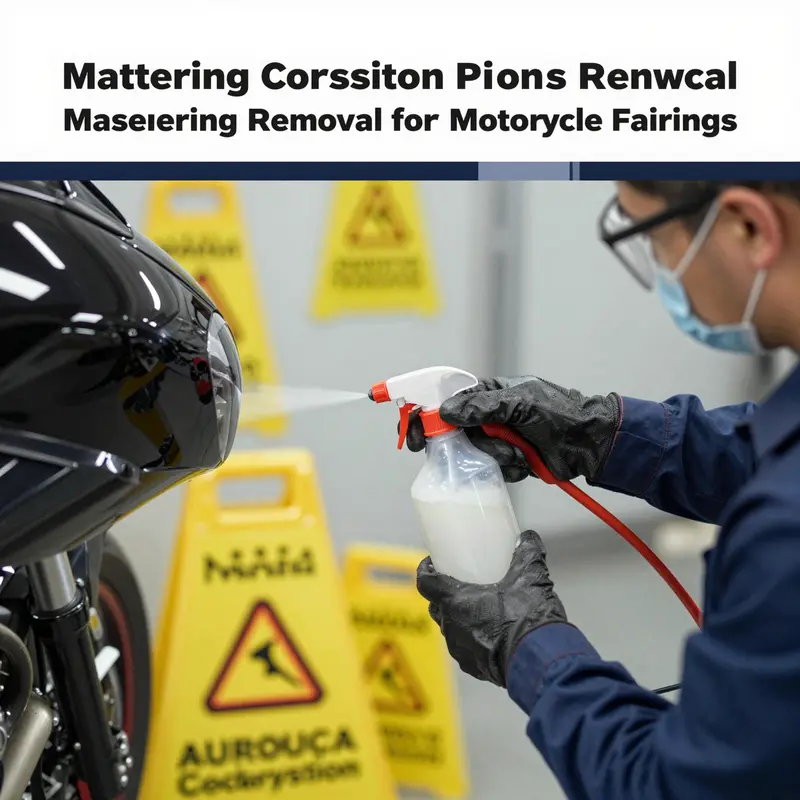
Before any chemical touches the fairing, the human element must be prepared. PPE is non-negotiable. Chemical-resistant gloves, preferably nitrile or neoprene, should shield the skin from splashes. Safety goggles or a full-face shield protects the eyes from any potential spray or runoff. A respirator with organic-vapor cartridges is not an optional accessory but a core component of the workflow. Paint-remover fumes can irritate the lungs and mucous membranes quickly, and repeated exposure carries the potential for longer-term effects. Even if the area seems ventilated, a respirator helps ensure a safe breathing environment, especially during repeated passes or when working on a larger panel.
Ventilation follows PPE in importance. Outdoor work is ideal, but if the project must happen in a garage or workshop, create a strong exhaust system. Open doors and windows are helpful, but a dedicated fan setup with appropriate ducting and high airflow is far more effective. The aim is to keep fumes moving away from the operator and any nearby ignition sources. It is prudent to schedule any chemical work during times of lower activity in the space and to avoid working near pilot lights, heaters, or electric tools that could spark, even unintentionally. This emphasis on airflow is not just to make the process tolerable; it is a fundamental safety measure that reduces the risk of dizziness, headaches, or accidental exposure for others who might share the workspace.
Material compatibility should be the lens through which every decision is filtered. ABS plastic and fiberglass respond differently to chemical attack. The safest path is to test the remover on a small, inconspicuous area of the fairing first. A discreet corner or the inside edge of a fairing panel can reveal whether the remover latches onto the plastic or simply loosens the paint. If there is any sign of surface whitening, a tacky residue, or softening after the test patch, stop and reassess. A product that claims to be safe for plastics may still cause issues if the layer beneath the paint is degraded or if the formulation contains a solvent that attacks the resin. The test becomes the pilot light for the entire operation: it tells you whether the material can tolerate this chemical, what dwell time is appropriate, and how aggressively you will need to scrape later without harming the surface.
The application phase is where technique and patience converge. Apply the remover in a thin, even layer across the painted area. Use a brush or applicator that keeps a bit of flex in the bristles so you don’t gouge or rub the surface with a stiff tool. Do not over-apply; excess remover can pool in seams or depressions and extend dwell time unintentionally. Follow the manufacturer’s dwell-time guidance precisely. Do not let the remover dry out on the surface. A common pitfall is to assume more dwell time equals easier paint removal; in reality, prolonged exposure increases the chances of softening the plastic or leaving a sticky, residual film that complicates rinsing and prepping for repaint. If the paint does not begin to soften within the recommended window, a light reapplication in a subsequent pass respecting the same dwell-time principle is acceptable.
When the paint has softened, removal must be gentle and deliberate. The preferred tool is a plastic or wooden scraper used at a shallow angle to lift the softened paint with minimal pressure. Metal tools should be avoided entirely as they can scratch or gouge the plastic or leave marks that later show through the new finish. Work in small sections, keeping the surface damp rather than allowing it to dry. If you see any resistance, pause and re-wet rather than forcing the remover off. This helps ensure that the surface remains intact and reduces the risk of micro-scratches that can compromise both aesthetics and adhesion later in the process.
Rinsing is more than a quick splash of water. After the softened paint begins to come away, flush the area with clean water and then wash with a mild soap solution to remove any residual remover. This rinse is essential to prevent any remaining solvent from interacting with the new paint or coating. A thorough rinse also helps reveal the true condition of the surface, making it easier to identify any hidden damage that might require attention before repaint. A clean, dry surface is the foundation of a successful repaint, and it is worth spending extra time on this step rather than rushing toward the finish line.
The inspection that follows is not a chore but a crucial checkpoint. Look closely for signs of damage—soft spots, chalky patches, or rounded edge areas where the plastic might have softened. If you notice any distortion, it may be best to retreat to the test patch approach again or consider a different remover formulation. The goal is a surface that is unblemished and ready to accept primer and paint with predictable adhesion and uniform texture. Any imperfection at this stage can magnify under the subsequent coats and lead to a less than flawless result. In severe cases, it may be wiser to consult a professional or to re-evaluate the entire fairing section rather than persevering through a risky adjustment.
There are also practical considerations that extend beyond the chemical action of the remover. Paint removers are generally flammable, and fumes can ignite if an ignition source is present. Always store removers away from heat, sparks, and direct sunlight. Keep rags and wipes used with solvents in a metal container with a tight lid and allow any wet cloths to dry in a well-ventilated area before disposal. Hazardous waste handling is not something to improvise; follow local regulations for disposal and recycling. These steps minimize the environmental impact of your project and protect you and others from exposure.
Read the label beyond the dwell time. The label contains essential warnings about skin contact, inhalation exposure, and the compatibility of the product with different substrates. It may also note limitations, such as not using the product on certain painted finishes or on parts that contain finishes or coatings beneath the paint that could react undesirably. If the label warns against certain temperatures or humidity levels, adhere to those guidelines to prevent poor performance or damage. The discipline of reading and following the label is what separates a careful project from a reckless gamble.
A final, sometimes overlooked, facet is the broader planning around the project. Even with a safe-for-plastics remover, you should map the sequence of steps so that each stage leads logically to the next. Preparation is not just a laboratory ritual; it is a practical blueprint for success. Have your tools lined up, your work surface protected, and a plan for the transition from removal to surface cleaning, sanding, priming, and painting. If your plan includes replacing a section of fairing or sourcing a new panel, a quick visit to the Honda fairings category can help you gauge what options are available and how they might integrate with the color or finish you intend to achieve. For reference to fairing options, you can explore the Honda fairings category here: Honda fairings category.
As you work, maintain a steady rhythm. The goal is not speed but predictability. A consistent, patient approach yields uniform results and minimizes the need for rework. It also protects the underlying materials from cumulative damage that can occur with haste. When you step back at the end of the session, you should see a paint-free surface that still looks like the original plastic or fiberglass shell—free of visible gouges, with edges intact, and with a texture that invites the next stage of finishing. This is the moment where the safety-focused process pays off in tangible, visual gains: a fairing that is ready to receive primer, color, and a protective topcoat without surprises.
For readers who are continuing this journey, the safety-first mindset does not end with the removal itself. It informs every choice around cleaners, solvents, and preparation steps that follow. The next chapters can explore how to select primers and topcoats that maximize adhesion on plastic without risking cracking, how to manage color matching for a factory-like finish, and how to mount and seal the fairing so that the aesthetic stays pristine under rider exposure and weather. If you are curious about fairing options during the restoration or upgrade phase, the Honda fairings category remains a useful resource to visualize compatible shapes, mounting points, and design options that fit your bike.
External resource for extended safety guidance: https://www.motorcycle-mechanic.com/paint-removal-safety-tips-for-motorcycle-fairings/
In sum, safety in paint removal is not a footnote to the project but its backbone. By selecting an automotive or motorcycle-safe remover compatible with plastics, equipping yourself properly, ventilating the workspace, and following a measured, test-driven process, you protect the material you are working with and ensure a clean, reliable path to the finished finish. This careful, methodical approach helps ensure the final result is not only aesthetically striking but structurally sound and durable in the demanding conditions of riding. The same discipline translates to every subsequent step—prepping, priming, painting, and sealing—carrying forward the safety-first ethic from the first wipe of solvent to the last clear coat.
null
null
Final thoughts
The removal of paint from motorcycle fairings should be approached with knowledge, precision, and care. By selecting the right products and employing effective application techniques while prioritizing safety, businesses can ensure high-quality restorations that satisfy customers and elevate service standards. Keep informed of the best products available through customer feedback and reviews to continually refine your offerings. This not only enhances customer trust but also fosters repeat business, ultimately contributing to a thriving motorcycle repair enterprise.