Maintaining the appearance of motorcycles is crucial for businesses that deal with sales, repairs, or modifications. One key area that often requires attention is the fairing, which not only contributes to the aesthetics of a motorcycle but also protects its components. Selecting the right touch up paint for motorcycle fairings is essential for achieving an optimal color match while ensuring durability. This guide delves into the selection of touch up paint, provides preparation steps for a successful application, and explores leading brands and products in the market, offering business owners practical insights to enhance their service offerings.
Color in Motion: Selecting and Applying Motorcycle Fairing Touch-Up Paint for a Seamless, Durable Finish
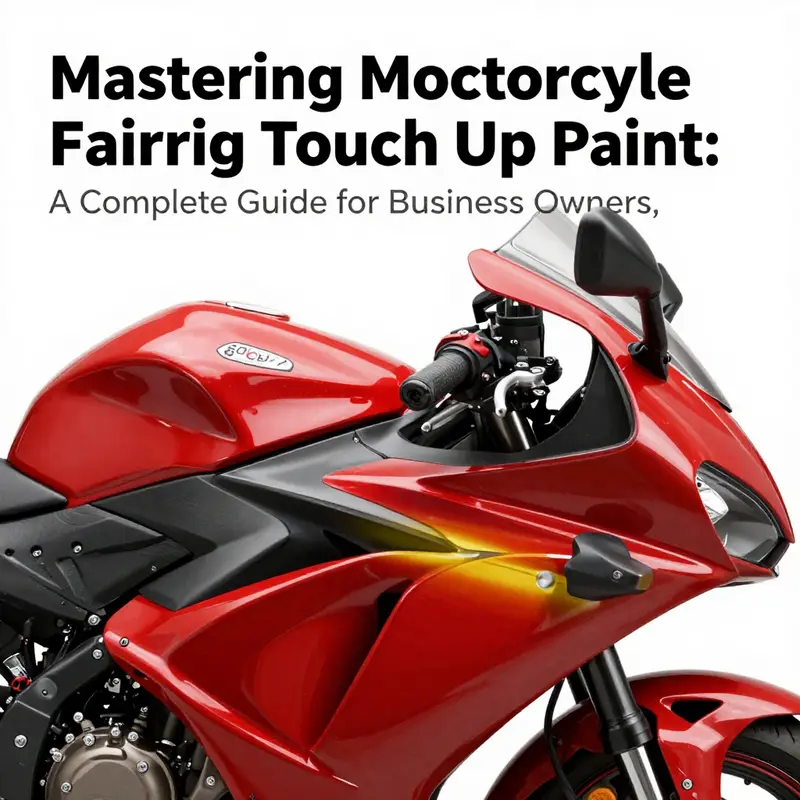
The moment a motorcycle leans into a corner of sunlight and the fairing panels catch a few chips or scratches, the eye is drawn not to the ride’s silhouette but to the imperfect edge of color that breaks the visual continuity. A skilled touch-up is more than a dab of pigment; it is a careful restoration of the bike’s story, a reconciliation between factory intent and the road’s realities. In this chapter, we move through the decision-making and technique necessary to choose touch-up paint for motorcycle fairings in a way that respects the original finish, the plastic or composite substrate, and the harsh conditions of outdoor riding. The aim is not merely to conceal damage but to reestablish a seamless surface where color, texture, and UV resistance align with the factory standard while preserving the fairing’s structural integrity and long-term durability.
At the heart of a successful repair is obtaining the exact OEM paint code. This single code is the most reliable key to color accuracy because it ties the repair to the original chemical formulation and hue selected by the manufacturer. The paint code can be found on a sticker tucked in less conspicuous locations—often inside the engine compartment, beneath the seat, or listed in the owner’s manual. With that code in hand, the repair begins from a position of confidence: you are not guessing the shade or the undertone, you are aligning with the color the factory used. In a market where color drift is real and lighting can alter perception, starting with the correct code minimizes the risk that a perfect match becomes a near miss once the sun hits the panel and the surrounding paint.
Beyond color, the material of the fairing itself guides every choice of paint system. Motorcycle fairings are commonly built from ABS plastic, sometimes reinforced with fiberglass or carbon fiber composites. Each substrate has its own idiosyncrasies: ABS expands and contracts with temperature, fiberglass presents a rougher surface that can trap dust or moisture if not properly sealed, and carbon fiber composites can respond differently to solvents. This means that a touch-up formulated for automotive sheet metal—while it may provide color compatibility—might not deliver optimal adhesion, flexural behavior, or UV resistance on plastic or composite panels. The best practice is to select a paint system specifically designed for plastic and composite materials. Such systems usually include a primer with strong adhesion to plastics, a base coat that offers color depth and opacity, and a clear coat that provides gloss, protection, and additional UV resistance.
When the color codes are unavailable or when an exact match is elusive due to aging or subtle factory variations, it becomes prudent to lean on color-matching systems that come with color cards and mixing options. A color-matching approach helps bridge the gap between the existing panel finish and the new touch-up. It is essential to recognize that even a perfect color match on the sample card can look different on the bike under natural daylight, especially when viewed against neighboring panels that have aged at different rates. For this reason, a practical workflow includes testing the matched color on a small, inconspicuous patch of the fairing before proceeding to the repair area. A neutral, natural daylight environment is the best judge of hue, tone, and saturation. If the test swatch looks right in daylight, you are closer to a seamless blend; if it reads too warm, too cool, or too green, it is wise to adjust the mix and re-evaluate under the same lighting conditions.
A complete repair system—one that includes primer, base coat, and clear coat—offers the best chance for a durable, long-lasting result. The primer improves adhesion to plastic, blocks stains from seeping through the repair, and provides a uniform surface for the base coat. The base coat delivers the color and opacity necessary to cover the repair area and blend with the surrounding paint. The final clear coat seals the color, adds depth, and protects against UV exposure, moisture, and abrasion. When choosing a system, look for products that emphasize plastic compatibility, chemical resistance, and rapid, even drying. A three-step system helps ensure that the repaired area responds similarly to heat, cold, and sun as the rest of the fairing, reducing the chances of uneventful color shifts as time passes.
The process begins with meticulous preparation. Clean the damaged area with a mild degreaser to remove oils from skin contact, wax, and road grime. A clean surface is not only essential for adhesion; it also makes the color matching more predictable. After cleaning, gently sand the damaged area with a fine abrasive—enough to remove loose flakes and to create a mild profile for the primer to grab onto, but not so aggressively that you erode the surrounding OEM finish. Mask the adjacent panels with painter’s tape and film to prevent overspray and to maintain crisp, defined edges where the repair meets the original paint. Surface prep, while it may seem routine, is the unsung hero of a seamless blend. Skipping steps, taking shortcuts, or rushing between stages will often reveal itself as a visible seam, a rough edge, or a color halo around the repair.
With the surface prepared, apply a primer designed for plastic or composite materials. A good primer will adhere to the ABS, fiberglass, or carbon fiber while giving the base coat a uniform canvas. In multi-layer repairs, the primer can also help level minor surface variations and create a tiny buffer that reduces the risk of solvent attack on the underlying substrate. Allow the primer to dry completely according to the manufacturer’s guidance, then sand lightly to remove any imperfections and to re-create a level surface for the base coat. The base coat itself should be applied in light, even passes, building color gradually rather than dumping a thick coat in a single application. The goal is to achieve uniform coverage with minimal texture so that the color looks consistent across the repaired area and the surrounding panels.
Color matching is a nuanced craft. When you mix or select a base coat, evaluate it against a small patch that mirrors the repair geometry—ideally a suppressed area on the same panel or a hidden spot that can be easily scanned in daylight. Because the surrounding panels may have absorbed more sun or sustained more wear than the repaired area, there is a real chance that a perfect match on the patch looks slightly off on the larger panel. The fix is often a careful, incremental approach: adjust the base color hue or tone in small increments and recheck under natural light. The use of color cards or digital scanners can help, but hands-on testing remains the most reliable method. For complex or high-visibility repairs, seek professional paint matching services. These services use calibrated systems to reproduce the exact shade and undertone, and they can provide guidance on how to blend the repaired area with the adjacent panels for a uniform overall appearance.
As you progress, you will likely move from base color to clear coat. The clear coat is not merely a top layer; it provides gloss, depth, and protective barriers against UV damage and moisture. A well-chosen clear coat will cure to a hardness that resists micro-scratches and will not yellow or craze with temperature changes. When applying the clear coat, practice the same discipline as with the base coat: light, even coats, with adequate drying time between passes. The goal is to achieve a glossy, wet-look finish that reads as one with the surrounding paint rather than a separate, patchy overlay. If the repaired area is in a high-wear region or near critical edges, consider additional protective layering such as a sacrificial film during assembly or a carefully designed micro-layer of clear with slightly enhanced gloss to mimic the surrounding panels.
The environmental factor—the light that reveals color—cannot be overstated. The color you see on your workbench under shop lighting often changes once the fairing is mounted and exposed to daylight. Some hues will appear grayer or more saturated in different lighting, and a color that looks correct indoors can drift when outdoors. One practical approach is to evaluate color in two lighting environments: the shop’s diffuse lighting and natural daylight near a window or outdoors in shade. If the color remains stable across both environments, you are likely close to a true match. If not, you may need to adjust the mixture, test again, and give the new formula time to settle before applying it to the visible area.
The repair should be considered a staged, patient process rather than a one-shot operation. Deep chips or gouges that expose the underlying substrate require more careful management. For deeper defects, you may need to build up with multiple layers, not unlike the way a sculptor builds a form. Sand between layers to maintain levelness, and ensure that you do not trap moisture in the repair, which can lead to future issues such as peeling or adhesion loss. If you encounter a repair that seems to resist blending, stepping back and allowing the area to cure fully before re-evaluating can prevent chasing a moving target. The most important principle is to preserve the fairing’s contour and edge integrity. A repair that leaves a flat, non-contoured patch will stand out more than a small, well-blended chip that respects the panel’s shape and line.
As with any precision finish, the potential for professional involvement should be weighed against the time, skill, and the desired outcome. Color matching services and professional painters can offer an objective assessment and a calibrated approach to color, gloss, and texture. If you choose this path, provide the color code, the make and model information, and any known age-related changes to the paint. A good practitioner will assess the substrate, the existing finish, and the surrounding panels to deliver a solution that minimizes the risk of a mismatch at the borders or a difference in aging across the fairing. In many cases, this collaborative approach yields the best long-term result, particularly on high-visibility panels or complicated colorways.
To help you navigate these options, consider a workflow that begins with the OEM code and plastic-friendly systems, followed by careful testing on inconspicuous areas, and then, if necessary, professional input for color matching and final finishing. This sequence respects the bike’s original design intent while acknowledging that outdoor riding subjects plastics and paints to UV exposure, temperature swings, and abrasion. The outcome is not simply color restoration; it is a restoration of continuity—the sense that the fairing, from the cockpit to the tail, is one continuous skin rather than a mosaic of patched color. It also preserves resale value and the overall aesthetic that riders invest in when they choose a particular model or colorway.
Within this framework, one small but meaningful decision is choosing where to source color and how to validate the result before committing to the visible areas. When you want an integrated solution that feels factory-fresh, seeking options from the manufacturer’s color resources can be advantageous. This approach includes color-matching kits and substitution options that align with the factory palette while preserving adhesion and durability for plastic substrates. A practical step is to verify the match by applying a few test coats on a concealed area and reviewing the hue under daylight. If the test suggests improvement is needed, refine the color or opacity, re-test, and proceed only when you are satisfied that the final finish will look consistent beside the rest of the bike’s surface.
For riders who want to keep their options open, the approach above can be adapted to various styling goals. Some owners prefer brighter, more saturated hues to compensate for fading on the surrounding panels, while others favor a near-flawless color restoration that makes the chips vanish entirely from sight. Either path requires discipline in preparation, patience in layering, and realism about the limitations of touch-up work on large or highly contoured surfaces. It is important to manage expectations: a touch-up can be highly effective, but a perfect, single-application match across a large area, automatically blending into a curved fairing with complex reflections, may be ambitious without a professional-grade color-match and a controlled, studio-like finishing environment.
In terms of practical, on-bike results, the most convincing touch-ups are the ones that disappear at a casual glance, leaving only the calm impression that the color is continuous and unbroken. The patch should not read as a separate entity, and the panel edge should not be heightened by a ridge or a halo. This is not a trivial achievement; it is the culmination of color accuracy, proper surface preparation, a compatible plastic-focused paint system, and a disciplined, patient application approach. When done well, the repaired fairing can endure the rigors of rain, sun, and high-speed airflow with a uniform appearance that ages with the rest of the bike rather than standing out as an obvious repair. The result is a finish that respects the bike’s design language, helps maintain its value, and keeps the rider visually confident in the machine’s unity of appearance.
To connect this guidance with practical navigation, consider the value of exploring brand-specific fairing catalogs or categories that host compatible repair options. One accessible path for riders seeking compatible fairings or replacement panels is to browse the Honda fairings category, which provides a sense of the available color palettes, panel textures, and finish options that align with contemporary production standards. This resource serves as a touchpoint for understanding how different models and colorways are designed to harmonize across a bike’s bodywork and how it informs your touch-up strategy. Honda fairings offers a window into the varied shapes, textures, and color families you may encounter when planning a repair that both fixes the problem and preserves the visual coherence of your machine.
In closing, choosing motorcycle fairing touch-up paint is an exercise in precision, patience, and prudence. It asks you to balance color fidelity with substrate realities, to respect the material science that underpins plastic and composite panels, and to acknowledge the environmental forces that conspire to alter a finish over time. The most enduring solutions start with the OEM code, advance through a plastic-optimized paint system, and proceed in measured layers that respect the fairing’s contours and the surrounding color field. When you combine these elements with careful testing, you can achieve a repair that feels less like a patch and more like a natural extension of the bike’s original finish. And if the task grows beyond the comfort zone, remember that color-matching services and professional refinishing resources exist to help you reach a result that remains faithful to the design intent while delivering the durability today’s riders demand.
External reference for professional color matching resources: https://www.harley-davidson.com/us/en/shop/color-shop.html
From Surface to Seam: The Precision Path to Motorcycle Fairing Touch-Up Paint

The first step is the most fundamental, yet it is often overlooked. Surface cleaning and preparation set the stage for every subsequent layer. Begin with a thorough wash of the damaged area using an automotive cleaner or a dedicated degreaser. The goal is to remove oils, waxes, dust, and any hydrocarbon residues that could undermine adhesion. Rinse away contaminants completely and allow the surface to air dry. Oils left behind can create micro barriers that cause the new paint to peel or peel unevenly later, especially on soft plastic fairings that flex with heat and airflow. After cleaning, a light sanding follows. Use fine grit sandpaper, typically in the 600 to 800 range, to gently abrade the damaged area and the surrounding original paint. The texture you create does not need to be aggressive; it simply needs to be tamed enough to provide a mechanical key for the new paint without creating deep scratches that will show through the finish. A consistent, even pattern is essential because irregular scratches can telegraph through the final coat, betraying the repair to anyone who looks closely. Once sanding is complete, wipe the area with a clean, lint-free cloth dampened with isopropyl alcohol to remove residual dust and debris. This final wipe is not merely a pro forma step; it eliminates the risk of dust particles acting as tiny anchors for the new paint, which could cause an uneven surface or micro moons on the cured film. The goal is a surface that feels uniformly smooth to the touch and looks uniform under light, with no shine or dull patches that betray the repair. The preparation stage also invites the mind to consider the broader environmental realities of outdoor riding. Temperature, humidity, and air quality can influence how paint dries and cures, so you should plan the work for a dry, temperate window, with minimal dust and a stable indoor environment if possible. A clean slate is not a timid choice but a deliberate stance toward quality.
Masking is the quiet craftsman’s companion to preparation. Adjacent areas, trim, and any sensitive components must be shielded from stray solvent or pigment. Apply high-quality painter’s tape and masking film with care, ensuring the edges are straight and free from wrinkles. The objective is to create a sharp boundary between repaired and unrepaired areas, a boundary that will preserve the integrity of the nearby paintwork while allowing the repair to sit flush with the rest of the panel. Wrinkles or gaps in the masking invite leaks of overspray and can ruin an otherwise clean edge. The masking step also offers a moment to consider fixture points and the geometry of the fairing. Curved sections require attention to how tape adheres to a contoured surface, and it may be necessary to cut small adjustments in the tape to maintain a crisp edge around compound curves. When masking is executed with precision, you reduce the risk of subsequent touch-up work becoming a larger project than originally anticipated. The moral of masking is restraint; the best result often looks effortless because the boundary is invisible to the casual observer.
With the surface prepared and protected, attention turns to material selection and the art of mixing. The touch-up paint you select should be designed for motorcycle plastics or composites. While some general automotive touch-up paints can be adapted for small plastic repairs, products engineered specifically for plastic surfaces offer better adhesion, UV resistance, and flexibility to accommodate the micro-motions of a fairing as the motorcycle experiences wind and temperature fluctuations. The color match is the heart of the task. Ideally, you have a color code from the manufacturer that corresponds to your model. If an exact match is unavailable, consult a professional auto body shop or paint specialist for color matching. The process often involves mixing a base color with a hardener or catalyst if required by the product line. Thorough mixing is essential; it ensures uniform pigment distribution and the avoidance of streaks and splotches after application. After mixing, let the mixture rest briefly to allow any trapped air bubbles to rise to the surface and dissipate. This small pause can prevent pinholes in the dried film and yields a smoother final appearance.
Color matching in particular can be a nuanced challenge. The shade that looks right in a shop light can drift under natural daylight or under the artificial indoors lighting that often dominates workshop spaces. It is wise to test the color on a concealed area of the fairing or on a sample plastic patch that matches the panel’s plastics. Observe the hue under several lighting conditions and the gloss level you intend to achieve. If a perfect match remains elusive, a two-step approach can sometimes deliver a more forgiving transition: a base coat that blends with the surrounding area and a translucent midcoat or pearl that helps harmonize the color with the rest of the panel. The base and any midcoat should be applied in very thin layers, allowing each coat to dry and cure before the next. This reduces the risk of a thick, tacky buildup that could crack or peel later.
Layering and finishing are where the art of touch-up moves from repair to restoration. The introductory coats are kept deliberately light. The technique involves a cross-hatch or directional spray pattern that builds color gradually rather than dumping pigment in a single dense layer. The exact number of coats depends on the repair size, the color itself, and the specific product, but the philosophy remains constant: thin layers, controlled drying, and gentle taming of texture. Between coats, allow for a short flash-dry period recommended by the product guidelines. If you are using a spray can, the distance from the surface should be held steady around 15 to 20 centimeters, with smooth, overlapping passes to avoid heavy spots that look like ridges. If a spray gun is available, use a light, even fan pattern and adjust the atomization to optimize coverage without creating excess film that could trap dust or distort the final gloss. The goal is to achieve even color density with smooth transitions, especially at the repair edges where the new color meets the existing paint. A common practice is to apply three to five light coats, then examine the build up in natural light before deciding if a light gloss or satin finish is appropriate for the panel.
In the discussion of surface finish, the role of clear coats often enters the conversation. A clear coat adds depth, protection from UV rays, and abrasion resistance. When the final color coats reach a stable, dry state, a clear coat layer can be applied to seal and enhance gloss. The clear should be compatible with the base color and the plastic substrate, and it should be applied in very thin, even layers. Sanding between coats of clear is sometimes recommended to improve leveling, followed by a final polishing stage. Wet sanding with very fine paper, such as 1500 to 2000 grit, can help remove any micro-orange-peel texture and produce a uniform surface that gleams in the sun. Polishing compounds and a soft buffing wheel then bring the surface to a showroom-like finish. It is important to protect freshly painted areas from dust and direct exposure for the recommended curing period. Even after curing, a fairing can benefit from routine care, using gentle cleaners and a soft microfiber cloth to maintain the luster without scratching the delicate surface.
The practical resonance of this process becomes clear when considering the common missteps and how to avoid them. Rushing the masking or the color-matching phase can lead to overspray onto adjacent panels or a color mismatch that reveals the repair. Skipping proper surface preparation can result in poor adhesion and a paint job that fails at the first rub or rain. Overloading the surface with thick coats invites runs, sags, and a dull finish that disrupts the seamless look sought after in a high-quality repair. A more subtle but equally critical failure mode is the development of micro-bubbles and pinholes caused by trapped moisture or air. Gentle patience—allowing films to dry to a tack-free state between coats and using a clean, lint-free environment—greatly mitigates these risks. The repair, then, becomes a quiet testament to technique rather than a loud statement of effort.
Finally, a note on color control and documentation can save future headaches. As soon as the repair is complete, record the color code, the batch numbers, and the date of application. If possible, photograph the repaired area under different lighting to create a visual reference for future touch-ups. When color systems evolve or if the bike is shown on a catalog or a show, having this documentation makes it easier to extend or refresh the match later without repeating the entire process. If you ever need to revisit the repair, a well-documented panel is the most important companion to your careful preparation and execution. The path from surface to seam is a journey of consistent technique and thoughtful decisions, one that respects the original design while ensuring the repair stands up to the realities of a rider’s road.
For readers seeking additional practical guidance on the broader technique and professional approaches to touch-up painting, a widely used reference compiles a comprehensive breakdown of spray techniques, drying times, and small-area repair strategies. That resource provides a deeper dive into the spray gun settings, the math of film thickness, and the subtleties of color correction in challenging light conditions. It offers a deeper technical framework that complements the experience of working with plastic fairings and emphasizes the craft behind professional-looking repairs. As you follow these steps, you’ll discover that the beauty of a well-executed touch-up lies not just in hiding damage, but in preserving the bike’s narrative: a fairing that continues to ride true, with color that breathes again and a finish that invites a second, third, and many more long rides.
Internal reference: For model-specific fairings and color code considerations, you can explore Honda fairings pages that help pinpoint compatibility and color information for particular models and years. This can be especially helpful when you want to verify paint compatibility before purchase and avoid color drift caused by aging plastics. Honda fairings provide a starting point for model-specific considerations and paint compatibility notes. While the page focuses on a particular brand line, the emphasis remains on reliable color information, correct substrate compatibility, and the importance of using plastics-grade finishes tailored for fairings. This is a reminder that achieving a seamless repair is about choosing the right material and matching strategies for plastic components rather than simply picking a shade that looks close in a showroom.
The narrative of preparation closes with a reminder that touch-up painting for motorcycle fairings is a disciplined practice. It rewards patience, precision, and a readiness to address each parameter that affects the final appearance. By treating the process as a sequence of sound decisions about cleaning, masking, material selection, color matching, and layering, riders can extend the life of their fairings and enjoy a finish that endures. This approach respects both the original design and the practical demands of riding in the real world, where sun, rain, and road grime test every coating. The result is a repaired surface that blends with the surrounding paint, resists the elements, and remains aesthetically faithful to the bike’s identity. External resources that provide deeper insight into touch-up painting techniques can be valuable references as you refine your own method. For a detailed exploration of spray technique, drying times, and best practices in touch-up painting, consult the Motorcycle Mechanics Institute guide, which offers a broader framework applicable to a wide range of two-wheeled finishes. External resource: Motorcycle Touch-Up Paint Guide at https://www.motorcycle-mechanics.com/touch-up-paint-guide.
Color, Compatibility, and Coat: Navigating Brands and Materials for Motorcycle Fairing Touch-Up Paint
Color has a precision all its own on a motorcycle’s fairing. The plastic, composite, and curved geometries of fairings demand more than a simple can of paint. They require a finish that not only matches the OEM color in hue but also agrees with the surface chemistry, defends against UV and weathering, and behaves under the flex and abrasion that riding imposes. In this chapter we pull together practical wisdom about the brands and product categories that riders tend to rely on when a small touch-up becomes a long test of color fidelity and durability. The aim is to translate aesthetic repair into a lasting, almost invisible restoration that respects the fairing’s material reality while preserving the visual integrity of the whole motorcycle.
When we talk about touch-up capability for bike fairings, the terrain is distinctly defined by the material of the panel. Modern fairings are more often manufactured from durable plastics or composite blends designed to resist impact and weight. That reality means the most reliable options come from paint systems formulated specifically for plastic or composite substrates. These systems differ in formulation from metal primers and automotive lacquers. They are designed to bond to plastics, resist plasticizer migration, and endure the outdoor rigors of wind, sun, and temperature cycles. A paint choice that is optimized for metal, or even for bicycle parts, can lead to poor adhesion, micro-cracking, or color drift when applied to a fairing. The best approach, therefore, starts with selecting a paint system that speaks plastic first and color second, with the color being matched through color-matching tools and swatches rather than guesswork.
Within the spectrum of brands and product families, you will encounter several broad categories that shape both the application experience and the finished result. There are high-temperature resistant coatings designed for areas near heat sources such as exhaust or engine components. These coatings emphasize adhesion durability under heat exposure, and they often come in a spray format with ready-to-use primers and sometimes integrated clear coats. There are also finish-focused systems intended to deliver a near OEM gloss or a desired satin or matte texture. Some lines are optimized for quick repairs and feature color-matching options that align with common factory palate ranges, while others emphasize scratch resistance and UV stability for long-range outdoor exposure. In practice, most riders gravitate toward a modular approach: a plastic-friendly base color layer, followed by a dedicated primer where needed, and finished with a clear protective layer that cushions the color from abrasion and fading.
A useful way to think about these products is to consider three climactic properties: adhesion to plastic, color stability under sunlight, and resistance to the chemical and physical wear of riding conditions. Adhesion to plastic involves surface preparation and primer compatibility. Plastic surfaces usually require careful degreasing, and sometimes sanding to create a micro-roughness that gives the topcoat something to bite into. The primer, if used, should be formulated for plastics and not simply be a metal-centric primer repurposed for fairings. Color stability under UV light matters because fairings are constantly exposed to sun. The best systems incorporate UV absorbers and stabilizers that slow pigment degradation and gloss loss. Finally, resistance to wear assures the finish can withstand gravel, rain, and highway speeds without micro-chipping or dulling. These three qualities—plastic adhesion, UV resilience, and wear resistance—often determine whether a color match remains faithful after several months of exposure.
In practical terms, the selection process begins with a careful assessment of the damaged area. If the blemish is superficial—a nick, a micro-scratch, or a faded spot—the repair can often be contained with a touch-up pen or aerosol that delivers a fine, controlled spray and a color-matched result. If the damage is broader or enters through multiple layers of paint or clear coat, more involved steps are warranted. A patch repair may involve feathering out new pigment into the surrounding area with thin, pistol-like passes, maintaining an even film thickness to avoid a noticeable ridge. The goal is a seamless blend where the touch-up behaves like the surrounding factory finish under both light and viewing angles. In this respect, the color-matching stage is not merely about achieving the same shade of black, gray, red, or blue; it is about ensuring the texture and finish read as one continuous surface rather than two distinct planes.
From a sourcing stance, there is merit in looking for color systems that explicitly state compatibility with plastics and ease of application for DIY repairs. Some manufacturers in this space offer aerosol or spray-can formats and also provide touch-up pens or small kits that include a selection of base colors, a primer, and a protective clear coat. The convenience of kits can be a practical boon, especially for riders who are repairing small chips and want a turnkey solution. Many of these kits also come with ancillary items such as sandpaper and scratch wax, which help in the preparation and finishing stages. The presence of a sanding material is a subtle but meaningful cue: it signals a holistic approach to repair that treats the panel as a whole, not merely as a chipped surface. The rough-and-ready sand-and-spray method is not always the most sophisticated approach, but when done with care it can yield a surprisingly smooth transition if the color cards are well matched and the layering is controlled.
To navigate the landscape of brands without becoming overwhelmed, consider the following mental map. There are products designed for automotive plastics that aim to be versatile and broadly compatible with common fairing materials. Within this family, paints are formulated for adhesion to plastics and for minimal sensitivity to temperature changes. Other products are marketed as “high-temperature” offerings because they can tolerate heat near engine components or exhaust ducts, even if these zones on a motorcycle fairing are relatively modest in temperature compared with an exhaust pipe. The best-fit choice is often guided by the anticipated environment of the repaired area and the rider’s willingness to invest time in prep and layering. In addition, the finish type matters. Some riders prefer matte or satin finishes for a modern look that hides minor surface texture, while others want a high-gloss mirror finish to closely mimic OEM gloss. Modern production lines frequently produce a spectrum of surface terms—gloss, satin, pearl, and metallic effects—so a system that can reproduce the chosen surface texture while maintaining fidelity to color is highly desirable. The level of difficulty in recreating a pearlescent or metallic effect should be weighed against the practical limits of a touch-up scenario. For a small chip, a gloss finish with a clear topcoat might suffice; for a larger panel where the texture is distinctive, more careful blending and perhaps a specialized finish layer may be required to preserve visual coherence with adjacent panels.
Color matching itself deserves a deeper emphasis. Even when the shade is recorded as a standard code in a manufacturer’s color chart, actual factory finishes can diverge slightly due to batch variation, the aging of the paint, and the underlying color of the plastic itself. A robust approach combines a color card reference with a discreet test on a hidden area or a spare swatch, followed by a controlled layering of very thin coats. The layer-by-layer approach is essential; too much pigment in a single pass risks running or sagging on curves. The use of multiple very thin coats allows for a gradual build that brings the repaired area into congruence with the rest of the fairing. When color variance is a concern, a professional color-matching tool or a calibrated swatch can offer a quantitative sense of deviation in color and brightness, guiding the painter toward a blend that is visually cohesive when seen from typical riding distances and angles.
The finishing step—clear coat or protective sealant—often makes or breaks the repair’s longevity. A clear layer is not merely a cosmetic layer; it acts as a barrier to UV degradation, chemical attack from road debris, and micro-abrasion from everyday riding. A high-quality clear coat should be compatible with the underlying paint system and formulated to minimize additional color drift. In many cases, the process of buffing and polishing after the clear coat cures is the final ritual that integrates the repaired area back into the panel’s broader surface, smoothing uneven micro-textures and restoring a cohesive reflectivity. The discipline of this finishing phase—patience with drying times, indoor curing conditions, and light protection during the final cure—will often determine whether the repair remains durable through the next riding season.
For those seeking a premium level of performance, there are professional-grade color systems and protective topcoats that deliver advanced resistance to abrasion, weathering, and UV exposure. These systems are typically more expensive and may be used by professionals who routinely restore fairings with complex color matching or those who aim for a finish indistinguishable from new OEM panels. The overarching principle remains consistent: compatibility with plastics, careful surface preparation, controlled multi-layer application, and a final finishing coat that harmonizes gloss, texture, and color.
As you consider the path forward, keep in mind the practicalities that influence daily use and maintenance. The cost of repair must be weighed against the value of the bike, the visibility of the damaged area, and the rider’s tolerance for ongoing maintenance. Some riders opt for a conservative patch approach, while others pursue a more meticulous restoration that may involve a repaint of the entire panel to guarantee uniformity. Either route benefits from the same core discipline: begin with a clean, prepared surface, choose a color-appropriate plastic-friendly system, apply in thin layers with measured intervals, and complete the operation with a durable clear coat.
The ecosystem of resources surrounding fairing touch-up paint includes not only the color and finish choices but also the practical access to compatible parts and reference materials. For riders who want to compare fairing options or understand how color and finish choices affect different models, one can explore extensive catalogs and category pages dedicated to particular makes or models. For example, those curious about Honda fairings can browse a dedicated category that provides context about panel shapes, mounting points, and the kinds of finishes typically offered for those panels. This kind of shopping context helps align repair expectations with the realities of replacement parts, allowing for more informed decisions about whether to repair a damaged panel or replace it with a panel that already visually aligns with the rest of the bike. To explore such model-specific options, you can visit the Honda fairings section in the catalog of fairing categories.
The practical takeaway is simple: buy a plastic-specific touch-up system that includes a color-mitted base layer, primer if needed, a topcoat or clear finish, and a finishing toolset that supports minute surface refinishing. Use a methodical approach to prep, layer, and cure, and treat the repair as an extension of the bike’s original finishing process rather than a hurried fix. The result should be a visually seamless transition, with color stability that remains faithful through sun and rain, and with a film integrity that resists chipping and wear after many rides.
For readers who want to dig deeper into the broader landscape of fairing care and finishing, the internal reference to a makes-and-models catalog can be a helpful starting point. In particular, the Honda fairings category provides a practical snapshot of compatible parts, finishes, and finishes that riders can reference when planning repairs. This pointer can help you orient your repair strategy within the wider ecosystem of fairing customization and maintenance. Honda fairings catalog.
In closing, while the temptation to seek one universal, “best” paint system is strong, the reality is more nuanced. The most successful touch-ups blend plastic-compatible chemistry with careful color matching and disciplined layering. The result is a repaired area that remains resilient against the weather and continues to look as though it belongs to the bike rather than an ad hoc fix. With the right system, proper prep, and patient technique, a small patch can read as a natural continuation of the fairing’s story, not a departure from it. The journey from color choice to coat completion is a careful choreography of chemistry, optics, and time, guided by a philosophy that a fairing’s beauty is in its seamless integration as much as in the bold statement of color.
Final thoughts
In conclusion, selecting the appropriate motorcycle fairing touch up paint involves careful consideration of color matching, preparation, and choice of reputable brands. By following the outlined steps and understanding the market options, business owners can maintain the high standards expected in motorcycle maintenance and repair. Investing in quality touch up paint not only enhances the overall look of the motorcycle but also builds customer satisfaction and trust. By applying these insights, businesses can ensure they offer comprehensive services that keep motorcycles looking their best.