Motorcycle fairing sticker kits offer a unique opportunity for business owners within the motorcycle industry to tap into a burgeoning market. As riders seek to personalize their bikes without incurring the high costs of new fairings, these kits present an economically viable solution. This article will delve into the multiple benefits of motorcycle fairing sticker kits, explore extensive customization options that appeal to a wide audience, and provide insights into the installation process, ensuring that businesses can cater to the evolving needs of riders effectively.
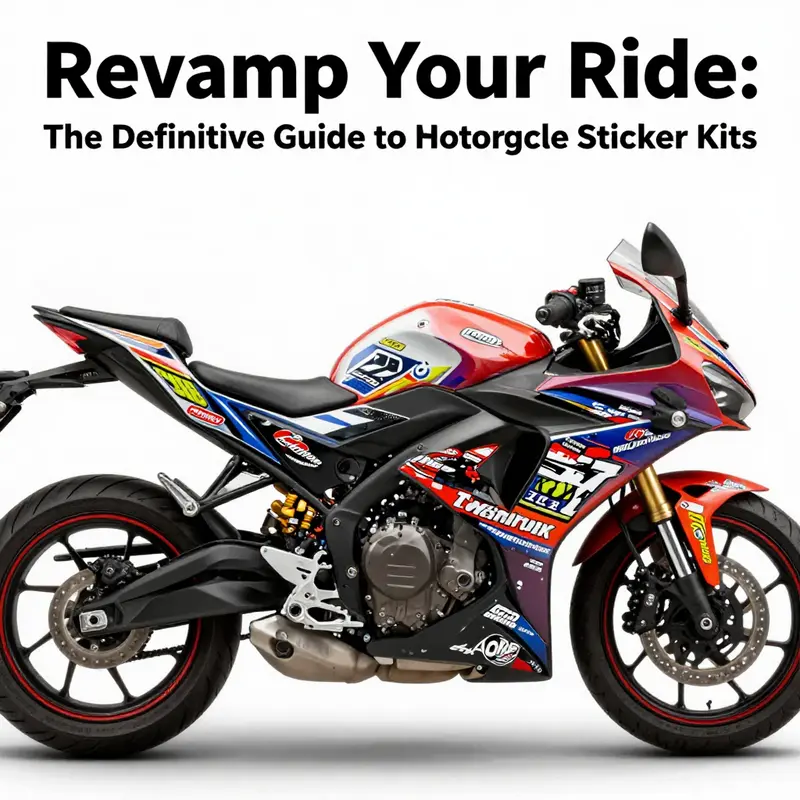
Sticker Power: How Motorcycle Fairing Sticker Kits Redefine Style, Value, and Protection
When a rider begins to think about personalizing a motorcycle, the temptation often leans toward something that feels instant, tangible, and easy to control. A fairing sticker kit arrives like a kit of paints without the smell, a sculpture without chiseling away the original surface, and a statement that can be peeled away with minimal consequence if the taste changes or the season demands a different look. What begins as a cosmetic tweak quickly reveals itself as a practical philosophy: transformation that respects the bike’s existing geometry, protects its lines, and accommodates the rider’s evolving identity. A sticker kit is not merely a design layer slapped onto a shell; it is a modular approach to style that engages the rider’s sense of narrative while keeping the machine’s integrity intact. The broader arc here is simple but telling. Sticker kits offer a bridge between affordability and artistry, between the desire for customization and the reality of budget, between the urge to stand out and the need to maintain durability on the road. In a world where new paint and full wraps can price out a project, the sticker kit becomes a smart, iterative way to express character without paying a premium, and with a degree of flexibility that many other customization routes simply cannot match.
At the heart of this approach is a material truth: decals, when chosen and applied with care, can perform like a second skin. The best kits are crafted from high-grade vinyl that tolerates weather, sunlight, and the mechanical realities of road use. They are designed to resist peeling under heat after a long summer ride, to withstand cold and damp without cracking, and to endure the minute abrasion from rain spray and the occasional stone chip. This durability does more than preserve color; it preserves the rider’s moment in time. The look of a bike—its hues, its lines, and the way light slides along its panels—becomes a shared memory of streets traveled and miles earned. A kit that retains its vibrancy through the seasons is more than a cosmetic asset; it becomes a quiet partner in the daily ritual of riding.
The installation experience itself matters as well. For many riders, the prospect of a permanent painting project is daunting. A sticker kit, when applied with a little patience and a steady hand, is approachable. The process invites a rider into a hands-on moment of decision-making and care: selecting alignment, smoothing out air bubbles, and applying even pressure with a squeegee. The result, once the installation is complete, is a finish that looks integrated rather than imposed. The panels’ surfaces remain, in effect, unchanged beneath the new graphics, which means that mistakes can be corrected with removal and reapplication, within the bounds of the kit’s design and the material’s tolerance. This repositionability is not just a practical convenience; it reduces anxiety around experimentation. A learner can refine technique over a weekend, rather than committing to a lifelong, irreversible change.
And yet the decision to embrace sticker kits goes beyond ease and cost. It opens a doorway to a form of creative branding that resonates with a rider’s identity as part of a larger community of enthusiasts. The spectrum of designs available in reputable kits runs from minimal, refined graphics to bold, racing-inspired motifs, with textures that mimic honeycomb patterns, metallic sheens, or even subtle, laser-cut lines that appear as if carved into the surface of the bike. The rider becomes the curator of their own story—choosing a motif that speaks to personal history, values, or an affinity with a club or a riding scene. Personalization is a distinct virtue here. Many kits allow for number decals or text that can be customized to reflect a team name, an era of racing influence, or a nickname welded into the bike’s visual identity. This is where the sticker kit evolves from mere decoration into a storytelling instrument, capable of signaling who the rider is when the bike is at a standstill or in motion.
The fit of a sticker kit is another critical dimension. A kit designed to conform to a bike’s contours ensures that the aesthetic reads as original equipment in mood and silhouette. When a decal follows the fairing’s lines, it catches light in a way that seems natural, preserving the geometry and the perceived speed of the design. A snug fit also minimizes wear that can occur at panel edges and seams, which, without attention, can lead to peeling or lifting. The best kits are offered with tailored patterns for different models, ensuring that the decals align with the curves and cutouts that define a motorcycle’s face and body. This precise alignment matters not only for look but for longevity, since misaligned pieces are more susceptible to edge curling and near-term failure in high-wear zones. In addition, reputable kits are manufactured with surface preparation and finishing considerations in mind—clear protective coatings that seal the graphic and shield it from UV exposure, moisture, and road grime.
Durability, however, does not come at the cost of removal or repairability. A defining advantage of modern fairing decals is their removable and, in many cases, repositionable nature. For riders who might be adjusting a color palette to reflect a new season or a new mood, the ability to peel away a sticker without scuffing the original finish is invaluable. This property gives birth to a risk-managed approach to customization. A rider can experiment with placement, test different alignments, and, if the design needs revision, remove the layer and start again with minimal compromise to the underlying paint or clear coat. It also makes the decision to switch back to a stock look less daunting, which can be appealing for those who want to recapture a legacy appearance when the moment calls for it. The sense that styling choices can be revisited over time reduces the pressure to commit to a single vision. It invites continued exploration and adaptation as riding preferences evolve with experience.
But there is more to the value equation than cost and ease. Sticker kits implicitly offer a form of protection that might otherwise be overlooked. By covering portions of the fairing with a layer of vinyl, the graphics act as a sacrificial surface against micro-scratches, tiny chips, and minor scuffs that accumulate from daily riding. In effect, the kit creates a buffer between the paint and the elements, which can reduce direct contact with abrasive particles and help preserve the underlying finish. To be clear, this is not a substitution for proper paint protection film or careful maintenance, but it is a complementary line of defense that matters, especially on budget-conscious builds or bikes that see frequent track or weekend-riding use. The result is a bike that remains visually striking and legible at a distance, while the actual bodywork retains more of its original charm over time.
The practical benefits of sticker kits extend into maintenance and care routines as well. A well-applied decal layer invites riders to view the bike as a single, coherent surface rather than a mosaic of panels with different finishes. This coherence makes cleaning easier in some respects: the surface becomes a continuous plane rather than a patchwork of textures, which means that streaks and deposits can be wiped away with standard cleaners without the risk of exposing mismatched edges. The protective layer on many high-quality kits is also designed to resist water penetration, which matters for riders who frequently ride in variable weather. The ability to rinse away grime without weakening the adhesive contributes to a longer service window before full replacement might be considered. In the longer arc, the sticker kit becomes part of a maintenance philosophy—one that recognizes the fairing’s role not only as a protective shell and aerodynamic element but as a canvas upon which a rider’s identity is projected, season after season.
What about safety and compliance? A rider’s dream of a bold, eye-catching look can be tempered by the realities of visibility and regulatory markings. Reputable sticker kits are developed with these concerns in mind. They are designed to avoid occluding critical markings or model identifiers, and they emphasize edge-to-edge coverage in ways that respect the bike’s essential cues. A thoughtful approach to design placement ensures that stickers enhance readability and visibility in various lighting conditions rather than reduce it. For those who ride on roads or in mixed-use environments, this is essential. A kit should never compromise the rider’s access to important information, nor should it obscure warning labels or reflective elements that contribute to safety. The best practice is to select designs that harmonize with the bike’s original typography and branding—if any—while prioritizing legibility, contrast, and the practical realities of daily exposure to sun, rain, and road grime.
Another dimension to consider is the ecosystem around sticker kits: how riders find inspiration, measure fit, and learn application techniques. The market now offers a broad spectrum of options, including model-specific patterns that map to the contours of a bike’s fairing and generic designs that invite creative reinterpretation. The range of sizes, colors, and textures enables a rider to tailor the visual language from the simplest, most understated aesthetic to the most aggressive, high-contrast schemes. A key insight is that the most successful projects balance boldness with restraint. A clean, well-placed set of decals can look as curated as a full wrap or a custom paint job, while preserving the smooth, uninterrupted surface of the original fairing. In practice, this means paying attention to where a design begins and ends, the way it interacts with panel seams, and how the design flows across the bike’s silhouette when viewed from different angles. These are not mere details; they are the elements that transform a sticker kit from a decorative overlay into a dynamic, believable extension of the bike’s identity.
The purchasing landscape for sticker kits also shapes the rider’s experience. A growing number of retailers offer customization options that go beyond fixed designs. Riders can specify numbers, team names, or personal identifiers to be integrated into the decal sheet. This degree of customization makes each kit feel bespoke, even when it is produced at scale. The process often involves choosing from a palette of materials, finishes, and textures, followed by a careful review of the sample patterns to ensure alignment with the bike’s geometry. The ability to customize has a social dimension as well. Riders share photos of their builds, exchange tips about placement and technique, and compare results across different weather conditions and road surfaces. In this sense, sticker kits become a social currency—proof of experimentation, skill development, and a shared appetite for self-expression within a riding community.
For readers who are curious about the practicalities of exploring these options, a quick orientation to the landscape can help. A rider can start by assessing the current state of the fairing’s surface: is there paint chipping or sun fade that the decals will need to coexist with, or is the surface relatively pristine and ready for fresh artwork? The next step involves selecting a design approach that aligns with how the bike is used. If the bike sees long hours in sun-drenched riding, a UV-stable vinyl with a robust clear coat will be especially important. If the rider is more concerned with a stealth or minimalist appearance, a simple, monochrome scheme with precise lines can achieve a refined look while remaining easy to maintain. Then comes fit: a model-specific kit is a wise choice for riders who want a clean, factory-like fit with minimal trimming. For others, a universal or flexible-pattern kit can offer room for creativity, including custom number decals or lettering that adds a personal stamp without compromising the panels’ integrity.
The economic angle also deserves attention. Sticker kits represent a bridge between the two poles of customization: professional appearance and modest investment. Compared with full paint jobs or high-end vinyl wraps, decals provide a more accessible entry point for riders who want to test a new look without a heavy upfront cost. They also offer ongoing flexibility. If a rider’s tastes evolve, the same kit can be replaced in a new colorway or design without the same level of commitment or the risk of a poor resale outcome that might accompany a permanent modification. This flexibility is not merely about change; it is about stewardship—honoring the value of the work already done on the bike and building on it, rather than discarding it at the first sign of a new fashion trend. The sticker kit, then, becomes a practical manifesto: you can be expressive, efficient, and thoughtful at once.
To close the arc, consider the kit as part of a broader practice of care and adaptation. A rider who sees the bike as a living project will appreciate how decals can be integrated into maintenance rhythms—checking adhesive edges after a wash, re-sealing with a compatible clear coat as needed, and tracking the design’s response to weather and use. The approach invites ongoing experimentation, a recurring decision to refresh the bike’s personality without surrendering the bike’s structural integrity. Style evolves; protection endures; and the rider remains in control of the pace and direction of that evolution. The result is a motorcycle that communicates purpose through its appearance while quietly preserving the reliability and aesthetic appeal that attracted the rider in the first place. In this sense, fairing sticker kits are not merely accessories. They are a practical, expressive framework that honors the bike’s purpose and the rider’s voice, all while delivering the ease, accessibility, and durability that make them a compelling option for a broad community of riders.
For readers who want a direct lens into how these kits fit within a broader catalog of fairing options, a quick exploration of the Kawasaki fairings category can provide insight into how these designs interact with the bike’s original silhouette. This aggregation shows how kits align with the factory lines while enabling personalization, offering a sense of how the design language travels from the serial production environment to the rider’s personal workshop. Kawasaki fairings category
As a closing reflection, the story of motorcycle fairing sticker kits is not a single moment of transformation but a sequence of small, deliberate choices. Each choice—the level of durability, the precision of fit, the texture of the finish, the scope of customization, and the method of application—builds toward a final impression: a bike that looks neither drab nor overprocessed, but confidently alive with the rider’s chosen narrative. The chain of decisions starts with quality materials and ends with a sheen that invites a closer look. The chain includes the rider’s careful installation technique, a thoughtful maintenance routine, and a readiness to revise the design as tastes and riding contexts shift. The end state is a motorcycle that holds its appeal across seasons, that withstands the test of time and weather, and that continues to express the rider’s personality with crisp clarity. In short, sticker kits provide an intelligent pathway to personalization that honors the bike’s existing value, preserves its structural and stylistic integrity, and empowers riders to shape their own identities on the road.
External resource: For a broader context on how decals and stickers compare in terms of durability, application, and safety considerations, see the Decals vs Stickers Guide: How to Choose for Your Motorcycle. https://www.motorcycle.com/decals-vs-stickers-guide/
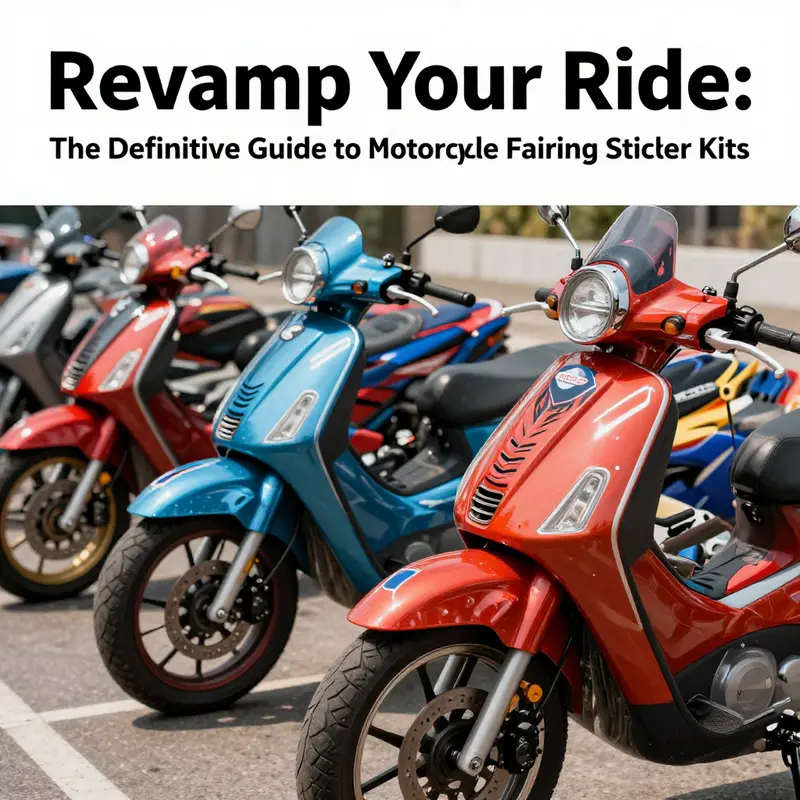
Color, Contour, and Craft: Unlocking Personal Expression Through Motorcycle Fairing Sticker Kits

Every rider carries a story about their bike. Sticker kits offer a portable, affordable canvas to tell that story on the fairing without changing the skeleton of the machine. They are not just decorative; they are a line of dialogue between rider and road. The choices available—colors, patterns, textures, and even typographic details—let a rider translate a personal code into visible, lasting form. In this way, a kit becomes a signal that the bike is more than a transport tool; it is a partner in the rider’s journey, a reflection of taste, risk tolerance, and a sense of belonging to a larger scene of speed and precision. The language of design here is deliberate but forgiving. It invites experimentation, while still respecting the bike’s original geometry and engineering. The result, when the design is right, feels like it was always meant to be there, a natural extension of the machine’s lines rather than an afterthought slapped on for flash or fantasy.
The spectrum of customization begins with design choice. A sticker kit can present racing-inspired graphics that echo the world of competition, or more restrained, aero-forward motifs that emphasize speed through suggestion rather than proclamation. The designs span from bold, high-contrast schemes to subtle, tonal blends that trace the curves of the fairing with quiet authority. The rider chooses not only color but also the weight of the graphics: a dense mosaic that creates texture under changing light, or a simpler silhouette that reads crisply from a distance. These decisions matter because they alter how the bike reads in motion. A proper kit gathers the bike’s silhouette into a single, coherent statement—one that feels neither generic nor overworked but precisely tuned to the rider’s sense of rhythm and balance.
Material quality is not an afterthought here. A high-grade vinyl forms the skin of a kit, and a protective clear coat seals it from sun, rain, and road grit. The best materials resist fading, peeling, and cracking as the hours of sunlight accumulate and the air grows wetter, colder, or dustier. The durability of the vinyl matters because the sticker is a long-term impression. The maintenance routine is simple: clean with mild soap, dry thoroughly, and avoid harsh solvents that can degrade the adhesive or the surface. A well-chosen kit thus matches not only the rider’s aesthetic but the bike’s practical realities. The investment pays off in steady color and legibility season after season, even in environments that test materials through humidity, salt spray, or UV exposure. In essence, the sticker kit becomes a durable skin with the potential to age gracefully, developing character as the bike itself gains miles and stories.
Beyond raw durability, the installation experience is central to the appeal. A kit is designed for DIY satisfaction, not for a trip to an expensive body shop. The process typically requires only a few tools, a clean workspace, and patience. The most essential tool is a squeegee, used to press the vinyl to the contours and ridges of the fairing. A light touch, steady pressure, and careful smoothing around edges prevent air pockets and misalignments. Heat, applied with a modest heat gun or even a warm room, can help the vinyl relax into curves and around compound angles. The rider moves slowly, aligning the stickers piece by piece, checking edges against seams and panel lines. When a misalignment appears, it is often easier to lift and reposition than to live with a stubborn bend or bubble. This walk-through approach—design, test-fit, adjust, and seal—transforms installation from a task into a small, mindful ritual. The result is not merely a visually satisfying outcome, but a sense of accomplishment that accompanies every ride after application.
The customization journey is also about fit and precision. Some kits are designed to follow exact contours of specific models, turning installation into a straightforward, nearly error-free operation. The claims of precision are not empty. The decals are laser-cut with tolerance considerations in mind, ensuring that each piece nests into the intended boundary without overlapping into neighboring panels. When a kit fits a model with precision, the finished appearance looks professional, as if the fairing itself carried a factory-esque graphic. This alignment matters for the rider who wants a clean, integrated look that reads as purposeful rather than ad hoc. It also reduces the risk of peeling at edges and corners, which can occur if parts are forced to conform to mismatched shapes. In a well-fitting kit, the lines flow from panel to panel, and the eye perceives a seamless surface rather than a patchwork of mismatched decals.
Another powerful dimension is authenticity. Sticker kits can reproduce OEM branding cues, model silhouettes, or engine badges in a controlled, legal manner that satisfies a collector’s impulse while respecting intellectual property boundaries. For some riders, authenticity means a nod to heritage—an homage to the lineage of the model or the era of racing that shaped its character. For others, it is a clever echo that signals loyalty to a team, a rider’s own race number, or a personal insignia. The ability to replicate certain branding elements can feel like a respectful tribute rather than a counterfeit claim. The effect is a hybrid identity: the bike carries its original signature while wearing the rider’s personal fingerprint. That balance between homage and originality is where sticker kits often find their richest expressive potential.
As designs become more modular, the appeal broadens still further. Some kits embrace modular and interactive concepts that permit color swaps, panel replacements, or easy reconfiguration without professional help. This flexibility is especially valuable for riders who use their bike across seasons, racing formats, or show-and-tell events where the appearance needs to shift with mood or mission. A modular approach may mean several color layers that can be peeled away or added, or it may mean adapters that allow swapping motifs on selectable panels. The end effect is a living aesthetic, one that can evolve with the rider while preserving the underlying fairing structure. It invites experimentation without committing to a single look for the life of the bike. The rider can explore a different identity for a new season or a new date with a different club, always returning to the core, original silhouette when desired.
The breadth of design possibilities also touches narrative and branding. A sticker kit can evoke a racing lineage by referencing abstract geometry reminiscent of race graphics, or it can present a modern, tech-forward language through precise lines and negative space. The effect is not purely decorative; it communicates a story about what the rider values. When a kit aligns with a riding philosophy—speed, control, precision—the visual language reinforces the feeling of riding as a coordinated performance rather than a casual outing. The rider’s choice becomes a kind of visual manifesto, a statement that the bike is aligned with specific aesthetics and aspirations. In this sense, customization is not vanity but position: it communicates readiness, intent, and pride in the craft of riding.
In many cases, the sticker kit also contributes to a sense of authenticity and coherence when paired with other components of the bike’s appearance. A complete transformation can be achieved when a kit integrates with other cosmetic elements, such as matching numbers, honeycomb patterns, or metallic emblems that mimic the luster of racing finishes. Some riders even go further, commissioning full custom graphics that extend across the fairing, tank, and tail to create a unified visual narrative. When the integration is well-executed, the bike looks like a single, thoughtfully designed piece rather than a collection of applied stickers. This holistic approach makes a strong impression in casual rides, track days, and photoshoots alike, where the bike underlines the rider’s commitment to a consistent aesthetic. It also invites others to read the bike as a design object with a backstory rather than a mere machine with stickers slapped on for effect.
For those who crave a deeper sense of customization, the market offers dedicated options tailored to particular models or families of bikes. These tailor-made kits are cut to fit the exact contours of the original fairing geometry, ensuring that edges align with panel lines and vents. The promise here is minimal trimming, maximal precision, and a finish that resembles a factory graphic when fully applied. While the economic appeal of sticker kits remains a central draw—their prices can be a fraction of a full repaint or replacement of fairings—the value proposition extends into performance-conscious thinking as well. A well-applied kit can subtly improve aerodynamics by smoothing minor irregularities and gaps where air could create uneven flow, though it should be noted that the primary objective remains visual upgrade. The minor aerodynamic effect, if present, is a welcome bonus rather than the main selling point.
The availability of sticker kits speaks to a broader culture of customization that exists in the motorcycle world. Riders with different budgets, priorities, and time horizons can express themselves in meaningful ways, without sacrificing reliability or safety. The experience of choosing, buying, and applying a kit is itself a small ritual that reinforces a sense of agency. The rider becomes a co-designer, editing the bike’s face to match mood, environment, or competition goals. And as this practice grows, a subtle ecosystem emerges: designers refine their graphics for durability, testers share practical installation tips, and riders compare notes about fit, finish, and the long-term behavior of adhesives under various climates. In such a community, sticker kits are not just products; they are a shared language that evolves with every new application, every new ride.
Market accessibility and pricing reinforce the appeal. The kits cover a broad range of sizes and complexities, from small accent decals to full fairing overlays. The scale of the offering means that a rider can start with a few accent pieces to test the waters and gradually evolve toward a more complete transformation if appetite grows. Because the cost can be a fraction of repainting or replacing panels, sticker kits have a high-value proposition for those who love frequent changes or want to switch looks for different events, seasons, or display opportunities. The low barrier to entry encourages experimentation, which in turn fuels a culture of continuous personalization. As with any customization, the key is to align the design language with the bike’s character and the rider’s intent. When this alignment happens, the sticker kit becomes more than decoration; it becomes a practice of care, curation, and continual reinvention.
For readers seeking examples of how these concepts translate into real-world choices, consider exploring model-specific pages that showcase the fit and finish of dedicated kits. For example, a page dedicated to a BMW sportbike’s fairings highlights how a cohesive graphic system can extend across the curves of the bike, creating a unified look that respects both form and function. This approach demonstrates how a carefully chosen kit can enhance the bike’s existing silhouette, rather than overpower it. It also provides practical reassurance about assembly, compatibility, and the relative ease or difficulty of alignment across complex panel boundaries. Such references help riders imagine how a generic set of ideas translates into a specific, model-aligned result, which is especially valuable for first-time sticker-kit adopters who want a reliable path from concept to final effect.
In sum, customization options in motorcycle fairing sticker kits are about more than color and pattern. They are a set of design levers that allow riders to shape the visual identity of their bikes in ways that feel personal, plausible, and resilient. The best kits honor the machine’s geometry, support the rider’s narrative, and stay legible under the scrutiny of road, rain, sun, and street photography. They are the sum of careful design, durable materials, precise manufacturing, and mindful installation. They invite riders to experiment with confidence, to curate their bike’s look over time, and to celebrate the moment when fabricating a personal identity on the bike becomes a natural extension of riding itself. For those who want to see how these principles play out on a specific model while also keeping a flexible, modular approach, the related category pages offer a practical glimpse into the possibilities. BMW S1000RR fairings illustrate how a model-specific kit can wrap a bike in a continuous graphic language, guiding the eye along the fluid lines of the fairing and creating a cohesive, race-ready silhouette. This example highlights the balance between fidelity to the original form and the rider’s personal statement. When readers imagine a similar process on their own machine, they can begin to see how a sticker kit can serve not just as adornment but as a carefully curated element of the bike’s overall design philosophy.
For those who want to explore further into the practicalities of sourcing and applying sticker kits, it’s worth considering the broader marketplace dynamics. The availability of designs that range from subtle to aggressive—along with the option to include personal numbers or custom text—ensures that almost any rider can find a kit that speaks to them. The ease of removal is another notable benefit. If tastes shift with time or if a rider changes bikes, a kit can be removed with minimal residue and little risk to the underlying paint. This reversibility supports experimentation without long-term commitment, a key advantage in a hobby where expression evolves as a rider gains miles and confidence. The real value here lies in the blend of affordability, accessibility, and artistic latitude. A sticker kit is not merely a cosmetic upgrade; it is a rapid, reversible upgrade to a bike’s personality, capable of shifting mood from streetfighter to track-inspired, or from stealth to swagger, with only a few square feet of vinyl and a steady hand.
As a closing reflection, the broader takeaway is clear. Sticker kits empower riders to articulate who they are in the language of speed, design, and detail. They enable a dialogue between rider and machine that is intimate yet accessible, allowing for quick shifts in identity without compromising performance or safety. The best kits respect the bike’s native geometry and the rider’s goals, ensuring that installation is straightforward, durability is predictable, and aesthetics remain resilient through a cycle of rides, rain, and sun. In this way, customization through fairing stickers becomes a practical craft—one that honors engineering, celebrates personal taste, and invites ongoing experimentation as the road unfolds ahead. For readers who want to peer into real-world examples and see how these ideas translate into finished looks on specific models, the related pages offer concrete demonstrations of fit, finish, and flair in action. And for those who seek a broader sense of where to begin, the world of sticker kits remains a welcoming, affordable gateway to personal expression on two wheels. External references can provide further context on production scales and materials, such as global sourcing insights that illuminate how durable vinyl and protective coatings are engineered to withstand the road. External resource offers a broader view of the market’s capabilities and the kinds of finishes riders can expect when selecting a kit that promises longevity and performance. This external perspective complements the practical, model-focused discussions above and helps frame sticker kits as a mature option within the wider ecosystem of motorcycle customization.
Flawless Fit: A Practical Guide to Installing Motorcycle Fairing Sticker Kits
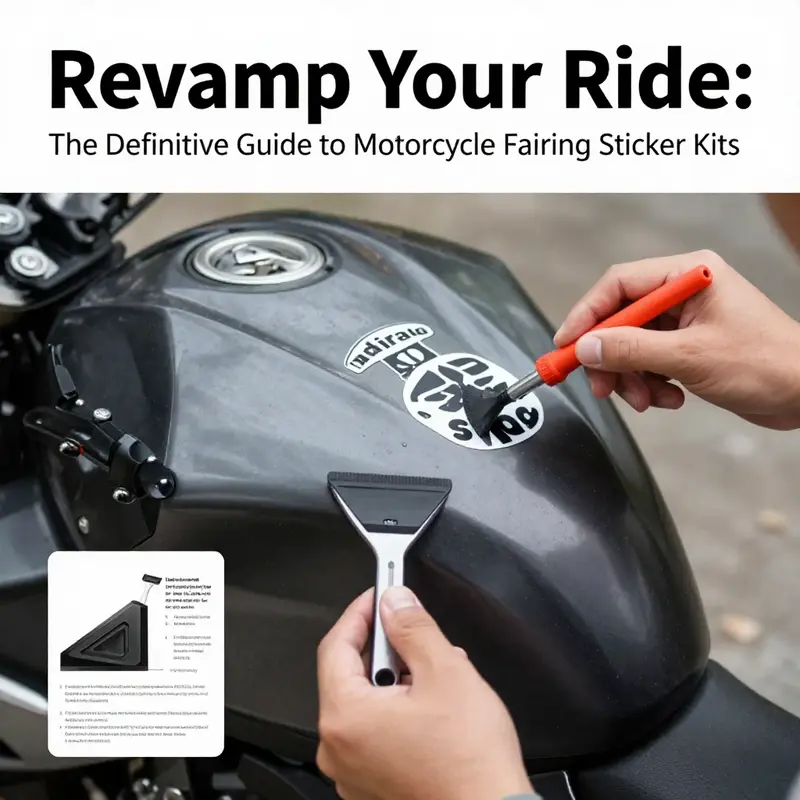
Installing a motorcycle fairing sticker kit is as much about patience and preparation as it is about the decal itself. With careful steps and the right approach, you can transform a bike’s appearance and achieve a finish that looks fitted and professional. This chapter walks you through a single, continuous process from preparation to final curing, sharing practical techniques for complex curves, vents, and fasteners. The aim is simple: help you apply vinyl with confidence, avoid common mistakes, and extend the life of your new graphics.
Begin by creating the right workspace. A clean, dust-free area is essential. A garage or covered porch with steady temperatures works best. Avoid direct sunlight and wind. Mild temperatures around 60–75°F (15–24°C) let adhesives behave predictably. If the day is very cold, bring the panels indoors for a short period to warm. If it is very hot, work in the shade or early morning to keep the vinyl from stretching too quickly. Lay soft blankets on a table to protect panels when you remove them.
Surface preparation is the single most important step. Even high-quality vinyl will fail badly on a dirty or greasy surface. Start by washing the fairing thoroughly with a gentle automotive soap and water. Use a microfiber cloth to lift grime without scratching. Pay attention to areas around bolts, vents, and edges where grease tends to accumulate. Rinse and dry fully. After the initial wash, remove any remaining oil or wax with an isopropyl alcohol wipe. Use a lint-free cloth and change wipes often to avoid spreading residue. If the fairing has old adhesive or sticker residue, use a sticker remover or a gentle solvent designed for automotive plastics. After removing residue, clean again with alcohol to leave a neutral surface.
Inspect the surface for imperfections. Small scratches, cracked paint, or deep seams will affect final adhesion and appearance. If there are rough spots, sand lightly with a fine-grit abrasive and then clean again. If the panel is cracked or warped, consider repairing it before applying the kit. Vinyl will conform to minor contours but will not hide structural defects.
Decide whether to apply the stickers to the bike on its frame or to remove the fairing parts. Removing panels makes alignment easier and reduces the risk of trapping dirt underneath. Most riders find it easier to work on a flat surface where the vinyl can be handled without strain. If you choose to work on the bike, ensure it is stable on a stand. Either way, remove fasteners or cover exposed threads that could snag the vinyl.
Most kits perform best with the wet application method. This method uses a light soapy water solution to permit repositioning before the adhesive sets. Mix a spray bottle with clean water and a few drops of mild dish soap. The mixture should feel slippery but not overly bubbly. Lightly mist the fairing and the adhesive side of the decal. Do not soak; a fine mist is enough to allow sliding and alignment while keeping the adhesive tacky.
Peel the backing from the sticker carefully, starting at one corner. For large panels, use the hinge technique: stick one edge of the vinyl to the panel and use it as a hinge while you align the rest. This prevents misalignment and reduces air entrapment. For multicolor or layered kits, identify each segment and work from centerlines outward. Many kits include registration marks or alignment edges—use them to match panels precisely.
Position the decal and allow it to settle. If you are using the wet method, you should be able to slide the vinyl into place. Use soft, even pressure rather than forceful rubbing. A squeegee is your primary tool for adhesion. Start at the center of the sticker and push outward in smooth strokes. Work slowly and deliberately to push water and air toward the edges. For delicate edges and curves, use a felt-edged squeegee or a soft microfiber cloth to prevent scratching.
Curved areas require special care. Vinyl has elastic memory and will want to return to its manufactured shape. To seat vinyl onto compound curves, apply low heat from a heat gun or hairdryer on a low setting. Keep the heat source moving and never focus it on one spot for long. Warm the vinyl until it becomes pliable, then use your fingers and the squeegee to conform it to the curve. For tight radiuses, use small incremental stretches rather than large pulls. Overstretching creates visible distortion, while under-stretching leaves air pockets. Remember that heating also reactivates adhesive temporarily, helping the vinyl to set into place neatly.
When working around vents, inlet grilles, or mounting holes, cut carefully. Use a fresh, sharp blade to make relief cuts where necessary. Make shallow cuts through the vinyl only, not through the underlying panel. Cut along natural separations such as seams or bolted edges. If you must trim around exposed bolts, remove the bolt first, seat the vinyl, and then reinsert the fastener. This ensures the vinyl sits flush and prevents tearing when the bolt is tightened.
Bubbles are the most visible sign of a poor installation. Large bubbles indicate trapped moisture, dirt, or insufficient pressure. Small bubbles, especially those that appear immediately after application, often disappear as the water migrates out over 24 to 48 hours. Use the squeegee again to manage any remaining air. For persistent small bubbles, use a micro-needle to puncture them and press the air out. Clean the area with alcohol before puncturing. Insert the needle at a shallow angle and make as few punctures as possible. Press out the trapped air and smooth the vinyl with the squeegee.
Edges are vulnerable points. Pay attention to them during application. Use steady pressure to seal edges and corners. If lifting occurs, heat the area lightly and press back down. For extremely tight edges, an edge sealer can be applied after the vinyl has cured. This adds longevity by preventing edge lift from moisture and road debris.
Allow the vinyl to cure properly. Adhesives generally bond fully within 24 to 48 hours, though some high-grade films may require up to 72 hours in cooler climates. During curing, keep the bike sheltered from rain, direct sunlight, and car washes. If you must move the bike, handle it gently to avoid flexing the panels. After the initial curing window, avoid high-pressure washes aimed directly at seams for several days. Once cured, most vinyls are waterproof and UV-resistant, but a short waiting period ensures a permanent bond.
If you choose to add a protective overlaminate, do it only after the sticker has fully cured. Overlaminates provide extra protection from UV rays, chips, and chemical exposure. Apply them with the same wet method and squeegee technique. Use only laminates compatible with your vinyl film. When done correctly, overlaminates add a subtle sheen and noticeably increase resistance to abrasion.
Removal and replacement are as straightforward as installation, but they require care. When it’s time to remove the decals, heat the vinyl to soften the adhesive, then peel slowly at a low angle. Use adhesive remover or isopropyl alcohol to clear any residue. Avoid scraping aggressively, as this can damage paint. If residue resists, a plastic scraper helps without scratching. For older adhesive that has hardened, repeat the heating and peeling process.
Maintenance after installation keeps your stickers looking fresh. Regularly wash the bike by hand with mild soap and water. Avoid harsh solvents and abrasive cleaners that can break down the vinyl or the overlaminate. For tough stains, use a cleaner formulated for vinyl graphics. Periodic waxing is acceptable for many films but check compatibility first. Do not use products with strong solvents or caustic chemicals.
Anticipate wear areas. Lower panels and edges near the road will receive the most impact from debris. Consider adding clear protective film to these zones before applying the decorative sticker. This sacrificial layer absorbs chips, preserving the printed vinyl beneath. It’s a small step that prolongs life on high-mileage bikes.
Be mindful of temperature extremes. Very cold temperatures make vinyl brittle and prone to cracking. Very hot conditions can soften adhesive and cause lifting at edges. If you expect seasonal extremes, plan installations during temperate weather. If you must install in colder weather, warm the panels and the vinyl gently before application.
For multi-piece kits, alignment is crucial. Treat the fairing as a single canvas. Begin with major reference points such as seams or vents and align the primary pieces first. Secondary pieces should follow those anchors. If a kit includes numbered or matching panels, lay them out on the table before starting to ensure the sequence is correct. Misplacing one panel can ruin the intended flow of the design.
If this is your first time, practice on a spare panel or a small test piece. That practice gives you the feel for how the vinyl stretches, how heat affects it, and how quickly the adhesive grabs. Practice also builds familiarity with the squeegee strokes and the pressure that works best.
Common mistakes are easy to avoid. Rushing causes creases and air pockets. Working in dusty conditions traps debris under the vinyl. Using too much heat will warp the design. Not cleaning the surface thoroughly leaves oils that eventually cause peeling. Each of these can be prevented with simple discipline: a clean area, slow work, and the right tools.
Tools matter but do not have to be expensive. A soft-edged squeegee, a spray bottle, a clean microfiber towel, a hairdryer or heat gun on low, a sharp utility blade, and a few isopropyl alcohol wipes will get you through most installations. Higher-end kits sometimes include application tools and instructions. If your kit includes these, use them. They are supplied to match that kit’s materials and will often make the job easier.
Finally, respect manufacturer guidance. Different vinyls and adhesives behave differently. Always read and follow the instructions included with your kit. They will often include specific curing times, recommended temperatures, and tailored application techniques. When in doubt, contact the vendor or consult a visual tutorial for your particular panel.
A well-applied sticker kit transforms a motorcycle, giving it a refined, custom look without costly bodywork. Follow the steps above, take your time, and use measured heat and pressure. With attention to preparation, alignment, and curing, you can achieve durable, professional results that last for seasons.
For inspiration and to explore new panel and decal options, see the 2023 new fairings collection. For a step-by-step visual demonstration, consult this tutorial video: https://www.youtube.com/watch?v=example-decal-installation
Final thoughts
Motorcycle fairing sticker kits empower riders to express their individuality while enhancing their bikes’ aesthetics. For business owners, understanding the benefits, customization options, and installation process opens new avenues for engaging customers. By offering a range of kits that cater to various preferences, businesses can capitalize on the growing demand for personal expression in motorcycle culture. Engaging with this market not only drives sales but also fosters community among motorcycle enthusiasts.