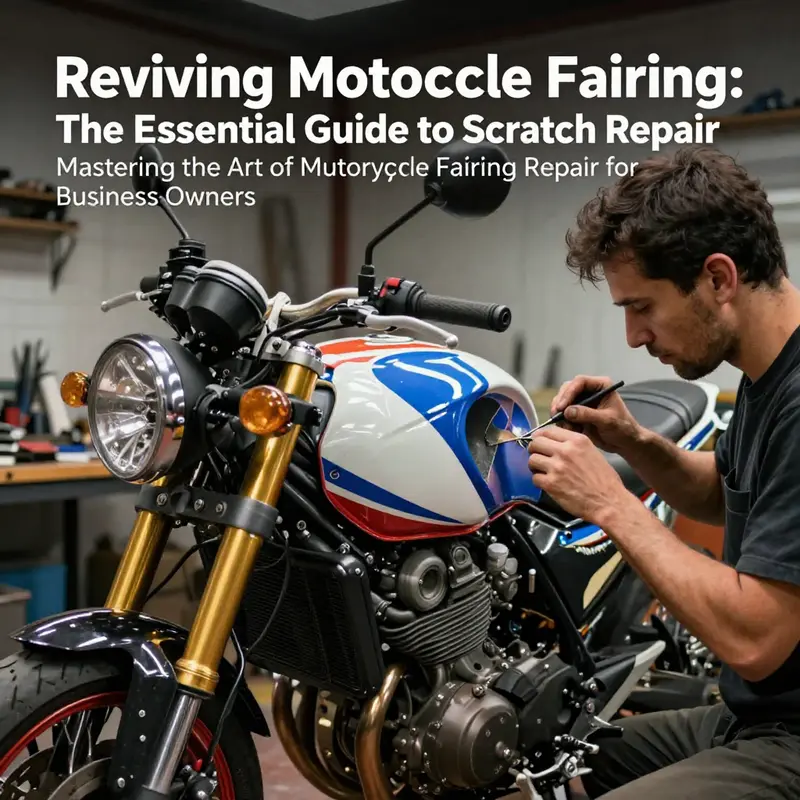
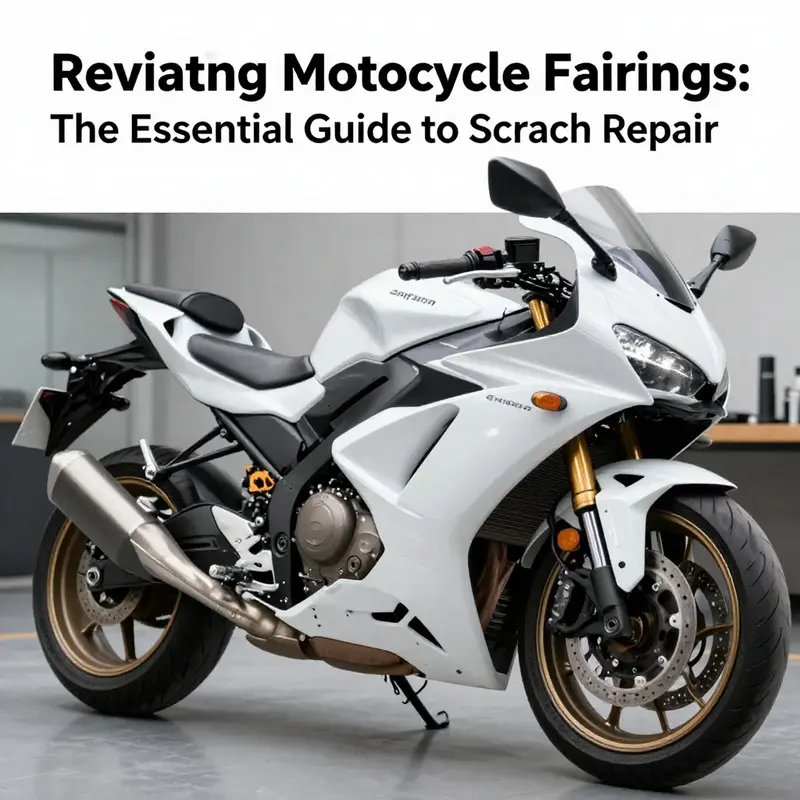
Motorcycle fairings play a crucial role in both the aesthetics and aerodynamics of a bike. For business owners in the motorcycle industry, ensuring that customers’ bikes remain in pristine condition can cultivate loyalty and attract new clientele. Motorcycle fairing scratch repair not only revives the appearance of the bike but also protects the integrity of its components. This guide aims to walk you through essential repair techniques, the materials and tools necessary for effective repairs, the challenges of color matching, and the critical aspect of long-term maintenance following repairs. Each chapter will build upon the previous one, enhancing your understanding of how to provide superior service to your customers.
From Tiny Scratches to Pristine Panels: A Practical Guide to Motorcycle Fairing Scratch Repair
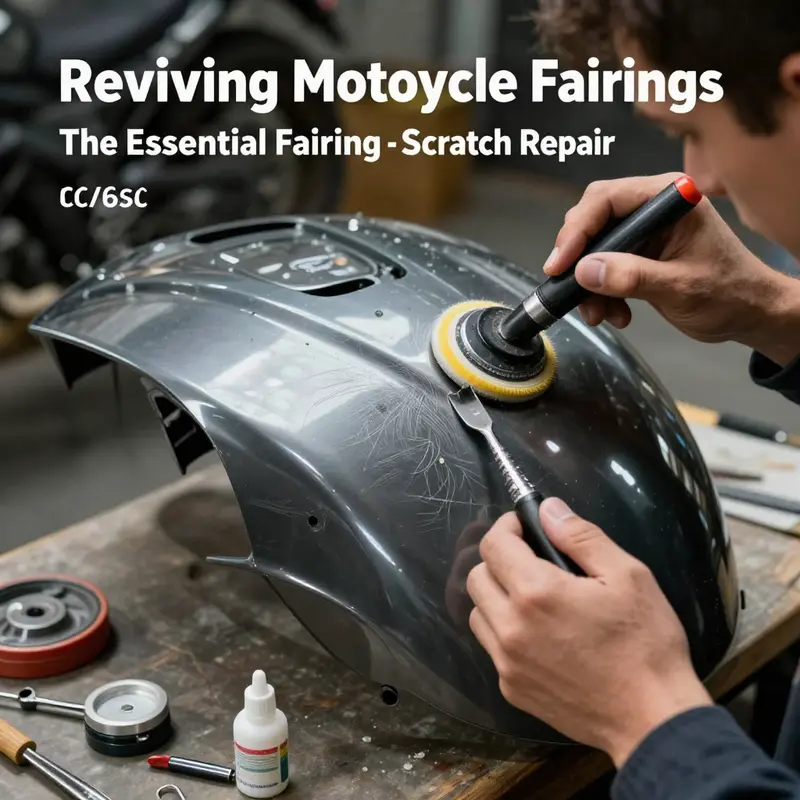
Scratch repair on a motorcycle fairing is more than a quick polish or a dab of filler. It is a careful dialogue between surface chemistry, material behavior, and visual perception. The fairing, usually made of plastic or a composite, takes the brunt of road debris, tip-in contact, and the occasional curb encounter. When a scratch disrupts that smooth, glossy skin, the impulse is to reach for a bottle of liquid magic. Yet real restoration demands a methodical approach, a sequence of clean, repeatable steps, and a respect for the material under the paint. The narrative of repair begins with assessment. Not every mark is equal. A shallow surface scratch that barely catches light is different in kind from a groove that penetrates the clear coat and nudges the color beneath. A practical repairer reads the damage with a trained eye: is the top clear coat scuffed, or has the scratch breached through to the base plastic? Is there a small dent or pitting that disrupts the even plane of the panel? The answers determine the path forward and the tools required. The essential rhythm is preparation, treatment, finish, and protection, a loop that repeats as needed until the repair sits so close to invisible that the eye must search for distinctions rather than the other way around. The process is not merely cosmetic; it can preserve structural integrity, maintain adhesion for future layers, and extend the life of the fairing through respect for the plastic’s properties, the primer’s grip, and the clarity of the finish layer.
Begin with cleanliness. Dirt, grease, and wax on the surface act like a sandpaper pad for any subsequent work. A mild detergent solution does the job, followed by a thorough rinse and a careful drying with a lint-free cloth. Any residual moisture can cause micro-etching or improper bonding later on, especially when the panel will receive filler or paint. Once the surface is dry, the depth of the scratch must be gauged more precisely. For superficial abrasions, the surface might respond to refined polishing, but even here, the preparation phase remains critical. A gentle, controlled abrasion helps the adjacent clear coat bite and blend. Use fine-grit paper—something like 1500 to 2000 grit—and keep everything wet. The goal is not to remove material aggressively but to create a micro-scratch pattern that gives the next layer a chance to adhere evenly. Work in small, deliberate circles, and frequently wipe the area to monitor progress. The tactile feedback matters; if you feel the scratch with your fingernail, you likely have a deeper issue than a mere surface sheen can fix.
If the mark is truly shallow, a careful polish might restore gloss and even out the transition between the damaged zone and the surrounding paint. A high-quality polishing compound, applied with a dual-action polisher or even by hand with a microfiber pad, can erase fine sanding marks and restore a near-flawless finish. The polishing step is not about vanity alone; it is about reducing the visual contrast that makes the repair obvious. The underlying color remains the same, so if the color is consistent across the panel, polishing can suffice. But the moment color or depth begins to appear different, more involved work is warranted. The transition region should be almost invisible, and the surrounding paint should read as a continuous field rather than a repaired patch.
For slightly more than a superficial scratch, the repair may require a light filler to level the surface. Minor dents or pits call for a restoration that respects the fairing’s curvature and contour. Cleanliness remains essential, and the area should be free of any flaking clear coat or loose material. A two-part epoxy putty or a quick-dry filler designed for automotive plastics can be worked into the defect. The aim is to fill and slightly overshoot above the surrounding plane so that, after curing, you can sand the area flush. Sanding should follow the same patient, progressive approach used for surface scratches: start with 800 to 1000 grit to remove the bulk of the excess and then move to 1500 to 2000 grit to achieve a mirror-smooth finish. Between grits, wipe the surface clean to evaluate progress and to prevent clogging the sandpaper. The finished filler surface should be flush with the rest of the fairing, with no high points or hollows that would catch light differently.
Deeper scratches that expose the underlying plastic are where the repair becomes more technical. Polypropylene (PP) and acrylonitrile-butadiene-styrene (ABS) are common plastics in fairings, and each responds differently to adhesion challenges. When you encounter exposed plastic, you should begin with a thorough cleaning and degreasing, followed by a light scuffing around the scratch to create a rougher surface for better bonding. A specialized plastic repair compound, tailored to the characteristics of PP or ABS, is then applied. The adhesive behavior of these compounds is key; they must bond to the plastic without becoming brittle or prone to cracking. In more complex cases, a professional-grade plastic welding method, using a compatible welding rod and controlled heat, can provide a robust repair for cracks or larger breaks, but this approach demands competence and proper equipment. If you pursue filling and bonding, allow the material to cure completely according to the manufacturer’s instructions and then perform a careful sequence of sanding steps. Progressive grits again, starting with 800-1000 and moving up to 1500-2000, help the repaired zone blend with the surrounding surface. After sanding, a plastic-specific primer is essential to ensure paint adhesion on plastic repairs. Primers formulated for plastics create a better bond than those designed for metal or traditional body filler surfaces, and they help to prevent peel or micro-cracking as the finish ages under UV exposure and temperature cycling.
Color matching is the next frontier. Achieving an exact color match on a motorcycle fairing is notoriously tricky because the panel’s translucence can reveal subtle differences in shade, depth, and gloss. The most reliable approach is to obtain a color code from the manufacturer or to use a professional color-matching service. This is not merely an aesthetic exercise; mismatched color can magnify the repaired area’s visibility, especially on modern, high-gloss fairings where light returns in a coherent, predictable manner. When you prepare to paint, apply a primer suitable for plastic to ensure adhesion and to create a uniform base color field. After the primer dries, the color-matched paint is applied in multiple thin layers. Thin coats minimize sagging and running, and each layer should be allowed to dry thoroughly before the next is applied. The sequence of coats matters: a base color, followed by a mid-coat if necessary, and a final color layer that equals the depth of the surrounding panel. A clear coat then finishes the job, sealing the color and adding the gloss and protection that makes a repair disappear into the original finish. The clear coat serves to protect the paint from UV damage, minor abrasion, and moisture ingress. When applying clear, multiple very thin coats are preferable to a single heavy one. Between coats, light scuffing helps the next layer adhere and helps to achieve a uniform sheen. The final result should read as a single, continuous surface when viewed from typical riding perspectives, not as a patch of altered brightness or hue.
The decision tree of repair reaches its apex when the damage is extensive. Large cracks, significant breaks, or warping can compromise both aesthetics and structural integrity. In such cases, replacement of the entire fairing panel is often the most practical and reliable solution. While replacement is the most expensive option, it guarantees fit, finish, and integrity that can be difficult to reproduce with a patch job. The choice between repair and replacement should weigh the cost, time, skill, and the desired long-term result. A careful assessment may reveal that a pristine, factory-like appearance is achievable with a well-executed repair; in other cases, a panel swap ensures symmetry, fit, and a lasting visual match. The overarching goal remains consistent: preserve the fairing’s original curvature and alignment so that the repair blends seamlessly with the bike’s silhouette and aerodynamics.
Throughout this process, safety is non-negotiable. Wear gloves and eye protection when sanding, cutting, or applying any fillers or paints. Dust, fumes, and solvents can pose risks even in a hobby setting. If you lack experience with plastic welding or painting, seeking professional assistance is prudent. The success of the repair hinges on meticulous preparation, appropriate material selection, and precise technique. A well-executed repair respects the fairing’s shape, ensures good adhesion of filler and paint, and protects against future wear. The story of the repair, finally, is a story of patience and disciplined craft rather than a rush to complete a patch. When you step back and inspect the finished surface under different lighting, you should notice a uniform plane, a consistent gloss, and a seamless transition from repaired zone to original paint. The difference between a good repair and an average one is often the difference between a quick fix and a restoration that lasts for years of riding.
For riders who want to explore restoration from a parts perspective or who prefer to replace a panel for a flawless finish, exploring a broader catalog of fairings can be a practical path. If you are considering a brand-specific look or want to maintain your bike’s aesthetics with a complete panel, you can browse the Honda fairings collection to compare options and find panels that align with your bike’s model and color scheme. This approach can be especially helpful when the repair requires an exact curvature or when color matching proves particularly challenging. In the context of a repair project, a well-chosen panel can save time, maintain symmetry, and deliver a result that looks factory-fresh, even if the original panel has been retired from service. The decision to repair versus replace is rarely a single moment but rather a thoughtful calculation performed with the owner’s goals in mind. In either path, the emphasis remains on precision, patience, and protecting the fairing’s long-term performance on the road.
This narrative thread, drawn from practical experience and the broader body of guidance available to motorcyclists, emphasizes that successful fairing scratch repair is not a single trick but a disciplined sequence. It begins with a clear-eyed assessment, proceeds through careful material selection and bonding strategies, and culminates in a color-matched finish sealed with a durable clear coat. The less visible the seam between repaired and original surfaces, the more successful the repair appears. As riders, we value aesthetics as a component of riding experience, but the repair philosophy also highlights respect for the materials, the craft of detailing, and the commitment to a finish that endures through weather, grit, and time. For those seeking further in-depth guidance, the Cycle World resource provides a broader set of tutorials from experienced mechanics and riders, spanning everything from quick, surface-level fixes to full resprays. External link: https://www.cycleworld.com/motorcycles/how-to-repair-a-motorcycle-fairing/
And for practical options on the parts side, the Honda fairings category can be a useful starting point when replacement becomes the most efficient path forward. Accessing a curated selection of panels can help riders evaluate fitment, color compatibility, and style, ensuring that a replacement panel aligns with the bike’s original geometry and appearance. Internal link: Honda fairings.
Essential Materials and Precision Tools for Motorcycle Fairing Scratch Repair
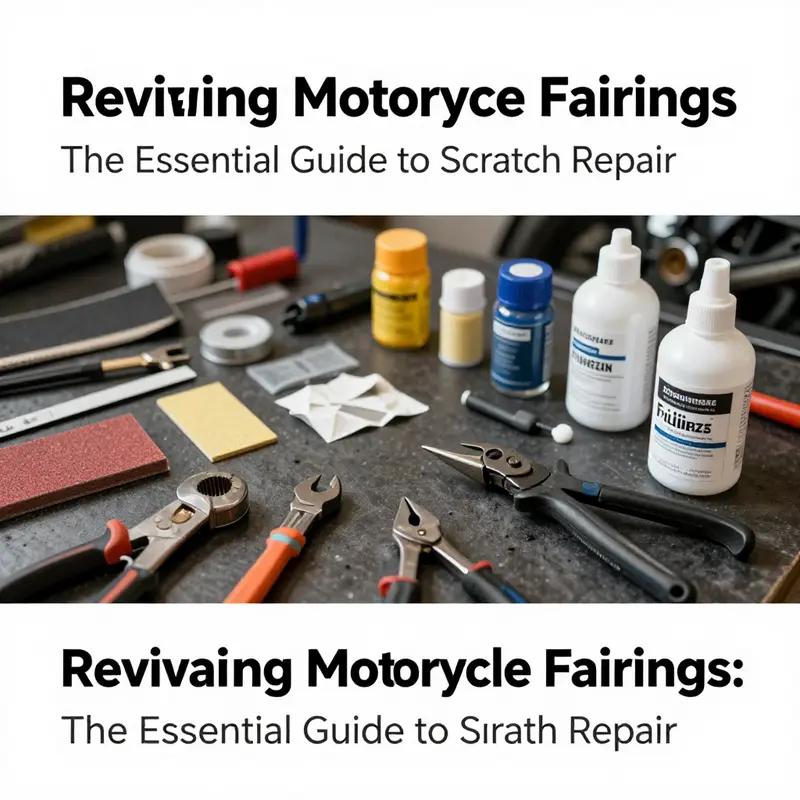
Materials and tools define the difference between a temporary fix and a professional repair. When approaching a scratched motorcycle fairing, understanding the right supplies and how to use them matters as much as technique. The fairing surface may be plastic, fiberglass, or a composite, and each substrate calls for compatible materials. Start by identifying the fairing type. That simple step narrows the choice of adhesives, fillers, primers, and paints that will stick and remain durable.
A thorough, efficient repair begins with cleaning. Remove dirt and road grime with a mild soap and warm water. Rinse thoroughly and dry with a clean, lint-free cloth. After this, use a degreaser to remove oils, wax residues, and silicone contaminants. These substances prevent adhesion and cause fisheyes or peeling later in the process. Use a tack cloth to pick up any remaining fine dust. Cleanliness is not optional; it directly affects adhesion and the longevity of your work.
Sanding tools and abrasive materials are next. For fairing scratch repair, a range of sandpaper grits is required. Coarse grits remove damaged material and shape fillers. Fine grits refine the surface prior to painting. A typical progression moves from 320 or 400 grit for initial levelling, to 600–800 grit for smoothing, and finally to 1500–2000 grit for wet sanding before clear coat polishing. Use a sanding block for flat areas to maintain even pressure. Flexible sanding pads work better on contoured panels and help avoid scallops or flat spots.
Selecting the correct filler or bonding agent depends on the fairing substrate. For deep gouges, a plastic-compatible epoxy putty or two-part filler provides structural repair. These compounds bond strongly to ABS, polypropylene, and other plastics when used with a suitable adhesion promoter. For fiberglass panels, use a polyester or epoxy-based body filler formulated for that material. Apply filler in thin layers to avoid shrinkage and excessive sanding. Let each layer cure fully before adding the next. A feathered build up reduces the amount of sanding needed and preserves surrounding paint.
Primers are not all equal. Use a primer specifically labelled for plastics or for automotive use with plastic adhesion properties. A high-build primer surfacer helps level minor imperfections and fills small pinholes left after filler sanding. Apply the primer in thin, even coats. Allow proper dryness between coats. Primer provides a uniform base and improves adhesion of the topcoat. For flexible plastics, use a flexible primer to reduce the risk of cracking when the panel flexes.
Color-matched paint is critical to a seamless repair. Use the motorcycle’s paint code where possible, and select a paint system designed for plastics. Many local automotive paint suppliers can mix color formulas to match factory finishes. Apply paint in multiple thin coats instead of one thick pass. Thin coats dry evenly, reduce runs, and provide better gloss when buffed. If blending into surrounding panels, practice feathering techniques to create a subtle transition and avoid a noticeable edge.
A clear coat seals and protects the repair. Use a clear coat compatible with the paint system. Multiple thin layers build durable protection and create a deep gloss. Allow sufficient flash time between coats and a full cure period before wet sanding or polishing. Clear coats require controlled application conditions. Dust, humidity, or extreme temperatures can compromise the finish, causing orange peel or solvent pop.
Polishing and finishing tools complete the job. After the clear coat cures, wet sand with 1500–2000 grit paper to remove minor surface orange peel. Then use a fine polishing compound and a polishing pad to restore high gloss. A dual-action polisher is forgiving and reduces the risk of burning through clear coat. Finish with a very fine polish and a clean microfiber cloth. This final step integrates the repaired area visually with the surrounding finish.
Personal protective equipment is essential. Wear nitrile gloves to protect skin from solvents and resins. Use safety goggles to shield eyes from dust and spray. A respirator with the correct cartridges is necessary when sanding, priming, or painting. Many chemicals used in fairing repair are harmful if inhaled. Always work in a well-ventilated space or a spray booth. Keep a fire extinguisher nearby when working with flammable materials.
Several handheld tools streamline the process. A heat gun helps during paint leveling and polishing, and can relieve minor surface stresses. Use it with care to avoid softening or warping the fairing. A putty knife or spreader suits filler application. An angled sanding block fits tight curves. Masking tape and paper are essential for protecting surrounding panels and creating clean paint lines. Clip or remove trim pieces and lights as needed to prevent overspray and to gain better access.
For paint application, choose between spray cans, an airbrush, or a spray gun. Spray cans are convenient for small repairs and touch-ups. Airbrushes excel at fine blending and color transitions. Spray guns are ideal for larger work or full resprays, offering the most even coverage. Whatever tool you select, practice spray technique on a scrap panel. Maintain a consistent distance and a smooth wrist motion to avoid runs and uneven coverage.
Adhesion promoters and plastic welds deserve special attention. Some plastics, like polypropylene, resist traditional fillers and paints. An adhesion promoter creates a chemical bridge between the substrate and the coating. In more severe structural damage, a plastic welding kit restores integrity by melting and fusing the plastic together. Plastic welding is more permanent than fillers for cracked panels, but it requires steady hands and correct technique. Test methods on scrap material to understand heat and speed settings before repairing the actual fairing.
Quality of the workspace influences outcomes. Temperature and humidity affect drying and curing times. Aim for moderate temperatures and low humidity to reduce solvent entrapment. Keep the environment dust-free. Even small dust particles can cause blemishes in the finish. If possible, work inside a temporary paint tent or a clean garage. Illumination matters too; good lighting reveals imperfections during sanding and painting.
Inspection tools help spot lingering defects. Use a bright light source and low-angle inspection to find dimples, runs, or sanding marks. A small magnifier can reveal hairline scratches invisible to the naked eye. Address these issues before painting. Catching problems early saves time and produces a superior finish.
Time and patience are important resources. Curing and drying times vary by material and environmental conditions. Rushing the process causes adhesion failures, cracking, and poor gloss. Read product instructions for proper recoat windows and cure times. Allow extra time between steps when humidity is high or temperatures are low.
When a fairing is beyond economical repair, replacing the panel may be wiser. Many riders prefer replacement fairings to restore factory fit and finish. If you choose replacement, inspect available panels for correct model fitment and finish. For example, riders seeking replacement parts can browse options specific to their model, such as Kawasaki fairings, to find compatible panels and styles. Replacing a badly damaged panel removes guesswork about structural integrity and color matching.
Finally, keep a small kit of essential materials for on-the-spot touch-ups. A compact pack with a matching touch-up paint, sandpaper, a small filler, and clear coat helps you address minor chips before they worsen. Preventative care and early repair keep repair scopes small and restore the fairing before corrosion or cracking spread.
For detailed, step-by-step guidance from experienced technicians, consult authoritative repair tutorials. These resources provide images and procedures that align tools and materials with each repair stage, helping you choose the right products for your fairing type. More detailed technical guidance can be found at the Motorcycle Mechanics Institute: https://www.mmi.edu/motorcycle-repair-tips/scratch-repair-on-plastic-fairings/
Color by Design: Mastering Seamless Color Matching in Motorcycle Fairing Scratch Repair
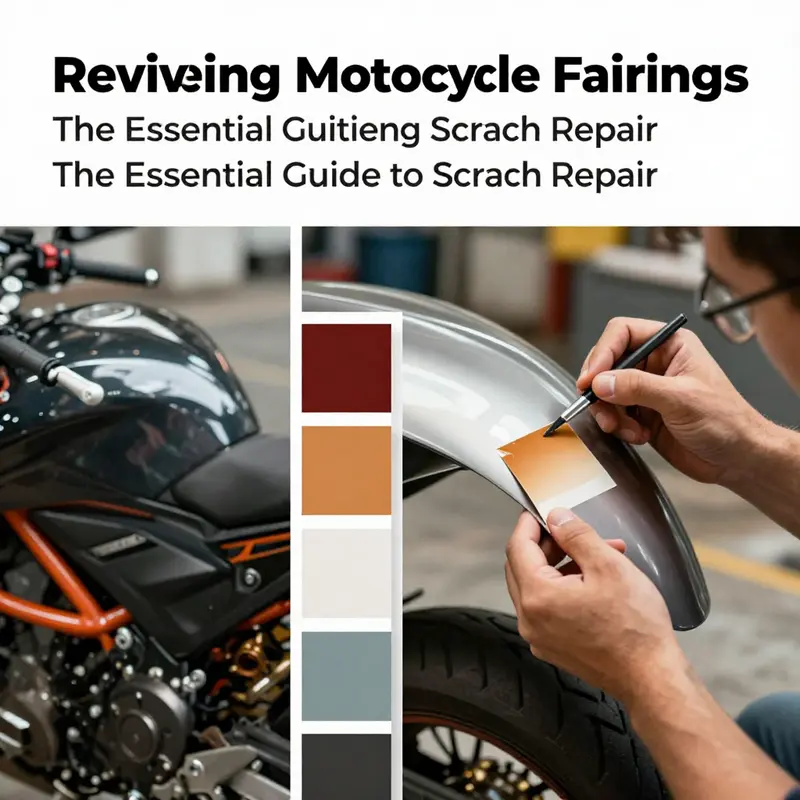
Color is not just a surface attribute when a motorcycle fairing sustains a scratch. It is the final measure of a repair’s success. A well-executed fix can restore the panel’s integrity, but without careful color matching, even a technically perfect repair will appear as a telltale seam rather than a seamless continuation of the original. This demands a disciplined approach that treats color as a separate and critical stage of the repair, one that requires as much attention as the sanding, filling, and priming that precede it. When done with care, color matching can restore not only the visual harmony of the bike but also the rider’s sense of confidence in the machine. When done haphazardly, it can undermine the entire repair, highlighting the difference in hue, gloss, and depth across the repaired area and the surrounding panels. The challenge is more than matching a shade; it is reproducing a multi-layer truth that includes base color, metallic or pearlescent effects, and the final veil of clear that seals and adds depth. Each layer interacts with light in its own way, and any deviation in thickness or composition can alter the perceived color. For a repair to disappear into the rest of the bodywork, every nuance must align, from the tiny micro-shifts in hue to the way the surface reflects the world around it. The color story begins with recognizing how modern paints are built. A typical system uses a sequence: a base coat that establishes the pigment, possibly some metallic or pearlescent additives that interact with light, followed by a clear coat that adds gloss, depth, and protection. If the fairing has aged unevenly, those layers may have shifted differently on the surrounding panels. The repair area must not only reproduce the color but also mimic the way light interacts with the surface. Any difference in gloss, a slight change in depth, or a different texture will betray the repair, no matter how closely the hue matches in a paint chip. This is why color matching is often described as an art that combines chemistry, physics, and practical skill. In professional settings, color matching begins with accurate measurement. A spectrophotometer or a similar instrument reads the color of the surrounding paint and translates that data into a formula. The goal is to identify the exact base color and its additives so that the repair coat blends with the original layer by layer. The process may also involve consulting a database that links paint codes to vehicle details, sometimes even using the VIN or a paint code specific to the model. Yet even with exact data, the actual application environment can cause the color to drift. Temperature, humidity, airflow, and the speed of the spray all influence how the paint dries and cures. A single degree of temperature difference can shift the final appearance enough to be noticeable once the panel is back in the light. The finish adds another dimension. A glossy surface reflects the world with precision but can make even tiny discrepancies magnified. A satin or matte finish shifts the problem: it reduces glare and can mask defects, but it also complicates the task of achieving a uniform look. Professionals often have to choose not just the right color but also the right finish, or to replicate the finish across overlapping panels, which might have different aging histories. The practical consequences of these complexities reveal themselves in real-world challenges. A color match on a fairing scratch may seem perfect under lab lighting but reveal a drift in natural daylight. If the panel is near a curve or edge, the shade will appear to change as the light angles vary, complicating the decision about how many coats to apply and how thick each layer should be. In all of this, the human eye remains a critical instrument. Even the most advanced instruments cannot fully replace the subtle judgement of an experienced painter who can sense when the color depth is right and when the sheen matches the reflectivity of adjacent surfaces. The narrative of color matching is not just technical; it is also a story of patience and iterative refinement. A small repair can require several cycles of application, cure, and evaluation. A typical approach begins with meticulous cleaning and surface preparation to ensure the new paint adheres properly. The area is cleaned with an appropriate solvent to remove oils and waxes and then gently abraded to create a fresh, receptive surface. A thin layer of primer is applied to improve adhesion and to provide a uniform base for the color coat. The color formula is then mixed to match the surrounding panel as closely as possible, often using a reference shade from the original code, if available. This is followed by a sequence of light, even coats designed to build color gradually without creating drips, ridges, or orange peel. As each layer cures, the technician evaluates the color under multiple lighting conditions. This evaluation helps determine if the hue, gloss, and depth are aligning with the adjacent areas. If a difference is detected, the mix may be adjusted in tiny increments, and a new coat is tested. It is rare to achieve a perfect pass on the first attempt; more typically, several iterations are needed before the result satisfies the eye in real-world light. An additional complication arises with finishes such as metallics or pearls. These pigments rely on microscopic reflective particles that scatter light in unique ways. The orientation of those particles during spraying can subtly shift the perceived color, so the technician might need to adjust spray technique or even re-pigment the base layer to ensure uniformity across the panel and surrounding areas. The nontriviality of this work is why many riders weigh the decision to pursue color matching as a specialized service rather than a casual DIY task. The willingness to invest in precise color matching often correlates with the importance of the repair to the overall appearance of the bike. A small scratch on a high-visibility panel may justify the extra steps and costs involved in achieving a seamless blend, while a more isolated or inconspicuous repair might not. The concept of color matching also intersects with other aesthetic decisions, such as whether to rework only the damaged portion or to repaint an entire panel or section of fairing. In some circumstances, blending the repaired area into the rest of the fairing may be impractical because the surrounding panels have aged differently or because the color has faded over time. In such cases, the most harmonious solution may be a complete repaint of the affected panel, or even a broader refresh of adjacent areas to reset the color balance across the fairing. The decision is guided by a combination of expected durability, cost considerations, and the rider’s priorities for appearance. Even with the best efforts, complete invisibility remains a high bar. A repaired panel may still require adjustments over time as environmental exposures accumulate and the paint ages. The best practice is to document the color match approach and maintain the repair within a controlled environment to minimize future drift. For those who want to explore color options and see how different fairing styles handle color across models, there are rich resources illustrating color and finish choices on various fairing lines. A practical path for hobbyists is to refer to a dedicated catalog of fairings that showcases how color and finish interact with different materials and lighting. For readers curious about specific brand lines and the breadth of options, one can explore a catalog of Honda fairings to observe how color coordination is implemented across models and years. This exploration can provide helpful context for the color matching challenge when planning a repair. See the Honda fairings catalog for more on color and finish variety. Honda fairings This reference helps illuminate how color decisions are shaped by model design, panel geometry, and finish choices, which in turn influence how a repair should be approached to achieve harmony with the rest of the bike. In practice, a repair plan often begins with a clear assessment of the color environment: the shade under which the panel will live, the neighboring finishes, and the way light interacts with the surface as the rider moves through shade and sun. Practitioners emphasize the importance of not just hue matching but also depth and reflective quality. The depth of color depends on the cumulative effect of coats and the smoothness of the surface, while reflective quality is dictated by the clarity of the clear coat and the evenness of the finish. A well-executed repair achieves more than a color match; it achieves a new panel that behaves like the original under real-world viewing conditions. The skill set required to realize this balance blends scientific measurement with an educated eye. It can be learned, but it takes time, practice, and an understanding of how materials respond to heat and air during curing. For many riders, color matching is the defining step that decides whether a fairing repair looks right enough or truly seamless. When professional services are engaged, technicians bring not only measurement tools but also a practiced sense of how to lay down layers in a way that minimizes visible boundaries. They plan the sequence with attention to the panel geometry, ensuring that the edge where repaired color meets original color is as feathered as possible. They also consider the real-world environment where the bike lives: the garage, the driveway, or the showroom floor, each with different lighting that can emphasize or hide discrepancies. Understanding these realities helps keep expectations grounded. If, after patient effort, the color still looks slightly off in certain lights, a common recourse is to re-evaluate the surrounding panels. In some cases, the most prudent solution is to rework more extensively to achieve a holistic color balance rather than forcing a local fix that remains perceptible in some contexts. This approach aligns with broader restoration principles that favor long-term consistency and durability over a quick cosmetic fix. The goal is not merely to hide a scratch but to restore the panel so that the entire surface tells a coherent color story when viewed at typical riding distances and lighting. The reality is that color matching will often require compromise and thoughtful decision-making. The repair may be excellent in person yet reveal itself under certain lighting, while other riders may not notice it at all. The threshold for acceptance is shaped by the repair’s visibility in daylight, at eye level, and across the most frequently observed angles. This is where the art of color matching meets the craft of maintenance. When color is treated with the attention it deserves, the repair becomes a durable part of the bike’s story rather than a blemish that demands attention every time the sun shifts. As a final reminder, color matching should be undertaken with a plan that considers not only the immediate scratch but the potential for future color drift. If the rider anticipates a long service life for the bike, it may be advisable to adopt a broader repaint strategy or to explore cosmetic options that preserve aesthetics while accommodating eventual aging. The repair should be seen as an ongoing care task, not a one-off fix. For readers seeking a detailed, step-by-step guide to fairing repair, see How to Repair a Motorcycle Fairing. (https://www.cycleworld.com/motorcycles/how-to-repair-a-motorcycle-fairing/)
Guarding the Gloss: Long-Term Care After Motorcycle Fairing Scratch Repair
A scratch repaired on a motorcycle fairing is more than a cosmetic fix; it can be a doorway to preserving the bike’s value and the rider’s confidence in the machine. The work done to fill, sand, and paint a damaged section lays down a new surface that deserves the same respect you give to the rest of the bodywork. Long-term maintenance is not a set of chores but a consistent mindset—one that treats the repaired area as a shelter for gloss, depth of color, and the smooth, hard feel that tells you the finish is intact. If you think of protection as insurance for the repair, you’ll approach each ride with a plan to minimize exposure to sun, road grime, and accidental scuffs while keeping the color and texture uniform across the entire fairing.
From the moment the repair is complete, a barrier becomes the first line of defense. A high-quality wax or sealant designed for painted plastic surfaces seals the repaired layer against the daily assault of UV radiation, dirt, and tiny abrasions. The idea is not to create a layer that hides flaws but to give the surface a sacrificial shield that wears down first, keeping the underlying finish pristine. For those seeking an extra margin of protection, a professional-grade coating or a clear-film protection approach can deliver superior resistance to environmental contaminants and micro-scratches. These options, while more involved, can be worth the investment if you ride in harsh climates, off-road environments, or frequently park in high-traffic areas where door dings and brush contact are possible. The key is compatibility and proper curing. If the repair involved color-matching paint, you want to ensure the coating or sealant does not react with the newly cured layer or alter the shade of the color you worked hard to reproduce.
A practical maintenance rhythm begins with a careful cleaning routine. Regular washing removes the dust and grime that, over time, can embed themselves into subtle flaws and magnify the appearance of any texture difference between the repaired area and the original skin. Use a pH-neutral car wash soap and a soft microfiber cloth or sponge. This combination minimizes micro-scratches while still delivering a thorough clean. Avoid abrasive brushes or harsh cleaners that might target the repaired zone more aggressively than the surrounding part. Pressure washers, while tempting for the big clean, can force water into seams or micro-porosities and stress the edges of the repair. A thorough pre-rinse helps purge loose debris so your wash mitt can glide across the surface without dragging grit into the paint. After washing, dry the fairing with a clean, soft towel rather than letting it air-dry in a breezy outdoor space where dust can settle.
Environmental considerations shape a maintenance plan that respects the repair as a long-term investment. The places you park, the routes you ride, and the seasons you endure all influence how the finish ages. Parking near construction sites, under heavy tree cover, or in exposed urban canyons increases exposure to grit, tar, road oil, and abrasive particles that cling to the paint. A protective cover, when feasible, adds a quiet boundary between the repaired panel and the world. The cover won’t prevent all damage, but it reduces direct UV exposure and limits incidental contact with other objects. If you ride through bright sun and hot temperatures, you’ll notice the repaired area can be the part that heats up most, potentially accelerating color fade or clear coat wear. A simple habit—short stints in shade when possible, and avoiding long hot parking—helps extend the life of the repair and the surrounding finish.
Periodic inspection becomes a routine that catches problems before they grow. A monthly visual check of the repaired area reveals chips, micro-cracking, or color drift that may not be obvious on a quick glance. The objective is early detection: a faint color mismatch, a tiny chip near the edge, or a slight dulling of gloss can be corrected with a targeted approach rather than letting them escalate into noticeable blemishes. If you notice a new scratch or a small chip, assess whether it can be touched up locally or if the entire panel needs a professional polish to maintain uniformity. Small touch-ups done promptly can preserve the overall coherence of the bike’s appearance and prevent the repaired section from standing out as a sore point.
The decision to seek professional help is not a betrayal of the DIY repair but a practical acknowledgement of the limits of home upkeep. If the repaired area begins to show wear, or if the color difference becomes more pronounced over time, a professional detailer can perform a precise polish or a color-accurate touch-up to harmonize the finish with the rest of the fairing. The aim is not perfection in isolation but uniformity across the entire surface. A well-executed professional refinement can restore depth, clarity, and the original glass-like sheen that makes a fairing look almost new from a few feet away. In this light, maintenance becomes a partnership with the professionals who understand how nuances in pigment, binder, and clear coat interact after repair, and who can minimize the risk of future adhesion issues or peeling.
To embed this maintenance mindset into a rider’s routine is to recognize the value of balance between care and use. The repaired fairing is not a fragile, precious surface to be hid behind a garage door; it is still a working body panel that endures daily exposure. Gentle handling—avoiding harsh pressure on the edges, being mindful of bag straps and bowl-like tank bags that rub the paint, and choosing routes with smoother road surfaces when possible—helps protect the new finish. In this sense, maintenance is not about living in fear of a scratch but about cultivating habits that preserve the repair while maintaining the bike’s character and performance. The longer the repaired finish remains consistent with the original panels, the more cohesive the overall appearance of the bike becomes, and the more confident the rider will feel when stepping back into the saddle after a period of maintenance.
A quiet, ongoing practice accompanies all these steps: keep a small, dedicated kit for touch-ups and minor corrections. A clean bottle of paint-safe cleaner, a fine polishing compound, and a soft, lint-free cloth can address the occasional micro-scratch before it becomes a visible flaw. When color consistency becomes a concern, professional color-matching can re-establish the uniform shade across the entire fairing. It is this blend of proactive protection and timely intervention that sustains the repaired surface across years of riding. The repair ceases to be a one-off event and becomes part of a disciplined approach to bike care, one that respects the work and the investment that went into restoring its look.
For riders who want a tangible, long-range plan, consider the wider ecosystem of fairing care available in the community of riders who share a practical, no-nonsense philosophy. If you’re browsing different fairing styles or seeking compatible options for future updates, you may explore the BMW fairings collection as a reference point for quality fit and finish, which can inform how you care for the repaired area and how you approach color matching across panels. You can view this category here: https://ultimatemotorx.net/product-category/bmw-fairings/. The goal is not to chase a brand-new look every season but to preserve a repair that feels as solid and as seamless as the day you finished it.
Ultimately, the narrative of long-term maintenance after a fairing scratch repair is a narrative of stewardship. The bike invites you to respect the work that restored its appearance and to treat the repaired surface with the same patience you apply to the rest of the fairing. The combination of protective strategies, careful cleaning, mindful parking, and timely professional intervention forms a continuous loop of care that keeps the repair from aging early or looking out of place. When that loop functions smoothly, the repaired area remains a natural part of the bike’s story—one that riders can tell through silence of a glossy surface and the confident cadence of a ride that looks as good as it feels.
External resource: Cycle World offers in-depth guidance on scratch repair and maintenance strategies for motorcycle fairings, including step-by-step considerations for long-term care and color matching. For a detailed walkthrough, see: https://www.cycleworld.com/motorcycles/how-to-repair-a-motorcycle-fairing/.
Final thoughts
Understanding the ins and outs of motorcycle fairing scratch repair equips business owners with the tools needed to provide exceptional service and enhance customer satisfaction. From mastering essential techniques to tackling color matching challenges and emphasizing the importance of maintenance, each segment of this guide reinforces the integral role of high-quality repairs in building a successful motorcycle business. Regular engagement with these practices will not only sustain the aesthetic appeal of the motorcycles but also foster long-term relationships with clients, ultimately driving profitability.