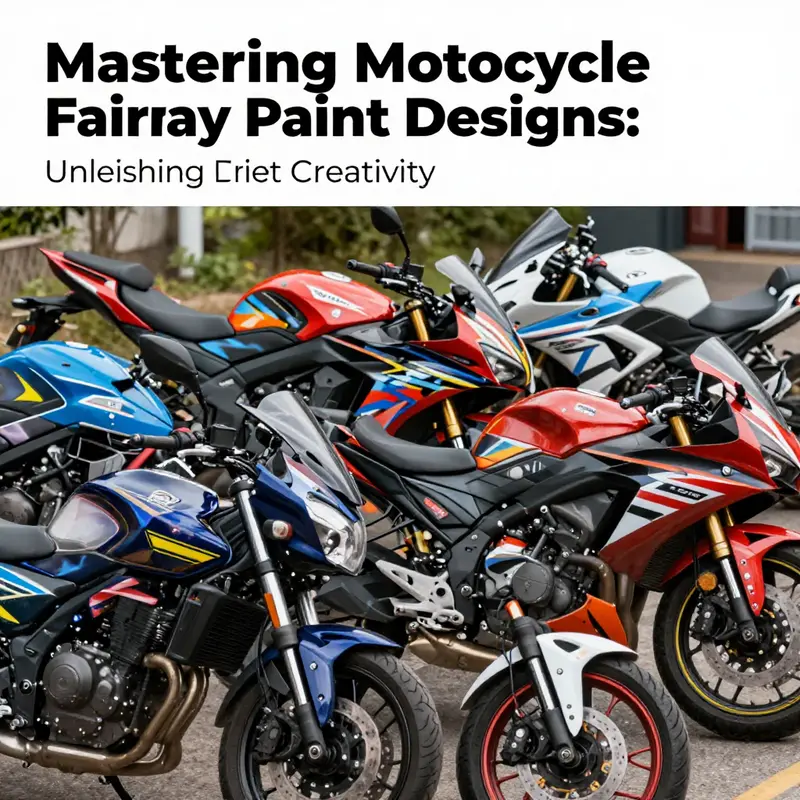
Motorcycle fairing paint designs serve as a canvas for riders to showcase their individual styles and express their identity on the road. Whether you are a business owner in the motorcycle industry or an enthusiast looking to diversify offerings, understanding the nuances of paint designs is vital. This article delves into three core chapters: first, the vibrant world of airbrushed artwork that elevates aesthetics; second, the allure of color-matched factory designs that ensure consistency, and finally, a guide to DIY approaches that empower creativity. By exploring these themes, motorcycle owners and businesses alike can cultivate tailored experiences that resonate deeply with their audiences.
Airbrushed Artwork on Motorcycle Fairings: Turning the Bike Into a Moving Canvas
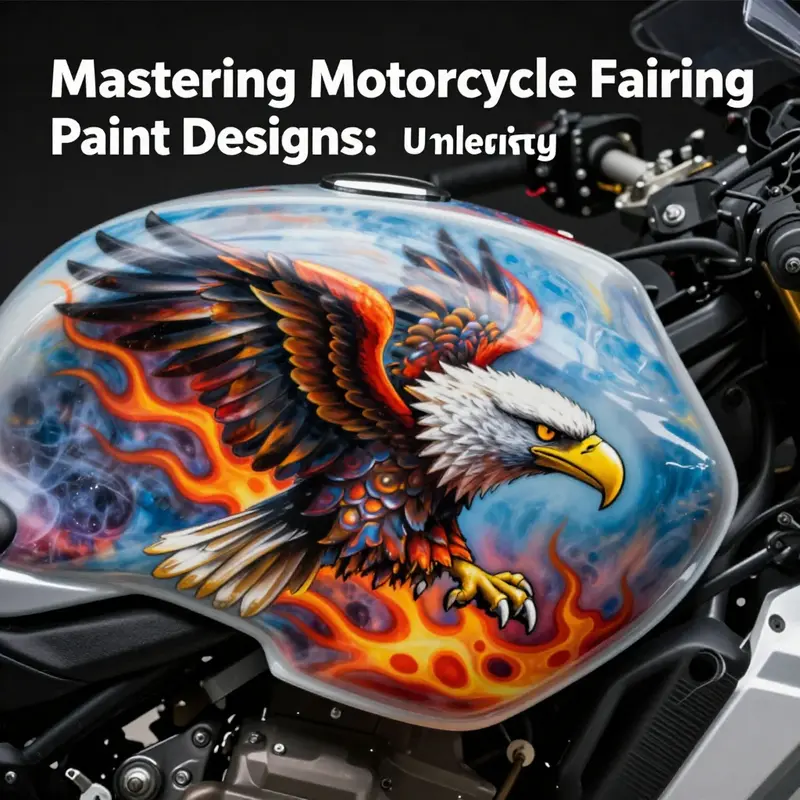
Airbrushed artwork on motorcycle fairings stands at a fascinating crossroads between metal, motion, and fine art. It is more than a decoration; it is a conversation between the rider’s personality and the machine’s engineering. When a skilled artist lays down a design with an airbrush, the fairing surface ceases to be mere protection and becomes a stage where color, light, and form fuse with the bike’s lines to tell a story. The result is a seamless blend of precision engineering and artistic intention, where the bike appears to breathe with depth and movement even when it is at rest. This craft began as a brave experimentation with shading and gradients, but it has grown into a sophisticated discipline that rewards patience, planning, and a deep understanding of how paint interacts with curved geometry, weather, and the demands of riding. The airbrushed approach, with its ability to render continuous transitions and subtle textures, offers riders a way to express ideas that straight spray or solid blocks of color cannot convey. The fairing becomes a living surface, a semi-transparent diary that records light as it travels over concave contours, ridges, and the sweep of the rider’s gaze as they ride past trees, buildings, and other traffic. The color language chosen in these designs—whether bold contrasts or softly feathered blends—sets a mood that can range from aggressive and kinetic to serene and contemplative. It is a language learned by artists who study how color travels over convex and concave shapes, how shadows deepen under the fairing’s seams, and how highlights trace the edge lines that define the bike’s silhouette. In this sense, airbrushed artwork is less about copying a reference image and more about curating a visual rhythm that complements the bike’s architecture and the rider’s intent. The process begins long before the first drop of paint touches the surface. Preparation is the quiet, almost meditative phase that makes the subsequent layers sing. The fairing must be sanded to a micro-smooth finish, free of dust, oils, and any old coatings that could cause ghosting or peel. Any circular marks left by an earlier buffer can become a trap for dust and micro-pibbling in the paint, and the best airbrush artists treat every stroke as a conversation with the panel’s texture. A clean surface is the platform for precision, and this is non-negotiable. Primers are selected not only for adhesion but for their behavior under multiple layers of color. A primer that bites too aggressively can cause edges to lift in the clear coat later, while a primer that too softly accepts pigment can cause feathering to lose its definition. The choice of primer, along with the base coats, is part of a choreography that asks the artist to anticipate how the final layers will respond to heat, vibration, and cooling in real-world riding conditions. The actual design is often born from a sketch that travels from pencil to paper to transfer onto the curved, sometimes irregular, surface of the fairing. The transfer is rarely a direct tracing; more commonly, the artist photographs the sketch and then projects or freehands the outlines, adjusting for perspective as the piece wraps around a complex geometry. This is where the airbrush becomes an instrument of precision. Each color is mixed to a specific viscosity, each line is laid down with careful control of spray density, and each feathered edge is nurtured through gradual layering. The airbrush allows for micro-gradients that would be impossible with a spray can or brush alone. It is the feathering, the art of blending two tones so that their boundary dissolves into a soft edge, that often gives airbrushed work its ethereal quality. When a design teems with motion—think of flowing lines that curve along the fairing’s surfaces or a gradient that morphs from dark to light as the bike moves—feathering becomes not just a technique but a narrative device. A well-executed gradient can imply speed and wind, even when the bike is stationary. The texture of the paint, the way light sits on top of it, and the level of gloss all play a part in how the final piece reads to a viewer who sees the bike in close proximity and from a distance alike. Beyond technical prowess, there is a storytelling element to airbrushed artwork. A favored motif is the eagle in flight, rendered with lifelike plumage and subtle shading that gives the impression of feathers arranged in a natural pattern. The goal is to capture the creature’s energy and focus without turning the design into a literal illustration. The same spirit can be found in depictions of dragons, wolves, or other mythic beings, where the artist choreographs scales, fur, or scales of light in a way that seems almost sculptural. Nature-inspired scenes—forests, oceans, or stormy skies—are another enduring theme. These are not merely decorative scenes but immersive environments that wrap around the fairing, inviting the viewer to take a closer look at hidden details: a glint on a leaf, the ripple of a wave under the sun, or the way sunlight pierces through mist. The painter’s hand must manage not only color but the contours of the rider’s world in that moment. Some artists lean into cultural references, weaving symbols, patterns, and textures borrowed from history, art, or personal symbolism. The challenge here is to respect the source material while translating it into shapes that ride elegantly across the bike’s form. The best outcomes feel intimate and personal, yet universal enough to be admired by strangers who share an eye for detail. In all these approaches, color theory guides choices about hue, saturation, and temperature. A bold, saturated palette can convey power and speed, while cooler tones might evoke precision and calm. Warm hues can suggest danger or heat, whereas cool tones might imply calm after the ride, a sense of quiet victory. The interplay of color over the fairing’s curvature can amplify or soften the bike’s perceived mass, guiding the eye along a path that enhances the rider’s silhouette. The finishing stage—clear coating—serves not merely as a seal but as the final brushstroke that binds the entire piece together. A clear coat adds depth, enhances color richness, and protects the artwork from weather, stones, and UV exposure. The decision between a high-gloss finish and a matte or satin appearance carries its own implications. Gloss can intensify color and create a mirror-like surface that intensifies reflections from headlights and streetlights, while a matte or satin finish softens contrasts and can emphasize texture and form in a subtler way. Each option influences maintenance as well. A gloss finish tends to show scratches more readily, demanding more frequent care with polishing to preserve the pristine look. A matte finish, while more forgiving of micro-scratches, can require different cleaning techniques to prevent smudges and to maintain its even appearance. The durability of the overall piece depends on the compatibility of clear coats with the base colors and the fidelity of the pigment to temperature changes and exposure to sunlight. Airbrushed artwork on fairings is a time-intensive discipline. A full-scale piece can require days or even weeks to complete, with design development, masking, base layers, airbrush detail, and multiple clear coats all contributing to the final time horizon. The rider must appreciate that this is not a quick upgrade but a commitment to a living art form that will accompany the machine for years. The investment extends beyond time to include materials, space, and the artist’s studio environment. Proper ventilation, climate control, and dust-free conditions are essential to achieving a flawless finish. Even the smallest imperfection—a stray dust mote in a wet layer or an uneven edge along a feathered transition—can become a lasting blemish if not corrected before the final coats are applied. While the hands of the artist are central, collaboration with clients matters just as much. The rider’s vision is the north star, but the design must also respect the bike’s geometry, the rider’s riding posture, and the practical realities of wind, vibration, and heat. The process often begins with an exploratory conversation in which the artist translates a rider’s mood, story, or personal symbol into a visual language. From there, a rough concept is sketched, discussed, and refined. A color palette is defined, keeping in mind how colors will age and how sunlight will alter them over time. The choice of base color, the undercolors, and the layers of shading are coordinated so that the final artwork remains legible at high speeds and under streetlight illumination. For those who want to go deeper into the craft, there are rich resources on how-to guides that cover the full spectrum of preparation, masking techniques, and finishing options. These guides emphasize a meticulous approach: surface prep first, then base coats, then the airbrush work, and finally the protective clear coats. They also stress the importance of practicing on practice panels or smaller panels before attempting a full fairing, a wise step for anybody new to airbrushing. The availability of materials and the skill of the artist inevitably shape what a rider can expect in terms of design complexity and refinement. Some studios specialize in full-coverage murals that wrap around the entire fairing and even onto the inner panels, while others focus on more restrained, color-matched accents that harmonize with the bike’s factory lines. The spectrum runs from fully customized, hand-painted canvases to carefully curated color-matched schemes that integrate with the vehicle’s lighting and bodywork. The latter approach, sometimes labeled as color-matched factory options in the broader market, offers a sleek, cohesive finish that can still accommodate an individual touch through subtle shading and emblem placement. In any case, the artistry remains anchored in the same fundamentals: sanding, priming, precise masking, controlled layering, and a respectful approach to finishing that ensures durability and beauty over time. Inspiration for these designs can be found in a wide array of sources, from the natural world to architectural patterns, to myth and folklore, to purely abstract explorations of form. The visual library of airbrushed works is vast, and modern riders often discover inspiration online, in galleries, or through conversations with artists who treat the bike as a mobile studio. Pinterest, in particular, has become a repository of ideas where enthusiasts collect examples that show everything from dramatic color field gradients to highly detailed renderings of winged creatures and mythic beasts. The community aspect of this field is strong; riders share photos, discuss techniques, and celebrate the achievements of skilled painters. The result is a dynamic ecosystem where ideas are tested on panels, refined through critique, and ultimately realized on the road. This collaborative environment supports a broader culture of craftsmanship that values the rider’s story and the artist’s hand equally. As the practice evolves, new tools and techniques continue to emerge. Airbrush technology has advanced in tandem with paint formulations that offer improved adhesion, greater UV resistance, and longer durability in the face of temperature swings and road spray. Some artists experiment with multi-layer stencils that create crisp edges within fluid gradients, while others push the limits with ultra-fine atomization that yields micro-details once deemed impractical on curved surfaces. The result is a continually expanding set of options for achieving both precision and expressiveness. For those who crave a personal, do-it-yourself touch, there are step-by-step guides that walk beginners through the essential stages of painting fairings at home. These guides emphasize safety, proper masking, and the importance of a dust-free environment, alongside practical tips about weather, curing times, and the use of quality clear coats. They acknowledge that the final appearance hinges on discipline and patience, and they celebrate the satisfaction of turning a blank panel into a work of art you can ride with pride. Readers who consider commissioning a piece can approach the process with a clear plan: collect visual references, set a budget that accounts for both artistry and durability, and foster a collaborative dialogue with the artist about motifs, scale, and placement. The design must honor not only the rider’s personal narrative but also the bike’s physical realities, from panel transitions to the way light reflects off a gloss finish at highway speeds. In the end, airbrushed artwork on motorcycle fairings embodies a bold statement: that motion can be both mechanical and lyrical, that color can ride the wind, and that a moving canvas can invite strangers to slow down, look closely, and share in a moment of shared aesthetics. The fairing, arguably the most visible textile of the motorcycle’s bodywork, becomes a portal through which ideas travel as quickly as the machine itself. It invites the rider to participate in a living art form—one that evolves with each ride and gains a new texture whenever sunlight shifts, rain dampens, or night lights flicker along the street. For those drawn to this practice, the path forward is less about chasing a trend and more about cultivating a durable, expressive language that remains legible under the road’s changing conditions. Those who pursue airbrushed artwork know that every line, every gradient, and every highlight is a deliberate choice, aligned with a vision of speed, beauty, and personal meaning. The ride becomes not just a journey of physics and fuel but a journey of interpretation and identity, etched into the fairing’s surface through skillful airbrushing, clean finishing, and a shared devotion to the craft. For readers seeking practical footholds as they imagine their own project, one internal resource offers a gateway to a broad spectrum of fairing options, including components designed for different brands and models: Honda fairings. This catalog can help you gauge compatibility, panel shapes, and how a particular design might translate across the bike’s geometry. Engage with it to understand how a design concept might layer onto existing forms without compromising fit or function. And for those who want to explore the look and feel of airbrushed ideas beyond the perceived limits of their own bike, a wealth of visual inspiration awaits in online image collections. A compelling starting point is the collection of airbrush ideas that showcases a wide range of styles, from the hyper-real to the abstract. These images serve as a tactile reminder that the art form thrives on experimentation, patience, and a deep respect for the bike’s architecture. External resources can expand your understanding of technique and aesthetics, offering demonstrations of masking, shading, and finishing that translate well to fairing panels. For further visual exploration of airbrushed motorcycle artwork, the following resource provides a curated, image-rich reference: Motorcycle airbrush ideas on Pinterest. This online collection offers hundreds of examples that illustrate the breadth of approaches artists bring to the moving canvas, from lifelike animal portraits with feathered detail to dreamlike, softly blended landscapes that wrap around curved surfaces. As you absorb these images, consider how the artist’s choices—such as edge definition, color temperature, and the balance between negative space and painted detail—contribute to the overall impact of the design. The principle to take away is that airbrushed artwork succeeds when it respects the bike’s form while inviting viewers to look again, to notice the nuanced shading of a wing feather, or the way a mountain range appears to rise and fall with the rider’s line of sight. It is this interplay between structure and art, between speed and storytelling, that keeps airbrushed fairing designs vibrant year after year. In closing, the practice of airbrushed artwork on motorcycle fairings is a discipline that rewards patience, reverence for craft, and a willingness to translate a rider’s inner world into geometry, color, and texture. It is a collaboration between technician, painter, and dreamer, culminating in a moving canvas that travels through light, weather, and wind. The journey from blank panel to finished portrait is marked by deliberate steps, each built on a foundation of meticulous preparation, thoughtful design, and careful finishing. The resulting piece is not merely a decoration but a statement about how riders relate to their machines—the way they see themselves on the road and how they want to be seen by others who share the road’s quiet, constant motion. If you carry a vision of color and form with you as you ride, airbrushed artwork on fairings can turn that vision into a living, breathing part of your bike, a storytelling surface that moves, glows, and keeps pace with the world you travel through. For those who wish to delve deeper, the journey begins with gathering inspiration, understanding the basics of technique, and selecting the right collaborator who can translate an idea into a balanced, durable design that complements the bike’s lines while reflecting personal meaning. Voices from the studio and the road alike remind us that painting a fairing is as much about listening as it is about painting. It is about recognizing the dialogue between rider and machine, and letting that dialogue unfold across a curved, rolling canvas that accompanies every mile with color, character, and motion.
OEM-Grade Precision: How Factory Color-Matched Fairings Preserve Authenticity and Elevate the Ride
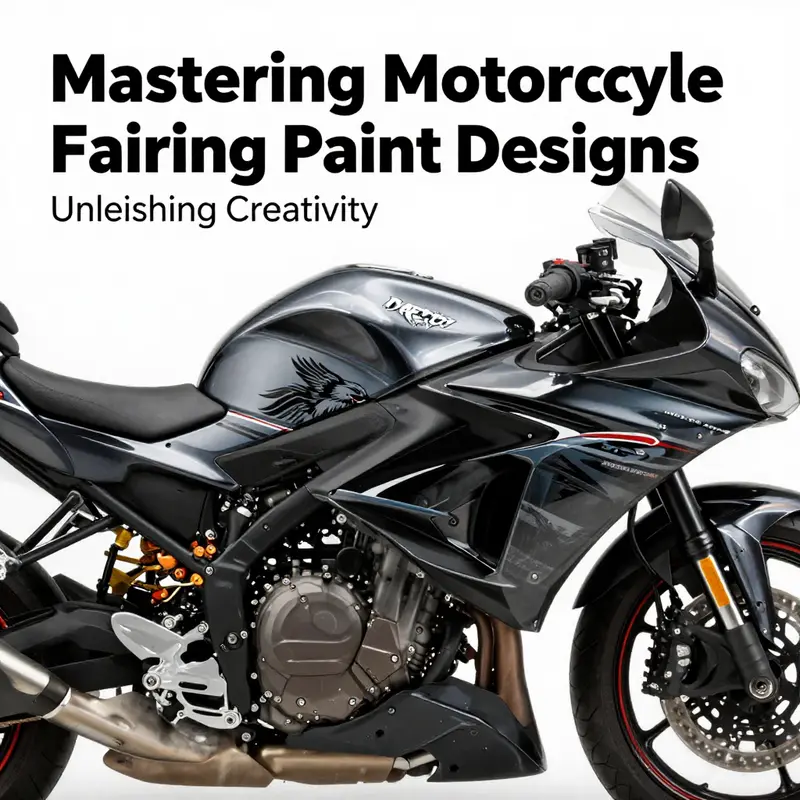
When a rider contemplates changing the look of a motorcycle, the instinct often leans toward bold graphics, dramatic airbrushed scenes, or vibrant flame motifs.\n\nYet there is a distinct, almost invisible art to factory color-matched designs that can elevate a bike’s appearance without shouting for attention. Factory color-matched fairings are engineered to blend so seamlessly with the rest of the machine that the upgrade feels less like a change and more like the bike simply arriving from the factory with an even more refined personality. This approach respects both the motorcycle’s original design language and the rider’s desire for a cohesive, authentic look.\n\nRather than introducing a new color story or a high-contrast graphic that risks clashing with the bike’s lines, color-matched components are built to honor the silhouette, the lighting nuances, and the subtle tonal shifts that come with a mature paint system. The result is a visual harmony that translates into a refined stance on the road, a look that appears as if it were always part of the bike, not an aftermarket add-on slapped onto its sides.\n\nThe core promise of factory color-matched fairings rests on precise color replication. This precision starts with the exact factory paint code, a numeric fingerprint that distinguishes shade, depth, and the nuanced interplay of metallic or pearlescent particles. When a rider chooses replacement panels—inner fairings, full kits, or partial components—the color code is not just a suggestion but a specification. Authorized dealerships and certified paint specialists use advanced color-matching technology to recreate that code with automotive-grade paints that resist weathering, UV exposure, and the gradual fade that accompanies sunlit hours on the open road.\n\nThe process is more than a cursory color check. It often involves spectrophotometric analysis, where a sensor measures the way light reflects off the original surface, translating it into a digital recipe that can reproduce the same hue, reflectivity, and depth on the new panel. The goal is to achieve an invisible seam where the new piece meets the existing fairing—no telltale edge, no mismatched gloss, no visible difference in tint under daylight, streetlight, or highway glare.\n\nIt helps to picture the color-matching workflow as a careful collaboration between chemistry and optics. Automotive-grade paints bring resilience and uniformity that typical consumer paints may lack. The base color, the metallic or pearl layers, and the clear coat must all align in thickness and composition with the original build. This alignment is essential for consistency across the surface, especially on panels that face different angles of light or that sit in contact with airflows at varying speeds. The result is a seamless surface that reflects light the same way as the rest of the bike, creating an impression of continuity rather than a panel swap.\n\nTo the observer riding past or stopped at a cafe, the bike appears as if it sprang from the factory with the replacement parts already in place, a whisper of continuity that strengthens the bike’s narrative rather than disrupting it.\n\nIn practice, the scope of factory color-matched options extends beyond a single color. It encompasses the full spectrum of components that can be replaced or upgraded without breaking the visual cadence. Inner fairings, fairing caps, media doors, and even small trim pieces can be color-matched so they visually disappear into the bodywork when viewed from a distance, yet reveal their attention to detail up close. The seamlessness of this approach is particularly valuable for riders who mix and match components from different model years or for those who swap to aftermarket panels that carry the same color language as the factory finish. The aim is not just color accuracy but visual integration: the alignment of curves, the way the paint meets the edge of a panel, the way the gloss catch lights across a fairing’s sculpted planes. When done well, the result is a machine that reads as a single, cohesive surface, where every segment seems to belong to a single design brief rather than to separate manufacturing runs.\n\nA key advantage of color-matched solutions lies in their impact on resale value. A bike that retains a uniform, factory-like finish reduces the perception of a compromise between aftermarket parts and the original bodywork. Potential buyers often read a consistent color story as a signal of care and attention to detail, not only in aesthetics but in maintenance practices. When a fairing kit or inner fairing aligns perfectly with the bike’s original finish, questions about fit, weather resistance, and long-term durability tend to recede. The finish itself is part of the narrative—how it holds up under rain, sun, and road grime becomes a visible testament to the investment in quality. Even in markets where styling trends move quickly, a color-matched presentation of OEM standards offers a timeless clarity: the bike looks purposeful, not trendy, and the owner’s choice feels deliberate rather than impulsive.\n\nThe installation journey for color-matched fairings is an important chapter in the story of authenticity. While some riders prefer DIY projects that push the envelope of customization, color-matching is an area where professional installation offers measurable benefits. The process involves more than simply swapping panels. It requires careful alignment of mounting points, calibration of mounting hardware, and sometimes adjustments to wiring harnesses for features embedded in the fairing, such as integrated lighting or sensor housings. Even small misalignments can alter the perception of color depth at certain viewing angles, so precision is essential. Authorized service centers bring a tested sequence to the job: verify the paint code, check the fit across the cradle and mounting points, adjust gaps and seams to minimize visible lines, and finally apply a protective clear coat that matches the factory’s gloss level. This last step is critical because the clear coat not only adds depth and durability but also acts as a final buffer against micro-scratches and environmental exposure. The result is a surface that ages with the bike in a uniform way, a feature that protects the integrity of the color match as the bike travels through years of use.\n\nOf course, no discussion of color-matched designs would be complete without acknowledging constraints. The palette available through factory color-matched programs is typically governed by the manufacturer’s current lineup and reserved for official parts directly associated with the model. This means that while the look can be impeccably faithful, it is also subject to the brand’s design language and production realities. Riders who pursue color-matched pathways should anticipate availability limitations, especially if they are restoring a vintage model or pairing parts from multiple model years. In those cases, the color-matching process demands more nuance: sometimes technicians must approximate a close match rather than an exact replication, trading absolute fidelity for a visually coherent outcome. The trade-off, in many cases, is acceptable because the final appearance remains aligned with the vehicle’s character and proportions. And there is no denying the sense of confidence that comes with knowing every upgraded panel communicates with the same high standards of finish and protection.\n\nDurability is another pillar in the rationale behind factory color-matched designs. Automotive-grade paints are formulated to resist UV fading, chemical exposure from road grime, and the wear of daily riding. The layers, from the base coat through to the top clear, are engineered to maintain color depth under a range of temperatures and lighting conditions. A factory-standard clear coat not only seals in color but also enhances scratch resistance and sheen longevity. This is particularly meaningful for inner fairings and edge areas that may be subjected to more routine handling and contact during maintenance and cleaning. The finish’s resilience becomes part of a broader philosophy of routine care: washing with gentle cleaners, avoiding harsh solvents that could compromise the clear layer, and applying protective wax or coating that can preserve gloss without altering the color balance. Riders who invest in color-matched design often find that their maintenance routine naturally revolves around preserving this synergy, reinforcing the sense that the bike’s look is a carefully curated composition rather than a series of quick fixes.\n\nFrom a design perspective, the integration of color-matched parts invites riders to think about how color interacts with form. The fairing is not a flat panel slapped onto a curved surface; it is a shape that catches light, creates shadows, and communicates motion even when the bike is at rest. In color-matched configurations, the paint’s tonal depth becomes part of the sculpture. Subtle shifts in hue across panels can accentuate the bike’s lines, highlighting the sculptural work that designers put into the fairings. The effect is perceptual as much as it is aesthetic, guiding the eye along the bike’s silhouette and linking the fairing to the chassis, the tank, and the rider’s lines of sight. This is the essence of a well-executed color-matched design: it respects the machine’s architecture while offering a refined, almost architectural, finish that invites closer inspection.\n\nFor riders contemplating this path, practical steps can help translate concept into a tangible, satisfying outcome. Start by identifying whether your goal is a near-invisible panel replacement that preserves the factory look or a bold, yet coherent, color statement through color-matched kits. Gather the factory paint code if possible, or work with a certified technician who can retrieve it through the vehicle’s documentation. Request a color-match sample or swatch from the shop before any panels are painted; seeing the sample under different lighting conditions can reveal how the color shifts with the environment. Ask for documentation that details the paint system used, the expected gloss level, and the number of coats applied. Confirm that the installation team has access to the same color-matching protocol for all components involved and that they can demonstrate a plan for aligning the new pieces with the bike’s geometry. A transparent dialogue about surface preparation, masking techniques, primer selection, and the sequence of steps to maintain seam invisibility helps set expectations and reduces the chance of surprises after the panels are mounted. In short, the best outcomes arise when the rider and the shop approach the project as a partnership between design integrity and technical execution, where every choice serves the shared aim of a seamless, authentic appearance.\n\nAs the community of riders continues to explore fairing paint designs, one point remains consistent: factory color-matched options offer a pathway to a polished, OEM-consistent look without compromising authenticity. They honor the original aesthetics, respect the engineering precision that underpins modern motorcycles, and deliver a finish that ages gracefully as the miles accumulate. For those who want a subtle, sophisticated upgrade that preserves the bike’s inherent character, color-matched fairings deliver a compelling balance of art and engineering. And for riders who crave a more dynamic or personal expression, these factory-backed paths can still serve as a stable base from which to pursue further customization, whether through upgraded lighting integration, refined graphic accents in the future, or carefully orchestrated accessories that complement the color story rather than overpower it. In the end, the choice to pursue color-matched fairings is a choice about continuity—continuity with the bike’s original design intent, continuity with the rider’s appreciation for quality, and continuity with the long arc of ownership where each mile on the odometer becomes part of a carefully curated visual narrative.\n\nFor riders seeking a direct route to compatible options within a broader catalog, a practical place to start is to explore manufacturer-approved or OEM-inspired lines that align with the model’s fairing architecture. Such catalogs help ensure that the chosen panels align with the frame geometry, mounting points, and electronic integrations that define modern sport and touring motorcycles. This approach minimizes fitment surprises and supports a smoother transition from stock to color-matched components. If you’re curious about specific catalog offerings, you can browse the Kawasaki fairings collection to see how panels are organized by model and year, which can illuminate how color-coded parts are presented across different lines. This visit is not a commitment but a chance to visualize how the color-matching philosophy translates across the catalog and lays a foundation for a future upgrade strategy. For added context and practical reference, see the Kawasaki fairings collection here: https://ultimatemotorx.net/product-category/kawasaki-fairings/.\n\nIn the broader ecosystem of design and customization, factory color-matched designs represent a careful balancing act between authenticity and innovation. They provide a believable, faithful appearance that respects the bike’s original character while offering a path toward more refined personalization. The process demands meticulous attention to color science, material quality, and precise installation. It rewards riders who value a cohesive, high-quality finish and who understand that the strongest aesthetic upgrades are those that seamlessly integrate with the machine’s existing language. This is the ethos behind OEM-grade color matching: it is not merely about color. It is about texture, depth, alignment, and the quiet confidence that comes with a finish that looks and performs as though it grew from the factory’s own design brief. When done well, color-matched fairings become more than an exterior upgrade. They become a quiet, enduring statement of care, of craft, and of the rider’s commitment to riding a motorcycle that looks, feels, and performs with a singular, unmistakable integrity.\n\nExternal reference for authentic OEM color-matched parts, which offers further context on how manufacturers approach color fidelity and long-term durability, is the official color-matched parts resource. It provides additional insight into the standards, processes, and expectations that shape factory-grade finishes across models and years: https://www.harley-davidson.com/en_us/accessories/vehicle-parts/color-matched-parts.html
Brushstrokes on Alloy: A Practical Odyssey in DIY Motorcycle Fairing Paint Designs
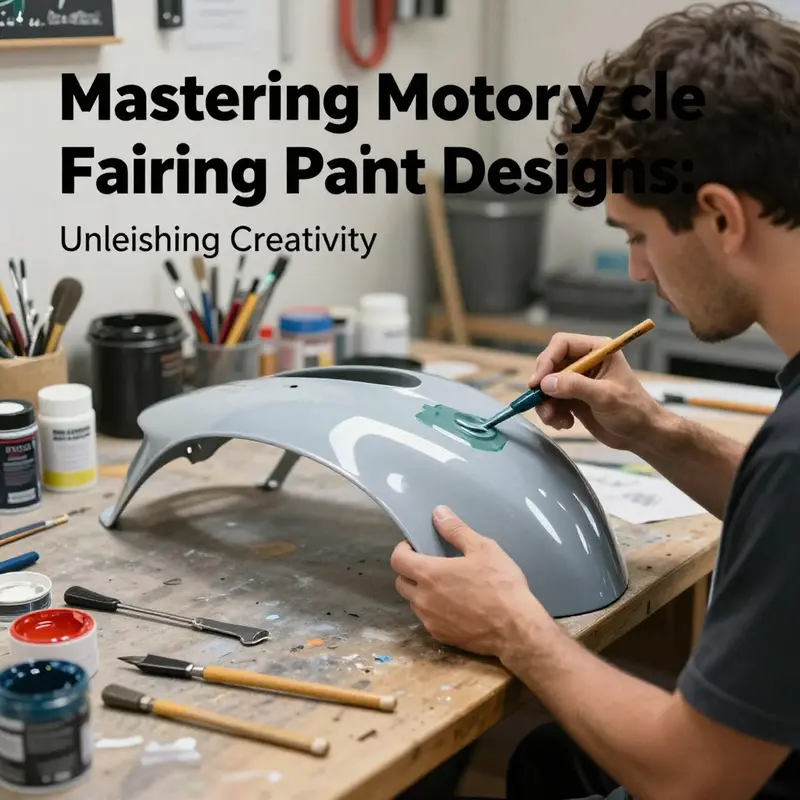
When a rider contemplates transforming the look of a motorcycle, the surface most people notice first is the fairing. It is more than a panel; it is a canvas that wraps around the rider and the machine, a curved plane where color, light, and line meet the road’s velocity. DIY fairing paint design is a negotiation between desire and discipline. It invites you to dream up a motif, test it against curves and angles, and then translate that idea into a durable finish that can withstand rain, sun, and the occasional stone. The process blends creativity with preparation, a sequence that rewards patience as much as skill. Rather than merely applying color, the goal is to build a reliable, repeatable process that can yield a professional look from a home shop or a rented spray booth. The key is to treat each stage as a separate craft while keeping the bigger arc in sight: a cohesive, enduring design that fits the silhouette of the bike and the rider’s personality.
A practical approach to painting fairings begins with a mindset tuned to craft. The surface must be honored as a partner, not a hindrance. Preparation is the quiet, stubborn work that makes whatever follows possible. Cleanliness is not a superficial step; it is the foundation of adhesion and clarity. Oils, waxes, or fingerprints left on the surface can undermine the smoothness of a final coat and compromise the depth of color. Start by removing any removable hardware and giving the panels a thorough wash with a degreaser that leaves no residue. The intent is not to scrub away the last mile of shine but to reveal a surface that is truly receptive to primer. Only then can you move to sanding, the step that converts a glossy, imperfect surface into a uniform field where edges meet curves with predictable transitions. Light abrasions with fine-grit paper are enough to create a micro-roughness that the primer can bite into. The goal is not to create a rough finish but to lay a gentle, even texture that helps subsequent coats lay down evenly.
Priming is the bridge between the bare fairing and the painted face you want to project. A high-quality primer, chosen to match the topcoat system you plan to use, is essential. It seals porosity, provides a uniform tone for color perception, and smooths out minor surface irregularities that sanding can’t fully erase. The primer’s job extends beyond adhesion; it also influences color accuracy and the ease with which you can achieve sharp edges and clean lines. After the primer dries, a final light sanding can remove any remaining pinholes or stippling, leaving a ready canvas for masking and painting. Here the importance of masking becomes apparent. The lines you want your final design to carry—whether they are radiused fades, crisp geometric shapes, or delicate borders—depend on clean, sharp borders. Masking tape and parchment paper act as your design restraints, and the quality of your masking determines how confidently you can approach the next steps. It is an act of design as much as it is of technique, because every edge you define with tape becomes a line you will later see in three dimensions on the bike.
With the surface prepared, the painting process unfolds as a careful balance between technique, environment, and the design’s demands. The environment matters. A spray booth or a well-ventilated outdoor space free from gusts and dust makes the difference between a field of specks and a smooth, cohesive field of color. Dust is an uninvited collaborator that always seems to appear at the wrong moment; controlling it requires a clean work area, proper filtration, and a momentary pause when the air is unsettled. In a DIY setting, you often learn to micro-manage conditions: temperature, humidity, and airflow all influence how paint levels settle, how edges crisp up, and how long you have before the coating begins to dry to a point where it resists adjustments. The choice of paint system matters as much as technique. Base coats provide the primary color and depth, while mid-coats can add shading or metallic depth. Clear coats seal the work and add gloss, protection, and a durable, UV-resistant finish. The layered approach—primer, base color, any mid-tones or gradients, then clear coat—creates a multi-dimensional effect that a single color cannot achieve.
Design options in DIY painting range from precise stencils to full airbrushing and even hand-painting with careful brushing and careful color blending. A stencil can guide you to reproduce a motif with repeatable accuracy, such as a stylized emblem or a geometric motif that follows the fairing’s contours. Airbrushing, by contrast, opens up the possibility of subtle gradients, feathered edges, and soft transitions along the curves. If airbrushing isn’t available, a skilled hand can still deliver impressive results with high-quality automotive enamel and a patient hand for shading and edge work. When you choose your design language, consider how it will read from a rider’s eye level on the road and how it interacts with the bike’s lines and reflections. A flame motif, for example, can emphasize motion and heat; a geometric motif can emphasize precision and symmetry; a soft gradient can evoke depth and mood. The goal is to create a visual story that remains legible and cohesive across the bike’s many angles.
To execute a custom design, a practical workflow often begins with a clear plan. Draft your concept on paper, then translate it into measurements on the fairing. A light pencil guide on the primed surface can serve as a reference when you begin masking and painting. If you are using stencils, ensure they are securely anchored to prevent creeping during spray passes. The ideal approach is to test colors and blend zones on a spare panel or a test piece that mirrors the curvature of the actual fairing. This practice gives you a chance to refine your color choices, adjust line widths, and calibrate your airbrush or spray gun settings before committing to the real panel.
The color phase is where your design begins to come alive. For a bold, enduring look, you might choose a base color with a well-chosen clear coat to maximize vibrancy. For more complex effects, color layering and translucent mid-tones can create a sense of depth that reads as three-dimensional even on a flat surface. Gradients can be achieved with careful masking and controlled airbrushing, allowing colors to blend seamlessly along a fade from high saturation to a softer edge. When planning gradients, consider the transition points and how they align with the fairing’s natural seams and features. You want the gradient to feel intentional, not accidental, with edges that become a deliberate element of the design.
Masked borders and crisp lines demand patience. The edges where one color ends and another begins are the visual anchors of the design. These lines must be clean and sharp, which is why some painters seal lines with a secondary layer or a narrow masking tape boundary. The moment of decision—whether a line should be perfectly straight, gently curved, or stepped to echo the fairing’s contour—defines the design’s tone. For complex motifs, multiple masking steps might be necessary. Each masking layer is a commitment to precision because any drift will ripple into misalignment once the paint dries. It is better to take a little extra time on edge work than to chase inaccuracies after the fact.
As the color and lines dry, attention shifts to curing. Curing is not mere drying; it is the chemical process by which the paint reaches its ultimate hardness and resistance. Adhere to the manufacturer’s instructions for drying times and temperatures, and give extra time if your shop environment is cooler or more humid. Rushing curing can trap solvents, causing micro-mist or solvent pops that mar the surface. Once the color sets, a light color-sanding with a very fine grit can help smooth minor imperfections before the clear coat goes on. In many cases, a second or even third clear-coat pass is appropriate to build depth and durability, followed by a final color-sanding and polishing sequence that reveals a glass-like finish. The polish stage is not cosmetic fluff; it is essential for removing minor dust nibs and leveling the final surface so that light reflects evenly, giving the design its proper legibility and luster.
Protecting the finished work is as important as achieving it. The clear coat acts as the armor against UV damage, weather, and road grit. It should be chosen to match the base and the color system so chemical compatibility is maintained across layers. A properly applied clear coat should be built up in multiple very thin coats, with a careful spray pattern to avoid buildup that can cause orange peel or runs. After curing, the panel can be color-sanded and buffed to obtain a flawless surface. A light, high-quality polish can further heighten gloss and clarity, but the key is to avoid over-polishing that might begin to wear through the clear layer over time. This last step is where patience pays off; quick-fix tactics rarely yield lasting results, and the best finishes emerge from controlled, deliberate refinement rather than hurried, last-minute adjustments.
Maintenance after completion is the practical discipline that keeps a DIY paint job from degrading prematurely. Gentle washing with mild soap and water prevents chemical attack from harsh cleaners that can dull a finish. Avoid abrasive scrubbers that can scratch or lift edges of your masked designs; instead, use soft cloths and avoid aggressive scrubbing near fine lines. Periodic inspection for chips and micro-cracks allows you to address issues before they spread. Small touch-ups—carefully matched paint or a tiny amount of clear coat—can prevent minor flaws from becoming major problems. If you notice color drift or fading, don’t assume the finish will resolve itself. Sometimes a quick repaint of small sections is more practical than attempting a full panel redo. The objective of maintenance is to preserve the integrity of the work while keeping the aesthetic alive, because a design that loses its crispness or glow reads as though it has aged out of its belt of time.
The DIY painter’s journey also has a narrative element. It is a voyage from concept to execution, and then to stewardship. The decisions you make about color, line, and texture are choices about how you want the bike to speak when it rides by at speed, how it looks in the garage when the bike is at rest, and how a crowd might read the finish from various angles. Your process should be repeatable and scalable, so that you can reproduce it on future panels or modify it for new schemes with confidence. A comprehensive approach to design keeps you from chasing trends that won’t endure the bike’s long life on the road. It is not about the loudest color or the most complex motif; it is about a balance between expression and resilience, a personal signature that can weather weather and time while still looking fresh and intentional.
As you consider the path forward, you may find yourself seeking additional inspiration or practical guidance. A robust DIY guide can be a reliable companion, offering step-by-step procedures, inventiveness in design, and practical tips on surface preparation, masking accuracy, and coating durability. For readers exploring this path, a widely regarded resource provides a thorough walkthrough that complements the discussion here with concrete, real-world advice. The resource emphasizes a patient, methodical approach to painting fairings—an ethos that aligns with the principles described above. If you want a direct pointer to a complementary tutorial, the following external guide can be a valuable reference as you plan your first or next project: https://www.motorcycle.com/diy-motorcycle-fairing-paint-designs/.
For those who want to broaden their options beyond a DIY-only route while still embracing a hands-on ethos, it is worth considering how a DIY finish can work with components that are designed to be color-matched or coordinated with a broader aesthetic. Within the broader ecosystem of fairing customization, there are many shells and panels designed to integrate with a wide range of color schemes. If you are sourcing replacement or aftermarket components to harmonize with your paint work, the wide catalog of parts offered in various fairing categories can support a cohesive presentation. A practical starting point is to explore a dedicated fairings category for your motorcycle’s make and model, which can provide shells that pair well with customized surfaces while preserving fitment and structural integrity. To explore this, you can visit the Honda fairings category, which offers a broad range of primary panels and accessories that can be repainted or integrated with a personalized scheme. The category serves as a useful reference point for planning color-matched accents and ensuring your new look remains balanced with the bike’s fundamental geometry. Honda fairings.
The DIY path to fairing paint designs is not a solitary journey. It is a conversation between your concept, your skills, and the bike’s physical form. The success of a project like this rests on the fidelity with which you translate your imagination into a stable, reproducible process. It requires you to anticipate the tactile experience of the finish under road conditions—the feel of the gloss, the resilience to road debris, and the way light plays along the surface as the bike moves. It also demands a degree of restraint. A bold concept can be ruined by misapplied layers or a lack of patience at critical moments. The most enduring designs are those that command attention through composition, precision, and a clear sense of purpose rather than sheer flamboyance. That is the essence of painting fairings by hand: you are not merely applying color; you are shaping perception and reinforcing the rider’s relationship with the machine’s silhouette.
In closing this chapter, the DIY approach to motorcycle fairing paint designs invites you to treat your bike not as a static object but as a dynamic platform for personal storytelling. The fairing becomes a narrative surface, inviting dialogue between color, line, and light—an invitation to ride with confidence and leave a mark that is unmistakably yours. The steps outlined here—careful preparation, thoughtful design, disciplined masking, patient layering, and deliberate finishing—provide a reliable map for that journey. They remind you that the road not only tests a design’s durability but also reveals the care invested in its creation. The result is more than a new coat of paint; it is a statement about how you connect with your bike, the road ahead, and the craft of painting itself.
Final thoughts
Motorcycle fairing paint designs are a versatile means for riders and businesses to express individuality and creativity. By embracing airbrushed artwork, selecting factory color-matched options, or engaging in DIY projects, motorcycle enthusiasts can significantly enhance the visual impact of their machines. Whether you are a business owner looking to offer services or someone who wishes to personalize their bike, each chapter offers invaluable insights. Ultimately, the right fairing paint design does more than enhance aesthetics; it creates a narrative and connection that resonates with riders and reflects their unique journeys.