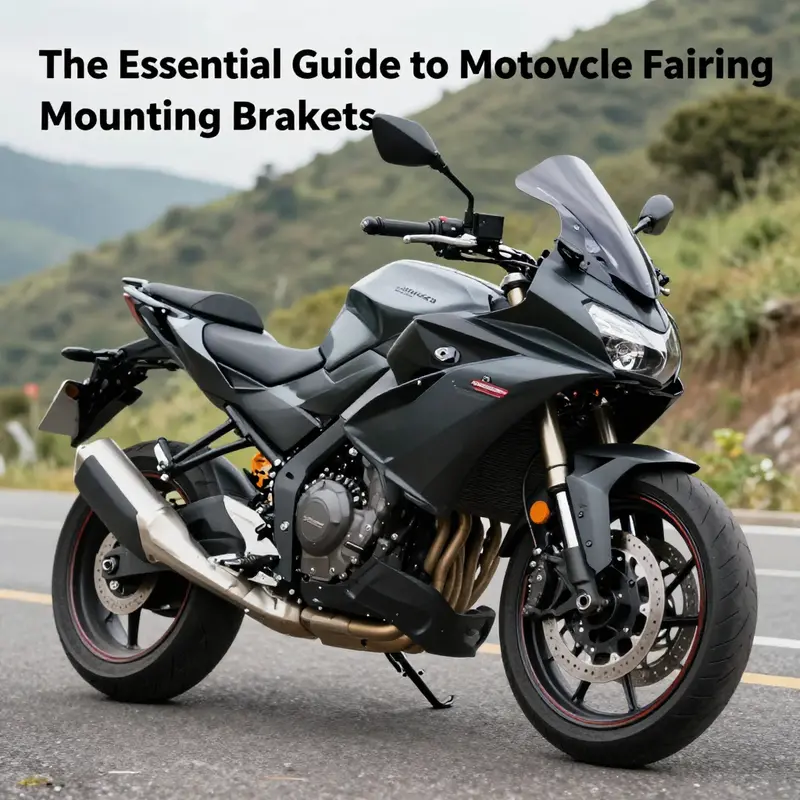
Motorcycle fairing mounting brackets serve a crucial function in ensuring that fairing panels remain securely attached to the motorcycle’s frame. These components not only enhance the bike’s aesthetics but also play a significant role in performance and rider safety. In an industry where precision is vital, understanding the role and importance of these brackets is indispensable for business owners aiming to stock quality motorcycle parts. This article will delve into the vital functions of fairing mounting brackets, the materials and design considerations that impact their effectiveness, and best practices for installation and maintenance, ensuring that you can provide your customers with the best solutions available.
Securing Speed: The Unseen Architecture That Elevates Performance and Safeguards Every Ride
The aerodynamic silhouette of a motorcycle is not just about a sleek shell or a stylish line; it is the result of a carefully engineered partnership between the body panels and the structural frame that anchors them. The fairing, as riders know, is more than cosmetic armor. It is an aerodynamic intervention, a shield against wind fatigue, and a dynamic element that must stay steadfast at speed and in variable weather. The mounting brackets that connect these panels to the frame perform more than a simple fastening role. They act as the unseen spine of a system designed to transmit loads, dampen vibration, and preserve the intended airflow. In a well-tuned machine, the brackets and the panels they secure behave as a single, harmonious unit. Any misalignment, looseness, or material failure can ripple through the ride, increasing drag, amplifying noise, and, in worst cases, undermining safety. Reading the road through the geometry of brackets, alignment, and attachment points reveals how closely engineering decisions touch rider experience, performance, and safety.
When a rider accelerates toward the horizon, the fairing’s job is to shape the air into a smooth, low-turbulence profile. The bracket system must therefore resist the kinds of forces that threaten that profile: the gusts of wind, the yaw and pitch moments from high-speed maneuvering, and the relentless tick of road-induced vibrations. A robust mounting system is not merely a bulkhead of metal and plastic; it is a precision instrument. It keeps the panels flush against the frame, maintains the intended gap geometry, and ensures that the surface continuity—the very thing that reduces drag and wind noise—remains intact across a wide range of speeds and accelerations. The bracket’s integrity translates directly into a more stable front end. When the fairing remains secure, the rider experiences calmer handling and more predictable steering feedback. A clean aero profile reduces buffeting around the helmet and shoulders, which in turn contributes to rider comfort and endurance on long rides or during competitive laps where every marginal gain matters.
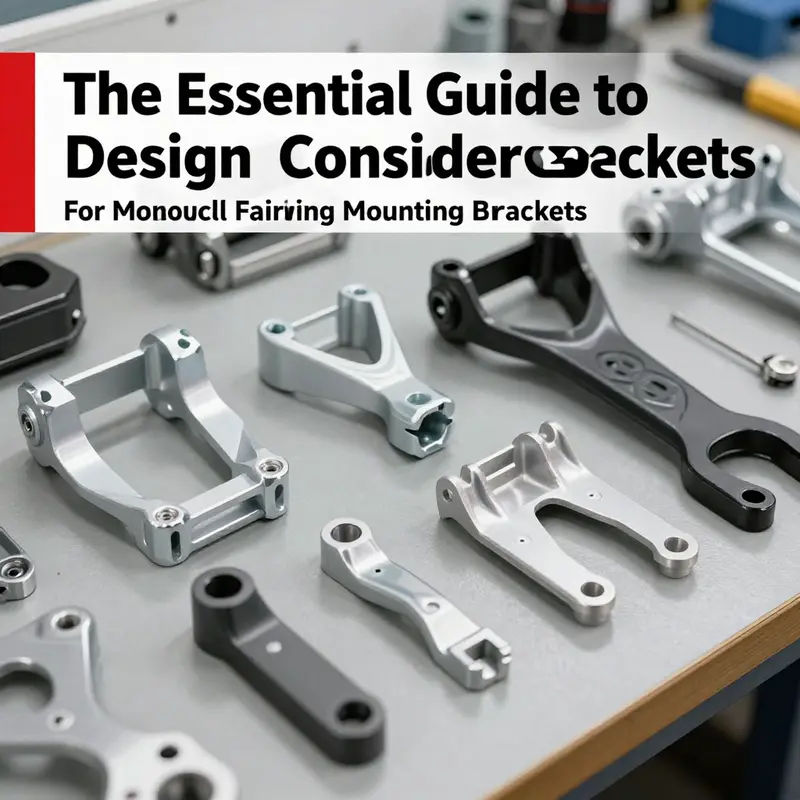
In practice, the materials selected for fairing mounting brackets reflect a balancing act among strength, weight, stiffness, and durability. Common choices include iron, ABS plastic, and aluminum, each bringing distinct advantages to different applications. Iron, with its high rigidity and load-bearing capacity, can anchor heavy or high-stress fairing assemblies with confidence. It provides a robust backbone against the bending and twisting moments that arise when a rider encounters road irregularities at speed. In contrast, ABS plastic offers a lighter, more forgiving substrate that can flex slightly without cracking when exposed to temperature changes or minor impacts. Its compatibility with a wide range of fairing materials makes it a popular choice for kits designed to integrate with commonly used panel polymers. Aluminum strikes a middle ground, delivering excellent stiffness-to-weight ratio and strong corrosion resistance. The choice among these materials often reflects the intended use case: a sport-focused setup may lean toward aluminum for weight savings; a touring configuration might favor iron’s durability where the framework remains visible to a higher degree of stress; and certain OEM or aftermarket kits may combine materials to optimize both rigidity and weight.
A typical mounting arrangement is tailored to the structural realities of the motorcycle. In many configurations, the fairing brackets attach to the frame or engine mounts, creating a direct path for loads to travel from the fairing to the chassis. This direct transfer is critical because it reduces the likelihood that a panel’s weight or aerodynamic forces will be absorbed by adjacent components or by the bracket’s own joints. The arrangement must also accommodate precise alignment, ensuring that the front fairing lines up with the headlight, the windscreen, and the side panels to form a cohesive aero envelope. A well-aligned system minimizes gaps where air can swirl and separate, which would otherwise create drag spikes and wind noise. The aesthetic and functional synergy extends to the color and finish options. Black is a common choice because it tends to blend with the bike’s overall appearance and can help disguise minor imperfections or mounting hardware that becomes visible under certain lighting. Yet, the choice of finish is rarely a mere cosmetic preference; it often signals the intended environment for the bracket—whether it’s exposed to road spray and corrosion, or shielded within a fairing cavity—and can influence maintenance routines.
The engineering of mounting brackets is inseparable from the broader philosophy of reliability in motorcycle design. A bracket that is overbuilt for the ride scenario can add unnecessary weight, increasing unsprung mass and slightly altering handling characteristics. Conversely, a bracket that is underdesigned risks fatigue failure, cracks at welds or fastener points, or even detachment of a panel during a cornering maneuver or a sudden gust. These failure modes are not theoretical musings; they are realities that species of riders encounter, underscoring the essential importance of adherence to manufacturer specifications and vetted installation procedures. Therefore, riders and technicians are encouraged to consult official documentation or trusted retailers for fitment guidance. Doing so provides a map of which brackets are designed to attach to the frame versus to engine mounts, and which fairings are compatible with certain mounting geometries. In addition, it aligns expectations with the service intervals, torque specifications, and recommended fastener materials that preserve the bracket’s performance over time.
A crucial dimension of the bracket system is its compatibility with the entire fairing ecosystem. Fairings come in a multitude of shapes, thicknesses, and attachment patterns. Some kits are designed for rear full fairings, with mounts that anchor behind the cylinder to secure the lower sides of the panel. Other configurations involve direct-to-frame or engine-mount connections that prioritize a clean, aerodynamic silhouette around the fuel tank and front wheel. In each case, the bracket must harmonize with the chosen panels to maintain panel-to-panel gaps and to ensure that the flush lines between panels stay consistent through the full range of steering lock and motion. The engineering intent is not to complicate the installation but to simplify it, delivering a system that a skilled technician can assemble with predictable outcomes and a rider can rely on under the stress of high-speed riding or adverse weather.
From the rider’s perspective, the bracket system’s impact is felt in several subtle, but meaningful, ways. Aerodynamics benefits translate into measurable gains in top-speed potential and fuel efficiency, particularly on sport-oriented builds where every drag coefficient reduction translates into seconds or fractions of a mile per gallon. Stability, too, is a palpable outcome. A firmly mounted fairing—one whose alignment remains stable through vibration and wind pressure—reduces flutter and allows the front end to track true through sweeping turns. The sensation of a secure, quiet front end fosters smoother steering inputs, less mental distraction, and a greater sense of control in the saddle. These effects compound as speed increases or as ambient conditions degrade. When rain pelts the sequence of panels or a crosswind collapses from a highway shoulder, the bracket system’s rigidity and reliability can be a critical safety feature, helping to prevent sudden panel movement that could disrupt steering or obscure the rider’s line of sight.
The safety dimension extends beyond the immediate handling and control of the motorcycle. A robust mounting system is, in effect, a protective measure against panel detachment. If a fairing comes loose, it can create unpredictable drag characteristics, snag on the wheel or moving components, or strike the rider’s leg or knee in a high-speed vibration event. Brackets designed with adequate margin for endurance, including fatigue resistance and proper stress distribution, help ensure that the fairing remains in place through the cycle of acceleration, deceleration, and cornering loads. They also contribute to the overall front-end stiffness, which plays a role in how the motorcycle resists impact vibrations and how well the bodywork remains aligned with the rider’s ergonomic position. In all these respects, the mounting brackets do not merely support the fairing; they participate in the rider’s sense of confidence and the machine’s tactile predictability under diverse riding conditions.
To navigate the realities of installation and maintenance, it is essential to keep a few guiding principles in focus. First, installation must follow manufacturer specifications to the letter. This includes using the recommended fasteners, ensuring correct torque values, and validating that the fasteners are captured with the appropriate thread-locking or anti-seize protocols as prescribed. Second, the geometry of the mounting system must be checked in multiple axes. A small misalignment at the bracket level can translate into a noticeable misalignment at the panel edges, a gap that looks uneven, or a panel that becomes difficult to seat properly. Third, ongoing inspection is a non-negotiable habit. Brackets and fasteners should be examined for signs of corrosion, cracking, or loosening—especially after off-road use, heavy braking into corners, or repeated high-load events. Quick checks and periodic re-torquing can extend the life of the mounting system and preserve ride quality.
In the broader landscape of motorcycle engineering, mounting brackets sit at an intersection of aerodynamics, structural engineering, and rider comfort. They embody the practical wisdom that the best aerodynamic design is not a single component but an integrated system. A fairing that is optimized in isolation can underperform once mounted if the bracket geometry is misaligned or insufficiently stiff. Conversely, a bracket system conceived with a comprehensive view of the fairing’s role in aerodynamics can unlock smoother airflow, quieter operation, and a more stable ride. The chapter’s discussions echo a common thread across high-performance engineering: performance is not the result of one ideal part but of a carefully engineered ecosystem in which every connection matters.
For riders who are delving into customization or replacement work, the message is clear. Do not assume interchangeability between brackets and fairings without a thorough fitment assessment. The mounting system is not a generic interface; it is purpose-built to transfer loads in a way that preserves both the aero profile and structural integrity. In practice, this means verifying compatibility with the selected fairing kit, confirming the bracket material and thickness suit the expected loads, and ensuring that the attachment points align with the frame or engine mounts as designed. If a bracket kit promises a straightforward installation, that promise should be validated by the accompanying documentation, which typically includes a diagram of correct alignment, torque values, and any required shims or spacers. A measured approach to installation—one that prioritizes precise alignment, secure fasteners, and periodic inspection—yields the most durable, predictable performance from the fairing assembly.
The knowledge embedded in official technical documentation provides a reliable compass for both technicians and seasoned riders. These resources detail the exact interfaces, the recommended hardware, and the allowable ranges of motion and load. They serve as a reminder that what seems small—the bracket’s position, the gap between panels, the precise seating of a fastener—can cascade into meaningful differences in how the bike cuts through air, how the front end responds to gusts, and how much noise permeates the cockpit. In this light, brackets are not ancillary accessories but essential elements of the motorcycle’s aerodynamic and structural DNA. The results are tangible: more efficient airflow, steadier handling, and a safer, more confident riding experience across the many miles a rider may traverse.
These insights are not merely theoretical. They are reflected in the careful engineering and documentation that accompany fairing mounting systems. They emphasize a clear message to riders and shops: invest in proper fitment, respect the manufacturer’s guidelines, and value the bracket as a critical system component. When a rider looks at a line of brackets, the decision should consider not only the weight and aesthetics but also the stiffness, corrosion resistance, mounting geometry, and compatibility with the selected fairing panels. The ultimate objective is a cohesive, high-performance aero package that remains secure under diverse conditions and contributes to a safer, more comfortable journey on every ride.
Technical references and manufacturer guidelines exist to support this aim. They provide the concrete measurements, the recommended escape routes for misalignment, and the cautions that should accompany any attempt to modify the mounting system. By treating these sources as living documents—updated with new fairing philosophies, materials, and mounting strategies—riders and technicians can maintain the integrity of the entire aero assembly over the life of the bike. In the end, the height of performance and safety is achieved not by a single dazzling panel but by the quiet, dependable work of the mounting brackets that hold the dream in place and let the machine breathe with confidence at any speed.
External reference: official technical manuals outlining fairing mounting systems and installation guidelines provide a comprehensive framework for understanding how brackets contribute to both performance and safety. official technical manuals
From Alloy to Aerodynamics: Materials and Design Principles Behind Motorcycle Fairing Mounting Brackets
The fairing of a motorcycle is more than a cosmetic shell; it is a structural interface between the rider, the machine, and the environment. The mounting brackets that hold these panels in place are unsung components whose design governs everything from aero efficiency to long-term reliability. When a rider slices through wind at highway speeds, the fairing brackets endure a complex blend of forces: steady loads from the weight and wind pressure, transient shocks from bumps and micro-vibrations, and environmental challenges that change with weather and temperature. In such a context, materials choices and design strategies are not ancillary concerns but core determinants of performance, safety, and upkeep. A thoughtful approach to bracket design starts with the realization that the bracket is not just a piece of hardware. It is a carefully tuned link in an assembly that must stay aligned, protect the fairing’s integrity, and preserve the bike’s aesthetic and aerodynamics under a wide range of conditions.
Material choice for fairing mounting brackets is driven by a triad of requirements: strength, stiffness, and resistance to the elements; weight and manufacturability; and compatibility with the surrounding materials, especially the plastic or composite skins that form the outer surface of the bike. Aluminum offers a compelling balance of light weight and strength. It can be formed into curved, precise profiles that hug the bike’s frame while offering sufficient rigidity to resist deformations under loading. Alloys used in structural brackets can be selected for either higher strength-to-weight or enhanced corrosion resistance, depending on the model and intended environment. For many configurations, aluminum brackets are paired with ABS or PC fairings to maintain a clean aerodynamic profile while keeping weight down. Other times, high-strength steel or stainless steel is chosen for the most demanding mounting points where resilience to fatigue and impact is paramount. The heavier option may be necessary where brackets directly bear the brunt of loads transmitted from fasteners to frame or engine mounting points, particularly on sport or touring machines that carry larger fairing skirts, heated panels, or protective shields.
Stainless steel stands out for its corrosion resistance, a critical property when triaging components exposed to rain, road salt, and humidity during extended riding seasons. It is inherently robust against the elements, a feature that reduces maintenance frequency and helps ensure that fasteners, brackets, and their attachment points remain secure through many heat-cold cycles. However, stainless steel can be heavier than aluminum and may require careful design to prevent galvanic corrosion when steel contacts aluminum or certain coated surfaces. When stainless brackets are used, designers often isolate contact areas with non-metallic bushings or coatings to mitigate any galvanic coupling with nearby materials and to preserve the finish of surrounding components.
Mild steel and iron-based brackets have a long history of use in automotive and motorcycle applications when cost and predictable mechanical behavior are prioritized. Their strength is reliable, and they are easy to machine and weld. The downside is a higher susceptibility to corrosion unless properly treated or coated. For brackets that experience frequent exposure to moisture but are otherwise protected by fairing shells or engine shields, a coated mild steel option can deliver excellent strength at a reasonable weight and cost. Designers must consider the potential need for maintenance—recoats, touchups, and occasional replacement—when selecting these materials, especially for entry-level or budget builds where simplicity is valued.
Beyond metals, the growing use of reinforced plastics and composite materials has opened new pathways for fairing mounting systems. ABS and PC plastics, commonly used for the fairings themselves, interact with brackets in ways that affect both fit and durability. In some configurations, brackets may incorporate polymer sleeves or bushings to dampen vibrations and reduce the risk of direct metal-to-plastic contact, which can lead to wear or micro-fractures in the fairing’s attachment points. In higher-end builds, carbon-fiber or fiberglass-reinforced polymer brackets are considered for their exceptional stiffness-to-weight ratios and their compatibility with carbon or composite fairings. While these materials may command a premium, they can yield a lightweight, integrated appearance that aligns with aggressive aerodynamics while maintaining structural reliability under high-speed loads.
The design process also embraces the realities of how brackets are manufactured. Casting can produce complex geometries that accommodate the bike’s contour and the fairing’s fastening points with fewer assembly steps. Extrusion and machining can yield predictable tolerances and repeatable performance across a production run or a custom fabrication job. Stamping, bending, or sheet-metal forming may be suitable for simpler brackets that need to bolt to frame or engine mounts with minimal mass. Each approach carries implications for cost, weight, and rigidity. The chosen method interacts with material selection: a thin-walled aluminum extrusion might be ideal for a lightweight, aero-friendly bracket, while a thick, fully machined stainless piece could provide robust attachment points for heavy fairings and larger windshields.
A recurring design principle in these brackets is modularity coupled with a disciplined attention to fit. The fairing consists of multiple panels that must align with very precise gaps to minimize drag and avoid interference with moving parts. The mounting brackets, therefore, must not only be strong but also geometrically forgiving to account for tolerances in the frame, engine mounts, and subassemblies. This tolerance discipline facilitates easier maintenance and replacement. The bracket should accommodate micro-movements and still maintain alignment as temperature shifts or as fatigue subtly alters component geometry. In many cases, designers embed small adjustable features into the bracket or provide shim allowances to fine-tune panel alignment without requiring a full disassembly. Such adjustments are not cosmetic amenities; they are essential to ensuring the fairing remains sound under aerodynamic loading and vibration without cracking or generating wind noise.
Another crucial aspect of design is the interaction between the mounting bracket and the fairing’s attachment hardware. The fasteners—bolts, studs, nuts, and sometimes captive components—must resist loosening under vibration and thermal cycling. Material compatibility guides the choice of fastener coatings, thread-locking compounds, and locking mechanisms. A bracket made from aluminum might partner with corrosion-resistant stainless fasteners and a nylon-insert locking nut or a thread-locking adhesive designed for metal joints. If steel is used for the bracket, selecting coatings that match the aesthetic and prevent galvanic reactions with aluminum or carbon-fiber panels becomes even more important. The goal is to create a joint that remains secure across race-style acceleration, cruising wind loads, and weather exposure, while preserving the fairing’s finish and the rider’s sense of reliability.
An often-overlooked but vital topic is the management of thermal expansion. Temperature swings—in a sunny ride, a tunnel, or after engine heat soak—lead to small changes in part dimensions. In a well-engineered system, expansion gaps are introduced into the bracket-to-fairing interface and the bracket-to-frame connections. These gaps prevent binding, cracking, or undue stress on fasteners as metals and plastics expand at different rates. In composite fairings, this becomes even more important because the panels can expand differently from metal brackets. A simple design rule is to leave modest, symmetrical gaps at critical joints, then compensate with flexible seals or compliant inserts where weather sealing is necessary. This approach helps preserve both structural integrity and aero performance across a wide operating temperature range.
Material compatibility is not only about avoiding galvanic corrosion. It also concerns more subtle interactions, such as differential wear between metal fasteners and plastic or composite attachment points. The choice of coatings and the use of isolating sleeves, bushings, or polymer caps can dramatically reduce wear, preventing the emergence of loose panels or rattle that degrade the rider’s experience and the bike’s acoustic signature. In environments where road salt or humidity is a daily reality, a bracket that offers inherent corrosion resistance, combined with a finish designed to shed water and resist abrasion, can dramatically extend service intervals and reduce warranty calls.
Within the broader ecosystem of fairing systems, brackets must harmonize with the rest of the assembly. Aerodynamics dictates that the mount points stay out of the high-pressure zones around the windscreen and the nose, to minimize interference with the laminar flow that is crafted by the fairing’s curvature. A bulky or poorly contoured bracket can disturb airflow, add unwanted drag, or create hotspots for noise and vibration. Aesthetics matter, too. The bracket’s finish and its geometry contribute to a clean, integrated look when the panels are installed. A high-quality finish—whether powder-coated, anodized, or painted—helps ensure the bracket looks as good as it performs, even after hundreds of hours on the road or track.
The practical realities of selecting bracket materials are often framed by a simple design question: what is the expected duty cycle of the fairing in its specific use case? A sports bike that slices through wind at high speeds requires brackets that resist fatigue, manage micro-impacts from debris, and maintain precise alignment as aerodynamic forces shift with speed. A touring machine, designed for long rides and variable climates, benefits from materials with exceptional corrosion resistance, predictable long-term behavior, and a design that remains serviceable after miles of exposure. A retro or custom build may prioritize easy fabrication, cost efficiency, or a particular visual language, even if it sacrifices some weight or stiffness. Across these use cases, the interplay of materials, geometry, and finish determines how robustly the fairing brackets hold their place and how gracefully they age.
In many discussions of bracket design, an often-understated factor is the interaction with the fairing’s base material and attachment system. ABS, PC, and reinforced plastics each respond differently to mechanical loads and environmental stress. For ABS and PC fairings, bracket attachments should avoid sharp edges that could cut into or crack the plastic under stress. Instead, designers favor rounded radii, compliant fastener bushings, and, where possible, non-abrasive insertions that distribute clamping loads evenly. This approach reduces the risk of delamination or crack initiation around the fastener holes. On the aesthetic side, brackets that align harmoniously with the fairing’s lines help preserve the bike’s visual coherence, a point riders often notice when panels are removed for maintenance and then reinstalled.
The materials conversation blends naturally with the broader narrative of vehicle accessory design. Even though the bracket is a comparatively small component, it embodies a philosophy: select materials that offer the best balance of strength, weight, and durability for the intended operating environment; design joints that tolerate manufacturing variation and environmental change; and ensure the assembly preserves the fairing’s aerodynamic profile while remaining serviceable. The decisions made at the bracket level reverberate through the entire system, affecting ride quality, maintenance cycles, and the bike’s resale value. In this spirit, practitioners often model and test bracket designs not only for static strength but also for dynamic behavior. They simulate how the bracket and its fasteners respond to engine torques, braking-induced loads, and wind gusts, then refine the geometry to minimize stress concentrations. They evaluate fatigue life under repeated thermal cycles and vibration, because many milliseconds of repeated loading can degrade joints in ways that single static tests cannot capture.
Material science, in this context, is not an abstract discipline. It is a practical toolkit that helps engineers and fabricators choose the right alloy, coating, and joining method to ensure reliability in the field. The choice of aluminum for weight-sensitive projects, stainless for corrosion resistance, or reinforced polymers for integrated aesthetics should be guided by the expected service environment, maintenance philosophy, and the rider’s willingness to invest in durable hardware. The goal is to deliver a bracket that does not dominate the bike’s weight budget, does not introduce avoidable stress risers around the fastener points, and does not demand excessive maintenance to maintain fit and function. Achieving this balance is as much about engineering judgment as it is about material data sheets, and it often rests on a willingness to protude into nuanced design decisions that pay dividends over thousands of miles of riding.
For readers seeking practical touchpoints in the real world, consider how the bracket design translates to the final assembly’s look and feel. The mounting system should feel precise when a panel is snapped into place, and it should retain that precision after exposure to heat and rain. When the fairing panels are removed for service, the bracket should enable straightforward reassembly without the operator needing to perform rework on the mount points. The simplicity of maintenance is a sign that upstream design has achieved a successful equilibrium between strength, weight, and ease of service. This is where the art of bracket design intersects with the rider’s daily experience: a bracket that holds its own under stress also supports the rider’s confidence in the machine.
The conversation about materials and design also invites a gentle reminder of where to look for reliable reference information and what to prioritize when planning a build. In the broader ecosystem of fairing components, many riders and builders seek compatibility with a range of models and styles. The information ecosystem around fairings often points toward vendors and catalogs that group parts by model or brand, helping ensure the correct fit and consistent quality. When evaluating brackets for a particular fairing system, it is prudent to check the compatibility notes for related panels and frames, verify the fastener type and thread pitch, and confirm whether the bracket’s finish aligns with the bike’s aesthetic goals. Although brand-specific catalogs and community references can be helpful, the underlying principles of material selection, joint design, and environmental resilience apply across the spectrum. Illustrating this through a practical lens, the bracket design philosophy should emphasize modularity and interchangeability where feasible, enabling riders to swap panels or upgrade to more robust hardware without a complete redesign of the mounting system.
As with any component that stands at the intersection of form and function, the challenge is to translate material science into a reliable, maintainable, and visually coherent solution. The interplay of material properties, joining strategies, and geometric constraints shapes a bracket that can withstand high-speed wind loads, resist corrosion, and accommodate the nuances of a plastic or composite fairing. Whether the rider is chasing performance edge or durability in urban commutes, the bracket’s performance is anchored in sound material choice and judicious design decisions that respect both the physics of loads and the realities of service.
To connect this deeper understanding to practical, model-agnostic guidance, one can reflect on the broader ecosystem of fairing components and see how choices echo across different manufacturers and styles. The intent remains consistent: a mounting bracket that securely anchors the panel, preserves aerodynamics, resists the elements, and remains serviceable through a lifecycle that includes routine maintenance and potential upgrades. The result is a quiet confidence whenever the rider tucks behind the wind and feels the bike’s mass and speed respond in a controlled, predictable way. In this sense, the bracket is not merely hardware; it is a critical enabler of the riding experience, a small but significant determinant of how a motorcycle communicates its performance and its character to the road.
For readers exploring related topics or seeking to expand their understanding of compatible components, a closer look at model-specific fairing families can be insightful. See the Honda fairings category for a representative look at how fairing panels are designed to integrate with mounting hardware and how material choices influence the attachment scheme. This reference can illuminate how bracket design interfaces with a family of panels that share common fastening patterns and environmental expectations. Honda fairings
As the discussion of materials and design considerations advances, it becomes clear that there is no single universal recipe for mounting brackets. Instead, engineers balance a spectrum of options, guided by the bike’s intended use, the fairing’s material and geometry, the expected operating environment, and the rider’s preferences for maintenance and aesthetics. The optimal bracket merges material science with practical engineering pragmatism, delivering a solution that remains secure under load, light enough to preserve performance, and robust enough to endure years of exposure to road grit, rain, heat, and wind. The result is a mounting system that quietly supports the rider’s aspirations—keeping the fairing in place, the lines clean, and the ride confident through every mile. This integrated approach lays the groundwork for the next steps in the chapter sequence, where the discussion will broaden to include installation strategies, protective finishes, and lifecycle considerations that turn these principles into everyday practice.
External reference for further reading: https://en.wikipedia.org/wiki/Mechanical_design
Securing the Shell: Practical Installation and Long-Term Care for Motorcycle Fairing Mounting Brackets
Installation and Maintenance Best Practices for Fairing Mounts
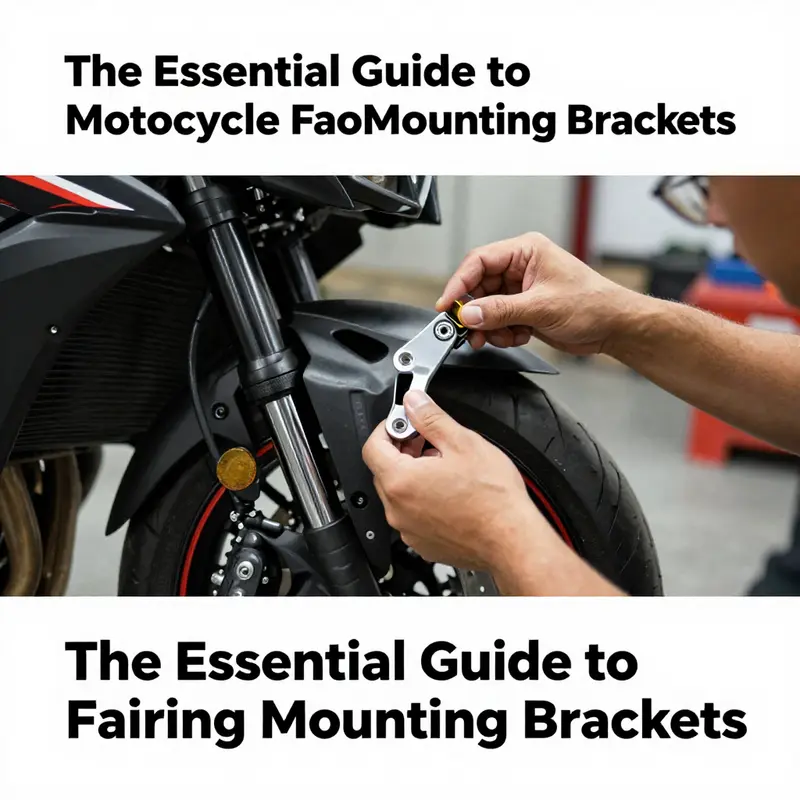
A motorcycle fairing owes its fit and function to the small, often overlooked metal pieces that hold it in place. Mounting brackets do more than fasten panels; they control alignment, absorb vibration, and distribute wind loads across the frame. When they are chosen, installed, and maintained with care, fairings sit true, resist damage, and preserve the bike’s aerodynamics. Overlook them, and rattles, cracks, and sudden failures become likely. This chapter weaves installation technique with routine care so you can keep fairings secure and the road safe.
Begin with the right parts. Brackets designed for your chassis and panel material perform predictably. Choose components that match your bike’s mounting points and fairing type. Metal brackets carry shock and flex loads differently than molded plastic supports. Aluminum brackets are light and resist corrosion, while steel options offer higher yield strength for heavy or stressed applications. Plastic or ABS supports are forgiving under minor impacts and fit molded bosses on panels. Always verify compatibility before beginning work.
Preparation matters as much as the bolt itself. Clean mounting areas on the frame and fairing. Remove old thread locker or corrosion, and inspect threads for wear. If threads are damaged, repair them with the correct insert or helicoil rather than forcing fasteners. A secure thread creates predictable clamping force. Where mounting bosses in fairings show hairline cracks, reinforce from behind with a patch or backing plate. A thin metal washer or dedicated backing plate spreads load through the plastic and prevents the boss from tearing out under torque or vibration.
Alignment is more than cosmetic. When a fairing sits aligned, stress is distributed evenly across all attachment points. Misalignment forces individual fasteners to carry disproportionate loads. Start by loosely installing fasteners in all mount points. Let all brackets and panels find their natural positions on the frame. Then gradually tighten following a cross-pattern sequence. This method brings the assembly into uniform contact and avoids bending brackets as you torque them down.
Torque control saves parts and prevents failure. Use a torque wrench and adhere to the recommended values in your service information. Over-tightening shrinks the clamping area, deforms plastic bosses, and strips threads. Under-tightening lets vibrations work fasteners loose. For aluminum and mixed-metal assemblies, apply the correct torque for the softer material. When in doubt, follow the frame manufacturer’s specifications. If those are unavailable, consult a repair manual specific to your model for torque charts and tightening sequences.
Fastener treatment is a subtle but critical decision. A medium-strength thread locker prevents vibration loosening while allowing future removal with hand tools. Anti-seize compound on stainless or dissimilar metal threads prevents galling and eases future disassembly. Do not mix these compounds on the same joint. Use thread locking where vibration loosening is the main risk. Use anti-seize on exhaust or heat-exposed fasteners and on dissimilar metals. Apply compounds sparingly to avoid contamination of nearby surfaces and to maintain accurate torque readings.
Consider isolation and damping. Rubber grommets, cushioned washers, and vibration isolators reduce transmitted vibration to the fairing. These elements reduce fatigue in both bracket and panel materials. Where brackets bolt directly to engine mounts, ensure isolators do not permit movement that alters alignment under load. Use vibration-damping hardware where the fairing makes broad contact with the frame. This reduces chatter and noise and extends life for plastic bosses.
Special mounting scenarios require extra attention. Rear full fairings often anchor near engine bolts behind the cylinder. Those brackets must tolerate heat cycling and engine vibration. Inspect the area for oil leaks and heat-induced material changes. For quarter fairings and belly pans, brackets may attach close to the swingarm or engine casings. In such cases, ensure there is adequate clearance at full suspension travel and under steering lock. If routing or clearance issues exist, alter bracket geometry only using approved parts or professional modification.
When threads are stripped or mounting points are damaged, choose repair over improvisation. For stripped frame threads, use an insert sized for the original fastener. For damaged fairing bosses, install a bonded backing plate or replace the panel. Welding bracket tabs to the frame should be a last resort. Any welding changes the metal’s heat treatment and may affect structural integrity. If welding is necessary, have the work performed by a skilled fabricator who can maintain alignment and metallurgical considerations.
Inspect new installations before the first ride. Work methodically through each mounting point. Confirm torque values for every fastener. Check panel gaps visually and by hand. Look for binding or uneven pressure that could flex the fairing at speed. Perform a short, slow test ride and listen for new noises. Recheck torque after that initial ride to account for any settling or slight fastener relaxation.
Routine maintenance keeps mounting systems healthy. Create a simple inspection rhythm. Visual checks every few hundred miles catch developing problems early. After any incident that jars the bike, inspect mounts immediately. Look for cracked brackets, loose bolts, or deformed tabs. Tighten fasteners at scheduled intervals, and reapply thread locker where repeated disassembly has removed it. Keeping a small notebook or log within your maintenance records helps track recurring issues and the frequency of retorquing.
Cleaning and corrosion control extend service life. Road grime, salt, and chemical cleaners degrade finishes and accelerate wear. Wash brackets with mild detergent and fresh water, and dry them thoroughly. On exposed steel parts, apply a thin coat of wax or a corrosion inhibitor in climates with salt exposure. For painted or powder-coated brackets, avoid abrasive brushes that strip the finish. Touch up chips promptly with compatible coatings to prevent rust from spreading.
Lubrication belongs where movement exists. Hinges, quick-release mounts, and adjustable vents need a little grease to operate freely. Use light lubricants on mechanical linkages and a dry lubricant where dirt attraction is a concern. Do not lubricate static fasteners unless anti-seize application is chosen, because oils can reduce the effectiveness of torque measurements and of thread locking compounds.
Watching for fatigue can prevent failures. Brackets see repetitive loads each time the motorcycle moves. Metal develops hairline fatigue cracks long before visible failure. Periodically flex the bracket by hand to detect unusual movement. Tap suspect areas with a small hammer; a dull sound may indicate internal cracking. Replace brackets at the first sign of structural fatigue. A small cost now prevents an expensive or dangerous failure on the road.
Noise troubleshooting provides quick clues. Rattles often point to loose hardware or missing isolation elements. A single loose bolt can cause wide-ranging noise and accelerate wear. Remove suspect panels and inspect mounting surfaces. Replace missing washers and grommets. Where noise persists, use a systematic approach: tighten, test, then isolate and damp any remaining contact points. When vibrations excite resonant panels, adding small strips of foam or rubber inside the fairing can damp frequencies without altering mounting geometry.
Modifications and aftermarket upgrades change load paths. When installing different fairings or custom brackets, understand how the new components route loads to the frame. Aftermarket parts sometimes shift attachment points or change panel stiffness. Always check how new mounts affect clearance, torque requirements, and vibration. If an aftermarket bracket is lighter or thinner, consider adding support or a reinforcement plate where stress concentrates. Conservative reinforcement avoids surprises at speed.
Seasonal care protects against climate extremes. Cold temperatures make plastics brittle and reduce the elasticity of rubber isolators. In winter, inspect fasteners more frequently. Heat cycles in summer affect sealants and can loosen certain fasteners. UV exposure degrades plastics and softens adhesives. When parking outdoors for long periods, position the bike to reduce sun exposure to sensitive panels. Regular inspections before long trips are essential regardless of season.
Record-keeping improves outcomes over time. Note torque values and any corrective actions. Jot down when thread locker was used, when a backing plate was installed, or when a bracket was replaced. These simple notes help troubleshoot recurring failures and guide future choices. A few lines in a maintenance log reduce guesswork and lead to safer repairs.
Tools and techniques complete the practical picture. A calibrated torque wrench is indispensable. A set of metric and imperial sockets, thread chasers, and a quality ratchet make clean work. Use non-marring prying tools for plastic panels to avoid scratching. Keep a supply of replacement washers, rubber grommets, and a small selection of fasteners that match original sizes. When a repair exceeds basic capability, seek professional assistance rather than improvising.
Post-repair testing ensures confidence. After a full installation or significant maintenance, ride under controlled conditions to verify fitment and handling. Listen for new harmonics, check panel stability at highway speeds, and observe for movement under braking and acceleration. Revisit torque settings after the first hundred miles, and then again after a few hundred, to catch any settling or relaxation.
Good practice balances safety, longevity, and appearance. Properly installed brackets keep panels aligned and reduce stress on plastic bosses. Regular maintenance prevents small problems from becoming critical. When uncertain, consult service literature that covers your model and the fairing attachment system in detail. The right reference clarifies torque numbers, sequences, and special considerations for your bike.
For model-specific torque charts and step-by-step procedures, consult official service documentation or a trusted repair manual that covers your motorcycle in depth. https://www.haynes.com/
For riders looking for compatible fairing options and bracket kits, review available selections by make and model, such as the Honda fairings collection, to ensure fitment and parts compatibility. https://ultimatemotorx.net/product-category/honda-fairings/
Following these combined practices keeps fairings stable, prevents damage, and enhances the riding experience. Careful selection, precise installation, and disciplined maintenance form a single approach. Over time, that attention preserves panels, brackets, and, most importantly, rider safety.
Final thoughts
The importance of motorcycle fairing mounting brackets cannot be overstated; they are integral to both the functionality and visual appeal of the motorcycle. By understanding their role, the materials used, and adhering to best practices during installation and maintenance, business owners can ensure that they are providing their customers with reliable and high-quality products. Investing time and resources in this area will not only enhance customer safety and satisfaction but also establish a reputation for your business as a trusted source in motorcycle parts. Ultimately, the right fairing mounting brackets will contribute significantly to the motorcycle’s overall performance and durability on the road.