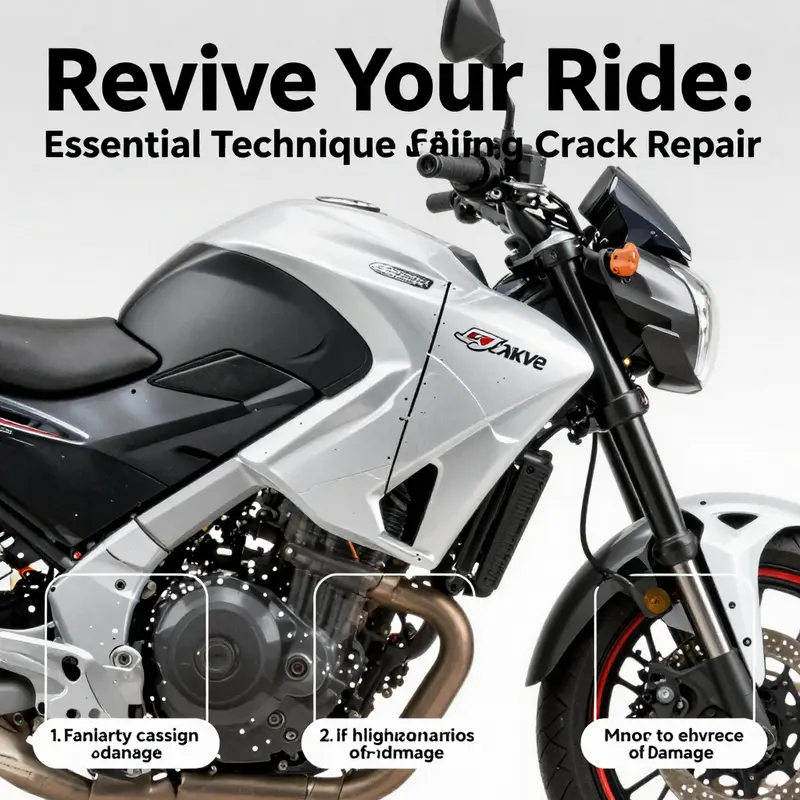
Motorcycle fairings are vital components that protect the rider and enhance the bike’s aesthetics. However, cracks can compromise both their functionality and appearance. For business owners, understanding the nuances of motorcycle fairing crack repair is essential for maintaining customer satisfaction and preserving the integrity of your brand. This article delves into diverse repair methods, from DIY solutions to professional services, assesses damage effectively, and weighs the options between repair and replacement. With insights from each chapter, you will be equipped to tackle this common maintenance issue efficiently, keeping your clientele on the road safely and stylishly.
From Fractures to Finish: Practical Methods for Motorcycle Fairing Crack Repair
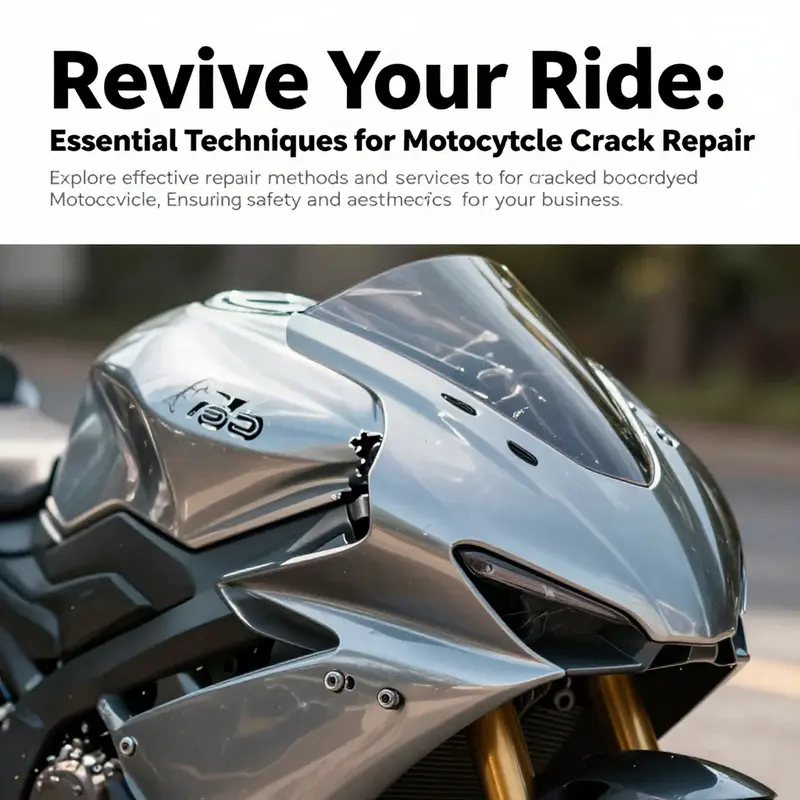
Cracks in motorcycle fairings are more than a cosmetic nuisance. They can alter aerodynamics, allow wind and moisture to infiltrate hidden chassis areas, and, in some cases, signal fatigue in mounting points or surrounding plastic. Understanding the repair pathway begins with recognizing that fairings are often made from thermoplastics like ABS or from fiberglass-reinforced plastics. Each material behaves differently under impact and heat, so the repair approach must match the underlying physics as much as the visible damage. When a crack appears, the first step is to assess its severity, location, and whether the crack compromises structural integrity or only scratches the surface. A small, hairline crack along a non-load-bearing seam is very different from a lengthwise split near a mounting lug or a section that bears direct wind pressure during riding. With this context in mind, the repair options can be laid out as a continuum from conservative, at-home fixes to professional, part-replacement decisions that safeguard safety and performance. The guiding principle is to restore strength and shape to resist flex under wind while preserving the original look as closely as possible. The choice also hinges on practical considerations such as DIY skill, available tools, time, and the value of the bike’s fairing visually and aerodynamically.
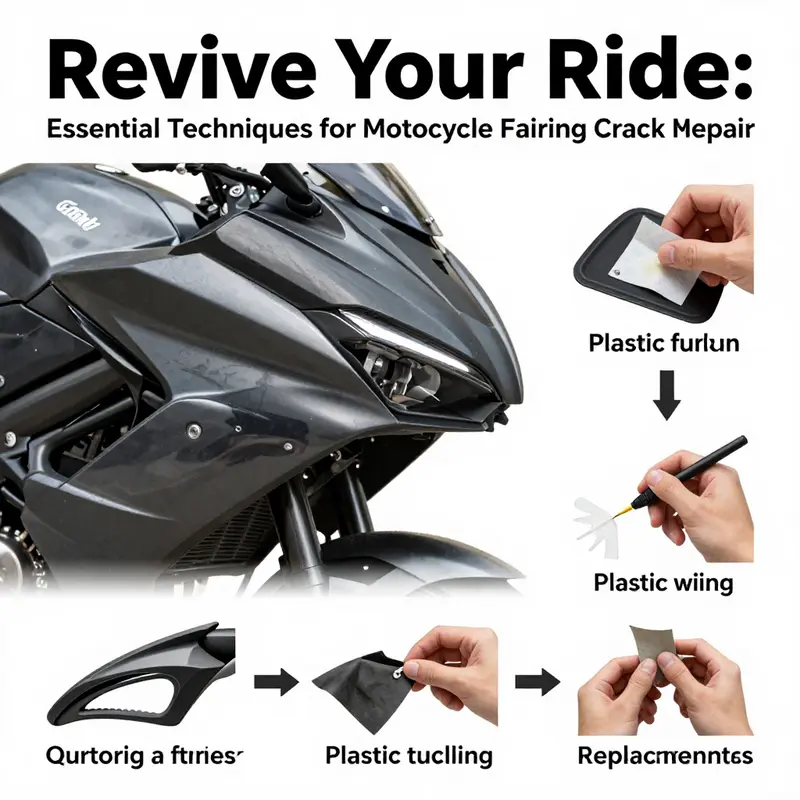
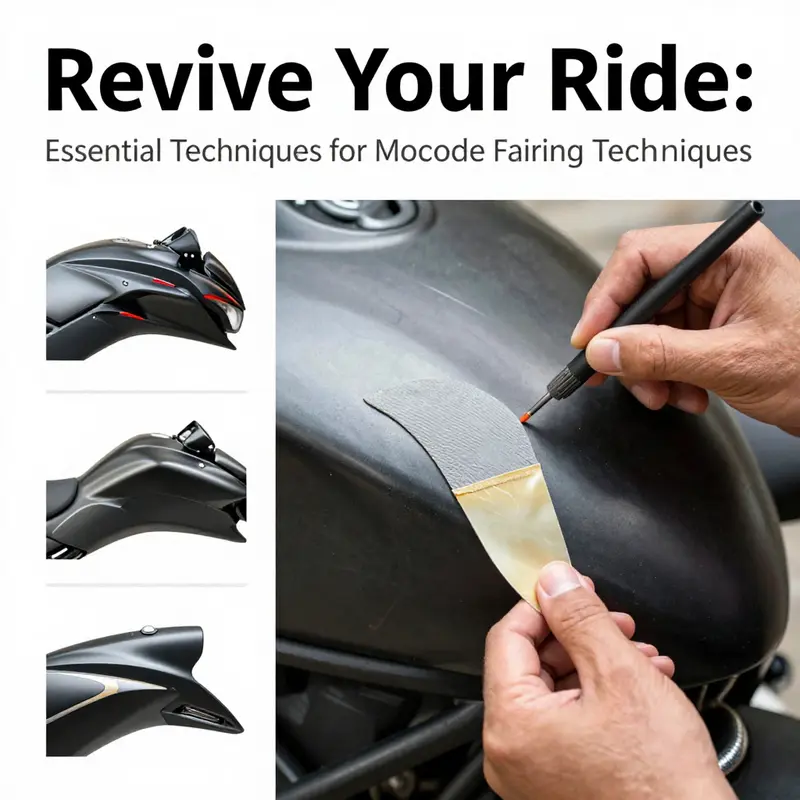
For minor cracks and surface damage, adhesive bonding often provides a cost-effective and durable solution. The process hinges on proper surface preparation and the chemistry of two-part systems. A high-strength, flexible epoxy resin or AB glue is typically used in a 1:1 mix, following the manufacturer’s instructions. The crack is thoroughly cleaned; any grease, wax, or dust is removed with isopropyl alcohol. A light sanding around the crack creates a micro-roughness that helps the adhesive bite. After mixing, the adhesive is applied generously to the crack, and the two sides are pressed together with even pressure until the adhesive seeps into the joint. To reinforce the bond, a thin copper tape or a small fiberglass patch can be placed over the cured adhesive, then clamped or held in place until the glue cures, usually about 24 hours. This reinforcement is crucial in preventing a returning crack or propagation under stress. While this method is cost-effective and preserves the original fairing texture, it may leave a visible repair line, especially on dark or glossy finishes. It’s a pragmatic option for patches that are not in high-stress zones and where the rider is prepared to accept a minor cosmetic compromise in exchange for a solid bond.
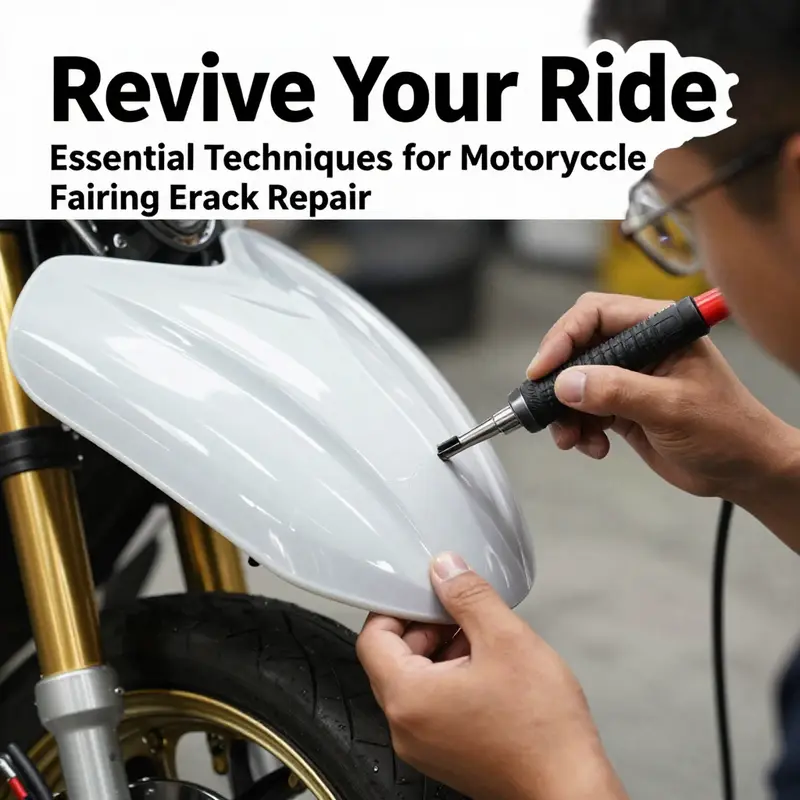
In cases where the crack is clean, straight, and the surrounding plastic remains largely intact, a more involved technique can deliver a near-seamless joint. Plastic welding is an option that, when performed correctly, fuses the cracked faces by locally melting the surrounding plastic so they merge into a single, continuous piece. This method works well on thermoplastics such as ABS and shares the feel of a factory seam after finishing. The critical caveat is precision and temperature control. Too little heat and the crack remains a weak point; too much heat and the surrounding material can warp, sag, or discolor. Plastic welding requires a trained hand, a steady eye for joint alignment, and the right tools—a dedicated plastic welder or a fine heat source with controlled settings. For riders who want a robust repair without replacing the entire panel, plastic welding represents a balanced choice when the damage is along a straight crack or a narrow slit in a non-visible location. The goal is a joint that not only holds together but appears uniform to the naked eye after finishing.
When the crack extends beyond a simple line and the damage spreads into moderate territory, a combination approach often yields the best result. Here, a repair plan might involve filling and shaping with fiberglass filler or a specially formulated plastic body filler designed for automotive use. The filler is applied slightly proud of the surrounding surface to account for shrinkage as it cures. After it hardens, meticulous sanding follows, using progressively finer grits until the repaired area sits flush with the rest of the fairing. The next step is a careful paint process. Thorough cleaning precedes priming, and color matching is crucial to preserve the bike’s aesthetics. The painter should follow the exact color code and apply multiple, light coats rather than a single heavy layer. While a professional spray booth can yield the most consistent results, a well-ventilated home setup with proper protection can achieve commendable results on smaller repairs. The key is patience and attention to the finish’s texture, gloss, and edge feathering so the repair blends with the surrounding surface.
In the most severe scenarios, where the fairing has sustained large breaks, significant deformation, or a missing section, repair becomes impractical or unsafe. In such cases, replacement is typically the safest and most economical long-term option. Replacing the entire fairing panel ensures a precise fit, preserves the intended aerodynamics, and restores full protection from wind, debris, and weather. Choosing between OEM parts and high-quality aftermarket equivalents depends on budget, availability, and the intended use of the bike. OEM pieces guarantee a factory-like fit and finish but can be more expensive, while aftermarket panels may offer a broader range of styles and pricing. Regardless of choice, the replacement part should come from a reputable source to ensure compatibility with mounting points, windscreen geometry, and electrical routing.
After any repair or replacement, attention to finish is essential. Repaint work should aim to match the original color and gloss, preventing mismatched tones that stand out in sunlight or under streetlights. A professional repaint, especially one that uses color-matching technology and a controlled environment, can restore not just the color but the texture and depth that give the fairing its original appearance. Keep in mind that UV exposure can affect newly painted areas differently than older paint, so a clear coat that provides UV protection is worth considering. Even for skilled DIYers, the final stage of refinishing often benefits from a refined workspace and time to cure, sand, and polish before the bike is returned to service.
Beyond the techniques themselves lies a practical framework for deciding which path to take. Preparation is the anchor of any repair. Cleanliness, de-greasing, and surface ablation are non-negotiable steps that set the stage for lasting bonding or fusion. Safety can’t be overlooked: wearing gloves, eye protection, and a mask during sanding and chemical work protects the rider and the crew handling the repair. The decision between repair and replacement also hinges on the crack’s location relative to critical mounting points, the fairing’s role in protecting the bike from weather and debris, and the potential for future cracking under vibrational loads. A crack near a mounting lug or a seam bearing high wind pressures requires extra caution; reinforcing with internal bracing or substituting the part may be the wise course. In contrast, a small surface scratch in a low-stress area is a prime candidate for an adhesive bond with a patch, offering a quick, durable fix.
For riders who want to explore their options with confidence, consulting a specialized motorcycle body shop or an authorized repair center can provide guidance tailored to the exact model, material, and equipment. These professionals bring industry-standard materials and techniques to the task, ensuring durability and color fidelity while mitigating the risk of over-heating or warping the panel. If the repair path involves color matching, a professional can also ensure that the finish integrates seamlessly with the rest of the bike’s look. The choice to seek professional help is not a sign of weakness but a measured step to safeguard safety and aesthetics, especially when the fairing forms part of the bike’s protective envelope.
As riders weigh the options, a practical and accessible resource for broader panel availability comes into play. If you’re exploring replacement parts from broad catalogues, consider the Honda fairings catalog as a reference point for compatibility and fit. This internal resource helps ensure you’re selecting panels that align with mounting points, screw patterns, and line geometry, preserving the bike’s original lines and aerodynamics. Keeping a keen eye on compatibility reduces the chances of misfit or misalignment after installation and repainting. Finally, for those who want to see a broader range of options that go beyond a single model, a look into dedicated catalogs for other brands and styles can be equally informative. An external reference that readers may find helpful for additional context and options is a comprehensive catalog listing for various Ducati fairings, which showcases how different models handle panel replacement and restoration across generations. This external resource offers insight into how similar repair philosophies apply to different plastics and structural configurations, illustrating the universal considerations of bonding, welding, filling, finishing, and matching color and gloss after a repair has been performed. For readers who want to investigate further, the Ducati fairings catalog can serve as a comparative guide to the repair choices discussed here and in related chapters. See the external resource: https://ultimatemotorx.net/product-category/ducati-fairings/fairings-for-ducati-749-999/fairings-for-ducati-749-999-2003-2004/.
In summary, patching a cracked fairing comes down to matching the repair strategy to the damage. Minor cracks can often be cured with adhesive bonding reinforced by a patch. Moderate damage benefits from a combination approach, including filler, careful shaping, and meticulous color matching. Severe damage frequently necessitates replacement to restore full strength and proper aesthetics. Across all levels, preparation, restraint with heat or pressure, and finishing with a durable paint job determine whether the repair endures under wind, rain, and long rides. The most reliable path blends technical competence with a measured understanding of the bike’s unique geometry and riding conditions. As you weigh repair against replacement, remember that the goal is not just to restore the fairing’s look but to preserve the bike’s performance, safety, and rider confidence on every mile of the road.
From Tiny Cracks to Strong Shells: Mastering the Art of Motorcycle Fairing Crack Repair
A crack in a motorcycle fairing often starts as a quiet line that seems to appear after a close pass with a curb, a parking lot misjudgment, or a stone kicked up by a passing vehicle. The fairing acts as a protective skin, a wind shield for the rider, and a support for the bike’s overall aerodynamics. When the line shows up, it is easy to panic about how it will look at the next bike night or while rolling down the highway. Yet the repair choice should be guided by the nature of the damage, not just the impulse to hide it. The material of the fairing matters just as much as the crack itself. Plastic and fiberglass respond differently to adhesives, heat, and the kinds of reinforcement you might add. The goal is simple in theory: restore strength where needed, preserve the smooth silhouette, and keep the ride safe and predictable. In practice, this means reading the crack like a map, understanding how far the damage extends, and choosing a path that respects the fairing on its own terms rather than forcing it into a quick fix that may only delay the inevitable break under a future stress. The best repairs start with a careful assessment of severity, location, and material, followed by a calm, methodical approach that blends craft with realism. A tiny crack on a noncritical area may respond to a simple, well executed bonding and reinforcement, while a larger fault or a crack that runs through a high stress point calls for more substantial work or even replacement. The journey from crack to continuity is a conversation between the rider and the structure, and it rewards patience, proper preparation, and disciplined execution.
For minor cracks, the repair philosophy centers on restoring bonding strength and preventing the fracture from propagating. A high quality adhesive is employed, one that adheres well to plastic and holds up against the temperature cycling and vibration typical of motorcycle use. The initial phase is cleaning and light surface preparation. Thorough cleaning removes oil, wax, and dust that could weaken the bond. Light sanding following cleaning helps create a micro-rough surface that gives the adhesive something to bite into. The point is not to remove large amounts of material but to present a rough, clean canvas for the glue to grip. The crack itself is gently opened and cleaned so that every bit of debris is removed from the groove. In many cases, the bonding strategy also includes a reinforcing element such as a copper strip or a fiberglass patch pressed firmly into place. The copper strip provides a structural bridge across the crack, distributing stress away from a single line, while a fiberglass patch offers a translucent, lightweight reinforcement that can blend with the surrounding surface when properly fit. The application of adhesive in a precise 1:1 ratio, the classic pairing of resin and hardener, ensures a predictable cure profile and a hardened seam that resists moisture and heat. Once the patch is in place, pressure is applied to seat the reinforcement and squeeze out any trapped air. The goal is to create a bond that not only fills the gap but also forms a continuous surface that can be sanded smooth and finished to match the original contour.
Watching the repair take shape is a reminder that the fairing is more than a cosmetic cover. It is a shield that protects delicate internal components and reduces wind-induced fatigue by maintaining a clean aerodynamic profile. When the resin cures, the next step is controlled sanding. Progressive grits of sandpaper are worked from coarse to fine, shaving the repaired area to an even plane that sits flush with the surrounding skin. The careful leveling of the repair is crucial; any low spot can show through paint, while a high spot will create a visible ridge that defeats the purpose of smooth aesthetics. After sanding, the surface is cleaned again to remove any dust that could interfere with paint adhesion. The final step in this branch of repairs is finishing, which can take the form of paint or film. A color-matched paint or a seamless wrap can restore the fairing’s original appearance, making the repair nearly invisible to the casual observer. The result is not just cosmetic; the repaired area gains resilience and a predictable response to wind and heat that mirrors the rest of the shell.
But not all cracks are created equal, and this is where experience matters. When the crack extends deeply and the structural integrity of the fairing is compromised, the bonding approach may no longer suffice. Plastic welding—using a plastic welder or a heated tool to fuse the surrounding material and reestablish material continuity—offers a rugged solution. This process dissolves a thin layer of plastic at the edges and reconstitutes the seam into a homogeneous mass. It sounds simple, but it is a technical skill that demands control, the right equipment, and a clean working environment. Missteps here can weaken the area, burn the surrounding plastic, or create new distortions in the fairing’s shape. For most riders, this kind of repair belongs in the hands of skilled technicians who understand the material in use, the heat it can tolerate, and the way the final contour should look after cooling. When the crack is particularly large or occurs near mounting points or high-stress curves, the risk of repeat failure increases, and the prudent choice may be to replace the entire fairing. Replacement offers a clean slate: a perfect fit, original appearance, and consistent protection against wind, debris, and weather. It is not merely about aesthetics; it is a decision about predictable performance and long-term cost efficiency. When contemplating replacement, choosing parts from a reputable source, ideally OEM, helps ensure compatibility with mounting points, wiring channels, and fitment tolerances. The new shell should align with the bike’s lines, and its surface should be consistent with the rest of the bodywork to maintain aerodynamic balance and ride feel. After a replacement, a painter can lay down a fresh coat to restore the original color and finish, so the fairing appears as part of a single, continuous surface rather than a patchwork. This attention to color, gloss, and texture is what often separates a repair that looks credible from one that draws the eye and invites questions at the next meet or ride.
All along this path, the decision to repair or replace is not a rigid rule but a judgment based on the scope of damage and the rider’s willingness to invest time and resources. For many enthusiasts, patience is as important as the repair kit. Small, non-structural cracks do not demand the drama of a full fairing replacement. A well-executed adhesive bond with reinforcement can restore the plane and strength needed for everyday riding. Yet the line between a quick patch and a future crack is thin. If the repair is not executed with meticulous surface preparation, clean adhesive mixing, and careful alignment of the reinforcement, the crack can reemerge, sometimes with renewed vigor after a single storm or a rough ride. This is why a careful, stepwise approach is so valuable: it honors the dynamics of the material, respects the fairing’s role in the bike’s performance, and helps ensure that the repair remains durable under the responsibilities of daily use.
Riders who value model-specific fit and finish may also consider model-specific parts when repairs reach the replacement stage. A catalog or a parts list tailored to a particular make can help ensure that the new fairing not only fits but preserves the bike’s proportion and stance. For those who want to explore compatible components for a given model, there is a dedicated catalog that aggregates fairings by brand. Stepping into that catalog offers a sense of how the aftermarket and original options compare in terms of fit, color range, and mounting details. That said, the practical question remains: how to decide when to repair and when to replace? The answer is grounded in the crack’s size and location, the structural role of the affected area, and the rider’s tolerance for risk. A minor crack along a non-supporting contour, treated with a disciplined repair approach, can be a smart, economical choice that preserves the original shell. A serious fracture near a mounting point or a stressed curve, on the other hand, calls for a broader view that weighs the steady performance of the bike against the cost of a new fairing and the time required to achieve a flawless finish. In all cases, the objective remains constant: recover the fairing’s protective function, restore its seamless appearance, and keep the ride secure and enjoyable. For riders seeking a path that meshes model compatibility with practical repair choices, a model-specific fairings catalog can be a useful resource, and a community of technicians can provide guidance on how to handle the most challenging cases while minimizing downtime. For model specific options, see Yamaha fairings.
External resources can provide additional context and a visual reference that complements the hands-on approach described here. A concise, step by step guide with photographs can illuminate the nuances of preparing the surface, applying the resin, shaping the patch, and achieving a factory-like finish. For readers seeking that extra layer of guidance, an external reference offers a complementary perspective on minor fairing damage and its repair options. External guide: https://www.bikefairings.com/repair-guide/
From Crack to Confidence: The Art of Professional Motorcycle Fairing Repairs
A motorcycle’s fairing does more than shape the machine’s aesthetic. It channels air, shields the rider from debris, and protects internal components from weather and impact. When a crack appears, the question shifts from cosmetic concern to structural decision: can the damage be restored without compromising safety or performance? For many riders, the answer lies with specialized repair services that blend material science with precision craftsmanship. This chapter delves into how professional fairing crack repair works, what to expect from a qualified shop, and how the right choice preserves the bike’s original integrity while keeping it on the road and looking its best.
Specialized repair is not a one-size-fits-all fix. The material makeup of a fairing—whether it is a thermoplastic like ABS or a composite such as fiberglass or a carbon-fiber skin over a core—drives which methods are feasible. In professional settings, plastic welding and composite repair stand at the core of restoring cracked panels to their original strength and appearance. Plastic welding uses heat and specialized tools to fuse the fractured plastic back together. When executed by trained technicians, this method can re-create the panel’s structural continuity, reducing the likelihood of the crack propagating under wind pressure or vibration. The process is not simply about melting and fusing. It requires control, knowledge of the material’s melt characteristics, and an eye for the correct heat input so that surrounding areas are not overheated or discolored.
Where cracks cross the line from cosmetic to structural, or where a single clean weld cannot restore load paths around mounting points, resin-injection and composite patching come into play. A two-part resin system, carefully chosen to match the fairing’s material class, can be injected into the crack’s interior to bond surfaces behind the visible seam. This approach supports the panel without adding excessive stiffness that could transfer stress to adjacent areas. In conjunction with resin, technicians often apply patch reinforcement—thin fiberglass or carbon-fiber fabric laid along the crack and bonded with resin—to distribute loads more evenly and to minimize future crack growth. The combination of resin treatment and patch reinforcement is a hallmark of professional repair because it addresses both the surface and the subsurface behavior of the material.
A different class of technique comes into play for panels that have already lost their structural integrity or for those with wide, ragged cracks. In such cases, repair centers may perform a full or partial replacement using OEM-compatible parts or high-quality aftermarket equivalents. The aim is to restore fit, function, and appearance so that the repaired fairing aligns with mounting points, air gaps, and wind deflection profiles as originally designed. Replacement is not a failure of craftsmanship but a pragmatic decision when the damage exceeds what bonding and patching can reliably sustain. In a well-equipped service center, the technician will present a spectrum of options, each with its own implications for weight, aerodynamics, color matching, and long-term durability.
Repaint and finish are essential components of professional repair, especially for riders who care about an exact color and gloss match. After a crack has been sealed or a panel replaced, the fairing often requires sanding, primer, base coat, and clear coat to restore its factory-like look. Color matching is not merely about shade; it is about translucency, texture, and depth of finish that under certain lighting makes a panel disappear into the rest of the bike’s bodywork. In many shops, this step is performed by painters who specialize in automotive coatings and who can blend edges to minimize the visibility of repair lines. The goal is a seamless transition from repaired area to untouched panels, preserving the bike’s visual continuity as well as its protective function.
From a practical standpoint, professional repair centers emphasize accuracy in assessment before any work begins. A technician will inspect the crack’s length and trajectory, the surrounding mounting points, and whether the panel has sustained additional micro-damage that is not immediately visible. Non-destructive testing methods, including careful visual inspection, tapping tests to gauge stiffness, and sometimes diagnostic lighting, help determine whether the crack has traversed the panel’s thickness or if the fracture has peeled away from a bonding surface. This diagnostic phase informs the recommended repair strategy, balancing risk, cost, and expected longevity. It is during this stage that the distinction between DIY and professional work becomes clear: while small cosmetic cracks can sometimes be patched at home, deeper cracks near fasteners or high-stress zones demand the expertise, tools, and quality control that a trained technician provides.
The choice of repair method hinges on several factors. The location of the crack matters greatly. Cracks near mounting brackets, headlight assemblies, or the windscreen interface can alter air flow and vibrational characteristics if not correctly restored. In these instances, plastic welding may be favored to reestablish the panel’s original stiffness and alignment. For less critical areas, epoxy or resin bonding reinforced with a fabric patch may suffice. The material system also guides the approach. ABS and other thermoplastics respond differently to heat than do fiber-reinforced composites, which rely more on resin systems and fabric sheets for structural repair. Technicians must select adhesives, fillers, and reinforcements that complement the parent material, ensuring a durable bond that resists future cracking from flex or impact.
Another essential consideration is the repair center’s equipment and expertise. Authorized service providers and dedicated motorcycle repair shops bring a depth of experience in fairing materials, mounting tolerances, and finish techniques that general auto repair facilities may not consistently match. These centers train technicians to work within the constraints of motorcycle aerodynamics and rider protection, keeping the mounting points, grommet seats, and bracket locations intact. Their workflows are designed to minimize downtime, document the repair for warranty and resale, and ensure that the final product meets safety and aesthetic expectations. A shop with a strong track record in motorcycle bodywork will typically offer a transparent diagnostic report, a written repair plan, and a clear cost estimate before any invasive work begins. For riders who value precise OEM-fit results, seeking a repair center with experience in OEM-compatible materials and procedures is often worth the extra effort.
In practice, a professional repair might unfold along a sequence that begins with careful preparation. The area around the crack is cleaned to remove waxes and contaminants, lightly sanded to promote bonding, and abraded to reveal a fresh, receptive surface. The repair method is then executed under controlled conditions—temperature, humidity, and cleanliness all influence the bond’s long-term behavior. Afterward, a protective topcoat and finishing layer is applied, and the panel is cured under appropriate conditions to achieve hardness, adhesion, and gloss. Finally, the technician will re-check alignment with adjacent panels and mounting points, performing any minor adjustments needed to restore the air-fit between components. The finished result should feel solid to the touch, with a seamless transition where the patch or weld meets the original material. When done well, a professional repair not only restores strength and protection but also preserves the bike’s silhouette and value.
For riders facing larger cracks or compromised structural integrity, the option of replacement remains a viable and sometimes preferable solution. Modern fairings are designed for modularity; OEM-compatible replacements can deliver a precise fit, original appearance, and reliable durability. Replacing a damaged panel can prevent recurrent issues that stem from aged material or repeated flexing around a crack. Even when replacement is selected, professional shops often apply the same level of care to color matching and finish to ensure the new element blends with the rest of the bike. This approach is particularly important for riders who prize a flawless, showroom-like appearance, or for those who plan to enter shows or sale listings where cosmetic consistency adds tangible value.
Choosing the right repair center involves a balance of expertise, accessibility, and trust. Look for technicians who can demonstrate experience with fairings, a solid diagnostic process, and a willingness to provide a detailed plan and warranty terms. A reputable shop will discuss the expected lifespan of the repair, the likelihood of future cracks in the same area, and the precautions needed to extend the repaired panel’s service life. They should also consider the broader ride, recommending protective measures such as film protection or repaint strategies that reduce the risk of future impact damage. While some riders may be tempted to pursue cheaper, quick-fix options, the cost of repeated crack growth, misalignment, or color mismatch can surpass the price of a proper professional repair. In short, professional fairing repair is an investment in safety, aesthetics, and the long-term value of the motorcycle.
As you explore repair options, a practical step is to gather information about potential service centers before committing. Ask about whether the shop uses OEM-compatible materials, what kinds of tests they perform to certify a repaired panel’s integrity, and what their post-repair warranty covers. Request a written assessment that outlines the crack’s characteristics, the proposed method, the expected lifespan of the repair, and the anticipated turnaround time. With clear communication, riders can compare proposals and select the option that best aligns with their bike’s needs and their own expectations for performance and appearance.
For readers seeking broader context on repair pathways and how to navigate updated fairing designs, a helpful resource can be found by visiting the 2023 new fairings category. This page offers a sense of how contemporary fairing designs influence repair considerations, including the relationship between changes in airflow management and panel stiffness. 2023 new fairings
External resources also provide valuable guidance on materials, standards, and repair practices used by professional centers. For a reputable overview of industry-standard techniques and the kinds of equipment relied upon in serious repair workflows, see the external resource linked here. external resource
Reading the Crack: A Thorough Assessment of Damage Before Motorcycle Fairing Crack Repair
Reading the crack in a motorcycle fairing is more than a quick visual check; it is a careful, almost forensic process that sets the course for any repair or replacement. The decision hinges on a clear understanding of how severe the damage is, where it sits on the bike, and what material the fairing is made from. A crack may be a simple hairline, barely noticeable and easily trapped in a layer of finish, or it can run deep, fragmenting the structure and compromising both function and protection. Recognizing the difference matters because the same adhesive fix that seals a tiny fissure will not necessarily restore a large split or a warped panel. In the end, the goal is not just a cosmetically smooth surface but a fairing that remains rigid, aerodynamically faithful, and protective against wind, debris, and the weather. To reach that goal, follow a measured path that weighs repair feasibility against safety and long-term cost, and treats the assessment as the gateway to a durable outcome.
Cracks come in a spectrum of forms, and the type often guides the recommended course of action. Minor hairline cracks describe a small, clean interruption in the plastic with no missing fragments. In most cases, a precise adhesive bond can arrest further spread and restore the panel’s integrity. The key to success with these repairs is preparation: clean the surface thoroughly, remove any wax or oil residues, and lightly sand the area to create a micro-roughness that helps the adhesive grip. The repair technique commonly involves an epoxy-based or AB glue mixed in a 1:1 ratio, carefully applied along the crack, and reinforced from behind with a supporting patch. A copper strip or a fiberglass patch pressed into place can distribute stress and reduce the chance of re-cracking under vibration. When the cure is complete, the repaired area should feel solid to the touch, and the surface should be flush with surrounding material to maintain the fairing’s aerodynamic profile. This approach keeps the repair relatively affordable and non-invasive while preserving the original appearance if done with patience and attention to detail.
Larger cracks, those that span a sizeable portion of the panel or exhibit signs of structural compromise such as warping or delamination, demand a different calculus. Even when a surface seems to close up after adhesive application, the underlying glass or plastic structure may still be weakened. In such cases, a DIY bond is unlikely to deliver the long-term reliability required for a component that endures high-speed airflow, engine heat, and the constant vibration of riding. Replacement becomes a more sensible option, especially if the fault extends toward critical mounting points or the fairing’s aerodynamic shape has been distorted. A replacement preserves the original geometry, maintains protection, and supports stable handling, which is a practical investment for riders who depend on their bike’s reliability. The decision should consider not only the immediate cost but also the risk of rework, misalignment, or mismatched paint when a repair fails under stress.
Beyond the crack’s size, its location matters almost as much. Cracks near mounting points or around the front wheel well are high-stress zones. They experience repeated flexing, impact from debris, and sharper torque during steering and braking. A repaired crack in such a position may still fail under the next vibration cycle or road impact, even if the initial bond feels solid. Conversely, a crack in a low-stress area may respond well to adhesive repair because the surrounding structure can still bear the load, and cosmetic concerns can be addressed with a finish that blends with the surrounding panel. The fairing’s protective function is another essential factor; a cracked panel can invite dirt, water, and moisture into seams and cavities that hasten corrosion of internal components. Even a small crack can become a pathway for wear if moisture penetrates critical junctions, so the assessment must account for both immediate performance and longer-term durability.
To carry the assessment forward with confidence, a professional eye can be invaluable. A certified motorcycle technician or specialized body shop can perform a structural check that goes beyond the naked eye. Tools like UV lights can reveal hidden micro-cracks that are invisible in ordinary daylight, while a thorough inspection can verify whether the manufacturing layers and reinforcement materials remain intact. The Motorcycle Industry Council emphasizes the importance of proper inspection and repair standards to maintain vehicle safety and longevity. If you want to dive deeper into the recommended practices, consult the official repair guidelines for fairings.
For riders who are considering their options in the context of part availability and fit, a quick exploration of aftermarket or OEM components can help shape the decision between repair and replacement. The Honda fairings category, for example, offers a wide range of panels with varying structures and finishes, and reviewing such listings can provide a practical baseline for fit and finish expectations when planning a replacement. If you are navigating such a path, a quick look at the available options under the Honda fairings category can help establish what is feasible in terms of mounting points, contours, and color-matching requirements. Honda fairings can serve as a reference point for comparing OEM styling with aftermarket alternatives, clarifying how much of the original aura you can preserve if you decide to replace rather than repair.
Diagnostic precision also benefits from a methodical approach to moisture, stress, and paint integrity. A cracked fairing may have more than cosmetic damage; the adhesive or welding process can trap heat and alter the panel’s response to heat and cold cycles. When evaluating repairs, consider the surrounding paints and finishes. If the crack runs through a paint layer, you may face color mismatches or finish inconsistencies after repair. In some cases, the right course is to refinish the entire panel to achieve a uniform texture and shade. This is especially true when the color or gloss has degraded over time or when weather exposure has caused uneven fading. A professional paint and finish job can restore the seamless look and protect the repair area from UV damage, salt, and moisture. Because paint work can reveal subtle variations in shade, it is prudent to plan for a repaint that harmonizes with neighboring panels, ensuring the bike looks cohesive rather than patched.
The decision framework also benefits from a clear sense of the repair’s long-term implications. Adhesive repairs, reinforced with a patch, can deliver a durable fix for minor cracks and are often sufficient for riders who value cost efficiency and quick turnaround. The caveat is that these repairs require patience: exact surface preparation, precise mixing, controlled application, and correct curing conditions. A rushed or sloppy repair may create another failure point later, undermining the initial effort and increasing the total downtime. Plastic welding offers a more robust structural fuse for larger cracks, but it demands proficiency with the welding tool, steady hands, and the right heat management to avoid melting surrounding areas or warping the panel. If the fairing sits near essential airflow paths, incorrect heat application can alter the panel’s geometry in ways that degrade aerodynamics, fuel economy, or handling. In such situations, entrusting the job to a skilled technician reduces risk and preserves performance.
In the end, the core message of damage assessment is balance. Weigh the crack’s severity against the fairing’s role in protection, aerodynamics, and aesthetics. Consider the bike’s use profile—daily commuting, spirited weekend riding, or high-speed performance sessions—as this context shapes the tolerance for risk and the acceptable downtime. And, crucially, accept that some damages are better addressed with replacement rather than repair. When the fairing’s structure is truly compromised, or when the damage sits in a high-stress zone or distorts the aerodynamics, replacement not only restores the factory geometry but also ensures that the rider benefits from consistent protection and predictable handling on every ride.
If a repair path is chosen, proceed with a disciplined sequence: meticulous cleaning, light sanding, application of a compatible adhesive, reinforcement with a patch, appropriate curing, and a careful surface finish that prepares for repainting as needed. Keep in mind that the repair should be performed within a framework that prioritizes safety, roadworthiness, and long-term durability. For riders who seek additional guidance, professional services and authorized repair centers offer the advantage of standardized procedures and access to industry-tested materials and techniques. These specialists can help you navigate the complexities of fairing repair and replacement, ensuring you arrive at a solution that preserves both form and function. Finally, when contemplating aftermarket or OEM options for replacement, remember that fit and finish matter as much as the underlying integrity—taking the time to understand the available choices can save time and money in the long run. For a more structured set of repair guidelines and safety considerations, refer to formal resources and professional recommendations.
External guidelines and professional standards can be found in reputable repair resources, which provide detailed instructions on inspection, repair sequencing, and finish quality. External repair guidelines.
Cracked Fairings, Clear Decisions: Weighing Repair Over Replacement on a Motorcycle’s Protective Skin
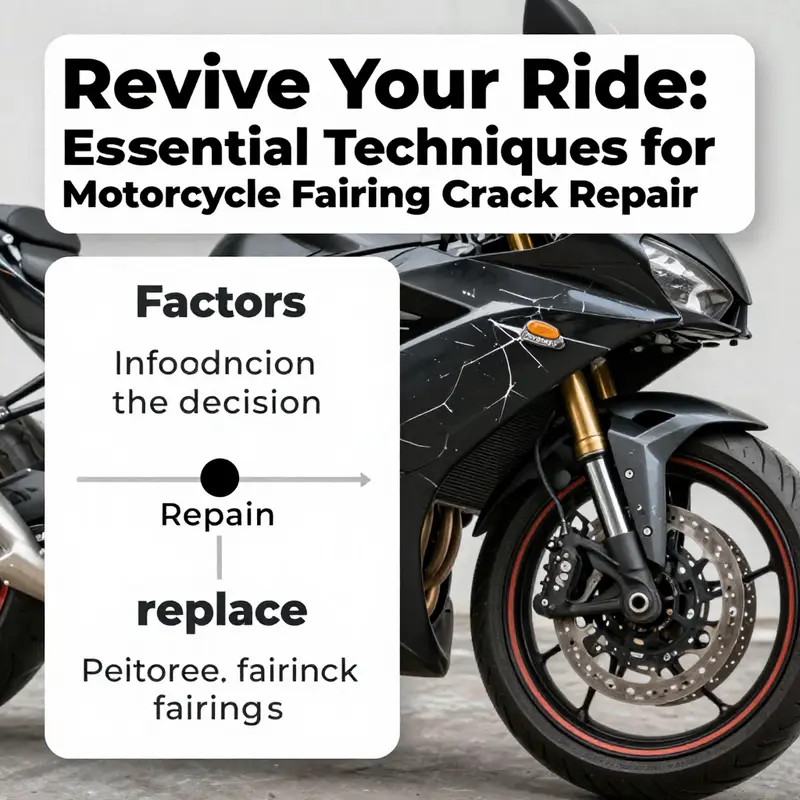
Cracked fairings can feel like a small flaw in an otherwise smooth ride, but the decision behind fixing or replacing them reaches far beyond cosmetics. The choice hinges on a careful assessment of how bad the damage is, where the crack sits, what the fairing is made of, and how the repair will affect safety, cost, and appearance over the long haul. A rider rarely has the luxury of choosing purely on price; the real criteria are reliability and protection. The fairing, after all, is not merely a shield against wind and spray. It is a structural element that helps deflect debris and weather, contributes to aerodynamics, and—even when the bike is parked—helps preserve the integrity of the bike’s frame and mounting points. When a crack appears, a quiet test begins in the back of the mind: Is this superficial or structural? Will a fix hold through countless highway miles, or does it risk failing at a critical moment? The path forward must answer those questions with honesty, since the wrong choice can compromise safety as quickly as a snapped fairing can ruin the look of a once-pristine machine.
The starting point for any repair decision is the crack’s severity and its location. Minor surface cracks are, by many standards, repairable without compromising durability. They tend to be non-structural and often appear as spiderwebs or fine lines on the exterior surface. In such cases, restoration is typically achieved through careful surface preparation and bonding. Thorough cleaning, light sanding, and a proper primer lay a solid foundation for adhesive repair. The repair approach commonly involves a two-part epoxy resin or a specialized automotive plastic adhesive. When these adhesives are mixed in the standard 1:1 ratio and applied with disciplined pressure, they can restore both the strength of the bond and the visual integrity of the shell. In practice, a common enhancement is to reinforce the repair with a strip of copper or a patch of fiberglass pressed firmly into place. The copper strip provides a durable, heat-conductive scaffolding that helps distribute load around the repair, while a fiberglass patch can spread stress more evenly across the surface. This method aligns well with the realities of plastic fairings, especially those made from ABS or similar materials, and it can deliver a repair that remains discrete and durable when executed with care.
Yet, even within the realm of minor cracks, the truth is that not every fracture is a candidate for a simple patch. The real test is whether the crack remains superficial after the repair or if the material around it shows signs of weakness—warping, crumbling edges, or thinning plastic. If any of these symptoms appear, or if the crack is creeping toward a mounting point, the risk of future failure rises. In those circumstances, repair may still be possible, but it no longer becomes a guaranteed long-term solution. The safest course is to shift focus from cosmetic healing to structural restoration, which often means replacement rather than patching. And in cases where a crack breaches a high-stress area, the structural integrity becomes the primary concern. The stake is not simply the appearance of the bike; it is the rider’s safety and the fairing’s ability to shield the rider from wind pressure and debris. In such scenarios, a replacement may be the more dependable path, even if the upfront cost is higher.
Material composition is the other essential axis of the decision. Plastic fairings come in several varieties, with ABS and polycarbonate among the most common. Each material has its own gluing and welding quirks. For ABS and similar plastics, plastic welding is a robust option for small to moderate cracks. A heat source, a compatible filler rod, and a steady hand enable the melted edges to fuse once more into a unified mass. The result is a bond that resembles the surrounding material both in strength and resilience. The process, however, requires the right temperature control and technique; otherwise, it can lead to additional warping or discoloration. Epoxy remains a reliable alternative for minor damage, especially when used with proper surface prep and a reinforced patch. The key is to match the adhesive’s properties to the fairing’s material and the crack’s location. A good rule of thumb is to treat plastics less like ceramics and more like living material that can be coaxed back into a continuous form with the right energy and restraint.
Cosmetic concerns also shape the repair-or-replace decision. Scratches, fading, or micro-scrapes that do not threaten the fairing’s structural rigidity can usually be addressed with a thorough sanding and a professional color-matching repaint. But if material is missing, edges are heavily gouged, or warping clouds the contour, even the most skillful repair may fail to restore the original look or the flawless fit that aligns with the bike’s line. In such cases, replacement becomes not only safer but more economical in the long run, since a poorly repaired fairing can require repeat work that compounds labor and downtime. The goal is to recover both function and form, not merely to hide damage.
Replacement decisions often center on fit, durability, and aesthetics. OEM parts guarantee the closest possible match to the original geometry and finish. High-quality aftermarket options can also offer solid compatibility, but the rider should weigh fitment accuracy and the risk of misalignment against the cost savings. Replacing a compromised fairing with the correct part preserves wind protection, weather sealing, and overall structural behavior, which is especially important for fairings that attach at multiple points to the bike’s chassis. The alignment of mounting points, the seamless integration with adjacent panels, and the continuity of paint and texture all contribute to a final result that feels like a single, intact shell once again. After replacing, professional repainting can be advisable to ensure the new piece matches the bike’s color and gloss level. A careful repaint erases subtle edges where the new panel meets the old, restoring the bike’s unified appearance.
The decision between repair and replacement also demands a sober view of cost and feasibility. A minor, well-executed repair can be a cost-effective choice that preserves the bike’s original structure and appearance. The repair process, though, demands patience, precise handiwork, and the right tools. It is not simply about gluing a crack shut; it is about restoring load paths, ensuring that the panel will hold up under wind pressure and vibration. A professional assessment can be crucial here. An experienced body shop can evaluate how a crack affects the fairing’s attachment points and underlying supports. They can determine whether a patch will remain bonded under sustained use or if the damage has silently compromised the shell’s integrity. For riders who value both safety and ride quality, this professional gauge can be the distinction between a repaired fairing that lasts and a repair that fails after a few months of urban commutes or highway miles.
If the damage tilts toward replacement, the decision becomes a mix of practical and aesthetic considerations. Replacement ensures a pristine appearance, a guaranteed fit, and the restoration of full wind protection. It also provides peace of mind that the pathway of air over the bike remains optimized for handling and stability. To help riders navigate this path, it is useful to consult a catalog of fairing options, such as the Honda fairings category, which offers a range of OEM and compatible pieces designed to mirror the original geometry and finish. This kind of resource helps ensure that the chosen replacement blends with the bike’s other panels and preserves the intended visual rhythm of the design. For a general sense of options, see the Honda fairings catalog.
Regardless of whether the route is repair or replacement, finishing touches matter. A professional repaint after any repair or after replacement helps the panel merge with the surrounding surfaces. A color and clear coat that match the factory finish not only looks right but also contributes to long-term protection against UV exposure and weathering. The final surface, once cured, should be smooth to the touch, free of ridges, and uniform in sheen. Achieving that requires attention to prep work, layering, and proper curing time. The goal is not merely to cover a crack but to re-create a protective, aerodynamic surface that behaves consistently at speed and in wind. In the absence of a flawless color match, even a visually perfect repair can feel off, diminishing the bike’s overall aesthetic coherence and potentially affecting resale value.
Alongside these considerations, the decision to repair or replace is also a question of expertise and availability. DIY repairs can save money and provide a satisfying project, but they demand the right tools, the capability to work with plastics, and a steady hand. In complex or safety-critical cases, a certified motorcycle body shop offers expertise that translates into durability and safety. A professional assessment can identify hidden flaws, such as micro-cracks that extend into mounting areas or cracking that begins to propagate under load. In those situations, handing the work to a trained technician minimizes the risk of a repeat failure and ensures the repair or replacement is performed with the precision these parts require.
For riders who want a practical pathway to informed decisions, a concise framework helps: assess the crack’s depth and location, identify the material, gauge safety implications, estimate repair versus replacement costs, and evaluate the aesthetic outcome. The most critical factor remains safety—the fairing must continue to shield the rider and preserve the bike’s controlled handling under speed and wind. If the crack threatens structural integrity or mounting alignment, replacement may be the prudent option. If the damage is localized, non-structural, and the repair can be reinforced to distribute load, a well-executed repair can restore the panel’s function and look. The final choice should reflect a balance between reliability, cost, and appearance, with safety informing every calculation.
Internal link for further exploration of fairing options can be helpful when considering replacements and compatibility: Honda fairings category.
External guidance can broaden the understanding of repair versus replacement beyond the practical steps. A widely cited resource offers a comprehensive perspective on when to repair and when to replace, reinforcing the idea that safety and durability trump convenience or price. For additional context, see the external resource: RevZilla’s Motorcycle Fairing Repair & Replacement Guide.
Final thoughts
Ensuring that your motorcycle fairing is in optimal condition is pivotal not just for performance but also for aesthetic appeal and customer satisfaction. By understanding the various methods and services available for crack repair, along with adept assessment techniques, you can confidently guide your clients through the repair process—whether they opt for a DIY solution or professional service. Ultimately, knowing when to repair versus replace can save time and cost, ensuring your motorcycle business thrives and your customers remain safe on the road.