Introduction
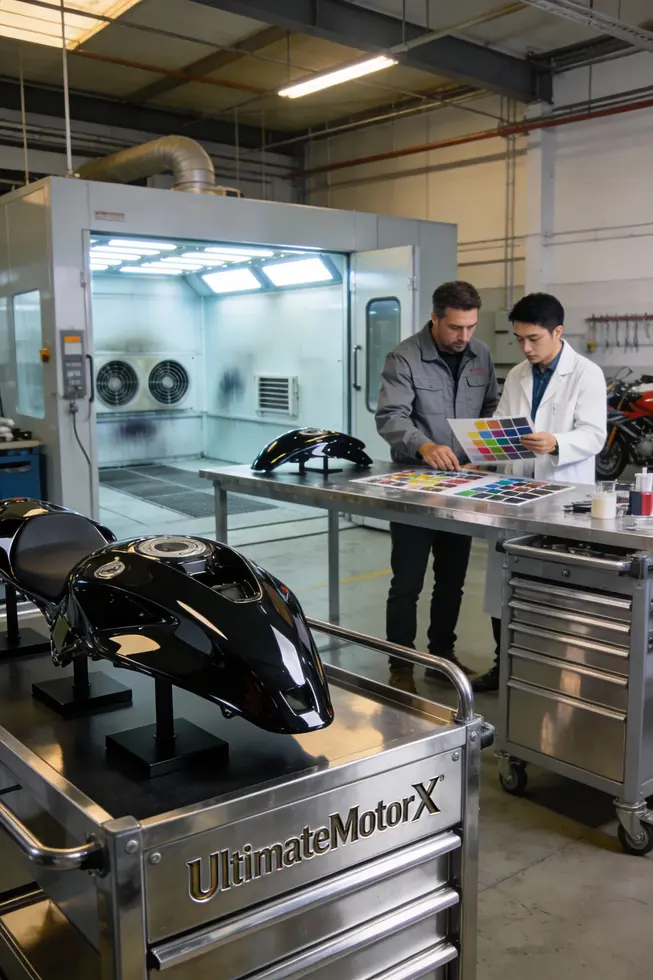
Motorcycle fairings are a high-visibility product for brands and riders alike. For business owners in customization, repair, or OEM‑aligned aftermarket segments, delivering consistent, high‑quality spray finishes is a competitive differentiator. Spraying off‑bike offers control and efficiency; improper prep or environmental missteps can lead to costly delays and returns. This guide translates technical steps into scalable practices for a shop floor: planning the workflow, choosing substrates, selecting paints, executing spray passes, and final inspection. The chapters build a lifecycle approach: from preparation and materials to the spraying process, finishing, and safety and environmental considerations. Each stage aligns with OEM expectations for fit, appearance, and durability while optimizing throughput and minimizing waste. Whether you operate a boutique shop, a contract painter for OEMs, or a parts distributor offering finishing services, applying these principles will help you standardize quality, reduce rework, and elevate the perceived value of your fairings. As demand for customized or restored fairings grows, manufacturers and repair centers must implement repeatable processes that protect color accuracy, aerodynamics, and finish stability across materials such as fiberglass, ABS, and carbon fiber. The five chapters that follow translate the research into actionable SOPs, equipment choices, and safety practices suitable for small shops and larger service centers alike.
Tables of Contents
Chapter 1: How to Spray Motorcycle Fairings: Preparation for the Spray Process
- Preparation for the Spray Process — Foundational Principles and Surface Readiness
Chapter 2: How to Spray Motorcycle Fairings: Preparation for the Spray Process
- Beyond Sanding and Priming: Economic, Geopolitical, and Societal Currents Shaping Motorcycle Fairing Prep
Chapter 3: How to Spray Motorcycle Fairings: Materials and Surface Prep
- Technological Foundations for Motorcycle Fairing Coatings: Material Selection, Coatings, and Precision Surface Preparation
Chapter 4: How to Spray Motorcycle Fairings: Materials and Surface Prep
- Beyond the Coats: Economic, Geopolitical, and Societal Dimensions of Prep Materials in Motorcycle Fairings
Chapter 5: How to Spray Motorcycle Fairings: The Spraying Process and Techniques
- Technological Foundations and Practical Applications in Spraying Motorcycle Fairings
Chapter 1: How to Spray Motorcycle Fairings: Preparation for the Spray Process

1. Preparation for the Spray Process — Foundational Principles and Surface Readiness
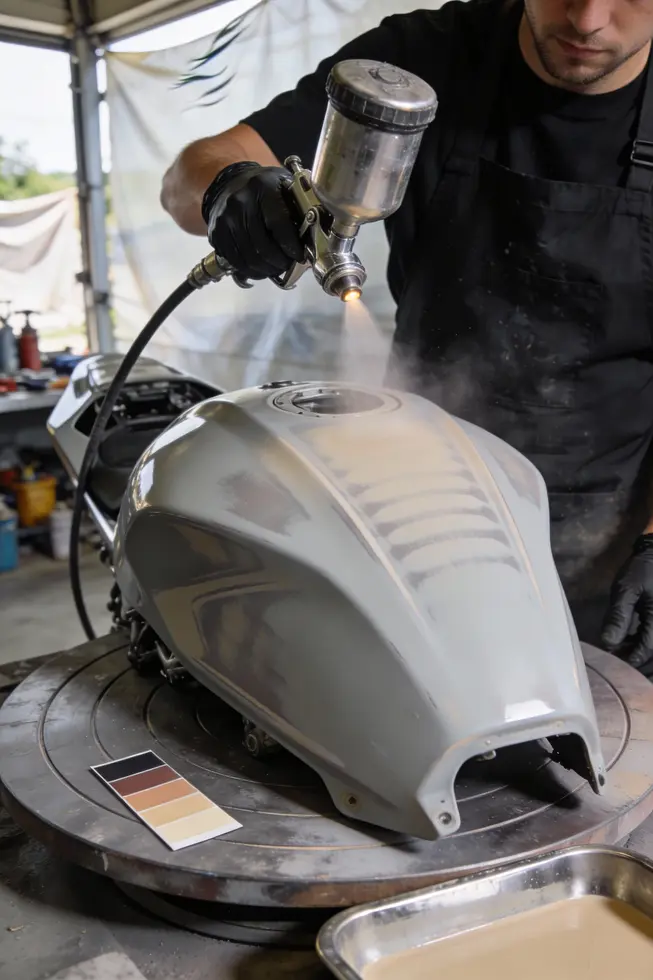
Spraying motorcycle fairings requires understanding coatings science and meticulous surface preparation. The goal is a durable, high-gloss finish with even color and reliable adhesion. This phase covers substrate choices (fiberglass, ABS, carbon fiber), primer and clear coat considerations, and the critical steps of surface preparation: cleaning, degreasing, masking, and careful sanding to create a uniform base for primer and subsequent coats.
Chapter 2: How to Spray Motorcycle Fairings: Preparation for the Spray Process

1. Beyond Sanding and Priming: Economic, Geopolitical, and Societal Currents Shaping Motorcycle Fairing Prep
Preparation for spraying motorcycle fairings is the quiet backbone of any finish you’ll be proud to ride. It is not enough to have the right colors, the correct spray technique, or the perfect weather window; the durability, appearance, and even the aerodynamic integrity of the final result hinge on a meticulous, well-considered prep. This subchapter threads together the practical steps of cleaning, rust management, blocking and smoothing, priming, and masking with a broader view of how broader forces—economic costs, geopolitical realities, and social practices—shape every choice you make in the preparation phase. In doing so, it remains faithful to the chapter’s core aim: to anchor the spray process in preparation that is as thoughtful as the finish is demanding, while acknowledging the real-world contexts that frame DIY painting for motorcycle fairings.
Begin with the decisive first move: removing the fairings so the panels can be treated off the bike without overspray compromising other components. This is more than convenience; it is about control. Off-bike prep allows you to approach each surface with uniform coverage and to address edges, curves, and joints that would otherwise trap dust or oil and undermine adhesion. Once off, a thorough cleaning follows. Contaminants—grease, wax, dirt, and fingerprints—act as barriers between the coating and the substrate, creating micro-movements that can lead to peeling or hazing later in the life of the finish. A pre-painting degreaser or cleaner is not a luxury but a necessity. Wipe down until the cloth emerges clean, and recheck problem areas like fastener pockets and seams, where lingering residue can undermine primer adhesion. If you encounter any rust, which on metal components can threaten long-term corrosion resistance, proceed with a cautious rust-management process. Although plastics and fiberglass dominate modern fairings, any metal subsections or interfaces require attention. A controlled, dilute phosphoric acid treatment can dissolve rust that would otherwise migrate through the coating system. The principle is simple: treat the rust at its source, not at the moment of paint failure. Always add acid to water, never the other way around, and observe dwell times closely. After the dwell, scrub with a nylon brush, rinse, and neutralize with a baking-soda solution before a thorough rinse and dry. A light film of oil can be applied to inhibit flash rust as the panels await the next step. These steps—though technical—establish the bedrock upon which adhesion and longevity are built.
From rust control, shift your attention to the surface itself. The aim is to create a mechanical bond for primer and to reveal all imperfections that would otherwise telegraph through the final coat. Begin with a deliberate sanding, using 80-grit paper to expose the first layer of imperfections and to roughen the surface enough to hold primer. This is a dance between remove and preserve: too aggressive, and you risk altering the fairing geometry or exposing composite fibers; too mild, and you don’t create the necessary key for adhesion. An orbital sander can help achieve evenness, but hand work remains essential for corners, edges, and complex curves. After the initial sanding, assess the surface for dents, low spots, or irregularities. For depressions or shallow dips, applying a body filler provides a smooth, uniform plane. The trick is to skim the filler on a cured, level surface and then to bring it down with progressively finer grits—moving from 220 toward 320 and beyond to reduce edge line visibility. Once cured, the surface should respond to a light pass with no obvious ridges, ridges, or pinholes. Mask off areas not intended for paint with tape and paper, ensuring clean lines and avoiding unintentional overspray. Before priming, a tack cloth removal of any residual dust completes the preparation of a clean canvas. This sequence—clean, dull, fill, sand, mask—creates a base that is both smooth and capable of accepting a durable, even primer layer.
Primer is the hinge point between preparation and color. Two to three coats of epoxy primer is a prudent standard for most plastics and fiberglass, providing rust protection where metal edges may be present and helping the adhesion of the subsequent color layers. Between coats, a short dwell or flash time helps the primer set without creating sags or solvent entrapment. The aim is uniform coverage across jams, edges, and panel faces, with special attention paid to edges where panels meet and feathering is required. After priming, allow the panels to cure in a dust-free, well-ventilated space at moderate temperature. Patience here is essential; primer can take days to fully harden depending on the humidity and airflow in your shop. For plastic fairings, primer compatibility is critical: epoxy primers work with many composites, but a quick test on scrap material if you’re unsure helps avoid a failure that could spoil the final finish. In this phase, the choice to consult broader resources—like the C61 category of compatible primers and coatings—can provide practical reassurance about compatibility and coverage. See the internal link for more on compatible materials, and integrate that knowledge into your prep plan.
The weather window is not an afterthought. Spraying outdoors demands stable conditions that can be difficult to maintain, especially when you’re balancing curing times and dew points. The initial guidance suggests temperate conditions around 13°C (55°F) or warmer, with warmed cans to prevent the viscosity from thickening in cooler air. Temperature influences how the solvent evaporates, how the pigment lays down, and how much time you have to correct flaws between passes. If spraying indoors, ensure adequate ventilation and manage dust and humidity; if outdoors, pick a calm day and shield the work area from windborne debris. A controlled environment supports the consistency needed for a truly professional look and helps minimize the need for rework, which dovetails with the broader economic considerations of preparation protocols.
Economic implications thread through every decision in this phase. Thorough prep—promoting adhesion, reducing the likelihood of peeling, and extending the life of the paint job—directly translates into lower long-term costs. Skipping steps, or rushing through them, often surfaces as costly rework, with peeling, micro-cracking, or edge wear that complicates future touch-ups and require a complete repaint sooner than expected. From the standpoint of a DIYer, investing in good primer, accurate masking, and careful surface preparation can be financially prudent: the upfront expense of quality materials and time is offset by fewer repairs and a longer-lasting finish. When you consider bulk purchases of primer and related supplies, the per-unit cost declines, further tipping the scale toward a methodical prep approach. These economic dynamics are not mere abstractions; they shape how much time homeowners invest, how meticulously they prepare, and how sustainable their practices are over multiple projects.
Geopolitical factors inevitably color the prep landscape as well. Many of the chemicals and solvents used in rust removal and primers are part of a global supply chain that is susceptible to tariffs, trade restrictions, and regional shortages. For instance, reliance on certain chemical suppliers can expose a project to fluctuations in price and availability, particularly in climates where international relations influence shipping costs or the cadence of supply. The reality that some components may be sourced internationally means that homeowners must be prepared to adapt—perhaps by choosing alternative, domestically produced materials or adjusting workflow to accommodate delivery delays. This means that preparation protocols cannot be viewed in isolation from the economic network in which they operate. Such considerations underline why some hobbyists favor simpler, safer alternatives, or why they explore more conservative strategies that reduce reliance on volatile supply chains without compromising performance. The broader implication is a shift toward adaptable, resilient practices that maintain quality while acknowledging the realities of global trade.
Societal implications also shape how a typical rider approaches prep. The democratization of customization means more people can experiment with fairing aesthetics in a self-reliant, hands-on manner. This cultural shift—fueled by accessible information and community sharing—encourages iterative learning and better resource stewardship. Yet it also places ethical and environmental responsibilities squarely on the DIYer. The disposal of chemical waste, the safe neutralization of rust treatment residues, and the management of used rags or paper are not mere footnotes; they impact urban garages and the surrounding environment. The logic of responsible practice guides choices about cleaners, rust removers, and how waste streams are handled. In this light, the societal trend toward safer, cleaner methods—such as waterless cleaners or low-odor formulations—reflects a maturation of the hobby that respects both personal safety and environmental stewardship.
Incorporating these broader currents does not diminish the importance of the hands-on steps described above. Instead, it clarifies why each decision matters, from selecting an appropriate grit for sanding to choosing the right primer system and from planning for a dry, dust-free curing space to accounting for potential supply constraints. The practical, tactile work of cleaning, rust removal, smoothing, and priming remains the core of a reliable finish; it is the thoughtful integration of economic prudence, geopolitical awareness, and societal responsibility that elevates a paint job from a momentary aesthetic to a durable, repeatable craft.
If you are exploring compatible materials and want to see how others in the field approach the balance between performance and practicality, consider browsing the relevant product categories that align with the prep phase. These resources can offer concrete guidance on the types of primers and fillers that work best with different fairing substrates, and they provide a practical reference for selecting materials that align with your budget and the conditions you face. For an anchored starting point on compatible options, see the C61 category, which compiles materials suitable for common fairing substrates and prep requirements.
With the preparatory steps and the surrounding considerations in place, you are positioned to move into the spray process itself with confidence. The discipline of thorough prep pays off here, delivering an even base, robust adhesion, and a finish that can withstand the test of time and the demands of riding life. The next phase will expand on the spray technique itself, including how to apply multiple thin coats, how to sand between layers for the ultimate smoothness, and how to protect your work area from overspray and environmental factors. The preparation you have now allows the spray to perform at its best, ensuring the final result matches the ambition you bring to your motorcycle’s appearance and performance.
Chapter 3: How to Spray Motorcycle Fairings: Materials and Surface Prep
1. Technological Foundations for Motorcycle Fairing Coatings: Material Selection, Coatings, and Precision Surface Preparation
Spraying motorcycle fairings starts long before the spray gun fires. It rests on a precise understanding of what the fairing is made from, how the surface behaves when a coating is applied, and how the entire preparation sequence shapes the finished look and its durability. Substrate choice drives every subsequent decision, from primer chemistry to topcoat finishing, and it also determines how aggressively you must treat the surface to achieve reliable adhesion. The common substrates—ABS plastic, PC-ABS blends, fiberglass, and carbon fiber—each present a distinct combination of surface energy, thermal behavior, and mechanical texture. ABS and PC-ABS are widely used for their balance of cost, weight, and resilience; fiberglass offers stiffness and strength at a modest weight penalty; carbon fiber signals premium performance with a resin-rich, often smoother but inherently different surface to bond. The raw chemistry of these materials matters as much as their outward appearance. Adhesion is not a single step but a carefully planned sequence that begins with understanding how the coating system will interact with the substrate on a molecular level. Silane-based adhesion promoters, for example, form bridging layers that can mitigate energy barriers at the interface between plastics and coatings. They do not replace good preparation, but they can significantly improve uniform adhesion and long-term integrity in environments that subject fairings to heat, sun, rain, and vibration. When you plan your coatings, you should consider not only color and gloss but how UV exposure will affect each substrate. ABS, PC-ABS, and their UV-stable clear coats are a common pairing, yet the aging of any plastic surface under sun and weather requires layers that resist yellowing, micro-cracking, and chemical attack. A multi-layer system with UV-absorbing stabilizers in the clear or in the base layer offers superior color retention and a longer service life, especially for fairings exposed to outdoor riding or trackside heat. For a broad, practical overview of how these substrates influence the coating approach, see the motorcycle fairings guide. The preparation of a fairing surface does not simply hide imperfections; it creates a dependable canvas for film formation. The foundational steps begin with meticulous cleaning and degreasing to remove oils, waxes, and fingerprint residues that accumulate during manufacturing and handling. A clean surface minimizes contamination at the molecular level and reduces the risk of solvent resistance issues later in the process. After detergent wash and thorough rinsing, a final wipe with an appropriate solvent ensures a residue-free baseline. The importance of dry, particle-free surfaces cannot be overstated, because even microscopic contaminants can interrupt primer wetting and lead to pinholes or micro-scratches that show through the finished coat. Degreasing must be followed by careful inspection under good light to verify the absence of streaks or smears, especially around contour features where residue tends to accumulate. Sanding is the next critical move, and it must be calibrated to the substrate. A typical progression begins with rough keying in the 120–240 grit range to create a mechanical “tooth” for the primer. This is not about removing material so aggressively as about providing a surface profile that promotes adhesion. The process then moves toward finer grits, such as 400–800, to smooth the surface while preserving the key that the primer will hold onto. For flat panels, machine sanding is efficient; for edges, corners, and delicate features, hand sanding helps prevent heat buildup, warping, or gouges that could affect fitment or aerodynamics. If the surface has been repaired, the sanding sequence should end with the same final grit to ensure uniform film build across repaired and original areas. Masking plays a quiet but essential role here. Non-paint areas must be protected with high-quality automotive tapes and coverings to prevent overspray and edge bleed that would complicate adhesion and edge definition. Primer systems are selected to bridge the interface between the prepared substrate and the color basecoat. Epoxy or plastic-compatible primers are the workhorses, but their job is more than filling scratches. They act as the first barrier to moisture and micro-defects, smoothing the microscopic texture created by sanding and offering a uniform substrate for adhesion. In practice, primers are applied in multiple coats—often three—with carefully timed flash intervals. These intervals allow solvent evaporation and surface leveling to minimize solvent pop and orange peel in subsequent layers. Adequate cure times between coats are critical because premature coating can trap solvents, leading to blistering or soft films. The basecoat then goes on in multiple passes, with each pass building color depth and coverage while preserving the flat, even appearance that supports aerodynamics and aesthetics. Color matching becomes particularly significant when blending new panels with older fairings or when a custom design requires precision transitions. Topcoats and finishes complete the system, and their selection hinges on both appearance and performance. Gloss, metallic, pearl, and matte options each present unique maintenance considerations. Gloss and metallic finishes are typically more forgiving in outdoor exposure when under a UV-stabilized clear and properly cured, but they demand a consistent film thickness to avoid light-related irregularities. Matte and pearl effects, while visually striking, emphasize uniform surface energy and scratch resistance; they can reveal dust and minor defects more readily and require careful maintenance to preserve the intended texture. The finish is not a single layer but a system, with a clear coat providing UV protection, gloss retention, and abrasion resistance. Many modern clear coats incorporate UV absorbers and anti-yellowing chemistries, and some combinations employ multiple clear layers or laminates to extend color stability and gloss over the life of the fairing. A three-layer coating system—primer, basecoat, and clearcoat—remains a practical benchmark for consistent results. In higher-end or industrial contexts, additional layers or specialized topcoats may be introduced for enhanced UV resistance or chemical protection. The spray technique itself remains the preferred method to control atomization, film build, and defect management; however, environment plays a decisive role. A spray booth with controlled temperature and humidity yields repeatable results by stabilizing solvent evaporation rates and preventing moisture-related defects. For larger scale work and certain primer applications, airless systems can deliver the required film thickness and speed, but they demand careful nozzle and pressure control to avoid texture variations or overspray. Post-application care focuses on curing and surface integrity. Curing windows typically span from several hours to a full day for initial handling, with full solvent outgassing and crosslinking that may take days to weeks, depending on the formulation. During the curing phase, aggressive cleaning, polishing, or chemical exposure should be limited to avoid interfering with film formation. Once cured sufficiently, the fairing can be wet-sanded to remove fine sanding scratches—often using very fine abrasives around 2000 grit—followed by a multi-step polishing sequence to restore factory-like gloss. The goal is a smooth, defect-free surface capable of enduring cleaning cycles, weather exposure, and routine maintenance without losing color depth or clarity. Beyond the surface, adhesion science informs how coatings behave under long-term stress. Silane-based adhesion promoters can dramatically improve the bond between plastics and coating systems by forming chemical bridges at the interface. The mechanism centers on the silane’s ability to bond to inorganic surfaces and to interact with the polymer through its organic functional group, creating a robust, durable interface. This technology helps overcome the inherent challenges of bonding to ABS, PC-ABS, and related plastics, particularly when water activation is not part of the process or when high-temperature cycles are expected in service. Practical use of silane promoters requires adherence to product-specific instructions, but the potential gains in coating integrity and long-term appearance are substantial. Advanced surface treatment technologies provide additional routes to improve adhesion and surface energy. Plasma and corona treatments modify the surface to enhance wettability without adding solvents, while chemical cleaning and etching offer targeted conditioning for particular substrates. In some workflows, a combination of mechanical roughening, chemical conditioning, and surface treatment yields the most reliable adhesion, especially for complex contours or repairs where consistent primer bonding is difficult to achieve with mechanical alone. Quality control ties the entire process together. A successful outcome requires verifying edge definition, color match, gloss uniformity, and absence of coating defects such as runs, dust inclusions, or solvent pop. Post-curing inspection and light or cross-sectional checks help confirm adhesion and durability, ensuring the fairings will endure vibration, temperature variations, and exposure to the elements during real-world riding. A practical approach to quality is to perform test sprays on inexpensive or track-only panels to validate color, laydown, and curing behavior before committing to a full on-bike application. For readers seeking a practical workflow and deeper step-by-step guidance that consolidates these concepts into actionable steps, the motorcycle fairings guide provides a comprehensive reference that aligns with this subchapter’s technological foundation. motorcycle fairings guide will help you translate these principles into a consistent, repeatable process from surface prep through final finish. This integration of material science with disciplined technique is what underpins a durable, aesthetically compelling spray result that preserves aerodynamics and rider satisfaction across years of use. As you move forward with your project, remember that each substrate choice nudges the entire coating system toward a unique balance of adhesion, finish, and longevity, and that mastery comes from honoring the science behind the surface as much as the spray technique itself.
Chapter 4: How to Spray Motorcycle Fairings: Materials and Surface Prep

1. Beyond the Coats: Economic, Geopolitical, and Societal Dimensions of Prep Materials in Motorcycle Fairings
The journey from a bare fairing to a flawless finish begins long before the first spray touches the surface. It rests on a complex interplay of materials, preparation techniques, and the wider systems that supply, regulate, and shape how coatings are chosen and applied. When we talk about the materials and surface prep for motorcycle fairings, it is easy to fixate on color, gloss, and texture. Yet the truth is that what lies beneath—the substrate, the primers, the adhesion promoters, and the solvents—dictates not only how well the coating adheres and wears, but also how efficiently the work can be done, how safe it remains for the people involved, and how it travels through the broader currents of economy, regulation, and society. In this subchapter, we explore that larger frame while staying anchored to practical considerations. We will see how the choice of materials and the prep sequence are not mere technical details but levers that connect shop floors to global supply chains, regulatory regimes, and lived worker realities, all of which feed back into the quality and sustainability of the finished fairing.
Motorcycle fairings come in a few common families of substrates—fiberglass-reinforced plastics, standard ABS or ABS/PC blends, and, in high-end builds, carbon fiber composites. Each substrate brings its own surface chemistry and mechanical profile. FRP, with its resin-rich matrix, often carries wax residues and surface oils from mold release that can hinder adhesion. ABS-based plastics, lighter and cheaper, present challenges related to surface energy and potential micro-missives that can trap solvents or lead to poor film formation if not properly prepared. Carbon fiber, prized for stiffness and strength, demands meticulous surface conditioning to ensure that primers and clear coats bond to the microscopic texture of the weave and resin. Preparation, therefore, is not a one-size-fits-all step; it is a substrate-aware discipline. It begins with thorough cleaning to remove oils, waxes, and release agents and proceeds through mechanical abrasion that creates the right roughness for mechanical interlock. If the substrate is particularly resistant to adhesion, chemical modification—such as adhesion promoters that increase surface energy—becomes essential. These promoters, while often invisible in the final sheen, play a critical role in long-term performance, especially on plastics and composites where the bond between resin and coating must endure outdoor exposure, temperature cycles, and the vibrations of riding life.
Within the prep sequence, primers act as the hinge between the substrate and the color. Epoxy primers rarely disappoint for corrosion resistance and universal adhesion; polyester and polyurethane primers provide build and leveling, helping to smooth imperfections and create a uniform base for color. On difficult plastics, surface-etch primers can be indispensable, offering a chemical bridge that improves mechanical bonding. Fillers and putties step in to repair gouges and create a consistent contour, allowing the subsequent basecoat to lay down evenly. The basecoat itself—pigmented layers with metallics or pearls in premium finishes—relies on the compatibility of the pigment system with the primer and the clear coat that follows. Clear topcoats, typically two-component polyurethane or urethane systems, seal in color and provide gloss, while UV stabilizers help resist yellowing and degradation from sun exposure. In all of this, the substrate and the prep materials must be matched not only to achieve a crisp, durable finish but to enable predictable results across a range of ambient conditions and riding environments.
The practical craft of prep demands a disciplined workflow that begins with cleaning and degreasing to remove oils, silicone residues, and waxes that would otherwise sabotage adhesion. Mechanical abrasion is then used to create surface roughness that enables the primer to grip. The degree of abrasion is tailored to the substrate: rougher scuffing for FRP and tougher plastics, finer scuffing for carbon fiber composites where you want to preserve the weave’s integrity and minimize fiber exposure. After abrasion, a careful sequence of adhesion promotion, priming, filling, basecoating, and clear coating unfolds. Each step has its own flash and cure requirements, and each decision—whether to supplement with a filler first or to introduce an adhesion promoter early in the sequence—can ripple through cure times, finish quality, and eventual durability. A well-planned prep also includes masking and protection to prevent overspray on other components and to keep lines clean. This is not merely about aesthetics; it is about the aerodynamics and the uniformity of the lamination that shields the fairing from environmental exposure and wear.
Beyond the shop floor, the materials and processes we choose connect to broader economic and regulatory realities. Prep materials—degreasers, adhesion promoters, primers, basecoats, and clears—sit on a supply chain that stretches across regions, with fluctuations in availability, price, and regulatory acceptance. Materials in these systems are subject to rules governing volatile organic compounds (VOCs) and worker health and safety. Regions with stringent VOC limits may favor waterborne or low-VOC formulations, even when those choices demand different equipment, humidity control, or longer cure times. The implications are practical: if a shop shifts toward waterborne systems to stay compliant and reduce emissions, it may need to invest in new spray equipment, ventilation strategies, and staff training. That investment has to be weighed against the savings from reduced solvent usage and potential regulatory risk. This is a classic example of how economic incentives and regulatory frameworks steer material selection and process design in ways that influence both cost and finish quality.
Supply-chain volatility magnifies these choices. Coatings and their components—resins, pigments, accelerators, and curing agents—are frequently sourced from global networks that can be disrupted by geopolitical events, shipping delays, and regional shortages. A shop’s ability to secure a stable supply of primers or topcoats often hinges on diversified sourcing and the capacity to adapt formulations to available materials. Such adaptability is not simply about cost; it is about consistency of finish, color matching, and long-term performance under mounting environmental stress. The geopolitical layer also shapes regulatory expectations that differ across borders. In some regions, regulatory regimes may push rapid adoption of low-emission systems, while others may maintain broader tolerances for traditional chemistries. This divergence can create a mosaic of regional best practices, complicating cross-border work and encouraging manufacturers and shops to tailor their prep and coating strategies to local demands.
Societal considerations enter the frame through worker safety, environmental stewardship, and ethical supply chains. The handling of isocyanates, solvents, and other hazardous components requires robust ventilation, protective equipment, and training. Practices that prioritize exposure control not only protect workers but reduce the risk of costly health claims and regulatory penalties. Environmental justice concerns emerge when communities near production facilities face disproportionate exposure to solvent emissions or waste management challenges. Transparent sourcing and responsible waste handling become not only moral imperatives but business considerations, as customers increasingly demand coatings that demonstrate sustainability and social responsibility. In the same breath, there is growing momentum toward safer, cleaner processes, which can reshape market expectations and push suppliers to innovate with lower-emission chemistries and more recyclable containment. The shift toward sustainability does not erase the technical demands of prep; it reframes them, urging a holistic view that intertwines finish quality with health, safety, and environmental outcomes.
For practitioners, these layers of economic, geopolitical, and societal context translate into concrete decisions about how to approach prep. Material selection should begin with substrate compatibility and the expected service environment of the fairing. A practical strategy is to map a prep protocol that aligns with the substrate—FRP, ABS, or carbon fiber—while incorporating adhesion promoters where needed and choosing primers and topcoats with proven performance under outdoor exposure. The prep sequence should be designed for reliability and repeatability, including standardized cleaning regimens, controlled abrasion, methodical adhesion testing, and a disciplined masking plan. Consider also the total cost of ownership, not just the price tag of a single can or bottle. Labor time, equipment needs for proper ventilation, and the potential for waste disposal costs all accumulate. A shop that anticipates these factors can optimize throughput and reduce rework caused by adhesion failures or finish defects.
From an educational standpoint, it is worth acknowledging the value of cross-regional knowledge exchange. Shops operating across different markets benefit from learning how others navigate regulatory changes and supplier dynamics. Keeping a ready set of alternative formulations and suppliers can mitigate disruption risk, while training programs focused on health and safety raise the bar for all workers involved in prep and coating operations. When discussing this topic with teammates, it helps to anchor conversations in the practical realities of the bench: how a given substrate responds to a particular primer, how a specific cure window fits into a daily production rhythm, and how the color system interacts with the chosen clear coat to resist UV exposure. The synthesis above points toward a critical, often overlooked truth: the quality of a fairing’s finish depends as much on the prudence of material choices and prep discipline as on the glamour of color and the sheen of the final coat.
If you want a concise bridge to product guidance within this broader landscape, consider this focused resource on a practical category that aligns with common prep decisions: Product category C61. This reference can help illustrate how substrate compatibility and prep compatibility map onto available coatings and systems, reinforcing the idea that smart prep begins with an honest assessment of materials and ends with a finish that endures. While the exact formulations and suppliers will vary by region and shop, the underlying logic remains universal: match substrate with an adhesion-promoting path, implement a disciplined layering sequence, and honor safety and environmental considerations as constant companions to performance and aesthetics.
Chapter 5: How to Spray Motorcycle Fairings: The Spraying Process and Techniques

1. Technological Foundations and Practical Applications in Spraying Motorcycle Fairings
Spraying motorcycle fairings sits at the intersection of material science and hands-on craft. At its core, the process translates the chemistry of plastics and coatings into a durable, aesthetically pleasing finish that can endure vibration, UV exposure, impact, and the rigors of riding. The journey from substrate to surface gloss begins long before any color is laid down. It starts with an understanding of what the fairings are made from—ABS plastics, fiberglass-reinforced plastics, or, in some higher-end builds, carbon fiber composites—and how each substrate interacts with coatings. ABS is light and forgiving, but its surface energy is comparatively low, which can challenge adhesion. Fiberglass brings strength but often requires careful grain and surface conditioning to keep resin residues from showing through. Carbon fiber, while offering exceptional stiffness and weight savings, introduces a unique chemistry of resin-rich layers and micro-roughness that must be primed to accept color. Each of these substrates responds differently to abrading, promoter chemistry, and primer chemistry. The technology, then, is not a one-size-fits-all recipe but a tuned system that harmonizes adhesion, flexibility, and long-term color stability. When this integration works, the result is not merely color on plastic; it is a resilient, flexible film that moves with the fairing without cracking or delaminating, preserving gloss and color integrity in the face of wind, debris, and sun. For practitioners, this is both a science and an art, a dance between surface energy, crosslink density, and practical spray technique, all aimed at a uniform, high-quality finish that can be reproduced across panels and projects.
From a technological perspective, the most critical decisions happen at the surface. Plastics have relatively low surface energy, which can hinder initial adhesion. To overcome this, the system relies on adhesion promoters and plastic-specific primers that bridge the polymer matrix and the subsequent coatings. These primers are often epoxy- or urethane-based, designed to bond chemically with the plastic while presenting a receptive layer for base coats. The base coats themselves are typically two-component urethanes that offer color, opacity, and UV resistance. When metallics, pearls, or candies are desired, the pigment and effect technology require precise layering and sequencing to avoid mottling and ensure depth. The final layer, a two-component polyurethane or acrylic urethane clear coat, adds gloss, scratch resistance, and weather protection, while maintaining enough elasticity to tolerate flexing as the bike vibrates and the fairings flex with airflow and riding conditions.
The substrate-to-topcoat relationship hinges on a careful balance of surface energy, mechanical interlock, and chemical bonding. A well-prepped surface provides micro-roughness that increases mechanical grip, while the adhesion promoter helps form chemical bonds with the polymer matrix. The result is a multi-layer system that remains flexible and resistant to cracking as the fairings flex at speed. This may sound abstract, but it translates into practical steps on the shop floor: cleaning, decontaminating, abrading to a defined micro-roughness, applying promoter and primer, building a smooth base, layering color with the correct stratification for metallic or pearl effects, and finally sealing with a durable clear that preserves gloss and protects against UV and road debris. The science here is nuanced but approachable; the job becomes manageable when you follow a systems approach, using compatible materials designed for plastics and controlled environmental conditions.
Consistency and color control are another pillar of the technological foundation. Pigment technology dictates how color, pearlescence, metallic flecks, or candy effects appear under varied lighting. A proper base coat must be UV-stable and designed for plastics, while the clear coat must offer scratch resistance and maintain flexibility without embrittling over time. Crosslink density is tuned so the film remains elastic enough to move with the substrate but robust enough to resist peeling and micro-cracking. In practice, this means selecting a primer that wet-sands to a flawless surface, applying a base coat with even coverage and appropriate flash times, and finishing with a clear that builds depth without orange peel or haze. It also means understanding curing dynamics: temperature, humidity, and ventilation can alter the rate of chemical crosslinking, influencing gloss, hardness, and the risk of defects like blush or solvent entrapment. The goal is a finish that looks as good on the showroom floor as it does after a season of use on the road or track.
For those approaching this work as a holistic process, a practical touchstone is to consult a well-rounded reference on plastic refinishing. A reliable guide compiles the physics of surface tension, the chemistry of primers and topcoats, and the craft of spray technique into a cohesive workflow. This broad perspective helps align the on-bike realities—flex, vibration, and exposure—with laboratory principles, translating theory into predictable results. The best practice is to view the project as an integrated system: you plan around substrate type, you prep with substrate-appropriate abrasives and cleaners, you select a primer and base coat system designed for plastics, you execute the spray with gun settings and distances tuned to thin, even coats, and you finish with a clear that yields the desired gloss and resilience. In other words, the spray booth becomes a controlled environment where science and practice converge, producing a finish that not only looks excellent but endures.
To connect theory with accessible, real-world guidance, many skilled refinishing guides emphasize the value of a structured but adaptable workflow. Before you reach for color, you build a solid foundation: clean, defect-free surfaces; appropriate adhesion promoters or primers; careful wet-sanding to remove orange peel from the primer; and a dry film thickness that supports the color and the clear without sags. The spraying itself benefits from a disciplined technique: use a modern spray gun with forgiving atomization, a typical distanced application of about 6–8 inches from the surface, and a cross-coat strategy to build uniform film. The first layers condition the surface and ensure even color; subsequent coats add depth and metallic or pearl effects if desired. The clear coat then locks in the color and provides the protective layer that resists UV, weather, and abrasion. The sequence—clean, prime, color, clear—mirrors the substrate’s needs and the coating system’s design, reflecting the underlying technology that makes practical application possible.
For readers seeking a concise, practical anchor, this approach is echoed in comprehensive guides that frame the entire process as a physics-informed, repeatable workflow. The key is to treat the fairing as a composite system, not just a surface to be painted. By acknowledging substrate chemistry, layer interactions, and environmental controls, you establish a robust pathway from prep to finish. That pathway supports not only a striking aesthetic but also long-term durability, ease of maintenance, and reliable color matching across panels. In practice, this means treating every project as a test bed: practice on test panels, document your parameters, and build a reference for future work. It also means recognizing that the best results arise when technology and technique are harmonized with disciplined process control, from room temperature and humidity to the exact sequence of steps and cure windows.
If you want a grounded starting point that aligns theory with hands-on practice, consider a broader reference on plastic refinishing that covers the substrate-to-coat sequence and the nuances of different base and clear coat systems. For a direct, project-oriented overview that links to practical steps and real-world examples, you can explore Motorcycle Fairings guides that delve into the full spectrum of preparation, application, and finishing. This resource helps connect the science to action and can serve as a practical companion to the process described here. Motorcycle fairings guide provides a detailed context for planning, material selection, and execution.
In the end, the technology behind plastic coatings informs every practical choice on the spray bench. The substrate dictates the prep and adhesion strategy; the primer and base coat chemistry determine compatibility and color behavior; the clear coat delivers gloss, depth, and protection; and environmental control ties it all together. When these elements are aligned, the finish on a motorcycle fairing becomes more than a cosmetic layer—it becomes a resilient, high-performance surface capable of withstanding the demands of riding while delivering the visual impact that owners expect. The subchapter’s goal is to illuminate that connection between scientific foundations and the on-bike reality, helping you plan, execute, and troubleshoot with confidence and clarity.
Final thoughts
Implementing a disciplined approach to spraying motorcycle fairings yields repeatable, OEM‑grade finishes that enhance brand value and customer satisfaction. By starting with proper preparation, selecting compatible materials, executing controlled spray processes, finishing with attention to curing and maintenance, and enforcing safety and environmental best practices, a shop can scale production without sacrificing quality. The key is standardization: clear SOPs, consistent inspection criteria, and ongoing training that keep your team aligned with material realities and market expectations. In a competitive market for aftermarket and OEM‑aligned fairings, those who invest in process integrity and responsible practices will deliver faster turnarounds, fewer reworks, and stronger client trust.
Upgrade your ride with UltimateMotorX’s premium motorcycle fairings—durably crafted, precision-fitted, and stylish. Meeting OEM standards for easy installation, our collection suits upgrades or replacements. Shop now for fast shipping, secure checkout, and expert support. Give your bike the ultimate quality it deserves!
About us
At UltimateMotorX, we’re rider-founded experts in top-tier motorcycle fairings. We source premium materials, partnering with trusted manufacturers for perfect fits and durability. Enjoy expert advice, hassle-free returns, and seamless shopping. Ride with confidence—style and quality guaranteed!