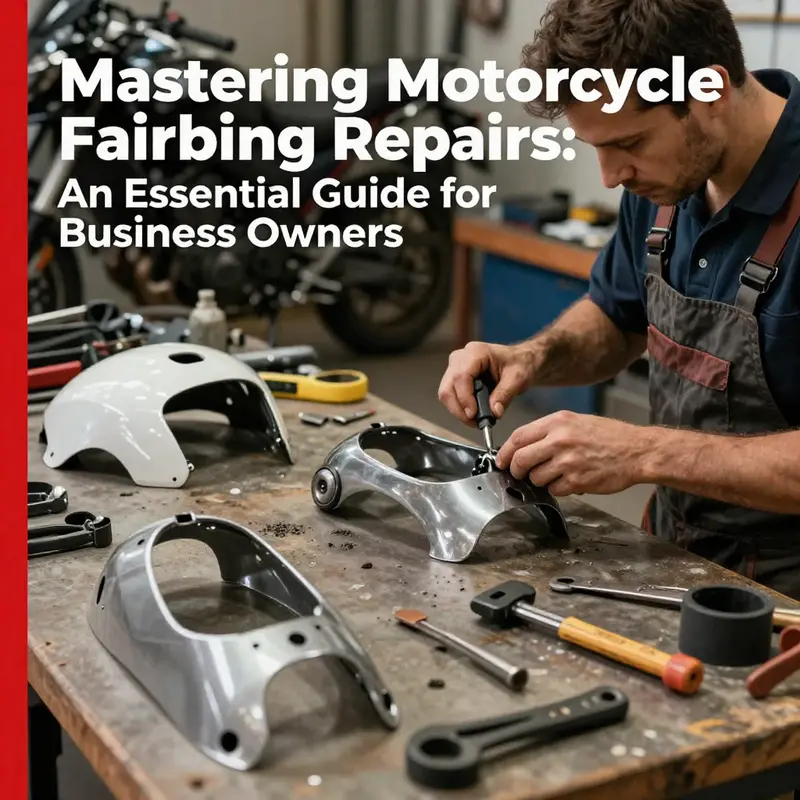
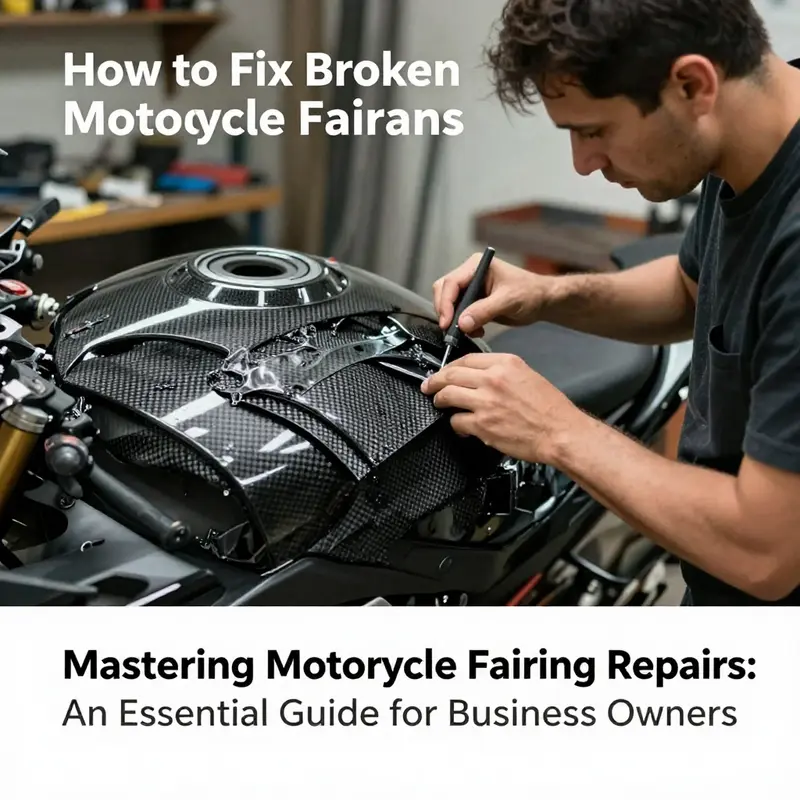
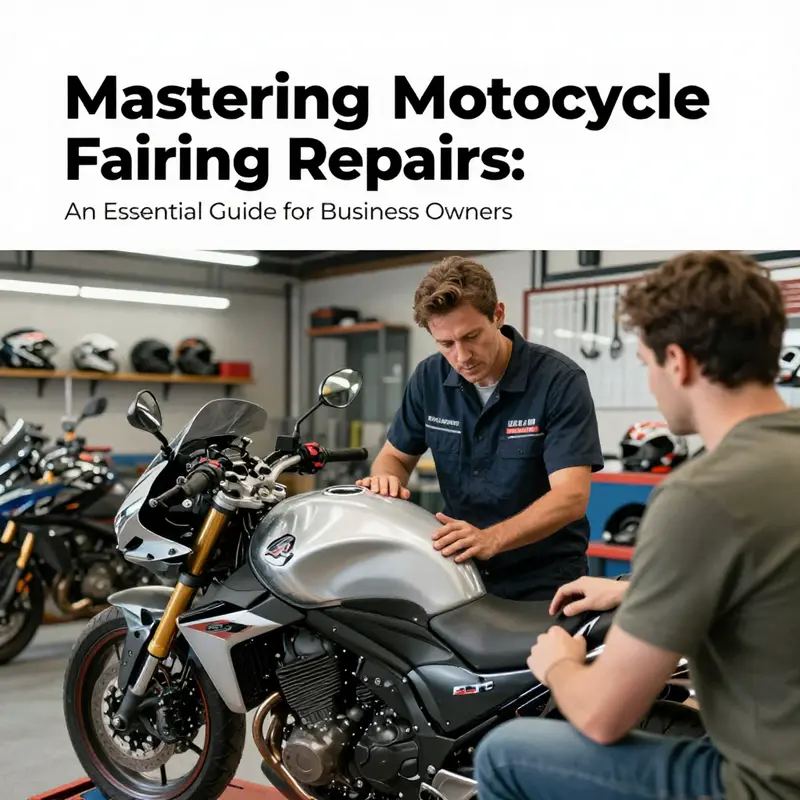
Motorcycle fairings, while providing protection and aerodynamics, often suffer from damage due to falls, drops, or accidents. For business owners in the motorcycle servicing industry, understanding how to repair these fairings is crucial for boosting customer satisfaction and ensuring cost-effective repairs. Each chapter of this guide delves into specific repair techniques suitable for differing extents of damage and materials used in motorcycle fairings. From addressing minor cracks in plastic fairings to the advanced methodologies required for fiberglass and carbon fiber, we aim to equip you with the knowledge necessary to tackle these repairs effectively. This holistic overview ensures that you will be prepared for any repair job that comes your way, helping you to improve your shop’s service offerings.
From Tiny Cracks to Pristine Panels: Mastering Small-Dent and Crack Repairs on Motorcycle Fairings
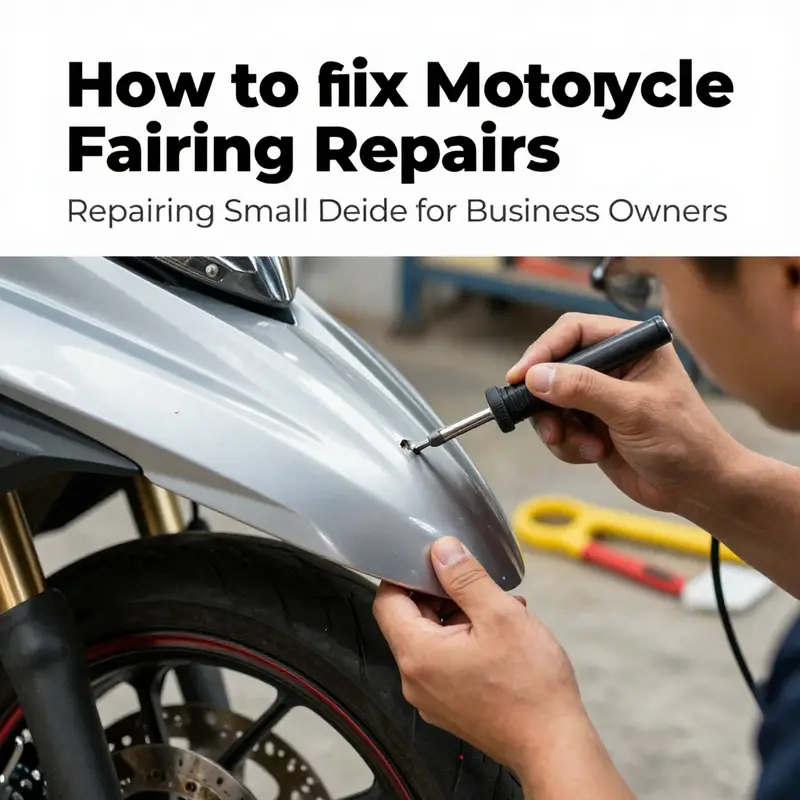
Small cracks and shallow dents are a surprisingly common reality for riders who push their bikes through city streets, crowded parking, and the occasional off-camp road. The fairings, often made of plastic or composite materials, take the brunt of wind, debris, and the regular vibrations that come with a live engine. When damage is cosmetic or barely structural, a careful, methodical repair can bring the panel back to life without the cost of a full replacement. The goal is not just to hide a flaw but to restore the fairing’s strength and fit, while preserving the line and paint that define the bike’s appearance. The approach centers on the material at hand and the extent of the damage. Plastic and composite fairings respond differently to repair, and the most economical fix in most cases still requires clean work, patience, and a plan that prioritizes both durability and finish. The process begins with a clear assessment of the crack or dent, followed by a choice between welding, adhesive bonding, or a composite layup when necessary. In any case, the work remains practical and repeatable with a proper toolkit and a steady hand.
When the damage is limited to small cracks in a plastic fairing, two paths often present themselves. The first is plastic welding, a technique that actually fuses the damaged area by melting compatible plastic filler into the joint. A heat source such as a plastic welder or a precisely controlled soldering iron is used to melt the surrounding material and the filler, creating a single, continuous bead. The result is a repaired seam that can be sanded smooth, primed, and painted to match the rest of the panel. Plastic welding is especially effective where the crack runs along a seam line or through a relatively flat section, because the heat tends to distribute along the path of least resistance and create a margin that can hold vibrations and exposure to weather. The key is to maintain steady heat, avoid oversaturation, and allow the area to cool gradually. A well-executed weld will feel nearly invisible once the surface is refinished, though it may take some time to perfect the technique if you’re new to it. The alternative in many shops and home garages is an epoxy-based, two-part adhesive system. When used on small cracks, the epoxy bonds the sides of the fracture and distributes stress away from the crack. To maximize strength, you can reinforce the bond with a thin insert of copper foil or similar metal placed behind the repair area while the epoxy cures. The copper acts as a micro-reinforcement, particularly around high-stress zones such as the lower front fender or the edge of a mounting point, where vibrations are most persistent. This approach—epoxy plus copper reinforcement—can provide a surprisingly robust fix without needing specialized welding equipment.
No matter which method you choose, the surface preparation matters as much as the repair itself. Start by cleaning the damaged region with a mild solvent to remove oil, wax, and dust. Then, blow out any loose fragments and deburr sharp edges that could impede the repair’s integrity. If you’re welding, ensure the surrounding plastic is dry, evenly heated if possible, and free from contaminants that could introduce voids. If you’re using adhesive, roughen the area slightly with a fine abrasive to increase the bond’s surface area and remove any film of release agents that might prevent a strong cure. After the repair material has been applied and cured, the next phase begins: shaping and smoothing the repaired zone so it merges with the surrounding surface. This step requires a careful hand and progressive sanding. Start with a coarser grit to flatten the repair bead and blend it into the native contour, then move through finer grits to remove any ridges. The goal is not simply to hide the repair but to create a seamless transition that feels natural when you run your hand over the panel.
Dents, especially shallow ones without any accompanying crack, offer a different kind of challenge. The best initial move is often to reshape the interior of the panel from behind, using a plastic pry tool to gently coax the material back toward the original contour. If access behind the dent is limited, you may need to locate a small access hole or create a temporary work point that allows you to press outward with steady pressure. The risk here is introducing new cracks or thinning the plastic. When you can coax the dent outward, the surface will usually show only minor irregularities. At that stage, a light filler—designed for use on plastic or composite panels—can fill any remaining imperfections. Allow the filler to cure fully before sanding. The same progressive sanding sequence used after a crack repair applies here: begin with a medium grit to reduce the repair’s footprint, then move to finer grits until the surface is smooth. A careful hand with the sanding block will ensure you don’t flatten bright edges or disturb the paint around the repair.
The painting phase is both technical and artful. If the crack or dent has penetrated the paint layer, you’ll need to apply primer to seal the repair before color. Plastic primers are formulated to bond well with thermoplastic surfaces and to provide a uniform key for the color coat. When you paint, use light, even coats rather than heavy bursts to avoid runs and sags. Align your color match as closely as possible, or, for a near-perfect result, spray a broader panel with a single coat that gradually fades into the repaired area. After the color layers have cured, a clear coat protects the finish and adds depth. The process mirrors the original paint schedule: light applications, dry times between coats, and a final polish to blend the repaired area with the surrounding finish.
All of these methods assume a plastic or composite fairing. When a panel is a true carbon fiber or heavy fiberglass composite, the repair can become more technically demanding because of the structural role these materials play and their respect for resin systems and layering. For small cracks in composites, a high-quality resin repair with new fabric or woven reinforcement can restore both appearance and strength, but this work benefits from experience. In many cases, a professional repair shop will perform composite repairs with a controlled layup, cured under heat and pressure to restore stiffness and avoid fiber misalignment that could compromise rigidity. The principle is consistent: you’re not just patching a cosmetic surface—you’re rebuilding a portion of the panel’s structural capability. If you’re considering this route, treat it as a longer-term investment and prep for a slightly larger commitment of time and precision.
Across all materials, a few universal practices help ensure long-term success. Begin with a complete clean and dry surface. Remove any loose debris and edge snags that could propagate a crack or dent as soon as you finish the repair. When you choose a repair technique, consider the area’s stress profile. Front fender sections and edges near mounting points experience higher loads, so extra reinforcement with a bonding agent, a patch, or a small metal insert may be wise. After repair, allow sufficient curing time before exposing the panel to heat, moisture, or vibrations. If you’re ever unsure about the best approach for a particular area, test a small, inconspicuous patch first to confirm adhesion and finish behavior.
Maintenance habits can also reduce the likelihood of recurrence. Apply a light protective film or paint sealant where chips and scuffs are most common. These measures don’t replace a repair, but they can slow down future damage by absorbing micro-abrasion and shielding the underlying material. When a fairing is heavily damaged, or the damage is close to critical points like mounting bosses or the edges that seat into the frame, err on the side of caution. The safest choice might be to replace that panel rather than attempt a repair that could fail under stress. In the end, the goal is to preserve as much of the original geometry as possible while ensuring the panel remains secure and visually cohesive with the rest of the bike.
For riders who want to explore compatible panels for their specific bike line, resources that categorize fairings by model can be helpful. For example, you can browse the Honda fairings category to locate panels that match your ride’s lines and mounting points. This can be especially useful when a repair seems unlikely to restore the panel’s original strength or if you prefer a fresh look that preserves resale value.
As you weigh the decision between repair and replacement, remember that the most precise work happens when you stay patient and methodical. Rushing through the steps risks heat damage, weak bonds, or an uneven finish that shouts a counterpoint to your ride’s otherwise flawless look. The techniques described here emphasize control, cleanliness, and gradual progression—from initial diagnosis to final polish. With steady hands and a little practice, the repair can vanish from sight, leaving only a smooth, even surface that mirrors the bike’s original silhouette. For a deeper, step-by-step narrative that mirrors professional workflows, you can consult detailed repair guides from reputable sources that walk through the same methods with images and timing cues.
If you’re seeking more visual guidance, you can explore related demonstrations that show carbon fiber repairs in action, where technicians layer new fibers and cure them under heat and pressure to restore both strength and appearance. These techniques are the gold standard for high-end fairings and offer a blueprint for how careful layering and controlled curing can revive complex panels.
Internal resource: Honda fairings category for model-specific panels. Visit the page to see how OEM-like fit and finish can factor into decisions about repair versus replacement. (Internal link: https://ultimatemotorx.net/product-category/honda-fairings/ )
External reference for a comprehensive, step-by-step repair guide: Motorcycle Fairings Repair Guide on Motorcycle.com, which consolidates practical tips and common pitfalls for repairing broken fairings. https://www.motorcycle.com/repair-tips/how-to-fix-broken-motorcycle-fairings/
From Fracture to Finish: Restoring Large Breaks in Fiberglass and Carbon Fiber Motorcycle Fairings
When a fairing sustains a large break, the repair challenge goes beyond gluing and surface filler. Fiberglass and carbon fiber panels act as structural components that influence aerodynamics, rider protection, and the bike’s overall integrity. A crack or fracture that spans a significant area, or that involves delamination where layers separate, demands a careful approach that rebuilds both strength and appearance. The goal is not just to close the gap but to re-knit the composite so it behaves like the original under stress, vibration, and temperature changes. This means choosing materials that match or exceed the mechanical characteristics of the damaged area, preparing the surface to host new layers, and allowing for proper curing before finishing. The process is methodical rather than magical, combining surface preparation, reinforcement, resin systems, and controlled curing to deliver a repair that can withstand the rigors of real-world riding and wind shear at speed. A clear assessment of the damage guiding and the right reinforcement strategy will save time and preserve value in the long run.
Begin with a thoughtful assessment. A large break is rarely a single, clean fracture. It often includes chipped edges, microcracks radiating from the failure, and, in carbon fiber panels, potential delamination beneath the surface. The first decision is whether the damage compromises the fairing’s integrity or aerodynamics to a degree that replacement becomes safer or more economical. If the break is connected to a critical load path or if the laminate has delaminated across multiple plies, the repair should lean toward a professional evaluation. In some cases, particularly with high-stress areas like the front intake or around mounting points, the strength of the repair matters as much as the cosmetic appearance. Even if you proceed with a DIY fix, treating it as a structural repair rather than a cosmetic touch-up helps you allocate the right materials and time for proper cure and test fits before riding again.
With the damage assessed, surface preparation becomes the next chapter in the restoration. Thorough cleaning is essential to remove grease, wax, dust, and any residue that would hinder resin adhesion. Isopropyl alcohol or a dedicated plastic cleaner does the job well, and a careful wipe sets the stage for bonding. Next, lightly abrade the edges and the surrounding skin with fine-grit paper, around 200 to 400 grit. The goal is to create a rough, clean edge that gives the new composite something to grip. Dust removal cannot be skipped; the smallest speck of debris can trap air or create a weak point beneath the new fabric. A clean, dust-free surface ensures the subsequent reinforcement will perform as intended when it comes to load sharing and impact energy distribution.
Reinforcement is where the repair moves from patch to rebuild. For fiberglass repairs, a patch of fiberglass mat or cloth is cut to size and positioned over the break. The mat acts as a bridge across the damaged zone, distributing stress and providing a stable base for resin. For carbon fiber fairings, the reinforcement should mirror the original material’s strength and stiffness. A carbon fiber fabric—preferably a twill weave that matches the surrounding layup—worked in carefully with resin tends to preserve the panel’s mechanical continuity better than a fiberglass patch. It is important to avoid intermixing layers of different fibers carelessly, especially mixing fiberglass into a carbon fiber structure, as this can create heterogeneities in stiffness and failure modes under load. In emergency situations where carbon fiber repair supplies are unavailable, a properly executed fiberglass patch might be the practical, temporary option, but the long-term performance will be diminished compared with a carbon fiber layup. When the repair involves a high-value or performance-oriented machine, consider professional restoration options that can employ vacuum bagging, precise layups, and heat-curing cycles to achieve a nearly seamless restoration.
Epoxy resin, carefully chosen for composites, is the adhesive and matrix that binds the new reinforcement to the damaged shell. A high-quality two-part epoxy designed for use with fiberglass or carbon fiber is mixed according to the manufacturer’s instructions, typically in a 1:1 ratio by volume. The process starts with a thin layer of resin applied to the prepared surface, followed by the reinforcement fabric placed over it. Working with a plastic spreader or a similar tool, you must push resin through the fabric to saturate every thread and eliminate trapped air. The goal is full wet-out of the reinforcement so resin can act as a unified matrix with the existing laminate. The presence of air pockets undermines strength and creates a path for moisture and later cracks. Take your time here; patience in saturating the fabric pays dividends when the repair is finally subjected to heat, vibration, and wind pressure.
Curing completes the structural restoration. Most epoxies cure best at room temperature—roughly 70 to 75 degrees Fahrenheit (21 to 24 degrees Celsius)—and require a full day, often 24 hours, to reach a solid state. Some systems benefit from controlled post-curing with gentle heat to improve bond density and cross-linking; a heat gun or an oven is sometimes used for this stage, but only if the manufacturer’s guidelines are followed. Do not rush the cure. A premature handling or exposure to heat, moisture, or stress can introduce microcracks that compromise the very reinforcement you’ve just built. The repair’s durability rests on the resin’s complete cure and the integrity of the fiber-to-resin bond. A properly cured repair forms a single, continuous laminate with the surrounding material, enabling the panel to share loads rather than concentrating them at the fracture line.
After curing, finishing is the last barrier between a repair that looks like new and one that betrays the damage. Begin with careful sanding using progressively finer grits—starting around 220, then 400 or higher as you refine the surface. The aim is a smooth transition from the repaired area to the surrounding fairing, without visible ridges or feathering that catches the eye or air. A light wipe-down removes sanding dust, and a primer designed for plastics or composites is applied to seal the surface and improve paint adhesion. Color matching is your next concern; a topcoat that hides the repair without altering the fairing’s color or gloss helps preserve value. In some cases, a flexible primer and a clear coat can better tolerate minor flexing of the panel under temperature changes and road fatigue. The cosmetic phase should never be rushed, because the visual quality of a repair often defines how well the structural work is accepted by both rider and observer. If the fairing has complex curves or intricate mounting features, the finishing step may require more time to blend the repair with the contour and to ensure the paint lays evenly across the repaired zone.
As with many mechanical tasks, you’ll find a spectrum of options when you consider professional involvement. For riders who demand the highest strength, or whose bikes operate in demanding environments—high-performance machines, race-ready builds, or rare models—the decision to engage a composite repair shop can be the smartest investment. Shops with vacuum bagging capabilities, engineered molds, and heat-curing processes can reproduce the original laminate’s thickness and fiber orientation with remarkable fidelity. They can also help with perfecting the cosmetic result, using controlled finishes and coatings tailored to carbon fiber or fiberglass panels. Even when you start with a DIY approach, a professional assessment at the outset can help you anticipate post-repair needs and avoid repeating work.
In terms of practical navigation, the repair workflow above aligns with the logic of many reputable guides that emphasize surface preparation, reinforcement, resin saturation, curing, and finishing. It is worth noting that the material choice matters as much as the technique. Fiberglass is more forgiving and easier to source for patches and patches-based repairs, while carbon fiber demands exacting compatibility and process control to preserve the original strength and stiffness. The difference between a cosmetic fix and a repair that stands up to rider stress is often found in the reinforcement step and the cure discipline. A well-executed repair—reinforcement properly sized and oriented, resin thoroughly saturated, and cure completed—can restore structural integrity, keep aero performance aligned, and allow safe operation at speed. If the injury involved a mounting point or a critical contour, you may also need to re-check the fairing’s fit with brackets and seals, because a misalignment can create new stresses that short-circuit the repair lifecycle.
For riders who want a touch of guidance aimed at real-world practice, consider browsing related content in the Honda fairings category where practical examples and compatible parts are gathered. This can help you gauge the typical thickness and layup used in production panels and can influence your decisions about patch sizes, patch shapes, and resin volumes. Honda fairings
An external reference that mirrors this approach and offers a comprehensive, step-by-step walkthrough is available in English. It provides a detailed sequence for repairing fiberglass motorcycle fairings, including tool lists, safety tips, and professional recommendations. For a broader understanding of fiberglass repair techniques and real-world timelines, you can consult Motorcycle.com’s guide on fiberglass fairings at https://www.motorcycle.com/motorcycle-repair/how-to-repair-fiberglass-motorcycle-fairings/. This resource complements the hands-on steps described here and underscores the importance of careful preparation, curing, and finishing in delivering durable, ride-ready repairs.
In practice, larger breaks demand a patient, methodical approach that respects the unique behavior of composites under stress and temperature. The repair is an investment in the bike’s future performance, not merely an aesthetic fix. By choosing appropriate reinforcement, ensuring thorough resin saturation, enabling proper cure, and executing precise finishing, you preserve the fairing’s job as a protective, aerodynamically efficient, and visually cohesive component. Always factor in your skill level, tooling availability, and the value of the bike when deciding between a DIY repair and a professional service. The math of repair—combining surface prep, structural reinforcement, resin chemistry, and disciplined curing—creates a result that stands up to the demands of real-world riding and the aesthetics that define the bike’s character. If in doubt, a professional assessment can provide peace of mind and a pathway to a restoration that holds up over miles and seasons.
Internal link reference: For practical reference on compatible collection and parts that relate to fairings, you can explore the Honda fairings category. Honda fairings.
Solid Bonds and Smooth Surfaces: The Plastic-Welding Path to Restoring Broken Motorcycle Fairings
When a fairing cracks or splits, the instinct is to patch it and ride on. Yet for thermoplastic shells, the best repairs hinge on restoring both strength and shape at the same time. Plastic welding offers a precise, durable path back to original integrity by fusing torn edges with heat and a compatible filler. This chapter treats the process as a careful craft rather than a quick fix, focusing on ABS and similar thermoplastics common to modern motorcycle fairings. The aim is to create a repair that looks right and behaves like the original component under vibration, wind, and heat. Proper preparation, the right tools, disciplined technique, and patient finishing are essential to success, while keeping options open for future maintenance without compromising the fairing’s performance or aesthetic.
The repair begins with a clear assessment of the damage. Small cracks and shallow dents can often be mended with welding or a filler-and-sand approach, depending on material and location. For repairs beyond surface level, plastic welding is preferred because it creates a continuous bond within the same material, reducing the chance of future crack propagation. Identify the plastic: most mass-market fairings are ABS, a tough thermoplastic that welds reliably with the right rod and equipment. If the damage is near a mounting point or in a high-stress region, reinforce the repair or rework surrounding areas to maintain alignment and fit when reinstalled. The goal is not only cosmetic; the fairing must stay securely in place at highway speeds and under heat from the engine and sun. A careful inspection also considers whether the break affects fasteners, edge radii, or attachment lips; in those cases, reinforce with a patch or replace the affected panel, but the welding skill remains valuable for preserving geometry and finish.
Preparation is the hinge on which a successful weld rests. Cleanliness is non-negotiable; oil, wax, or dust will ruin adhesion. Degrease the damaged area with a plastic-appropriate solvent. Lightly abrade the surfaces around the break with fine-grit sandpaper (roughly 120-200 grit) to improve the mechanical key. Wipe again with isopropyl alcohol. Alignment comes next; the broken pieces must be brought together precisely, as even a slight misalignment shows as a gap or seam after painting. Temporary clamps or alignment jigs can hold the pieces during welding. If parts don’t sit together naturally, trim or adjust edges to achieve a seamless join before applying heat. The surface around the break should look smooth and ready for welding, with the edges meeting cleanly along the fracture line.
With the area prepared, select tools and material matching the plastic. For ABS fairings, the common filler is an ABS welding rod; the welding gun should deliver steady heat appropriate for ABS, typically around 350-450 degrees Celsius. Precision matters more than brute force: melt base edges and filler just enough to form a uniform bead without scorching or warping. If unsure about plastic type, perform a small test weld on a scrap piece. Assembly aids such as clamps, heat shields, and a flat backing surface help preserve flatness, especially on curved panels. Remember that overheating can cause discoloration or distortion; too little heat yields a weak bond.
The welding itself is a careful sequence. Warm the edge of one piece, feed the welding rod into the joint, and melt both to create a smooth, continuous bead. Move along the crack with even heat, keeping the weld line aligned with the original fracture. If a gap exists, gently realign the pieces before continuing. Avoid lingering heat in one spot; use multiple short passes if necessary and allow each pass to set. When the seam looks solid, inspect for warping, trapped air, or rough edges. If warping appears, reinsert clamps or apply light pressure to restore straightness without melting the new bead.
Cooling should be gradual and undisturbed to prevent stress fractures. After cooling, refine the surface to blend the weld with the surrounding plastic: grind the seam with progressively finer grits (roughly 220 to 600 or higher) to achieve a flush surface. Be careful not to remove critical corner radii. Apply a plastic-compatible primer, then color-match paint in light, even coats, followed by a clear coat to protect the finish and restore gloss. A final polish with a mild rubbing compound can bring the repair to invisible harmony with the rest of the fairing. The result should be a repair that looks right and behaves as a single, continuous part under real-world conditions.
Structural integrity is the true measure of success. A properly welded joint distributes stresses along the panel rather than concentrating them at a seam. Perform a light functional test after reinstalling the panel; if you notice flex, creaking, or movement under load, recheck edge alignment and weld depth. If needed, remove the panel and reassess the joint, ensuring sufficient embedment of the filler and the absence of voids. When the finish looks consistent and the panel sits correctly against adjacent fairings, you have achieved a durable repair preserving both function and appearance.
Note that repair options vary with material and damage severity. Small dents or hairline cracks may be addressed with filler and sanding, but this may not match the strength of a welded joint. For larger breaks or composites such as carbon fiber, professional repair techniques may be necessary. When extensive damage or complex geometry threatens the panel, consulting a professional body shop is prudent. The process described here provides a solid foundation for understanding how a plastic weld can restore both form and function. If you’re shopping for parts, explore brand-specific options to locate panels that fit your bike’s geometry and mounting points.
Smoothing the Damage: Mastering Body Filler and Sanding for Fairing Repairs
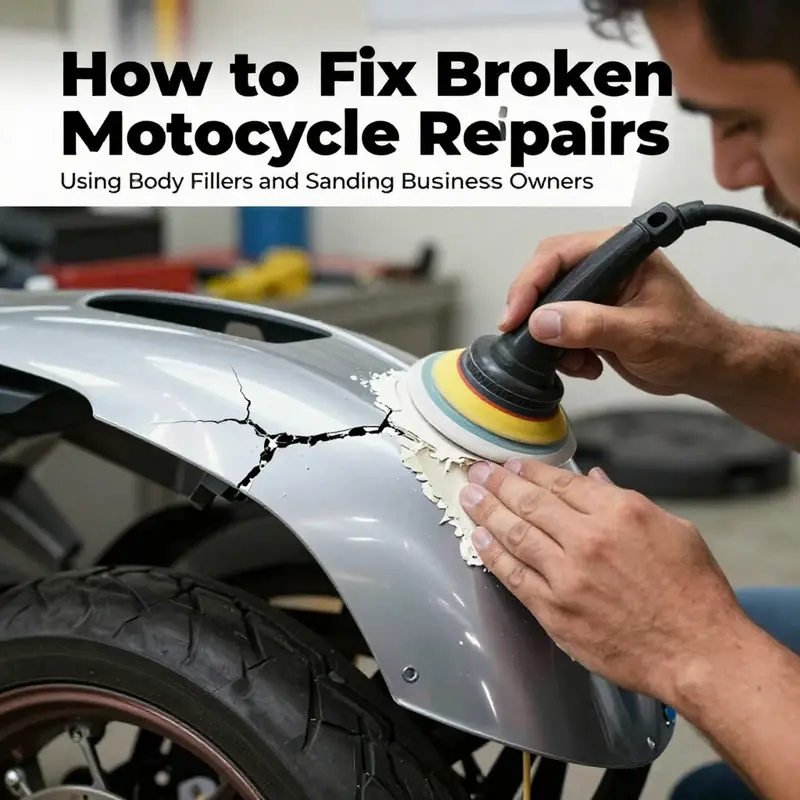
Repairing a cracked or dented motorcycle fairing with body filler and careful sanding is one of the most satisfying and cost-effective ways to restore appearance and function. This chapter walks through the entire approach as a continuous process, from cleaning and assessing to priming and finishing. The goal is a repair that looks factory-made and holds up on the road. Read each step in sequence and be patient; the quality of the result depends on preparation and measured work.
Begin by preparing the work area and the part. Work in a well-ventilated, dust-minimized space. Lay soft padding beneath the fairing and support it to avoid warping. Wear gloves, eye protection, and a respirator when sanding or handling compounds. Clean the damage thoroughly with a degreaser until all grease, wax, and road grime are removed. Dirt or oil under filler causes adhesion failure, so repeat cleaning until the surface feels clean. Dry the area completely before moving on.
With the part clean, evaluate the damage. Small chips and thin cracks are best handled with a lightweight filler that sands easily. When the fairing has lost chunks or has larger openings, reinforce the reverse side first. Apply a patch of fiberglass mesh or tape to the interior, wetting it with resin if needed to lock it to the shell. Reinforcement restores rigidity and prevents the filler from pulling out under stress. For shallow dents, the reinforcement step can be skipped; the right filler and good adhesion will suffice.
Mix the filler only in small, workable amounts. Most body fillers are two-part compounds, and the working time is limited. Follow the mix ratio on the container and stir thoroughly until color and consistency are uniform. Too much hardener makes the filler cure too fast and become brittle. Too little leaves it soft and tacky. Apply the filler with a metal spreader, pressing firmly to force it into cracks and low spots. Slightly overfill the area; this leaves room to shape the repair with sanding rather than scraping away excess and risking gouges. Smooth the filler as much as possible on the first pass to reduce sanding time.
Let the filler cure fully. Curing times vary, but a complete cure preserves workability and prevents smearing under the sandpaper. After curing, begin shaping with a coarse grit paper—start in the 80–120 grit range. Use a sanding block on flat portions and freehand for tight curves. Keep sanding strokes even and consistent. The first sanding stage removes bulk material and establishes the repair’s basic contours. Be careful not to sand back to bare edges where filler meets plastic; feather the transition gradually to avoid creating a visible step.
Switch to medium grits next, using 180–220 grit paper to refine the shape. The goal is a smooth contour that matches the original panel lines. For compound curves, sand with a flexible sanding block or wrap sandpaper around a rounded form. Check progress often by wiping away dust and viewing the part from various angles under bright light. This helps catch low spots and ridges that are easy to miss when working close.
Finish sanding with fine grits—320 to 400—to produce a uniform surface ready for primer. For the final smoothing, use long, overlapping strokes and keep the sandpaper flat to avoid creating flat facets on curved sections. If the repair area is large or contains several imperfections, repeat the filler and sanding cycle: apply a thin skim coat, let it cure, then sand again to refine. Two or three light passes typically produce the best result compared with one heavy application.
Throughout sanding, control and remove dust. Wipe the surface with a damp cloth or tack rag frequently. Fine dust will show through primer and paint, so cleanliness at this stage is critical. When the surface appears smooth, run your hand across it to feel for dips and edges; sight alone can deceive. If you find a small pit or surface void, apply a thin amount of spot putty, let it cure, and sand with fine grit until seamless.
Before priming, perform a final inspection under bright, angled light. Look for surface texture differences and any remaining seams. Mask off adjacent areas you don’t want primer to contact. Use a primer specified for plastic or composite surfaces. Apply thin, even coats with adequate flash time between passes. Thin coats reduce runs and build a consistent base for paint. After primer has set, sand the primed surface very lightly with 400–600 grit to knock down any orange peel and assure adhesion of the topcoat.
Color matching and painting require attention to layering. Use several light coats of paint rather than one heavy coat. Allow proper drying time between coats. Once the base color is even and dry, apply an appropriate clear coat to protect the finish from UV, chips, and weather. Clear coats also provide depth and gloss that blend the repaired section into the surrounding factory finish. After clear coat cure, wet-sand with very fine grit followed by polishing if needed to blend the repair fully into the original surface.
Properly engineered repairs rely on materials and technique more than speed. Avoid shortcuts like slapping on large amounts of filler to hide poor preparation. Large fills are prone to cracking and will reveal edges over time. Instead, take the time to reinforce, build up multiple thin layers, and shape gradually. Keep a consistent workflow: clean, assess, reinforce if needed, fill, cure, sand coarse to fine, inspect, prime, paint, and clear coat. That sequence minimizes surprises and yields a robust result.
A practical tip: when working a curved fairing, create a simple curvature guide out of foam or a rounded block to press against while sanding. This helps maintain the original curve and prevents flattening. For safety, always dispose of sanding dust and solvent-soaked rags according to local regulations.
If you prefer a ready replacement rather than repair, source a new or aftermarket fairing made for your model. For specific fits, consider exploring available fairings for your bike, such as this collection of YZF fairings, to compare options and find a good match. Small or cosmetic repairs are ideal for DIY, but for major structural damage or high-value composite parts, a professional repairer can restore the original strength and finish.
For a concise reference on the general process and safety considerations, see this external guide: https://www.motorcycle.com/motorcycle-repair/how-to-fix-broken-motorcycle-fairings/.
Knowing When to DIY and When to Call a Pro: Practical Advice for Repairing Motorcycle Fairings
Fairings protect mechanical parts, shape airflow, and carry a bike’s visual identity. When they break, the decision to repair them yourself or hand them over to a professional hinges on more than cost. It depends on the material, the nature of the damage, the fairing’s structural role, and how long you need the repair to last. This chapter guides you through assessing damage, choosing a repair path, and recognizing the warning signs that mean you should not attempt a DIY fix.
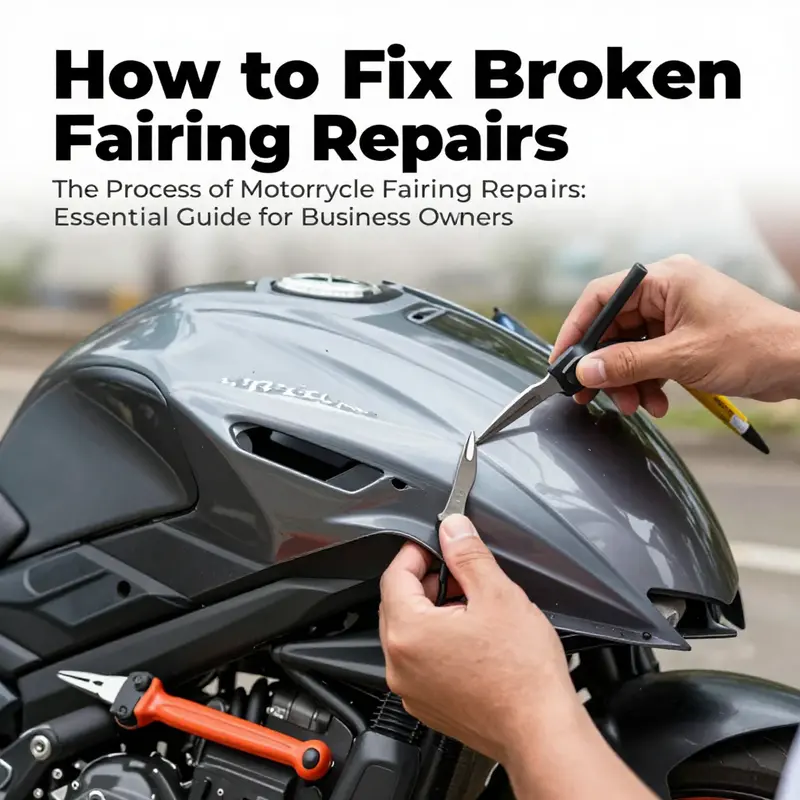
Start by inspecting the damage carefully. Clean the area with a mild degreaser and water so you can see the full extent. Small surface scratches and hairline cracks often look worse when dirty. Once clean, run your fingers along edges to feel for stress lines, flex the panel lightly to check for hidden fractures, and hold the piece up to a light to find pinholes. Note whether the crack runs across mounting points or structural ribs. Damage near bolts, engine mounts, and intake openings matters more than a cosmetic nick behind a footpeg. Also identify the material: injection-molded plastic, ABS, fiberglass, or carbon fiber each behave differently and require different repair approaches.
For minor cracks, chips, and dents in molded plastics, competent DIY work is usually sufficient. Plastic welding or a quality epoxy can restore continuity and strength if done properly. Plastic welding uses heat and compatible plastic filler rods to re-fuse the broken edges. It creates a mechanical bond that resists vibration and flex. If you choose epoxy, select a two-part adhesive formulated for plastics, and follow surface preparation steps: scuff the area with fine-grit sandpaper, degrease thoroughly, and clamp the pieces to maintain correct alignment while curing. Reinforce the backside of the crack with a backing patch of compatible plastic or a fiberglass strip if the fairing needs extra rigidity. Finish with successive sanding grades and primer before painting. These techniques can restore both strength and appearance when performed with patience and care.
When a panel has shattered into multiple pieces, is missing large sections, or has damage that crosses critical load paths, evaluate replacement options. Swapping in a used or aftermarket panel is often the fastest and most reliable fix. Many riders replace badly damaged pieces outright because the time, tools, and skill required to rebuild complex shapes outstrip the value of the part. If your bike uses aftermarket fairings, check compatibility and fit; some lower-cost kits require trimming or modification. For those who prefer OEM fit and finish, a professional shop or dealer can source correct replacements. If you want to explore new panels for particular models, see a selection of options for race and street bikes linked here for reference: fairings for Ducati models.
Fiberglass and carbon fiber present a different decision tree. These materials support aerodynamic loads and are often used on high-performance machines, so repairs must restore both stiffness and the laminates’ layered structure. Small cracks in fiberglass can be fixed by an experienced DIYer who understands wet layup techniques, resin types, and curing. But carbon fiber demands skill, proper materials, and often vacuum or heat-assisted curing to regain original strength and finish. If the fairing bears structural importance—rear wings, intake scoops, or shapes that influence handling—professional repair is usually the safer choice. A competent shop will grind back damaged layers, re-laminate with properly oriented fibers, and cure under the right conditions. They also have experience preventing resin-starved or overly resinous layups that can be brittle or heavy.
There are practical safety and longevity considerations that push you toward professional help. If the repair site is adjacent to a headlight, mirror mount, or air intake, misalignment can impact function and safety. Wind pressure at speed amplifies stresses on repair sites; a marginal DIY patch might hold at low speeds but fail on a highway. Temperature cycling and UV exposure degrade some adhesives and fillers over time. Professionals use coatings and primers formulated for outdoor exposure and color-match using spray booths—a critical step if the fairing’s finish must endure sun, grit, and fuel vapors.
Assess your tools and skills objectively before committing to a repair. Do you have access to a plastic welding kit, controlled curing area, and a spread of sandpaper and primers? Can you mask and spray a consistent finish, or do you have a trusted booth nearby? Even well-executed structural repairs require careful finishing to avoid visible seams, runs, or texture differences. If you lack the toolset or steady hands for color-matched spray work, consider sending the panel out after doing the structural work yourself; many shops will accept a prepared part for priming and paint only.
Time and cost also influence the choice. DIY can save money, but hidden costs appear if a poor repair needs redoing. For example, a brittle patch that fails in traffic means replace or re-repair under more stressful conditions. Professional repair raises the bill, but it often buys guaranteed adhesion, matched paint, and restored stiffness. Consider the bike’s overall value and your long-term plans. On a vintage or high-value machine, professional restoration preserves resale value and original specifications. For a commuter beater, a competent DIY fix that keeps the bike roadworthy and presentable is an acceptable trade-off.
When you do choose a professional shop, select one with experience in motorcycle composites and color-matching. Ask how they will address structural integrity—will they scarf and re-laminate, or use surface fillers? Will they match the original gloss and texture? Request photos of similar repairs from their portfolio. Reputable shops also explain whether they will replace mounting hardware or reuse original components; replacing fatigued clips and bolts reduces the chance of future failures.
Finally, document the damage and any repairs. Take photos before, during, and after work. If you plan to sell the bike later, records of quality repairs increase buyer confidence. If a repair is done professionally, retain receipts and the shop’s notes on materials used and curing times. These details help future owners or shops assess whether a prior repair was properly executed.
Picking between DIY and professional repair isn’t purely technical. It’s a judgment call informed by material, damage location, available tools, risk tolerance, and the fairing’s role in safety and performance. Small cosmetic repairs and non-structural cracks are well within reach for many home mechanics. Complex laminates, structural components, and damage near critical fixtures usually call for a pro. When in doubt, consult a specialist who can evaluate the fracture and recommend patching, reinforcement, or replacement. For a balanced perspective on when to tackle repairs yourself versus seeking a shop, see this detailed comparison from an expert motorcycle maintenance resource.
Final thoughts
Understanding and implementing the right techniques for fixing broken motorcycle fairings is crucial for business owners in the motorcycle sector. By mastering small repairs in plastic fairings, engaging with complex fiberglass and carbon fiber repairs, employing plastic welding, using body fillers appropriately, and recognizing when professional assistance is needed, you can significantly enhance your repair capabilities. These skills not only contribute to improved customer satisfaction but also empower your business to handle a broader range of repair scenarios. Equip your workshop with these essential repair techniques to better serve your motorcycle customers and boost your business’s reputation and profitability.