
For motorcycle enthusiasts and business owners alike, the appeal of customizing motorcycles often extends to creating unique parts such as fairings. Homemade motorcycle fairings offer riders a unique opportunity to personalize their bikes while maintaining budget control. This guide dives deep into the various elements involved in designing, constructing, and installing a DIY fairing. Each chapter focuses on essential aspects like design, materials, aerodynamics, cost-effectiveness compared to factory options, and crucial safety testing procedures. By the end of this article, readers will possess a comprehensive understanding of how to approach their motorcycle fairing projects with confidence and creativity.
Shaping Identity on Two Wheels: The Craft of Homemade Motorcycle Fairing Design and Customization
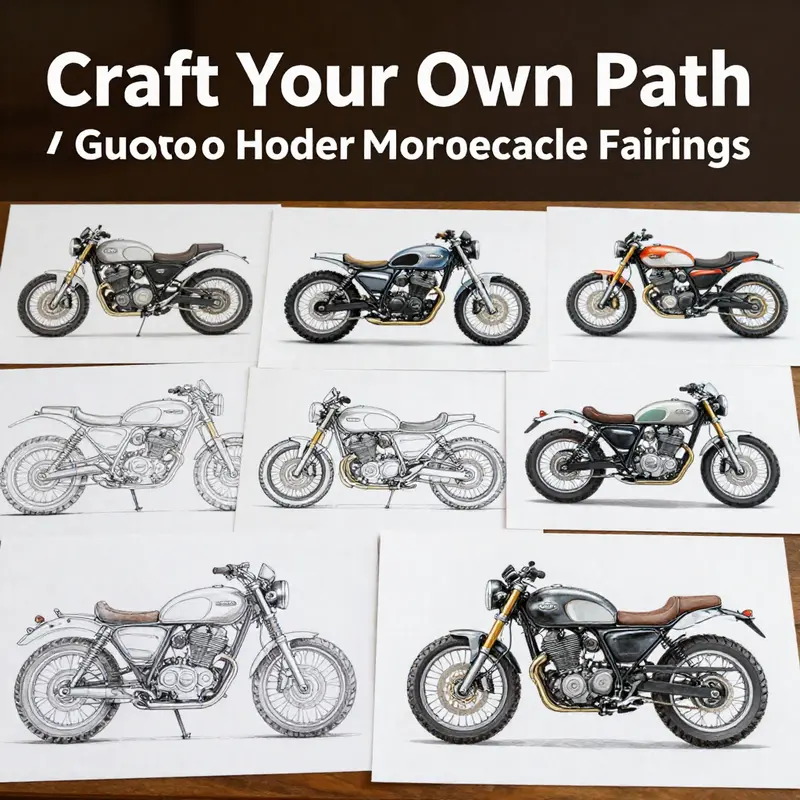
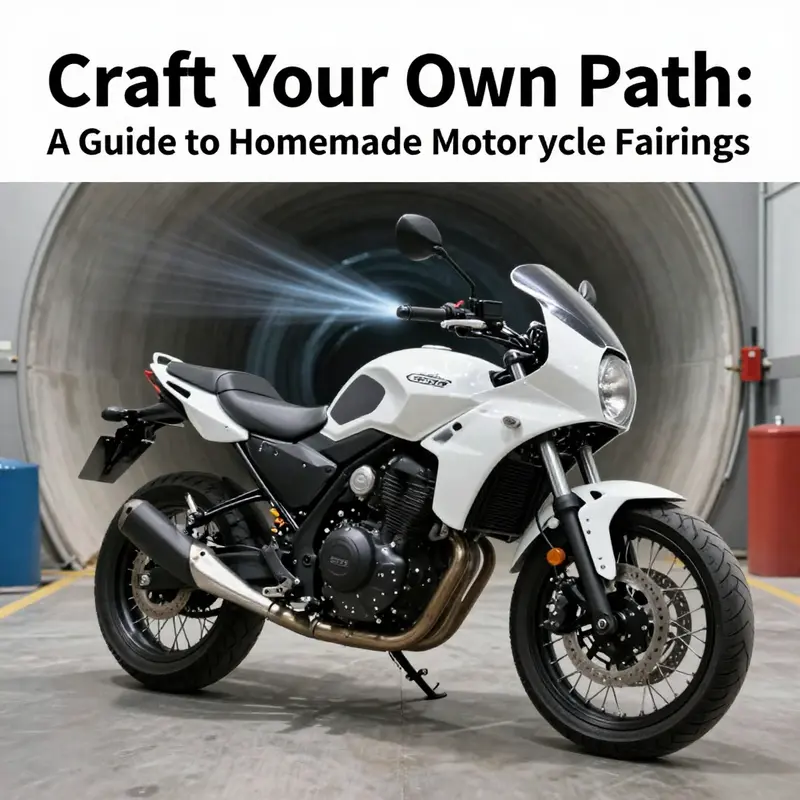
A homemade motorcycle fairing is more than a shell that smooths air around the rider. It is a canvas where engineering pragmatism meets personal style, a project that blends cost-conscious ingenuity with the satisfaction of seeing a vision ride into real life. The appeal lies not only in saving money compared with factory options but in forging a distinctive profile that mirrors the rider’s taste, riding goals, and even the bike’s intended temperament. The process begins long before any cutting or painting happens. It starts with a conversation between geometry, air flow, and personality, a dialect where lines, curvature, and color must speak the same language as the chassis, the suspension, and the engine’s heartbeat. The result is not merely a protective cover; it is a kinetic sculpture that must remain faithful to the machine’s balance at speed and the rider’s sense of control at the handlebars. The path from idea to riding fairing is a series of careful compromises, each choice narrowing the space of possible shapes while expanding the opportunity for a coherent, durable, and eye-catching result.\n\nDesign conceptualization in this hands-on context is less about chasing a single perfect form and more about weaving together practical constraints with aesthetic intent. Enthusiasts often start by collecting visual cues that resonate with their riding ethos: a preference for clean, uncluttered lines, or a willingness to experiment with bold motifs that echo a rider’s personality. Some draw on geometric repertories like chessboard motifs or spiderweb tessellations, while others lean toward flowing curves that emphasize the bike’s existing silhouette. Importantly, these ideas must be harmonized with the bike’s own geometry. The fairing needs to clear vital components—radiators, wiring harnesses, fuel lines—and it should respect the seat height and rider posture to avoid introducing awkward aerodynamics or obstructed visibility. The resulting design scaffolding often blends several motifs into a cohesive story, a kind of visual signature that remains readable from multiple angles as the machine roars past in a tunnel of wind.\n\nMaterial selection follows quickly from this vision. For beginners, the door into fairing fabrication is usually a lightweight, forgiving substrate such as foam board or ABS sheets. These materials accept the first cuts and shapes without demanding specialized tools, letting the maker prototype quickly and iterate as ideas evolve. Fiberglass and carbon-fiber composites offer a path to stronger, lighter structures but require more experience and controlled layups to avoid delamination and uneven resin distribution. For more complex geometries, some builders turn to additive manufacturing, using 3D-printed chassis sections or fairing skins where precision is essential and the surface can be carefully tuned for fit and finish. Even when not using advanced composites or 3D printing, the principle remains the same: prototype aggressively, test fit on the bike, and refine. A practical whisper to remember is that the final shell must not rely on the buy-and-hope method; it must be anchored in a structure that can carry fastener points, distribute loads, and absorb the fatigue of highway winds.\n\nThe hands-on portion of the craft is where idea and material meet. A fairing’s life is defined by how it is shaped, joined, and sealed. Simple heat-assisted shaping can coax foam into fairing contours, while careful sanding and filing shape the outer surfaces to a smooth, ride-ready skin. Bonding agents must be chosen with an eye toward both strength and flexibility, to accommodate the flexing that occurs as the bike wobbles at low speeds and dives into corners at high speed. Fiberglass or carbon fiber skin layers can be applied over an internal foam core to achieve a balance of stiffness and lightness, with resin systems chosen for workability and environmental resilience. The practitioner’s touch matters here: meticulous mold work, clean joins, and precise alignment with the bike’s frame minimize the risk of misfit that could lead to rattles or even safety hazards when the vehicle reaches speed ranges where aerodynamic forces magnify small gaps into performance losses.\n\nAssembling and finishing the fairing is a study in layered craft. The assembly stage demands a clear understanding of the bike’s mounting points, the routing of cables and hoses, and the clearance around the engine’s protrusions. It is not enough to trap a shell to the frame; the fairing must be a snug, vibration-quiet addition that does not interfere with movement or heat dissipation. Many builders begin with a dry-fit trial, then remove the shell to apply sealants, weatherproofing, and passive safety features such as soft edges near aggressive contact zones to reduce the risk of injury in the event of a tip-in crash. Finishing touches, while often viewed as cosmetic, are essential for longevity. Vinyl wraps and decals can provide changeable aesthetics with minimal commitment, while paint and clear coats demand patience and surface preparation. The goal is a surface that resists UV degradation, resists chips from gravel and rain, and remains legible and vibrant across years of exposure to sun and weather. A well-finished shell will also show a careful understanding of color harmony, where the chosen palette aligns with the bike’s base hues and the rider’s personal language without overwhelming the overall silhouette.\n\nThe narrative of realism in a DIY fairing is inseparable from safety and reliability. An evocative design that looks dramatic is never a justification for ignoring structural integrity. The installer must guarantee that the final piece sits with proper alignment to the motorcycle’s centerline and maintainers. This includes measuring mounting points with precision, ensuring hardware penetrations are reinforced, and the fairing does not press against moving parts or airflow pathways essential to engine cooling. The best practice is to simulate riding conditions as early as possible. A slow-speed fit check on a stand, followed by a controlled ride in a quiet area, helps identify issues such as flutter, vibrations at specific RPM ranges, or subtle misalignments that only reveal themselves at velocity. The avoidance of resonance is a recurring theme because even a well-crafted shell can become a thief of stability if its mass distribution and attachment points create a harmonic that amplifies at highway speeds. These checks remind us that design is not only what the eye perceives but also what the machine experiences in the wind.\n\nTo bring the concept to life, many builders incorporate a sense of continuity between the fairing and the rest of the motorcycle’s aesthetics. The fairing should echo the bike’s lines rather than fight them, selecting contours that reinforce the machine’s stance while adding a dash of personal character. The color strategy is not an afterthought; it acts as a bridge between the rider’s intent and the machine’s identity. A cohesive scheme might draw a single dominant hue and use secondary accents to highlight architectural features such as air intakes, edge lines, or lateral ribs. The result is a fairing that reads as a natural extension of the bike rather than a separate ornament, a trait that enhances visibility and appreciation from onlookers who understand the visual language of two-wheeled speed.\n\nFor those who want to trace practical examples without leaving the bike’s framework, there are community resources and design templates that focus on different rider goals and model families. If you are exploring model-specific fitments, you can study collections that gather fairings tailored to common platforms, such as those designed for a range of sport bikes. In particular, you can explore Honda fairings for CBR to understand how mounting points, silhouette, and line work are harmonized in a way that respects the original engineering philosophy of the machine. This reference is a useful starting point for designers who want to learn the grammar of fitment and proportion, while staying mindful of the need to adapt to aftermarket or custom-fit components that honor both style and safety. For a direct view into these model-specific patterns, see Honda fairings for CBR.\n\nThe design journey also intersects with the broader culture of DIY motorcycling. Tutorials and forums show a spectrum of methods, from quick vinyl overlays that dramatically alter the look to full-scale mold-based builds that demand months of refinement. The common thread is practice, patience, and a willingness to iterate. Even a modest fairing project can become a long-term learning process—one that improves a rider’s understanding of aerodynamics, materials science, and finish work. The core philosophy is simple: let the fairing serve the ride. It should be light enough to improve handling, robust enough to withstand the road, and bold enough to declare the rider’s presence on the street or track. As you navigate from concept to surface, the project evolves from a plan on paper to a kinetic expression in the real world, a testament to how a well-made fairing can define a rider’s relationship with their machine.\n\nExternal reference: https://www.alibaba.com/product-detail/Customized-Dark-Helmet-Costume-Motorcycle_1600714352375.html
Materials as the Skeleton of Customization: Selecting Substrates for a DIY Motorcycle Fairing
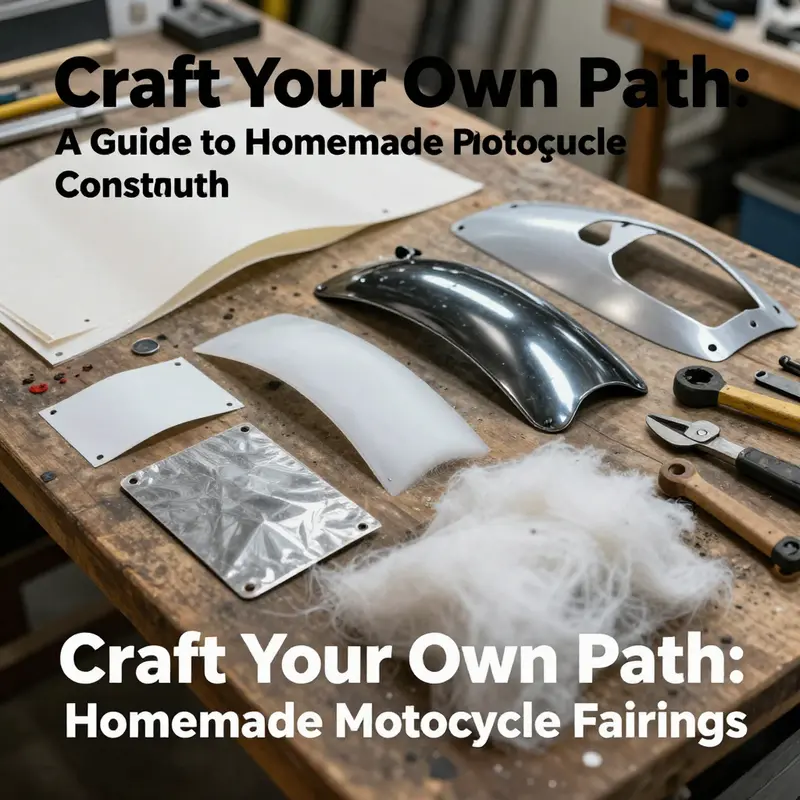
Choosing what sits between rider and road is as decisive as the lines you sketch on a fresh fairing model. In a project as intimate as a homemade motorcycle fairing, the material you pick sets the tone for how the bike looks, how it feels to ride, and how long the skin will endure weather, vibration, and road debris. The central idea is balance: you want something strong enough to resist impact, light enough to preserve handling, and forgiving enough to work with in a home workshop. The practical path is to align material properties with the bike’s geometry, rider goals, and budget, rather than chasing a factory-perfect finish from the start. The result is a shell that can be shaped, tested, and refined in a more forgiving environment than a production line.
Fiberglass sits at the heart of many DIY fairing projects for its straightforward strength-to-weight and ease of use in a home workshop. It pairs well with common molds and resins. A typical layup uses fiberglass cloth with a resin system—polyester is common for hobbyists, while epoxy systems offer greater stiffness and environmental resistance for more ambitious builds. The process is about technique as much as material. Ventilation, PPE, and patience during cure matter. Layering multiple plies and using control layers—such as a barrier coat to reduce print-through and a peel ply to regulate resin content—helps produce a smooth surface that sands well and accepts filler and primer. Resin choice matters: epoxy can yield stiffer laminates and better adhesion to gel coat or paint, while polyester resins can be simpler but may require more attention to moisture and yellowing over time. The result is a fairing that’s repairable and reasonably resistant to road debris when the underlying mold is solid and layup is careful.
Carbon fiber offers a different proposition: exceptional stiffness and a high strength-to-weight ratio, with a premium aesthetic few riders can resist. In practice, carbon fiber provides performance-oriented advantages when the goal is a lighter fairing that improves weight distribution and response. But carbon fiber is not a casual DIY choice. It demands precise layups, controlled curing, and typically more expensive materials and tooling. A typical layup involves multiple plies with careful alignment, followed by a compatible resin system. Vacuum bagging or autoclave-compatible techniques can improve resin distribution and cure quality, reducing voids and improving surface finish. The result is a lighter, stiffer panel, with a more direct feel at speed. The downsides are cost and the learning curve: a small misstep can cause microcracks or delamination and a finish that requires more polishing to reach showroom gloss. For riders who want top performance and have room in their budget, carbon fiber can be the aspirational choice. For others, fiberglass offers a reliable path with fewer obstacles while still enabling sculpted shapes.
Plastic—especially ABS or polycarbonate—offers a different route that emphasizes ease of shaping and rapid iteration. Thermoplastics can be heated and formed over a mold, making them appealing for fairings with simpler geometry or for early prototypes where speed matters more than ultimate strength. ABS is tough and forgiving when heating and reshaping is involved, though it may show lower impact resistance in some cases. Polycarbonate, by comparison, is more impact-resistant and clearer, which is valuable if a transparent section or translucent finish is desired. The trade-off is rigidity and heat tolerance: plastics can creep or crack if stressed in high-load areas or near engine heat for long periods. Also, plastics generally require careful edge trimming and finishing to maintain fit on complex curves. Nevertheless, for fast prototyping or simple contours, plastics can be a practical, approachable solution.
A hybrid approach—combining a foam core with a composite skin—has growing appeal in the DIY world. The idea is to create a lightweight, rigid shell by forming a core from EPS or polyurethane foam and adding fiberglass or carbon fiber over the core. This method reduces weight while maintaining structural integrity, especially for larger panels where solid lamination would be heavy. The foam core aids shaping, enabling complex curves and hollow regions without excessive resin uptake. The composite skin ties everything together, providing surface stiffness, impact resistance, and a base for paint or clear coat. This hybrid approach is attractive for riders who want a high-end look with a sturdy shell without paying the full premium of a solid carbon layup. It does demand careful control: uniform core density, clean bonding between core and skin, and meticulous trimming to prevent delamination under vibration and air pressure at speed.
Beyond material selection, the fairing’s architecture must respect the bike’s frame geometry, mounting points, and airflow. The material choice should align with mold design, surface finish, and edge treatment. A fiberglass layup benefits from a gel coat exterior, followed by sanding, filler, and primer to achieve a panel that takes paint evenly and resists micro-roughness. In carbon fiber projects, the finish tends to highlight the weave, so clear coats and precise edge-work are essential to avoid a dull or cloudy appearance. When plastics are used, heat forming and careful trimming are vital for a precise fit around radiator inlets, headlights, and rear subframes. The objective is a fairing that hugs the bike’s lines while providing a protective shell that withstands wind, gravel, and high-speed operation.
A practical path for any DIY builder is to start with a clear assessment of the bike’s mounting scheme and anticipated service conditions. The fairing should align with the frame and engine while avoiding contact with moving parts and maintaining clearance for steering at full lock. Real-world fitment notes and catalog guidance can help gauge compatibility. If you’re looking for a catalog-style reference that mirrors common mounting interfaces, use caution and verify fit for your specific model. As you prototype, you’ll likely oscillate between materials and techniques. The process of trial fits, wet testing, and staged reinforcement layers teaches where a given material shines and where a more conservative approach makes sense. The iterative mindset—test, adjust, test again—often yields the most satisfying balance between aesthetics and reliability.
Finally, a chapter like this would be incomplete without practical, hands-on guidance from the DIY community. Many builders turn to guides that break the process into approachable stages: mold-making, layup techniques, finishing, and safety. While reference materials vary, they share a core message: prepare, protect, and practice. External resources and guides can provide walkthroughs that translate theory into a reliable road-ready shell. See the recommended guides for comprehensive walk-throughs of layups, mold handling, and finishing steps that align with the approaches described here.
As you plan material selections, remember that the best choice is one you can reproduce consistently in your workshop, with your tools, and within your budget. The strongest fairing is not the one that never cracks but the one you can repair and re-finish with confidence after a long season. The optimal path often blends: fiberglass for accessible shaping and repair, carbon fiber for critical performance areas if budget allows, or a smart plastic or foam-core hybrid where speed and iteration trump absolute stiffness. The goal is a cohesive, well-formed shell that respects the bike’s geometry, performs at speed, and finishes with a polish that makes the rider want to ride. With patient hands, careful mold work, and disciplined curing and finishing, a homemade fairing becomes as much a testament to technique as it is a signature of style.
Sculpting Speed: Aerodynamics and the Handmade Motorcycle Fairing
The allure of a handmade motorcycle fairing lies not only in lowering wind resistance but in the intimacy of shaping air itself. When a rider becomes a designer, the air around the bike turns from a chaotic medium into a controllable force. This chapter follows that transformation, weaving practical craft with fluid dynamics so a DIY fairing becomes more than skin; it becomes a system that works with the bike, rider, and road. The aim is a cohesive whole where the form, the mounting, and the surface finish converge to reduce drag, improve stability, and cushion the rider from the worst of the wind, without compromising safety or reliability. In practice, the aerodynamics of a homemade fairing start with the core decisions: shape that guides air smoothly, fit that keeps air moving cleanly, and materials that can hold a precise surface without bending under speed or heat. Each choice cascades into the next, so a small deviation in contour or alignment can ripple into measurable drag or a fluttering background noise at highway pace. The knowledge drawn from established aerodynamic principles helps temper the DIY impulse with tested discipline, ensuring the final piece cooperates with the frame, the engine, and the rider’s habit of lean into wind and curve.
The shaping ritual begins with contour. A teardrop profile remains a time-honored target because it minimizes pressure differences along the surface. The front, where air meets the bike first, benefits from a gentle rounding that helps deflect air upward and outward, guiding it around the rider rather than striking the torso head-on. The rear, by contrast, must taper gradually to avoid abrupt separation. When air leaves the surface too suddenly, it forms vortices that swirl behind the rider, creating drag and buffeting that can destabilize steering at higher speeds. The challenge for a handmade fairing is to strike a balance: a profile that stays smooth over miles yet can be constructed with accessible materials and tools. It is this balance that distinguishes a practical DIY fairing from a cosmetic shell that merely looks aerodynamic at a standstill.
Fit and integration rise next as the unseen engine of performance. A fairing that fits poorly introduces seams and gaps that disrupt smooth airflow. Even small misalignments at the handlebars, the tank, or the lower edge can generate turbulent pockets that buffet the wind and raise vibration levels in the hands and feet. The real win comes from precise alignment with the motorcycle’s existing geometry. This means choosing mounting points that respect frame tubes, ensuring fairing panels sit flush against the tank’s curvature, and maintaining a continuous, uninterrupted surface from one edge to the next. In a handmade build, this demands a careful mock-up phase: create a temporary form, check for gaps, and adjust the model before committing to permanent attachment. The goal is a seamless envelope that the air can ride along without catching on fasteners or creating hitch points where airflow can stall or peel away.
Wind protection for the rider represents a major payoff of a well-executed fairing. A correctly proportioned shield reduces fatigue by sheltering the upper body and head from direct wind, which translates into clearer concentration on the road and fewer climbs in the shoulders after a long day’s ride. Yet wind protection should never compromise visibility, cornering feel, or the rider’s sense of connection to the bike. The sculptor’s eye must supervise the trade-offs between shielding and openness, especially around the cockpit and mirrors. In practice, the wind that slips past a front edge must not strike the rider with a harsh, singing pressure; rather, it should diffuse along the chest and shoulders, leaving a steady, controllable airflow that the rider can read with subtle body adjustments. The interaction between rider posture, fairing profile, and the bike’s balance is intricate. A taller rider may benefit from a slightly higher wind deflector, while a more compact rider may need a more modest shield to avoid echoing wind noise in the helmet.
Material choice enters the conversation as the enabler of aerodynamic fidelity. For handmade projects, the material must offer a favorable mix of light weight, rigidity, and ease of shaping. Fiberglass remains a common choice because it tolerates hand layups and allows intricate, curved surfaces to emerge from a mold or a well-prepared form. Carbon fiber, while offering superior stiffness for a given weight, demands a more meticulous manufacturing process and a higher tolerance for cost and complexity. The surface finish is equally critical. A rough or pocked surface, even if the contour is briefly aerodynamic in theory, ruins the intended flow by creating micro-turbulence. Therefore, sanding and polishing the entire surface to a seamless, mirror-like state becomes a non-negotiable step. Imperfections at the micron level can become drag-inducing roughness, especially at highway speeds. Seams, joints, and corners must be treated with care: bond lines should be slender, paint should be uniform, and any filler or adhesion layer should not introduce ridges that disturb the air over long stretches. In this light, the manufacture phase resembles a craft process as much as an engineering one, where attention to microscopic texture matters as much as macroscopic form.
The interplay between material and geometry also affects how the fairing behaves in crosswinds. A shape that works well in calm air can feel unsettled in gusty conditions if the side-to-side symmetry is imperfect or if the cross-section’s taper creates a subtle yaw moment as wind shifts. For a handmade project, a practical approach blends a symmetric, balanced profile with real-world testing. When possible, build a prototype and test it under varied wind directions, noting any tendency to yaw or twist. If a wind tunnel is available, the CFD (computational fluid dynamics) analysis can anticipate flow separation regions and wake behavior. If not, on-road testing with a calm-to-mgusty day and a loyal test rider who can push through corners and straightaways in a controlled manner provides invaluable feedback. The aim is to refine the fairing so that it remains stable at high speed, with minimal buffeting and predictable behavior in the crosswind regime. These tests also reveal whether any mounting points or bracing choices are introducing secondary flows that degrade the intended contour.
A practical path through these considerations often begins with a modular mindset. Rather than trying to sculpt a single piece that does everything, a handmade fairing can evolve through a staged approach: a primary contour that delivers core aerodynamic benefits, followed by refinements that optimize fit, finish, and the rider’s comfort. This mindset helps control costs and keeps the project on schedule. It also permits incremental validation of aerodynamic performance. With each revision, one learns where airflow is behaving as expected and where it is not, and the rider gains a clearer sense of how posture and line influence the bike’s response. In the DIY arena, this process is inherently iterative, grounded in observation and measurement rather than theory alone. It rewards patient craft, careful data gathering from speed runs or test laps, and a willingness to revisit the form after initial trials.
The how-to of integration extends beyond the fairing itself and into the broader ecosystem of the bike. The fairing must cooperate with the engine bay heat, radiator routing, and other under-seat or under-tail components. A poorly positioned cooling path can cause heat soak that impairs performance and even accelerates material fatigue. Likewise, the fairing should not obstruct the fuel system, the ignition wiring, or the braking lines. All lines and cables should route within the fairing’s internal channels or behind its outer surface, so the surface remains smooth and continuous. These practical considerations reinforce the point that aerodynamic charm must be married to mechanical reliability. The fridge of speed in a handmade project is not merely about how fast air can glide along a surface; it is about how that surface can stay intact while the bike consumes fuel, breathes, and responds to control inputs without surprise.
If you are considering entering a DIY fairing project, a pragmatic reference point is how existing options can be adapted safely. For those exploring options, check out the Honda fairings category. This resource can provide tangible starting points for understanding how a base shape might be integrated with cautious modifications, ensuring the final assembly remains within the bike’s geometry and handling envelope. The emphasis remains on using a solid base while shaping the rest of the surface to meet your aerodynamic targets and ergonomic needs. The path from raw panel to working shield is a blend of engineering discipline and artisanal handwork, where the quality of the final finish often mirrors the patience invested in the shaping and alignment steps. The result should feel like a natural extension of the motorcycle, a cohesive silhouette that enhances speed through air rather than merely masking it.
The broader takeaway is that aerodynamics for a handmade fairing is not a single trick or a clever curve. It is a disciplined sequence of decisions about contour, fit, rider protection, material behavior, and real-world testing. The practitioner must respect the bike’s existing geometry, harness the beneficial effects of a well-chosen surface finish, and validate the design under conditions that mimic actual riding. When done well, the handmade fairing does more than reduce drag; it contributes to the bike’s overall stability, confidence, and the rider’s sense of connection with the machine. This synthesis of form and function is the essence of true DIY aerodynamics, where speed is born not from guesswork but from a measured conversation with air itself.
External link for deeper aerodynamic principles: How to Choose Motorcycle Fairings for Aerodynamics – Guide
The Price of Shape and Speed: Weighing Homemade Motorcycle Fairings Against Factory Solutions

Choosing a fairing for a motorcycle is more than a cosmetic decision; it is a study in how form meets function on a moving platform. A well-made fairing reduces wind resistance, protects vital components from road debris, and can improve rider comfort at highway speeds. It is also a canvas for personal expression, turning a motorcycle into a silhouette that carries the rider’s taste and intent. For many enthusiasts, the appeal of a homemade fairing lies in the chance to bend form to fit a budget while still achieving a look that rivals factory work. Yet the path from idea to riding prototype is not a straight line. It demands a careful assessment of materials, manufacturing methods, and the realities of air flow around a curving shell. The decision to go DIY or to opt for a factory kit hinges on weighing upfront costs against long-term reliability and performance. While the lure of saving money is real, it should be balanced with respect for the bike’s structure and the demands of high-speed stability. The chapter that follows examines this balance by grounding the discussion in tangible cost factors and practical outcomes, rather than hype.
Factory fairings, whether OEM or premium aftermarket, are engineered to fit with the precision that comes from manufacturing processes designed to match a specific model and its frame. The result is a near-seamless integration with the bike’s lines, predictable mounting points, and a known standard of aerodynamic performance. Price bands for factory options tend to reflect these advantages. Typical ranges sit between two ends of the spectrum: a modest kit with straightforward contours and fewer bells and whistles may land around a couple hundred dollars, while more complex, multi-piece assemblies with integrated vents, tight tolerances, and high-gloss finishes can push toward several hundred dollars up to a moderated upper tier. The advantages here are clear: reliable fit, robust mounting options, material consistency, and a finish that resists the elements. The trade-off, however, is equally clear. The upfront sticker shock is higher, and for riders who crave customization beyond model-specific lines, factory options can feel limiting. In short, factory fairings deliver a guarantee of consistency and performance that many riders come to rely on, especially when the goal is speed, cornering stability, and a finish that can endure the rigors of track or daily commuter use. Yet the financial calculation cannot ignore the fact that even the most affordable factory kits may stretch a rider’s budget, especially when additional components such as windscreen adjustments, inner panels, or color-matched schemes are included.
Meanwhile, the DIY path presents a different calculus. Homemade fairings open the door to creative tailoring while offering a chance to manage costs in the short term. Materials such as fiberglass, resin, and composite sheets are widely accessible and can be shaped to mirror the bike’s existing lines. The tactile joy of building a fairing by hand—measuring, templating, sanding, reinforcing, and finishing—offers a sense of ownership that no pre-made kit can duplicate. Yet this creative freedom comes with real liabilities. The total cost of DIY work rarely stops at the raw materials. Tools, molds, curing resins, and the time spent designing and refining a model add up quickly. When you include labor, the math often approaches or even surpasses the price of a factory kit. Durability becomes another critical variable. A handmade shell must be thick enough to resist impacts, yet light enough not to upset weight distribution. Structural integrity matters as much as aerodynamic performance. Without rigorous testing and careful alignment with the bike’s frame, a DIY fairing can introduce unwanted vibrations, poor mounting points, or gaps that compromise safety at speed. In this sense, DIY projects carry not only a creative challenge but a safety responsibility. The best DIY outcomes come from disciplined planning: accurate modeling, a reliable mold, quality resins, and a meticulous finish that translates into repeatable fits across years of riding. Those who pursue this route typically spend substantial time in the workshop, iterating from initial templates to final assemblies, constantly checking alignment with the frame, engine, and fuel system. The end result can be a fairing that looks and performs well, but the path to it is marked by careful budgeting of both money and time, as well as rigorous testing to ensure there is no resonance, looseness, or interference with moving parts at velocity.
The long view on value helps illuminate why most riders tilt toward factory options, even when a DIY project seems cheaper on the surface. A factory kit, despite its higher upfront cost, often delivers a more predictable lifetime cost through reliable mounting hardware, consistent fit, and a finish that resists weathering and UV damage. If you ride frequently at highway speeds or plan to run on the track, the confidence that comes with a standard, tested fairing can translate into fewer surprises and fewer mid-ride adjustments. When a rider inventories the potential outlays for a DIY project—tools, adhesives, protective finishes, molds, and the inevitable rework—the sum can easily exceed the price of a factory kit that already includes the essential hardware and a warranty. Furthermore, factory and premium aftermarket fairings are more likely to maintain compatibility with other OEM components, such as the windscreen, radiator shrouds, and internal panels, reducing the risk of misalignment that can lead to rattling or aerodynamics that devolve into turbulence at speed. These considerations are particularly important for riders who use their bikes across varied conditions—daily commutes, long tours, or occasional track sessions—where consistency matters as much as initial aesthetics.
That said, budget-conscious riders still have legitimate options to bridge the gap between cost and quality. There exists a spectrum of affordable aftermarket kits that aim to balance price with reasonable fit and appearance. These budget options rarely pretend to be full factory equivalents, but they can provide a visually satisfying upgrade over stock while keeping the wallet mostly intact. The key is to avoid price traps that skimp on critical attributes, such as correct centimeter-level fitment, robust mounting points, and durable surface materials. The risk with very inexpensive kits is not only a lack of long-term durability but the potential for misalignment that undermines both aerodynamics and safety. In the end, the decision hinges on the rider’s priorities: is the goal a pristine showroom look, a well-tested aerodynamic profile, or the most economical path available? Most riders discover that a rational blend of quality and cost, rather than the cheapest option alone, offers the best ongoing value. For those who want a practical, hands-on approach to assessing options, testing fitment on a few key points before sealing a purchase can prevent missteps that lead to costly reworks later. A thoughtful approach means evaluating how the selected fairing will integrate with existing mounting points, the tank and engine area, and the bike’s overall weight and balance at high speed.
For riders who are exploring cost-effective, model-specific choices, you can browse the Suzuki fairings catalog. This internal link provides a sense of how the market segments model-specific needs from general aesthetic upgrades to more complex aerodynamic packages. The catalog showcases variations in contours, mounting schemes, and finish options that reflect common pain points and opportunities in fairing customization. It also serves as a reminder that even budget choices can come with benefits, especially when they are designed for a particular frame geometry and intended riding style. The goal is not to promise a magic substitute for meticulous engineering but to highlight the spectrum of options that riders can consider when balancing cost and performance. As part of a broader strategy, consulting a catalog like this can help a rider identify which features matter most—whether it is gaps-free paint work, consistent color matching, or the solidity of the internal bracing.
Ultimately, the question of which path yields the best long-term value rests on how a rider uses the bike and how much risk they are willing to tolerate in the intermediate stages of a project. Factory options provide a safety net of tested fit and predictable performance, often at a higher initial cost but with lower risk of mid-life issues. Homemade or budget aftermarket kits require more hands-on commitment, careful budgeting, and a readiness to engage in iterative refinement. They can deliver a satisfying blend of personality and performance when approached with clear expectations and disciplined execution. The practical upshot is simple: for most riders who prize long-term value, a well-chosen factory option remains the most prudent anchor. However, for those who savor the learning curve, enjoy the craft of shaping a shell, and are prepared to absorb the hidden costs of experimentation, a DIY or budget path can still offer meaningful rewards.
External resources can deepen understanding of the landscape, with real-world examples and listings that illustrate the affordability and variety available in the market. For context on affordable options from global suppliers, see this listing: https://www.alibaba.com/product-detail/Suzuki-GSX250R-17-18-Body-Fairings-Kit_1600438529402.html?spm=a2700.100112.0.0.6b2f7c5dQkLjGZ. While the link references a specific model in a wholesale context, it underscores a broader truth: there is a continuum from hand-built, hand-finished shells to factory-grade precision, and the market now offers approaches that sit at many points along that continuum. The challenge for riders is to map their own priorities—cost, safety, and aerodynamic stability—onto this spectrum and to choose a path that aligns with their riding realities. The final decision, after weighing up front costs against long-term reliability and the intangible value of personal craftsmanship, is less about chasing the cheapest option and more about finding a durable, aesthetically satisfying balance that can accompany a rider through seasons of use. As with any customization project, the smartest choice is one that respects the bike as a system, honors the rider’s budget, and remains faithful to the safety requirements that keep two-wheeled travel both thrilling and trustworthy.
Rigorous Safeguards: Thorough Testing and Confident Installation of a Homemade Motorcycle Fairing
Safety is the steady pulse of any project that reshapes the silhouette of a motorcycle. When the fairing is homemade, the stakes feel higher because there is no factory certification to rely on. The goal is not only to achieve a striking look but to ensure that the cover you design, cut, and install holds up under wind pressure, road debris, and the twists and shocks of real riding. This chapter follows a practical, integrated path from material choice to mounting, from static and dynamic testing to careful installation. It is a narrative of how to turn a creative idea into a robust, ride-ready component, with attention to details that often separate a cosmetic upgrade from a safe, long-lasting enhancement. Throughout, the emphasis remains on aligning the fairing with the motorcycle’s frame and engine, so the final product integrates smoothly rather than fighting against the machine.
Material choice sets the foundation for safety and durability. A homemade fairing must withstand environmental stressors—UV exposure, temperature swings, rain, dust—and the inevitable bumps and impacts of everyday riding. Fiberglass, carbon fiber, and high-density polyethylene are common, economical options that offer different balances between weight, stiffness, and impact resistance. The selection should consider how the material behaves under fatigue and how it can be joined to the bike’s frame without introducing dangerous flex or delamination. UV stabilizers, compatible coatings, and proper edge finishing are not cosmetic niceties but functional safeguards that reduce material degradation over time. Beyond the skin, attention must be paid to the internal structure: a fairing should be reinforced at high-stress points, especially near mounting interfaces to the frame, front forks, and seat area where vibrations and loads concentrate. The goal is a shell that behaves as a single, integrated piece rather than a series of loosely connected panels. In practice, this means designing with a jig in mind, prepping precise attachment points, and ensuring that every seam and fastener site is accessible for inspection and maintenance.
The mounting system deserves equal care. The bike’s frame is not a flat canvas; it is a dynamic, vibrating structure that moves with every bump and throttle input. A robust installation begins with hardware rated for the loads a rider experiences at highway speeds and in gusty crosswinds. Use high-quality screws, bolts, and brackets that resist corrosion and maintain clamping force over time. Where the fairing attaches to the frame, add reinforcement at the mounting points. This can take the form of gussets, backing plates, or purposefully designed inserts that distribute stress over larger areas. The alignment between the fairing and the frame is a subtle factor with outsized consequences: misalignment can create chatter, rubbing, or cracking; a gentle, precise fit avoids these hazards and reduces sudden load transfer to the shell. The connection to the front fork crown and radiator area, if applicable, should be checked for clearance at full steering lock, suspension travel, and when the rider moves in and out of the saddle. Even small misplacements can produce interference with brake lines, electrical looms, or cooling airflow.
From the outset, the design must honor aerodynamics without inviting instability. A well-integrated fairing guides air smoothly around the rider and the bike, reducing drag and delivering a calmer, more predictable wind environment. Yet a rough edge, a protruding fastener, or a sharp corner can become a wind-catching hazard at speed. A practical approach is to shape edges with gentle radii, minimize protrusions, and ensure that any mounting hardware sits flush or recessed where possible. The final silhouette should respect the bike’s natural lines, balancing aesthetics with function. While this is a creative project, the aerodynamic intent should be tested in a controlled manner—one reason to build a mock-up or use computer-aided design tools before any cutting occurs. A tested design reduces the risk of rattles, flutter, or resonance that could build into a frightening vibration at speed. As you refine the form, consider how light plays across the surface; glare or muted reflections can affect rider visibility through mirrors and lights, so plan for consistent finish on all critical zones that influence perception on the road.
Testing is the ethical hinge of any homemade fairing. Because there is no formal homologation for a custom bodywork piece, the burden of proof rests on the builder to demonstrate reliability under real-world conditions. A practical testing regimen starts with static load tests that simulate wind pressure and the weight of potential road debris. The test involves applying controlled forces at representative points on the fairing to measure how the shell deflects, where it flexes, and how the mounting system responds. The objective is to keep deflection within a safe range and to verify that the attachment points do not loosen under load. Next come impact tests, which can be performed with controlled strikes to simulate knocks from stones, branches, or minor collisions. These tests help identify fragile areas that could crack or detach, revealing joints or material choices that need reinforcement or different layup. If access to a lab or workshop with safe testing facilities exists, a more rigorous assessment—including a simulated crash scenario with a dummy setup—can provide valuable data about how the fairing behaves in a protective role during a mishap. While not everyone has the resources for formal crash testing, the principle remains: design and verify, then verify again.
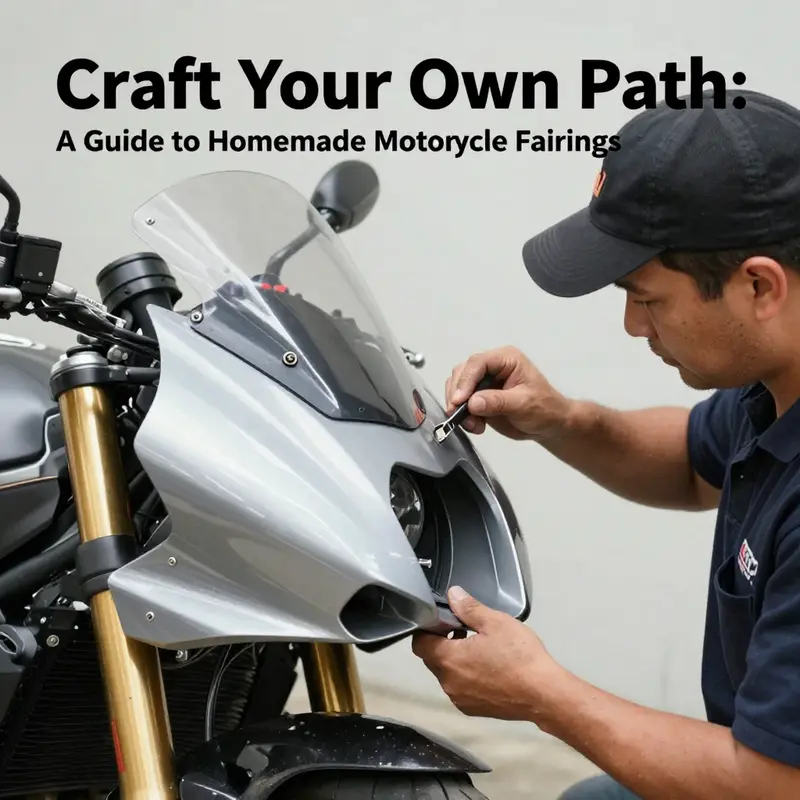
Incorporating expert review into the process adds a layer of safety that is hard to replicate through self-assessment alone. A professional mechanic or an engineer can examine the design for structural integrity, manufacturing tolerances, and compatibility with the bike’s electronic and hydraulic systems. This peer check helps catch issues that might be overlooked during enthusiastic hands-on work. Documentation of testing procedures, results, and any modifications is also essential. It creates a traceable record that can be useful for future maintenance or when revisiting the design for improvements. When it comes to installation, the sequence and method matter as much as the parts you choose. The installation should proceed with a clean disassembly of any components that could obstruct access to mounting points, followed by a methodical reassembly and retightening under specified torque values. A well-executed installation distributes stress evenly and minimizes vibration heat buildup that might otherwise loosen fasteners or crack joints. The process should begin with a dry fit: temporarily mounting panels to confirm alignment before final securing. This stage is where a builder can detect interference with headlights, turn signals, mirrors, or windscreen wipers, and adjust accordingly without committing to irreversible changes.
The actual installation guidelines can be summarized in a thoughtful sequence that emphasizes safety and stability. First, ensure hardware connections are secure and tested for durability. Use fasteners and brackets that are corrosion resistant and appropriate for the expected loads. Confirm that mounting points at the frame are reinforced as needed and that the fairing, once mounted, does not impede frame movement or wheel travel. Second, assess the fairing’s aerodynamic integration. Shape and transitions should facilitate clean airflow while avoiding any edge or protrusion that could catch wind during acceleration or at lean angles. Third, safeguard visibility and safety. Verify that the fairing does not obstruct mirrors, headlights, indicators, or the rider’s line of sight. Conduct a test ride at a controlled speed to observe any changes in steering response, wind buffeting, or the onset of vibrations that could indicate a loose connection. Fourth, evaluate vibration resistance. A thorough inspection at various speeds with the bike warmed up will reveal rattles and squeaks that indicate loose clips, poorly seated panels, or imperfect fitment. If any vibration persists, revisit the mounting strategy, check fastener quality, and ensure the fairing skin has adequate support across its entire span.
Beyond the mechanical and aerodynamic considerations, there is a regulatory and safety ecology that riders should acknowledge. Local and national laws may specify visibility requirements, lighting integration, and safe mounting practices. Insurance implications can arise if a modification is deemed non-compliant or unsafe, so knowledge of the regulatory landscape helps prevent downstream penalties or coverage gaps. A final reminder is practical but essential: even the best-crafted fairing cannot eliminate all risk. It complements a rider’s protective gear, a conscientious riding style, and a commitment to regular inspection and maintenance. Protective gear remains indispensable; handlebars and fairing edges should not tempt any rider to let speed and bravado override caution. The learning curve for a handmade fairing is real, but with careful material selection, thoughtful structural integration, disciplined testing, and a meticulous installation, a project born from creativity can also become a safe, reliable addition to the bike.
For readers seeking a tangible starting point on mounting considerations and compatibility while exploring different design cues, a practical reference is available in the Honda fairings catalog. It provides a sense of mounting geometry and alignment practices that help inform the custom approach without constraining it to a single design path. See the resource here: Honda fairings.
As the design and testing journey progresses, keep a clear, organized record of measurements, test outcomes, and adjustments. This archive becomes the backbone of long-term safety, helping you understand how your fairing behaves as the bike ages, as tires wear, and as you gain more riding experience. When you finally mount the fairing for a road test, perform a full-system check: ensure that all fasteners are tight, that cables and hoses between the fairing and engine region have sufficient clearance, and that the installation does not create rubbing or interference with the radiator, intake, or exhaust components. A careful, methodical approach yields not only a visually compelling piece but a coherent integration that respects the bike’s original engineering and the rider’s safety. For additional official guidance on safe customization practices, consult established safety resources that describe structural integrity, testing, and compliance standards. https://www.motorcyclesafety.org/resources/guidelines-for-custom-bodywork-modifications
Final thoughts
Homemade motorcycle fairings bridge the gap between aesthetic appeal and cost-effectiveness, allowing enthusiasts and entrepreneurs to tailor their bikes to their unique styles without breaking the bank. As explored throughout this guide, the process requires careful consideration of design, materials, aerodynamic principles, and rigorous safety testing to ensure the end product is not only visually striking but also functional. Armed with this knowledge, business owners and motorcycle enthusiasts can confidently embark on their fairing projects, transforming their visions into reality.