Introduction
Maintaining the appearance and integrity of motorcycle fairings is crucial for both aesthetics and performance. Business owners in the motorcycle industry must understand how to effectively repair and replace these components to enhance customer satisfaction and retention. This article delves into essential techniques for repairing fiberglass and ABS plastic fairings, addressing surface damage, detailing removal procedures for effective reparations, and exploring options for replacement and customization. Each chapter offers actionable insights, ensuring that owners can make informed decisions about fairing care and enhancement for their clientele.
Tables of Contents
Chapter 1: Transformative Techniques for ABS Plastic Fairing Repair: Mastering Chemical and Heat Welding
- Harnessing the Power of Chemical and Heat Welding for ABS Plastic Fairing Repairs
Chapter 2: Revitalizing Fiberglass Fairings: Step-by-Step Techniques for Effective Repairs
- Mastering the Art of Fiberglass Fairing Repair: Comprehensive Filler-Based Strategies
Chapter 3: Mastering Motorcycle Fairing Repairs: From Scuffs to Structural Integrity
- Expert Techniques for Restoring Minor Scratches and Surface Damage on Motorcycle Fairings
Chapter 4: Essential Repairs for Motorcycle Fairings: Mastering the Art of Scratch and Surface Restoration
- Harnessing the Right Materials and Tools for Motorcycle Fairings Repair
Chapter 1: Transformative Techniques for ABS Plastic Fairing Repair: Mastering Chemical and Heat Welding

1. Harnessing the Power of Chemical and Heat Welding for ABS Plastic Fairing Repairs
Repairing ABS plastic motorcycle fairings is a critical skill for ensuring the longevity and aesthetic appeal of your bike. Unlike fiberglass fairings that shine the spotlight on lightweight performance but often suffer from brittleness when subjected to impact, ABS plastic is favored for its remarkable strength, flexibility, and resistance to various environmental factors. When faced with the cracks, scratches, or breaks that plague these fairings, two primary methods for repair arise: chemical welding with ABS resin and heat welding using plastic welding techniques. Each method presents unique advantages and techniques, allowing motorcyclists to restore their fairings to near-original condition.
Chemical Welding with ABS Resin
Among the most effective techniques for repairing ABS plastic fairings is chemical welding with single-part ABS resin. Unlike two-part epoxies or super glues, which often create a superficial bond that can break down due to the different expansion and contraction rates of dissimilar materials, chemical welding integrates seamlessly with the original plastic. The beauty of single-part ABS resin lies in its formulation, which contains approximately 50% ABS solids. As the solvents within the resin evaporate, they facilitate a molecular bond that effectively fuses repaired sections, creating a resilient, shiny, and waterproof surface. This kind of repair can restore the structural integrity of the fairing, effectively making it indistinguishable from the surrounding areas once finished.
The Repair Process
To execute a chemical weld properly, begin by assessing the extent of the damage to your fairings. Once the area has been cleaned and prepared, the application of the resin can begin. Start with a thick layer of ABS resin—aim for a consistency akin to Greek yogurt. This thickness ensures that the resin adheres well and fills the cracks adequately. Carefully spread the resin over the damaged area, ensuring an even application around the edges to create a strong bond.
As the solvents evaporate, the resin sets into place, fusing with the original material. It’s prudent to allow sufficient time for the repair to cure fully; follow the manufacturer’s recommendations regarding drying times. Once cured, the strength of the repair should rival that of the original fairing material, making it a preferred choice for those looking to mend cracks and holes without resorting to extensive parts replacement.
Heat Welding Methods
Alternately, heat welding presents another viable method of repair, particularly useful for larger cracks or breaks in ABS plastic fairings. This technique involves using direct heat to melt the edges of the damaged plastic sections, thus enabling a fusion of the parts back together. For this method, specialized plastic welding rods are employed, which are specifically designed for repairs of ABS plastic, ensuring compatibility and durability.
To start with heat welding, align the cracked sections and tape them in place. This alignment is crucial; if the bond isn’t true to form, it can compromise the repair’s effectiveness. Next, you’ll need either a soldering iron or a designated plastic welding tool. If using a soldering iron, an 80W unit equipped with specific copper tips is ideal. Carefully lower the tip until it makes contact with the ABS rod, letting the plastic melt slightly as it seeps into the crack and amalgamates the two cracked pieces.
Similar to the chemical welding process, patience is key here. Upon completing the weld, allow it to cool completely before removing the tape. This process not only secures the damaged areas but also restores flexibility, a hallmark of ABS plastic.
The benefits of heat welding extend beyond just repairing structural integrity; it allows for a quick fix without requiring extensive materials. Knowledge of heat welding can offer a cost-effective, time-efficient solution to cosmetic and functional damages in motorcycle fairings.
Material Considerations and Best Practices
Understanding the materials is crucial for effective repairs. ABS plastic is the preferred choice for modern motorcycle fairings due to its robust nature and ability to withstand the rigors of without succumbing easily to impact damage. Fiberglass fairings may offer a more lightweight alternative that can enhance performance—especially in competitive settings—but they do come with their own set of challenges. High-impact scenarios often result in cracks that lead to more intricate repairs, making the necessity for ABS repair skills even more significant.
For optimum results, preparation and adherence to application guidelines cannot be overstated for both repair methods. When utilizing chemical welding, it’s vital to ensure that the surface is devoid of dirt, dust, or previous coatings that might interfere with adhesion. Similarly, during a heat welding repair, achieving proper alignment of plastic pieces is crucial before application to prevent future loosening or breakage.
In cases where the damage is extensive and involves larger areas, reinforcing the repair with additional layers could also be beneficial. For example, one might apply fiberglass mesh over the repair in combination with the resin to improve strength and prevent future damages. However, the key lies in maintaining a balance between the repair’s aesthetics and durability, ensuring that the final result mirrors the performance of the original fairing.
Completing the Repair
After the initial repair process—be it chemical or heat welding—the finishing touches are what truly make a repair successful. Sanding down the repaired area ensures a smooth transition from the repair surface to the surrounding fairing, and this step is vital in preventing the repair from being visually obvious. The goal is to create a flawless surface for painting. Once sanded smooth, a primer tailored for plastics should be applied to seal the area and prepare it for painting.
Selecting the right paint is as crucial as the repair process itself. Color-matched paint will ensure that the motorcycle retains its visual appeal. If the fairing has a gloss or metallic finish, applying a clear coat will protect against UV damage and weathering, further enhancing the durability of the repair. Rubbing compounds can help polish the repaired area to ensure a seamless finish, allowing riders to focus on the road ahead instead of potential imperfections.
Embarking on the journey of motorcycle fairing repair not only enriches the motorcycle maintenance experience but also fosters a deeper bond between the rider and their machine. Mastering the techniques of both chemical and heat welding can save time, money, and frustration in the event of typical wear and tear. With the right approach, even a damaged ABS plastic fairing can return to its former glory, ready to take on the adventures that lie ahead.
Chapter 2: Revitalizing Fiberglass Fairings: Step-by-Step Techniques for Effective Repairs
1. Mastering the Art of Fiberglass Fairing Repair: Comprehensive Filler-Based Strategies
Repairing motorcycle fairings, particularly those crafted from fiberglass, demands not only the right materials but also a systematic approach to breathe new life into the damaged structures. With their durability and lightweight properties, fiberglass fairings can often sustain multiple impacts before they reach a state of irreparability. Thus, knowing how to repair them can save both time and money while preserving the aesthetic and aerodynamic integrity of your motorcycle.
Essential Materials for Repair
To begin the repair of fiberglass fairings, it is fundamental to gather a selection of specific materials that will aid in restoring the damaged area. The typical repair kit should include fiberglass cloth or mat, which provides the structural reinforcement required during repairs. Polyester resin, combined with a hardening catalyst, must also be readily available since they form the core bonding components when applied to the fairing’s surface. Body filler, commonly known as products like Bondo, is essential for smoothing out imperfections and achieving a level surface after repairs. Sandpaper with various grits—ranging from coarse to fine—is necessary for both the initial sanding and the final finishing touches. Adhering tape is vital for masking off portions of the fairing to ensure a clean repair process, while a small roller helps eliminate air bubbles when applying resin. Finally, solvents should be on hand for clean-up purposes to remove any excess resin or filler that may inadvertently spill.
Preparation and Assessment of Damage
Before diving into repairs, it’s crucial to conduct a meticulous inspection of the fairing. Differentiate between cosmetic concerns, like chips and scratches, and structural issues, such as deep cracks or delamination. Correctly identifying the type of damage informs your repair approach—cosmetic fixes can be relatively straightforward, while structural problems may involve more intensive repairs.
Start this process by sanding down the damaged area using progressively finer grits of sandpaper; typically, begin with 80 grit to remove dirt and paint, then advance through 120, 180, and up to 220 grits. This gradual progression helps expose the clean fiberglass underneath, resulting in better adhesion when the repair materials are applied. As you sand, be cautious not to damage surrounding areas unnecessarily; this part calls for meticulous attention.
The Filler-Based Repair Process
Once the damaged area is cleared and smoothed, you can initiate the filler-based repair strategy. First, use tape to mask the exterior side of the crack or hole. This preparation helps create a backing that supports your repairs and keeps the filler from spilling onto unintended surfaces. After taping, apply the body filler generously to the damaged side, slightly overfilling it to account for the sanding process that will follow.
Allow the filler to cure completely—it’s crucial that this step is not rushed, as insufficiently cured filler can lead to further complications such as imperfections or instability in the repair. After curing, you will need to sand the filler down to create a smooth, level surface that matches the surrounding fiberglass contour. Progressively sand using finer grits, ensuring it blends seamlessly with the original fairing. This stage is incredibly important because any irregularities may become pronounced once painted, detracting from your hard work.
Reinforcing the Repair with Fiberglass and Resin
With the filler applied and sanded to your satisfaction, the next step is to make the repair robust by reinforcing it with fiberglass and resin. This is particularly necessary for areas that exhibited structural damage. Begin this process by preparing the resin mixture according to the manufacturer’s guidelines—typically, this involves mixing the resin with a catalyst in a specific ratio, usually around 1-2% by volume. Accuracy in this step is crucial to ensure the resin cures properly and achieves strength.
Next, cut your fiberglass cloth or mat to size, ensuring it overlaps the damaged area by at least one to two inches. Saturate this cloth with the resin mixture. It’s important to apply layers methodically; depending on the depth of the damage, you might need one to three layers for adequate reinforcement. As you work, use a small roller to carefully press out air bubbles, which can compromise the strength and appearance of your repair.
After laying the fiberglass and resin, allow everything to cure fully. This curing phase might take up to 24 hours; be patient—properly cured repairs yield the best results. Once cured, the tape can be removed, and you should have a reinforced structure ready for finishing.
Finishing Touches: Sanding, Priming, and Painting
Following the full cure of your fiberglass repair, the focus shifts to the finishing stages that will restore both the aesthetics and exterior protection of the fairing. Begin by sanding the repaired area with fine sandpaper (consider moving up to 400 grit) to ensure the surface is smooth and integrated with the surrounding material. Achieving an even surface at this point is crucial for the success of the next steps.
Next, it’s time for priming. Use masking tape to cover adjacent areas that you do not wish to paint, allowing for crisp lines and preventing paint overspill. Apply a coats of primer appropriate for fiberglass, giving it time to dry before addressing any necessary touch-ups. Once the primer has dried, you can apply color-matched paint. Multiple light coats will generally yield a better finish than fewer heavy coats, preventing runs and uneven surfaces. Finally, finish with a clear coat to provide depth and protection. Wet sanding, followed by compounding and polishing the clear coat, will give your motorcycle fairing a lustrous, factory-like shine.
Key Considerations for Successful Repairs
Successfully repairing fiberglass fairings is a fusion of art and science. It’s crucial to work in a well-ventilated area, utilizing appropriate personal protective equipment like gloves and goggles, particularly as resin fumes can be hazardous. Experimenting with resin-catalyst ratios on scrap materials can save you from disastrous results; this simple test helps ensure that you strike the right balance for effective curing.
While minor damage may be effectively managed through DIY methodologies, keep in mind that more complex structural repairs often necessitate professional insight, especially if spider cracks or intricate body lines are involved. Such assessments can take longer—anywhere from four to ten days—to ensure that your motorcycle achieves a safe and durable restoration.
In conclusion, learning the intricacies of fiberglass fairing repair does not merely enhance your biking experience; it extends the life of a vital part of your motorcycle. Maintaining these components carefully not only saves costs in the long run, especially if you employ replacement parts only when absolutely necessary, but also enhances the overall performance and appearance of your ride, generating extra pride in ownership.
For those in need of replacement options or additional fairing components, consider resources such as Ultimate Motor X’s fairing offerings to ensure that you maintain both functionality and style on your machine.
Chapter 3: Mastering Motorcycle Fairing Repairs: From Scuffs to Structural Integrity
1. Expert Techniques for Restoring Minor Scratches and Surface Damage on Motorcycle Fairings
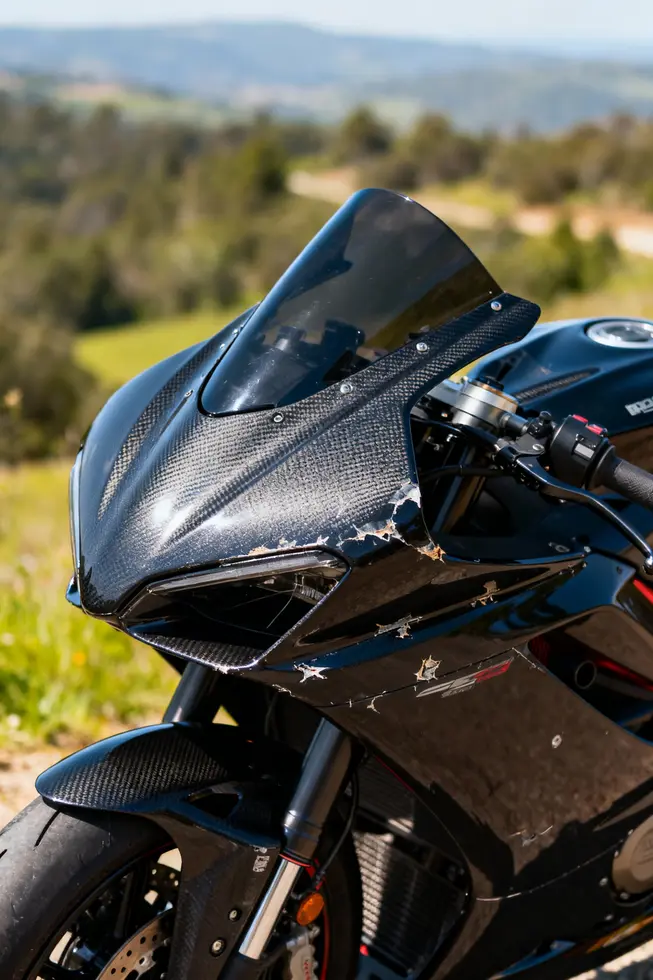
Motorcycle fairings, vital for both the aerodynamics and aesthetic appeal of the bike, often bear the brunt of daily wear and tear, resulting in minor scratches and surface damage. Understanding the unique materials used in fairings is essential for selecting the appropriate repair techniques that not only restore visual appeal but also maintain the structural integrity of the vehicle. In this section, we will explore effective repair methods for minor scratches and surface damage specifically tailored to various fairing materials, ensuring that you can confidently address those blemishes without the immediate need for costly replacements.
The two most commonly utilized materials for motorcycle fairings are ABS plastic and fiberglass, although other options like polycarbonate and thermoplastics are also prevalent. Each material presents distinct characteristics that influence repair strategies. ABS plastic is favored for its durability and ease of repair, making it a staple in many modern motorcycles. In contrast, fiberglass offers an aesthetically pleasing finish but can be more challenging to repair due to its susceptibility to UV degradation and delamination.
Repairing Minor Scratches on ABS Plastic Fairings
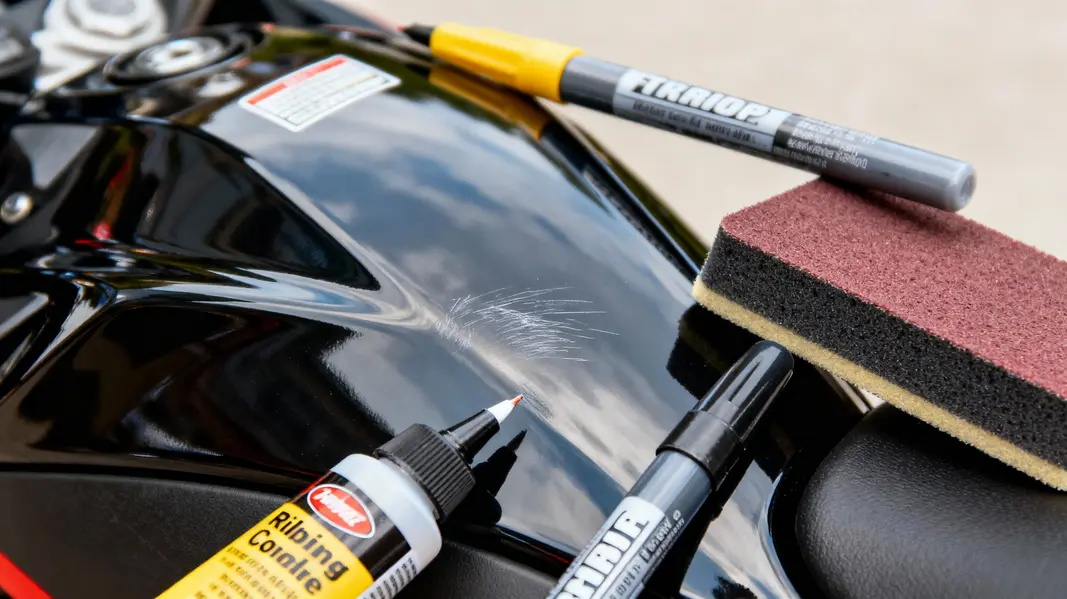
For ABS plastic fairings, minor scratches can often be repaired effectively at home, saving both time and money. Start by thoroughly cleaning the scratched area with a mild soap and water solution; this initial step is crucial as it removes contaminants that could interfere with the effectiveness of the repair. Once clean, assess the depth of the scratches. If they are superficial, a simple process of wet-sanding can be employed. Use sandpaper starting at 400-grit and progressively move to finer grits, like 600, 1200, and finally 2000-grit. This method gradually levels the surface and eliminates the scratch.
If the scratches are deeper, applying a plastic filler may be necessary. Once the filler has been applied and has dried according to manufacturer instructions, sand the area smooth, blending it carefully into the surrounding plastic. The next steps involve polishing the area with a rubbing compound to restore the gloss of the fairing. If paint touch-up is required to match the original finish, make sure to choose a color that closely matches the bike’s factory paint to achieve uniformity.
After painting, a robust clear coat should be applied—it’s recommended to apply at least three layers of clear coat for enhanced durability and to create a protective barrier against future scratches. Be cautious when using matte or pearl finishes in repaired areas, as they tend to scratch more easily and may require special coatings or finishes to maintain their appearance.
Dealing with Surface Damage and Cracks
Surface cracks in ABS or thermoplastic fairings can be more problematic but are usually manageable with the right techniques. Plastic welding is one of the most effective methods for repairing cracks. Using a soldering iron or specialized plastic welder, the edges of the crack can be melted and fused back together, restoring both aesthetic appeal and structural integrity. For more severe breaks, reinforcing the repair with copper wire or mesh can significantly enhance the bond’s strength.
Another effective approach is chemical fusion, which involves using a specifically formulated single-part ABS resin. This method not only fills and strengthens the crack but also creates a waterproof bond that is as strong, if not stronger, than the original material. Quarical Easy ABS Repair is an exemplary option for such repairs. After applying the resin, the area should be sanded flush, with any imperfections filled, followed by painting to match the original color. This step is crucial for maintaining the bike’s visual integrity.
For fairings made of fiberglass, the process is slightly different due to the unique qualities of the material. Fiberglass can be more brittle and requires careful handling during repairs. If cracks or other damage are less severe, you can employ similar techniques as with ABS by using a composite repair kit, which typically contains fiberglass cloth, resin with a catalyst, filler, and appropriate tools. Ensure that the area is properly prepped; this means sanding the damaged area to remove dirt and old paint before applying duct tape to cover the exterior surfaces.
Sanding and Resurfacing
Once the area is prepped, apply filler to level out any dips or uneven surfaces. Allow the filler to cure, and then mix the resin with its catalyst as per the instructions provided on the kit. Once mixed, apply this resin to the repair area, laying fiberglass cloth over the top while ensuring there are no air bubbles trapped underneath, which could compromise the repair. Utilize a roller to press the fabric into the resin and achieve optimal bonding. After the repair fully cures, remove the tape and sand the area smooth again, preparatory to applying primer and paint for meticulous finishing.
Finishing touches are paramount in repairs, especially for fiberglass or carbon fiber fairings. Skipping proper priming and sanding might lead to peeling paint or uneven finishes down the line. Once the fairing is primed, apply matching color paint, followed by a durable clear coat to protect against future scratches and UV damage. It is essential to note that securing the motorcycle on a stand with a cool engine is vital during this process to ensure safety and precision while working.
In summary, while the prospect of repairing motorcycle fairings may seem daunting, understanding the nuances between different materials allows for DIY repairs that can extend the life of a motorcycle. Whether addressing minor scratches on ABS plastic or tackling cracks in fiberglass, employing the right techniques can empower motorcycle enthusiasts to restore their bikes to pristine condition. Access to comprehensive repair kits can streamline the process, ensuring that repairs are not only effective but also visually pleasing. By following these expert techniques, you can breathe new life into your motorcycle fairings, ensuring they remain as stunning as the day they rolled off the showroom floor.
Chapter 4: Essential Repairs for Motorcycle Fairings: Mastering the Art of Scratch and Surface Restoration

1. Harnessing the Right Materials and Tools for Motorcycle Fairings Repair
Repairing motorcycle fairings may seem daunting, but with the right materials and tools, restoring minor scratches and surface imperfections can be achieved with relative ease. Whether your motorcycle features ABS plastic or fiberglass components, understanding the purpose and function of each repair material and tool will empower you to tackle fairing repairs with confidence.
Key Materials for Effective Repairs
Fairings, constructed from materials like ABS plastic and fiberglass, require distinct repair strategies tailored to their specific properties. Here’s a comprehensive look at the essential materials needed for successful fairing restoration.
-
ABS-Specific Repair Kits or Cement:
Among the most effective repair solutions for ABS fairings are specialized repair kits, such as those that utilize Quarical Easy ABS Repair. These kits are designed specifically for the characteristics of ABS plastic, creating a bond that mimics the structural integrity of the original material. This is vital because traditional epoxies may not flex adequately with the fairing, leading to future failures and additional repairs. These kits are particularly useful for fixing anything from minor cracks to deeper gouges in motorcycle panels. -
Fiberglass Repair Supplies:
For motorcycle fairings made from fiberglass, a different set of materials is necessary. Items such as fiberglass cloth, resin (with a catalyst), filler, and specific types of tape become indispensable. The process typically starts with sanding the damaged area to remove any dirt and old paint, which allows the new materials to properly adhere. Once formed, the fiberglass can rebuild strength in the damaged area while ensuring integration with the fairing’s design. -
Sanding Materials:
Sanding is a critical step in the repair process that ensures a smooth finish. A variety of sandpaper grits will aid in achieving the desired surface quality:- Coarse Grit (80-120): This is effective for removing jagged edges from deeper scratches or chips.
- Medium Grit (240): Ideal for refining the surface after the initial sanding, blending the repair area to ensure a seamless transition to the existing fairing surface.
In addition to sandpaper, sanding blocks can help maintain even pressure during the sanding phase, which is crucial for an aesthetically pleasing finish.
-
Fillers and Primers:
Filling deeper scratches with specialized plastic fillers is essential for achieving a uniform appearance. Once the filler cures, it can be sanded down to match the original profile of the fairing. Primers provide the necessary groundwork for paint adhesion, especially important when preparing repaired surfaces for color-matched painting, ensuring a professional-looking final product.
Essential Tools for Repair Success
The right tools can make the process smoother and more efficient. Here’s a rundown of key tools that belong in every DIY motorcycle repair kit.
-
Sanding and Application Tools:
A variety of tools make sanding and material application more manageable. Hand sanding blocks are essential for maintaining control and even pressure while sanding, ensuring you won’t accidentally create uneven surfaces. Small rollers are particularly useful when working with resins; they help eliminate air bubbles, resulting in a flawless finish that strengthens the repair. For applying fillers, putty knives are indispensable, allowing for smooth and precise application across damaged areas. Supporting materials like tape are also crucial for securing areas during the curing process, which can prevent misalignment in the repair’s final stages. -
Heating Tools:
Certain repairs, particularly those involving ABS plastic, can benefit from the application of heat. A soldering iron can be instrumental in plastic welding plastic edges together, especially for cracks or complete breaks. Additionally, heat guns can soften ABS edges, promoting better adhesion for new materials during the repair process. -
General Automotive Tool Kits:
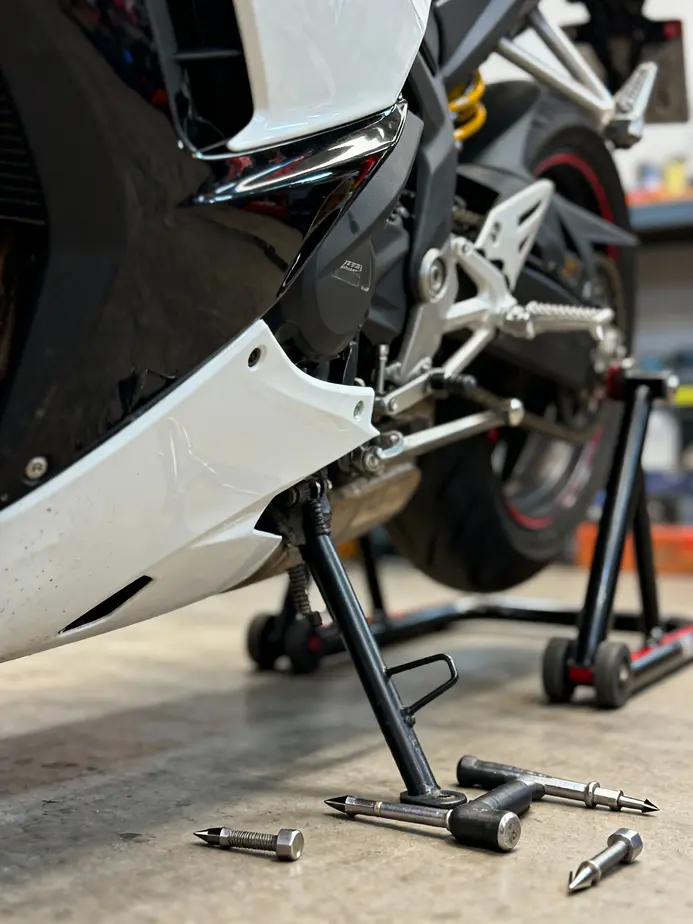
Lastly, having a comprehensive automotive tool kit, which includes various wrenches and screwdrivers, can greatly facilitate the reassembly of fairings after the repair process. While these tools may not directly apply to scratch repairs, they are essential for disassembling and reattaching the fairings—ensuring a hassle-free experience.
Repair Techniques and Best Practices
To achieve lasting and aesthetically pleasing repairs, understanding and mastering techniques utilizing the materials and tools discussed is paramount. It’s important to match the type of repair method with your fairing material to ensure longevity.
-
For ABS Fairings:
Start by cleaning the area around the damage with mild soap and water, followed by thorough drying. Depending on the damage, if it’s a crack, tape the pieces together or use an ABS cement that can penetrate and fill the gap. Applying heat to a soldering iron can allow for a more melded approach, where melted plastic strips reinforce edges without creating bumps or waves. After finishing with an adhesive, sand down the area to remove any uneven patches and ensure that the repaired surface is smooth.
For scratches, begin with light abrasives to even out the surface. Use rubbing compound on lighter marks, as it’s effective and allows quicker remediation. If you’re facing deeper scratches, apply filler precisely, sand it, and then cover it with a primer before matching color paint and finishing with a clear coat to safeguard against future damage. -
For Fiberglass Fairings:
The approach here is a bit more involved but yields excellent results. Start with sanding the damaged area to expose clean fiberglass. After laying the fiberglass cloth over the crack, apply a mixed resin with a catalyst following the instructions, and when adding it, roll out air bubbles carefully to ensure a tight bond. Once cured, sand the surface using the aforementioned methods, before transitioning to primer and paint.
Additional Considerations
As with many DIY projects, paying attention to detail can make or break the integrity and appearance of your work. After the repairs, ensure to use appropriate fasteners and bolts to reattach the fairings securely. Opt for brass inserts or stainless steel screws, which can withstand environmental changes better than standard materials. Depending on the age and style of your motorcycle, checking for specific fastener kits might also streamline this process.
Conclusion
Mastering the repair of motorcycle fairings involves not only an investment in specific repair materials and tools but also a commitment to learning and practicing effective techniques. Understanding the differences between ABS plastic and fiberglass, accurately applying repair kits, and utilizing sanding and heating tools correctly can ensure that minor scratches and surface damage become a distant memory. By investing time and effort into each repair, motorcycle owners can significantly enhance the aesthetic and functional integrity of their rides. A well-repaired fairing not only contributes to the motorcycle’s value but also ensures that the ride remains enjoyable and visually enticing. For an extensive selection of fairing kits that match different motorcycle models, make sure to check out options tailored to brands like BMW, Honda, Ducati, and more, to ensure you find the right fit for your repair needs.
Final thoughts
In conclusion, understanding how to repair and replace motorcycle fairings is essential for business owners aiming to provide excellent services in the motorcycle market. Each technique discussed—from repairing cracks in fiberglass and smoothing out scratches in ABS to ensuring proper removal methods—is crucial in delivering quality repairs that meet customer expectations. Furthermore, the option for replacement and customization allows businesses to offer unique solutions tailored to every rider. Implementing these practices not only ensures durability but also enhances the overall appeal of motorcycles.
Upgrade your ride with UltimateMotorX’s premium motorcycle fairings—durably crafted, precision-fitted, and stylish. Meeting OEM standards for easy installation, our collection suits upgrades or replacements. Shop now for fast shipping, secure checkout, and expert support. Give your bike the ultimate quality it deserves!
About us
At UltimateMotorX, we’re rider-founded experts in top-tier motorcycle fairings. We source premium materials, partnering with trusted manufacturers for perfect fits and durability. Enjoy expert advice, hassle-free returns, and seamless shopping. Ride with confidence—style and quality guaranteed!