Motorcycles are more than just machines; they symbolize freedom and adventure. However, with the exhilaration of riding comes the inevitable wear and tear of fairings—crucial components that protect and enhance aesthetics. For business owners involved in motorcycle maintenance or customizations, understanding fairing repair techniques is essential to providing comprehensive service. This article delves into the basic and advanced methods of fixing surface and structural damage, the necessary tools and materials, and when to consider professional services. By examining these aspects, you will equip your business to better serve clients and maintain the integrity of their motorcycles.
From Basics to Brilliance: Mastering Motorcycle Fairing Surface Repairs
A motorcycle’s fairing is more than a face on the bike; it is a complex blend of protection, aerodynamics, and aesthetics. When a panel bears a crack, a dent, or a chipped paint job, the rider is faced with a decision about how to restore not only the appearance but also the integrity of the surface. The repair path depends on the material—ABS plastic, fiberglass, or carbon fiber—and the depth and location of the damage. In this chapter, the aim is to walk through a practical, unified approach that respects the kind of material, the extent of harm, and the rider’s desire to keep the bike on the road with minimal downtime. The guidance is designed to flow from the simplest fixes to more involved processes, yet always with an eye toward durability, color matching, and safe execution. Along the way, you’ll see how the repair mindset can incorporate brand-relevant considerations while staying accessible to home workshops, and you’ll encounter a small window into how professional shops approach more challenging cases without losing sight of the core, repeatable steps a careful rider can perform on their own.
Damage on a fairing ranges from the almost invisible to the clearly structural. Minor surface scratches, for instance, are best addressed with a light touch that restores gloss and reduces visibility without altering the panel’s geometry. Cleaning is the first, nonnegotiable step: wash with soapy water to remove oils and debris, then dry the area thoroughly. Dirt trapped in a scratch can worsen the look once you begin polishing. A quality automotive polishing compound or wax, applied with a soft cloth or a polishing pad in gentle circular motions, can smooth microscopic abrasions and lift the surface just enough to recapture the original luster. The goal here is not to grind away the old finish but to minimize the visual footprint of the mark, leaving a uniform sheen that blends with the surrounding panels.
When scratches are a touch deeper, exposing the base paint, a different approach is warranted. A small amount of color might be required to hide the imperfection while maintaining a seamless look. In this case, a touch-up paint pen or a precise aerosol spray can perform the job. The process starts with a degreasing clean that removes any oils or fingerprints; oils are the enemy of adhesion. Shake the pen well, apply a very thin coat directly over the scratch, and let it dry. If the color requires it, a second light coat can be added to help with blending. The key is to apply multiple ultra-thin layers rather than a single thick layer, which can run or look uneven. Once the color has cured, a lightweight, clear topcoat or additional fine polishing can help fade the edge where the paint meets the surrounding surface. For some panels, especially those with matte finishes or metallic flake, blending becomes a bit trickier; in those cases, a careful, controlled approach to color and gloss is essential to prevent a new, obvious line where the touched area ends.
Deeper scratches, dents, or small holes introduce the next set of decisions. A body filler, sometimes called repair putty, can fill the gap and restore a level surface. The careful sequence is crucial: clean again, mix the filler per the product’s instructions, and press it into the defect so that it is slightly proud of the surrounding surface. Allow it to cure completely, then sand in stages using progressively finer grits—perhaps starting with 400, then 600, and finishing with 800 or finer. The aim is to achieve a surface that is truly flush with the adjacent panels, ready for primer. A well-executed fill is invisible after painting and helps avoid reappearing dips that would catch the eye on the road. After leveling, a primer is applied. Primer matters, especially on deeper repairs; it helps with paint adhesion and guides the color onto a uniform base. When the primer cures, a color coat is sprayed, often followed by a clear coat to protect the finish and add depth. Blending is more art than science here; the objective is to hide the repair within the mass of the surrounding color, not to create a new island of shade that announces the repair.
Cracks or larger breaks demand a more technical line. For plastic fairings, plastic welding is a common approach. This technique uses a heat source and a compatible plastic rod to fuse the broken edges back together. The procedure requires a heat gun or specialized tool and a steady hand to avoid overheating and warping around the repair site. An adhesive approach, using a strong two-part epoxy or a structural plastic adhesive, is an alternative or a complement to welding. The adhesive must be applied to the cleaned, dry surfaces and clamped or held in place until fully cured, then ground and re-sanded to a smooth surface. Both methods offer substantial strength but require careful surface preparation and the right materials to achieve long-lasting results. Professionals often perform the more challenging repairs because a mistake here can compromise fit, paint adhesion, or structural safety.
For events where the damage is severe—large areas deformed, multiple panels compromised, or significant loss of mounting points—the most reliable route is replacement. A new panel that matches the bike model’s geometry ensures a precise fit, proper alignment, and the desired aerodynamic performance. Replacement is not simply about cosmetics; if the frame or mounting structure has been affected, a new fairing may be the only route to preserve the bike’s aerodynamics, cooling, and overall safety. The journey from damage to replacement involves sourcing a panel with exact dimensions, preparing the mounting hardware, and ensuring the new piece sits flush with adjacent panels, often requiring slight adjustments to mounting points, gaskets, and seals to restore factory-like fit.
A practical repair plan also considers mounting hardware and how the fairing attaches to the bike. Loose or broken clips, bolts, or fasteners can undermine even the best cosmetic fix. The first step is to inspect every point where the fairing connects to the frame and other panels. Tighten any loose screws, replace damaged fasteners, and consider adding protective gaskets or adhesive-backed foam strips to dampen vibration. These small elements can dramatically improve longevity by reducing movement that often leads to chipping or cracking around fastener points. A well-executed reassembly not only stabilizes the repair but also makes future maintenance and cleaning easier because everything sits correctly and evenly.
Color matching and the finish require attention almost as much as the repair itself. If the bike’s paint is a common shade, you might find a close match with standard suppliers. If not, the process becomes a careful art of tinting and layering. A primer layer helps with adhesion and color uniformity, followed by the base coat and a clear topcoat. Each layer must dry completely before the next begins, and the work should be performed in a clean, dust-free environment. Temperature and humidity matter; the wrong conditions can lead to solvent pooling, dry spray, or an uneven gloss. It pays to test a small corner or inconspicuous area with the color and clear coat before tackling the main panel. Lighting also matters; bright, color-accurate lighting helps you spot micro-mistakes that might otherwise escape notice until the final polish or the sun hits the bike at ride height.
The repair journey is also an opportunity to reflect on fit and compatibility across models. If you’re evaluating what a repair means for other panels or variants, a quick look at the BMW fairings category can offer a practical sense of fit, edge geometry, and finish expectations across a range of models. This kind of reference helps you calibrate your expectations about edge lines, mounting points, and how a properly finished panel should look once installed. See more at the BMW fairings category to understand how shape and attachment surfaces influence your repair strategy. BMW fairings category.
Even with careful planning, some repairs are best guided by professional hands. When paint matching becomes a delicate exercise or when you’re dealing with carbon fiber, the resin system and lamination might require specialized knowledge and tools. In such cases, a professional body shop can deliver a durable repair with a consistent finish that withstands sun exposure, temperature cycles, and road debris. A qualified shop will also have the equipment to perform a more complex process, such as resin infusion or autoclave curing for carbon fiber, which are far beyond typical DIY capabilities. The objective remains consistent: restore the panel to a state where it aligns with the bike’s geometry, finishes consistently with nearby panels, and maintains the original protective and aerodynamic characteristics.
The practical takeaway is simple: start with a thorough assessment, choose a method aligned with the material and severity, and progress through cleaning, leveling, priming, painting, and sealing in the right order. Maintain a clean environment and work methodically, letting each layer cure before the next is applied. Testing fit and surface interaction after each major step helps catch issues early, before they become costly or time-consuming to repair. It’s also worth acknowledging that this process benefits from patience and an eye for detail. Rushing a repair can leave you with a panel that looks better in the short term but fails under road conditions or heat exposure. A measured, deliberate approach is the path to both appearance and integrity that endures.
For readers seeking a comprehensive, visuals-backed walkthrough, a trusted guide from an established motorcycle maintenance resource provides a detailed, step-by-step reference. While this chapter focuses on the core techniques and decision points, consulting a dedicated repair guide can supplement the hands-on experience with diagrams, photos, and model-specific tips. The referenced guide also emphasizes the importance of safety and proper technique when working with paints, solvents, and heat tools, ensuring you can complete a repair with confidence and protect yourself during the process. You can find a thorough, externally hosted guide at https://www.revzilla.com/motorcycle-fairing-repair-guide.
In summary, fixing motorcycle fairing surface damage is a layered discipline that blends careful assessment with a sequence of well-matched techniques. Minor scratches respond to polishing; shallow scratches benefit from precise color touch-ups; deeper damage calls for body filler and careful sanding; cracks require bonding or plastic welding; severe impairment may necessitate replacement. Throughout, attention to mounting hardware, environment, and paint compatibility helps ensure the repair lasts. The real art lies in achieving a seamless transition from repaired area to the surrounding panel so that the finish looks, feels, and performs as if the impact never happened. With the right approach, the repair not only restores the bike’s appearance but preserves its integrity on the road and its value in the workshop. The chapter’s aim has been to provide a coherent, practical path that respects material differences, prioritizes durable results, and remains accessible to riders who want to tackle fairing repairs with confidence.
null
null
The Hands that Heal the Shell: A Cohesive Guide to Fixing Motorcycle Fairings
The fairing of a motorcycle is more than a cosmetic shell. It is a functional shield that slices through wind, shelters delicate cables, and channels air to the engine while shaping a bike’s character. When a fairing suffers cracks, dents, or loose fittings, the problem is rarely just surface-deep. The material—whether ABS plastic, fiberglass, or carbon fiber—sets the rules for how the damage behaves and how repair work should proceed. A calm, methodical approach can restore not only the appearance but also the structural integrity of the shell, preserving aerodynamics, protection, and the pride that comes from riding a machine that looks and feels right. The repair journey begins with a clear assessment of the damage and an honest choice between patching and replacing, guided by material behavior, the scale of the injury, and the bike’s role in the rider’s day-to-day life.
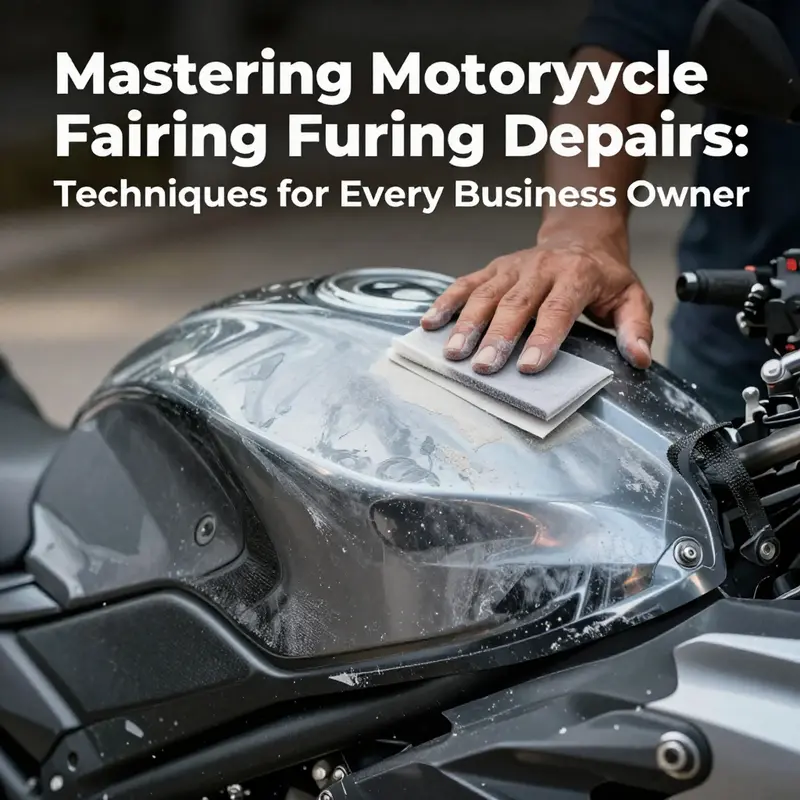
For minor surface blemishes, the path is nearly as straightforward as a careful polish. Start with a thorough cleansing of the affected area using soap and water, letting the panel air-dry or pat dry with a clean cloth. Dirt and wax residues trap maybes that mar the finish during subsequent steps. Once clean, a light sanding with very fine grit paper—think within the 1200 to 2000 range—softens edges and prepares the surface for polishing. The goal is to blur micro-scratch ridges without breaking through the original surface layer. After sanding, a high-quality plastic polish or wax brings back the gloss and adds a layer of protection from UV exposure and minor airborne debris. The key here is patience and contrast: you want the repaired area to blend with the surrounding fairing rather than stand out as a repair patch. The result should feel like a continuous skin over the bike, not a glued-on scar. The same philosophy applies to abrasions around mounting points or along edges where the rider’s knees brush the fairing during turning and leaning. A careful hand, not brute force, yields the best cosmetic marriage between old and new.
But not all damage is cosmetic. When cracks appear in ABS plastic fairings, the repair requires a sturdier response. The approach hinges on cleaning the area completely, then employing a two-part epoxy resin or an automotive plastic repair kit designed for lightweight plastics. The procedure begins with removing loose fragments and degreasing the surface so the adhesive bonds well. After applying the filler, allow it to cure according to the instructions before moving to shaping and smoothing. Sanding then begins with a coarser grade—around 600 grit—to level the surface, followed by progressively finer grits such as 1200 to achieve a smooth finish ready for primer. Priming is important on plastic surfaces: a paintable primer increases adhesion and helps the finish coat meet the rest of the fairing. Color-matching becomes your next mission. A spray can or airbrush application that matches the fairing color is ideal, and a clear coat will seal the color, add depth, and protect the repair from minor abrasions and environmental exposure.
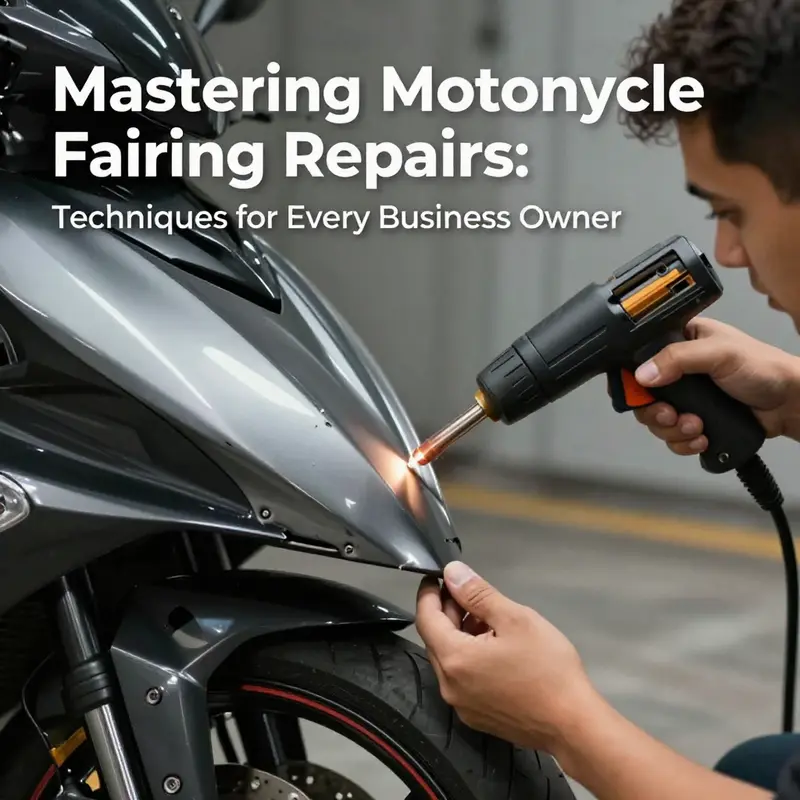
For larger dents or deeper damage where the plastic remains intact, there is a different rhythm to follow. If the dent is deep but the area is still uncracked, heat can be used to coax the plastic back toward its original contour. A heat gun is the right tool for this job; a hair dryer should not be counted on because it generally does not deliver the controlled heat required for plastics of this thickness. The process is gentle and patient: gradually warm the dented area, testing the plastic’s response as it softens. When the surface becomes pliable, use a soft tool or a rubber mallet to coax the material back toward its original shape. The objective is to minimize stress lines and avoid introducing new fractures when the plastic cools. If the dent is stubborn or if cracking begins to appear or worsen, it’s often wiser to consider replacement rather than risk a brittle, short-lived repair. This decision is especially prudent for structural damage or where the fairing helps protect critical components. When a panel must be replaced, it is not merely a matter of swapping a skin. The mounting geometry, the attach points, and the fairing’s alignment with adjacent panels all influence the ease or difficulty of the job. Some sections require carefully transferring clips, grommets, and fasteners from the old to the new piece, ensuring that the new shell seats correctly and maintains the storm-proof window to the engine and frame.
In a different vein, mounting hardware deserves thoughtful attention. Loosened screws, broken clips, or worn fasteners can make even a sound repair fail the moment you test the bike at highway speed. The remedy is straightforward but systematic: check every bolt, clip, and fastener that secures the fairing, replacing any damaged pieces and tightening the rest to manufacturer-specified torque values. Even when everything seems sound, vibration over time can loosen joints. In such cases, consider adding adhesive-backed foam strips or rubber grommets at strategic points. These humble materials dampen vibration, reduce chafing, and prolong the life of the attachment points. The idea is not simply to fix but to preserve—to ensure the fairing stays in place through the miles, rain, and heat rather than rattling loose in a fog of vibration and wind.
A repair’s elegance lies in its integration. Repaired edges should align with adjacent panels, gaps between parts should read as intentional rather than accidental, and the paint should fade into the original finish rather than shout out as a repaired area. Achieving this level of integration often requires precise color matching and, at times, a careful blend at the borders. This is where the craft becomes a balance between technical steps and aesthetic judgment. When the work touches the paint layer, the novice’s tendency is to repaint a broad area, which can alter the panel’s texture and opacity. By contrast, advanced method involves feathering techniques and selective repaint—rebuilding only the affected stripe or patch and blending into the surrounding pigment with thin coats and timed drying. The result is a seamless transition that fools the eye while keeping the repair within the same chemical family as the rest of the fairing’s finish.
As with any mechanical task, experience evolves with exposure to different configurations and materials. ABS plastic dominates many modern fairings for its light weight and surface resilience, but fiberglass and carbon fiber also appear in sport and adventure builds. ABS often repairs well with epoxy fillers and plastic adhesives that suit thermoforming and re-shaping. Fiberglass panels respond to resin systems and structural fillers that bond well with traditional metal or composite frameworks. Carbon fiber, while rarely repaired in the same way as thermoplastics, may require specialized restoration steps that preserve its weave integrity and avoid jeopardizing the inherent strength of the composite. In all cases, the repair must respect the part’s functional role: a cracked fairing that compromises air passage, heat dissipation, or rider clearance demands careful attention to materials compatibility, thickness, and reattachment strategy. The choice between patching and replacing is rarely a moral dilemma; it is a practical calculus grounded in the panel’s role, the extent of damage, and the risks associated with a compromised shell.
When the repair involves reattachment or re-securing broken sections, it becomes crucial to think about alignment. A misaligned fairing throws off wind protection and can bite into the rider’s knee at sharp corners or reduce the bike’s aesthetic line. Measuring and marking alignment points before disassembly—using a measuring tape and a marker—helps you recapture the proper fit after repair. Clamps or masking tape can hold pieces in place during adhesive curing, ensuring that the structural surface remains flat and true as the glue sets. These steps may seem meticulous, but they are the quiet work that translates into a riding experience that feels right and looks right as you roll out of the garage.
If, after careful evaluation, you still feel uncertain about the repair’s depth or the steps required, a professional body shop is a valuable ally. A trained technician can perform a model-specific assessment, confirm material compatibility, and ensure that restoration does not compromise safety. The investment is worthwhile when the fairing is part of the vehicle’s critical aerodynamics or when it carries costly color-matching demands or carbon-fiber finishes that warrant expert control. In such cases, a professional with shop equipment and experience will deliver a result that stands up to road and weather rather than a quick fix that fades under sun or rain.
The journey from crack to confident ride is anchored in accessible, methodical practice. For model-specific fitment and panel options, exploring model pages can provide practical context about attachment patterns and common mounting hardware. For instance, brand-focused collections provide a ready map of how fairings are shaped for particular motorcycles and how those shapes influence repair strategy. See Honda fairings for CBR for a sense of how restoration considerations can vary with design, attachment points, and finish expectations across different CBR generations. The broader takeaway is this: knowledge of materials, how they respond to heat, adhesives, and sanding, and how alignment works in practice will keep your repair work grounded in reality rather than guesswork. The repair path should always balance structural integrity with cosmetic cohesion, ensuring the shell continues to protect, streamline, and define the bike’s silhouette.
In the larger arc of motorcycle maintenance, fixing a fairing is a practical articulation of care and craft. It asks you to measure, test, and adjust in a way that honors the bike’s original design while acknowledging the realities of wear and incident. A well-executed repair preserves the balance of aerodynamics, rider protection, and aesthetics without demanding radio silence about the area that you wince at when you walk around the bike around dusk. The result is a shell that looks as though it has always belonged to this machine, with lines that flow and a footprint that whispers of meticulous, patient work.
For readers seeking a detailed, step-by-step walkthrough that includes professional techniques and product considerations, a reputable external resource offers a comprehensive guide to motorcycle fairing repair: https://www.webike.net/repair/motorcycle-fairing-repair-guide/
In summary, repairing a motorcycle fairing is a disciplined craft that respects the material’s properties, the damage’s scope, and the rider’s safety and pride. It blends careful cleaning, skillful adhesion, and precise finishing into a coherent process. Whether you fix a small scratch, mend a crack in ABS plastic, smooth a dent with heat, or reattach a panel with a precise fit, the goal is the same: a fairing that remains protective, aerodynamic, and true to the bike’s personality. Maintenance and repair are not afterthoughts; they are the ongoing care that keeps a machine reliable and a rider confident, mile after mile. The shell you repair today becomes the backdrop for countless rides tomorrow, a quiet testament to patience, craftsmanship, and the care you bring to your ride.
Professional-Grade Fixes for Motorcycle Fairing Damage: When DIY Isn’t Enough
Damage to a motorcycle fairing can feel like a dent in confidence as much as a dent in the plastic. Fairings are more than a shield for the rider from wind and debris; they define aerodynamics, aesthetics, and even the bike’s resale value. The repair story that follows is not a single recipe but a nuanced journey through materials, damage severity, and the real-world constraints of timing, budget, and finish. The starting point is honesty about what kind of injury you’re dealing with: is it a scratch on the surface, a small crack in ABS plastic, a sizeable dent, or a loose mounting that makes the piece rattle and vibrate at speed? Each scenario calls for a different level of intervention, and knowing the material you’re working with—ABS plastic, fiberglass, or carbon fiber—guides both the approach and the expectations. The guide you’ll follow in most repair shops and many DIY sequences begins with a clean slate: assess, prep, repair, prime, and protect. Yet the path to a satisfying finish never begins in a world of colors and coatings alone; it begins with how the damage interacts with the fabric of the fairing, where it lies in relation to mounting points, and how the underlying structure will bear up once the repair is done. If you’re considering professional services, you’ll want to read the room: does the damage compromise structural integrity, or is it cosmetic? Can you achieve a color match that will endure sun exposure and heat cycles? And when do you step back and trust the specialists with a replacement panel rather than a patch that might fail under load? These questions sit at the heart of a practical decision-making process that blends hands-on know-how with the realities of riding and ownership.
For minor surface damage, the path forward is surprisingly straightforward and forgiving. A careful, methodical approach will return the fairing’s gloss and smoothness with minimal risk of further harm. Start with a thorough clean using soapy water to remove grime, wax, and oils that can obscure the true condition of the surface. Let the area dry completely; residual moisture can hinder adhesion and paint retention later on. With the surface ready, a sheet of fine-grit sandpaper—ranging from 1200 to 2000 grit—allows for gentle buffing that smooths out micro-scratches without removing material. The goal here is not to flatten the entire panel but to create a uniform plane that presents as pristine once polished. After sanding, switch to a high-quality plastic polish or wax designed for automotive plastics. A light, circular burnish helps restore the luster and adds a layer of protection against future micro-abrasions while reducing the likelihood that new damage will show as quickly. The key with minor scratches is restraint: too much abrasive work can thin the plastic or remove existing paint layers, leaving a mismatch that’s even more visible than the original marks. The polish acts as both a cosmetic refinish and a shield for the first mile of your ride back on the road.
If the damage involves small cracks or chips in ABS plastic, the repair logic shifts. ABS is a forgiving material for modest repairs, but the trick is in creating a solid bond that respects the panel’s geometry. Begin with a clean, dry area and employ a two-part epoxy resin or a specialized repair kit designed for automotive or motorcycle plastics. The epoxy should be chosen for its flexibility once cured, so it won’t crack again with the flex and vibration typical of riding. Apply the filler to the crack or chip, following the kit’s directions for mixing ratios and curing times. Once the filler cures, sand smooth with progressively finer grits—start with around 600 and work up to 1200 to achieve a seamless transition with the surrounding surface. Depending on the extent of the repair and the color consistency of the plastic, you may need to prime the area before repainting. A spray paint that matches the fairing color can be applied with multiple light coats, each followed by a light sanding to blend edges and prevent nibs. Don’t forget the clear coat, which provides UV protection and a glassy, durable top layer that resists future chips and micro-damage. If you’re attempting a color match, it helps to test the paint in a less visible area first and to build the final coat with even, light passes to avoid runs and sags. The aim here is not merely to fill a crack but to restore the structural continuity of the panel while preserving the aesthetic of the bike’s lines.
For larger dents or cautionary structural concerns, the repair calculus grows more nuanced. A dent that is shallow but deep enough to affect the fairing’s contour may respond to heat-assisted reshaping. The heat gun—never a hair dryer, which can blow hot air unevenly and melt the surface—can be used to soften the plastic so that a soft tool or a rubber mallet can persuade the material back toward its original shape. The process requires slow, even heating and frequent pauses to check the panel’s deformation. The goal is to restore the panel’s geometry without introducing new distortions or soft spots. This method is most reliable when the plastic has not cracked; if the material has fractured, reshaping is only a step within a broader repair strategy that may involve filler and paint to hide the break and improve the uniformity of the surface. In cases of severe dents or breaks where the structural integrity of the fairing is compromised, replacement is often the safer and more durable option. The risk with patchwork in such scenarios is that flex under load, speed, or time can reveal the weakness, undermining both safety and performance. It’s a practical reminder that the rider’s goal is not merely cosmetics but a return to reliable aerodynamics and mounting stability.
When the damage involves mounting hardware—loose, stripped, or broken bolts, clips, or fasteners—the repair conversation becomes about stability and resonance. The fairing must stay securely clamped to the frame to maintain aerodynamic efficiency and to prevent vibrating or rattling at speed. Start with a thorough inspection of all fasteners and clips securing the panel. Tighten any loose screws to their recommended torque values and replace damaged hardware where corrosion or fatigue has occurred. In some cases, standard fasteners aren’t quite enough to dampen vibration, and an adhesive-backed foam strip or rubber grommet can be added to isolate the fairing from metal contact. These small sleeves or strips act as a cushion, reducing buzz and preventing future loosening. The goal here is to create a stable, noise-free ride while ensuring the fairing’s outer surface remains in place and aligned with adjacent panels. If the repair involves a detached or misaligned mounting point, you may need to re-align the fitting by loosening adjacent bolts, repositioning the panel, and re-tightening with new locking washers or thread-lock compounds as appropriate. This is not a cosmetic fix; it is a foundational repair that preserves the bike’s handling and stability.
A note on material-specific nuance is essential. ABS plastic, fiberglass, and carbon fiber each respond differently to heat, adhesives, and fillers. ABS holds a bond well with careful epoxy repair and filler work; it is forgiving enough for color matching and repainting, provided you clean, prime, and seal properly. Fiberglass is sturdy but tends to show fiber patterns if repaired with too-thick a bond; it benefits from a combination of fiber reinforcement on larger cracks and precise filler layers for smoothness. Carbon fiber offers perhaps the trickiest repair terrain. While surface scratches can be addressed with polish and careful buffing, delamination or deep abrasions can threaten structural integrity. In most cases, significant carbon fiber damage warrants professional assessment, as improper repair can compromise the fairing’s load-bearing characteristics and, by extension, the rider’s protection. Even when repairs are viable, expect a longer process for carbon fiber panels, given the need to ensure that resin systems cure evenly and that the finish preserves the distinctive weave and gloss of the panel. The overarching principle is that cosmetic fixes should never masquerade as structural fixes. If the integrity or the alignment of the fairing is in question, or if the pain of color matching seems likely, you begin to lean toward pro options, not out of reluctance but out of responsibility.
This perspective naturally dovetails with decisions about professional services. The materials and the damage profile determine whether DIY is sufficient or if the panel truly benefits from a professional touch. When you’re dealing with a complex contoured surface, a mismatched color, or a crack that penetrates through multiple layers, the precision, equipment, and experience of a body shop or a specialty fairing technician can save time, ensure a safer return to the road, and deliver a finish that respects the bike’s geometry. It’s not just about making it look right; it’s about ensuring the fairing preserves its protective function and that the paint job endures sun, heat, and the vibrations of each ride. If you choose to seek professional help, you’ll want to share your observations with clear, objective notes: where the damage started, how far it extends, whether mounting points show stress, and whether the surface finish remains consistent in color, gloss, and texture. A professional will assess the panel’s structural condition, evaluate the repair’s long-term durability, and forecast the likely lifespan of any repaint in the given climate. The advantage of this approach is a practical, transparent plan: the cost, the time required, and the expected outcome, all laid out before work begins.
For riders who prefer a balanced blend of DIY and professional insight, a hybrid approach often makes the most sense. Start with a thorough evaluation of the damage, paired with a careful, staged repair for any cosmetic cracks or minor dents, while leaving larger structural questions to a professional. In many cases, you can address the cosmetic aspects—scratches, slight chips, and minor gouges—with the steps described above while receiving a professional assessment for the more involved issues. The possibility of a partial repair remains a practical path that preserves the fairing’s essential features and keeps costs manageable without sacrificing safety or performance. This approach also recognizes the practical reality that not all fairing damage is equal in severity, and that the rider’s daily use, storage conditions, and exposure to sunlight all influence both repair choices and long-term durability.
As you navigate these decisions, consider how far you want to invest in restoration versus replacement. If a certain area of the fairing is repeatedly exposed to stones, weather, or aggressive brushing against curbs, you may reach a threshold where replacement makes more sense than ongoing patches. Replacement panels are often designed to fit the same body lines more precisely than makeshift repairs, and the consistency of color and texture can be superior when starting with a fresh panel rather than trying to match an older, weathered surface. If you opt for replacements, you’ll find a broad spectrum of options, including models tailored to particular brands and lineups. For readers who want to explore a wide range of replacement options, a accessible path is to look at the Honda fairings category, where you can browse a curated selection of panels that are designed to fit specific bikes. This kind of category navigation helps you avoid the guesswork that comes with generic covers and makes it easier to locate a panel that aligns with your bike’s geometry, mounting strategy, and color scheme.
When the repair journey ends with a return to the road, the best outcomes come from a blend of careful prep, appropriate material selection, and honest appraisal of when to escalate to professional services. A repaired fairing should feel as smooth to the touch as the surrounding panels and should mount with the same stiffness and precision as before. The color should blend convincingly, the gloss should be durable, and the surface should resist the next rock, curb, or sunbeam that comes its way. A well-executed repair is a quiet victory, a small victory over damage that respects both the bike and the rider’s time. It is worth remembering that the repair narrative isn’t a one-off effort but part of ongoing bike care. Regular inspection, gentle cleaning, and timely attention to mounting hardware can extend the life of a repaired fairing and prevent the cycle of minor damage from turning into a bigger problem.
If you need a quick pointer to broaden your options beyond DIY, exploring a dedicated fairing category can be a practical first step. For a broader selection of fairing options and replacements, you can explore the Honda fairings category. This resource helps you identify parts that fit your bike with confidence and can provide a reliable baseline if you decide to replace rather than repair. As you consider this path, it’s useful to pair the information from practical repair guides with visual references and model-specific guidance, keeping the repair journey grounded in what’s safe and achievable for your bike and riding routine.
For those who want a structured, visual, step-by-step guide to repairs—especially if you’re chasing color match and finish quality—the official guide to motorcycle fairing repair offers a comprehensive reference. It’s a reliable external resource that complements the hands-on process described here and provides illustrations and cautions that help you plan your steps with greater precision. You can consult that guide to reinforce your understanding of techniques, tools, and safety considerations as you approach your repair project. Remember, the aim is not to shortcut safety or durability; it is to restore the bike’s form and function while preserving its value and resilience on the road.
Internal link for related parts and categories: Honda fairings provides a direct pathway to a wide range of panels that match the geometry and style of many popular models. This is not a substitute for careful measurement and compatibility checks, but it helps align your repair with options that fit your bike’s profile and aesthetics. The content above keeps you focused on the practical mechanics and decision points that shape a repair’s outcome, while the linked category acts as a bridge to concrete, model-specific options when you’re ready to move beyond patchwork.
External resource for deeper guidance: RevZilla’s official motorcycle fairing repair guide offers detailed, visual instructions that complement the narrative here. It’s a useful reference to augment the steps described, especially for learners who benefit from seeing each stage in action. https://www.revzilla.com/motorcycle-fairing-repair-guide
Final thoughts
Repairing motorcycle fairings is not merely about aesthetics; it’s a vital aspect of motorcycle maintenance that can significantly impact rider safety and vehicle longevity. As a business owner, offering repair services for both surface and structural damages can distinguish your services in the motorcycle community. By mastering basic techniques, understanding advanced methods, equipping your workshop with the right tools, and knowing when to refer to professional services, you can enhance customer satisfaction and build a reputable brand. Embrace these practices to drive your business forward and serve the motorcycle community effectively.