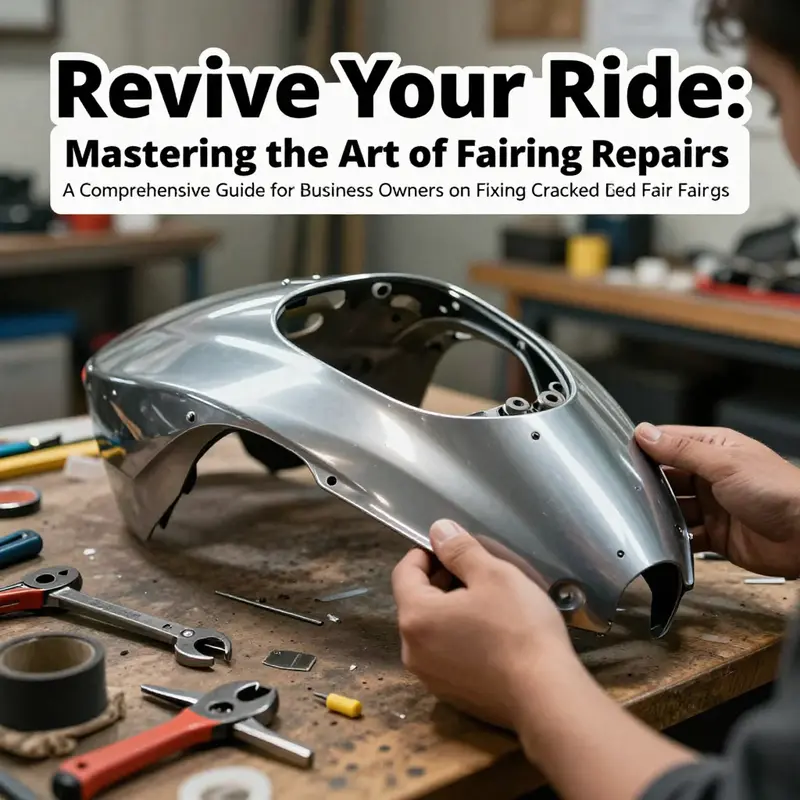
For many motorcycle enthusiasts, a cracked fairing can be a disheartening sight. Not only does it affect the aesthetics of the bike, but it can also compromise structural integrity. As a business owner in the motorcycle repair industry, understanding how to effectively address these damages can enhance customer satisfaction while maximizing profitability. This guide elaborates on three effective methods—plastic welding, epoxy resins, and replacement strategies. Each chapter delves into detailed procedures while emphasizing how honing these repair techniques can elevate your service offerings and result in a professional finish.
From Crack to Confidence: Mastering Plastic Welding for Motorcycle Fairings
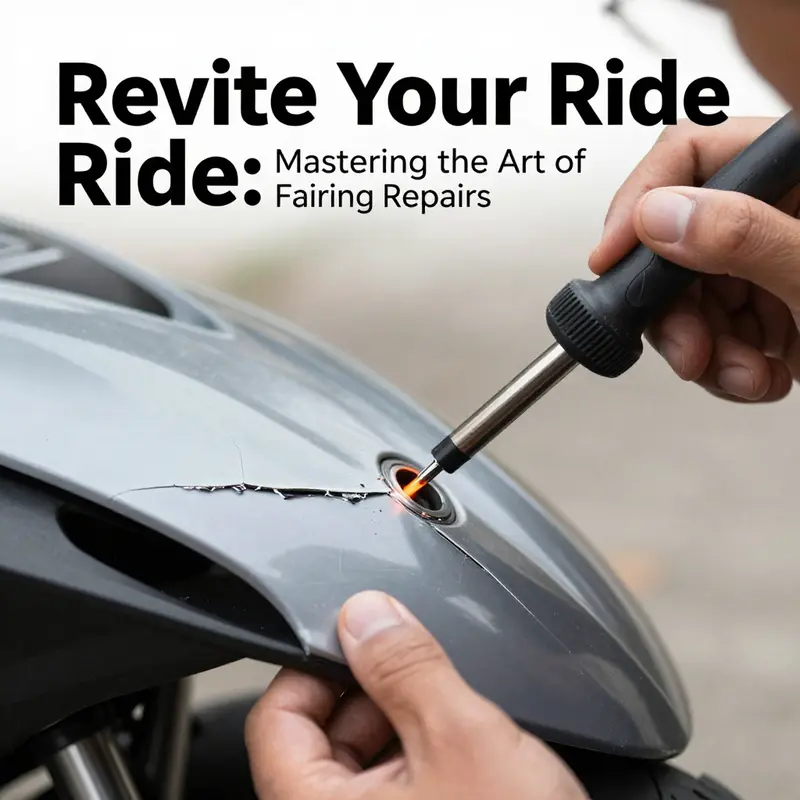
Cracks in a motorcycle fairing can feel like a setback that threatens both the bike’s aesthetics and its aero efficiency. Yet, when the damage is a crack or a small break in a thermoplastic fairing, plastic welding offers a repair path that preserves rigidity, handles vibration, and stays weather-resistant long after the first ride back. This chapter weaves a practical, technique-driven narrative you can follow in a garage or shed, where the goal is to rebuild the structural integrity and surface finish without surrendering to costly replacement. It’s about understanding the material you’re working with, the correct heat and feed, and the patient discipline to finis h with a finish that looks and feels like original work. The conversation around plastic welding isn’t merely about mending a crack; it’s about restoring a panel so that it resists the next impact, the next gust, and the next long highway stretch with minimal concern about aesthetic compromise. The approach is particularly effective for larger cracks or breaks in ABS or polycarbonate fairings, which are common on many sport and touring machines. It emphasizes a bond that’s strong enough to withstand road vibration, while also remaining resilient to temperature fluctuations and humidity that bikes endure on every ride. If you’re reading this, you likely want a repair that is both durable and cost-conscious, a repair that doesn’t demand a full replacement. It’s a practical objective, and the process described below is designed to deliver just that, with a careful emphasis on safety and proper technique.
Preparation starts with removing the fairing from the bike when possible. A clean separation gives you near-perfect access to the crack, and it protects other components from heat or molten plastic during the repair. The work surface should be stable, clean, and well-lit, because a steady hand and a clean workspace are the two quiet partners of any successful repair. Begin by thoroughly cleaning the cracked area with isopropyl alcohol to remove grease, wax, or embedded dirt. Any residue left behind can create pockets that trap air or oils, which in turn can degrade adhesion or produce a seam that’s more visible after finishing. After cleaning, lightly sand the crack edges with fine-grit paper, around 200–400 grit. The goal isn’t to remove material, but to create a micro-roughness that helps the melted plastic cling to the surrounding surface. You’re preparing a surface that will be re-melted and fused, so you want the edges to “grab” the new material rather than pull away.
Material selection matters as much as heat settings. Use plastic welding rods made from the same base polymer as your fairing. ABS is common in many fairings, as is polycarbonate, though some fairings incorporate blends or co-polymers. Matching the polymer ensures the melted filler blends chemically and mechanically with the original material, creating a seamless repair in both strength and appearance. The welding tool you choose is a plastic welding gun or a dedicated plastic welder, a device that heats the rod to its melting point just ahead of where you feed it into the crack. The temperature setting depends on the plastic you’re working with and the thickness of the section you’re repairing, but the principle is universal: you want a clean, steady flow of molten filler that penetrates the crack and bonds with the surrounding walls without overshooting and deforming the panel.
With tools in hand, the welding process begins. Heat the welding gun to the recommended temperature for the material you’re repairing. Some operators favor a conservative approach, starting just below the melting point and increasing gradually as they feed the rod into the crack. The technique is deliberate; you feed the rod slowly along the length of the crack, allowing the molten filler to fill the gap, while you maintain even pressure on the tool to push the molten material into every crevice. The aim is to create a continuous, homogenous bead that consolidates the crack into a solid, uniform section. If the crack has a widening or is a through-and-through fracture, you may need to produce a parallel bead on the opposite side or a shallow interior patch to prevent future propagation. The key is consistency: move at a steady pace, ensure the filler melts completely, and avoid creating air pockets or voids that could weaken the bond.
Cooling is not the moment to rush. Allow the repaired area to return to ambient temperature gradually, so the bond can set without residual internal stresses that might crack again. Once cooled, inspect the repair. Use medium to fine grit sanding to remove excess material and to feather the repaired area flush with the surrounding surface. Start with a coarser grit to level, then progress to finer grits to smooth the seam until it sits flush with the rest of the fairing. A careful hand with sandpaper reduces the need for heavy body filler and preserves the original geometry of the panel, helping the repair stay invisible from normal viewing distances.
With the repair structurally sound and the surface flat, the finishing phase begins. A light primer that is compatible with the fairing material helps the subsequent paint layer bond evenly and prevents any moisture from seeping into micro-scratches or the repair seam. After the primer cures, apply color-matched paint or a clear coat, depending on the finish of the surrounding area. The goal is a finish that looks as seamless as the original panel, so you’ll want to work in thin, even coats and allow adequate cure time between steps. If you’re repairing a high-gloss surface, a clear coat can help blend the repaired region into the broader sheen, masking the seam and creating continuity across the panel. For color-matched work, take care to contact the color match in a controlled environment, under lighting that reproduces the riding conditions you’re most often in, so your shade aligns closely with the rest of the fairing.
Advanced mechanics of repair may expand beyond basic plastic welding. For slightly larger areas or impatient drivers who want a reinforced bond, you can add a layer of fiberglass cloth or copper tape over the repaired site after curing. This reinforcement is especially common around potentially high-stress zones like the front fender liners, where impact resistance counts. The fiberglass acts as a light grid that shares stress and resists re-fracture, while the copper sheet, if used, provides additional energy-dissipation properties. Both approaches require careful preparation: you must ensure the reinforcement is clean, adheres well to the surface, and is properly encapsulated by resin or a compatible adhesive so it doesn’t bubble, peel, or show through the paint finish. Carbon fiber reinforcement with resin is another option for enthusiasts chasing performance-oriented repairs. It’s stronger and lighter, but it demands a higher degree of skill and the right materials, as well as a precise fit to maintain the fairing’s aerodynamics and weight balance. If you pursue carbon fiber, plan the repair as a composite repair from the outset, rather than attempting to overlay a patch later, and consider professional guidance to guarantee a finish that won’t compromise safety or performance.
The decision to pursue repair versus replacement hinges on several practical factors. If the crack is long, deep, or has separated multiple mounting points, or if the fairing’s structural integrity is compromised in a way that could affect mounting hardware or wind protection, a full replacement may be the most prudent choice. However, even in cases that appear severe, a well-executed plastic weld repair can restore enough strength for safe riding and everyday use, especially when reinforced with a strategically applied patch layer or resin. When choosing to repair, remember that proper ventilation and protective gear are non-negotiable. The process involves heat, fumes, and molten plastic; working in a well-ventilated area with eye protection, gloves, and a suitable respirator or mask reduces risk and improves comfort during longer repair sessions.
The repair’s practical value extends beyond the garage. It’s a chance to apply a disciplined, methodical approach to a common riding challenge—one that saves money and preserves the unique shape and color of your bike’s fairing. It’s also a reminder that not all damage requires a dramatic replacement; many fairings are spacious, multi-component structures designed to be repaired in sections. If you’re unsure about the exact material or the repair’s long-term viability, consult a professional body shop with experience in motorcycle fairings, especially when carbon fiber you’re considering could require specialized resins and curing protocols. For riders who enjoy knowing the details of their machine’s repairs, this approach offers a transparency that helps you monitor the repaired area during future rides and after exposure to sun, rain, and highway debris.
One subtle but important consideration is color matching and the final appearance. Even with precise repair, the repaired area may show faint lines or a slight texture difference. You can minimize the visibility by feathering the edges during sanding, applying a primer that fills micro-scratches, and layering paint with fine, even coats. A clear topcoat can help unify the appearance and protect the finish from UV exposure. If the fairing color is unique or custom, you may find yourself balancing a perfect repair with a best-match paint job. In some cases, a color-mandated repaint of the entire panel is the most straightforward way to achieve a flawless look. If you’re shopping for color options, consider the broader range of fairings and colorways available for your bike’s make and model, including brands that are widely compatible with your bike’s sport or touring lines. For a quick route to compatible options, you can explore the Honda fairings catalog and related pages to assess color and form compatibility with your model. The linked collection can be a practical resource when you’re weighing whether to repair, replace, or re-skin a panel.
In practice, the decision to repair or replace is rarely a single moment; it’s the result of an assessment that includes the crack’s location, the available repair space, and how the panel’s load path interacts with other components. Some cracks in the fairing’s inner shell or mounting points demand additional reinforcement to maintain the panel’s rigidity in the face of vibration and air pressure at speed. In those situations, a repair that integrates a structural patch or a containment resin can make the difference between a cosmetic fix and a robust, ride-ready repair. The guidance from professional tutorials and school-guided approaches emphasizes a deliberate ramp-up in complexity. Start with a straightforward crack repair, then, if you gain confidence and observe durability through riding tests or after exposure to the elements, you can consider modest enhancements like a fiberglass layer or a resin patch for high-stress areas. If you decide to explore a broader repair strategy, you’ll find that professional techniques prioritize a thorough surface prep, controlled curing, and careful blending of the finish with the surrounding panel to minimize visual differences. The process is iterative rather than a single-step fix, but with patience and attention to detail, you can achieve results that stand up to riding demands and seasonal weather.
For riders who want a quick practical reference, it’s useful to remember a few guardrails. First, match the material type to the repair—ABS to ABS, polycarbonate to polycarbonate. In the absence of a perfect match, try to use a compatible product class and plan for color and finish compensation later. Second, don’t overheat; excessive heat can warp the fairing or degrade the surrounding plastic, which undermines the integrity of the repair. Third, prioritize a clean bond line; a roughened surface and careful cleaning reduce the risk of moisture ingress and make the fill smoother to finish. Fourth, apply reinforcement only after the primary weld cures, ensuring the adhesive or resin does not trap heat against the skin of the finished area. Fifth, consider the fairing’s long-term life: the repaired region should not be deployed in a way that introduces new stresses or binds against moving parts. A subtle yet practical reminder is to check the fairing’s mounting tabs and screws after the repair. Tighten fasteners to spec, and make sure there’s no binding at the attachment points, which could otherwise add stress to the repaired seam and create a new crack.
If you’re exploring options for replacing or sourcing new panels, browse the broader catalog for fairing pieces tailored to your bike’s model line. For instance, a curated selection of Honda fairings can help you evaluate whether you want a color-matched replacement panel or a more neutral color that you can repaint to perfectly fit your bike’s scheme. The internal link to the Honda fairings collection provides a practical starting point for comparing panel shapes, mounting schemes, and color options, enabling you to weigh aesthetics against repair viability in a concrete way.
In closing, plastic welding a cracked motorcycle fairing is not just a repair; it’s a careful restoration that blends material science, heat management, and surface finishing into a coherent, ride-ready solution. It rewards patience, precise technique, and a willingness to assess every crack on its own terms. With the right tools, the correct materials, and a disciplined approach to finish and reinforcement, you can bring a damaged fairing back to its original strength and appearance, while keeping costs manageable and the bike looking sharp on the next set of miles. And if you ever feel uncertain about a step, remember that professional guidance remains a valuable safety net—whether it’s to confirm material compatibility, refine application technique, or help you decide when a replacement is the more prudent choice. The goal is not merely to seal a crack but to ensure the repaired panel will perform reliably under speed, wind, and weather, just as the rest of the bike does on every ride.
External reference for further detail on robust plastic-welding techniques and industry-recommended practices can be found in professional guides that outline best practices for motorcycle fairings: https://www.mmi.edu/blog/plastic-welding-for-motorcycle-fairings. This resource provides a broader context for the heat control, material compatibility, and curing practices that underpin successful repairs and durable outcomes. To explore related parts and accessories that can complement a successful repair, you might also examine the broader catalog that highlights various fairing designs and finishes, including options for specific bike models and brands, such as the Honda fairings.
Restoring Strength and Finish: Repairing a Cracked Motorcycle Fairing with Epoxy Resin

Preparation and Repair with Epoxy Resins
Fixing a cracked motorcycle fairing with epoxy resin is as much about preparation as it is about the adhesive. A correctly executed epoxy repair will restore structural strength, resist road vibration, and deliver a finish that blends with the surrounding panels. The goal is not just to close a gap, but to rebuild the fairing so it behaves like the original part. This means respecting the plastic’s characteristics, creating a solid mechanical bond, reinforcing where needed, and finishing carefully to match texture and color.
Begin by removing the fairing from the bike. Working on the bench gives you full access and keeps other components safe. Use the correct tools so fasteners are not rounded. Note or photograph fastener locations for reassembly. Once off, wash the fairing with soap and water to remove grime. Allow it to dry, then wipe the cracked area with a degreaser or isopropyl alcohol to remove oils and contaminants. Clean surfaces are essential for strong adhesion.
Assess the crack carefully. Fine hairline cracks often call for straightforward epoxy filling and surface finishing. Deeper fractures, separation of sections, or missing fragments require additional reinforcement or backing material. Consider whether the crack passes through a high-stress area. Mounting points, edges that flex, and front sections that take impact demand stronger repairs. If large sections are shattered or warped, replacement may be the safer long-term option.
Lightly sand the crack and an inch or two around it using 200–400 grit sandpaper. The sanding serves two purposes: it removes any glossy finish and creates a roughened surface that epoxy can key into. Sand both sides of the crack where accessible. Remove sanding dust with a lint-free cloth dampened with alcohol. Pay close attention to internal ribs and flanges. Those interior areas often carry load, and reinforcing them will noticeably strengthen the repair.
Choose an epoxy formulated for plastics. Not all epoxies adhere well to thermoplastic fairings. Look for products labelled for automotive plastics or engineered with good flex and impact resistance. Follow the manufacturer’s mixing ratio precisely. Mixing errors will result in incomplete cures and weak bonds. Combine the resin and hardener in clean containers and mix thoroughly. Scrape the sides and bottom of the mixing cup while stirring to avoid unmixed pockets. Mix only as much as needed for the working time. Epoxies vary in pot life; a fast-setting product can be helpful but allows less working time.
Before applying, consider backing and reinforcement. When a crack has opened wide or a piece is missing, a backing support will keep the epoxy in place and prevent sagging. For through-cracks, apply a patch of fiberglass cloth on the inside surface, saturating it with epoxy. Fiberglass adds tensile strength and distributes loads across a larger area. Copper or aluminum sheeting can serve as an alternative backing for heavy repairs, providing rigid support and a flat surface. Cut patches slightly larger than the damaged area to distribute stress.
Apply the mixed epoxy to the crack, forcing it fully into the gap. Use a small spatula, plastic spreader, or syringe for controlled application. For hairline cracks, apply epoxy along the line and press the edges together to close the gap. Clamp or tape the pieces until the epoxy sets if alignment is critical. For larger gaps, fill from the inside first, using the backing reinforcement, and then finish on the outside. Overfill the repair slightly to allow for sanding back to flush later. Avoid creating heavy ridges that are difficult to sand.
If you are reinforcing with fiberglass, lay the cloth into the wet epoxy and press to remove air pockets. Add more epoxy to fully wet the fibers. Work in thin layers, allowing each to penetrate and cure just enough to hold its shape before applying the next. Two or three layers are often adequate for fairing repairs. Keep layers thin to reduce the risk of cracking under stress. For flexible plastics, choose a lighter reinforcement and a flexible epoxy to reduce brittleness.
Curing conditions matter. Epoxy cures faster in warm, dry environments and slower in cold or humid ones. Place the repaired fairing in a dust-free, ventilated area with stable temperature. Avoid direct sunlight during cure to prevent surface overheating and distortion. Respect the cure time recommended by the epoxy maker; partial cures can mislead you into thinking the repair is complete. Full strength often develops over 24–48 hours, and mechanical stresses should be avoided until the epoxy achieves its rated cure.
Once cured, begin shaping the repair. Start with 400 grit sandpaper to remove excess material and gradually move up to finer grits to blend the repaired area with the surrounding surface. Keep sanding strokes even and feather the edges to avoid a visible lip. When sanding contours or curves, use masking tape and sanding blocks shaped to the curve to maintain form. For textured surfaces, mimic the original texture by varying sanding pressure or using specialty pads.
After sanding, use a plastic-compatible primer to create a uniform base for paint. Primers formulated for plastics promote adhesion and help fill minor imperfections. Apply thin, even coats and allow them to tack up between passes. Lightly sand the primer coat with 800–1000 grit paper to remove orange peel and get a smooth finish. Wipe clean before painting.
Select a paint system designed for automotive plastics. Such paints flex with the substrate and resist chipping. Apply several thin coats rather than one heavy coat. Thin layers reduce runs and help the paint conform to contours. Allow recommended flash time between coats. Once the color coats have cured, apply a clear coat for UV resistance and gloss. A clear coat also protects the repair from abrasion and helps match the sheen of surrounding panels.
When the finish has fully cured, reassemble the fairing carefully. Use new fasteners if the originals show wear. Do not overtighten; plastic threads can strip easily. Reinstall any internal components and check alignment. Once mounted, sit on the bike and visually inspect panel gaps. Small adjustments during reassembly will ensure the repair looks factory-made.
A few practical tips improve long-term results. If the fairing is made of a notoriously difficult plastic, scuffing with a coarse abrasive or using a chemical primer designed for that substrate can improve adhesion. If a crack continues to reappear after repair, evaluate the mounting geometry; stressed mounts can load a repair and cause failure. Adding a small reinforcement plate on the inside, anchored by bolts into existing mounting points, transfers loads away from the repaired area. Keep in mind that additional mechanical fasteners can change stress distribution, so use them sparingly and align them to avoid creating new stress risers.
Heat can be used cautiously to shape and seat fiberglass patches, but excessive heat risks warping the plastic. Avoid heat guns unless you have control and experience. Similarly, solvents should be used with caution. Aggressive solvents may weaken or crazes the plastic surface. Always test a solvent on an inconspicuous area first.
For riders who want a higher-strength, lighter repair, carbon fiber overlays are an option. Carbon fiber cloth with compatible resin can provide excellent stiffness and weight savings. However, it requires greater skill to lay up smoothly and a more meticulous finish to blend the matte carbon surface with painted panels. Consider carbon only when performance or weight is critical and you have experience with composite layups.
Safety cannot be overlooked. Work in a ventilated area to avoid inhaling fumes. Wear nitrile gloves and eye protection. Use a respirator when sanding cured epoxy, as dust can be harmful. Keep a clean workspace to limit contamination during curing. Store epoxy products according to instructions to maintain shelf life and consistent curing behavior.
Finally, know when a repair is a stopgap and when replacement is wiser. Epoxy repairs can restore function and aesthetics for many cracks, but severely deformed or extensively damaged fairings may not regain original geometry. In such cases, replacement ensures proper fitment and long-term reliability. If you find replacement fairings necessary, consider options that match your model. For a range of fairing choices for popular sportbikes, explore available categories for specific models and fitments such as fairings for CBR bikes, which offer direct-fit parts ready to install: fairings for CBR.
For those seeking a professional-level procedure and visual reference, a comprehensive guide from a respected technical institute walks through epoxy techniques step by step. The guidance covers mixing, structural reinforcement, and finishing practices useful for both hobbyists and professionals: https://www.motorcyclemechanicsinstitute.com/repairing-motorcycle-fairings-with-epoxy
By approaching an epoxy repair with careful preparation, the correct materials, and measured technique, you can turn a cracked fairing into a durable, attractive panel. The work rewards patience; a well-executed repair will be hard to detect and will stand up to the road for years.
From Crack to Confidence: Replacing and Reinforcing Your Motorcycle Fairing for Safe, Lasting Performance
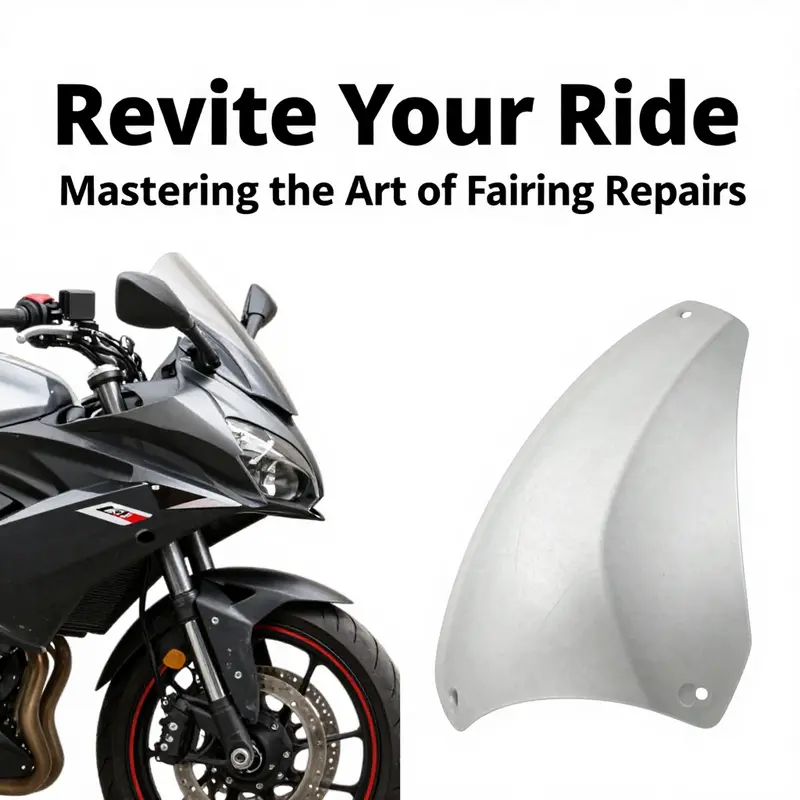
A cracked fairing on a motorcycle is more than a cosmetic issue. It speaks to the bike’s structure, aerodynamics, and, most importantly, rider safety. When you face a crack, the instinct is to patch it quickly and ride away, but the wiser path depends on how bad the damage is, where it sits, and what the fairing is made of. In many cases, the decision between replacement and reinforcement is not merely about saving money. It is about restoring the integrity of the entire bodywork system, preserving alignment with mounting points, and maintaining the original aerodynamic profile that a poorly repaired panel can compromise. As you assess the situation, focus on three factors: the severity of the crack, its location relative to critical supports or fasteners, and the material of the fairing. ABS is the workhorse of most street and sport bikes, while fiberglass still appears on older builds and certain aftermarket or lightweight designs. Each material responds to repair differently. ABS responds well to plastic welding or high-strength adhesives, provided the edges are clean and the area is accessible. Fiberglass, by comparison, benefits from resin-based patches and layers of reinforcing cloth, forming a patch that integrates with the surrounding composite. When you know which material you’re dealing with, you can craft a repair that is not only visually acceptable but structurally sound. The decision to replace versus reinforce often hinges on whether the crack is a hairline fracture in a non-load-bearing surface or a breach that extends toward mounting points, supports, or warp-prone sections. A small crack in a side panel might be repairable with confidence, allowing you to preserve an OEM part and avoid the expense and time of a full replacement. Even then, surface preparation remains essential. A fairing that has seen an impact can carry micro-deformations that will telegraph into the paint and finish if left unaddressed. In these moments, reinforcement methods must be chosen with care to avoid creating a stubborn ridge or an asymmetrical look that betrays the repair every time you glance at the bike in the garage. The assessment phase sets the stage for the entire repair story. If the damage is near mounting points or has caused notable deformation, replacing the panel becomes the more prudent option. A replacement ensures that the new panel aligns with factory mounting points, seals properly against the wind, and preserves the intended aerodynamics. The sourcing process is straightforward but requires attention to compatibility. When you search for a replacement, you want a part that matches the model year, the exact panel location, and the fastener pattern. OEM parts offer the cleanest fit and finish, but reputable aftermarket options can also deliver a precise match at a lower cost. The key is to verify fitment through measurements, reference photos, and model-specific notes from the supplier. If you find a replacement that promises a perfect fit, the next stage is the careful removal of the damaged fairing. Begin by disconnecting any electrical connections, hoses, or sensors that are attached to the panel. Protect adjacent components with soft blankets or padding to prevent incidental scratches or stress on adjoining parts. Use the correct tools to loosen fasteners in a sequence that minimizes the risk of warping surrounding panels. The objective is not to wrench the old piece off but to remove it with as little additional damage as possible. When the new panel arrives, you’ll want to verify fit before painting and final assembly. Align the new fairing with the bike’s mounting points and the surrounding panels. Loose fitment is a trap that leads to misalignment once everything is tightened. An alignment that feels off at the first try is a cue to take a step back, check the hardware, and recheck the mounting points. The goal is a seamless line between panels and a consistent gap around the edges. Some riders prefer to postpone painting until after the new piece has settled in, so that any minor flex or movement is accounted for before finishing. Once alignment is verified, secure all fasteners to the manufacturer’s recommended torque. It’s easy to underestimate how much force is needed at certain points, and overtightening can cause cracks or breakage in new plastics. After the panel is secured, reattach electrical connectors, hoses, and any fasteners that were detached during removal. The result should be a clean, symmetrical appearance with a consistent sheen that mirrors the rest of the fairing line. If replacement is not a practical option, reinforcement becomes a robust alternative that preserves the original shell and, in many cases, the bike’s aesthetics and performance. For ABS fairings, plastic welding is a widely used method that fuses the crack by melting the edges and closing the gap with a stable, heat-welded seam. A competent repair requires a clean crack edge and a controlled heat source. The process is precise, and it demands patience, but it yields a bond that is stronger than the parent material in many instances. When you choose welding, prepare the area by cleaning with isopropyl alcohol to remove oil and dust. A dedicated ABS welding rod or compatible filler material is used to fill the crack as you apply heat with a soldering iron or a plastic welder. The joint should be melted just enough to fuse the edges without creating a burn mark on the surface. If you’re new to plastic welding, practice on a scrap piece of similar plastic to dial in the heat and speed before touching the actual panel. While welding can mend small to moderate cracks, there are scenarios where reinforcement with adhesive bonding plus a patch is prudent. A two-part epoxy resin, applied in a 1:1 ratio, forms a strong base for a structural bond. It’s critical to clean the crack thoroughly; any residual grease or dust can undermine the adhesive’s grip. After applying the epoxy, it’s common to embed reinforcing materials—aluminum powder for added rigidity, or a fiberglass mesh—to extend the repair’s lifespan. The mesh, when embedded in the wet epoxy, spreads stress across a wider area and helps resist future crack propagation. Clamp the repaired section with steady pressure until the epoxy cures. In many cases, a reinforced patch becomes a reliable fix, especially in non-load-bearing regions or where impacts are routine, such as the lower front fender or side panels that tend to take on road debris. For fiberglass fairings, the reinforcement approach often relies on layered resin and cloth. A resin system, whether polyester or epoxy, is applied with fiberglass cloth laid down in multiple layers. Each layer is allowed to cure before the next is added, building a patch that strengthens the surrounding area without creating an obvious bulge. The layering sequence matters; too few layers may yield a weak patch, while too many layers risk adding unnecessary weight and altering the panel’s contour. In some high-performance or ultra-light applications, carbon fiber reinforcement with resin is used to achieve impressive strength-to-weight characteristics. This option, while more advanced, should be approached with a clear plan for curing, temperature control, and consistency with the rest of the composite structure. Since finishing is what most people notice first, the repair’s success is measured not by how quickly you can seal the crack, but by how convincingly the repair blends with the original surface. After any welding or patching, allow the material to cure fully. Curing times vary with adhesive systems, resin types, and environmental conditions, but patience pays off in a smoother finish and a stronger bond. Begin the finishing stage by removing burrs and smoothing the repaired area with progressively finer abrasives. Start with a medium grit to knock down any ridges, then move to finer grits to achieve a uniform surface. It’s common to apply a thin layer of body filler to address micro-imperfections that the sandpaper could not fully flatten. Once cured, sand again to create a seamless transition between repair and normal surface. The aesthetic work continues with priming, which not only creates a uniform base for paint but also improves adhesion of the color coat. A well-chosen primer helps prevent peeling and provides a more even color application across repaired and original sections. When you reach the painting stage, use color-matching paint that corresponds to the existing panel. The goal is a finish that is indistinguishable from the rest of the fairing and that stands up to UV exposure and weathering. For an even more durable result, apply a clear topcoat to seal the color and provide gloss. In addition to the cosmetic considerations, you must consider durability. A repair that looks good on day one but chips or warps within a month is not a true fix. Therefore, the repair plan should include protective measures against future impacts, such as a light coat or two of clear protective film in vulnerable areas or reinforcement in zones prone to contact with debris. Protective steps may seem minor but they have a meaningful impact on long-term resilience. Safety remains a thread running through every decision. The work environment must be ventilated, particularly when heating plastics and curing resins. Wear eye protection, gloves, and a respirator when working with fumes from solvents, adhesives, or resin systems. Work in a well-lit area with minimal dust to avoid compromising the finish. The curing time is not a suggestion to rush. It is an essential part of achieving a durable result. Rushing through curing increases the risk of a soft bond, air pockets, or a finish that chips easily. For the best results, follow the specific manufacturers’ guidelines for each product you use and refer to reputable repair tutorials from trusted sources. The benefits of a carefully planned approach are clear. Replacement offers the most predictable outcome when damage compromises structural integrity or alignment. It restores fit and finish to factory specifications and minimizes the risk of future failures around mounting points. Reinforcement, on the other hand, can save money, preserve original lines, and deliver a fix that remains robust under normal riding conditions, provided it is executed with attention to edge preparation, material compatibility, and curing. The practical decision comes down to a careful weighing of safety, durability, and cost, with the rider’s ultimate confidence in the bike as the guiding principle. If the damage is extensive, a total replacement is often the safest and most reliable option. A high-stress area or a deep fracture that travels through a significant portion of the panel can lead to warping and misalignment that undermines protection and aerodynamics. In those cases, swapping to a new fairing ensures that the bodywork continues to perform as designed and that the mounting structure remains uncompromised. Sourcing the right part means checking compatibility with the model, year, and sub-model. Some riders prefer OEM components for the most faithful reproduction of the original geometry, while others opt for reputable third-party options that balance fit, price, and finish. The installation process for a replacement is straightforward in principle but demands patience and care. Remove the damaged piece, inspect the mounting points for wear, and address any damage to the underlying substructure. The new panel should drop into place with minimal pressure on adjacent parts. Tighten fasteners following the recommended torque sequence, reattach electrical connectors, and test fit. After reassembly, the ride should feel tight and the panel should align with the surrounding lines. If you cannot obtain a perfect match, it is sometimes possible to make a close match with careful sanding and finishing. However, this approach has its limits and can result in an uneven transition if not executed with skill. In such scenarios, professional alignment checks and refinishing are worth considering. The repair journey, whether replacement or reinforcement, culminates not only in a visual restoration but in preserving the bike’s performance and safety. The fairing is a shield against wind, debris, and minor impacts; correctly repaired, it continues to deliver its designed functions while maintaining the aesthetic that riders value. For those who want to explore model-specific options without compromising the repair’s integrity, a practical path is to browse the Honda fairings collection and compare fitment notes, finishes, and available mounting options to the bike you own. This approach helps ensure you choose a panel that truly matches your bike’s geometry while giving you a baseline for color andTexture consistency across the entire shell. If you decide to explore this route, you can start with a catalog that categorizes parts by model and year, then drill down to the exact panel you need. The goal is to avoid mismatches that require further modifications, which can escalate both cost and risk. In parallel with replacement and reinforcement, it is wise to consult official maintenance resources that provide guidance on repair safety, curing times, and recommended material choices. The careful, science-based approach described here echoes the principles found in authoritative guides, which emphasize ventilation, proper curing, and adherence to manufacturer specifications. While the repair can be completed with a range of materials and techniques, the strongest results come from a thoughtful plan, precise execution, and a willingness to step back when a repair would compromise safety. A cracked fairing can be an opportunity to reassess the bike’s protection and aesthetics, aligning the repair with the rider’s goals—whether that means preserving original lines for resale value, or prioritizing performance and durability for everyday riding. The philosophy is simple: choose the path that ensures structural integrity first, and aesthetics second, then apply the highest care in finishing and protection. The final decision should make you confident in your machine’s continued ability to shield you from the elements and keep you connected to the road. If you are seeking a direct path to model-specific parts and standardized mounting, consider exploring the Honda fairings collection, which can offer a reliable starting point for compatibility and finish. This is not just about finding a part; it is about reconstituting the bike’s envelope—its wind deflection, its mounting geometry, and its visual coherence—so that every ride feels like a return to form rather than a compromise. As you move toward completion, document the repair process. Take notes on materials used, curing times, and any tweaks you had to make to achieve fit. A written record can be invaluable if the bike undergoes inspection, or if you ever decide to replace the panel again in the future. The documentation can also guide future repairs of other panels, helping you maintain consistency across the entire fairing set. In closing, tolerate no shortcuts that jeopardize safety. If the damage is beyond what you can confidently repair, seek professional assistance. A certified technician can ensure correct alignment, finish, and color-matching, which matters just as much as the repair’s mechanical strength. The combination of replacement and reinforcement strategies offers a spectrum of options, from cost-effective patches to full restoration. The best choice is the one that returns the fairing to its intended performance envelope while keeping you protected from the elements and comfortable on the bike. For readers who want a practical starting point to explore parts that fit specific models without risking a mismatch, consider the Honda fairings collection as a reference point for compatible options and a baseline for comparing finishes and textures across your bike’s bodywork. Whenever you refer to the repair process, remember to consult manufacturer guidelines and repair tutorials that emphasize safety, proper material selection, and suitable curing times. These steps form the backbone of a repair that stands the test of time. As you prepare to ride again, you’ll feel the difference a well-executed repair can make—one that preserves your bike’s silhouette, retains its protective capabilities, and delivers peace of mind on every road you traverse. External resources can provide additional context on best practices, particularly those rooted in official recommendations and long-standing repair standards. For a detailed, model-spanning reference, you can consult the official maintenance guide published by the manufacturer, which discusses repairing cracked fairings and related procedures. This chapter has presented a cohesive approach to deciding between replacement and reinforcement, underscoring that safety and durability should govern every choice. The practical path combines careful assessment, precise execution, and high-quality materials, culminating in a repaired fairing that looks right, functions correctly, and keeps you confidently protected on the ride ahead. The road to a durable fix is not a single maneuver but a sequence of well-considered steps that honors the bike, the rider, and the craft of bodywork itself. For ongoing reading and a broader view of model-specific options, you may explore the Honda repair guidance linked in the external resource and consider the internal link to a broader parts catalog focused on fairings. External reference: https://www.honda.com/motorcycle-maintenance-guides/repairing-cracked-fairings
Final thoughts
Mastering the repair of motorcycle fairings can set your business apart in a competitive industry. Utilizing methods such as plastic welding for minor cracks, epoxy resins for deeper damage, or full replacements for severe fractures ensures that you can cater to various customer needs. By investing time in learning these techniques, you’re enhancing your craftsmanship and promoting customer loyalty through high-quality service. Properly mending fairings not only restores the bike’s aesthetics but also underscores your business’s dedication to excellence. Embrace these skills, and you will see the benefits reflected in your bottom line.