In the realm of motorcycle maintenance and customization, fiberglass repair for motorcycle fairings is a critical aspect that cannot be overlooked. Fairings not only enhance the aesthetic appeal of the bike but also significantly improve aerodynamics and protection against elements. For business owners in the motorcycle industry, understanding the intricacies of fiberglass repair is essential in delivering high-quality service to customers. This comprehensive guide delves into the various phases of fiberglass repair, covering assessment and preparation, essential materials and techniques, the step-by-step repair process, and how to choose quality parts and kits. Each chapter builds on the last, creating a cohesive understanding that equips business owners with the knowledge needed to excel in fiberglass repair and ensure customer satisfaction.
Assessing Damage and Laying Groundwork: The Quiet Craft of Fiberglass Repair for Motorcycle Fairings
A fiberglass motorcycle fairing stands at once as a shield, a shell, and a platform for aerodynamics. When it bears the marks of a scrape, a dent, or a crack, it speaks in subtle languages of impact energy and material fatigue. The repair that follows is less a quick fix and more a careful dialogue between damage and restoration. The best outcomes hinge not on bravado but on a disciplined assessment and a disciplined preparation. Before any resin touches cloth or any filler finds its place, the repair must begin with a clear picture of what happened and a plan that respects the structure, the contours, and the painted surface that makes the bike look as good as it feels when riding. The goal is not merely to hide damage but to restore integrity, preserve aerodynamics, and maintain the visual integrity of the fairing so that it looks right at speed and ages well in the years to come.
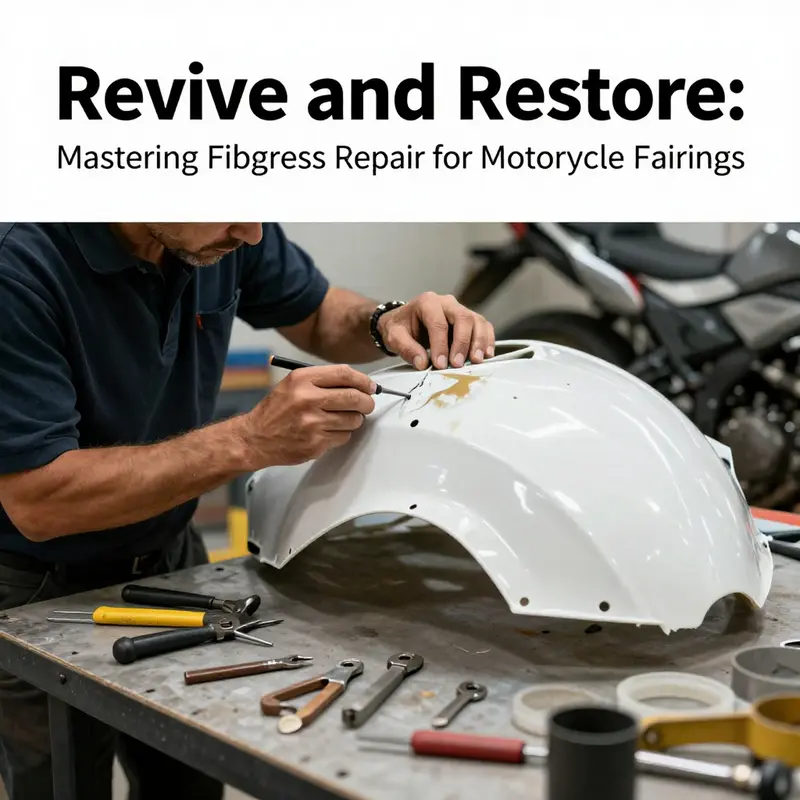
The assessment starts with a measured look at the damage. It matters whether the flaw is a small chip, a fine crack, or a large rupture that compromises the shell or the mounting points. Size and type both determine the repair method. A tiny nick may only require surface polishing and touch up; a deep crack often calls for reinforcement with fiberglass cloth and epoxy-based fillers. This initial diagnosis feeds the choice of materials, the preparation approach, and the sequencing of steps that follow. It would be imprudent to rush this stage. Skipping past a hidden crack or underestimating a dent can lead to a repair that weakens under vibration, heat, or the next impact. The gentle truth is that proper repair begins with humility: accept the damage, study it, and plan a method that addresses both the visible surface and the unseen structural reality beneath it.
Once the damage is understood, the next essential phase is surface preparation. Cleanliness becomes the dividing line between a repair that sticks and one that peels away. A thorough cleaning removes oils, waxes, and old residues that can undermine adhesion. A degreaser works best when applied with a clean cloth, and then the area must dry completely. Residues left on the surface can create micro-contaminants that trap air and prevent resin from soaking evenly into cloth or mat. After cleaning, any loose material must go. A scraper or medium abrasive sandpaper, in the 80 to 120 grit range, is often used to lift away flaking edges and to create a slightly roughened surface that will help the new material bite in. The goal during this phase is not to flatten every irregularity but to establish an anchor for the repair materials. The surface should feel stable and dry to the touch, with no sticky residues that would invite later separation.
The decision about how to bridge the damage hinges on understanding the nature of the flaw. Deeper cracks or structural compromises require reinforcement beyond a patch. In practice, technicians layer fiberglass cloth or mat with resin to build up the strength where the fairing has lost integrity. Filler compounds, such as epoxy putty, can be employed to fill voids and to sculpt a fair transition between original material and added reinforcement. The strategy here is to create a gradual, well-anchored transition that avoids sharp edges or sudden changes in thickness. Properly chosen reinforcement materials must be compatible with the resin system and the original fiberglass so that the cured patch behaves like a single, continuous shell rather than a mismatched sandwich of layers. It is in this careful layering that the repair gains its long-term durability and its ability to resist the vibrations and stress that come with riding.
In preparation, it helps to visualize the repair as a small construction project. First, the damaged area should be cleaned, dried, and then examined for any water intrusion or soft spots that may indicate delamination. Any core damage or voids should be noted. If a section feels hollow or flexible when pressed, it likely needs additional bonding and reinforcement. This is where epoxy resin combined with fiberglass cloth becomes the backbone of the repair. The cloth is laid over the prepared area in thin, concentric layers, each fully saturated with resin and worked into the contours with careful strokes to avoid air bubbles. The first layer should be a smooth, even veil that lies flush with the surrounding surface. Subsequent layers add strength, with attention paid to aligning the fibers with the direction of stress that the fairing typically experiences during rides and airflow.
The resin system itself deserves a moment of focused attention. In the typical repair workflow, a compatible epoxy resin and a hardener are mixed in a precise ratio to achieve proper cure time and bond strength. The working time, sometimes called pot life, matters. In the heat of a repair session, everything happens quickly, and a resin that cures faster can be unforgiving if mistakes occur. A slower, more forgiving resin system may be advantageous when working on larger patches or when the ambient temperature climbs. Temperature and humidity influence cure behavior significantly; a cooler workshop can slow cure, while high humidity or heat can accelerate it, sometimes at the cost of surface finish. The repair practitioner manages these variables with patience: mixing in small batches to maintain control, applying resin quickly but evenly, and allowing each layer to cure before applying the next. The moment the resin begins to gel, the surface should be protected from dust and drafts that could mar the finish.
When deeper damage is present, a combination of epoxy putty and fiberglass reinforcement becomes useful. The epoxy putty serves as a filler to level low spots, fill voids created by impact, and provide a base that matches the fairing’s external plane before cloth is added. This is not a cosmetic flourish. It is a structural measure that restores continuity, prevents future cracks along weak planes, and sets a smooth, paint-ready surface. After the putty cures, it is sanded to a feathered edge, again using progressively finer grits. The feathering is essential; it ensures the patch does not create a hard, abrupt transition that would be visible under light or, worse, catch on air during riding. Sanding must be controlled and methodical, with regular checks of the surrounding finish to ensure that lines and contours remain true to the original shape. A well-feathered edge often disappears under primer, a sign that the groundwork was laid with care.
Of course, the visual result matters as much as the structural one. The repair must not only hold together under stress but also blend with the fairing’s painted surface so that the finish is even and consistent. The preparation phase includes a plan for finishing: a high-build primer that fills minor imperfections, followed by a base coat and a clear top coat that matches the surrounding color, gloss, and depth. Achieving a seamless look requires attention to color matching, shading, and the subtle cues of the bike’s design. It is a gradual process, with small tests of paint on a hidden edge or panel to ensure that the shade, tone, and reflectivity behave as expected under different lighting conditions. The repair is a careful synthesis of engineering and artistry, science and craft, where every stroke of filler and every layer of cloth contributes to a final result that is not readily distinguished from the factory surface.
A practical note for those navigating a repair project is the importance of process discipline. Keep a clean workspace, organize tools in the order they will be used, and protect surrounding components from overspray. Masking tape and protective sheeting help keep corners and mounting surfaces pristine while you work. Another discipline is documenting the repair as you go: a quick sketch of the damage, the materials used, layer counts, and cure times. These notes become a personal template for future repairs and can be invaluable if the bike is subjected to inspection or resale assessment later. The discipline extends to storage and curing. Spare resin, hardener, and activators must be kept tightly sealed and away from heat or moisture. Curing should occur in a location with stable temperature, away from direct sunlight that might cause warping or discoloration. If the fairing was removed during repair, repositioning it for reinstallation requires careful alignment of mounting points and a check for any residual flex once the patch is complete. A well-executed assessment and preparation stage sets the stage for a repair that remains durable across seasons and miles of highway.
For readers who want to explore a broader catalog of fairing options and to consider potential repair paths beyond patching, there is value in examining a wider range of fairings and components in the sport-bike family. See the fairings-for-cbr category for a sense of how these shells are designed to fit and how variations in contour, venting, and edge radius influence the feasibility of a repair versus a replacement path. This contextual understanding can guide decisions about whether a repair will preserve the original geometry or whether a replacement shell would better preserve aerodynamics and aesthetics in the long run. fairings-for-cbr
In closing this phase of the process, the chapter acknowledges that assessment and preparation are often the most instructional parts of fiberglass repair. They are the quiet work that determines whether the layer of resin will bond properly, whether layers will lay down without wrinkles, and whether the final finish will align with the bike’s lines. The patient, systematic approach described here does not merely fix a surface flaw; it restores the fairing’s structural integrity and its visual balance with the rest of the motorcycle. The repair becomes a testament to careful craft, where the surgeon’s scalpel is replaced by the technician’s scribe and the patient is the bike that may ride faster and longer because the shell remains true under wind and road. For those who want to extend this practice with a deeper dive into techniques and material science, a practical, practitioner-focused resource on fiberglass repair tips for motorcycle fairings offers a structured guide to the nuances of bonding, layering, and finishing. External reference: https://www.mmi.edu/blog/fiberglass-repair-tips-for-motorcycle-fairings
Fiberglass Fairing Repair: A Practical, Cohesive Guide
A damaged fiberglass motorcycle fairing is more than a cosmetic concern; it tests materials, technique, and patience, because the fairing serves both aerodynamics and aesthetics. When a fairing cracks, chips, or splits, the repair must restore structural integrity without sacrificing the precise fit that keeps the bike stable at speed or under braking. The repair work begins long before resin touches the surface. It starts with a careful assessment of the damage, a realistic appraisal of what the part is asked to do in the machine, and a plan that respects the geometry of the fairing and the environment in which the bike lives. This approach integrates the science of fiberglass with the craft of finishing so that the repaired panel behaves like the original in both form and function. It is a process that rewards patience, precise material choice, and attention to surface compatibility, because a flawless repair is less about covering a crack and more about rebuilding the material’s continuity from the inside out.
The first step is surface preparation, which may seem mundane but is decisive. Dirt, oil, wax, and old residue create a barrier that prevents resin from adhering uniformly. A careful cleaning with a solvent such as acetone or an equivalent is worth the extra minutes it demands. After cleaning, the edges of the damaged area should be lightly abraded to create a rough surface that welcomes bonding. This step also helps to remove microfragments that could compromise the integrity of the patch. As you inspect the damaged area, picture the layers of the repair as a multilayered system: resin binds to cloth, cloth binds to repair, and the repair binds to the surrounding gel coat and paint. Any voids or unevenness in the initial layers will show up later as cracks or a mismatched surface, so the guiding principle is to achieve a smooth, continuous transition from the original surface to the repaired area.
Epoxy resin is the backbone of a durable fiberglass repair, chosen for its strength, moisture resistance, and relatively low shrinkage during curing. A two-part epoxy resin, mixed with its corresponding hardener according to the manufacturer’s instructions, is applied generously to the damaged region. The aim is to saturate the affected portion completely so that the repair becomes an integrated part of the fairing. For larger breaks, a reinforcement strategy becomes essential. Fiberglass cloth or mat is laid over the epoxy-saturated area, with multiple layers used as needed to rebuild the lost material and to establish a robust bond across the fracture. It is crucial to saturate the cloth fully and to avoid trapping air bubbles beneath the fibers; air pockets can create weakness and may later telegraph through the finish.
The reinforcement process is not merely “slap on cloth and go.” It requires a patient, methodical approach to ensure the resin penetrates every fiber and that the cloth lies flat against the fairing’s contour. In practice, one applies a first layer of resin, places the fabric, and then introduces more resin either with a spreader or a brush. Heavy areas may benefit from successive layers of cloth, each thoroughly saturated. For complex shapes, it can help to work with templates or formers that press the cloth snugly into curves without distorting the fairing’s profile. Air removal is a constant concern, so small tools, like a squeegee or a roller, can help push resin into folds and crevices while minimizing trapped air. The goal is a seamless, continuous laminate whose edges meld into the original material rather than sit as a separate layer atop it.
Curing is the next critical phase, and time matters as much as technique. The initial cure typically takes place over a day or so, depending on ambient temperature and humidity. During this period, the resin’s crosslinking hardens the laminate and stabilizes the repair’s structural foundation. Once the first layer has cured, a sanding process begins to shape the repaired region into a smooth, integrated surface. Abrasive work should progress through progressively finer grits—starting around 120 and moving toward 240 or 400—so that the transition from the original surface to the repaired area becomes almost imperceptible. The objective is not to remove the entire repair but to refine its contours and to erase ridges that would otherwise show through the final finish.
After the initial sanding, a second application of resin, often described as a fairing layer, is applied to rebuild the shape and provide a more uniform base for finishing. This layer helps to blend the repair into the neighboring surface, smoothing the interface so that the final paint or gel coat can lay down evenly. The second cure allows the filler to reach its final form and ensures that any subtle contour mismatches are addressed before finishing. When the surface is fully cured, sanding resumes with finer grit sandpaper to prepare for painting. The aim is a mirror-smooth canvas that accepts color with minimal texture differences.
Finishing the repair moves the project from the realm of mechanics to aesthetics. After the surface is perfectly smooth, a gel coat or automotive-grade paint itself is applied to match the original color and finish. Gel coat provides a durable, UV-resistant layer that protects the repair from weather and sun exposure, while automotive-grade paint and a clear coat offer a hardened, gloss finish that blends seamlessly with the rest of the fairing. The painting stage must be performed in a controlled environment since even minor dust or ambient contaminants can mar a otherwise flawless surface. Several thin coats are typically better than a few thick layers; this approach yields a uniform color and gloss and reduces the risk of solvent blush or orange peel.
The repair’s durability also depends on thoughtful post-repair care. For instance, the cured surface must be protected from early impact or bending loads until the finish has fully hardened. A period of gentle handling prevents microcracks that might otherwise undermine the repair’s longevity. In practical terms, this means giving the repaired area time to reach full hardness before the bike is returned to active use, especially if the fairing bears high aerodynamic loads or is mounted near areas that experience vibration. The weather can also influence the repair’s success; extreme heat can accelerate cure times in ways that lead to stress concentrations, while cold, damp environments may slow or halt curing altogether. Where possible, perform repairs in a well-ventilated space with stable temperature and humidity to optimize resin performance and finish quality.
Beyond the simple repair, there is a broader design consideration for fiberglass fairings: the interplay between the repair’s structural role and its aerodynamic requirements. A fairing’s shape is not just cosmetic; it channels air, reduces drag, and protects internal components from airflow and debris. When an area has sustained a significant break, it is essential to evaluate whether the original layup was sufficient or if a more conservative repair approach would be prudent. In some cases, a more substantial reinforcement, perhaps with additional cloth layers or a revised layup strategy in the surrounding area, can improve long-term durability. The objective is not to create a heroic patch that hides a flaw but to produce an actual repair that behaves like a single, continuous piece of composite material. This means considering the fairing’s weight, stiffness, and resistance to moisture or impact in the repair plan.
For repairs that involve particularly complex shapes, the use of templates or even temporary molds can support a more precise restoration of contour. A heat gun can be used selectively to help the resin flow into tight corners or to smooth curvature without burning the surrounding material. The same principle applies when working near edges or fastener locations, where a careful, patch-by-patch approach preserves thinning areas and ensures that the repair remains compatible with the mounting hardware and the bike’s overall geometry. It is helpful to imagine the repair as a conversation between two surfaces: the original outer skin and the internal reinforcement. The better this conversation is coordinated—without abrupt transitions or misaligned edges—the more likely the finished work will be indistinguishable from the factory piece.
As with any repair work, safety remains non-negotiable. Protective gear—gloves, a mask or respirator, eye protection—and a well-ventilated workspace are essential. Resins and solvents can pose health risks, and proper handling reduces exposure to fumes and skin contact. The finished repair must also respect the rider’s safety expectations. A crack that compromises structural integrity or a patch that introduces soft spots can lead to unsatisfactory performance, particularly under high-speed wind loads or during hard braking. Therefore, the repair should be treated as a restoration that seeks to restore both the aesthetic quality and the functional resilience of the fairing. The goal is not merely to patch a flaw but to reconstitute the fairing’s original strength and appearance so that it continues to perform as part of the motorcycle’s overall system.
In practice, a fiberglass repair will often be accompanied by careful inspection of the surrounding paint and clearcoat. It is common to prepare the adjacent area so that the transition from repaired panel to the intact surface is seamless under the final finish. When the paint dries, a final clear coat can provide added protection against UV exposure and environmental wear. The combination of a durable resin system, reinforced by properly saturated fiberglass fabric, and a careful finishing process yields a repaired panel with both the look and the resilience of the original part. The success of the repair relies on the harmony between materials, environmental conditions, and technique, rather than on raw speed or brute force.
For readers seeking practical guidance on fairing options and fitment considerations, the broader landscape of available fairings includes a range of models and shapes designed to meet varied performance and aesthetic goals. If you’re exploring compatible fairing options and fitment considerations, you can browse the Honda fairings category. This resource can help contextualize the repair within a broader ecosystem of shapes and contours that riders encounter in the field. See the Honda fairings category for a sense of how different curves and mounting points influence the repair approach and to align your patch with the bike’s overall profile.
In parallel with the repair steps, a broader, more reflective view of fiberglass in motorcycle practice emerges. Fiberglass is not merely a material but a language—the way it responds to heat, moisture, and load, the way its layers communicate through resin, and the way its surface accepts paint to achieve a nearly seamless color match. The repair sequence described here is a disciplined conversation with that language. It requires precise materials, deliberate technique, and a quiet respect for the bike’s structural and aesthetic demands. When done well, the repaired fairing becomes more than a cosmetic fix; it is a reinforced skin that preserves the rider’s safety and confidence while restoring the machine’s visual coherence. The narrative of fiberglass repair thus becomes a narrative of restoration—an act that blends science and craft, so the motorcycle can continue to ride with the same grace and precision as when it rolled off the showroom floor.
For scholars, technicians, and hobbyists, the chapter on materials and techniques for fiberglass repair offers a framework that applies across models and contexts. The two-part epoxy resin, the decision to saturate with fiberglass cloth, the careful sanding, the fairing layer, and the finishing steps together provide a repeatable path to durable repairs. It is a path that respects the integrity of the original design, acknowledges the realities of field conditions, and delivers results that speak to both performance and appearance. By bringing these elements into alignment, riders can repair damaged fairings with confidence, knowing that repair quality can rival the factory’s workmanship when approached with a steady hand and a clear plan. For those who want to delve deeper into the practicalities and variations of fiberglass repair beyond the basics, the referenced practical guide on fiberglass repair offers step-by-step procedures, materials, and safety practices tailored to fiberglass fairing repairs across common motorcycle models. The guidance emphasizes technique and context, and it remains an indispensable companion for anyone undertaking a serious repair project, from minor chips to major structural work.
Crafting a Second Skin: The Repair Journey for Fiberglass Motorcycle Fairings
Fiberglass motorcycle fairings are more than mere covers. They shape the bike’s profile, influence aerodynamics, and form a protective shell that shields riders from debris and the elements. When a fairing is damaged, the repair journey becomes a test of material science, craftsmanship, and patience. The path from assessment to a seamless finish is not simply about filling a chip or hiding a crack; it is about restoring structural integrity while preserving the smooth lines that keep a bike performing at its best. This journey unfolds as a careful dialogue between damaged material and reinforcement, between time-tested techniques and the conditions under which the repair takes place. Each step, from the first look to the final polish, matters because the fairing’s stiffness, wind flow, and impact resistance depend on how well the repair is executed. In practice, the repair process can accommodate everything from surface-level blemishes to substantial structural compromise, yet the underlying principles stay consistent: assess, prepare, reinforce, finish, and protect. As with any repair of this kind, the goal is not to return to a perfect replica of the original part but to restore enough strength and alignment so that the fairing behaves as designed under real-world riding conditions.
The repair begins with a precise damage assessment. A chipped paint job or a shallow scratch is not the same as a deep crack or a broken segment. The surface tells a story: a chip may only bruise the outer layer but can leave micro-cracks running beneath, while a crack can extend through the laminate, compromising stiffness and ability to carry load. A broken piece may leave voids in critical attachment points or create gaps that disrupt the fairing’s alignment with adjacent panels. The assessment requires a methodical approach: identify the location, measure the extent, and consider whether the damage affects mounting points or internal stiffeners. It’s essential to determine not only what is visible but what lies beneath. In the best repairs, the assessment informs the choice of repair method, whether a simple cosmetic touch-up or a layered structural patch that reconstitutes the fairing’s strength.
Cleanliness follows assessment. The surface must be free of oils, waxes, dust, and any contaminants that could compromise adhesion. Degreasers are applied with care, and the area is dried completely to remove any moisture that might hinder resin bonding. The importance of this step cannot be overstated. A clean, dry surface is the difference between a repair that holds and one that delaminates when the bike is next exposed to rain, heat, or vibration. After cleaning, the technician examines the edges of the damaged zone. Rough edges invite poor adhesion and weak patches, so a systematic approach to edge preparation begins. If the damage is minor, the preparation may be minimal; for more significant damage, the area is roughed with a light sanding, exposing fresh laminate and creating a key for the repair materials to bite into.
For surface-level damage, a repair kit that includes epoxy resin and hardener often suffices. The resin and hardener must be mixed precisely according to the manufacturer’s instructions. The ratio, temperature, and humidity all influence curing time and the final strength. A well-mixed resin forms a strong, barely perceptible bond, and applied evenly with a spreader, it creates a protective layer over the damaged area. The curing process is a patient one. In most regions, 24 to 48 hours is typical, with longer times in cooler or more humid environments. During this period, the repair area should be undisturbed to avoid introducing air pockets or misalignment. When the resin cures, it forms a solid patch that, while not yet perfectly smooth, provides a foundation for cosmetic finishing. For minor issues, this step may be enough to restore the fairing’s appearance and functional surface.
Extensive damage calls for a more involved strategy. The approach resembles rebuilding a small section of the shell. Start by sanding the damaged area with coarse grit paper—around 80 to 120 grit—to remove jagged edges and to create a rough surface that promotes adhesion. If there are holes, gaps, or missing pieces, a fiberglass patch or a scrap piece of fiberglass cloth soaked in resin is used to reinforce the area. Layering becomes the core principle here. After the initial patch, more resin and cloth are added as needed to rebuild the structure. Each additional layer adds stiffness and helps distribute stresses that would otherwise concentrate at a single point. The goal is not to replicate the exact original thickness but to restore sufficient laminate strength so the fairing can withstand airflow, vibration, and minor impacts.
Sanding is the next crucial stage, a process that transitions a functional repair into a visually cohesive surface. Once the patch has cured, the entire repaired region is sanded with progressively finer grits. Beginning with roughly 180 grit, then moving to 320 or higher, the operator seeks a smooth, uniform surface that blends with the surrounding fairing. This is a delicate phase; excessive material removal can reintroduce thin spots or expose the patch, while insufficient sanding leaves a visible seam. The sanding also helps to flatten any ridges created by the patch, ensuring a seamless transition across the repair zone. Between sanding steps, it’s common to wipe the area with a solvent like acetone to remove dust and debris. Cleanliness at this stage is as important as it was at the outset because any residue can compromise primer and paint adhesion later on.
Priming is the bridge between repair and finish. A primer designed for plastic or fiberglass helps the paint adhere evenly and can reveal remaining imperfections that sanding did not fully address. Primers also contribute to color uniformity, which matters when a repaired area must blend with the surrounding panel. Once the primer is dry, light sanding with finer paper removes any remaining imperfections and prepares the surface for paint. The painter’s technique becomes strategic at this point. Consistency in spray pattern, pressure, and distance from the surface reduces runs and orange-peel effects. The color-matching phase requires careful perception of the fairing’s texture and how it interacts with reflections and light. In a perfect world, the repaired area becomes indistinguishable from the rest of the panel. In practice, even with meticulous work, there may be a subtle tonal difference, something that a skilled painter compensates for with a slightly adjusted finishing layer.
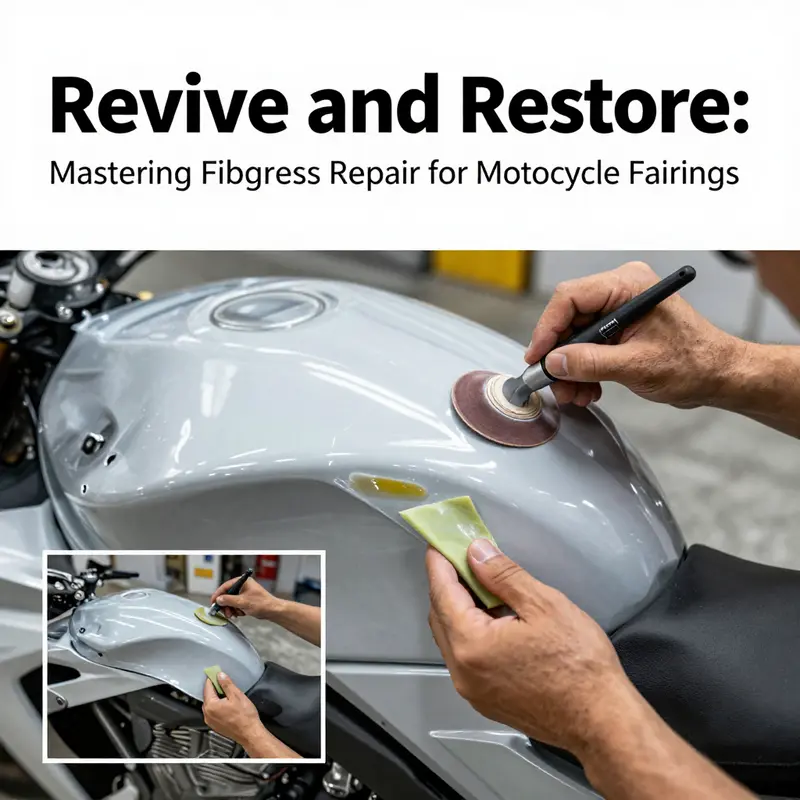
Paint application often employs a spray gun for precise, even coverage. The choice of paint depends on the environment and the intended durability. A typical sequence involves a base coat followed by multiple light coats, each cured before the next is applied. The base coat sets the color, while the clear coat provides gloss and protection against UV exposure, moisture, and micro-scratches. A clear coat finish is particularly important for fairings because these panels endure frequent cleaning and road grime. The final stage—buffing—combines polish with a gentle hand held by a skilled technician. Buffing blends the repaired area with the surrounding surface, reducing the likelihood of a visible seam and restoring the smoothness that affects aerodynamics and ride quality. The polishing compound used should be compatible with the paint system and the underlying laminate, ensuring that the glossy finish remains durable and resistant to dulling over time.
Even the most precise repair requires careful follow-through with inspection. A functional test is not enough; a visual and tactile examination verifies that the repair sits true to the original line. Misalignment can create drag or cause panels to contact each other during forward motion, producing noise or additional wear. The check goes beyond appearance. A thorough evaluation considers how the repaired area holds up under vibration, temperature fluctuations, and the stress of wind pressure during riding. If any movement or flex is detected, further reinforcement may be necessary, with additional layers of fiberglass or adjustments to the clamp points and mounting hardware. The aim is a repair that is not only aesthetically acceptable but structurally reliable enough to last through countless road miles.
Maintenance after repair is a practical companion to the repair itself. It includes regular inspection for hairline cracks that might reappear under stress, reapplication of coatings if the clear layer develops micro-scratches, and timely retouching of any abrasions that threaten the integrity of the finish. The history of a repaired fairing matters, especially if the bike will endure frequent trips or competitive riding. Documentation of the repair process—what was damaged, what materials were used, the curing times, and the final thickness—helps future technicians understand the panel’s behavior and plan for any future maintenance. In addition, protecting the fairing from harsh environmental conditions, such as prolonged exposure to sun or road salt, extends the life of the repair. Simple steps like protective wax or coatings that repel grime can keep the surface in better condition between rides. The practical ethos remains consistent: respect the material, use appropriate reinforcement where needed, and treat the repaired area as a living part of the bike, capable of withstanding the same demands placed on the rest of the shell.
The repair process also carries a larger sense of responsibility. Because fairings are part of a safety system—providing shelter for riders and shaping airflow that affects stability—every repair must be approached with a critical eye for structural integrity. The temptation to cut corners for speed or cosmetic perfection can backfire the moment the bike hits a gust or a rough patch of pavement. This is why the sequence described here emphasizes patience, precision, and ongoing assessment. It’s not about a single triumph of adhesion but about building a robust laminate through patch, cure, and finish that harmonizes with the bike’s overall geometry. When done well, the repaired fairing stands up to the wind, preserves the chassis geometry, and preserves the silhouette that gives a motorcycle its character. The path from chip to champion lamination is one of incremental improvements—each layer contributing to a stronger whole.
For readers seeking a broader sense of fitment and aftermarket options—while keeping the discussion focused on practical repair techniques—explore the dedicated fairing category that concentrates on compatible panels and finishing variants. This resource provides an illustrative sense of how repairs interact with the broader ecosystem of bodywork options, allowing riders to appreciate not only how to fix but also how to align repaired panels with the bike’s overall lines and aerodynamics. fairings-for-cbr600rr.
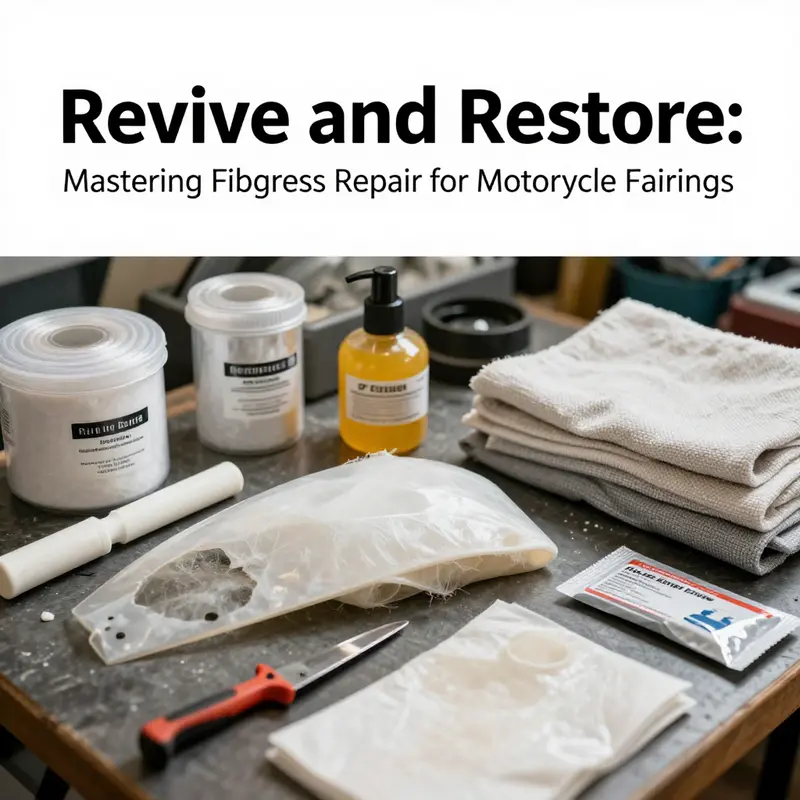
In terms of sourcing materials, a reliable supply of repair components that are designed for structural integrity is essential. The repair kit should include high-quality epoxy resin, hardener, and a selection of fiberglass cloth or mat suitable for the repair’s scale. The cloth thickness and weave determine how the laminate builds stiffness and distributes load. For larger gaps or missing sections, multiple layers of cloth with resin in between provide the needed reinforcement. Careful alignment of the cloth during placement helps maintain the fairing’s natural curvature, ensuring that the finished work remains aerodynamic. Temperature and humidity in the workshop influence curing times and resin viscosity. Maintaining a controlled environment—ideally warm and dry—yields more predictable results and reduces the risk of air entrapment. It’s helpful to have a dedicated space for cure times to avoid disturbances that could lead to misalignment or weak bonds.
A broader perspective on the repair and modification of fiberglass fairings extends to the way materials are manufactured and joined in the first place. Understanding the laminate structure—the stacking sequence and orientation of fibers—can inform decisions in field repairs. While a repair cannot replace a damaged bulk laminate with a factory-made layup, applying the correct patching technique and respecting fiber direction can preserve the fairing’s resilience. In this sense, repair is not merely restoration but an opportunity to reinforce the shell in a disciplined manner. The synergy between the patch, the epoxy matrix, and the surrounding laminate determines how well the repair will stand up to future stresses. The result is a repaired fairing that remains faithful to its original behavior under load and maintains the smooth surface required for both look and performance.
Finally, it’s worth noting that professional guidance remains valuable for more complex cases. When repairs involve critical mounting points or severe damage to the inner structure, consulting with specialists who understand the nuances of composite materials can make a significant difference. Even for experienced DIY enthusiasts, recognizing the boundary between a practical, long-lasting repair and a temporary fix is part of the craft. The discipline of fairing repair blends artistry with engineering: the eye for a seamless finish, and the mind for how fibers bear the loads during riding. The result is a resilient, aesthetically coherent panel that not only looks right but works right when the bike honors the road with every turn.
External resource: For further guidance on fiberglass component repair and repair-material specifications, an extensive online catalog offers detailed compatibility information and technical support for motorcycle bodywork. https://www.alibaba.com/product-detail/CBR600RR-2005-2006-fiberglass-motorcycle1600738479412.html?spm=a2700.galleryofferlist.normaloffer.d_title.1e3f1c17wB3uXj
Choosing Quality Fiberglass Repair Motorcycle Fairing Parts and Kits
Repairing a fiberglass motorcycle fairing is a task that tests both patience and judgment. The repair’s longevity, its aerodynamic performance, and the overall look of the bike after restoration hinge on the quality of the parts and kits chosen. Chips, cracks, and delamination may look like cosmetic issues at first glance, but they can compromise structural integrity and safety if the underlying reinforcement or bonding isn’t up to par. The decision to invest in higher-grade materials is often the difference between a repair that lasts through a few seasons of riding and one that fails under sun, heat, or impact. In this chapter, the focus is not on quick fixes or patchwork, but on cultivating a mindset of quality that informs every choice from the kit you buy to the way you prepare the surface and finish the repair. A well-considered approach starts long before resin meets cloth, with the right expectations about durability, finish, and compatibility with the rest of the bike’s coatings and trims. It’s a practical craft, built on solid materials and precise technique, one that rewards meticulous preparation as much as it does careful layering of fiberglass and resin.
Material quality is the backbone of a reliable repair. When you select fiberglass components, you’re choosing a reinforcing medium that must endure exposure to road debris, weather, and the sun’s ultraviolet rays. The most dependable fiberglass kits are constructed from high-grade fiberglass that resists cracking and ashing under thermal cycling. They are designed to bond with standard body fillers and automotive or motorcycle paints without shrinking, warping, or delaminating during cure and after the finish has cured. A kit that emphasizes resin-to-fiber compatibility and predictable cure characteristics reduces surprises later in the process. In practice, that means looking for materials with documented performance in impact resistance and environmental exposure, and choosing combinations whose resin systems and fiber layups are known to work together for a long-lasting repair. The goal is a repair that remains stiff where needed, yet light enough to preserve the original riding feel and performance of the bike’s fairing.
The completeness of a repair kit matters almost as much as the raw materials themselves. A complete kit should provide all of the essentials—resin, hardener, fiberglass cloth or mat, and enough application tools to execute a proper reinforcement—without forcing you to raid the tool box for missing pieces. The best kits anticipate the typical repair scenarios riders encounter, from modest chips to mid-scale cracks that require controlled layering and careful fill. In addition to the primary resin and hardener, look for pre-wetted or easily saturated fiberglass cloth options, as well as matts that optimize layer strength without adding unnecessary weight. The inclusion of compatible sanding products, release film or wax, masking materials, and surface fillers helps ensure that the job can progress smoothly from surface preparation through final finishing. A professional-grade repair isn’t completed by luck; it unfolds through a complete package that supports a coherent workflow from start to finish.
Compatibility is the bridge between materials and the bike they are meant to restore. Every model of motorcycle has its own contours, mounting points, and attachment interfaces. A repair kit that is designed for a specific model or a tight range of models reduces the risk of misalignment, poor adhesion, or gaps that compromise both aesthetics and aerodynamics. Compatibility extends beyond mere fitment. It includes cure times that align with your riding schedule, or at least predictable times that allow you to plan a repair around days when the bike can safely remain undisturbed. It also covers the bond between repair composite and existing paint or gel coat. If the fairing has been previously repainted, you’ll want compatible primers, adhesion promoters, and topcoats that won’t react with the resin or cause lifting and finish mismatch over time. In short, the right kit respects the geometry of the bike and the sequence of steps necessary to achieve a seamless transition from damaged surface to a robust, smooth, and uniform finish.
Endurance is the test that separates a good repair from a great one. The road environment is unforgiving: UV light, temperature swings, and humidity can all affect cured resins and laminated cloths. Repaired areas should resist UV-induced chalking and yellowing, maintain color integrity when repainted, and hold up under temperature cycling without cracking along the laminate seams. Durable repairs also tolerate minor flexing as the fairing moves with airflow and vibration, so the cure and cure time of the resin system must account for some elasticity without compromising stiffness in the repaired zone. A quality kit often features resin systems formulated for motorcycle applications, with predictable pot life and cure exotherm that won’t overshoot into overheating a thin-walled fairing section. When evaluating endurance, consider how the kit’s materials perform under automotive-grade finishing processes. You want a repair that accepts primer and paint cleanly, forms an even surface for color work, and resists micro-cracking that can reveal itself as the sun-and-surface cycles accumulate.
A practical repair routine reinforces the theoretical advantages of materials with real-world application. Surface preparation is where quality begins to show or fail. You’ll typically start by cleaning the damaged area with a solvent that removes wax, oil, and old silicone, then lightly abrade the surface to create a mechanical key for bonding. If the damaged area has flakes or loose resin, carefully remove it to expose a sound base. A progressive approach—scuffing with progressively finer grits, wiping down with a compatible cleaner, and ensuring the area is completely dry—sets the stage for a resin and cloth rebuild. When applying the resin, work in a well-ventilated space and mix only the amount you can use within the resin’s working time. Saturate the fiberglass fabric evenly to avoid dry spots or overly saturated pockets that can trap air and create voids. Build the repair with multiple thin layers rather than one thick pour, allowing each layer to cure per the product’s instructions before adding the next. This technique reduces heat buildup, minimizes shrinkage, and yields a smoother surface for sanding. As with any finishing process, patience is essential. Rushing through cure cycles can force you to sand away more material than necessary, erasing the very strength you aimed to restore.
Once the laminate is cured, shaping and smoothing become the next critical steps. Start with a coarse abrasive to flatten high spots and remove imperfect edges, then gradually move to finer grits to refine the surface. Between steps, wipe clean to inspect the surface and identify irregularities. Pinholes, air pockets, or resin bleeds should be addressed with appropriate fillers that are compatible with the resin system. The goal is a uniform canvas that accepts primer evenly and reveals a true copy of the surrounding fairing’s contour once painted. Primers that promote adhesion and fill micro-defects are a boon; they reduce the risk of finish defects that might otherwise show through a final color coat. When you select a finishing approach, consider the final appearance you want for the fairing as well as its resistance to road conditions. A fairing that is too heavy or too thick can alter aerodynamics, while one that is too thin or under-reinforced may crack at the first impact with a stone or road debris.
Color matching and topcoats complete the restoration, turning a solid repair into a virtually seamless piece of the overall bike. If you’re aiming for a factory-like finish, you’ll want a paint system that adheres well to the primed surface and responds predictably to clear coats. Compatibility with the repair’s substrate is essential; some paints interact poorly with certain resin systems and can cause a finish defect such as solvent bloom or whitening along the repaired seam. A careful approach uses a base coat that matches the surrounding panels, followed by a midcoat or color coat, and a clear topcoat that provides UV protection and abrasion resistance. The result should look and feel like a single, continuous surface rather than a patchwork of panels. Beyond the aesthetics, the finish should stand up to weather and sunlight without fading or crazing. The goal is a repair that reads as a single, integrated part of the bike rather than a repair job that draws attention to itself.
Sourcing quality repair parts and kits is not just about purchasing the most expensive components. It’s about finding a reliable balance between material quality, kit completeness, model compatibility, and long-term durability. The guidance from seasoned riders and technicians emphasizes choosing vendors who can provide clear technical details, compatibility notes, and customer feedback. A thoughtful buyer will ask questions about cure times, working time, and the expected shelf life of resin and hardeners, as well as the feasibility of returning items that don’t fit their bike’s contours. Reading user reviews and seeking technical support when needed can prevent missteps that lead to added costs or frustrating failure. While price can be a factor, it should not be the sole determinant. A slightly higher upfront investment in a well-designed kit often saves time, reduces waste, and yields a superior visual and structural result in the long run. The repair process, when approached with a focus on quality, becomes a series of deliberate choices that protect both the rider’s safety and the vehicle’s appearance.
For riders who want a concrete path to high-quality results, the principle remains the same: prioritize materials with proven performance, use a complete kit that supports a disciplined workflow, and practice meticulous surface preparation and finishing. Model-specific compatibility is valuable because it minimizes guesswork about geometry and attachment points, which helps ensure a seamless final appearance. And while the repair may sit in the workshop for a while, the finished surface should ride as if it were part of the original fairing, not a patchwork remnant. In the end, this approach yields a restored fairing that preserves the bike’s aesthetics, contributes to its aerodynamics, and maintains the confidence of the rider who depends on both form and function.
External resource: for a representative example of a fiberglass repair materials listing from a prominent international supplier, see the external supplier listing here: external supplier listing.
Final thoughts
Mastering fiberglass repair for motorcycle fairings is not just about fixing damage; it’s about restoring the integrity and aesthetics of the vehicle while ensuring safety and performance. Business owners equipped with the right knowledge and skills can enhance their service offerings, boosting customer satisfaction and loyalty. By focusing on the assessment, utilizing quality materials, honing repair techniques, and selecting the best parts, businesses can set themselves apart in a competitive market. Embracing these practices will not only lead to successful repairs but also contribute to the overall growth and reputation of a motorcycle business.