For business owners in the motorcycle industry, offering DIY painting services for motorcycle fairings presents a lucrative opportunity. Not only can customers personalize their rides, but they can also engage in hands-on projects that enhance their connection to their bikes. Understanding each step involved in painting motorcycle fairings is essential for providing effective guidance to clients and ensuring high-quality results. This article explores everything from preparation and necessary materials to avoiding common pitfalls and perfecting the finish. Each chapter contributes vital insights, ensuring you are equipped to support your clients in achieving a professional-looking finish.
From Bare Shell to Mirror Finish: Essential Prep for DIY Motorcycle Fairing Painting
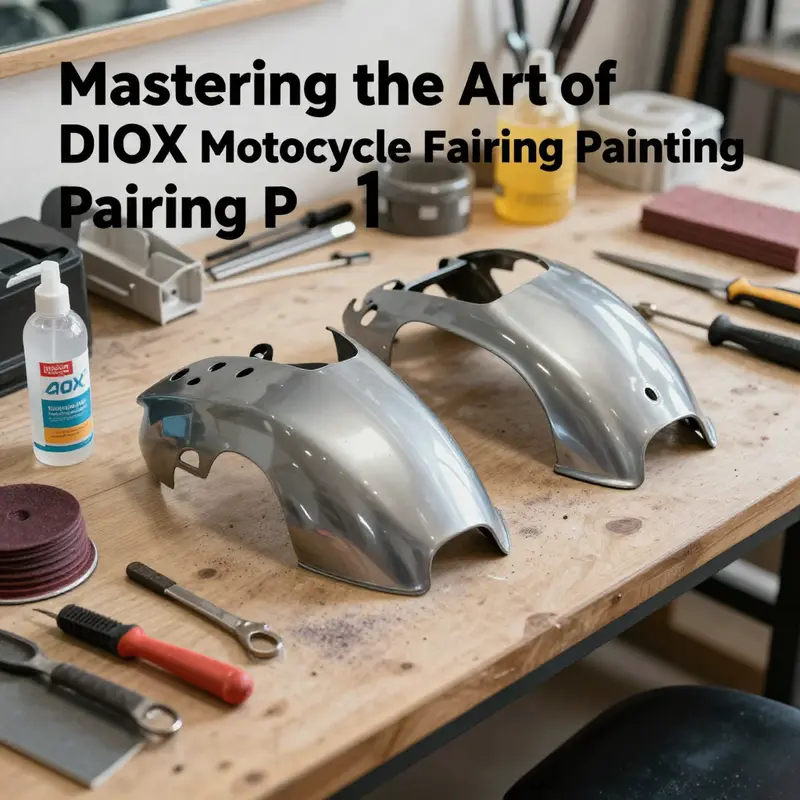
Preparing motorcycle fairings for DIY painting starts long before the spray gun fires. The prep work sets the stage for durability and a smooth, professional look. The path from a bare plastic shell to a glassy finish is practical, not glamorous, but essential. Work in a controlled space that stays clean and stable. A stable room reduces dust and temperature swings that mist up wet coatings. The first practical move is to remove the fairings from the bike, which gives full access and prevents overspray on other parts. Always consult the service manual, since fasteners and clips vary by model.
With the fairings off, cleaning dominates the early hours. Use a quality degreaser or dedicated plastic cleaner to strip oil, wax, and road grime. The surface should feel clean and dry, not slick. Rinse with water and allow thorough drying; trapped moisture can cause bubbles later. If residues linger, repeat the cleaning or use a soft brush to reach recessed areas. For plastics, avoid harsh solvents that could soften the surface. The goal is a substrate as pristine as possible, because every speck of dust or smear becomes magnified under paint.
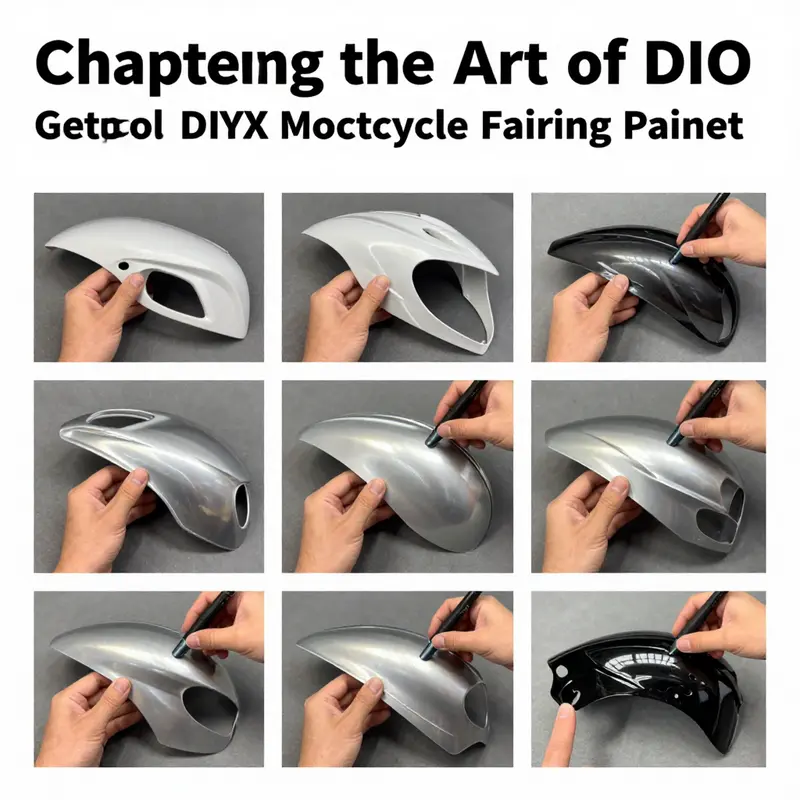
Next comes sanding. Lightly abrade the entire shell with fine-grit paper, typically 600–800. The aim is not to remove material but to create a micro-roughness for the primer to grip. Work around edges and contours, avoiding gouges that require fill. If old paint exists, be extra careful near corners where lifting often starts. After sanding, wipe with a tack cloth to pull away dust. You want a surface that feels textured yet clean, like a fresh canvas ready for primer.
With dust removed, apply a high-quality primer formulated for plastics or composites. Primer is the bridge between shell and color, improving adhesion and presenting a uniform base. Apply thin, even coats with a spray gun or aerosol can. Let each coat dry fully before the next; rushing here invites runs and texture. A light dusting can fill minor flaws, but set aside time for a proper dry. Once dry, many painters lightly sand with 1000–1200 grit to smooth imperfections. This step defines the surface you’ll see through every layer of color and clear.
Before painting, plan edge masking and protection. Edges meet color in specific ways, so masking reduces ghost lines and ensures crisp boundaries. If surfaces have textured areas or channels, you may fill shallow flaws with a light skim and re-prime. The goal is a uniform surface with no pinholes or swirling texture. At this stage, recheck for contaminants; a clean microfiber wipe catches fingerprints or oils you missed. That extra check prevents backtracking after the paint starts to flow and cures.
Ventilation and environment are indispensable. Work in a space with good airflow and as little dust as possible. A dedicated paint area is ideal, but a clean garage corner with a fan drawing air outward can work if it’s stable. Temperature and humidity should stay steady; heat makes primer dry too quickly, cold or damp air slows cure. Wear a respirator and safety goggles. Keep pets away; even brief contact leaves oils on the surface. A calm space lets coatings lay down evenly and cure cleanly, producing a finish that looks true to color and free of nibs.
Masking around areas that will not receive color—such as mounting holes and gasket surfaces—demands patience. Apply tape along the intended boundary and press it down with a plastic card to seal the edge. When you remove the tape, the line should be crisp. In some cases, protective films on areas you will reassemble soon help prevent paint transfer to rubber or soft plastics. A careful masking routine reduces bleed and saves rework later. The pre-paint phase is not showy, but it determines whether you’ll get showroom gloss or a muted, garage finish.
Even with care, imperfections can appear after priming. A scratch, pinhole, or dust nib becomes obvious under color. The fix is a light touch of sanding with 1500–2000 grit or a touch of compatible filler, followed by another thin primer layer to cure. Do not over-sand; you can dull the surface or leave swirl marks. The aim is to feel a uniformly smooth surface to the touch. When satisfied, wipe again with a clean tack cloth to remove last-minute dust before applying color.
Understanding the fairing’s aerodynamic and protective role helps tailor the prep. A full fairing offers the most coverage and a consistent surface but can be trickier to mask and align during assembly. A smaller panel requires careful planning of gaps and edge continuity. The core idea remains the same: a clean substrate ready to hold color evenly under light. Define your plan early—how many coats, drying times, and how you will protect adjacent parts—and you save time later. The prep phase is where you gain control over the finish you want and is the foundation of a credible DIY paint job.
After prep, painting becomes a measured process. Start with test sprays on a small, inconspicuous panel. Evaluate color, coverage, and how the paint behaves on the primed surface. Thin coats are safer than one heavy layer, reducing runs and sags. Let each coat dry according to the product’s instructions before applying the next. In practice, three to five coats often yield depth and evenness, followed by a clear topcoat to seal and gloss. Allow the finish to cure in a dust-free zone before polishing to a mirror-like glow. The polish comes last, but it rests on the strength of the prep that preceded it.
Readers seeking deeper guidance on air movement, humidity, and tool setup will find a thorough external resource worth consulting. It complements the basics described here and helps translate prep into predictable results: How To Paint Motorcycle Fairings Like A Pro.
With the right groundwork, the paint becomes the result of disciplined prep. Every layer builds on the last, and the final look depends on a clean substrate as much as on color and clear. When you roll the first thin pass over a prepared fairing, you will feel the difference—a finish that stays intact, resists peeling, and avoids common issues from rushed jobs. The journey from preparation to showroom-ready finish begins here, in your space, with your plan, and hands that respect the material you are shaping.
Chapter 2 — Assembling the Right Kit: Tools, Materials, and the Path to a Pro-Level DIY Motorcycle Fairing Finish
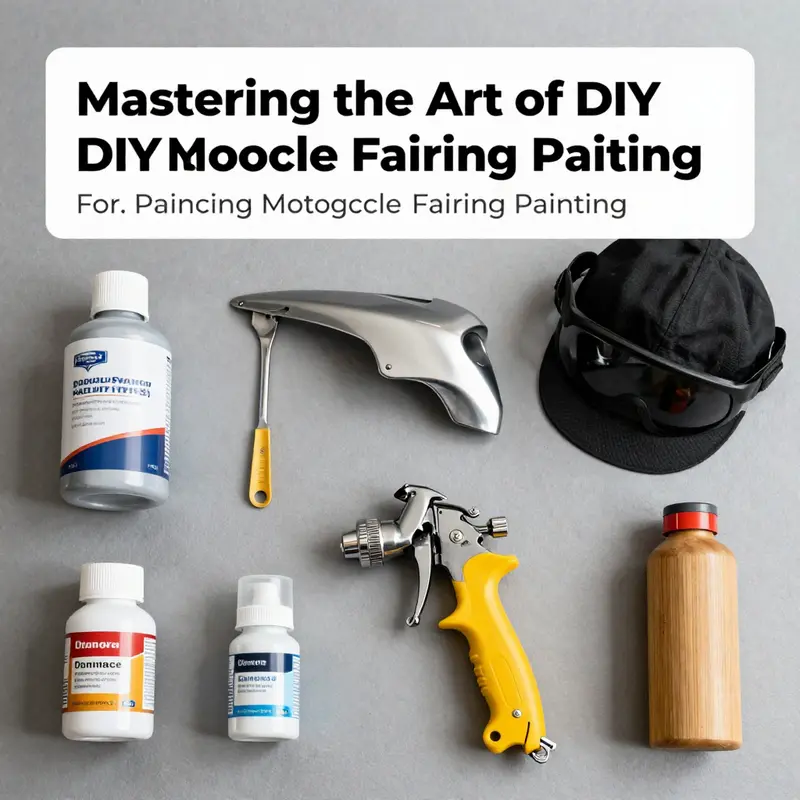
Choosing to paint motorcycle fairings at home starts with assembling a kit that matches the task. The fairings themselves are the canvas, typically made from plastics or fiberglass, which behave differently from metal and require careful preparation, the right primers, and a controlled painting environment. The core idea is simple: better tools and higher quality materials lead to fewer problems later—peeling edges, runs, or dull color—and a finish that stands up to the elements. This chapter threads those ideas into a single, practical flow, emphasizing the sequence, the why behind each choice, and how the pieces fit together so you can approach the project with confidence rather than guesswork. The journey begins with access. Removing the fairings from the motorcycle is more than a convenience; it reduces the risk of smudges on delicate areas and allows you to work with even pressure across large panels. It also reveals the true contours and masking opportunities that will define the final look. With the fairings detached, you gain not only space to maneuver but also an opportunity to inspect the surface in a way you simply cannot when the bike is assembled. The surface you see—whether it’s glossy resin or slightly textured plastic—will determine your approach to sanding, primers, and the kind of paint system you choose. You will find that the surface tells a story of existing finishes, repairs, and the natural wear that has accumulated over countless miles. This is where the meticulous selection of tools begins to pay dividends. A comprehensive toolkit isn’t about having the most gadgets; it’s about having the right kit that lets you execute each step cleanly and repeatably. Start with the basics: a reliable degreaser to strip oils left by chain lube, fingerprints, and hand oils, followed by a set of sandpapers in a progression that respects the material’s stiffness and its tolerance for abrading. In practice, many builders start with coarser grades to erase old paint or deep oxidation and then move to finer grits for a smooth, paint-ready surface. For this project, a practical trio of grits—400, 600, and 800—serves as the backbone. The 400 grit handles stubborn imperfections and older paint layers; the 600 smooths the transitions; and the 800 provides a key that helps primers bite without leaving scratch marks visible under color. If you prefer faster work, an orbital sander can dramatically speed up the process on large flat panels, delivering even results when you keep the pad flat and avoid creating corner burnish. The orbital sander’s role is about consistency; it reduces the risk of waviness and ensures that every inch of surface has the same level of micro-scratch that helps the primer adhere uniformly. Beyond the abrasive tools, you need primers engineered for plastics or fiberglass. The primer is more than a color base; it’s the glue that binds the surface to the paint and guards against future peeling or bubbling. A high-quality plastic primer creates a stable, uniform surface, fills minor imperfections, and establishes the foundation for color depth and clarity. It is worth investing in primers specified for non-metallic substrates because generic primers can cause adhesion issues or shrinkage as the coat cures. Once primed and cured, the color layer can begin. Use a dedicated automotive or motorcycle-grade system, choosing between a spray gun and aerosol cans based on your space and control needs. Thin, even coats are non-negotiable. A single thick coat invites runs and sags and can trap solvents, leading to longer cure times or an orange-peel texture. Plan on applying multiple light coats, allowing each to dry fully before the next application. The goal is uniform pigment density and smooth color across the entire surface. A high-volume, low-pressure HVLP spray gun offers superior control for larger panels because it delivers a fine mist with less force, reducing the chance of over-spraying edges and corners. Aerosol cans, when paired with a precise nozzle, are an excellent alternative for smaller sections or for touch-ups, especially when the workspace is limited. The paint’s chemistry should align with the primer and the plastic or fiberglass substrate; compatibility matters just as much as color choice. After you’re satisfied with color coverage, a clear coat is applied to seal the pigment and protect against UV degradation, minor abrasions, and environmental exposure. The clear coat should also be laid down in thin layers to avoid solvent pooling or flaking later. As with color, multiple light coats beat a heavy single application for gloss depth and scratch resistance. Once the clear coat reaches its cure, the finishing step turns your effort into something that looks showroom-ready: polishing. A fine compound with a soft pad can refine the surface, removing the faint micro-imperfections that dull a perfect base. The result is a mirror-like depth that echoes the way sunlight plays across a freshly painted panel. It’s not magic; it’s the disciplined execution of every stage, from degreasing through polishing. Safety, too, must be woven into this process. Work in a well-ventilated space that minimizes airborne particulates. A dedicated paint booth is ideal, but a large, enclosed area with outward airflow and a robust filtration strategy can work as well. Respiratory protection is essential; a respirator appropriate for solvent fumes, paired with gloves and protective eyewear, makes the job safer and more comfortable over longer sessions. Dust and fumes are not the only hazards; you should also protect yourself against flash fires when dealing with solvents and coatings. A clean, dust-free environment reduces the risk of contamination that would otherwise ruin your finish. The tools you choose should align with the scale of your project. For large panels, a sturdy sanding block and a flexible foam block help maintain flatness and reduce the risk of creating gouges. For finer work and tricky curves, a combination of sanding sponges and wrapped foam blocks lets you shape every contour. Beyond abrasion, masking plays a critical part in achieving clean lines and sharp edges. Masking tape and film, applied with patience, allow you to protect areas you don’t intend to paint while preserving edges that should remain flush and true. The type of fairing also informs your approach. Full fairings provide broad surfaces with generous curves, which can reveal any misalignment or tape bleed if you rush; semi-fairings, covering only the front portion, require precise masking around the headlight and air intake to maintain a cohesive look when reassembled. Understanding the fairing’s structure—and how it mounts to the bike—helps you plan masking, coverage, and the order in which you reassemble components after painting. If you are pursuing a model-specific project, such as a Kawasaki Ninja, you’ll find model-specific guidance helpful. See the Kawasaki Ninja fairings collection for relevant parts and fitment considerations as you plan your color and finish choices. Kawasaki Ninja fairings provides a sense of the scale and geometry you’ll encounter, and it contextualizes how the paint job should align with the mounting points and panel lines when you reattach everything. This kind of model-aware planning matters because alignment and masking accuracy translate into a professional appearance once the bike is fully reassembled. The importance of precision extends beyond aesthetics. Fasteners should be tightened to the manufacturer’s specifications, especially after a fairing repaint. A precision torque wrench becomes a small but powerful ally in reassembly, ensuring that screws and bolts do not over-stress the plastic or distort panel gaps. This is not a luxury; it’s a safeguard against mechanical issues that could arise from overtightening, which can crack plastic or misalign a panel. In practice, you’ll plan your work around a logical sequence: degrease, sand through the grits, wipe with a tack cloth to remove dust, apply primer, build color in thin passes, add the clear coat, cure, and then polish. Each step feeds into the next, and skipping steps or hurrying through them is where most DIY paint jobs stumble. The details matter: a slightly warmer day can speed cure but may also trap moisture; a cooler morning session may extend working time but help you avoid sagging. Your workshop conditions should be stable enough to keep the finish consistent. If your location is prone to dust or fluctuating humidity, you may want to invest in a temporary enclosure with filtration and a modest airflow system to keep particulates away during the critical curing windows. The payoff for these attentions to the toolkit and the process is a fairing finish that stands up to washing, rain, and the occasional road debris while maintaining color depth and gloss. It’s the difference between a finish that looks good in a photo and a finish that holds up to real-world riding and the occasional track-day session. The approach described here aligns with trusted practical guidance that emphasizes preparation, controlled application, and patient curing. For readers seeking a deeper, step-by-step breakdown of the painting process, a detailed practical guide on painting motorcycle fairings offers expanded, model-agnostic insights, including tips on masking, spray setups, and environment control. This external reference can provide a complementary perspective as you refine your technique and tailor the process to your own bike and color choices. If you’re curious about alternatives and refinements, you may also explore model-specific communities and galleries that showcase how different riders approach color-matching, decals, and line work while keeping structural integrity intact. Ultimately, your success will reflect your discipline with the tools, the quality of your materials, and your willingness to work methodically through each stage. The kit you assemble today becomes the foundation for the finish you ride with tomorrow. For a deeper, step-by-step reference that complements this discussion, see the detailed guide on how to paint motorcycle fairings. External resource: https://www.bikeandride.com/how-to-paint-motorcycle-fairings-a-practical-guide/
From Prep to Gloss: Mastering a DIY Finish on Motorcycle Fairings
Painting motorcycle fairings at home is more than a cosmetic project; it’s a test of patience, technique, and clean execution. A well-executed finish can transform the bike’s presence as surely as any high-end upgrade. The goal is a durable, smooth, and deeply glossy surface, not a color slapped onto a plastic shell. The process hinges on understanding the material, controlling the environment, and applying paint in thin, deliberate layers that build a flawless result over time. When approached with care, a DIY paint job becomes a learning journey that yields professional-like results without a pro-grade booth.
Begin with the physical work of access. Remove the fairings so every surface is accessible and to prevent overspray on other parts of the motorcycle. This is not just a convenience; it’s a prerequisite for even coverage. Set aside the removed pieces in a clean, dust-free area where you can inspect each surface for damage or imperfections before you begin. The next moves hinge on prep—cleanliness, texture, and uniformity—because those elements determine adhesion and the final appearance.
Cleanliness is where many good intentions falter. Use a dedicated plastic cleaner or a high-purity isopropyl alcohol to strip away oils, wax, and fingerprints. Any residue can jeopardize adhesion and leave a dull spot in the finish. Wipe with a lint-free cloth and let the surface dry completely in a dust-free environment. A clean surface is a quiet foundation for the rest of the work; it reduces the chance of micro-contaminants that will later show up as specks or fisheyes in the paint.
The next step is how you prepare the surface to receive color. Light sanding with fine-grit paper—think 800 to 1500 grit—removes the factory gloss, creating a faint, uniform tooth that helps the primer and paint grip. If you own a dual-action sander, it can make this step more even, but hand-sanding with steady, consistent strokes also works well. The key is to sand in a uniform direction to minimize cross-hatching, then sweep away all dust with a tack cloth. Dust left on the surface becomes a chronic enemy, producing tiny craters that disrupt the gloss in the cured film.
With the surface keyed, you apply a primer designed for plastics or thermoplastics. Primer is more than color; it is a bonding layer that improves adhesion and helps fill minor imperfections. Apply in light, even coats, holding the spray or can at a steady distance. Allow each coat to flash off just enough to dry to the touch before applying the next. The goal is a smooth, uniform undercolor that reveals no pinholes or reveals through the primer—the appearance should be a flat, consistent tone that will be the canvas for color.
Primer build matters. If the surface has deeper scratches or tiny gouges, a light sanding after the primer has cured may be warranted, followed by another thin primer coat to preserve an even surface texture. Avoid piling on thicker coats; the moment you see a high spot, feather it back with light passes so you won’t trap air beneath the paint. Once the primer is fully cured, which can take a day or more depending on humidity, you’re ready to move to color. The choice of color paint should be a high-build, UV-resistant automotive formula designed for exterior use. Thinner coats are the friend here, because a build of multiple thin layers reduces the risk of runs and orange-peel texture compared with a single thick coat.
Paint application should begin as soon as the primer is fully cured—typically after a full day in a well-ventilated space. Maintain an even distance, about a fist to a foot from the surface, depending on your spray system. Move with long, steady passes, and never linger in one spot long enough to puddle. Allow each coat to flash off, then apply the next. The color layers will accumulate depth as successive coats fill in the micro-scratches and even out any minor color variation from the primer. If you’re using aerosol cans, apply even, sweeping motions and rotate the piece to keep a consistent angle to the spray. If you’re using a spray gun, thin the paint appropriately and maintain a light hand—over-thinning can dull the color while over-application invites runs.
After the color has built up to the desired depth and is fully dry, a clear coat is applied to protect the finish and enhance gloss. Like the color, the clear coat should be applied in thin, even layers, allowing each coat to cure before applying the next. A well-executed clear layer protects the color from UV damage and minor abrasions that can occur during handling or road use. Plan for a curing window of at least 24 to 48 hours before reassembly and post-cure handling. During this phase, it’s wise to keep the parts in a dust-free environment and avoid high humidity, which can interfere with the final gloss and cure rate.
Once the clear coat has cured, the finish is not yet set in stone. A careful, staged polish is often the difference between a showroom feel and a simply clean surface. Start with a fine polishing compound and a soft cloth or a low-speed polishing pad. Work in small circular motions, applying minimal pressure. The aim is to enhance gloss and remove any micro-marring without erasing the depth of color or altering the shape of the surface. If you detect any roughness, a light pass with a higher-grit polish after your initial cut can restore a mirror-like finish. Avoid harsh abrasives in this final stage, which can dull the shine and leave visible swirls.
Understanding the material composition of fairings helps manage expectations and reduces the risk of future problems. Many modern fairings are made from ABS plastics or glass-reinforced resins. These materials offer strength and lightness but tend to be brittle compared with metal. That brittleness means a high likelihood of cracking if the surface is damaged and not properly supported, and it also means that scratches and chips can expose bare plastic if the finish is compromised. Proper preparation, from cleaning to priming to controlled layering of color and clear coats, is critical to prevent cracking or peeling down the line. A solid base keeps the top layers intact and makes future touch-ups more feasible should they be needed.
The practical realities of a DIY spray environment cannot be overstated. Work in a well-ventilated space, ideally a controlled area with minimal dust. If you can, use a dedicated booth or a large enclosed space with a fan directing air outward to keep particulates from landing on wet coatings. Mask off everything that shouldn’t be painted with careful tape and masking paper; uneven masking is a frequent cause of post-paint headaches. And while you plan, keep the entire process patient and methodical. Rushing through any step invites the most common finish flaws—orange peel, fisheyes, runs, and poor adhesion.
If you’re replacing panels or seeking a specific shape or size to fit a sport-style framework, sources of compatible fairings can be useful for planning your color scheme and layout. For readers exploring options, you can explore the Kawasaki fairings category to understand the kinds of panels that might be available for different builds. Kawasaki fairings offers a sense of the variations available and how those shapes interact with paint prep and masking on real-world projects. The right underlying panel can influence masking strategy and how you approach edge alignment, especially around complex curves and joints.
Beyond the mechanical steps, the mindset matters. Treat the work as a careful composition rather than a hurried procedure. Patience with drying times pays off in a film with real depth and clarity. A neat, consistent application—layer by layer—yields results that feel almost factory-level, even when done in a garage. The goal is not mere color but a convincing, durable finish that holds up to sunlight, weather, and the occasional brush with road grime.
As you progress, remember that the chain of preparation determines everything that follows. When gaps appear, or if a corner seems dull, a light sand and a fresh coat can rescue the surface without requiring a total redo. When the final result shines with a uniform, glassy sheen, you’ll know the effort was worth it. The transformation from bare plastic to a vibrant, enduring finish is a measurable demonstration of how careful prep and controlled application shape outcomes as much as the materials themselves.
For readers who want to deepen the technical side of this craft, a comprehensive external reference provides a deeper dive into materials chemistry and advanced finishing techniques. See the following resource for an authoritative, up-to-date discussion of fairing materials and painting best practices: https://www.motorcycle-magazine.com/2026/how-to-paint-motorcycle-fairings-like-a-pro
From Prep to Gloss: Common Mistakes to Avoid in DIY Motorcycle Fairing Painting
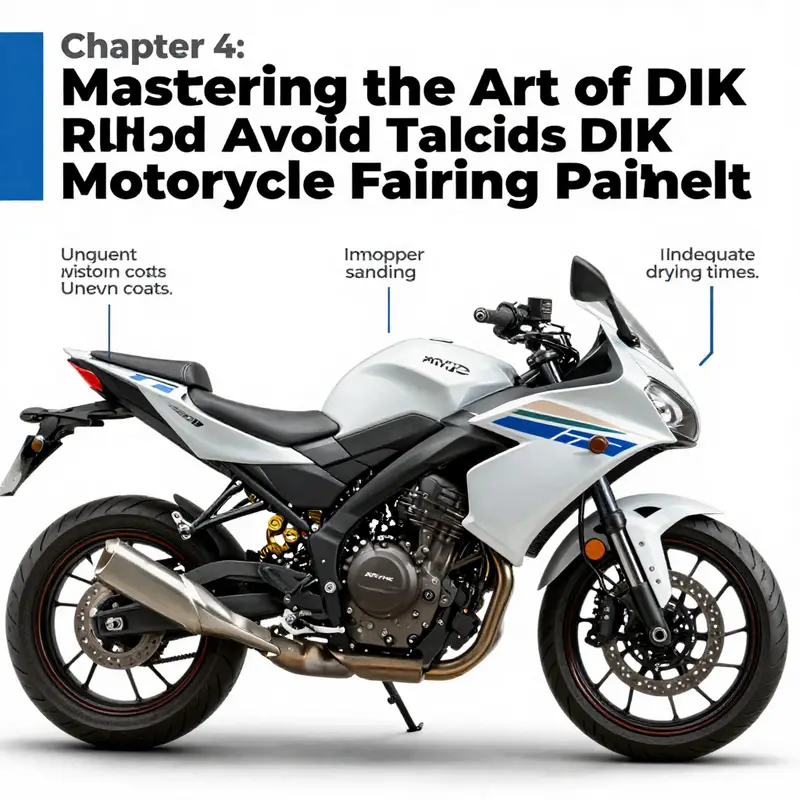
Painted motorcycle fairings can transform a bike’s look and protect the plastic shell from the elements, but the path from bare surface to glossy finish is narrow and easy to stumble on. Home painters often rush, skip essential steps, or misjudge the behavior of plastics and paints, inviting trouble that shows up as runs, peel, or dull color. The goal is not just a pretty color but a durable, flexible finish that stands up to the flex and heat of riding. To reach that goal, it helps to understand the pitfalls that commonly derail DIY projects and to adopt a disciplined approach that blends preparation, material choice, technique, and post-paint care into one steady process. This chapter walks through those pitfalls in a way that mirrors a real paint day—one careful step after another—so the final result looks professional and wears well through seasons of use and exposure.
The most frequent misstep is inadequate surface preparation. A fairing is made of plastic or composite and acts like a living surface that can shed paint if the substrate carries oil, wax, or dust. Skipping the thorough cleaning with a quality degreaser and not giving the surface a true, even scuff with fine grit sandpaper sets the stage for adhesion problems. When you fail to create a proper key for the paint to grab onto, you invite micro-peels that begin at the edges and creep inward with temperature changes. You’ll notice tiny flakes that look like fish-scale patterns rather than a uniform color. The remedy is as simple as it is exacting: scrub with a dedicated degreaser, wash away residues, then lightly scuff in a uniform direction with 800 to 1200 grit. A tack cloth is essential at this stage to capture every speck of dust. This may feel tedious, but it is the difference between a nest of imperfections and a smooth, even base that holds color uniformly over time. When you think you’ve finished, run a final pass with a clean tack cloth and inspect under bright light from multiple angles. If you see any smudges or residue, repeat as needed. The surface must be spotless before primer.
A second common mistake concerns the paint system itself. Many DIY painters default to regular automotive finishes or non-flexible coatings that are not designed for the dynamics of plastic fairings. Plastic and composite bodies flex as you ride, and the paint system must resist that motion without cracking or peeling. The winning choice is a high-performance two-part urethane or a system explicitly formulated for plastics and composites. These paints stay flexible, bond well to a properly prepared primer, and tolerate the normal flexing of the panels. Skipping this step is a shortcut that can lead to disappointingly fast wear, especially on sport-oriented fairings that experience more vibration and harsh excursions. When selecting materials, pay attention to the cure chemistry, pot life, and the recommended primers. The right combination becomes a forgiving but durable finish, whereas the wrong mix can end up dull, brittle, or prone to rubbing off in heat or cold.
Environmental control and spray technique form the third big cluster of mistakes. A garage with drafts, dust, or direct sun can ruin a finish long before you apply your clear. The ideal is a clean, temperature-stable space—think a dedicated paint booth or a well-sealed area with controlled airflow that directs particulates away from the work. If that isn’t possible, you can still create a controlled micro-environment by masking surrounding areas, using dust barriers, and employing a gentle, inward airflow that minimizes dust drift. The spray technique matters almost as much as the materials. Holding the gun too close can flood the surface; moving too slowly can cause heavy coats and sags. Overlapping passes incorrectly creates visible bands. The remedy is a disciplined approach: maintain a steady distance recommended by the manufacturer (often around a few inches, depending on the gun and nozzle), keep a smooth and steady motion, and apply multiple thin coats rather than one thick pass. The color should flash off between coats, which reduces the risk of solvent pooling and sags. A well-practiced hand, patience, and a proper environment do not add cost so much as preserve time and effort spent fixing errors later in the process. If you need to reference color choices or apply guidance more broadly to different models or fairing shapes, you can explore product categories that tailor to specific styles and lines online. For a broader sense of how this approach translates across different fairing families, you can inspect the Kawasaki fairings catalog, which showcases how variety in shape and fit intersects with finish expectations: Kawasaki fairings.
Primer is not a luxury step; it is a necessity for durable adhesion and even color. Skipping primer is a frequent, temptingly quick shortcut that becomes obvious later when you notice how soft edges and dust catching areas reveal themselves under color. Primers designed for plastics or composites create the key for the paint and build a barrier against plasticizers that could migrate into the film of paint. After priming, a light sand with a very fine grit helps to knock down any texture, followed by another tack cloth wipe to remove dust. Without this layer, the color can appear uneven, with pinholes or micro-scratches that only pop out after a clear coat has cured. When primer is properly applied and sanded, you’ll have a smoother surface that channels the clear coat evenly and gives the color depth that looks professional rather than flat. The sequence—clean, degrease, sand, tack, prime, and dry—must be followed with discipline, or the finish will betray shortcuts every time you inspect the bike under bright light.
Coats, not a single heavy application, define the journey from color to gloss. The mistake many DIY painters make is believing the goal is to cover the surface in one pass. Thick coats are a magnet for runs, sags, and poor curing. The solution is to apply several thin coats, allowing each to flash off and dry before the next is laid down. This approach also reduces the risk of blistering as solvents evaporate. If you’re unsure about your color, mix small samples and test them on a spare panel first. The practice reveals adhesion behavior, color depth, and any potential edge issues around masking lines. When removing masking tape, do so while the coat is just after the last coat has achieved a slight tack. This technique minimizes pulling and edge tearing and helps preserve crisp, clean lines along the masking boundaries.
Time is another critical factor. The cure schedule is not mere suggestion but a structural element of the finish’s durability. Rushing the clear or walking away too soon after base color can trap solvents, lead to micro-blisters, or create a waxy feel on the surface. Follow the manufacturer’s suggested cure times for base color and clear—times that consider temperature, humidity, and the specific products used. If you must handle the fairing, do so only after the base coat has fully flashed and the clear has cured enough to resist fingerprinting. When you do step back, inspect the work with a critical eye, noting any drips, dust specks, or uneven edges that demand a light touch-up in subsequent sessions. The glossy, mirror-like finish you expect rewards patience and adherence to the cure times rather than rapid, impulsive finishing.
Even the best-painted fairing benefits from thoughtful post-paint care. This is where many mistakes show up later: washing with abrasive brushes near edges, using high-pressure washers directly on the painted surface, or skipping wax maintenance. The paint’s surface should be cleaned with gentle soap and water, then dried thoroughly. To maintain gloss and shield the finish from UV and oxidation, a periodic wax or polymer sealant helps preserve clarity and color depth. Aggressive washing techniques and harsh cleaners are a shortcut to micro-scratches and edge lifting. The cycle of care matters as much as the painting itself because finishes that age well are those that resist the stresses of road grime, rain, and sunlight, while still allowing the bike’s lines to pop with color. Keeping the gloss clear means re-waxing every few months and avoiding aggressive scrubbing on edges where the film is thinnest.
A practical mindset helps avoid these mistakes: test, plan, and pace. Before you commit to the final color, practice on a spare panel or a test piece to dial in spray distance, flash-off times, and the exact sequence of coats. Masking accuracy becomes easier with a bit of rehearsal, and you will notice edge alignment and color consistency improving with each practice run. Planning is especially important if you are coordinating color with specific body lines or decals, as misalignment can ruin the final aesthetic even if the paint itself is flawless. When you’re ready to review the process in a broader context, consider consulting a comprehensive resource that outlines step-by-step workflow and pitfalls in color progression. It’s a reminder that the craft combines technique with patience and attention to the subtle cues the paint gives you as it cures. For a model alongside this discussion, you can explore the curated catalog of fairings and related components that supports this kind of work through the site’s product categories, including entries dedicated to different manufacturers and styles. This keeps the learning grounded in practical, model-agnostic practices rather than purely cosmetic aspirations.
In summary, the path to a durable, film-like finish on DIY motorcycle fairings is paved with disciplined prep, correct materials, controlled environments, and patient application. Avoid rushing through surface cleaning and priming; choose a paint system designed for plastics or composites; maintain a clean, controlled spray area and technique; apply multiple thin coats with proper flash-off times; respect cure schedules; and finish with gentle care during washing and waxing. With these steps in place, your finish will endure road use, resist chipping, and retain its luster through seasons of riding. For readers seeking more granular, model-specific workflows and masking strategies, the practical guidance linked earlier emphasizes masking off areas and setting up a proper spray environment that aligns with the level of finish you’re aiming to achieve. If you want to compare how these practices transfer across different fairing families, exploring the Kawasaki fairings catalog can provide a broader sense of how form and finish requirements intersect in real-world projects. And for a broader external primer that reinforces the workflow outlined here, you can consult a detailed guide on how to approach painting motorcycle fairings from industry resources, which lays out the process in a step-by-step, professional tone: https://www.motorcyclecruiser.com/how-to-paint-motorcycle-fairings-a-practical-guide/.
null
null
Final thoughts
Successfully painting motorcycle fairings is a multifaceted skill that requires attention to detail and knowledge of proper techniques. By exploring each chapter, you have equipped yourself with the essential insights to support your customers in their DIY painting endeavors. Promote these skills in your business, emphasize the importance of preparation, quality materials, and the commitment to avoiding common mistakes for superior results. Ultimately, fostering a community around motorcycle customization not only enhances customer satisfaction but also strengthens loyalty to your brand.