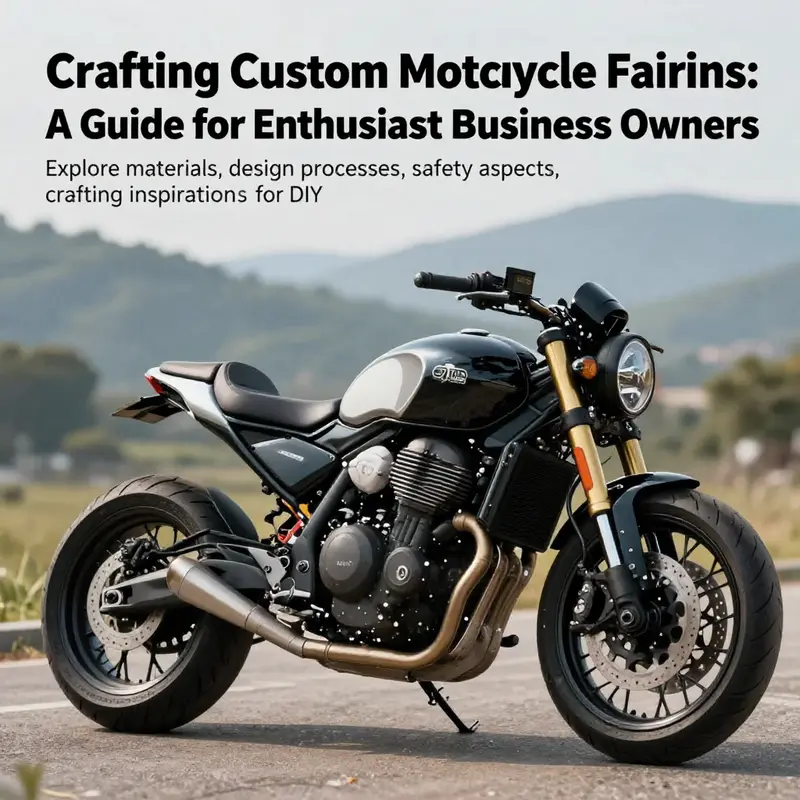
The allure of a custom motorcycle fairing lies in its ability to enhance both aesthetics and functionality, making it a favorite among motorcycle enthusiasts. This guide delves into the crucial elements of DIY motorcycle fairings, tailored for business owners looking to tap into this market. By understanding the materials and techniques required, the design process, safety considerations, and available resources, business owners can better cater to their clients’ needs and maximize engagement in this growing segment.
null
null
Shaping Wind and Identity: Designing a Custom DIY Motorcycle Fairing
A custom motorcycle fairing is more than a sheet of plastic or a lump of fiberglass. It is a statement about how a rider interacts with the road, how air meets form, and how a machine breathes with the rider’s intent. The process of designing a DIY fairing merges practical physics with a willingness to experiment, and it rewards patience as much as bold vision. In creating a fairing, the builder learns to translate a vague sense of speed, protection, and style into tangible geometry that cleanly integrates with the bike’s frame, handlebars, mirrors, and lights. The result can be a streamlined silhouette that reduces wind buffeting, a shield that keeps rain and wind off the rider’s chest at highway speeds, or an exterior that simply makes the bike look faster while standing still. The path from idea to mounted panel is a journey through materials, shaping techniques, and careful testing, all guided by the same principles that govern any successful form in metal, resin, or plastic: fit, finish, and function.
The starting point is purpose. A fairing isn’t a one-size-fits-all accessory; it must serve the rider’s needs. Aerodynamics matter, especially as speeds increase or riding in gusty crosswinds becomes common. A well-designed profile can tuck air more efficiently around the fairing and rider, reducing drag, smoothing the flow over the handlebars, and shrinking wind buffeting near the rider’s helmet. Comfort follows from that same airflow: a shield that directs wind away from the rider’s torso and arms, channels rain away from the visor, and minimizes fatigue on long trips. Aesthetics complete the triangle, shaping the bike’s identity—its stance, its lines, and how the rider perceives the machine as a personalized extension of self. Balancing these aims requires deliberate judgment: how much wind protection is enough, how aggressively the lines should sweep back toward the tail, where the fairing should meet or obscure existing mirrors and lights, and how the piece will behave when the bike leans into a corner at speed.
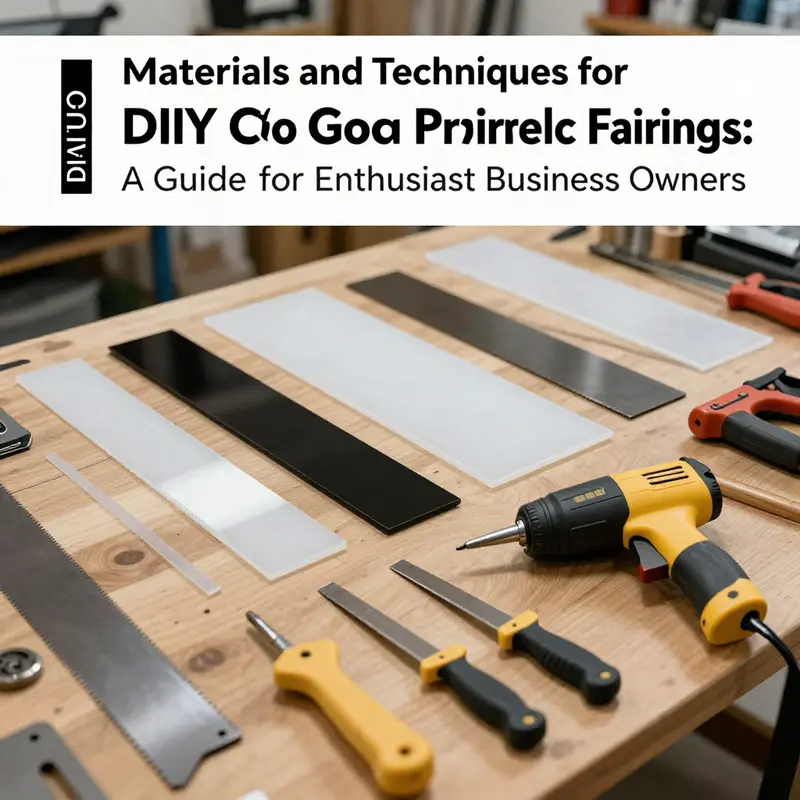
Material choice sets the stage for what is feasible. DIY builders often start with acrylic sheets because they’re transparent, light, and relatively easy to cut. But acrylic is not the only option. Fiberglass, for example, offers strength and the ability to be molded into complex shapes, especially when creating a full or partial shell. Polystyrene foam can serve as a forgiving prototype material, letting a builder test fit and shape without committing to heavier stock. Recycled plastics present an eco-friendly route that can still be shaped into functional forms. Each material has its own arc of work: the initial rough cut, the shaping phase, the priming and finishing, and the method of attachment to the bike. For a prototype or a lower-budget project, foam and simple fiberglass layups can prove surprisingly effective, while a more durable, long-term build may lean toward a laminated acrylic or fiberglass composite with a carefully engineered inner support.
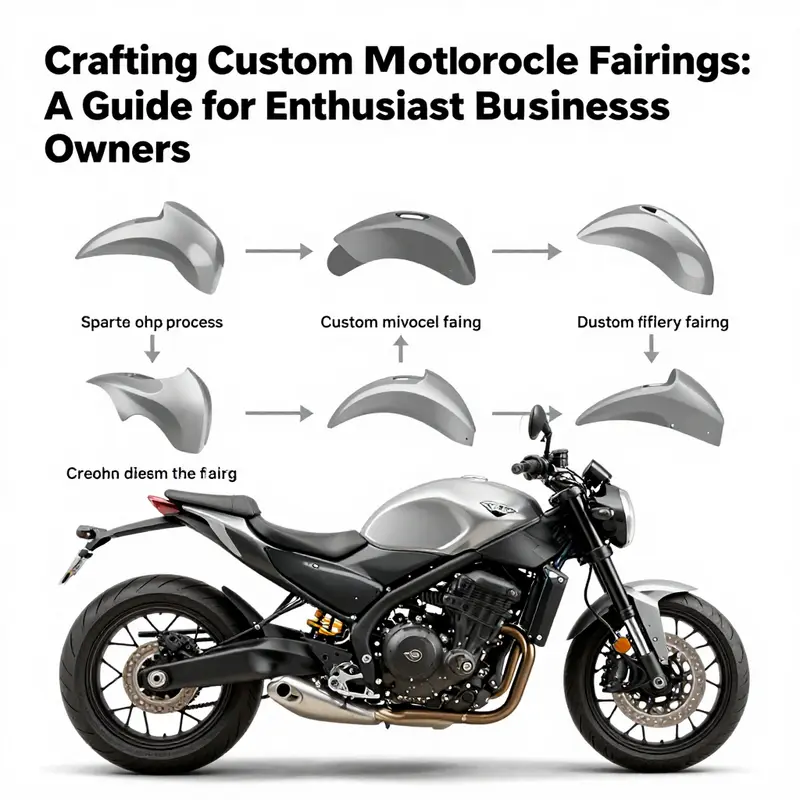
Design creation begins with a clear sketch, then a more quantitative sense of how the fairing will sit in relation to the bike’s front end. Sketching helps nail the silhouette, but CAD aids—whether a basic 2D plan or a more detailed 3D model—bring dimensional accuracy to the design. The goal is not just a pretty face; the fairing must align with the bicycle’s geometry, clear the mirrors, and integrate with the headlight assembly or any aftermarket lighting accents. The shape should also respect the rider’s posture and the bike’s ergonomics. The dimensions should anticipate the thickness of the chosen material and how much inset, overlap, or edge trim will be needed to achieve a mature, finished look. During this phase, it helps to visualize the mount points and consider how vibrations might transfer through the fairing when the engine and road demand greater torsional and vertical stiffness. The design process is iterative: a sketch becomes a template, templates produce a pattern, and patterns guide the cutting and shaping.
Preparation and cutting are the practical bridge between concept and reality. Material preparation begins with selecting the proper thickness and type for the intended use. Saws cut shapes, while sanding tools refine edges to a safe radius and an even texture. For more complex or curved forms, heat can become a shaping ally. A heat gun can soften plastic parts or laminates sufficiently to bevel edges or bend corners, enabling a more integrated fit against the bike’s contours. When a form is simple, a straight panel cut with clean edges is sufficient; for a more integrated look, sharper curves can be achieved by gradually applying heat and molding the material along the intended curvature. For inner structures, some builders opt to create a lightweight internal framework—standoffs, braces, and supports—that buttresses the outer shell and dampens flutter at high speeds. This internal reinforcement is critical as the fairing grows in size or weight, turning a decorative panel into a stable aerodynamic shield.
Mold-making and shaping become central when the project transitions from flat panels to a curved, robust shell. For complex geometries, resin molds or silicone molds can capture the necessary curvature and create repeatable parts. Epoxy resins can be used to form rigid molds, while silicone offers flexibility for undercuts or rounded transitions. When working with acrylic, shaping often happens in two modes: direct forming on the part via controlled heat or using a mold approach for consistent curvature. Direct forming can be effective for small to mid-size fairings that follow the bike’s existing lines, while molds help when multiple parts must share the same contour or when a more pronounced arch is required for a protective shield. Regardless of approach, the goal is uniform thickness, smooth transitions, and a finish that will accept primer and paint evenly.
Finishing is where the fairing begins to reveal its finished personality. The surface must be smooth to reduce air resistance and to provide a good base for paint and clear coats. Sanding steps gradually remove tool marks and transitions from edges to corners, ensuring no abrupt ridges compromise the aerodynamics. Priming then seals the material and provides a uniform base for color. UV-resistant automotive finishes extend the life of the paint, helping to prevent sun damage and hazing on clear surfaces. When the fairing features edge trim or an edge bar to cover rough cuts, the trim not only hides imperfections but also contributes to a professional look with clean lines. The finishing phase also includes weather sealing and attention to edge safety; rounded edges reduce the chance of snagging on clothing or gloves and limit injuries during handling. In this stage, the designer’s mindfulness about weight—keeping the panel as light as possible without sacrificing rigidity—pays dividends once the bike moves back into traffic and into the wind.
Safety and fit are not merely afterthoughts but core requirements. The fairing must not introduce new hazards: sharp edges must be rounded, mounting points must be robust, and the assembly should not interfere with the rider’s control or visibility. A well-engineered fairing maintains adequate clearance for the handlebars and instruments, and it should not press against cables, hoses, or wiring corridors that live behind the front fairing. A put-together installation demands secure brackets or fasteners and, in some cases, adhesive mounts that complement mechanical attachments. After installation, a careful test ride under controlled conditions sorts out any dynamic issues. The rider should feel confident that the fairing does not flutter, vibrate, or shift under acceleration or braking. If flutter appears, it may signal insufficient reinforcement, an imbalance in mass distribution, or a misalignment that should be corrected before riding in real traffic.
The process is inherently iterative. Builders often start with a simple, flat shield to test fit and ergonomics, then graduate to curved forms as the need for wind protection grows. It is common to prototype with inexpensive materials before committing to a final shell. For those who want to explore multiple looks without sacrificing structural integrity, modular designs offer an appealing path: a base fairing with optional add-ons or extensions that can be swapped as preferences or seasons change. While the core language of design remains consistent—fit, finish, and function—the evolution speaks to a builder’s willingness to experiment with curvature, ventilation, and lighting accents. In some projects, interior bends near the handlebars reduce wind directivity on the rider, providing a subtle but meaningful improvement in comfort during long rides. In others, aero features like narrow shoulder lines and a tapered chin help tuck air closer to the bike’s centerline, yielding a cleaner flow toward the wheel and pushing buffeting further away from the rider’s headspace.
The lighting and accessory layer is a place where form meets personality. Some builders integrate subtle cues such as internal LEDs or accent bands that glow through the acrylic when the bike is stationary or in motion. While lighting is not the primary function of a fairing, careful placement can enhance visibility and contribute to the bike’s overall styling. When adding lights or decorative elements, it is essential to respect electrical safety, wiring routing, and the possibility of water exposure. The goal is to augment the bike’s presence without compromising the structure or the rider’s safety. Aesthetic features—whether clean, minimal lines or more aggressive, angular facets—should harmonize with the bike’s existing geometry and the rider’s intentions. This is where the design language of the fairing becomes a dialogue with the motorcycle’s silhouette: how the fairing starts at the headstock, how it flows into the forks, and how it meets the tank and seat area to create a unified, cohesive vision.
If the project crosses into markets and communities that share their builds, the journey can benefit from outside perspectives. Platforms that showcase user-generated builds often reveal practical tweaks that improve fit and performance, such as adjusting edge protection, reinforcing underbelly brackets, or refining the curvature at the lower edge to reduce turbulence. Inspiration might also come from catalogs and community groups that discuss fitment issues for common frame geometries. For those who want to connect to a broader library of fairing styles, a curated catalog can provide a sense of scale and proportion, helping to align the design with the bike’s overall persona. In this spirit, a builder can consult a specific category such as one that houses a Honda fairings collection to explore how others have integrated similar shapes with existing components and mounting schemes. This reference point does not replace hands-on work; it informs the eye and guides decisions about curvature accuracy, line continuity, and attachment strategies Honda fairings.
The culmination of this process is a cohesive, installed piece that communicates both intent and craftsmanship. A well-made fairing looks as if it grew from the bike, not as if it were bolted on as an afterthought. The ride quality reflects this, with reduced wind noise, a calmer cockpit, and a silhouette that reads clearly in motion. There is a quiet satisfaction in knowing that each line, each edge, and each attachment point has been chosen with care—balancing the wind’s push with the rider’s needs and the machine’s engineering. The DIY approach invites experimentation, but it also demands respect for safety, aerodynamics, and durability. The final product is a tangible intersection of design thinking and hands-on practice, a reminder that great riding experience often begins with the quiet act of shaping air, light, and form.
External resource for deeper guidance on hands-on fairing construction and testing can broaden the technique palette and offer practical step-by-step approaches beyond the core principles outlined here. For further reading, see this detailed guide on building a custom fairing: How to Build a Custom Motorcycle Fairing.
Shielded by Craft: A Safety-First Path Through DIY Motorcycle Fairing Projects
The appeal of a DIY motorcycle fairing is not just about making a bike look distinct; it promises real-world gains in comfort, aerodynamics, and weather protection. Yet the same project that can sharpen a bike’s silhouette can also create risk if safety is treated as an afterthought. In this chapter, the thread that ties aesthetics, function, and rider protection together is a steady commitment to safety at every stage. From material choice and edge treatment to mounting methods and post-installation testing, a thoughtful approach keeps the project faithful to its purpose: enhancing the ride without compromising the rider’s control or visibility. The conversation begins with how materials respond to wind, impact, and vibration, and it winds through the processes that transform flat sheets into a shield that stays with the bike under dynamic conditions. This is not a guide to a quick, glossy result; it is a narrative about disciplined craft, where every decision has safety as its core consideration.
The most common starting point for many DIY fairing efforts is a sheet of acrylic, chosen for its clarity, rigidity, and relative lightness. Acrylic offers a transparent canvas that can be shaped to match a motorcycle’s front profile, and it accepts careful thermoforming with a heat gun to create gentle curves. However, acrylic is brittle when hit with sudden impacts, and its edges can be sharp if left unprotected. That is why the practical DIY workflow emphasizes neat, deliberate cutting and a robust edge treatment. Manual cutting, combined with a thoughtful edge trim, is a widely used approach for keeping costs down while still delivering a finished look. The insight from recent builds is consistent: a well-trimmed edge not only improves aesthetics but also reduces the risk of snagging clothing or gloves in a crash or a tense stop. The edge isn’t just cosmetic; it is a functional safeguard against micro-cracks and delamination where stress concentrates at the cut line.
As the shape takes form, the next decision centers on how to manage the fairing’s interaction with the rider and the bike’s own geometry. A flat shield can be effective, but most riders quickly discover that a more integrated contour reduces buffeting and directs airflow more cleanly around the handlebars and seating area. The technique of bending the acrylic into a curved profile—using a controlled heat gun and careful bending—allows the fairing to echo the bike’s lines rather than impose a rigid, boxy silhouette. The risk here is overheating the material or introducing warps that create blind spots or misalignment with the headlight and indicators. The careful answer is to heat gradually, apply pressure with appropriate forms or fixtures, and conduct fit checks often. The goal is a smooth, continuous surface that maintains optical clarity and structural integrity, not a fragile, overstressed sheet that will sag or crack under typical riding loads.
Structural support is the quiet backbone of any durable fairing. For larger or curved pieces, internal supports become essential. Without them, the wind forces generated at highway speeds can induce flutter, a form of vibration that transmits through the fairing and into the mounting points, potentially loosening fasteners or creating unsettling feedback through the handlebars. The modern DIY practice consistently includes lightweight yet sturdy reinforcement beneath the visible surface—think of a lattice or ribbing that sits between the fairing and the frame. The reinforcement is not a cosmetic afterthought; it is a performance measure. It reduces flutter, dampens vibrations, and helps preserve the alignment of the fairing with the bike’s geometry even when air loads are at their peak. The approach is to balance rigidity and weight, ensuring the fairing remains a contributing factor to aerodynamics rather than a source of additional drag or turbulence.
Mounting hardware and attachment strategy deserve equal attention. Proper mounting is the decisive factor between a fairing that enhances the ride and one that becomes a hazard at speed. In a DIY context, it is prudent to use hardware that mirrors, as closely as possible, the design intent of factory assemblies. That means robust fasteners, thoughtfully chosen spacers, and hardware that can withstand acceleration, braking, and road vibrations without loosening over time. The hardware must also accommodate the fairing’s anticipated movement, including anticipated flex and thermal expansion. A secure mounting system often requires brackets that anchor to the bike’s frame or subframe at multiple points, paired with vibration-damping materials to cushion the fairing from high-frequency stresses. The idea is to maintain a stable, predictable relationship between the rider, the bike, and the shield. A fairing that shifts, wobbles, or detaches is not only unsightly but dangerous, especially at highway speeds where debris and weather demands quick, controlled reactions from the rider.
The matter of visibility is inseparable from safety. Modifications around the headlight housing, turn signals, and instrument clusters must be designed to preserve, or even enhance, visibility and signaling. It is essential to verify that the shield does not obscure essential lighting, reflections, or instrument readings. In practical terms, this means aligning the fairing so that headlight cutouts or shrouds do not block the light’s beam pattern, ensuring that the reflectivity of surfaces remains intact for nighttime visibility, and confirming that indicators remain clearly visible to other road users. If the fairing includes integrated lighting accents or decorative elements, those should be designed so they do not distract from the rider’s primary field of view or reduce the effectiveness of the bike’s lighting system. Even small misalignments can have outsized consequences when riding in low light or in weather that demands heightened rider awareness.
Safety also extends to testing and validation before the rider ever twists the throttle with full speed. The DIY path invites experimentation, but it also invites risk. A prudent sequence starts with bench tests that simulate mounting loads using weights or force gauges. These checks verify that fasteners hold under expected wind loads and that the fairing remains attached when subjected to simulated vibration. For those pursuing more ambitious modifications, wind tunnel testing or dynamometer simulations can reveal aerodynamic instabilities that might not be evident through static testing alone. While not everyone has access to wind tunnels or full-scale testing rigs, the principle remains: test, observe, and adjust before riding at speed. The safer path is to iterate in a controlled environment, correct issues early, and avoid the temptation to rush to road testing, especially in variable weather or on busy roads.
Decisions around materials deserve particular care due to potential safety implications. High-impact resistant ABS plastic is commonly favored in factory fairings and is a sensible choice for DIY projects. It offers a resilient balance of strength, weight, and impact resistance. Acrylic, frequently chosen for its transparency and ease of shaping, requires discipline in handling and edge protection. The risks associated with inferior materials are real: brittle plastics can crack or shatter upon impact, creating sharp fragments or unpredictable failure modes during a crash. In a DIY context, it is prudent to prioritize materials that comply with general safety expectations and, when possible, to rely on proven, tested options that many builders have used successfully. The beauty of the DIY process is that it invites skill development and thoughtful material selection, but it must not compromise the rider’s safety.
The chain of responsibility extends beyond the build bench and into the rider’s responsibilities after installation. It is wise to review the fairing’s influence on handling characteristics, especially when the bike’s mass distribution is altered by a new shield. A heavier or differently shaped fairing can change front-end feel, steering response, and even braking dynamics. Riders should adjust riding behavior during the break-in period, avoiding high-speed tests until they are confident in— and have verified—the fairing’s stability. Regular maintenance is essential: re-tightening fasteners after the first long ride, inspecting edge trims for signs of chipping, and checking for any loose components after long highway sections. These steps ensure the project remains safe across the lifecycle of the bike and that the rider is aware of how the fairing interfaces with the bike’s dynamic systems.
To keep the process grounded in safety, it is helpful to anchor decisions to established guidelines. When in doubt, consult official safety resources and manufacturer guidelines to understand what is recommended for your bike and its components. The broader regulatory context is not a barrier to creativity, but a framework that protects riders and others on the road. In the United States, for example, regulatory bodies offer guidance about safety standards for modifications, ensuring that aftermarket or DIY additions do not undermine crucial safety functions like lighting, visibility, and structural integrity. The practical takeaway is simple: approach every modification with a plan for safety that includes testing, alignment checks, and a readiness to revert or revise if any aspect seems uncertain.
The path to a successful DIY fairing is a balance of craft, care, and caution. It invites a rider to explore form and function while maintaining a clear-eyed view of risk and responsibility. The materials, the shaping process, the reinforcement strategy, and the mounting approach all connect to a single aim: a shield that protects the rider, preserves visibility, and complements the bike’s handling. This is a project that rewards patience and precision as much as it rewards creativity. A well-executed fairing does not merely cover the front end; it becomes an integrated part of the bike’s operating envelope, contributing to rider comfort, reducing fatigue from wind, and adding a personal signature to the machine. As you explore shapes, tests, and finishes, keep safety at the center—ask questions, measure twice, and adjust once.
For riders seeking reference points as they plan and execute their builds, a catalog of fairing shapes and fitment options can be a useful guide. For example, a collection of Honda fairings offers a sense of how manufacturers approach curvature, mounting geometry, and edge detailing across different models. The catalog can help with planning the edge conditions, the mounting strategies, and the visual alignment a DIY project aspires to achieve. You can explore such a catalog at this link: Honda fairings.
In the spirit of responsible customization, it is also valuable to consult broader safety resources as you proceed. Government and industry guidance emphasize the core principles of structural integrity, proper mounting, visibility, and testing. These are not barriers to creativity but guardrails that preserve the rider’s safety while enabling expressive, personalized engineering. The goal is to honor the original design intention of the bike while extending its capabilities in a way that remains predictable and controllable. The safest projects are the ones that include a deliberate check-and-recheck cadence: plan, measure, test, and revisit, with safety as the constant reference point.
External safety guidance reinforces the practitioner’s responsibilities beyond the bench. Official riding safety tips emphasize that modifications must not undermine critical safety systems, and that testing under controlled conditions is essential before exposing riders to open-road conditions. The overarching message is clear: safety is not a product constraint but a design constraint that shapes every stage of a DIY project. As you breathe life into a shield that both protects and personalizes the machine, remember that the strongest fairings are those built with discipline so that form and function advance together rather than compete. For comprehensive safety guidance, see the official resources on riding safety and modification best practices.
External resource: https://www.motorcyclecouncil.org/riding-safety-tips
null

null
Final thoughts
Crafting a custom motorcycle fairing is not just an exciting venture; it’s also an opportunity for business owners to meet the growing demand from motorcycle enthusiasts. By mastering the materials and techniques, following a structured design process, adhering to safety regulations, and utilizing available resources, business owners can provide unparalleled service and products. This not only enhances customer satisfaction but also promotes brand loyalty in the niche motorcycle customization market.