The world of motorcycle customization has increasingly embraced the artistry and functionality of fiberglass fairings. For business owners in the motorcycle industry, understanding how to create high-quality fiberglass motorcycle fairings is not only a fascinating endeavor but also a lucrative opportunity. This guide delves into the intricacies of preparing materials and tools, the design process, and the production techniques essential for crafting effective and appealing fairings. Each chapter will build upon the last, giving you a structured approach to mastering this rewarding craft.
From Resin and Cloth to Road-Ready Form: The DIY Fiberglass Fairing
Building a fiberglass motorcycle fairing by hand is a test of patience and craft as much as a test of planning. The fairing is more than a cosmetic shell; it is the interface between rider, machine, and environment. When done well, it reduces drag, smooths air over the bike, and gives the rider a confident, tactile connection to the road. The heart of a DIY fairing project lies in the material system you choose and the tools you assemble around it. Without a solid plan for fibers, resins, and mold preparation, even the most ambitious design can turn into an uneven shell that chips, warps, or fails under load.
The structural backbone of a DIY fairing rests on a careful balance of fiber and resin. Fiberglass cloth comes in a family of weights and weaves, each chosen for its role in the laminate. In a practical build meant to deliver stiffness and a manageable surface, a woven fabric with a moderate thickness around 0.45 millimeters serves as a reasonable reference point. This cloth provides the primary stiffness and shape retention, while keeping weight in check. The resin you select acts as the binder that transmits load between fibers and seals them against moisture and environmental exposure. Here the classic choice boils down to two main families: epoxy and polyester. Epoxy resins are renowned for their bond strength, dimensional stability, and weather resistance. Polyester resins are typically more forgiving for beginners, cheaper, and faster curing in many conditions. They can be adequate for a fairing that will experience wind shear and road vibration, provided you design for the added risk of shrinkage and slightly lower environmental resistance.
Gel coat is another crucial layer in the prep and finish chain. It goes down on the mold before the fiberglass layup, creating a smooth, paint-ready surface and shielding the outer skin from UV exposure that can cause chalking and color fading over time. The mold itself must be prepared with a release agent to ensure the cured shell separates cleanly. A smooth mold translates into fewer hours of sanding and reshaping after demolding, which is particularly valuable in a DIY setting where time and effort are precious. The release agent, whether silicone-based or a wax-based system, forms a barrier that prevents the resin from bonding to the mold surface while still allowing the laminate to release under gentle, even force. A well-executed release strategy reduces the risk of perimeter scars, pinholes, or micro-tears that would otherwise require patching after the shell is fully cured.
Beyond the fundamental cloth and resin, the finishing toolkit includes fillers and surface modifiers that help you shape and perfect the laminate. Microballoons or chopped strand mat are common choices for filling thickness gaps and building up high-stress areas while keeping weight in check. Fillers are especially useful where the mold has slight irregularities or where you want to feather transitions so that the final surface reads as a single, smooth curve when painted. Sandable fillers enable you to skim imperfections, while maintaining compatibility with the resin system you have chosen. The gel coat sits on top of the mold, but once the fiberglass is cured and sanded, you will apply a primer and then paint. The surface you end up with should be ready to take a topcoat with minimal surface preparation beyond a thorough wipe-down, a light scuff, and a primer coat that enhances adhesion.
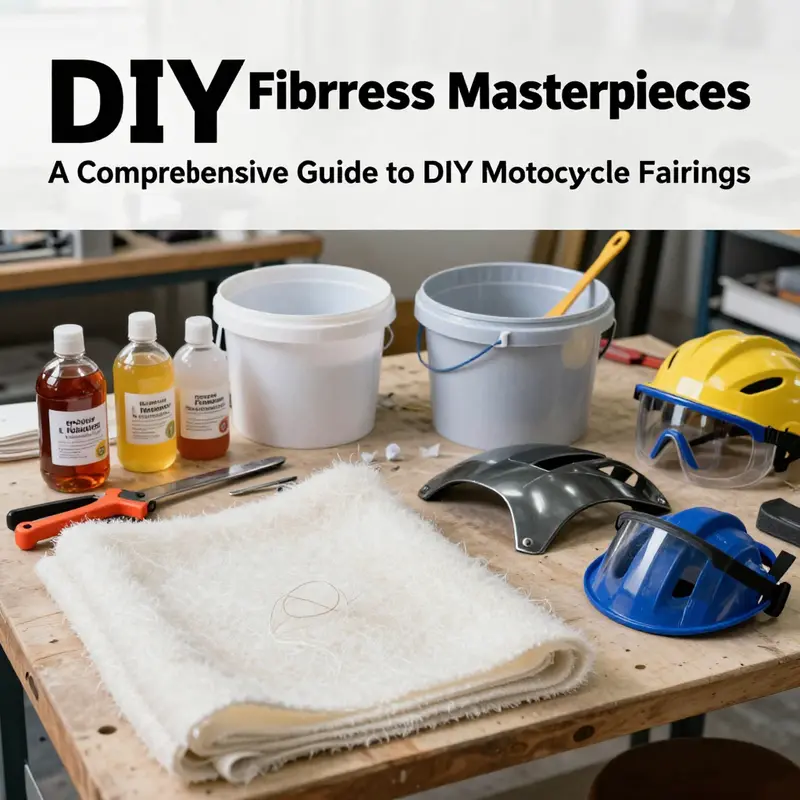
Tools form the other half of the equation. A proper set of mixing pots and sticks, along with rollers, brushes, spreaders, and squeegees, allows you to manage the resin and lay it into the fabrics with control. For a layup designed to minimize air pockets and maximize the density of the laminate, many builders also consider a vacuum-assisted process. A vacuum bagging kit is optional but highly recommended for high-performance or race-oriented builds, because it actively removes entrapped air and helps the resin flow into every fiber well. The safety gear is not optional. Ventilation is essential to manage the volatile organic compounds that evaporate from resins as they cure, and a respirator, safety goggles, gloves, and appropriate clothing should accompany every session in a well-ventilated workspace. The importance of a clean, organized work surface cannot be overstated; misplacement of a tool or an accidental spill can slow progress and compromise the laminate while you attempt to patch later.
The mold deserves special attention because it determines the shape you will ride with. You can source a mold from an existing genuine fairing or create a prototype using foam, clay, or a 3D-printed model that captures the intended profile. The precision of your mold defines the surface outcomes, so invest time to sand, fill, and finish the mother mold and any auxiliary components that contact the resin early in the process. Once the mold is prepared, you apply the release agent in a meticulous, even manner. The goal is that the final shell emerges with a flawless finish and minimal friction against the mold surface during demolding. A deliberate, patient approach to mold finishing often reduces the risk of micro-scratches and edge nicks that can appear after a rushed demold.
As you begin the actual layup, the sequence matters. The first layer of resin is aimed at saturating the fabric without oversaturating the layer, which would lead to excessive resin-rich regions, increased weight, and sometimes more pronounced pinholes. A common practice is to run a thin layer of resin across the mold or cushion the first contact with the fabric by lightly squeegeeing to ensure that the cloth lays into every contour. The subsequent layers reinforce the geometry, with a balance between stiffness and weight. In many builds, three to five layers are a practical target; this range provides a solid stiffness profile while keeping the laminate manageable. Each layer cures before the next is added, in keeping with the resin system’s guidelines and environmental conditions. Epoxy systems often present more controlled cure behavior in a stable climate, while polyester systems can be more aggressive with shorter pot lives. In either case, maintain consistent mixing ratios according to manufacturer instructions and avoid introducing air during resin impregnation. Between layers, a light sanding helps the next application to bond, but be mindful not to abrade the mold surface or remove too much of the existing laminate at the edge lines where alignment with the bike body will occur.
The curing window is a moment when discipline wins over speed. Room temperature curing is common, but many workshop environments use modest, controlled heat to help the resin reach a complete cure with fewer soft pockets. If you overshoot and heat too aggressively, you risk warping or creating internal stresses that manifest as micro-cracks later on. A stable environment makes the final shell more uniform in thickness and appearance. After curing, demolding should be careful. A mold that has micro-scratches or reveals a tacky surface after cure is a warning sign that the mold surface could interact negatively with the laminate during removal. The post-demolding stage is where the fairing begins to reveal its true character: the surface that will hold primer and paint, the junctions where panels meet, and the edges that will be trimmed for mounting.
Post-processing starts with flattening and refining the surface. Start with a coarse abrasive and then progress to finer grits as you approach the final finish. The aim is to create a surface smooth enough for primer but not so aggressive that you thin out the edges or create micro-scratches that telegraph through the paint. Where seams show or where gaps remain, a filler compound helps you prepare a seamless surface for primer. The objective is to achieve an even, uniform contour and a thickness profile that does not betray the presence of stiffening ribs or mount points through the paint. After sanding, apply a fiberglass-compatible primer that improves paint adhesion and blocks the surface from absorbing too much color or moisture. The topcoat can be chosen to yield a high gloss or a subtle satin depending on the rider’s preference. A clear protective layer is often added to preserve the finish and resist UV exposure, although the choice of topcoat must be compatible with the underlying resin system and the primer to prevent adhesion failures or crazing.
Safety and certification considerations thread through this entire process. Fiberglass dust is irritant, and resin fumes can be harsh to breathe without proper ventilation. Always work in a space that allows for air exchange and wear a respirator suitable for organic vapors. Gloves, goggles, and protective clothing should be worn throughout, especially during sanding and handling of cured laminates. When thinking about the bike’s performance and road safety, consider that a DIY shell may not meet every official certification standard for speed or track environments. If the final application includes high-speed riding or track use, reference the applicable regional safety standards to ensure the laminate, joints, and mounting points meet the required structural expectations. The effort you invest in mold finishing, process discipline, and surface preparation should reflect the intended use of the bike and your own comfort with risk.
The materials and tools described here enable a starting point that is solid, repeatable, and capable of producing a professional-looking shell. They are chosen not just for aesthetics but for the predictable behavior they offer under load, temperature, and airflow. A fairing built with a careful layup, deliberate mold preparation, and disciplined finishing will translate your design intent into a physical form that rides with you as a partner rather than impeding you as a weight or a wind trap. The true reward is not only the look but the confidence that comes with a well-made shell that behaves as intended when you lean into a turn or slice through a gusty stretch of highway.
To ground the discussion in practical references and to give you a sense of working references, consider looking at existing fairing designs for shape cues and structural ideas. Look to shape references and to the ergonomics of mounting strategies as you iterate your own design. For deeper aerodynamic and material performance insights that can refine your approach, several external resources offer well-structured guidance on fiber reinforcement and aero shaping in fairings. A respected reference on fairing structure, material properties, and performance metrics highlights fiberglass stiffness advantages over plastics and the importance of smooth contours for aero efficiency. This literature supports the practical decisions you make in the shop as you translate a design into a functional shell for your bike.
From Sketch to Shell: Designing and Modeling a DIY Fiberglass Motorcycle Fairing

Design begins long before resin meets cloth. In the realm of DIY fiberglass motorcycle fairings, the voyage from a rough idea to a smooth, aerodynamically sound shell is a study in balance: between aesthetics and function, between a rider’s comfort and the bike’s performance, and between the tools at hand and the physics of wind. The core of this chapter is the design and modeling phase, where vision is translated into a tangible shape that not only looks right but also integrates with the machine’s geometry, weight distribution, and riding posture. It is a stage that rewards patience and meticulous measurement as much as it rewards imagination. The process, while technical, is ultimately a creative exercise in sculpting air as much as form, an effort to coax the bike into a silhouette that whispers efficiency while carrying the rider with confidence through each mile and bend.
A successful fairing starts with intent. Before you draft a line on paper or illuminate a screen with a digital model, you establish a clear set of goals. What is the target for weight reduction? How will the fairing merge with the frame, lights, mirrors, and handlebars? What rider position are you optimizing for—sport stance, tucked-in aggression, or a more upright posture for comfort? How will the final piece handle at speed—will it pull air cleanly around the sides or create a small amount of gentle ram-air pressure to smooth the ride? These questions guide every subsequent choice, from contour to the number of layers in the laminate.
Reference material forms the backbone of the early phase. Practical benchmarks come from existing designs that have demonstrated air-efficient profiles, while still leaving room for customization. The aim is not to replicate but to learn: the way a front edge meets the wind, how the fairing flank tapers toward the tail, and how it integrates with headlights and mirrors without obstructing visibility or serviceability. A useful approach is to collect a handful of silhouettes that embody the aesthetic you want and then map your own geometry against them. This keeps you grounded in real-world geometry rather than letting style drift into fantasy.
With goals and references in place, the next step is to transform concept into a digital or physical form. If you have access to CAD software, you can begin a detailed 3D model of the fairing that accounts for aerodynamics, structural integrity, and the motorcycle’s existing geometry. The model should reflect the rider’s line of sight, the wheelbase, the rake and trail of the front end, and the points where the fairing will attach to the frame. You may also model spaces for the headlight unit, turn signals, and mount points for mirrors and handlebars. If access to such software is limited, a hand-drawn schematic can still serve as a workable blueprint. The critical move is to translate lines and curves into accurate measurements that can be checked against the real-world dimensions of your bike.
As you refine the digital or drawn design, you’ll frame the transition from concept to a physical form by creating a plug—an actual model that becomes the basis for the fiberglass mold. The plug is usually built from foam or clay and shaped to mirror the intended contour with high fidelity. The smoothing of this plug is essential; every irregularity tends to mirror into the final surface. The smoother the plug, the better the laminate will release from the mold later and the less post-mortem effort you’ll spend chasing minor defects. This stage is less about final aesthetics and more about precision shaping: gentle curves, clean radii, and a surface that can be faithfully reproduced in fiberglass.
Once the plug is shaped to satisfaction, a mold is formed around it. The mold surface should be prepared with a release agent so the cured fairing can come away cleanly. A well-made mold is a prerequisite for repeatable, high-quality laminates. The release layer is not glamorous, but it pays dividends in the form of fewer stuck parts and fewer etches in the final finish. The mold’s surface should be impeccable—any dust nibs or skin imperfections will translate into the fairing’s outer face. In this sense, the mold is the stage where attention to detail ceases to be optional and becomes the defining factor in the final appearance.
The actual layup begins with a controlled, clean workspace, ideally with ample ventilation. Glass fiber fabric typically comes in rolls and in sheets, with a common thickness around 0.45 millimeters for light, rigid builds. Epoxy resin is favored in many circles for its environmental resilience, strength, and lower odor relative to polyester resins. The resin must be mixed according to the supplier’s instructions, and the ratios should be measured precisely to avoid a stiff, brittle layer or a resin-poor laminate that lacks cohesion. The first step is to treat the mold with a thin, even layer of resin and then press a sheet of fabric into place. The goal is to saturate the cloth fully while removing air pockets that could hollow out pockets or create unsightly pinholes.
Layering continues with the deliberate application of additional fabric layers. A typical build might use three to five layers, depending on the required stiffness, impact resistance, and the overall weight target. Each layer should be given a moment to begin curing before the next is added, a practice that helps prevent resin migration and ensures a uniform laminate thickness. With each layer, the cloth is pressed and smoothed with a squeegee or a similar tool to evict air and align fibers. The laminate’s uniformity hinges on patience here; rushing can trap air and create seams that are hard to fill later. When the layup nears completion, a final top layer—even a light veil of resin-saturated fabric—provides an even surface for the mold’s outer face and helps reduce print-through in the finished piece.
During curing, temperature and humidity play supporting roles. Room temperature cures can be sufficient, though moderate heat can accelerate hardening. If you choose to use heat to speed up the process, be mindful of resin-specific temperature limits to avoid exothermic spikes or resin breakdown. A slow, steady cure is often more forgiving for novices and yields a surface less prone to warping. Once cured, the fairing is separated from the mold with care. The release process benefits from patience; forcing a stubborn part risks tearing the laminate or pulling fibers out of alignment. A well-cured laminate should feel solid with a crisp edge at the join lines and a surface that is ready for finishing.
Post-processing is where the mass of technical steps converges into a smooth, gallery-ready surface. The first stage is to trim the rough edges, removing excess resin and any flash that may have formed around the mold boundary. A robust sanding schedule follows, starting with coarser grits to shape the fairing and moving toward finer grits to achieve a uniformly smooth surface. The sanding is not merely cosmetic; it reveals surface inconsistencies in need of filler and fills the micro-imperfections that epoxy alone cannot hide. Body filler or a similar compound is applied to seams, plug marks, and pinholes. This material must be chosen for its compatibility with epoxy and its ability to sand evenly without shrinking or cracking. After curing, the surface is sanded again to a pristine state, ready for primer.
Priming is the bridge between the raw laminate and the final paint. A high-build epoxy primer is applied to reveal any remaining imperfections while providing excellent adhesion for the topcoat. The primer is then sanded to a near-mirror finish. The choice of color and finish for the final paint is a personal statement, but it also affects the protective qualities of the surface. A clear, UV-resistant topcoat is essential to prevent fading and micro-scratches over time. The finish should be both durable and forgiving to minor stone impacts, heat from engine and sun exposure, and the daily wear of maintenance and cleaning. The best finishes do not merely cover; they protect and extend the life of the laminate beneath.
A crucial strand weaving through design, modeling, and finishing is fitment. The fairing must align accurately with the bike’s frame and with other components such as headlights, mirrors, and the handlebars. Fitment checks are performed repeatedly as you progress—from early dry fits using lightweight spacers to full-season test rides once the fairing is structurally complete. The process demands honest assessment of tangential fit and interference. It is not unusual to revise the contours during offline modeling or to adjust attachment points on the mold. The goal is to arrive at a shape that looks natural on the bike and works harmoniously with the rider’s posture and the machine’s ergonomics.
In this design-first path, you may encounter the tension between aesthetics and practicality. A striking silhouette can be visually compelling, but if it compromises rider visibility, control, or service access, it loses value. Therefore, a mature design integrates practical considerations from the outset. For example, you might account for how the fairing will accommodate a range of rider heights or how it could be adapted to different lighting configurations without requiring a wholesale redesign. The smoother and more forgiving the lines, the easier it becomes to tune later for performance on the road or on the track. The practice of keeping the model adaptable—using modular sections or adjustable mounting points—pays dividends when you want to experiment with angles, air intakes, or edge radii without reconstructing the entire shell.
As the fairing draft moves toward completion, there is value in stepping back and seeking broader perspective. A fresh set of eyes can spot subtle design cues that have gone unnoticed in prolonged work sessions. The process of iterative refinement—design, prototype, test, revise—turns a rough sketch into a credible, high-performance shell. In practice, this means repeatedly returning to the model, rechecking measurements against the motorcycle’s actual geometry, and ensuring that every curve serves multiple purposes: shaping airflow, guiding water away from joints, and maintaining clean line-of-sight for the rider. Some builders find it helpful to reference a few practical benchmarks: whether the leading-edge radius is generous enough to avoid abrupt airflow separation at high speed, whether the tail taper minimizes wake that could interfere with rear suspension or the seating position, and whether the overall weight distribution remains consistent with the bike’s chassis dynamics.
For readers who want to explore practical references that span design and the early modeling phases, consider this route into broader resources: 2023new category. It can provide examples of how different shapes and mounting philosophies have evolved across bike platforms, without getting lost in era-specific details. 2023new category.
Throughout this journey, it is vital to document measurements and decisions. A well-kept design notebook or a structured digital file set enables you to trace back where each contour originated and why a certain path was chosen. This archival habit is not just for the final build; it accelerates future projects by giving you a ready-made reference framework. In practice, you should capture not only the numerical data—dimensions, radii, and thicknesses—but also the rationales behind those numbers. The more clearly you articulate your constraints and decisions, the easier it becomes to evaluate trade-offs when you pivot from one aesthetic direction to another or when you swap materials for a different purpose.
As the model solidifies into a final form, the chain from idea through digital and physical prototyping to finished laminate becomes tangible. Yet the design and modeling stage does not exist in a vacuum; it intersects with engineering discipline, craftsmanship, and the rider’s personal narrative. The best DIY fairings emerge when you blend method with artistry, when a measured approach to geometry does not erase the expressive curves that make a bike look fast even while standing still. A well-modeled fairing carries a sense of intent in every line—the suggestion of motion at rest and the promise of efficiency in motion. It is the result of deliberate choices about air, light, and texture, balanced with the realities of construction, cost, and practicality.
External resource: https://www.instructables.com/DIY-Fiberglass-Motorcycle-Fairing-Design-and-Modeling/
Shaping Speed: A Cohesive Guide to DIY Fiberglass Motorcycle Fairing Production and Safe Practice
The process starts with a design intent that respects both form and function. A fairing made from glass fiber reinforced polymer is fundamentally a composite sandwich: a skin of woven glass fibers bonded to a resin matrix. Epoxy resin is often preferred over polyester for its weather resistance, strength, and relatively modest odor during curing. In practice, this means choosing a resin system that aligns with your climate, your workshop ventilation, and the level of post-c cure you intend to apply. A well-chosen resin is the backbone of long-term performance, helping the surface resist micro-cracking, maintaining stiffness under load, and stabilizing color and gloss after finishing. The material decision should also consider weight—fiberglass composites can deliver a lighter, stronger alternative to traditional plastics when laid up with intent.
Design thinking in this context leans on a blend of traditional models and modern practice. Start with a prototype that captures the desired contour of the fairing. A foam plug can serve as the quick and flexible basis for the master model. This foam plug is shaped to achieve the anticipated lines, the sweeping cheek sections, and the taper toward the tail. The aim is to translate the visual impact into a form that can be replicated consistently in the mold. Once the foam model is satisfactory, it undergoes reinforcement with multiple layers of fiberglass to produce a robust master model. This stage is more than a surface coat; it is where the surface becomes durable enough to serve as a reference for mold-making, a critical step to ensure repeatability across multiple production runs.
Finishing the master model involves a smoothing coat, often a resin-based filler to ensure the surface is flawless before you proceed to mold construction. A pristine master model reduces the likelihood of imprinting imperfections into every part you cast later. The mold, in turn, is created by applying several layers of fiberglass and resin over the master. The resin cures to form a rigid negative that captures every subtle contour of the master. When the mold has cured, it is carefully separated from the master; the master, having done its job, is typically discarded or repurposed, leaving behind a faithful, reusable mold that will define your fairing’s outer shape for the rest of the project.
Before you begin laying fibrous material into the mold, you apply a release agent to the mold surface. This is a small but crucial step. It ensures the completed fairing will separate cleanly from the mold after curing, preserving both the mold’s surface integrity and the exterior’s smoothness. The layup itself is the heart of the process. The first layer is a veil of low-viscosity resin that lightly saturates the glass fabric before it touches the mold. This step helps the fibers wet out evenly and reduces air entrapment. The initial layer is followed by successive layers of fiberglass cloth, typically 0.45 millimeters thick for woven fabric, each saturated with resin and pressed with a stiff tool to remove air bubbles. The number of layers is a function of the desired stiffness, impact resistance, and the fairing’s mounting points. A baseline of three to five layers is common, with additional layers included if the design demands greater rigidity or when heavy-use areas—such as around mounting brackets—require extra strength.
Curing is a patient act. In a well-ventilated space, room-temperature curing can take roughly a half-day or more, depending on resin choice and environmental conditions. A heated cure accelerates the process but introduces a different thermal profile that must be managed to avoid warping or resin bleed. Once the resin fully cures, you demold with care. The finished fairing emerges with its geometric integrity intact, but the work is far from over. The demolded piece must be trimmed and refined to remove flash, misalignments, and any resin-rich zones near the edges. It is common to saw away rough edges and then sand progressively from coarse to fine grits, using 80 to 600 grit or higher, until the edges are clean and the surface is uniform.
Finishing touches begin with addressing any seams or small voids. Minor gaps are filled with a body filler or an epoxy-based putty that bonds well with fiberglass and allows easy sanding. It is essential to re-sand these repair areas to maintain a seamless surface. After the filler is fully cured, the entire fairing surface is re-sanded to ensure uniform deposition of primer and paint. The goal is a mirror-smooth surface that can receive paint without showing scratch lines or filler shadows. A proper primer—epoxy-based, favored for its adhesion and filling properties—lays a solid foundation for color. The paint stage can be approached like automotive spraying, with the same attention to even coats, flash-off times, and cure windows. A multi-layer approach—base color, graphics if desired, and a durable clear coat with UV protection—produces a finish that resists sun fade, stone chips, and minor abrasions. Although the finish is primarily aesthetic, the clear coat also contributes to impact resistance by distributing micro-loads across the fairing’s surface during a ride.
The aerodynamic aspect of fairing design is a careful negotiation between form and flow. The leading edge should be smoothly rounded to minimize separation at typical air speeds, while the tail end should taper, guiding the wake away from the rider and the mechanical shadows behind the bike. In practice, this involves modeling an aerodynamically favorable profile during the initial design phase and validating it with CFD or other aerodynamic heuristics. Even without full CFD, a well-considered line that reduces sharp corners and abrupt transitions will manage drag better than a blunt, unrefined shape. The data drawn from industry practice—where advanced glass-fiber composites replace traditional plastics to deliver lighter weight and reduced drag—provides a compelling design target. A fairing built with this mindset is not just lighter than a typical molded part; it is also stiffer, with better resistance to surface cracking under road hazards and wind-blast, and it can be tuned for the rider’s weight distribution and riding position. For those who want a reference point in design exploration, examining cataloged designs can help calibrate expectations about curvature continuity and edge radii. A model or catalog path may be consulted for insights into how contour decisions translate into perceived aerodynamics on a motorcycle, and a reference point in the Honda fairings catalog can offer a practical baseline for contours and interface regions with the bike’s frame. Honda fairings catalog.
Safety considerations are woven into every step of the process. Fiberglass dust and resin vapors pose irritants and potential health hazards. Work should occur in a well-ventilated workshop, ideally with local exhaust ventilation. Personal protective equipment is non-negotiable: a respirator rated for organic vapor when working with resins, safety glasses, gloves, and long sleeves to minimize skin contact. The curing and sanding phases generate particulates, so a properly fitted respirator and a dust mask are essential during sanding. When you are handling solvents or thinners for resin or degreasing the surface, ensure you have a dedicated, well-ventilated area and, if possible, use a fume hood or a dedicated spray booth.
Beyond the health aspects, safety extends to how the fairing integrates with the motorcycle’s systems and how it is mounted. A properly designed fairing must not obscure headlights, indicators, or braking lights, and its mounting points should be robust and well-wetted to avoid panel detachment at speed. It is prudent to incorporate alignment features and test-fit the piece on the bike before any final paint or clear coat is applied. The installation should respect OEM dimensions where possible and avoid covering cooling vents or brake lines that could be compromised by contact. The structural integrity of the mount is as critical as the skin itself; bolts, brackets, and fasteners should be chosen for their ability to resist vibration, impact, and corrosion, with attention paid to torque values and interface strength. In other words, the safety and legality of a DIY fairing depend not only on the quality of the composite layup but on the design’s ability to perform under real-world riding conditions and to meet applicable standards where necessary.
This chapter remains firmly anchored in the practicalities of hand-building a fairing rather than drifting into abstract theory. The path from a foam plug to a finished, mounted panel is long but navigable with a disciplined workflow and an eye for detail. The approach emphasizes a balance between craftsmanship and engineering: the craft of shaping, layering, and finishing; the engineering of layup schedules, airflow considerations, and robust mounting. The process is iterative by nature. A rider who undertakes this project will likely refine the fairing’s contours after initial test fits, adjusting the edge radii, the taper length, or the thickness in high-stress areas to optimize both aesthetics and performance. This iterative, feedback-informed practice makes the DIY route not only feasible but genuinely rewarding, as each iteration aligns more closely with the rider’s goals and the bike’s character.
As you prepare to move from concept to production, keep in mind that this is a craft built on a foundation of materials science and mechanical understanding. The hands-on steps—master modeling, mold creation, resin wet-out, layer count, curing, demolding, and finishing—are not mere tasks; they are checks and balances that ensure your final part is durable, accurate, and visually satisfying. When executed with care, a fiberglass fairing can deliver a lighter, stiffer, and more aerodynamically efficient shell than a similar replacement crafted from traditional plastics. It can also accommodate the rider’s preferences and riding style, from the degree of aggressive aero shaping to the tolerances required for modern instrumentation and headlights. The result is a case where form supports function and function supports safety, all wrapped in the unmistakable personality of a DIY build.
To deepen the practical perspective, you may explore the broader catalog of available fairings in the same space. For example, you can browse a dedicated catalog of bike-specific fairings to better gauge interfaces, mounting points, and contour language that translates well into a DIY workflow. This reference can help calibrate expectations about how curves interact with the bike’s silhouette and how mounting schemes can adapt to a custom composite shell. In the end, the craft remains about aligning the rider’s aesthetic with the machine’s aerodynamic and mechanical realities. The fairing should feel like a natural extension of the bike—an integrated skin that carries the rider’s style while contributing to performance and certainty on the road.
If you’re seeking a broader understanding of successful, safety-conscious composite work beyond fiberglass, a practical, step-by-step external guide can provide additional context for the resin-curing, mold-release, and post-cure strategies that influence both results and safety. For a broader DIY carbon-reinforced perspective, consider supplementary guides such as the Instructables resource linked here: https://www.instructables.com/Capital-City-Motorcycle-Rally-Fairing/.
Final thoughts
Understanding the intricate processes behind crafting fiberglass motorcycle fairings equips business owners with the knowledge necessary to innovate within the industry. By meticulously preparing materials, thoughtfully designing models, and maintaining safety standards during production, companies can create unique products that enhance motorcycle performance and aesthetics. This guide not only serves as an educational resource but also as a gateway for business owners to expand their offerings and meet the growing demand for customized motorcycles.