
Creating a motorcycle fairing is not only about enhancing performance; it’s also a strategic move for businesses wanting to elevate customer satisfaction and engagement. A well-designed fairing can improve aerodynamics, reduce wind resistance, and importantly, cater to aesthetic desires. This guide breaks down the essential steps to building a motorcycle fairing, focusing on key elements such as design, material selection, and installation, tailored specifically for business owners looking to offer such customized solutions. Each chapter progresses towards a complete understanding, ensuring business owners can efficiently integrate fairing production into their services.
From Sketch to Shield: Designing a Fairing That Balances Aerodynamics, Structure, and Style

Designing a motorcycle fairing starts long before a single sheet of acrylic or a lump of resin leaves the workshop. It is a problem-solving journey that threads together airflow science, mechanical reliability, and the rider’s daily realities. The fairing is not just a surface to beautify a bike; it is a working component that interacts with the wind, the engine’s cooling needs, the rider’s posture, and the bike’s mounting points. A thoughtful plan translates ideas into a coherent form that can be manufactured, installed, and maintained without turning maintenance days into scavenger hunts. The design and planning phase, when done with a calm but curious mindset, makes the difference between a project that feels rushed and one that feels inevitable once bolted on the frame.
Measurement is the first practical act. Before a line is drawn, accurate data about the bike’s geometry is essential. The fairing must clear the headlight assemblies, mirrors, and turn signals; it should not press against the fuel tank or the rider’s knees at full lock. Precision begins at the stance of the bike on a stand and the lines of the forks, the wheelbase, and the rake. In practice, this means mapping the front end in three dimensions: the widest point where the fairing will meet the fork legs, the area over the radiator or side cooling vents if present, and the spacing to the rider’s body so that airflow transitions smoothly around the torso. The goal is to create a shape that invites laminar flow rather than spawning turbulent wakes. Designers often sketch, then transfer measurements into CAD software or even simple cardboard templates to test fit on a nonmachined model of the bike’s profile. This iterative approach keeps the process grounded in reality and reduces the risk of discovering, too late, that a brilliant silhouette clashes with a critical component.
Airflow is the heartbeat of any fairing. The modern approach borrows from high-performance aerodynamics: integrated air intakes that channel air to the engine bay or braking system with minimal turbulence, contoured surfaces that avoid sharp discontinuities, and a rider shield that runs high enough to deflect wind from the helmet but not so tall that it traps heat or creates buffeting behind the rider’s head. The concept of the shark fin, or the dive plane, is a useful reminder that small, purpose-driven fins and planes can steer airflow in a controlled way without requiring a dramatic silhouette. Thinking in terms of aerofoil sections—the same idea behind wings that manage lift and downforce in racing—helps in planning cross-sections that stay stable at speed rather than billowing at the edge of the wind. A clever design might also integrate air intakes that double as stylistic cues, providing a clean path for cooling air while contributing to the overall balance of the bike’s appearance.
The choice of material follows from the design brief. For a first project or a prototype that prioritizes ease of fabrication, acrylic (PMMA) is a sensible starting point. It is lightweight, easy to cut, and heat-formable, which means you can bend it into shallow radii without specialized tooling. But acrylic has its caveats: it can crack on impact, and prolonged sun exposure can degrade clarity and strength. Fiberglass offers more toughness and the ability to hold complex curves with resin reinforcement, yet it demands resin handling skills and generates fumes during layup. Carbon fiber, when budget allows, delivers exceptional stiffness and weight savings, but it requires more sophisticated manufacturing and safety protocols. The planning stage should explicitly map a material strategy to performance goals and budget. A clear path from concept to a stained-glass-clear cosmetic surface to a rugged, impact-resistant shell helps prevent late-stage design drift where aesthetics overshadow practical constraints. In a thorough plan, a designer might chart several path options—one tuned for light, another for durability, and a third that optimizes cooling—then prune to a single, coherent direction.
Software tools become a digital workshop for the planning phase. CAD programs such as SolidWorks or Fusion 360 enable precise dimensions and the ability to simulate how a fairing will mate with the bike’s chassis. A digital model allows quick exploration of form without cutting a single piece. From there, 3D printing can yield a tangible prototype that reveals how the shape interacts with the rider’s line of sight, the helmet’s aerodynamics, and the bike’s turning radius. Even more advanced planning might include virtual airflow analysis or wind tunnel-inspired testing at a small scale to confirm that the intended silhouette actually deflects air in the way the sketch promised. The point is to put the idea in motion through multiple lenses: geometry, manufacturability, and real-world performance, all before cutting a sheet of plastic or laying up a composite.
Compatibility is the other pillar of planning. A fairing does not exist in isolation; it must respect the bike’s lighting, instrument cluster, mirrors, exhaust routing, and braking components. If the design introduces new fairing angles, you must account for visibility and glare from the headlight and the rider’s forward view of the instrument panel. Electrical harness routing may require new grommets, protected channels, or repositioning of some components. Structural compatibility means choosing mounting points that can bear wind-induced loads and vibration without fatigue. A robust plan details mounting brackets, stud positions, and the possibility of modular sections that detach for maintenance. Modularity—removable front cowls or side panels—reduces downtime and makes it possible to swap styles without rebuilding the entire shell. A practical tactic is to plan for quick-release or semi-permanent fasteners that allow service work without specialized tools, a feature many builders appreciate when chasing both convenience and reliability.
Incorporating real-world references is a hallmark of good design. Looking at existing fairings on bikes similar to yours can reveal how airflow is marshaled around riders and engines. Note how the upper portions double as wind protection, how the lower edges channel air around the front wheel to mitigate buffeting, and how the transitions between fairing panels avoid sharp corners that become stress risers. These observations translate into design equations: how wide the shield must be to block gusts at various speeds, how to taper the sides to minimize seam drag, and where to place edges to avoid catching air as the bike leans through corners. When the design reaches its draft stage, a rough model can be compared with a real-World reference: you want a silhouette that looks as if it belongs on the bike, while still meeting the engineering demands of aerodynamics and fit.
The plan naturally leads to a material and manufacturing strategy that aligns with the rider’s intent. For a fairing built primarily for wind protection and visual impact, a simple, shallow-depth design in acrylic might suffice, with careful edge finishing and UV-resistant coatings to reduce yellowing. If the plan prioritizes longevity and aggressive use—track days or fast highway cruising—a stronger approach, such as fiberglass or carbon fiber, could be chosen, recognizing the higher skill and tooling requirements. The manufacturing path should specify curing times, safety measures for resin handling, ventilation, and the sequence of layers if composites are involved. It should also consider the finish line: whether paint is desired for color matching and gloss, or a clear-coated, natural look with a minimal stain or pigment that helps resist UV damage. The finishing plan would detail sanding regimens, polishing, and protective coatings that maintain the fairing’s aesthetic and structural integrity over time.
A clear plan also contemplates installation and adjustment. The fairing must be mounted with attention to rider position and visibility. The plan should articulate the sequence of loosely mounting, aligning, and adjusting height and angle before final tightening. It should specify where to place dampening solutions to tame vibration, such as rubber grommets between brackets and panels, and how to space fasteners so that panels flex without cracking. A practical design note is to incorporate adjustable mounts or threaded rods that permit height and angle changes without disassembly, making it easier to dial in the rider’s wind comfort and the bike’s aero balance. By forecasting these steps, the builder saves time and reduces the risk of misalignment that could compromise safety or aerodynamics.
Within this design and planning frame, one must also consider the broader ecosystem of the project. A fairing, even when designed for DIY fabrication, benefits from modular thinking, repeatability, and a plan for maintenance. A modular front cowling, for example, can be removed for radiator access or for service intervals, while side panels can be swapped to alter the bike’s look or to swap between performance-oriented and street-oriented configurations. The planning stage should therefore articulate maintenance pathways: how to access bolts, how to adjust or replace damaged components, and how to reseal joints to prevent water intrusion. The goal is to produce a design that, beyond its first ride, remains practical and serviceable for years to come. This is where the engineering sense of the project converges with the rider’s passion—an honest collaboration between form and function.
For readers who want a concrete reference point as they start, a practical approach is to study model-specific shapes and how they solve airflow around the rider and engine. You can explore a dedicated catalog of fairings to observe, for example, how model-specific geometries influence mounting points and panel shapes. That kind of catalog provides a tangible sense of scale, fit, and proportion that complements the planning process. It also helps keep expectations aligned with what is realistically achievable in a DIY framework while still preserving room for personal interpretation. The work of translating such references into a coherent, custom solution is where design becomes ownership, and ownership becomes the strongest argument for a well-planned build.
In the spirit of building toward a coherent finish, the next stage may then leverage the materials and manufacturing methods outlined earlier while staying faithful to the design intent. The route from initial drawing to final paint is not a straight line but a winding path of decisions that reflect balance. The design must honor the bike’s identity, the rider’s comfort, and the project’s budget. It must also respect safety and legality, ensuring that lighting, signaling, and visibility remain uncompromised. The long arc of planning—from measurements to modular installation, from virtual simulations to tangible prototypes—creates momentum that carries the project forward with clarity and purpose. A well-planned fairing is less a single piece and more a living system of components that work together to slice through air, cradle the rider, and harmonize with the bike’s character. And when that harmony emerges, the rider not only feels an improvement in wind deflection and stability but also experiences a renewed sense of connection with the machine.
Internal resource note: for readers seeking model-inspired geometry and reference shapes, see the Honda fairings catalog for a sense of proportion and how designers balance the rider’s line of sight with a streamlined silhouette. This cross-pollination between practical planning and model-specific geometry can illuminate paths that respect both creativity and engineering discipline. For broader aerodynamic context, the RAC resource on motorcycle aerodynamics explains some of the principles referenced in this chapter and can deepen understanding of why certain design decisions matter at speed. External link: https://www.rac.co.uk/driving-advice/road-safety/motorcycle-aerodynamics-explained/
Material Matters: Choosing the Right Build for a DIY Motorcycle Fairing

A motorcycle fairing is more than wind protection; it’s a material decision that shapes aerodynamics, rider comfort, and how you’ll work with the shell over miles of riding.
For DIY builds the three core options are ABS, fiberglass, and carbon fiber, each with distinct weight, stiffness, cost, and workability. The choice comes down to how the material forms, how it stands up to heat and vibration, and how easy it is to repair or modify. Finish considerations also matter, since different substrates interact differently with primers and coatings. ABS is the most approachable: easy to form over simple molds, forgiving in home shops, and relatively repairable, but heavier and less stiff than carbon; it can sag on long spans and heat can soften it in extreme conditions. Fiberglass offers better stiffness and a good balance of cost and workability; it is lighter than many ABS builds but heavier than carbon, and requires care in layup, sanding, and curing; it tolerates a wider variety of shapes and allows more aggressive contours. It also needs ventilation during curing. Carbon fiber delivers the best strength-to-weight and stiffness, with the caveat of higher cost, more specialized tooling, and tougher repairs; in a DIY shop you’ll need protective practices and precise workmanship. Hybrids (for example a carbon face with an ABS or fiberglass core) let you tailor weight and strength while controlling cost. The practical takeaway is to define your priorities: highest performance and lowest weight versus ease of fabrication and repair. For racers or track-focused builds, carbon fiber can be worth the effort; for weekend projects and easy repairability, ABS is a solid baseline, with fiberglass sitting in between. Finally, plan how the fairing will mount and endure heat, vibration, and weather, and consider how you will finish the surface to resist UV exposure and road debris.
Cutting to Conform: Mastering the Shaping of a Motorcycle Fairing

Designing and fabricating a fairing is a careful dialogue between form and function. The cut and the curve determine not only how blocks of material will look but how air moves around the rider and engine at speed. This chapter follows a practical throughline: choosing the right material, translating a plan into a workable outline, then shaping and refining that shell so it holds up under wind, vibration, and the rigors of riding. It is a process that rewards precision, patience, and an understanding of how different materials respond when heat, resin, or layers of fabric are introduced. Though the end goal often blends aesthetics with performance, the heart of the work remains the same: cut accurately, shape deliberately, and finish with consideration for durability and safety. A well-cut fairing respects the bike’s geometry and the rider’s posture, directing airflow to reduce drag while shielding shoulders and hands from the gusts that can fatigue a ride after hours in the saddle. When you approach cutting and shaping as a craft rather than a quick fix, you begin to see the fairing not as a single piece but as a carefully contoured shell that must move with the bike, not against it.
Material choice anchors the whole process. For newcomers, plastic sheets such as ABS or polycarbonate offer a forgiving start because they soften evenly under heat and respond well to manual forming. Fiberglass, while tougher, demands careful resin handling and a cleaner workshop environment due to vapors and dust. Carbon fiber, the pinnacle of stiffness-to-weight, presents a higher barrier to entry but becomes a compelling option for riders chasing performance and durability. The readiness of ABS for heat shaping makes it particularly accessible: you can heat the sheet, drape it over a mold or buck, and coax it toward the desired contour with a measured touch. The other materials demand more specialized steps—laying up cloth in a mold, controlling resin viscosity, and managing curing temperatures—but they, too, share the same fundamental principle: create a fairing that fits the bike and the rider with a clean edge and predictable behavior at speed.
Before a single cut is made, the plan must be faithful to the bike’s geometry. Measure the front end, the tank overlap, the handlebar sweep, and the engine’s silhouette. A careful set of templates, whether CAD-generated or hand-drawn, translates three-dimensional intent into two-dimensional outlines that you can transfer to material. The template is more than a drawing; it’s a map of airflow. When the lines trace a path that avoids sharp turns where wind could separate, the panel becomes a smoother, more predictable surface. This is where study of existing fairings on similar models becomes invaluable. Observing how the curves meet under the headlight, where the chin fairing blends into the radiator area, or how the upper and lower sections join at the sides can reveal practical tricks for your own build. Even small decisions—like where to place a vent, or how a cut line interacts with a mounting bracket—alter the final aerodynamics and serviceability.
With the design locked in, the practical act of cutting begins. For ABS and similar plastics, the baseline approach is straightforward but precise. Secure the sheet firmly to a work surface and lay the template on top. Use a sharp, stable blade to trace the outline, or apply a marker that won’t bleed through the material. The cut should be deliberate rather than hurried; any wavering line translates into misalignment later. When making curves, a jigsaw with a fine-tooth blade or a bandsaw can yield smoother radii than a rough utility knife, especially along tight corners or intricate contours. It’s worth noting that multiple light passes are better than a single deep cut. Each incremental pass reduces heat buildup in the material, which helps preserve dimensional stability as the outline develops.
Once the outline is cut, the shaping phase begins. Here the process diverges by material, but the underlying logic remains consistent: the goal is a controlled, gradual transformation from flat sheet to curved surface that matches your mold or buck. For plastic sheets, heating is the simplest and most forgiving path. A heat gun, set to a moderate temperature and used with even motion, softens the plastic just enough to bend it over a form. The mold—whether it’s a wooden buck with the exact contours of your fairing or a more elaborate fiberglass form—provides the precise curve you want. Heat evenly, rotate the sheet to avoid hotspots, and bend slowly to the mold’s surface. Clamps or weights keep the softened sheet pressed into the form as it cools; do not rush this step. Cooling should proceed gradually to minimize stress cracks and distortion. Edge radii matter, too. Sharp edges can be uncomfortable to touch and more prone to crack at speed; rounding edges with progressively finer sanding keeps the finished surface smooth and safe for handling.
Finishing edges is a crucial, sometimes overlooked, part of shaping. After the sheet has set, trim any excess with care, then move to a progression of sanding. Start with a medium grit to remove burrs, then step toward finer grits to refine the surface. Polishing compounds can bring a near-glassy finish if you plan a clear coat or a glossy paint. For those aiming at a more rugged look, a matte finish achieved through careful texture and sealing can be equally striking and functional. The joint lines between panels must be treated with sealants to prevent water ingress; a thin line of silicone or a compatible sealant at seams protects the interior from moisture and reduces corrosion at mounting points.
If your design leans toward fiberglass or carbon fiber, shaping remains a matter of form and rigidity, but the path differs. Fiberglass surfaces commonly require a mold, release agent, and resin-impregnated cloth laid into the mold. The lay-up is pressed with a roller or squeegee to remove air pockets and ensure a uniform distribution of resin. Carbon fiber follows a similar mold-based approach, but the material has less tolerance for misalignment and air voids. In both cases, curing conditions—temperature, humidity, and time—must be controlled, as any deviation can leave you with warping or weakened fibers. Able hands with a steady eye for detail will check for air pockets and pinholes, fill with appropriate hardeners or fillers, and sand with the same care given to plastics, just with the added caution that the surface may be stiffer and more unforgiving at the edge of a curve.
A key practical consideration across all materials is thickness management. You want the panel to be stiff enough to resist flutter at speed but not so stiff that it becomes a brittle point of failure. This often means distributing thickness strategically: slightly thicker sections where mounting brackets anchor the fairing, and thinner, pliable zones along gentle curves that must bend with the bike’s bodywork. The mounting system itself must learn to breathe with the panel. Vibration dampeners, such as grommets and bushings, help absorb engine and road-induced vibrations, reducing fatigue and prolonging the life of the fairing. When you design your mounting brackets, consider adjustable features that allow for fine-tuning alignment after riding tests. In practice, many builders find that a quick-release or semi-permanent adjustment arrangement makes the process of aligning and re-aligning the fairing after maintenance or cosmetic changes much easier. A practical note from builders on the ground shows that keeping bracketry simple and modular reduces the need to rework panels when components are removed for service.
The integration of a new fairing with the rest of the motorcycle is more than just aligning a curve to a bike’s silhouette. It includes ensuring the panel does not shadow lights, obstruct mirrors, or interfere with throttle and lever reach. The rider’s line of sight should remain clear, and the optical axis of headlights should not be blocked by a higher or lower mounting. A clean installation also requires attention to ventilation. Engines and radiators need appropriate cooling air, so small vents or scoops must be incorporated where they won’t ruin the aerodynamic intent. The result is a cohesive skin that looks professional and behaves predictably in wind. It is in this synthesis of shape, material behavior, and mounting that the craft of cutting and shaping earns its keep.
The finishing stage seals the journey. For plastics, color and protection come through primers, paints, and a clear coat that guards against UV exposure and minor airborne abrasion. With composites, finishing may include resin polishing, filler work for seams, and paint or clear coats tailored to the composite’s curvature and surface texture. Regardless of material, the aim remains identical: a surface that feels smooth to the touch, resists moisture, and presents a uniform, deliberate color and texture. It’s worth emphasizing safety here. Work in a well-ventilated space, wear protective gear when heating plastics or mixing resins, and follow proper solvent handling procedures. These precautions protect both your health and the integrity of the materials you’re shaping.
As you pursue this work, it helps to test your fairing at growing speeds and in different wind conditions. Start with low-speed trials to confirm that the shape directs air away from the rider’s torso and hands and does not introduce unexpected flutter or vibration. Small adjustments to angle, height, or edge rounding can yield meaningful gains in comfort and control. The first test ride is not a final verdict but a turning point—evidence that your careful cuts and patient shaping have paid off in real-world performance. A well-cut fairing can dramatically reduce fatigue on long rides, making the difference between a pleasant breeze and a gusting trial. And since aesthetics matter to many riders, the final finish should complement the bike’s lines, reinforcing its silhouette and the rider’s confidence in the machine beneath.
For readers who want a practical, example-based exploration of plastics and heat shaping in this context, a detailed guide to ABS-based fairing shaping offers a thorough, step-by-step reference. The resource emphasizes templates, heat shaping, mold interaction, and safe finishing practices in a way that resonates with this chapter’s emphasis on careful preparation and measured execution. If you’re curious to see how other builders approach the same challenges, a visit to the Honda fairings category can provide context for how panels are integrated with standard mounting points and existing geometry, offering inspiration without compromising your project’s unique goals. the Honda fairings category.
In closing, the act of cutting and shaping a motorcycle fairing is a blend of art and engineering. It rewards precision in the planning stage, patience during the heat shaping and lay-up processes, and discipline in the finishing and installation. Each step—outline transfer, controlled heating, gentle bending, edge finishing, and secure mounting—contributes to a shell that not only looks purposeful but behaves predictably when the air rushes past it. The final piece should feel almost inevitable in its fit, as if it always belonged on the bike. This is the measure of success in a DIY fairing project: a seamless union of form, function, and finish that invites riders to ride with a renewed sense of speed and confidence.
External resource for further reading on shaping and fabrication techniques can be found here: https://www.mmi.edu/motorcycle-fairing-modification-guide. This guide provides diagrams, tool lists, safety protocols, and real-world examples to deepen understanding and broaden practical ability, especially for those who want to expand beyond simple heat shaping into full lay-up work and advanced finishing techniques.
Solid Foundations: Designing and Securing Mounting Systems for a DIY Motorcycle Fairing
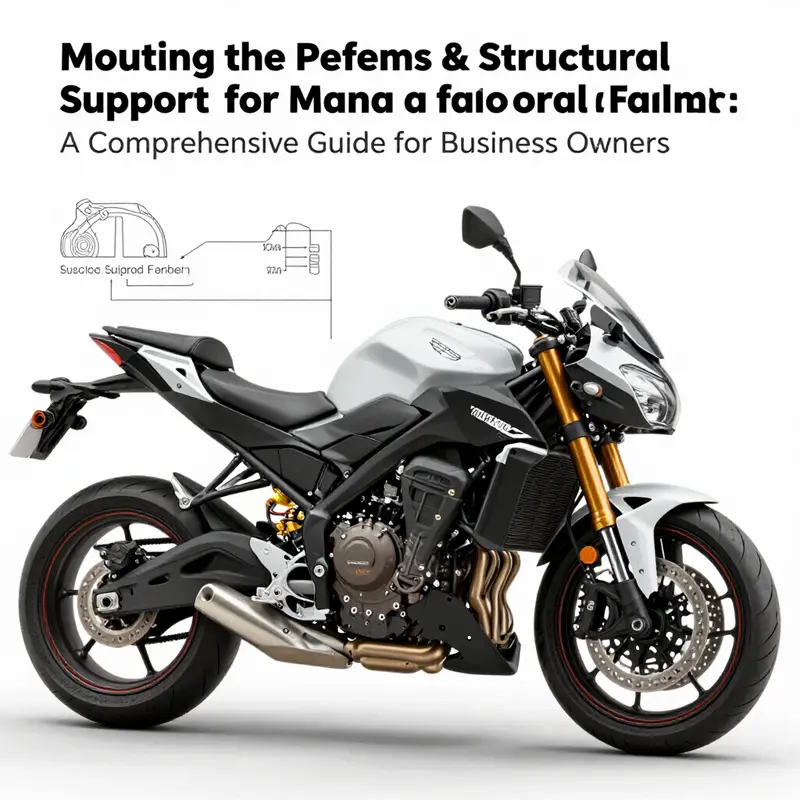
A motorcycle fairing is more than a cosmetic shell; it is a true structural partner to the bike’s frame. The mounting system that supports a fairing must contend with engine heat, engine vibration, wind loads at speed, and the rider’s shifting weight. In practice, the fairing and the bike form a coupled system, so the way you attach and reinforce the fairing matters as much as the shape and material you choose. This is where the spine of your build—the mounting brackets, support bars, and internal ribs—becomes visible in performance, durability, and ride quality. The goal is to create a clean, integrated silhouette that channels air smoothly around the rider and engine while resisting flex, cracking, and loosening that can shake loose at speed. It is a balance between stiffness and tolerance for vibration, between ease of maintenance and the strength needed to keep the fairing aligned through countless highway miles and sudden gusts of wind.
From the start, the mounting plan should be anchored to the bike’s existing frame, rather than attempting to fix a standalone shell to fragile points. A front frame or a dedicated fairing support bar, crafted from high-strength materials, serves as the primary backbone. In practical terms, that backbone is usually built from premium steel or aluminum alloys with enough rigidity to resist flex while remaining relatively light. The brackets you design should connect to sturdy, non-movable portions of the frame or to subframes that were never intended to flex with the fairing’s load. This is why a simple, overbuilt bracket set often outlasts a complex, lightweight lattice that isn’t anchored properly. It sounds obvious, but the reality on many DIY builds is a subtle misalignment or a bracket that tolerates motion poorly, turning a once-clean aero profile into a rattling, unattractive chore to maintain.
As you plan, view the fairing as part of a system. The fit is not just about keeping air off the rider but about distributing loads so that vibration doesn’t fatigue any one joint. A robust mounting system includes not only brackets and a backbone but also internal supports. Small-diameter tubes or rods can be threaded or bolted into place to form an internal framework that resists bending along the fairing’s length. This is especially important for larger fairings that wrap around the rider’s legs or engine bay. Internal ribs can be attached to the brackets or to a lightweight interior panel, creating a set of interconnected nodes that share the bending load rather than concentrating it in a single flange. When designed properly, these supports reduce flutter at speed and preserve alignment for mirrors, headlights, and vents.
If you’re seeking a disciplined approach to strength and weight, consider the concept of topology optimization. In high-performance contexts, engineers use optimization to shave weight from the structure without sacrificing stiffness. The idea is to remove material where it contributes little to performance while preserving critical load paths. In racing-inspired work, this can yield a spider-like network of members that holds the fairing in place with minimal mass. While a DIY project may not perform the same engineering calculations as a professional race shop, you can borrow the mindset: design for the most critical load paths first, then fill in with lighter supports where they won’t compromise rigidity. A practical takeaway is to position the main load-bearing elements at the strongest frame points and use lighter cross-members only where they do not threaten warp or deformation under wind pressure.
The choice of material for the mounting framework matters, too. Steel offers exceptional strength and long-term durability, especially in the joints and brackets, but it carries weight and requires attention to corrosion protection where road salts and moisture are present. Aluminum alloys provide a favorable strength-to-weight ratio and resist corrosion more readily, which is helpful for a fairing that may be exposed to rain and road debris. In some builds, fabricating brackets from sections of tubing or angle stock and then finishing with a protective coating can yield a clean, professional look while keeping costs reasonable. Whichever path you choose, ensure the fasteners and connectors are compatible with the metal you’re using, and design fastener points to tolerate minor misalignment introduced during assembly or maintenance.
In practice, you’ll also want to consider how the mounting system interacts with the rest of the bike’s controls and lighting. The fairing should not interfere with the steering, throttle, brake lines, or clutch operation. Make sure lights remain accessible and functional, and that mirrors still provide the rider a full view of the surroundings. The mounting brackets should allow for some adjustability. A little vertical or horizontal slippage can be the difference between a clean aero line and a fairing that looks, feels, and sounds like it’s fighting you as you ride. This is where a thoughtful design becomes a practical one: you want a system that can be tuned quickly during a fit session and that can be re-tuned after a maintenance period or after swapping a fairing to a different bike style.
For DIY builders, practical, low-cost methods can still meet these demands if reinforced appropriately. Some builders start with simple sheet materials and convert them into a fairing’s backbone by attaching them to the bike with brackets and bolts that are chosen for rigidity and ease of service. You can tap into a familiar toolkit—drill, weld, cut, and bolt—while applying internal ribs and cross-bracing to resist flex. If you pursue such a route, plan for a method to reinforce joints at every attachment point. For instance, adding small gussets at bracket intersections can dramatically improve stiffness without a heavy material increase. Rubber grommets or bushings between metal parts reduce vibration transfer and quiet annoying rattles that can degrade the rider experience and distract from attention on the road.
There is value in studying how professional builders arrange their attachment strategies. A common approach is to anchor the primary fairing structure to strong, shared mounting points that already exist on the frame, then add secondary supports that tie into the engine-side pieces to form a streamlined, contiguous shell. The aim is not only to hold the fairing in the desired position but to ensure the overall assembly acts as a harmonized surface rather than a loosely attached panel. If you want to explore a catalog of established approaches and see how different frame geometries influence bracket placement, a useful reference is the broader catalog of fairing-related components available in the online market space. This kind of reference helps you visualize where the strongest anchor points are likely to be on your bike model and how to route supports around exhausts, radiators, and intake air paths. For a concrete, real-world example of a bike-friendly design ethos, consider examining the BMW fairings collection to observe how designers plan mounting points and bracing to preserve symmetry and airflow around common bike architectures. BMW fairings provides a practical reference point for visualizing these concepts when planning your own mounting scheme.
The actual fabrication phase requires attention to joinery, alignment, and fitment under load. Brackets can be cut from steel plate or formed from aluminum stock, then welded or bolted to the frame with careful layout. If welding, you must account for heat distortion and ensure the welds don’t introduce residual stresses that could warp the parts when the bike heats up during operation. If bolting, use hardware that resists loosening under vibration, such as lock washers, proper thread engagement, and perhaps thread-locking compounds where appropriate. In both cases, ensure the bracket surfaces that contact the fairing are smooth and free of burrs that could irritate the panel or bind against the paint. The use of protective finishes—powder coating, epoxy enamel, or a clear protective layer—helps preserve the appearance and prevents corrosion at the joints, where moisture can accumulate and degrade metal over time.
Attachment points should be designed with serviceability in mind. The best mounting systems allow the rider to remove and reattach the fairing without needing a toolbox full of uncommon fasteners. A practical path is to incorporate a few well-chosen, easily accessible fasteners that can be tightened by hand or with a standard tool. A simple, quick-release approach—where feasible—can streamline maintenance such as cleaning, painting, or replacing panels after a ride. Even with a robust design, you want the fairing to remain secure under the daily stresses of riding, including road impulses, curb impacts, and gear shifts. The last thing you want is a misaligned edge or a pinched panel that creates chatter at speed or compromises the rider’s visibility.
When it comes to the actual installation, the sequence matters. Begin by loosely mounting the entire system at like-for-like reference points on the frame. Check alignment with the rider’s seating position, handlebars, and instrument panel. Make sure the front edge meets the rider’s line of sight for the windscreen or shield, if your design includes one, and verify there is adequate clearance for the headlight and turn signals. Recheck the engine’s cooling vents and body panels to ensure nothing blocks airflow. After you’ve achieved a satisfactory fit, tighten the fasteners in stages, alternating across the mounting points to equalize clamping forces and prevent uneven stresses. It’s worth noting a simple technique many builders have found useful: use adjustable height features via threaded rods or slotted brackets that let you dial in a precise stance for ride height and wind deflection. This adjustability helps during track days or long highway rides when you want to fine-tune the aerodynamics and rider comfort without reconstructing the entire framework.
The finishing touches extend beyond aesthetics. Once the mounting system is secure, you should confirm that all joints are vibration-damped and sealed against water ingress. A bead of durable sealant at the joints, combined with a careful paint or clear coat, keeps moisture from creeping into gaps that could corrode metal or degrade the structural integrity over time. A well-sealed, properly finished mounting system doesn’t just look professional; it reduces fatigue loading on the screws and brackets and helps the whole assembly age gracefully.
The relationship between mounting design and rider safety cannot be overstated. A fairing that shifts or buckles under wind introduces unpredictable handling, and a loose panel can create dangerous flutter at higher speeds. The best DIY projects acknowledge this risk and mitigate it through robust design, careful material selection, and rigorous testing at low speeds before venturing onto busier roads. A practical test protocol includes progressive speed trials with the bike parked and then slowly freighting up to a modest, controlled test ride. Observe for any creeping movement, audible creaks, or new vibrations, and address them before riding aggressively.
In sum, the mounting system is the invisible engine of a successful fairing project. It needs to be strong, adaptable, and integrated with the bike’s frame without compromising access for maintenance or rider safety. It should be designed with a clear understanding of wind loads and the stresses of road-use, with redundancy in critical joints and a path for simple replacement if a bracket or support wears or is damaged. When done well, the result is a sleek, durable fairing that enhances aerodynamics and rider comfort as part of a coherent, well-engineered machine.
For readers who want to explore broader engineering principles behind these systems and how modern optimization informs lightweight yet robust support structures, deeper reading is available in the study of optimized design and manufacturing of a motorcycle. This external resource offers analytical context that can inform decisions about thickness, material choice, and topology in your own build: https://www.researchgate.net/publication/365845971Optimizeddesignandmanufacturingofa_motorcycle.
Alignment and Airflow Mastery: Installing and Tuning a DIY Motorcycle Fairing for Performance and Comfort

Installing a full motorcycle fairing is less about simply snapping a shell onto a frame and more about building a controlled conversation between the rider, the machine, and the air that rushes past at speed. The goal is not only to look right but to behave right: to curve the wind around the rider, to manage weight distribution, and to avoid creating new points of failure in the middle of a ride. The process begins long before any bolt is turned. It starts with preparation that recognizes the bike as a system; every mounting point, every dimension, every line of the bodywork has to fit into an existing geometry that already includes the handlebars, the fueling system, and the engine’s cooling paths. The first discipline is stability. A motorbike under a fairing must be supported as if you were performing surgery on a living machine. The bike stands must be solid, the tires at a stable contact patch, and the area around the front end free of tools that could shift during handling. With the bike supported, you lay the fairing piece flat and run through a practical checklist: are the mounting points in the expected places? Will the fairing clear the headlamp, mirrors, and the upper edge of the fuel tank? Will the sides wrap neatly around the engine and create a clean line that reduces drag rather than catching wind and buzzing at speed? Those questions guide the early hands-on phase and prevent a cascade of fit issues later on.
In the planning phase, measurements take on the authority of a map. You measure the front end with the same care a navigator uses to chart a coastline. The handlebars, the fuel tank, and the engine top must be accounted for so that the new panels sit where they should without crowding controls or lighting. If you’re using CAD software or a handmade mock-up, you translate those measurements into a digital or physical template. It’s not about achieving a perfect, factory-perfect shell on the first try; it’s about building a frame of reference that keeps airflow in mind. You want to see how the air will flow over the rider’s chest and shoulders and around the engine bay. A well-conceived outline can reduce drag and buffeting, especially at higher speeds, without sacrificing access to the controls or serviceable components.
With the plan in place, material choice comes into sharper focus. Acrylic, fiberglass, and carbon fiber each have a voice in the workshop. Acrylic offers beginner-friendly shaping and low cost, but it can crack under impact and degrade under UV exposure if not protected. Fiberglass is a friend to those who want to sculpt complex curves and receive a resin finish, though it demands better ventilation and careful handling of fumes. Carbon fiber earns its keep with lightness and strength but often requires a more advanced toolkit and refined technique. For many first-time fairing builders, acrylic sheets provide the most forgiving path to a solid, aerodynamic result. The material choice then informs the next steps: cutting, heating, and bending must be done with respect for the substrate’s limits and the angles needed to chase clean airflow.
Cutting and shaping become a blend of craft and caution. Acrylic is cut with fine-toothed blades or a router, and it bends more predictably when heated evenly with a heat gun. The key is to work slowly: heat the sheet to a pliable state, let it relax, and bend it over a form that mimics the bike’s contours. Rotate the sheet to prevent hot spots that lead to warping, and cool it gradually to avoid stress cracks. Edges deserve the same meticulous attention as the face of the panel. Sanding the perimeter with progressively finer grits and then polishing with a buffing compound yields a smoother joint surface, which helps with sealing and overall fit. The critical caveat is not to overheat; shimmering edges give way to cloudy, cracked panels if the heat climbs too high. Practice on practice pieces to calibrate your technique before you touch the final shell.
Once the shape is ready, the mounting system becomes the backbone of the installation. A fairing must survive wind loads, vibration, and occasional mishaps on a curve. Fabricating robust brackets from aluminum or steel and integrating internal supports—like metal rods or tubes—can dramatically reduce flex at speed. Rubber grommets or bushings between metal-to-plastic interfaces help isolate vibration and cut down rattling, which is a common nuisance that quickly erodes rider confidence. The fasteners should be stainless steel to resist corrosion, and the length of bolts may need adjustment to reach mounting points that were not originally designed for the new panel. A thoughtful builder considers the possibility of maintenance and service: the most elegant installations often feature a quick-release concept or easily removable fasteners that enable quick access to the lights, the radiator vents, or the wiring harness without wrestling with stubborn plastic.
Alignment is the heartbeat of a successful install. In practice, you begin with loose fits and a careful visual and tactile check for gaps, overlaps, and parallelism with known reference lines on the bike. The mounting holes on the fairing brackets must align with the frame or subframe points. If even a small misalignment exists, you will see it in the panel’s stance, feel it in the way the edge sits against the tank, or hear it in the echo of vibration when the engine comes up to speed. The philosophy here is simple: test-fit with everything barely snug, then adjust height, fore-aft position, and angle until the line of the fairing reads clean from head-on and from the rider’s eye level. This stage also doubles as a chance to validate clearances. Mirrors must not rub paint or explode into a different plane, lights should not be shaded or masked, and throttle and gear levers must operate freely. The best installations won’t merely avoid interference; they will optimize the line of airflow and minimize turbulence as wind travels around the rider’s torso and the machine’s silhouette.
Torque control follows alignment. The temptation to tighten everything to the last quarter turn is real, but guidance from the broader bodywork discipline cautions against over-tightening. The goal is secure, not brute. If a torque specification exists in the kit manual, you follow it with a torque wrench, stepping through bolts in a crisscross pattern to distribute clamping force evenly. For components without explicit torque values, grip and feel become the guide, but you still avoid putting extra stress on brittle plastic or on delicate mounting tabs. The mantra here is to secure without stripping threads or distorting the panel’s geometry. If a panel edge must bear a load, a strategic use of washers and maybe threaded inserts can spread the load and preserve the integrity of the fairing’s attachment points.
After the fairing has been anchored in a manner that respects both form and function, you move to the sequence of installation and dynamic testing. First, mount the fairing loosely and gauge the overall aesthetics from several angles—eye-level, a rider’s seated view, and even a test silhouette against a wall to catch any odd gaps. Then, with everything still a bit loose, ride through a slow-speed cone setup or a controlled environment to feel for any unexpected buffeting, rattles, or contact points. This is the moment to refine; tiny adjustments to the angle of the fairing relative to the rider can shift the wind’s path enough to reduce drag and improve comfort. The rider’s visibility is also part of this evaluation. If wind pressure on the chest or helmet becomes uncomfortable, raise or tilt the upper edge slightly; if the fairing blocks any portion of the dashboard or instruments, revise the mounting height or the angle. A practical tip that recurs in real builds is the use of quick-release hardware for rapid removal. It allows the rider to swap configurations for different riding styles or weather conditions without dedicating an entire afternoon to reassembly.
The finishing touches are not afterthoughts but part of the aerodynamic and protective strategy. Joints between panels may need sealing to prevent water ingress or flex-induced squeaks. Silicone sealant provides a gentle, flexible barrier that accommodates panel movement with temperature changes. If color or texture is important, automotive-grade primer and paint with a clear coat can not only match the bike’s tone but also protect the surface from UV exposure that would otherwise degrade clarity and color over time. It is entirely acceptable to embrace the aesthetic potential here—graphical decals, brushed edges, or subtle chrome accents can elevate the visual integration of the fairing with the bike’s lines, as long as they do not invite attention away from essential function or compromise aerodynamics.
Throughout this process, safety remains the guiding principle. The installation should be treated as a staged test, not a single moment of assembly. After the mounting is complete, a thorough inspection is prudent: check for wobble, ensure no bolts have backed out, and confirm there is no gap that could become a stress concentrator. A short, low-speed test ride is essential to sense if the aerodynamics have introduced unexpected buffeting or if any part rubs at suspension compression or during wheel travel. If the ride feels unsettled at highway speeds, revisit the alignment, the mounting stiffness, and the edge transitions where air meets the fairing’s surface. The first highway test should be undertaken with caution, in calm conditions, and always with a reasonable margin for error. A well-executed install grows more confident with each ride, as signatures of stability, quiet operation, and clean wind deflection emerge from the data of experience and observation.
For builders who want more context on installation principles beyond a single component, the general thread remains consistent: prepare thoroughly, align precisely, secure with appropriate torque, and test with a critical eye toward both aerodynamics and rider comfort. In the absence of a universal, factory-style manual for a full fairing kit, these principles become the operating system that allows any DIY project to become a coherent and reliable upgrade rather than a cosmetic add-on. If you’re curious about category-specific opportunities and examples from other riders, you can explore related collections that organize fairings by fit and style. In particular, the BMW fairings category provides a sense of how the pieces relate to a bike’s underlying geometry and how mounting points map to the frame’s architecture. This kind of reference can help you anticipate common alignments and potential fitment challenges when you apply the same discipline to your own build. BMW fairings category.
The journey from a rough shell to a harmonized, air-conscious shell is iterative. Every ride refines understanding of how weight distribution, line of sight, and air flow interact with body position and riding style. What begins as a set of measurements becomes a shaping philosophy: the fairing is not merely a cover but a partner that slides into the rider’s silhouette, guiding wind away from sensitive surfaces and toward a profile that slices through air with less resistance. When done thoughtfully, installation becomes a journey toward balance, where the rider feels less wind fatigue on long miles, and the machine gains a tangible edge in stability and efficiency. The chapter on installation and adjustment thus pivots away from a single act of bolting on a panel and toward an ongoing dialogue with the bike’s aerodynamics. The result is a fairing that does not merely exist on the frame; it performs with the rider, harmonizing shape, speed, and sensation as one continuous, mechanical conversation.
External resource for deeper installation considerations: https://www.autohome.com.cn/news/20251204/9135924.html
Final thoughts
Building motorcycle fairings equips business owners with the capability to enhance product offerings and meet specific customer needs. By following the outlined chapters—ranging from design to installation—owners can craft custom fairings that not only improve performance but also add to the bike’s aesthetic appeal. Investing time in understanding each phase of development, from material selection to secure mounting, ensures that businesses can provide high-quality, tailored solutions to riders. This not only strengthens customer loyalty but can also lead to increased sales opportunities in a competitive market.