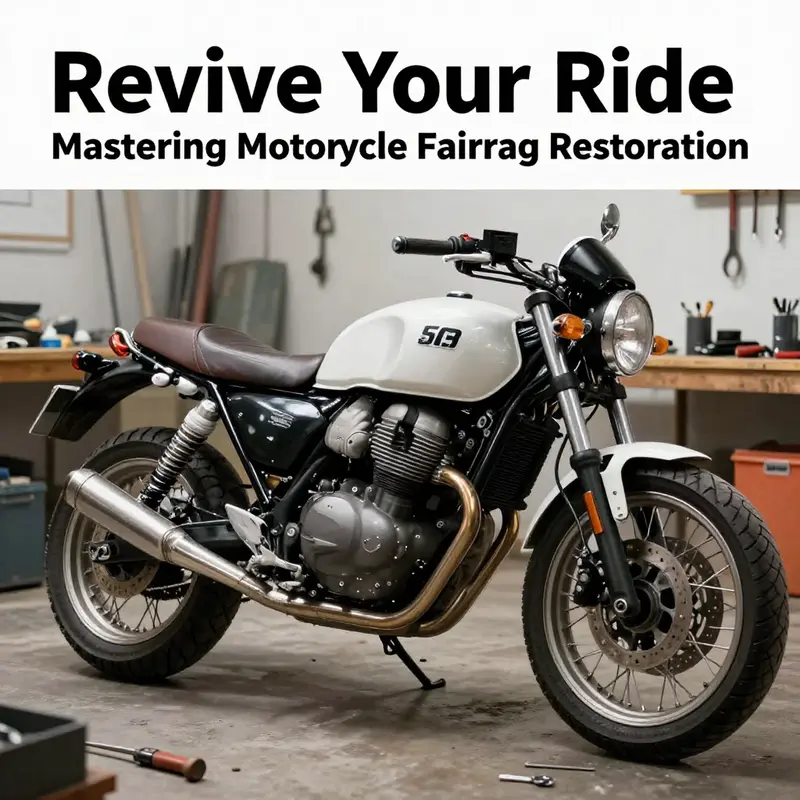
Motorcycle fairing restoration plays a crucial role in maintaining the aesthetic appeal and functionality of motorcycle bodywork. This process, essential for owners of classic and high-mileage bikes, as well as those involved in accidents, includes evaluating damage, employing varied techniques for repair, and ensuring authenticity through proper sourcing of parts. Understanding each aspect of the restoration process not only preserves the bike’s value but also enhances the riding experience. Chapters ahead will dive into assessing damage, exploring techniques and materials for restoration, and sourcing authentic parts to ensure a quality outcome.
Reading the Crack Surface: A Comprehensive Assessment for Restoring Motorcycle Fairings
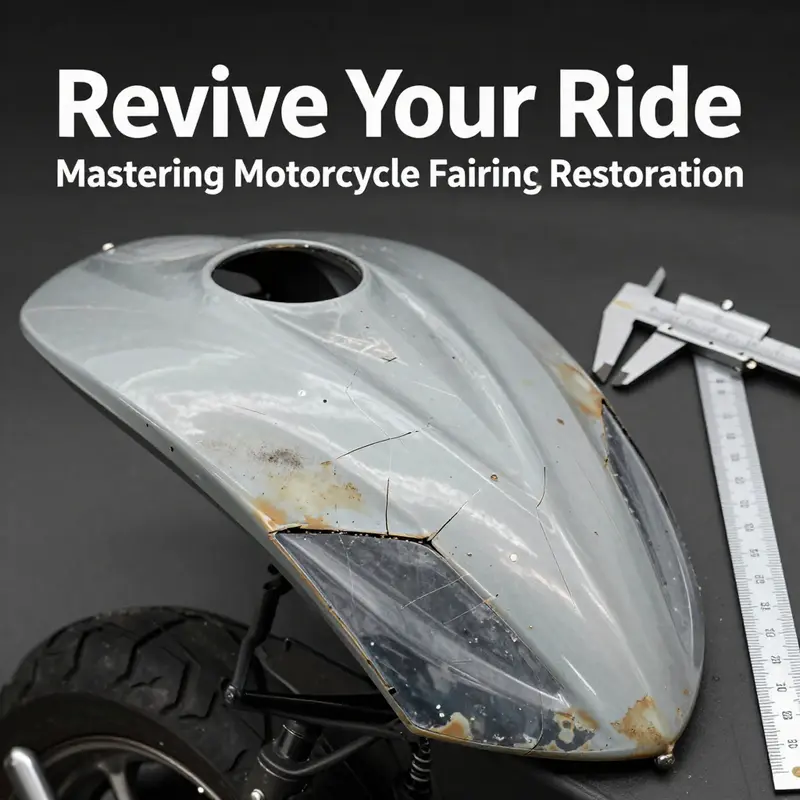
Assessing damage in motorcycle fairing restoration is more than noting a superficial flaw. It is a careful, narrative diagnostic that reads the history written into the plastic by impact, weather, and time. The goal is not merely to decide whether a repair is possible, but to understand how every decision—be it filler choice, primer compatibility, or the shift from repair to replacement—will affect fit, strength, and the ultimate look. In practice, this assessment begins with a patient observant gaze and ends with a clear plan that aligns with the bike’s era, its owner’s aims, and the possibilities offered by OEM or high-grade aftermarket parts. The quiet discipline of this phase is what separates a cosmetic touch-up from a restoration that endures through miles, years, and the sun’s unrelenting UV rays. The following reflection traces the steps of this assessment as a continuous thread, weaving visual and tactile cues with structural considerations and practical testing, and it keeps a steady eye on how each clue guides the restoration path toward authenticity and resilience.
The first impression is visual. A fairing’s appearance tells a story: where heat has softened edges, where color has surrendered to fade, and where cracks have quietly extended their reach. A thorough visual inspection requires good light—the kind of light that reveals subtle shifts in curvature and gloss. A rider might inspect from several angles, rotating the bike as if it were a sculpture, letting the light reveal deviations in contour that betray warping or prior misalignment. Warping shows up as inconsistent radii along curves, while uneven contours reveal themselves as subtly raised or sunken edges along seams. Cracks differ in character too. A hairline crack that runs along a seam behaves differently from a spiderweb fracture that has radiated outward from an impact point. Surface irregularities such as orange peel indicate paint application issues, while a blotchy finish might point to improper blending between original material and filler layers. When the eye discerns a discrepancy in shade, gloss, or texture, the decision tree broadens. Will the discoloration clean up with polish and a careful blend, or has the pigment degraded to the point where color matching becomes the centerpiece of the restoration plan? Even the presence of yellowed clear coats or crazed finishes can signal deeper issues beneath the surface that warrant more than cosmetic remedies. The visual phase is not mere aesthetics; it is the map for subsequent steps of repair, refinement, and reassembly.
Touch adds a second, indispensable layer. A careful tactile examination complements what the eyes perceive. As the fingers explore the repaired area, the absence of rough edges becomes as important as the absence of visible seams. A smooth surface should feel seamless, with no gritty undertone or abrupt changes where original plastic gives way to filler and rework. If the surface reveals rough patches, sanding marks, or a gritty texture that can be felt through gloves, the repair strategy must change. The texture acts as a fingerprint, identifying whether the approach used to fill cracks—be it polyester-based or epoxy-based fillers—left a thick, uneven layer or whether steps to re-sand and re-prime are overdue. A high-quality repair registers as a continuous, even plane across the entire panel, free from raised lines that would later telegraph through paint. The tactile method also checks for soft spots where the filler has failed to bond fully with the substrate. These tactile cues guide whether the area needs additional filler, more thorough sanding, or perhaps a partial replacement of the panel. In this phase, the mind translates texture into technique: too much filler demands additional sanding, and sanding beyond a reasonable threshold risks thinning the panel or weakening the bond with adhesive and paint.
Structural integrity remains the backbone of any restoration. A fairing is more than a cosmetic shell; it is a structural participant in the bike’s silhouette and, at times, a protective layer for the rider. The assessment must therefore extend beneath the surface into the internal reinforcement, mounting points, and the panel’s interactions with adjacent components. If the damage extended to an internal rib or support, the repair plan must include secure reinstallation and verification of anchor points. Misalignment that appears minor at first glance can become a source of vibration, rattles, and misfit with other bodywork. The structural check also flags signs of prior repairs that may have compromised the fairing’s natural geometry. Prior fix attempts can leave gaps, mismatched seams, or flex when pressure is applied. Any of these issues signals a potential safety risk if left unaddressed, even if the surface looks pristine after a polish. The structural stage is therefore not a separate box to tick; it is the physics of restoration. It demands that fasteners fit flush, that nearby panels align with consistent gaps, and that the reassembled unit behaves as a single, coherent shape under load and during operation.
Functional testing completes the triad of assessment: it tests fit, alignment, and performance in the real world. The rider’s experience is the ultimate judge of success. After restoration, the fairing should sit squarely against other body panels, closing gaps evenly and avoiding clashes with headlights, vents, or windscreen edges. The mounting points must accept fasteners without forcing or strain, and there should be no rattles or newly introduced vibrations at cruising speeds. Function follows form; even a visually flawless panel can fail functionally if the alignment alters the aerodynamics or rubs against the frame under load. The functional test invites a dynamic check: does the fairing still clear the radiator guards and the fork crown under full steering? Do the vent grills align with their ducts for airflow? These considerations matter more than the swath of gloss on a repaired surface. The rider’s satisfaction rests on a fairing that feels integrated, not an assembled shell that looks good while moving as a separate entity.
The best assessments also invite external eyes, for there are subtleties that trained technicians catch more reliably with specialized tools. In professional settings, laser alignment systems can verify that panels meet OEM geometry within tight tolerances. Paint thickness gauges help quantify whether the various coats contribute more than the intended protection, ensuring the original color purity and gloss depth can be restored without overbuilding. The aim is not only to reproduce the look but to reproduce the dimensional fidelity that makes a vintage bike feel like it rolled off the factory floor. When a repair plan is based on precise measurements and rigorous checks, the restoration gains the credibility that seasoned enthusiasts seek. It is the convergence of aesthetics, fit, and durability that transforms a repaired shell into a faithful steward of the bike’s history.
The depth of the assessment also informs the choice between repair and replacement. Small surface scratches and minor discoloration may be within reach of polishing and paint correction, especially when the underlying plastic remains rigid and undamaged. But deeper scratches that cut through color layers or chips that expose the substrate may necessitate more conservative repairs, using body fillers that are compatible with the chosen plastic and a sequence of re-prime and topcoat steps. If the plastic has become brittle due to UV exposure or if warping has progressed beyond cosmetic correction, replacement becomes the safer path. Replacement can preserve the integrity of the mounting points and the panel’s contour, preventing the risk of delamination or structural failure later in the bike’s life. The assessment thus becomes a decision-making map, balancing the cost, time, and risk of continued use against the value of restoring originality and maintaining safety.
In practice, the assessment also embraces the reality of material choice and method. If a decision favors repair, the materials must be chosen with care. A reliable adhesive system is essential to prevent future delamination in a panel that will experience vibrations and varying temperatures. Filler selections must tolerate flex without cracking, and the primer must provide a uniform base for paint, with the right chemistry to bond to both the original plastic and the new layers. The finish demands color accuracy and appropriate gloss that matches the bike’s era and style. A carefully matched shade is not a cosmetic flourish but a component of the restoration’s integrity. The clear coat, too, must resist yellowing and cracking over time, while offering protection against the sun’s UV rays and environmental exposure. The entire sequence—surface preparation, filler, primer, basecoat, and clear coat—requires a disciplined approach, with each step designed to integrate with the next. Skipping a step or rushing a layer undermines the entire effort and risks the need for rework that compounds cost and downtime.
Another layer of consideration concerns authenticity and the rider’s expectations. For those restoring a classic or a high-mileage machine, the goal often centers on historical accuracy: color codes, finishes, trim pieces, and vent bezels may all carry specific cues that distinguish a model year. In such cases, the assessment must verify compatibility with the intended finish and the availability of OEM or high-grade aftermarket parts. It is not enough to achieve a surface that looks like original; it must also honor the panel’s historic geometry and functional compatibility with the bike’s other components. This is where thoughtful sourcing enters the narrative. A reputable approach may involve consulting restoration guidelines from manufacturers or trusted industry bodies and comparing paint codes against factory references. In this light, authenticity and performance converge, ensuring the fare is not only visually convincing but also mechanically and aerodynamically coherent.
Within this careful discernment, the chapter on assessment also attends to the rider’s practical constraints and preferences. Some riders seek the closest possible replica of the original, even if it requires more time and greater investment. Others aim for a robust modern finish that can withstand daily riding while reflecting a vintage silhouette. Each path has its own budget and time frame, and the assessment process should illuminate those parameters early. The clarity that comes from a disciplined evaluation helps prevent choices driven by impulse or quick fixes. It helps ensure that a restoration project ends with a fairing that fits precisely, wears evenly, and communicates a clear story of preservation rather than neglect.
As the assessment closes, visual cues, tactile feedback, and structural reality converge into a concrete plan. The plan lays out whether the next phase will be surface-oriented, focusing on color matching and finish quality, or whether it will require fabricating or replacing components that surpass the fairing’s repairable range. It specifies the sequence of steps, the materials chosen, and the tolerances that will define the project’s success. It also identifies points of verification during and after assembly, so that a final fit check, a test ride, and a review of the finish can be completed with confidence. In this way, the assessment is not a detached diagnostic but an integrated compass that guides every subsequent action—from masking and prep to priming, painting, and sealing. The road from assessment to restoration is linear in purpose but flexible in execution, adapting to the panel’s condition, the owner’s expectations, and the realities of the bike’s design.
For readers seeking to connect what they read here with practical options, consider exploring a broader catalog of fairing categories to understand mounting schemes, compatibility, and trim options that align with your model. For instance, exploring the Honda fairings category may offer a range of OEM-friendly paths for authenticity and fit. Honda fairings category This kind of lookup helps you gauge what is realistically achievable within your restoration plan while keeping your bike’s visual language faithful to its era.
Beyond the specifics of color and contour, the assessment reinforces a principle: restoration is not a single act of repair but a careful orchestration of decisions that preserves function, appearance, and value. It is a discipline built on patience, precision, and a willingness to revise plans in light of new evidence. The fairing’s surface may reveal a story written across years, but the restoration author can choose how to tell that story—whether to honor it with subtle touch-ups or to recast it with careful, well-supported replacements. The narrative of the process is ultimately a narrative of respect for the machine, its history, and the rider who cherishes the motorcycle enough to invest the time to restore it thoughtfully. This respect is the thread that binds the visual and tactile discoveries of the assessment to the steadier hands of the repairer as they prepare to reassemble the fairing, align it with neighboring panels, and reintroduce the bike to the road in a form that endures.
External resources and professional guidelines can offer additional benchmarks for quality and safety. For authoritative guidance on motorcycle fairing repair techniques and quality benchmarks, refer to the official guidelines published by the Motorcycle Industry Council. This resource provides best practices for bodywork restoration and safety compliance, supporting the judgment calls that arise during the assessment process. You can consult their guidance at: https://www.motorcycle.org
Sculpting Strength from Plastic: Techniques and Materials for Motorcycle Fairing Restoration
Restoring motorcycle fairings is a craft that sits at the intersection of artistry and engineering. The plastic skins that wrap a bike carry the weight of aesthetics and, increasingly, the demands of aerodynamics and protection. Over years of exposure to sun, weather, and road debris, those panels can fade, craze, crack, or warp. The challenge is to bring back not just the color and gloss but the structural integrity that lets the fairing do its job and look right on the bike. A successful restoration blends careful assessment with a measured choice of techniques and materials, so the result feels seamless, authentic, and durable enough to withstand the next ride down the street or the track. The path from a damaged shell to a revived appearance is rarely a single step. It is a sequence of decisions about preparation, repair strategy, reinforcement, and finish, each grounded in the properties of the plastic used in the fairing and the role that panel plays in the overall assembly of the motorcycle.
In this broader conversation about restoration, the first anchor is always assessment. A fairing’s material is typically a form of plastic—common options include ABS and various fiberglass-reinforced composites. ABS, with its balance of rigidity and impact resistance, behaves predictably under heat and repair, but it can suffer from stress cracking if it’s flexed too aggressively. Fiberglass-reinforced plastics bring additional stiffness and abrasion resistance, yet their repair requires more careful attention to resin uptake and surface matching. The degree of damage communicates which route to take. Minor surface scratches and dulling can often be corrected in place with polishing and paint correction, returning the gloss and depth that define a bike’s look. Deeper scratches, chips, or small cracks demand a more considered approach: structural bonding, patching, and controlled finishing to restore both form and function. In cases where UV exposure has aged the plastic to the point of brittleness, warping, or creeping stress, replacement becomes the prudent choice rather than repair. Accepting that limit is part of honoring the bike’s integrity and the rider’s safety, because a repaired panel that fractures again on the highway is never a good outcome.
The core of any restoration, then, is the repair strategy itself. When damage is contained to smaller areas or cracks that do not compromise the panel’s mounting lugs and mounting points, a two-pronged approach is viable: adhesion and reinforcement. A high-strength, flexible adhesive designed for plastics offers a robust bond over cracked edges and small breaks. A fast-acting cyanoacrylate adhesive provides quick stabilization for non-load-bearing sections or for temporary alignment while a longer-term repair cures. These adhesives, applied with care and clamped until set, form the foundation of a durable repair. For larger breaks or more significant gaps, a patch approach becomes necessary. A fiberglass patch, bonded with a compatible resin, can bridge the split and distribute stress away from the cracked line. If an even higher strength is required or the panel is subject to higher loads, carbon fiber patches provide a lightweight, stiff reinforcement that minimizes flex and helps preserve alignment under vibration and wind loads. The advantage of carbon fiber is not merely strength; it also imparts a refined stiffness that keeps the repaired area from oscillating at speed, which could otherwise lead to delamination at the edges.
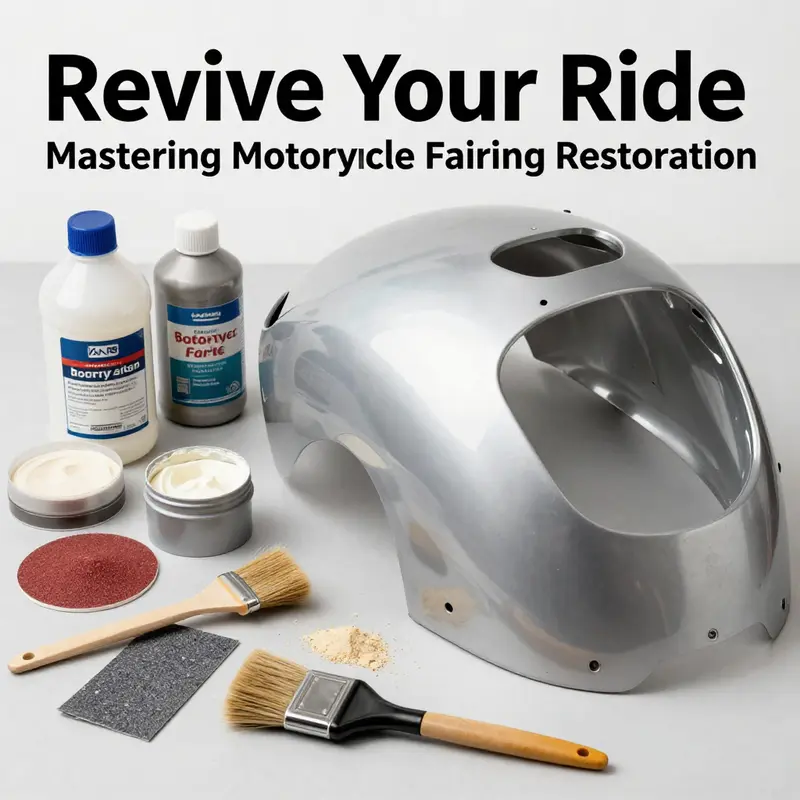
Preparation is the unsung hero of a lasting repair. Surface preparation begins with thorough cleaning to remove dirt, oil, wax, and silicone that can sabotage adhesion. A degreasing step is essential, followed by careful feathering of the edges around cracks and breaks with a fine-grit sanding block. The goal is to create a rough, uniform surface at the repair zone so the adhesive can bite evenly across the entire bonded area. The sanding is not punitive; it’s a controlled, gentle abrading that respects the panel contours while creating the bonding canvas. After sanding, a clean wipe with a solvent designed for plastics removes any remaining residues that could impede adhesion. The next stage is the actual restoration work, which often unfolds in layers.
For minor cracks, a two-part epoxy with excellent adhesion to plastics provides a solid anchor. The epoxy system should be chosen for elasticity with a cure that yields a slight give, allowing the repaired area to flex with the panel rather than remaining rigid and prone to re-cracking. The epoxy is mixed and applied to the cracked surface, with the edges carefully pressed together. The use of clamps or strong tape to hold the joint in alignment during the cure period—typically around 24 hours—ensures that the bond forms with the edges flush against each other. When gaps or larger breaks are present, a patch system becomes more appropriate. A fabric patch—fiberglass for standard repairs or carbon fiber for premium reinforcement—is laid over the crack and impregnated with resin to create a continuous, integrated structure. The patch should extend several millimeters beyond the cracked area to distribute stress away from the failure line. This approach not only repairs the panel but also helps return the panel’s load paths to their original geometry, reducing the likelihood of a repeat failure at the same location.
The repair is only as good as the bond it forms with the surrounding surface. Consequently, after the adhesive cures, the area is carefully sanded again to remove any cured edges, creating a smooth transition between the patch and the original panel. This feathering is crucial; if the join line remains visible, the eventual paint layer will exaggerate it. The next step is priming. A plastic primer that is compatible with the panel material is applied in thin layers, allowing each coat to dry before the next. Priming serves two purposes: it improves paint adhesion and it seals the repaired area to prevent moisture ingress that could undermine the bond over time. In the case of ABS panels, the primer must be compatible with the resin system that will follow; otherwise, the paint may peel or lift at the repair site. Once the primer has cured, the surface is wetted with a fine sanding, typically in the 600- to 1000-grit range, to provide a smooth base for paint.
Paint matching and finishing are where restoration becomes an art form. Achieving an accurate color match requires a careful combination of tinting, color separation, and, where possible, reference to factory paint codes. Some restarters source color-matched finishes via professional color-matching services that analyze the panel’s color and blend it to align with the bike’s original hue. For vintage or customized machines, a bespoke finish may be required to preserve the character of the bike. The paint layer is typically applied in several thin coats, each allowed to cure before the next. This approach reduces the risk of runs and creates a uniform surface that reads correctly in light. A clear coat is essential for protection against UV exposure, road grit, and fading, and it also adds the depth and shine riders expect from a well-kept fairing. The finish is not just cosmetic; it seals the repairs against moisture that could lead to delamination around the edges.
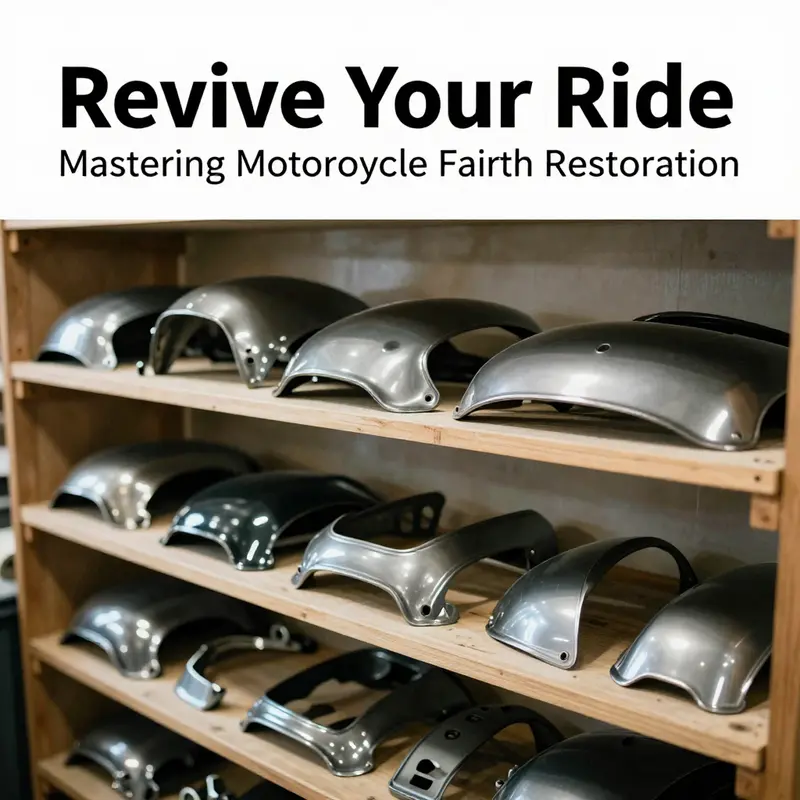
Beyond the basics of bond and color, the material choices themselves guide the long-term outcome of a restoration. Original equipment manufacturer (OEM) panels, when available, offer the most reliable fit and the most faithful look, but they can be costly and time consuming to source. High-grade aftermarket kits, designed for a specific model range, offer a practical balance of fit, finish, and price. When riders seek authenticity, many opt for panels in durable plastics such as ABS or composites that mimic the original structure while providing improved resistance to stress cracking or impact. The consideration of material type also influences the repair strategy. A panel made from a tougher composite may resist minor cracking but require more sophisticated techniques to drill and bond patches without compromising its structural integrity. In contrast, thinner ABS may be easier to repair but can be more susceptible to re-cracking if the repair is not done with the proper surface preparation and adhesive choice.
A practical restoration does not stop at the repair and paint. Surface details—the trim pieces, vents, and bezels that define the fairing’s character—are integral to the overall look. Here, the restoration often aligns with accessory and trim kits that installers use to restore or replace specific features. Premium approaches may incorporate carbon fiber replications for structural elements that are visible and under load, offering a modern contrast to the original shell while preserving the bike’s visual language. It is in these details that many restorers find a sense of completion: the tail wing’s contour is crisp, the winglets align with the body line, and the finish around the edges catches light in a way that makes the repair almost invisible. When authenticity is the goal, the choice of components—whether OEM-replenished parts or high-quality aftermarket pieces—becomes as important as the repair itself. If a restorer is seeking model-specific fidelity, one might reference a model family’s fairings as a guide. For instance, the fairings built for popular sport models include a family of panels designed to match a model’s aerodynamics and line, and evaluating these pieces can inform the decision about whether to repair or replace a damaged section. In this regard, to explore the broader ecosystem of model-specific options, consider resources focused on Honda fairings for CBR machines, which help align the repair approach with the precise geometry and finish of that lineage. See Honda fairings for CBR motorcycles.
The advanced end of restoration often involves more than glue and paint. Enthusiasts pushing the envelope look to reinforcement methods that add measurable stiffness and durability without significantly increasing weight. Carbon fiber reinforcement, in particular, has gained popularity for tail wings and other high-stress areas where speed and wind resistance translate into higher loads. The technique involves laying carbon fiber fabric over the repaired region, saturating it with epoxy resin, and curing under controlled heat or pressure. The result is a repair that is both lighter and stronger than conventional patches while also offering a visually distinctive texture that resonates with the contemporary aesthetics of performance motorcycles. This approach, while more time-consuming and technically demanding, has become a hallmark of high-end restorations. It enables riders to preserve the look of original panels while benefitting from a modern level of rigidity that helps prevent future delamination or cracking at the repair seam. The use of carbon fiber, though, should be considered carefully in terms of panel flexibility and alignment with mounting points; the added stiffness must not distort fit or create stress concentrations at joints.
In discussing the material and technique choices, it is useful to speak to the iterative nature of restoration. A good restoration often starts with a conservative repair, followed by a test fit, and then, if necessary, additional reinforcement. This iterative approach minimizes the risk of over-engineering a panel—over-reinforcement can alter the panel’s bend radius, cause mounting misalignment, or produce an unnaturally stiff surface that betrays the bike’s original character. Restorers who document their process often track the sequence of steps, the adhesives used, cure times, and any fit checks performed after each stage. This record becomes a practical guide for future touch-ups, color corrections, or panel replacements and helps maintain consistency across the project. The narrative of restoration, then, is not merely about restoring a single panel; it is about reconstructing the integrity of the fairing assembly and preserving the bike’s silhouette as it was designed to be seen and ridden.
The broader ecosystem of fairing restoration, including community knowledge and model-specific guidance, provides valuable context. For those seeking to extend their understanding beyond the basics, tutorials and technical guides from reputable sources can offer model-tailored instructions that speak to nuance in geometry, mounting, and finish. While such resources can be model-specific and occasionally biased toward particular material choices, they are indispensable for refinements and troubleshooting. Practitioners often supplement their hands-on work with practical demonstrations and community feedback to refine their technique. The common thread across these voices is a shared emphasis on surface preparation, controlled bonding, and a finish that withstands the test of weather and time while remaining true to the bike’s original look.
In closing this part of the chapter, the central message is that restoration is a careful dialogue between materials and methods. The materials set limits and offer opportunities, and the techniques are the vehicle that translates those properties into a durable, aesthetic result. When done well, the repair ceases to be a repair and becomes a restoration that respects the bike’s history and its future. The result is not merely a glossy panel but a surface that carries light with the same confidence it carried wind years ago. That outcome rests on selecting the right approach for each area of the fairing, preparing the surface with patience, applying bonding and patching with precision, and choosing a finish that respects both the model’s lineage and the rider’s intention. And because the fairing is more than a cover—it is a shield and a statement—the restoration that returns it to its former strength is exactly the kind of craftsmanship that keeps a machine’s spirit alive on the road or the track.
For readers who want to see how modern carbon fiber reinforcement looks in practice, a detailed demonstration of the technique exists in a visual tutorial that walks through material application, shaping, and finishing steps for a damaged tail wing. This external resource provides a compelling complement to the written guidance, showing how resin, fabric, and heat combine to create a repair that is both strong and elegant. External resource: https://www.bilibili.com/video/BV1Ku4y1r7Nw/.
As you plan your next restoration session, consider not only the immediate repair tasks but also the long-term maintenance that preserves the fairing’s life. Regular inspection for micro-cracks, prudent handling during assembly and disassembly, and applying a protective clear coat that resists UV damage will help ensure the result endures. In the end, the best restoration is one that integrates seamlessly with the bike’s geometry and aesthetic, offering a sense of continuity between a machine’s past and its continued performance on the road. For those seeking a more model-specific reference as part of their ongoing project, exploring targeted model catalogs can provide the alignment between component shapes, mounting interfaces, and finish nuances that matter when you’re aiming for an authentic look. This holistic approach—assessment, careful repair, reinforced structure where necessary, precise finishing, and thoughtful component choices—defines the practice of modern motorcycle fairing restoration and elevates it from a repair task to a craftsman’s alliance with the machine.
Preserving Authenticity in Fairing Restoration: Sourcing Parts with Care
Authenticity in motorcycle fairing restoration is more than a concern about looks. It is a discipline that binds the bike’s contemporary function to its original design language. The fairings are not merely decorative shells; they regulate airflow, protect mechanical systems, and establish a rider’s perception of balance and speed even when the bike is standing still. The path to authenticity starts with a pragmatic assessment of damage and proceeds through a careful choice between repair and replacement. Minor surface scratches or color fades can often be addressed without altering the underlying structure, but deeper cracks, deformities, or UV-induced brittleness demand a different approach. The decision hinges on the extent of the damage, the stability of the material, and the long-term performance expectations of the restoration. The narrator of this process is not nostalgia alone but a clear-eyed evaluation of how each decision affects the bike’s posture, aerodynamics, and resilience under the next ride into the wind. The aim is to keep the machine honest to its original intent while embracing the benefits of modern materials and techniques where appropriate.
Authenticity is most tangible when a restorer prioritizes sourcing from credible channels. The most trusted route is the one that includes official parts or OEM-grade replacements. These parts are manufactured to the same tolerances that shaped the bike at the factory, ensuring that every clip, every mounting boss, and every seam aligns with the surrounding panels. They preserve the intended thickness, edge geometry, and surface texture, which in turn preserves the craft of the original engineering. When an authentic path is chosen, it reduces the risk of misalignment, which can create a cascade of fitment issues—gaps that trap moisture, seals that don’t seat properly, or fasteners that refuse to thread smoothly. The restoration becomes a conversation between the past and the present, where the language of the original design is spoken with contemporary precision.
Material choice figures prominently in the authenticity equation. Modern fairings are constructed from a spectrum of plastics and composites designed to balance strength, weight, and impact resistance. ABS plastic remains a staple for its formability and resilience, while fiberglass-reinforced composites offer stiffness and a different tactile feel on the surface. Over decades, exposure to sun and heat can lead to UV degradation, making a panel brittle, discolored, or warped. A critical early step is to distinguish between issues that can be revived with surface work and those that demand replacement. A panel that has lost its structural integrity or has warped beyond repair will not simply benefit from refinishing; it requires a replacement that matches the original shape, weight distribution, and mounting interface. Even in repairable situations, the choice of filler, primer, and bonding agents must respect the long-term behavior of the plastic and its response to temperature and moisture. Properly chosen materials will bond without peeling, polish to a consistent gloss, and maintain flexibility to accommodate repeated disassembly and reassembly during maintenance.
The sourcing journey is where authenticity becomes a practical, enforceable standard. The most reliable sources for fairing components are authorized dealers, official brand outlets, and well-regarded specialists who publish traceable part identifiers and stock histories. A counterfeit part can imitate the outward appearance, but it often shows through in critical attributes: a different wall thickness, altered internal ribs, mismatched screw bosses, or a texture that diverges from the factory’s finish. In contrast, genuine replacements or high-quality replicas—produced with precision tooling and subjected to rigorous quality control—tend to reproduce exacting tolerances. The difference may be subtle at a glance but becomes clear when the piece is installed: alignment around the headlight shroud, the flushness of the joint seams, and the way the edge radii reflect light. Authentic sourcing also preserves the bike’s historical narrative, which matters to collectors and enthusiasts who want a faithful representation of the machine’s original era.
To safeguard authenticity, many restorers insist on verifiable identifiers. Part numbers, manufacturing codes, and factory insignia act as fingerprints. The restoration plan should include a checklist to compare these markers against official catalogs and your bike’s records. Purchasing from sources that publish and verify these identifiers reduces the chance of exposure to counterfeit items. It also makes it easier to document the provenance for future owners, insurers, or appraisers. A well-documented purchase trail supports the restoration’s credibility just as much as the final finish supports its aesthetics. When a part number matches the factory database and the production batch aligns with the original build period, the piece earns trust. Conversely, vague listings or ambiguous dating can signal either an aftermarket replacement or a counterfeit, which can undermine the restoration’s value and reliability.
Restoration kits often promise a turnkey path to authenticity, yet they demand careful examination. A premium kit can include the essential trim pieces, vents, bezels, and mounting hardware that mirror the original hardware set. The advantage of such kits is cohesion: every component is designed to work together with the others, which reduces the risk of mismatched seams or incompatible fasteners. But not all kits offer the same level of fidelity. It is important to scrutinize the materials, the edge finishing, and the texture of the surface. A kit that claims model-specific accuracy should provide specifications that mirror the factory’s geometry and the same fastening interfaces. Cheaper kits may deliver visual similarity but fail under the rigors of heat, vibration, and terrain. In that case, the restorer may choose to supplement the kit with individual, verified parts to maintain a consistent line and consistent performance across the entire fairing ensemble.
Color matching carries the weight of historical fidelity. The original color is more than a shade; it embodies the era’s materials, the time’s environmental conditions, and the production techniques of the factory. The restoration workflow typically begins with a color code pulled from the factory records or a color-matching service that references the original code and a living sample. Yet color is a layered property: it has hue, saturation, and brightness, plus a gloss gradient that changes with viewing angle. A faithful finish requires reproducing the same depth of color, the same gloss, and the subtle micro-texture of the panel’s surface. Tests are essential—spraying on spare panels and evaluating the result under different lighting conditions, then adjusting the mix until a seamless blend is achieved. The clear coat should provide a durable seal that resists UV fading and micro-scratches while maintaining that glassy finish. Proper adhesion is essential, so the chosen primers and sealants must be compatible with both the plastic substrate and the final paint system. A mismatch can show up after washing or in humid mornings as paint lifts or edge lines loosen.
The fit between panels remains a practical test of authenticity. OEM-grade parts are molded to exact tolerances so that panels align with the bike’s mounting points, gaskets, and adjoining pieces with minimal effort. When a part is aftermarket or a replica, there is a higher likelihood of slight deviations that require adjustments—drilling, trimming, or reworking edges. Some restorers prefer to limit the scope to essential panels and rely on the surrounding trim to carry the visual narrative. Others pursue a full set, ensuring that the entire fairing line follows a unified contour. In either case, the installation sequence matters: improper torque, misaligned gaskets, or stubborn clips can cause gaps that water can penetrate and paint can crack around. To preempt these issues, it is wise to test-fit all components before final painting and sealing, then re-check after the paint has cured.
The practical decisions around authenticity are inseparable from documentation. A restoration ledger captures every purchase decision, every source, and every test result. It should record the part’s origin, the price, the color reference, the expected finish, and the installation notes that guided the fit. This record becomes a living archive for future owners or for insurance assessments. The paperwork also helps you resist the temptation to substitute a lower-quality part when a model-specific item is out of stock. In the long run, the extra effort spent on traceability pays back through better resale value, clearer provenance, and more predictable maintenance in the future. The best restorations treat authenticity as a continuous practice rather than a one-off achievement; each future service interval is an opportunity to verify that the original decision remains valid and that the fairing continues to reflect the machine’s history.
For those who want to deepen their model-specific knowledge, there are abundant resources that lend practical insights into fit, materials, and repair strategies. Peer communities, video demonstrations, and manufacturer-guided technical resources provide a spectrum of perspectives. A balanced approach blends hands-on experience with documented guidelines to illuminate the nuances of particular generations or design eras. In addition to broad references, model-focused reference pages can help restore the bike’s exact character by detailing the expected geometry, material choices, and assembly sequences. When an installation or repaint involves a complicated seam, this kind of guidance reduces guesswork and helps maintain the integrity of the original form. For readers seeking a practical starting point, a catalog-like page dedicated to fairings offers a structured entry point and can be accessed here: fairings category page.
Authenticity is not a solitary pursuit. It thrives in dialogue among the restorer’s hands, the parts’ provenance, and the bike’s enduring design language. The craft requires patience, exacting standards, and an eye trained to identify deviations in texture, tone, and curvature. It demands a respect for the past while embracing the possibilities of modern manufacturing. The result is more than a surface refresh; it is a careful restoration of the machine’s identity as a whole. Each part chosen, each seam sealed, and each finish applied tells a story about the bike’s lineage and its owner’s commitment to preserving that lineage for riding today and for generations to come. Authentic sourcing becomes the backbone of that story, ensuring the fairing continues to communicate the same precision, performance, and aesthetic intent that defined the machine at birth.
As the project progresses, the restoration team keeps sight of the larger objective: a coherent, durable, and historically honest representation of the fairing. The work is not simply cosmetic; it is a restoration of function, identity, and trust between rider and machine. The careful selection of parts, the validation of fit, the fidelity of color, and the reliability of seals are all essential to that aim. When authenticity is achieved, the final result is not a static replica but a living, breathing part of the bike’s ongoing story. It stands up to the everyday realities of maintenance, it stays true to the original design intent, and it offers a riding experience that respects the past while benefiting from present-day materials and processes. In this sense, sourcing is not a hurdle to overcome but the compass that guides the entire restoration toward a faithful, enduring expression of the machine’s character.
External resource: https://www.kawasaki.com/motorcycles/zx7r/fairings-guide
Final thoughts
Motorcycle fairing restoration is an art that combines skill, knowledge, and the right materials to return a motorcycle to its former glory. By carefully assessing the damage, employing effective restoration techniques, and sourcing authentic parts, business owners can not only enhance the value and appearance of their motorcycles but also provide a service that resonates with enthusiasts. A commitment to quality and authenticity ensures that every restored fairing not only looks great but stands the test of time, making it a worthwhile investment for any rider.