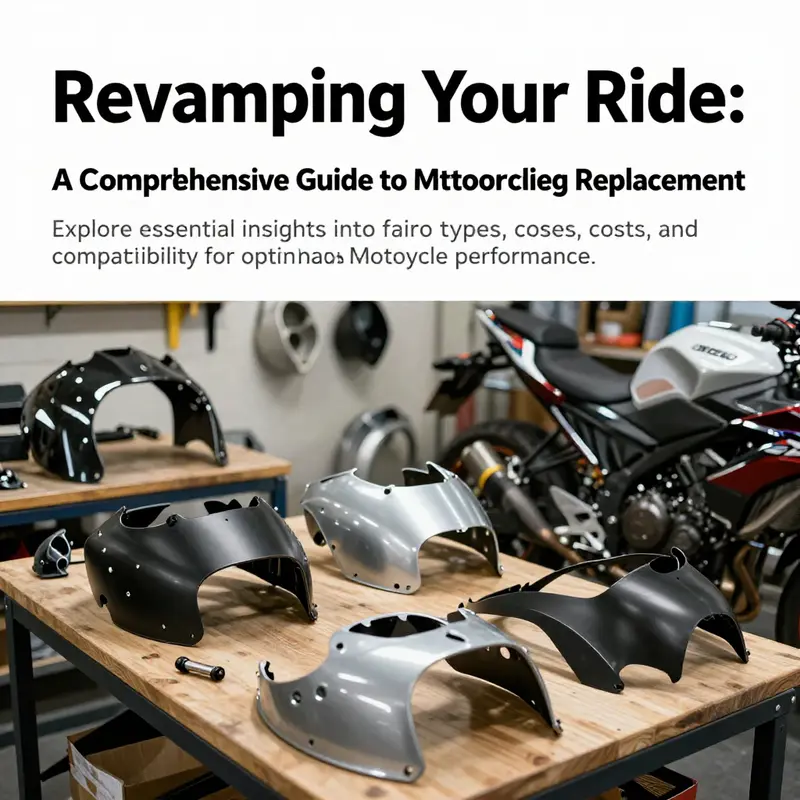
Motorcycle fairings play a crucial role in both the aesthetics and performance of bikes. Understanding motorcycle fairing replacement is essential for business owners involved in the repairs, sales, or customization of motorcycles. This guide focuses on three main areas: the types of motorcycle fairings available, a comparative cost analysis between aftermarket and OEM options, and how to ensure compatibility with various motorcycle models. By diving into these topics, you’ll gain the necessary insights to make informed decisions that can enhance your services and meet customer expectations while maintaining the value of motorcycle investments.
Shells in Motion: Understanding Full, Semi, and Lower Fairings for Replacement
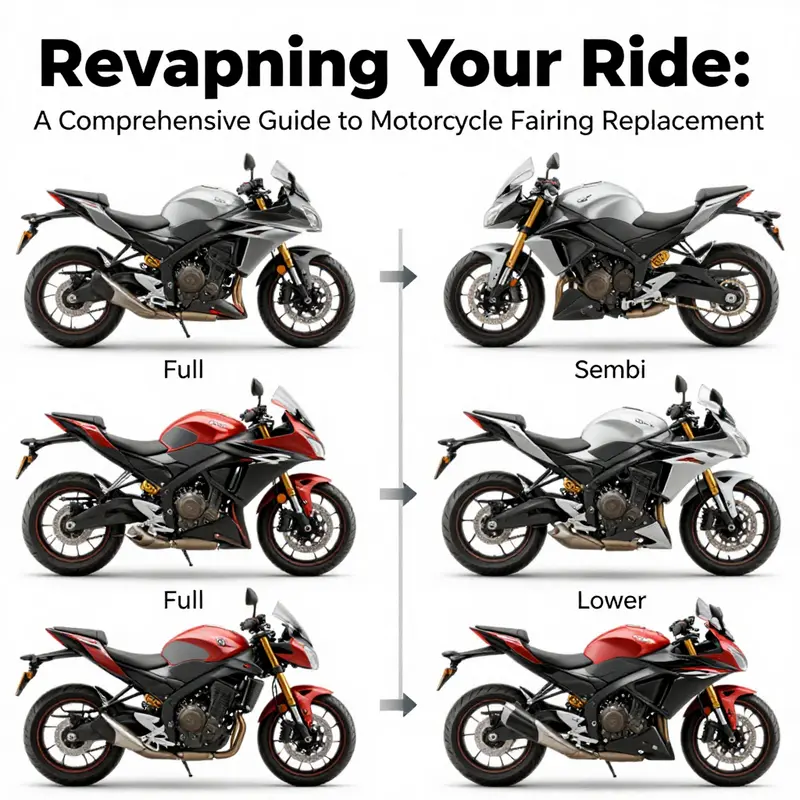
The fairing of a motorcycle is more than a visual shell; it is a carefully engineered interface between rider, machine, and environment. When a fairing needs replacement, the decision process blends considerations of aerodynamics, protection, accessibility, and budget, all while keeping the bike’s original intent intact. The three primary categories—full fairings, semi-fairings (often called half fairings), and lower fairings—each carve out a distinct niche in how a motorcycle governs wind, weather, weight, and ease of maintenance. A thoughtful replacement plan begins with understanding what each category is designed to do, how it interacts with the bike’s geometry, and what labor and parts implications follow. The result is more than a cosmetic refresh; it is a recalibration of the bike’s balance between speed, comfort, and practicality.
Full fairings are the most comprehensive expression of a bike’s aerodynamic and protective ambitions. They wrap the front and sides of the chassis, often enclosing the headlight, instrumentation, and the upper portion of the frame. In sport and touring lines, this enclosure translates into reduced drag and a calmer riding environment at highway speeds. A well-fitted full fairing can improve stability by smoothing the airflow around the bike, enabling the rider to maintain higher speeds with less muscular effort and fatigue. Yet there is a tradeoff: full fairings demand precise alignment during replacement and compound the complexity of accessing mechanical components for maintenance. The mounting points must align with the frame and any subframes that support the fairing’s structure. Otherwise, gaps may appear, fasteners can hide under panels, and wind noise can creep in where it does not belong. The aesthetic payoff—clean lines, a unified silhouette, and a cohesive color or decal scheme—often accompanies the performance benefits. For riders who spend long hours behind the shield in varying weather, the full fairing is a weather barrier that can make the difference between an enjoyable ride and a test of endurance.
Semi-fairings occupy a middle ground, offering substantial protection without the bulk of a full enclosure. They typically shield the upper portion of the bike—headlights, instrument cluster, and the upper forks—while leaving the lower engine, belly pan, and sometimes the sides exposed. The result is a lighter assembly that is easier to handle during replacement, a factor many riders appreciate when the bike is out of daily use or when a quick turnaround is a priority. The aerodynamic gains of semi-fairings are real but more modest than those provided by full fairings. They still contribute to wind deflection and rider comfort, especially at mid-to-high speeds, but they allow easier access to cooling fins, spark plugs, and lower mounting points. For sport-touring setups, café racers, and commuters who value a blend of style and manageability, semi-fairings deliver a pragmatic compromise: better wind protection than naked bikes, with fewer mass and maintenance hassles than full kits.
Lower fairings, the leanest option in this spectrum, focus their protective effort on the lower front end. They shield engine cases and lower forks while leaving the cockpit area more exposed. Lower fairings often serve two purposes: adding a touch of visual depth to the bike’s front end and offering another line of defense against road debris and weather for the components that sit closer to the pavement. On many builds, lower fairings are paired with semi- or full-fairing configurations to produce a complete, cohesive look without the full aerodynamic footprint. They also appeal to riders who favor a minimalist, retro, or custom aesthetic where the goal is not maximum weather protection but a sharper visual statement and a bit more engine heat management exposure. In a replacement scenario, adding or preserving lower fairings can be a smart way to maintain a bike’s personality while balancing maintenance access and weight.
When planning a replacement, fitment is the subtle yet crucial detail that binds the whole decision together. The compatibility between the fairing kit and the motorcycle’s make, model, and year determines whether panels align with mounting points, whether the upper fairing aligns with the dash and instruments, and whether the windscreen integrates cleanly with the chosen panels. OEM (original equipment manufacturer) fairings typically guarantee exact fit and factory-grade finishes, but they come at a premium and may extend lead times. Aftermarket sets, by contrast, can offer substantial savings and a wider selection of styling cues, but variability in fit and finish is a reality that must be weighed against cost. The goal is to achieve a seamless integration that preserves the bike’s intended aerodynamics while delivering a durable surface that can stand up to weathering and road rash. In this decision space, careful measurement, cross-checking of mounting points, and an honest appraisal of the bike’s current condition—especially any damaged mounting tabs or frame integrity—are essential steps before a single bolt is turned.
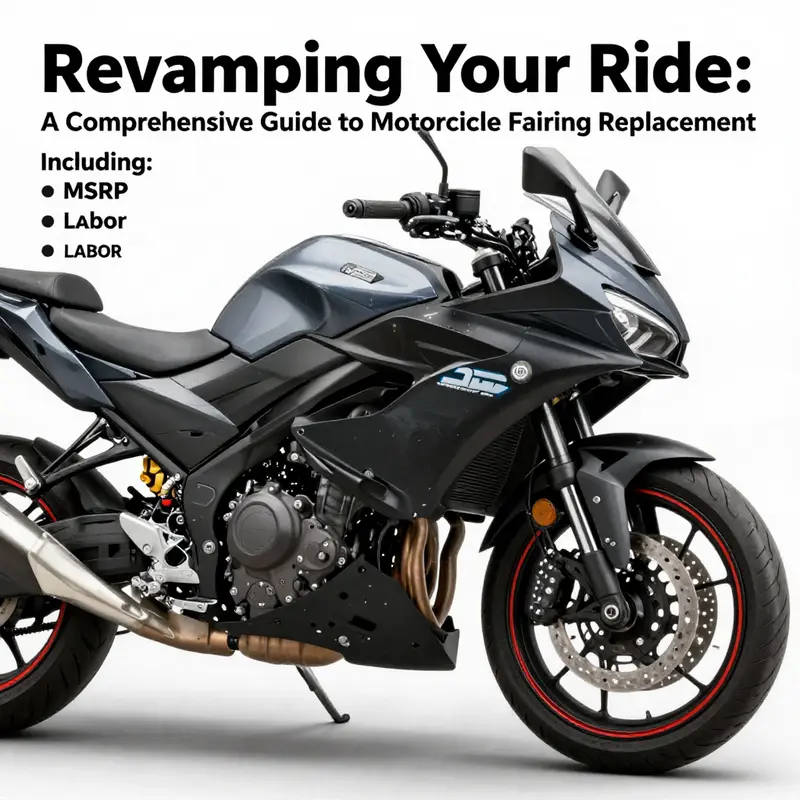
The cost landscape for fairing replacement reflects the breadth of these choices. Aftermarket fairing sets generally fall in a broad mid-range—roughly a few hundred dollars to eight hundred dollars—depending on the breadth of coverage, the quality of materials, and the complexity of the design. OEM sets, when new, can escalate into the upper thousands for a complete suite, particularly when the kit includes any weather-resistant glass, integrated electrical routing, or specialty finishes. Labor adds another dimension to the calculation. Professional installation can range from about one hundred to one-fifty dollars per hour, with typical replacement jobs taking two to three hours. Given these figures, a complete fairing replacement can commonly approach or exceed the one-thousand-five-hundred-dollar mark when you include parts, grommets, side covers, and seals, plus the sometimes unpredictable costs of paint and finish work if an exact color match is required. The numbers begin to shift in the direction of affordability when a rider is comfortable performing partial replacements, pairing a new upper fairing with existing lower panels, or choosing a minimal, utilitarian windscreen approach rather than a fully enclosed shell. In the end, the financial decision aligns with the rider’s priorities: maximum protection and a showroom finish, or a pragmatic blend of protection, weight, and budget.
All of this is amplified when the bike in question carries a mix of parts that might not be readily available off the shelf. Some models benefit from a robust aftermarket ecosystem that wideens the choice of shapes, finishes, and mounting hardware. Others rely more on OEM pathways or specialized suppliers to preserve a precise fit. In any replacement scenario, compatibility remains the anchor of success: the panels must align with the bike’s mounting points, the fasteners must thread properly without over-tightening, and the finished surface must resist weathering while tolerating the vibrations of a road-going machine. If you are evaluating catalog options, the choice may hinge on the balance you want to strike between ease of replacement and the perceived alignment with your bike’s original aesthetic. A well-chosen kit should deliver more than an appearance update; it should restore the flood of air around the rider to the level originally designed by the manufacturer, and in the same gesture, preserve the bike’s handling characteristics.
A note on components that frequently accompany fairing replacement is worth underscoring. Windshields, grommets, and side covers often appear as separate items or as part of a bundled kit. Some suppliers organize components in packages designed to simplify the replacement workflow, while others present modular options that let a rider swap only the panels they need, keeping much of the existing hardware in place. Windshield compatibility is particularly sensitive to the fairing shape and the rider’s posture; a mismatch can create buffeting or obstruct vision. In several cases, a compatible windshield kit is sold as part of a broader fairing solution package, even if the windshield itself is not the primary reason for replacement. When selecting a kit, it is prudent to confirm the inclusion of critical elements like mounting grommets and sealants, and to verify whether any additional fasteners or brackets are required for the completion of the install. The goal is a clean, weatherproof, vibration-free surface that preserves electrical routing, sensor placement, and radiator airflow. To achieve this, many riders opt for OEM-quality aftermarket components, which are designed to align more precisely with the original geometry than some generic alternatives.
For riders who approach replacement with a long-term view, the decision path often includes a careful assessment of how the panels will age under real-world conditions. The surface finish—whether painted or raw plastic with a clear coat—will determine how often touchups are needed and how the color will respond to sun exposure, road salt, and temperature shifts. A durable paint finish with a robust clear coat can help resist micro-scratches and UV degradation, extending the life of the replacement. The quality of the underlying fit matters as well; a tiny misalignment can become a big problem over hundreds of miles of use, causing rattles, gaps, or water ingress around fasteners. A well-executed replacement plan considers not just the first installation, but the bike’s needs over years of riding. The rider gains from a kit that ages gracefully, with panel joins that remain tight, weather seals that stay intact, and a finish that keeps its luster with minimal maintenance.
From a sourcing perspective, the conversation often moves toward where to buy. Reputable suppliers that emphasize accurate fitment data, model-specific compatibility, and user reviews tend to deliver the most reliable outcomes. This is where a blend of research, measurement, and trustworthy advice converges. The most effective path is to identify a kit that aligns with your bike’s year, make, and model, then verify that the mounting points and bolt patterns match. If a panel is out of spec, you may discover misalignment not only at the edge but also in door-like gaps that can trap moisture, or in the misfit of a side panel that must be pressed into place with pins that neither click nor seat correctly. The more methodical the approach to measurement and policy regarding returns and warranties, the higher the likelihood that the replacement will be both visually satisfying and functionally sound. In this regard, many riders find value in consulting detailed fitment guides, cross-referencing parts diagrams, and communicating with suppliers who can confirm whether a given set will slip into place without modification.
The process of replacing fairings, in its best form, is a careful dialogue between the rider’s expectations and the bike’s bodywork. It begins with a clear assessment of what failure looks like: is the panel cracked in a place that compromises wind protection, or is the aesthetic damage limited to paint and superficial scuffs? The next step is to decide on coverage level and weight implications. Then comes the practical planning: selecting an OEM or aftermarket kit, budgeting for paint if needed, and arranging labor or setting aside time for a DIY approach. The final step often involves a careful fit check, a test ride in a safe environment, and a return visit to the shop if any gaps, misalignments, or rattles emerge. Even with the best parts, the installation’s quality hinges on attention to detail, from the torque applied to each fastener to the way a connector harness is resecured and tucked away from moving parts. And as the rider cycles through these stages, the bike gradually recovers its intended silhouette—the shape that first attracted the rider to the machine and the shape that, in turn, continues to define its performance.
A practical tip is to approach the replacement as a phased project. If budgets or time limits preclude a full kit, you can begin with the most visible panels and work toward the remainder over subsequent seasons. This staged approach can reduce downtime and help you assess fit and finish under real-world riding conditions. It also gives you the opportunity to evaluate whether the chosen finish holds up under sun exposure and road grime, and whether the smaller pieces—like side covers and grommets—need replacement at the same time to maintain a consistent look and protection. The aesthetic harmony between panels, the weather seals, and the cockpit area is what makes the replacement feel deliberate rather than accidental. When the panels finally align, when the edges meet without gaps, when the windscreen seals snugly against its surface, the sensation is not merely cosmetic. It is the confirmation that the bike’s aerodynamics have returned to equilibrium and that the rider can enjoy the ride without the cognitive load of racing against panel rattle or wind buffeting.
For readers seeking a model-specific pathway, one practical step is to consult a catalog that groups fairings by model lineage. This helps ensure the mounting points, bracket configurations, and the general drumbeat of the bike’s geometry remain in sync with the replacement. While the catalog itself cannot replace a hands-on measurement or a conversation with a knowledgeable technician, it serves as a valuable preliminary filter that narrows the wide range of options to those that are genuinely compatible. As you consider models and years, keep in mind that some manufacturers and aftermarket suppliers offer both the inner mounting hardware and the outer shell in a cohesive kit, designed to reduce the guesswork during installation. The goal is to minimize the number of surprises when the first bolt is introduced and to maximize the chance that the installation will be straightforward rather than a multi-day project.
In closing, the choice among full, semi, and lower fairings is less about a single best answer and more about aligning the bike’s character with the rider’s priorities. If ultimate weather protection and aero efficiency at speed are top priorities, a full fairing can deliver a compelling return on investment in ride quality and stability. If a lighter footprint and easier maintenance are more valuable, a semi-fairing offers a balanced approach that preserves much of the protective advantage while keeping serviceability straightforward. If the aim is a distinctive, lean aesthetic with a bit of added wind deflection and a nod to classic lines, lower fairings can complete the look while maintaining realistic maintenance access. Each choice carries a different set of installation realities, costs, and long-term considerations, but all share the same underlying objective: to restore the bike’s intended performance envelope and protect its core mechanicals while preserving—or even enhancing—the rider’s connection to the road. When you select a path that respects fitment, quality, and finish, the result is not simply a new surface on a bike; it is a reestablished partnership between rider and machine, one that keeps the motorcycle moving efficiently through air, weather, and time.
Internal resource for model-specific fitment can help inform your decision: Honda fairings catalog. For a broader, consumer-focused perspective on how to choose and care for motorcycle fairings, consult the external guide that helps translate technical options into practical decisions: CarInterior Motorcycle Fairings Guide: How to Choose the Right One.
Weighing the Price: A Practical Cost Guide to OEM and Aftermarket Motorcycle Fairings
Understanding what you pay for when replacing motorcycle fairings is as important as choosing the right shape or style. Cost is rarely a single number: it is a bundle of parts, labor, finish, fitment, and future value. This chapter walks through the full cost picture so you can choose wisely between aftermarket and OEM fairings, account for installation and finishing expenses, and make decisions that match your budget and riding priorities.
A fairing replacement always begins with the parts themselves. At a glance, the starkest difference between aftermarket and OEM options is the sticker price. Aftermarket fairing sets commonly land in the lower price band, while OEM parts command a premium. But price alone does not capture the complete trade-off. Aftermarket fairings often offer attractive savings—typically between $300 and $800 for a full set—making them appealing when budget matters. OEM sets usually sit in a higher range, often $800 to $2,000 or more, reflecting factory-grade materials, precise engineering, and strict quality control. Those numbers are a starting point, not the final verdict.
Labor and installation add another predictable layer to total cost. A professional installation generally requires two to three hours of shop time. With average rates of $100 to $150 per hour, expect labor to add roughly $200 to $450. Combined with parts, a full replacement can approach or exceed $1,500 when OEM components and professional paint work are included. Even with a modest aftermarket set, labor and paint can lift the cost significantly beyond the initial parts price.
Beyond headline prices, the real decision depends on what you value most: absolute fit and long-term durability, or cost savings and customization. OEM fairings are made to the factory specification. That means they fit the mounting points exactly, require little trimming or modification, and usually offer superior finish and consistent tolerances. For riders who prioritize long-term reliability and want the exact original look, the extra cost often feels justified. OEM parts also commonly carry warranties from the manufacturer or dealer network. That warranty can be valuable when fitment flaws or material defects appear later.
Aftermarket fairings, on the other hand, have evolved. Good-quality aftermarket manufacturers now use competitive materials such as advanced ABS plastic or fiberglass, and many use modern molding techniques that produce durable and lightweight panels. These components can be tailored for different priorities: lighter weight, track-ready contours, or bespoke designs. The savings are real, and they open possibilities for customization that would be cost-prohibitive with factory parts. In many cases, a well-reviewed aftermarket set will deliver a satisfactory fit and finish for a fraction of OEM pricing, especially when you factor in the cost of professional painting.
Material choice affects both price and long-term performance. ABS plastic is common in both OEM and many aftermarket sets. It is resilient to impact, resists cracking, and takes paint reliably. Fiberglass is lighter and can be cheaper to produce in volume, but it can be more brittle on impact and sometimes requires reinforced mounting points. Higher-end composite materials or specialized blends will raise the cost but may offer weight savings and improved strength. When you compare prices, look beyond the number and ask which material is being used and how mounting areas are reinforced.
Sourcing also alters cost dynamics. Factories and suppliers in major manufacturing regions can deliver competitive prices through scale and efficient molding processes. That is why many budget-friendly aftermarket fairings originate from large production hubs where volume buyers benefit from lower unit costs. For individual riders, certain retailers offer curated fairing kits that balance affordability and quality, while bulk orders or dealer channels can achieve deeper discounts for fleets or resellers. If you plan to shop overseas to save money, include shipping, duties, and returns in your calculation; these expenses can erode upfront savings quickly.
Paint and finishing are often overlooked when estimating the total. A raw fairing set usually arrives unpainted or primed. Matching factory paint or applying custom colors requires professional prep and painting, which can run several hundred dollars. Expect to pay more for multi-stage paint jobs, clear coats, or special finishes. If you intend to save by painting yourself, account for proper preparation time and materials; a poor paint job can quickly devalue the savings by necessitating a redo.
Fitment is another hidden cost. OEM fairings generally drop in with minimal modification. Aftermarket panels, even those marketed for direct fit, sometimes need trimming of tabs, slight re-drilling, or added mounting brackets. For a mechanically inclined rider, these tasks may be acceptable; for others, the time and potential for mistakes translate into shop bills. If a shop must adapt aftermarket parts to fit, expect additional labor costs equal to or greater than the initial installation estimate.
Warranties and return policies also contribute to value. OEM parts often come with a clear warranty and a dealer channel for returns. Aftermarket sellers vary widely. Reputable aftermarket vendors offer guarantees and clear returns, while others may have limited recourse if a part arrives damaged or incompatible. Consider the total risk: paying less for a part that requires a complex return across borders is not always cheaper than paying more for a domestic, warrantied OEM unit.
Insurance and claim impacts can influence your choice, too. If a fairing replacement is tied to an insurance claim, insurers sometimes require OEM parts for a full settlement, or they may value OEM replacements higher when calculating depreciation. If you plan to file a claim, verify policy language and insurer preferences before ordering parts. Choosing aftermarket parts for a claim might lead to a larger out-of-pocket cost when the insurer settles at lower market values.
Resale and perceived value are practical considerations. A motorcycle with OEM bodywork often presents stronger resale appeal for buyers seeking originality. Conversely, tasteful aftermarket kits that enhance aesthetics or performance can attract a niche buyer and sometimes increase desirability. However, poorly fitted or mismatched aftermarket fairings can reduce resale value. If resale matters, weigh how potential buyers in your market view aftermarket upgrades.
Bulk purchasing and B2B pricing can dramatically shift the cost equation. For sellers, shops, or fleet owners, large orders reduce per-unit cost through economies of scale. Volume discounts can push aftermarket sets into the range where they are cheaper than OEM even when factoring in paint and installation. If you are part of a community of riders, consider group buys to lower unit costs for aftermarket sets while negotiating better shipping and color matching from the supplier.
Customization choices also affect long-term value. Aftermarket providers often support modifications such as race-spec vents, alternative mounting points, or tailored aero profiles. These features can improve performance or cooling but may require additional adjustments to the frame or ancillary components. OEM replacements rarely offer such options but preserve original aerodynamics and cooling pathways. Decide whether you want the flexibility to modify the bike or prefer the predictability of a factory spec.
Practical shopping advice helps convert this analysis into action. First, always verify compatibility with your motorcycle’s exact model year. Fitment descriptions that claim broad compatibility can hide subtle differences in bolt patterns or electrical routing. Second, review user feedback and independent images from riders who have installed the same set. Real-world photos reveal fit gaps, paint quality, and how much trimming was required. Third, request detailed material specifications and reinforcement details. Ask whether mounting tabs are reinforced or if the kit includes grommets and hardware. Missing or low-quality hardware often forces additional purchases.
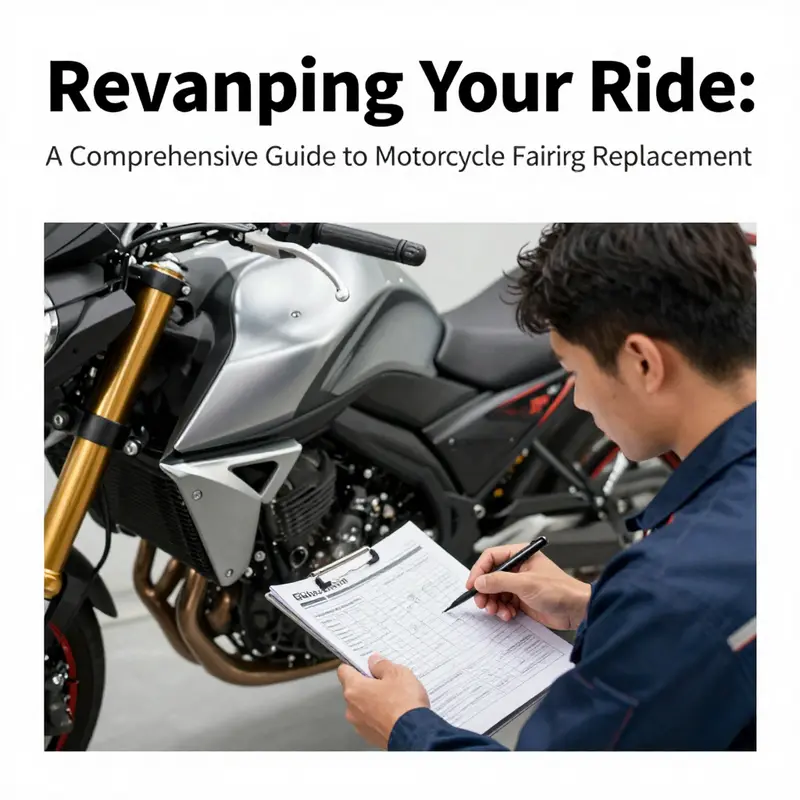
If professional installation is part of the plan, obtain estimates from at least two shops. Prices vary regionally, and some shops specialize in bodywork and paint, while others focus on mechanical fitment. Choose a shop with experience installing the type of fairing you buy. Experience shortens labor time and reduces the chance of improper mounting or stress fractures caused by incorrect bolt torque.
Financing and staged expenditure can make a premium option more manageable. You might replace only the visibly damaged parts now, or install an aftermarket upper fairing and save the OEM lower until a later date. Staging the work lets you spread cost and test the aftermarket fit before committing to a full respray. Remember that mixing OEM and aftermarket parts may produce aesthetic mismatches; plan colors and finishes ahead of time.
One final consideration is long-term maintenance and repairability. Some aftermarket materials resist cracks and scuffs better than others. OEM panels are designed to maintain alignment under service conditions and are often easier to source in the future through dealer networks. If you expect to keep the bike for many years, pay attention to how easy it will be to replace a single panel later. That ease can justify paying more now for an OEM piece.
Selecting between aftermarket and OEM fairings is not a binary choice. It is a spectrum defined by price, quality, customization, and long-term objectives. For riders seeking the most accurate factory fit, warranty coverage, and predictable resale value, OEM remains the strongest option despite higher initial costs. For those focused on saving money, customizing appearance, or experimenting with performance-oriented shapes, a well-made aftermarket set can deliver excellent value when chosen carefully, installed correctly, and finished professionally.
To convert this understanding into a practical plan: calculate the total cost for each option, not just the part price. Add labor, painting, shipping, taxes, and potential modification time. Factor in warranty differences and estimate resale impact. If you need reference examples or fitment-specific options, consult specialized catalogs that list fairings by make and model; for instance, a vendor catalog focused on fairings for specific models provides useful comparison points for pricing and fitment. You can browse a catalog of brand-specific fairings to see how options and pricing vary across models.
For broader guidance and a checklist of what to look for when replacing fairings, consult an in-depth replacement guide that covers fitment, materials, and sourcing. https://www.carinterior.com/motorcycle-fairing-replacement-guide/ (Published: February 9, 2026)
By approaching the choice with a clear cost model and an eye for fit, finish, and future needs, you can replace your motorcycle’s fairings in a way that balances aesthetics, performance, and value.
null
null
Final thoughts
Understanding motorcycle fairing replacement is vital for business owners seeking to provide exceptional service. By familiarizing yourself with the types of fairings, conducting a thorough cost analysis, and ensuring compatibility with the motorcycle models you work with, you can enhance customer satisfaction and maintain competitive advantage in the motorcycle market. Investing in knowledge and quality components will not only improve bike performance but also foster a loyal customer base.