In the realm of motorcycle maintenance, the simplicity and efficiency of quick release clips cannot be overstated. These innovative components have transformed how motorcycle enthusiasts, mechanics, and business owners manage fairing transitions. Understanding the design and functionality of motorcycle fairing quick release clips is paramount for optimizing maintenance services and enhancing customer satisfaction. This article will delve into their intricate workings, highlight popular options tailored for Harley-Davidson models, and present versatile universal solutions suitable for a myriad of motorcycle brands. By the end of this exploration, business owners will be equipped with valuable insights to elevate their service offerings and stay ahead in a competitive market.
Fast Access, Flawless Form: The Design and Function of Motorcycle Fairing Quick-Release Clips
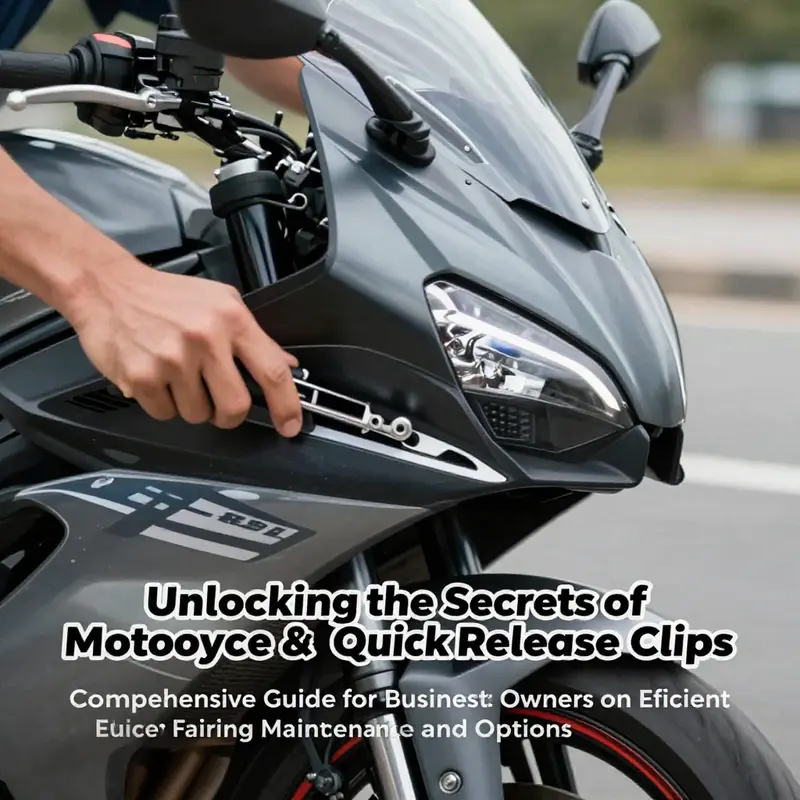
A motorcycle’s fairing is a careful balance of aerodynamics, protection, and style. Quick-release clips that secure the panels keep the bike clean in appearance while enabling fast, repeatable access for maintenance and upgrades. This chapter explains how these clips work, why their design matters, and what riders should consider when choosing a system.
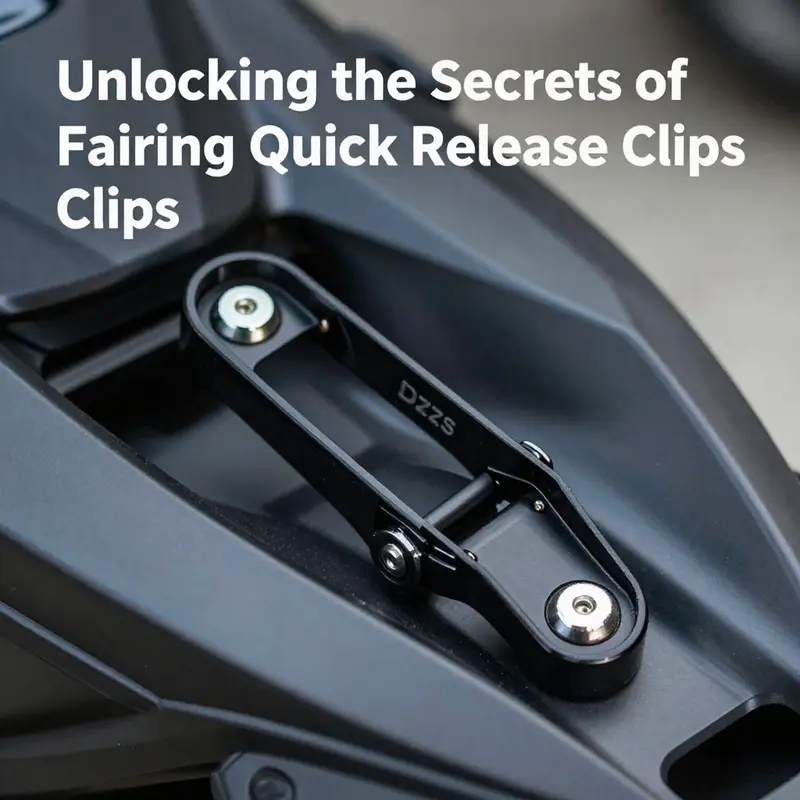
Design is the beating heart: a post or stud engages a spring-loaded clip that locks with a decisive action. A quarter turn, a lift of a lever, or a pull of a release frees the panel so it comes away cleanly. The benefit is a reliable seal when engaged and a predictable feel when released, even in gloves or rainy weather.
Materials matter. Die-cast metal and hard-coated polycarbonate are common because they combine stiffness with lightness and wear resistance. The finish also matters, helping the fairing maintain its line and appearance after repeated service.
Size and compatibility. Common sizes include 14mm, 15mm, and 19mm; correct pairing ensures secure engagement and a clean outer contour. Universal sets offer flexibility across models, while model-specific kits can optimize fit for particular bikes.
Functionality and user experience. The goal is easy operation without compromising the seal or safety. A well-tuned system distributes load smoothly, resists vibration, and provides repeatable engagement forces for confident removal and reattachment.
Aesthetics and integration. In advanced layouts, the release mechanism can be mounted so it becomes a deliberate design cue that complements the bike’s lines rather than cluttering them. The best setups look integrated and purposeful.
Practical considerations. Misalignment can cause edge wear or seam distortion, so measuring panel thickness and choosing the right size matters. Regular checks for wear, corrosion, or cracking help prevent sudden panel detachment on the road. If in doubt, replace as a matched set to keep load distribution even.
Market ecosystem. Universal quick-release sets save across projects, but model-specific options may offer tighter tolerances. A catalog or category guide can help locate the right fit for a given bike, while testing fit during installation remains essential.
Conclusion. With the right fastener, riders gain speed of access without sacrificing aerodynamics or security, keeping the bike ready for service, wash, or upgrade at a moment’s notice.
Quick-Release Fairing Hardware for Large Touring Bikes: What Fits, What Works, and What to Expect
Quick-release clips and hardware transform the chore of fairing removal into a brief,-repeatable action. For riders of large touring cruisers and full-dress machines, the ability to detach lower fairing panels and windshield mounts without tools saves time at the roadside and in the garage. These systems use a simple mechanical premise: a fastener on the panel mates with a reusable clip or receiver on the frame or fork, and a short turn, push, or snap locks the panel in place. The result is secure retention during riding, and quick access when the front end requires inspection, cleaning, or modification.
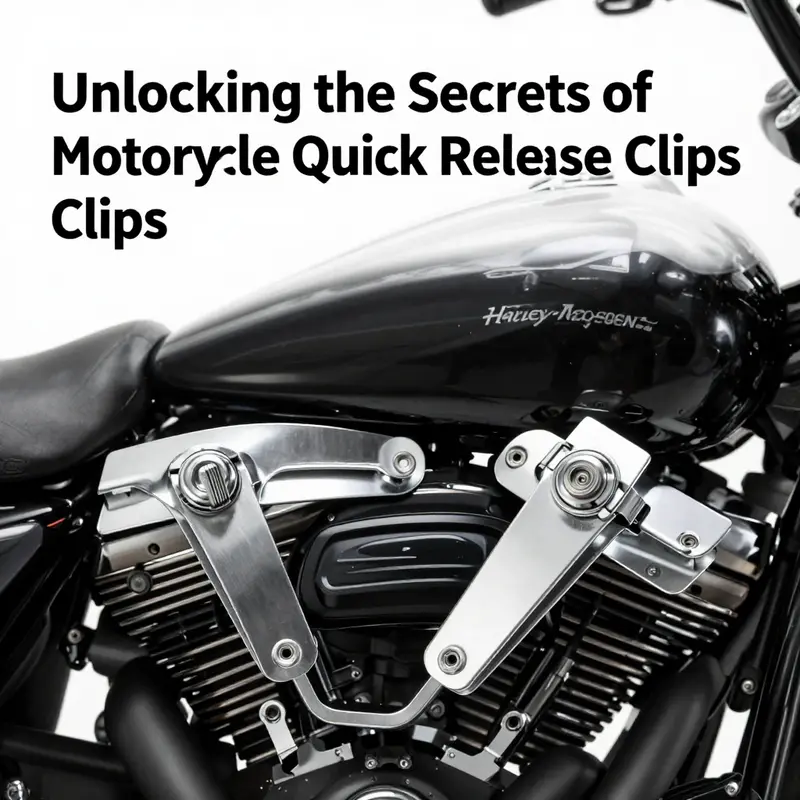
Across the options available, three practical families of hardware dominate: Dzus-style studs and clips, quarter-turn fasteners, and clamp-based release systems that affix to fork tubes. Each style has strengths. Dzus-style studs are compact, robust, and common on race and aftermarket panels. Quarter-turn fasteners provide visual simplicity and fast operation. Clamp-style releases give a clean look and remove entire assemblies without disassembling mount points on the fairing. Understanding how these systems interact with fairing geometry, fork dimensions, and accessory fitment is crucial when selecting hardware for a large touring machine.
Fitment begins with geometry. Touring fairings often attach across multiple points: a top windshield mount, mid-level body bosses, and lower fairing mounts that wrap around the forks. Quick-release hardware for lower fairings must account for fork tube diameter, the presence of speakers or cooling hardware in the lowers, and the type of windshield mounting bracket in use. Some clamp-style kits are designed to slip over fork tubes of a specific diameter and then clamp down to carry retaining points. If an aftermarket fairing uses a different mounting layout, a quarter-turn or Dzus approach mounted to dedicated studs may be a better fit. Riders should measure the distance between original mounting points and check clearances before committing to a system.
Material matters. Stainless steel components resist corrosion and look the part on polished forks. Zinc and plated steel fasteners can be cost-effective but show wear sooner in salty conditions. High-quality clips and studs use hardened steel for wear resistance, and their mating surfaces are often polished to reduce galling during repeated installs. For clamp-based systems, the clamp body often uses stainless or chromed steel to resist moisture and salt. In addition to metals, some clip bodies incorporate polymer bushings where vibration damping is useful. When longevity matters, choose hardware rated for outdoor use and with tight tolerances between the stud and clip.
Security and retention are core concerns. Quick-release systems must keep panels secure at speed and through vibration. The best hardware offers a tactile, audible click when fully engaged and clear visual indexing that shows when a fastener is locked. Dzus-style systems lock by cam action; quarter-turn fasteners rotate a cam into position. Clamp systems transfer loads to the clamp rather than to a single stud. For touring riders who carry luggage and sometimes heavy loads, selecting a system with redundant retention — for example, multiple clips per panel rather than a single central fastener — reduces the chance of a panel releasing if one fastener fails.
Compatibility with electronic components and aftermarket accessories requires attention. Many large touring fairings house speakers, cooling ducts, and wiring looms. Quick-release installs must avoid pinching wires or interfering with ducting. Where factory lowers include speaker cutouts or have integrated venting, clips that mount in the same footprint must clear these openings. Some kits explicitly do not fit lowers with integrated speakers, because the additional depth or bracketry prevents a proper clamp. If planning to switch to quick-release hardware, inspect the inner surface of the fairing and the back of the mount points to confirm there is room for studs or clip bodies.
Ease of installation varies. Quarter-turn and Dzus systems often need access from both sides during installation to set the stud and clip. Clamp-style systems may require only that the clamp be placed around the fork tube and its retention points aligned. For customers retrofitting existing fairings, a hybrid approach sometimes works: use clamps where the fork provides convenient attachment, and install studs for points that have access only from behind. A well-documented kit with clear hardware counts and fitment notes reduces surprises. Where possible, choose kits that include replacement studs, clips, and springs, because small consumables often wear out first.
Aesthetics also play a role. Touring bikes often display chrome and polished finishes, and many riders prefer hardware that matches. Polished stainless clips and chrome-plated clamps maintain a factory look. Low-profile black Dzus studs provide a discrete, understated appearance on painted panels. Consider also how the head of the fastener sits relative to the fairing surface: countersunk studs sit flush, while raised heads create visible detail. For those who customize their machines, consistent hardware finish across all visible mounts gives a cohesive, intentional appearance.
Durability under road conditions deserves scrutiny. Fasteners experience road grime, salt, rain, and the continuous vibration of highway speeds. Look for sealed or shielded clips where possible. Spring clips that hold studs in place benefit from corrosion-resistant springs. For clamp systems, frequent removal of panels can stress the clamp interface if its finish is thin or if the clamp is over-torqued. When choosing hardware, read installation instructions on torque values and lubricants. A light coat of non-gumming anti-seize on threads or studs helps prevent galling without attracting dirt.
Warranty and support can simplify long-term ownership. Some kits from established manufacturers include limited warranties against defects. Warranties vary in length and coverage, especially for finish wear versus functional failure. If a supplier offers replacement clips individually, that option reduces long-term ownership cost. Consider the availability of spares: being able to buy a single clip or stud rather than a full kit makes repairs easier after years of use.
Cost ranges broadly. Entry-level sets of studs and clips are inexpensive and allow a full-fairing retrofit for modest spend. Mid-range systems balance finish and durability. High-end clamp systems aim at a premium fit and finish and often cost more, reflecting stainless components and machining. Evaluate cost against longevity: inexpensive parts replaced frequently often cost more over time than a durable stainless kit. Also consider installation time; if a kit simplifies recurring maintenance, the value adds up in saved labor.
Practical use considerations include how often panels will be removed and where. For riders who remove lowers only seasonally, robustness may trump speed. For track or show riders who remove panels daily, speed and repeatability matter most. Also consider theft and tamper resistance. While quick-release systems are convenient, they may allow a casual theft or tampering more easily than bolts that need tools. Using locking fasteners at critical points or secure storage practices when parked in public can mitigate this risk.
Troubleshooting common problems is straightforward. If a panel rattles after installation, check that all fasteners are engaged and that the clips have not deformed. Replace any springs or clips showing excessive wear. If a fastener will not insert, confirm alignment and check for interference from wiring or ducts. For clamp systems that slip under load, tighten per manufacturer recommendations and verify the clamp inner surface is clean and free of oil. When replacing existing studs or clips, match thread sizes and stud lengths carefully to avoid short engagement.
Choosing the right hardware begins with a checklist: measure fork tube diameter and the distance between mount points; inspect for integrated speakers or cooling ducts that obstruct clips; decide the desired finish; and estimate how frequently panels will be removed. Then, match the fastener style to the fairing’s mounting layout. For kits that attach to fork tubes, confirm clamp diameter and whether the clamps sit inside or outside any existing fork covers. For stud-and-clip installations, ensure the panel thickness and backing allow sufficient stud engagement.
Installation best practices include cleaning mating surfaces, test-fitting without threadlock or sealer, and labeling panel locations with masking tape during initial installs so you can reinstall panels in the same orientation. Use light anti-seize on stainless studs to prevent galling. For quarter-turns and Dzus studs, install retention springs where recommended; a missing spring is often the cause of a fastener coming loose. When adjusting clamps, tighten incrementally and recheck fit at ride speeds if possible.
For owners concerned about future upgrades, choose hardware with modularity. Systems that allow you to replace only the clip or stud without altering fairing panels make later changes easier. Also, select fasteners that are commonly stocked or that use common thread sizes. That way, spares are available worldwide, and you avoid being stranded without the right part.
Finally, think about the experience you want each time you remove a panel. The best quick-release solutions make removal fast, simple, and repeatable. They preserve panel alignment and finish. They sit quietly at speed. They are serviceable and replaceable. Whether you prefer a polished metal look or a stealthy black finish, the right hardware turns routine maintenance into a few quick motions rather than a long afternoon in the garage. For official specifications and parts guidance, consult the manufacturer’s parts and accessories page linked below.
Official parts and accessory information
Universal Quick-Release Clips for Motorcycle Fairings: Versatile Fastening Across Brands
Universal quick-release clips change how riders interact with fairings. They simplify panel removal and reinstallation. They let you access electricals, perform routine checks, and swap bodywork quickly. For owners of multiple motorcycles, or for those who prefer a single fastening system, universal kits offer clear advantages. This chapter explores what universal quick-release clips are, how they differ, and how to choose and install them to suit many brands and fairing types.
At their core, universal quick-release systems pair a fastener with a clip. The fastener usually consists of a stud or a quarter-turn mechanism. The clip is a dedicated receptacle that holds the stud in place. Most designs allow tool-free operation. Turn or latch the stud and the panel releases. Reinsert and secure the stud and the panel locks. This simple mechanism reduces time spent on maintenance and minimizes the chance of overtightening or damaging plastic mounting points.
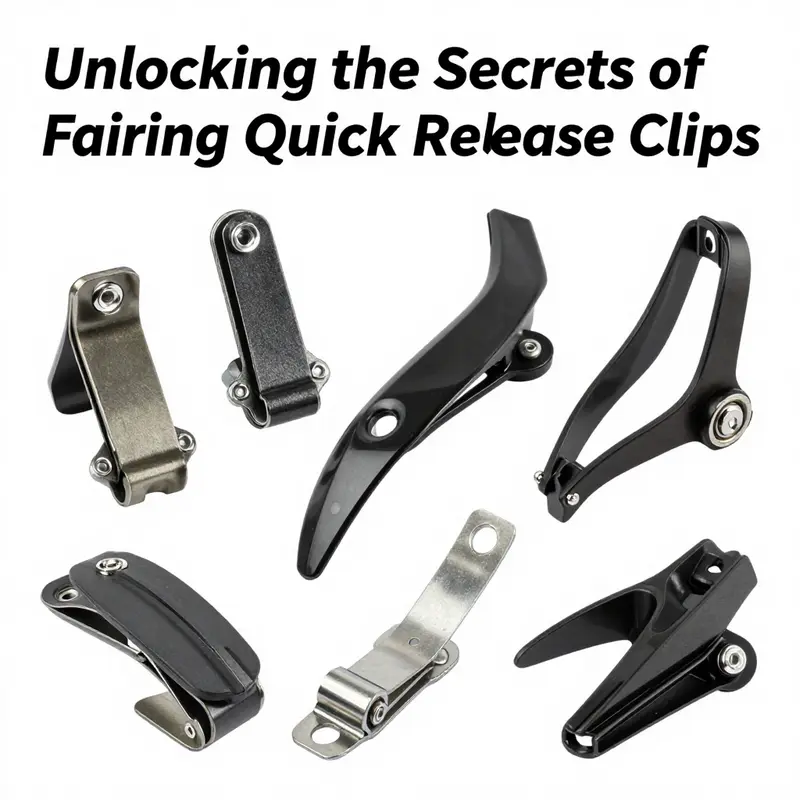
Universal kits come in a few common styles. The quarter-turn type uses a mushroom-shaped head. A 90-degree turn locks or unlocks the stud. D-ring or Dzus-style fasteners rely on a spring clip that accepts a rotating stud. Threaded stud kits combine a conventional bolt with a specialized clip that snaps over the thread. Many kits include different head sizes to suit the fairing hole and aesthetic preferences. Popular diameters are 14 mm and 17 mm for the visible head. Internally, these kits usually provide both M5 and M6 sized studs and clips, covering the most common OEM hole sizes.
Materials matter. Stainless steel resists corrosion and maintains appearance. Anodized aluminum reduces weight and can be color-matched to the bike. Nylon and polymer clips offer flexibility and lower cost. For everyday road use, stainless steel studs with stainless or galvanized clips perform well. Racing environments may favor lightweight aluminum heads and hardened studs. Consider heat and vibration exposure too. Metal-on-metal systems tolerate higher temperature and mechanical stress. Plastic clips may fatigue faster under repeated use or intense vibration.
Compatibility is the key selling point of universal kits. Manufacturers from multiple markets—street, touring, sport, and off-road—use similar hole patterns and thicknesses. Universal kits therefore fit many Honda, Yamaha, Suzuki, Kawasaki, Ducati, Aprilia, and KTM fairings. That said, fitment is rarely plug-and-play. You must verify head diameter, stud length, and clip type against your fairing and underlying bracket. ABS and injection-molded panels sometimes require washers or backing plates to distribute load. Fiberglass or carbon fiber panels behave differently than thin OEM plastic. Measure material thickness before selecting stud length. Too short and the fastener won’t engage. Too long and the stud may bottom against inner structure or interfere with cables.
Installation planning prevents mistakes. Start by counting the mounting points on each panel. Note stud diameters and head clearances. Many universal kits include templates and a range of spacers. If yours does not, create a simple template using cardboard. Mark each hole and test-fit a clip. Where holes are larger than the stud head, add a flange washer or grommet to center the fastener. When replacing OEM push-pins with quick-release studs, expect to enlarge or reinforce holes slightly. Use a stepped drill bit for a clean cut. Avoid enlarging holes too much; a snug fit reduces panel movement and prevents rattles.
Clip choice affects longevity. Spring-steel clips offer strong retention and predictable behavior. They clip onto the stud tightly and resist loosening under vibration. Plastic clips are kinder to fairing edges. They also reduce the chance of metal-on-plastic wear. However, plastic can deform and lose tension over time. For touring bikes or long-distance commuting, prioritize metal clips or add backing plates beneath plastic clips to spread load. Race bikes sometimes adopt blind-nut style plates for rapid pit work. These provide solid engagement on thin fiberglass or carbon panels.
Aesthetic considerations matter to many riders. Quick-release heads are visible after installation. Choose heads that match your bike’s finishes. Low-profile heads are subtle and suit classic styles. Contrasting colored heads add a custom touch on sport bikes. Be mindful of head diameter and surface area. A large head distributes load well but may visually dominate the fairing. For minimal visual impact, choose smaller flat-head studs and ensure correct clipping mechanics to avoid stress concentrations on the panel.
Sealing and weatherproofing extend the life of both fastener and fairing. Water intrusion can corrode studs and promote clip failure. Apply a thin bead of silicone or a closed-cell rubber washer under the head. This blocks water and dampens vibration. For long-term anti-seize properties, apply a small amount of non-conductive grease on metal threads. Avoid petroleum-based lubricants on plastic clips. They can cause swelling or degradation over time.
Security is a trade-off with quick access. Tool-free systems are convenient but easier to tamper with when the bike is unattended. For touring or high-risk parking situations, consider quarter-turn studs with locking features. Some universal kits provide locking caps or tamper-resistant heads that require a special key. These add a small weight and cost but increase peace of mind. Another tactic is to use quick-release clips only on panels less likely to conceal valuable items. Reserve locking fasteners for storage compartments and luggage mounts.
Durability under vibration and impact is critical. Motorcycle fairings are exposed to road shock and engine vibration. The quickest way to fail a quick-release system is to install the wrong stud length or clip type. If the clip does not fully engage the stud, repeated flexing will shear it. Use thread engagement guidelines. For threaded studs, aim for at least three full threads engaged in the clip or nut. For quarter-turn and D-ring systems, ensure there is no more than a few millimeters of play when engaged. Adding a spring washer or lock washer can absorb micro-movements and reduce fatigue.
Retrofitting factory panels requires care. OEM mounting points are sometimes reinforced by brackets or ribs. When replacing push-pins with quick-release studs, retain or add reinforcement. Use a thin metal plate behind the panel where the stud clamps. This spreads load and prevents cracks. If you are mounting to a bracket, select a stud length that allows for the bracket thickness and any washers. Keep alignment consistent to avoid uneven stress on the fairing edges.
Maintenance is straightforward but essential. Inspect clips periodically for wear. Replace any clip showing deformation or loss of tension. Check for corrosion on threaded studs. Tighten studs by hand only; avoid power tools that can over-stress the clip. Keep spare clips in your toolkit. A small kit with ten clips and a few studs will usually cover most emergency repairs. For race setups, inspect clips after every event. For road bikes, check quarterly and after long rides.
Choosing the right kit requires balancing compatibility, material, and quantity. Comprehensive kits often include dozens of pieces. They typically combine M5 and M6 screws, various clip types, and extra washers. These kits suit hobbyists maintaining multiple motorcycles. Smaller kits focus on a few studs and clips for a single panel. If you plan to replace many original fasteners, buy a comprehensive kit that includes studs in both metric sizes and a selection of head diameters.
Installation hints improve outcome. First, test-fit everything before final assembly. Place a clip on the backside and thread or insert the stud lightly. Ensure the stud passes cleanly and seats without forcing. Next, use a torque-limited driver if tightening is necessary. Many quick-release studs only require hand torque. Over-tightening risks stripping or cracking plastic panels. Use washers to distribute pressure on thin or soft plastics. Finally, mark stud positions with a permanent marker during test-fitting. This speeds reassembly and reduces mistakes.
When selecting universal clips, consider head clearance and panel curvature. On highly contoured surfaces, flat-head studs may sit proud. Low-profile or flush-mount studs fit better on curved panels. Also, some fairings incorporate decorative seams or vents near fastener holes. Place studs where they won’t interfere with airflow or design features. If necessary, relocate the mounting point slightly, but maintain structural support behind the hole.
Sourcing is simple. Many retailers stock universal kits online. Look for sellers offering clear size charts, material specifications, and content lists. Reviews often highlight real-world fitment. Prioritize kits with corrosion-resistant finishes and a range of stud lengths. Expect variation in clip quality between low-cost and premium options. When in doubt, opt for stainless studs and spring-steel clips for longevity.
Universal quick-release clips are a practical upgrade for many riders. They reduce maintenance time and add customization opportunities. They require careful measurement, correct clip selection, and small installation adjustments. With the right kit, you can standardize fasteners across multiple motorcycles. This makes spares management easier and speeds routine tasks. For fairings that see frequent removal, these systems are especially valuable.
For owners of brand-specific panels, there are manufacturer-tailored fairings and parts pages that help confirm fitment. For example, to review brand-focused fairing options and compatibility notes, consult resources for Honda fairings.
For broader shopping and SKU choices, see this universal product search: https://www.amazon.com/s?k=universal+motorcycle+fairing+quick+release+clips
Final thoughts
The significance of motorcycle fairing quick release clips lies not just in their ability to streamline maintenance but also in enhancing the overall riding experience. For business owners in the motorcycle industry, offering products that embody efficiency and ease of use can set them apart from competitors. By understanding both the specific offerings for prominent brands like Harley-Davidson and the versatility of universal options, businesses can better meet customer demands. Investing in quality fairing quick release clips will not only foster customer satisfaction but also build long-term loyalty among riders who appreciate accessible maintenance solutions.