
Creating a personalized motorcycle fairing is not just a way to enhance your bike’s look, but it can also improve aerodynamics and performance, appealing to motorcycle enthusiasts who seek unique, customized options. For business owners in the motorcycle industry, mastering this skill can lead to new revenue streams through bespoke services and products. Each chapter in this guide unpacks vital knowledge—from design through installation—that empowers you to create motorcycle fairings that resonate with both aesthetics and functionality, ensuring you stay ahead in a competitive market.
Designing Your Own Motorcycle Fairing: From Concept to CAD-Ready Contours

Designing your own motorcycle fairing is a holistic act that blends imagination with engineering. It asks you to translate a rider’s needs, a bike’s geometry, and the laws of air into a single, coherent shape. The core of Step 1 is not just sketching lines on paper or fiddling with a CAD program; it is about building a digital twin of the bike’s front end and then guiding that twin through a process of refinement. You begin with a clear objective, whether you aim to tame turbulence around the forks at highway speeds, maximize downforce in tight cornering, or craft a silhouette that reflects your personal style. The goal should be explicit enough to steer decisions about mounting points, aerodynamics, and integration with the bike’s existing chassis. In practice, that means starting from measurements, then translating those measurements into a three-dimensional form that can be tested and iterated in a virtual space before any resin touches foam or fabric molds. The discipline here is almost architectural: a fairing is a shell that must embrace both function and form without compromising rider safety or the bike’s mechanical envelope.
The first decisive step is data collection. A modern approach leans on 3D scanning, sometimes called “抄数” in the design community, because it anchors your design in the actual geometry of the motorcycle. By capturing every contour of the front end—blade-like fork tubes, headlight recess, radiator intake, and the curve of the tank overlap—you create a reliable digital reference. This data becomes the baseline from which all future iterations spring. If you can’t scan, manual measurement with a tape measure, calipers, and a careful grid system can still yield a robust dataset, but the scanner’s precision makes the subsequent modeling far more forgiving. The point is to avoid assumptions about curvature or interface locations. You want a model that sits in the same coordinate system as the bike itself, so that your fairing mounts align with existing fixtures and the fairing does not intrude on critical components or rider clearance.
With a solid data foundation, the next phase is 3D modeling and design optimization. Modern CAD tools empower you to manipulate surfaces as freely as you would sculpt clay, yet with the fidelity needed for engineering evaluation. In this phase, you create a digital surrogate of the fairing and run through a handful of design variants. You can explore a sleeker, low-drag contour that hugs the bike’s nose or test a more aggressive silhouette that signals performance. The software acts as a sandbox where you can push lines, blend radii, and define control points for smooth transitions from the windscreen to the sides. For many builders, the workflow oscillates between surface modeling and rigid-body analysis, a process that helps anticipate how a new contour will transfer loads, where it might flex, and how it will interact with fasteners and mounting brackets. The digital twin is not merely an aesthetic instrument; it is a structural proxy that helps you foresee real-world implications before any material is hardened.
Inspiration can come from a wide spectrum of real-world designs. International teams iterate on their tail sections with different scales and strategies to balance downforce, weight, and ease of integration. One practical thread is to consider two design archetypes—an exaggerated, high-downforce solution and a more minimalistic, function-forward variant. The high-downforce approach borrows from the F1-style philosophy: bold, sweeping surfaces intended to push the air downward under load, stabilizing the bike through aggressive cornering and braking. The lighter, more restrained approach emphasizes simplicity and ease of installation, with shallow profiles and exposed fasteners that reveal a more mechanical ethos. Both paths offer valuable lessons: the high-downforce route teaches you where structural redundancy and attachment points must live, while the minimalist route shows how far you can push integration without overbuilding the fairing’s backbone. When you study these concepts, you can weave practical engineering judgments into your initial CAD sketches. The trick is to avoid just chasing a look; instead, you test how your chosen form behaves under simulated flow and dynamic loads, and you design for real-world mounting constraints in the same breath.
Safety and functionality must thread through your process from the outset. A fairing is not an aesthetic shell; it is an engineered interface between rider, bike, and environment. Even during the conceptual stage, you should perform rough assessments of material thickness, support ribs, and mounting redundancy. If the design grows large or extends near the wheelbase, you must account for potential collision with the rider’s boots at full lock, or with the front tire during compression. In practice, you incorporate considerations such as air intake placement, cable routing clearance, brake line pathways, and the possibility of impacts that could fracture or detach the unit. A robust design anticipates such scenarios by including safe margins, redundancy in fasteners, and a simple, repeatable method for disassembly should a panel need replacement. At this stage, you also begin to think about thermal behavior. How will the fairing influence radiator airflow or engine bay heat rejection? Will a vent pattern introduce squeaks or rattles when the bike is in motion? These questions have practical consequences for performance and durability that you can begin to address through either virtual simulations or simple physical prototypes later in the process.
The material choice you consider during the design phase will strongly shape the geometry you settle on. If your plan is to prototype quickly and cheaply, you may lean toward foam blanks—sculpted EVA or polyurethane foam—that can be carved and then reinforced with fiberglass. The foam approach is forgiving for a first-timer because it allows you to test fit and tweak without expensive tooling. It is common to create a rough foam model that captures the essential silhouette and cross-sectional behavior, then fabricate a fiberglass-reinforced shell once you are confident in the shape. For those aiming for a more production-like outcome, you start to model with the actual material family in mind, whether fiberglass, carbon fiber composites, or thermoplastics such as polycarbonate or ABS. Each material has distinct tolerances, heating responses, and bonding requirements, so your 3D model will carry features that reflect those realities. For instance, composite parts demand precise layup sequences and fixation principles, while thermoplastic panels might be designed with integrally molded ribs or snap-fit features. Keeping a materials-aware mindset during CAD reduces the need for expensive redesigns during the molding or production phases and helps ensure your final fairing is both strong and light.
A practical aspect of this planning phase is how you organize the digital data that will steer the build. You will create reference planes, datum lines, and coordinate systems that align with the bike’s own geometries. You will define the intended mounting zones and document the exact positions of holes, brackets, and attachment hardware. It is valuable to maintain a changelog as you iterate: every revision should capture what was changed, why it was changed, and how the change affects fit and performance. The discipline of documenting decisions early pays dividends when you reach the sculpture and mold stages, because you can trace design rationales back to the original goals and constraints. As you think through these choices, you might consult design references that show how real-world fairings balance aerodynamics with rider ergonomics. A practical hint: when you design the interface between the fairing and the bike’s frame or triple clamp, introduce generous clearances for movement and vibration. The last thing you want is a panel that binds or strains at full steering lock or when the forks compress under a bump.
Throughout this process, it helps to keep one eye on the future: the next steps in your project will move from virtual to tangible. The transition from CAD to a physical prototype is softened by a continuous mindset of measurement, validation, and iteration. The CAD model should describe not only the final contour but also the assembly logic—where fasteners live, how panels detach for maintenance, and how the unit can be swapped if a minor crack appears. A well-structured model reduces the friction of iteration and accelerates testing once you begin sculpting molds or fabricating test panels. In practice, your workflow might alternate between adjustments in the digital space and block-by-block physical checks. Each iteration sharpens your understanding of the bike’s real-world behavior and narrows the gap between your vision and what you can actually build.
As you sketch and refine, you may want to ground your exploration in concrete references that align with your design language. For example, you can explore a variant approach by consulting a dedicated fairings collection page that focuses on compatible shapes and mounting patterns. This reference point isn’t meant to replace your own engineering decisions; rather, it offers a sense of proportion, interface strategies, and aesthetic cues that you can adapt to your bike’s geometry. When you land on a promising shape, you’ll have a clear path to test-fit against the bike and stage a controlled build. The goal is to keep your design anchored to the bike’s central axis and symmetries so that the resulting fairing is not only striking but also repeatable and reliable. This approach ensures your CAD model translates into a practical, real-world component that can be assembled with predictable tolerances and with maintenance in mind. As you proceed, you will gradually move from the realm of imagination into a tangible, testable, and adjustable form, ready for the sculpting and molding steps that will follow in Step 2.
For readers who want a quick hands-on reference while drafting, consider reviewing design guides that articulate airflow principles, material behavior under load, and the workflow from concept to test-fit. Such resources translate high-level ideas into practical design rules you can apply as you refine your own fairing concept. And if you need a concrete touchstone for how a design can visually translate to a bike, you can explore published pages that catalog fairing variants and their mounting schemes. These references can help you calibrate your own design language so that it remains consistent with your bike’s silhouette while still standing out as a personal signature. In choosing a direction, remember that the most successful fairings tend to be those that balance restraint with ambition: they carve air efficiently, integrate cleanly with the rider’s posture, and express the creator’s intent without becoming an accessory that looks tacked on.
When you reach the point of presenting your CAD work in a visual render, you should also test how the form communicates with the rider and with the road. Visualizing the rider’s line of sight, the windshield height, and the shadow under the chin is part of a broader ergonomics evaluation. You don’t need to suspend disbelief about the rider’s sense of safety; rather, you ensure that the form respects visibility, head clearance, and the rider’s field of view. In practice, that means creating a few render passes that show the fairing from the rider’s perspective and comparing them against a baseline. If you notice that the silhouette obscures critical gauges or blocks a lamp, you adjust the contours accordingly. This iterative cadence—from data capture to CAD refinement to rider-centric visualization—serves as the backbone of Step 1 and sets a robust stage for the more hands-on phases of sculpting, molding, and finishing that lie ahead. By grounding your design in accurate geometry, clear functional needs, and a disciplined process, you will emerge from Step 1 with a CAD-ready concept that is both beautiful and buildable.
As you move toward the conclusion of this design phase, it is useful to remember that the fairing’s journey is never only about one perfect geometry. It is about a family of viable shapes, each with its own trade-offs, that you can compare and contrast in a structured way. Your digital model should be capable of representing several configurations, so that you can select the most practical variant for prototyping. The goal is not to lock into a single perfect line but to establish a controlled framework in which multiple ideas can be tested against physical constraints and rider needs. This approach nurtures a design culture that values exploration without losing sight of manufacturability, safety, and performance. With this mindset, Step 1 becomes less about a single outcome and more about cultivating a rigorous, repeatable process for turning a rider’s dream into a real, ride-ready fairing. In the next stage, you will sculpt and mold based on the CAD geometry, transforming digital contours into tangible panels, but the credibility of that transition rests on the clarity and discipline you applied here. If you’re curious to explore practical nuances beyond design, a well-curated external resource can offer deeper airflow insights and engineering validations that enrich your understanding of how form interacts with function. For a comprehensive guide to fairing design principles and engineering verification, see Cycle World’s technical guide to motorcycle fairing design: https://www.cycleworld.com/motorcycles/gear-and-accessories/technical-guide-to-motorcycle-fairing-design-476858. And for a concrete reference within the site’s catalog, you might explore the available fairing variants in the internal collection page referenced here: fairings-for-cbr.
Material Mastery for DIY Fairings: Weighing Strength, Lightness, and Budget in the Safe Construction of a Personal Bike Shield
Choosing the right material for a DIY motorcycle fairing is more than a matter of taste. It is a negotiation between weight, stiffness, impact resistance, UV longevity, heat tolerance, and what your skills and tools can realistically achieve. The fairing is not just a shell; it functions as a rider-safe, aerodynamically tuned component that must resist highway wind, minor scrapes, and weather, while still fitting precisely onto your bike’s frame and mounting points. The design process, the way you shape the surface, and the way you finish and paint it all depend on the material you decide to use. To move from concept to a durable, road-ready piece, you must understand what each option brings to the table. In the context of a hands-on build, the discussion tends to center on three plastics for mass-manufactured-like practicality and one composite for performance enthusiasts. ABS plastic offers a well-rounded baseline. Polycarbonate ups the ante on impact resistance and clarity. Carbon fiber delivers premium stiffness-to-weight performance, though it requires more specialized handling. Alongside these, fiberglass and foam-based prototypes provide a low-cost, forgiving path for first-time builders who want to validate forms before committing to a final material choice. This approach keeps the project grounded in what you can actually craft in a home workshop while preserving the integrity of the bike and the rider experience.
ABS plastic earns its place as the most common material for motorcycle fairings because it strikes a practical balance. It is relatively easy to mold, which makes it attractive for imperfect hobbyist tooling and iterative prototyping. ABS heats and cools with reasonable tolerance, accepting hot-wire shaping and trimming with standard workshop tools. It also accepts paints and primers well, delivering a glossy finish that can be polished to a showroom look. When you consider weight, ABS is light enough to keep the overall mass of the bike in a favorable range, especially if you’re replacing or augmenting a stock panel with a lighter, better-fitting aftermarket version crafted in ABS. Its impact resistance is solid, and for most riders, it protects against the kind of scrapes that occur when you’re learning or testing fitment at the edge of a driveway or in a garage. Yet, there are trade-offs that a careful builder must reckon with. UV exposure can degrade ABS over time, leading to chalking and loss of color or brittleness if the material is not treated with UV inhibitors or protected by a robust clear coat. The cure is a multi-layer approach: an appropriate UV-stabilized formulation, a high-quality primer, and a clear topcoat designed to hold up under sun, rain, and temperature swings. If you plan to ride year-round or live in a sunny climate, you should budget for UV protection from the outset and make sure your paint system includes a UV-filtering clear layer.
Polycarbonate offers a step up in durability and longevity compared with ABS, particularly in impact resistance. It is the same family of material trusted in helmet shells, where the goal is to prevent catastrophic fracture on sudden, high-energy impacts. For fairings, PC’s advantage shows in its resistance to shattering in a struck or kicked scenario, which is rare but not unfamiliar on busy roads or during parking mishaps. PC panels are often lighter than ABS for an equivalent thickness, which matters when you chase a high-performance balance of strength and weight. The challenge with polycarbonate is its surface hardness and its propensity to scratch more easily than some other plastics. In practice, PC may require a clear protective film or a specialized coating to keep visibility and aesthetics intact as the panel ages. PC also tends to be more expensive than ABS, and it can be sensitive to certain solvents in paints, so you need to choose compatible coatings and adhesives from the outset and perform test panels before final assembly. In a fairing project, PC’s transparency isn’t typically the goal, but its clarity can matter if you’re weaving large clear wind deflectors or show-through sections into a design. If you want a windscreen-leaning fairing with a lot of visibility through the panel, PC remains a natural choice for those particular sections, though for most street applications the entire shell is not see-through.
Carbon fiber stands apart for those who chase the ultimate in performance, stiffness, and weight savings. When laid up correctly with suitable resins, carbon fiber can deliver a remarkable strength-to-weight ratio that translates into crisper handling, a stiffer shell, and a sleeker, race-inspired appearance. The ride quality of a carbon fiber fairing can feel more responsive, and the material’s low mass reduces unsprung weight, which can subtly affect the bike’s overall behavior. However, carbon fiber is not a beginner’s material. It requires a higher level of craft, more precise tooling, and a controlled layup process. Repairs, when necessary, are more involved and costly because carbon fibers don’t bond as readily with typical plastics and require specialty resins and curing methods. The material is also more sensitive to heat and temperature variations during resin cure and environmental exposure, so your workshop conditions and cure cycles must be monitored. Finally, the price barrier is real: carbon fiber panels cost more per kilogram than ABS or PC, and the tooling investment—molds, autoclave or vacuum bagging setups, and resin systems—may be out of reach for casual hobbyists. For builders who pursue track-day performance or a high-end street machine, carbon fiber represents a pinnacle, but it demands deliberate planning, proper containment of fibers, and a willingness to pursue meticulous finishing to avoid surface micromotions and micro-cracking cracks under stress.
Beyond these three primary options, fiberglass remains a versatile, user-friendly alternative. A typical fiberglass layup over a male mold or a foam core can produce a fairing with excellent rigidity at a reasonable cost, especially when you’re still learning the craft. Fiberglass can be layered to tailor stiffness and impact resistance, and it tolerates a wider range of resin options, including polyester and epoxy. The finished surface accepts paint with good adhesion, and the process can be more forgiving for a novice than working with carbon fiber prep. Foam cores, on the other hand, are a common starting point for shaping a fairing’s general silhouette. Foam blanks can be carved, hot-wired, or cut with a hot knife to achieve the rough geometry, after which a fiberglass skin is applied to create a sturdy, reusable mold that ultimately becomes the final shell. The technique offers a gentle introduction to fairing construction, enabling you to test fit and refine curves before committing to a more expensive material or a final layup. The foam-and-fiberglass route aligns well with a stepwise design philosophy: you build, test, modify, and then either finalize in ABS or move forward with carbon fiber once your contours and mounting strategies are locked in.
When you select a material, you’re not merely choosing a shell for the bike; you’re defining how you’ll assemble, mount, and finish the panels. The design must accommodate the panel thickness, the desired radii at edge transitions, and the geometry of mounting points. A CAD-driven approach becomes essential here. If you’re leaning toward ABS for a first project, you’ll want to model the panel in CAD with conservative thickness and generous radii to reduce the risk of cracking during handling and installation. You’ll also map the mounting brackets, fasteners, and potential reinforcement ribs into the design, so the final piece aligns with the forklift of the bike’s existing frame and engine guards. If you pursue PC or carbon fiber, your CAD work should reflect not only the surface geometry but also the underlying internal structure—whether you’re using a fiberglass-reinforced core, a carbon layup schedule, or an aluminum or composite backing plate. The better your model, the less you’ll fight a panel that doesn’t sit flush or requires trimming after epoxy cures. For comparison with finished, commercially produced products, you can browse the Honda fairings category to glean mounting patterns, bracket locations, and common interface details that may inform your own design language without copying any particular product. See Honda fairings for a sense of standard mounting geometry and aesthetic compatibility with a broad range of bikes: Honda fairings.
Cost and tooling needs are also a crucial part of the equation. ABS remains the most forgiving on a tight budget. It can be bought in sheet or preformed shapes, then trimmed to fit. If your workshop lacks sophisticated composite tooling, ABS offers a straightforward path to a durable, paint-ready shell with a good glossy look. Polycarbonate, by contrast, demands careful selection of coatings to prevent surface degradation from UV exposure and scratches, and it often requires higher-end tools and cleaner resins to minimize clouding or hazing. Carbon fiber requires precise containment, specialized resins, and controlled cure conditions. The upfront costs rise quickly, but the payoff can be a panel that keeps its shape under stress and reduces the bike’s overall weight. If you’re testing out a concept or learning the craft, the fiberglass-and-foam approach gives you the chance to practice shaping and bonding techniques without burning through resources. It also gives you a signal about how closely your patterns and radii match the bike’s silhouette before you commit to the more expensive, high-performance options. A well-considered combination can even involve a mixed-material approach, using ABS or PC on outer shells with a carbon or fiberglass backer in high-stress areas where you need reinforcement, or using a CF panel for sections closest to the wind or where you want a visually premium finish.
Practical considerations also include repairability and long-term maintenance. ABS is commonly repairable with heat or welding techniques and can be repainted with conventional automotive-grade paints, which makes it attractive for riders who want a fixable shell with a reasonable life span. Polycarbonate’s scratch resistance can be improved by coatings or protective films, but the clear protection layer adds another maintenance layer and cost. Carbon fiber, although strong, becomes more complex to repair after a major crack. You may need to cut away damaged sections and refinish with composite repair techniques, and stable repair of CF often necessitates a full inspection from a skilled technician. Fiberglass, with the right resin, can be repaired at a fraction of the cost of CF, but repairs must be thorough to avoid delamination that would compromise stiffness. The learning curve matters too. If you’re new to pulling off clean, aerodynamically smooth shapes with compound curves, you’ll want to start on ABS or fiberglass before attempting CF or PC, where the tolerances for misalignment and surface flaws are tighter and more likely to show up on the final paint job. A thoughtful sequence—prototype in foam and fiberglass, validate fit, then finalize in ABS or PC, or graduate to CF for performance goals—tends to deliver the most satisfying results with the least frustration.
The choice of material, in the end, comes down to your goals and your workshop reality. If you want a reliable, aesthetically pleasing fairing that you can repair with common tools and paints, ABS will serve you well. If you’re chasing a lighter, more durable piece and you’re prepared to manage more complex manufacturing steps, polycarbonate offers a compelling upgrade—especially in sections where visibility or clarity is important and a lightweight feel matters. If your aim is to win on handling and performance or you crave a high-end look with a tuned weight profile, carbon fiber becomes an appealing though more demanding path. Fiberglass and foam provide a forgiving springboard, letting you perfect the form and the fit before you commit to a final material system. Each route requires a different approach to edge radii, wall thickness, reinforcement, and surface finish. Even with a single chapter’s worth of guidance, the core idea remains clear: your material choice shapes not just the final appearance of the fairing but how you design, fabricate, assemble, and maintain it. The right choice aligns with your bike’s geometry, your skill set, your tools, and your long-term maintenance plan, so you can ride with confidence, knowing your fairing sits at the intersection of form, function, and durability.
External resource: For a broader look at how CAD-driven design informs material choice and part integration, see Fusion 360 – Free CAD Software for DIY Projects. This resource helps you translate your shape language into manufacturable, testable plans, turning your ideas into a coherent build plan that respects the realities of material performance and workshop constraints.
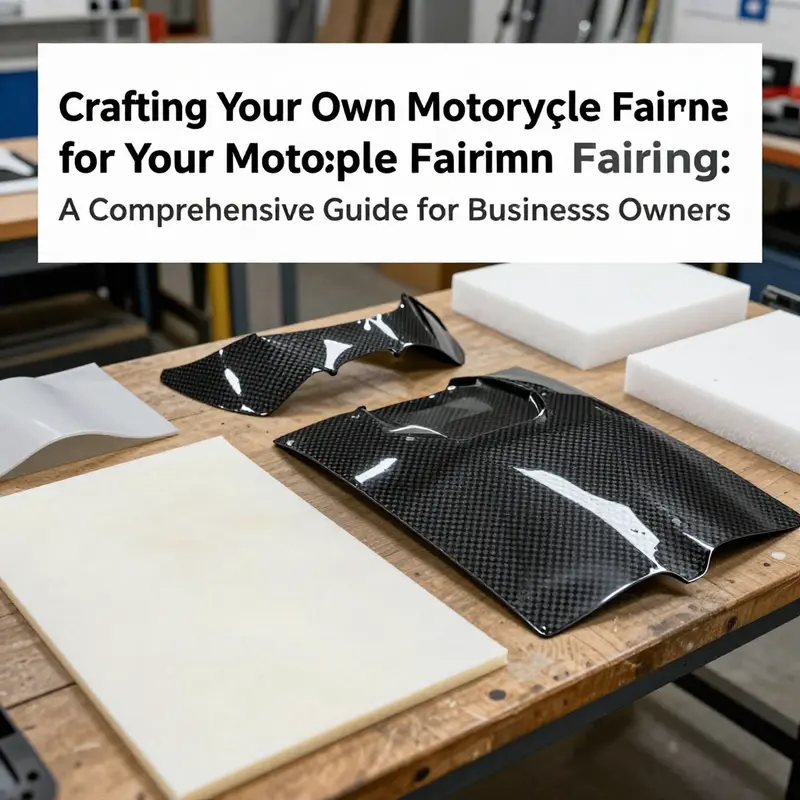
From Block to Body: Sculpting and Molding Your Custom Motorcycle Fairing

Sculpting and molding a motorcycle fairing is where concept becomes skin. This stage transforms measured lines and digital sketches into a physical surface you can touch, trim, and fit. Whether you began with drawings or a 3D model, you now need a full-scale master that captures every curve, inlet, and mount. The method described here balances approachable techniques with workshop-grade discipline. It emphasizes reliable materials, predictable steps, and practical touches that keep the project manageable for a home builder.
Begin by choosing your prototyping medium. Two common paths work well: sculpting directly in modeling clay, or carving a foam blank. Clay offers detail and easy editing. Foam is faster for broad shapes and lighter to handle. For clay, use a sulfur-free formulation that holds crisp edges and fine texture. For foam, choose a medium-density urethane or similar block that slices cleanly and sands smoothly. Both methods favor iterative shaping: remove large volumes first, then refine with finer tools.
Establish a stable pattern base. Mount your clay or foam to a rigid backing board that matches the fairing’s intended mounting plane. Secure it so the master sits at the exact orientation you will install the final part. This helps ensure that mounting surfaces and screw bosses align precisely when fitting the finished component. If your design includes vents, headlight openings, or mirrors, mark their locations on the master early. These features influence the mold layout and later insert placement.
Shape the master progressively. Start with coarse tools: hot wire cutters and rasp files on foam; loop tools and metal scrapers on clay. Focus first on the major planes and radii. Keep edges consistent and flowing. Regularly step back and view the piece from riding height and side angles. This habit reveals asymmetries and unnatural lines. Use templates cut from paper or thin plastic, derived from your measurements or prints from your model, to verify contour accuracy along critical cross-sections.
Refine details with sanding and small hand tools. For foam, coat the final sculpt with a thin layer of filler or putty to seal the surface before fine sanding. This creates a uniform grain and prevents the composite from following foam texture. For clay, smooth with solvent and soft tools, then lightly dust with release powder where needed. Keep profiles feathered where two surfaces meet, and define abrupt intersections only where the final fairing will have a mechanical step or joint.
Plan the mold architecture before applying any release film or agent. Decide if a single-piece female mold will suffice or if a split mold is necessary. Simple shapes can use a one-piece negative, poured around the master. Complex forms, or those with undercuts, require multi-part molds with keyed registration features. Map out parting lines that avoid visible areas or follow natural bodywork seams. Place registration keys on less visible zones.
Apply an appropriate release system to protect the master. Use a release agent formulated for your chosen mold material and master medium. For clay masters, apply a barrier film first, then the release coat. For foam sealed with filler, use a wax or PVA that bonds well with the mold compound. A correct release system prevents adhesion while preserving detail.
Proceed to create the female mold. A common and reliable choice is a rigid plaster jacket or a reinforced resin mold. If using plaster, build the mold in controlled layers. First, cover the master with a thin, detail-capturing layer. Press gently to ensure all contours are recorded. Layer thickness matters: too thin and the mold will crack; too thick and it will trap heat and distort the master. Allow each layer to set before adding the next.
Reinforce the mold backing. Once the detail layer cures, apply reinforcement using fiberglass cloth and resin, or build a thicker plaster shell supported with embedded fiber mesh. The goal is a stiff, stable negative that resists flexing during composite layup. Flex in the mold leads to uneven part thickness and poor surface finish. Increase rigidity around mounting bosses and areas where you will clamp the mold during layup.
Cure the mold fully and remove the master carefully. For clay masters, warm and extract the material through the mold’s openings, taking care not to chip edges. For foam and sealed masters, pry gently and use soft tools to avoid chipping the mold. Inspect the mold cavity for voids, air bubbles, or imperfections. Small defects can be filled with a thin coat of resin or surface mastic. Larger issues may require patching or even remaking that section of the mold.
Prepare the mold interior for composite layup. Apply a thin, even layer of mold release wax or PVA, depending on the resin system you’ll use later. For resin systems that can react to certain releases, follow the manufacturer’s recommendations. After the release has set, buff it smooth. A properly prepared mold will ease demolding and protect surface detail.
Lay up the composite carefully. Cut cloth to match each mold zone, and plan layer orientation to optimize strength where needed. For a reinforced fairing, start with a thin surface veil or woven layer for finish quality, then follow with biaxial or unidirectional fabrics where stiffness is required. Dry-fit each cloth template in the mold before wetting to ensure complete coverage and minimum trimming. Use a brush or squeegee to wet out each layer thoroughly with resin, removing trapped air with a roller or by hand. Work methodically to avoid pooling.
Pay attention to core areas and mounting points. If you need additional thickness where brackets attach, place localized reinforcement or an insert during the layup. For a lightweight but strong fairing, consider sandwich construction with a foam core in flat, wide areas. Bond foam cores with compatible adhesives, and ensure edges are tapered to allow a smooth fiber transition. Place bolt bosses or threaded inserts into the mold before final layers cure, so they embed glass-to-glass and lock in place.
Manage curing conditions. Temperature and humidity affect resin flow and set times. Keep the workshop within recommended ranges and allow slow, steady cure rather than a rushed heat cycle. For thicker molds and parts, use a controlled post-cure to improve strength and thermal resistance. Avoid demolding prematurely; doing so can warp the part and damage the mold.
After demolding, trim and finish the raw fairing. Cut flash and excess material with a rotary tool or fine saw. Sand edges until shapes align with mounting tolerances. For seams and joins, use compatible filler and sand progressively from coarse to fine grit. Check fit repeatedly on the motorcycle frame. Small adjustments at this stage are faster than reworking mounting plates later.
Finalize structural details and surface prep. Where the composite meets metal brackets, ensure bonding surfaces are clean and roughened for adhesive. If the fairing will accept paint, apply a thin, compatible surfacing layer to achieve a paint-ready finish. Gelcoat can provide a durable, paintable surface when used correctly in the mold. A light sanding and primer coat before final color work will reveal any remaining imperfections.
Test-fit several times and evaluate aerodynamic behavior visually. Walk around the bike, sit in the riding position, and inspect sight lines. Confirm that vent paths align with radiator outlets and that the fairing does not impede control movement. Make small shims or backing plates to adjust alignment, then permanently fasten brackets after final fit confirmation.
Preserve the mold for future parts. Clean the mold thoroughly after each use and reapply release where required. Store molds in a stable environment, away from heat and UV exposure. If you plan multiple identical fairings, consider making a stronger mother mold around the female cavity to speed repeated production. A durable mold extends your ability to refine and reuse the design.
Sculpting and molding demand patience and attention. Mistakes early are costly later. Move from rough shaping to detail slowly, and validate fit at every stage. The physical master captures your aesthetic and functional choices. The female mold locks those decisions into a reproducible form. Follow careful preparation, layer planning, and curing discipline, and your DIY fairing will move confidently from concept to road-ready bodywork.
For reference on materials, mold techniques, and composite supplies, consult a respected technical resource on fiberglass and composite methods. For a selection of existing fairing shapes and aftermarket templates that can inform mount locations and parting lines, review fairing offerings for models similar to yours, for example a curated selection of fairing kits for popular sport models. fairings-for-ducati-749-999
External reference: https://www.fibreglast.com/
Polish, Fit, and Finish: Completing a Self-Made Motorcycle Fairing with a Pro-Grade Install
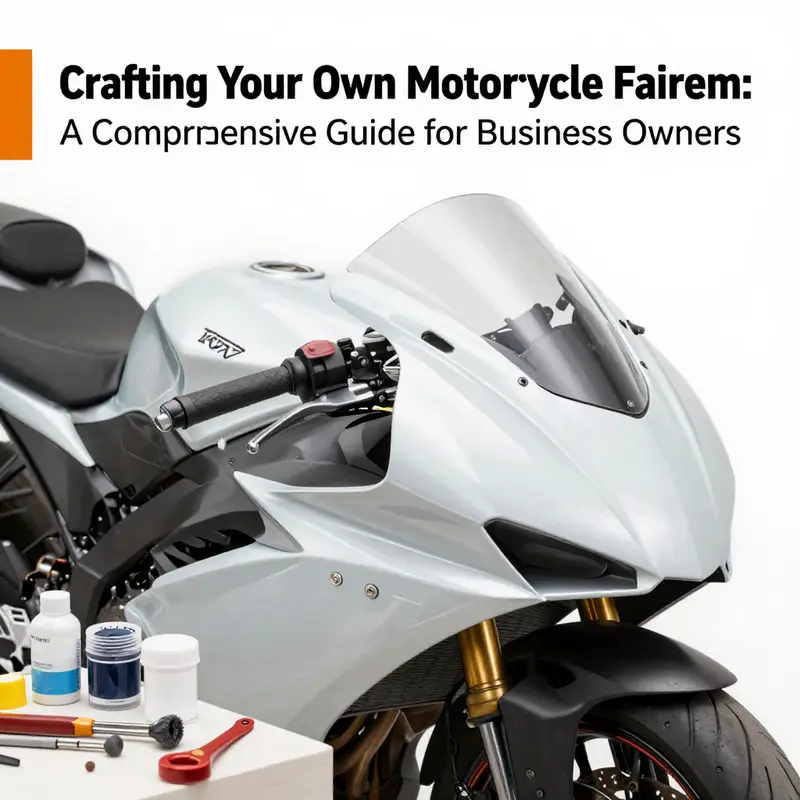
Finishing and installing a self-made motorcycle fairing is where craft meets reliability. After the long ride from an initial foam sculpture or a fiberglass layup to a painted shell, the final stage tests your patience, your eye for detail, and your respect for how a fairing behaves at speed. This chapter isn’t a catalogue of tricks; it’s a seamless narrative of how to bring a thoughtful piece of work into the bike, how to secure it without warping or gapping, and how to finish things so the whole assembly looks and performs like a factory part rather than a project you once tinkered with in the workshop. The aim is a best-in-class fit that looks right in natural light, feels solid to the touch, and remains functional under wind, rain, and vibration. It starts with a clean slate: a frame prepared for adhesion, edges sealed, and mounting points verified for accuracy. Before you go back to the bike, take a moment to appreciate how far the process has taken you from the sketch to the surface, from the rough foam to the smooth primer, from dry-fit looks to a live, aerodynamic profile that you can rely on when the road opens up ahead. A key part of this journey is attention to detail and a steady rhythm in checking alignment, clearance, and contact with every part of the bike that the fairing touches. The goal is to avoid gaps that reveal the understructure, to keep the edge line true and consistent along the entire length, and to ensure that the fairing does not interfer with steering, headlight alignment, or exhaust heat. As you approach the installation, you should see the result not just as a shell you can put on the bike, but as a cohesive, welded-together system where each fastener, foam spacer, and edge trim plays a role in the overall integrity. The finishing touches are not cosmetic accidents; they are functional elements that protect, seal, and stabilize the fairing as the ride reveals itself in real conditions. The process begins with preparation—clean and degrease the contact surfaces on the frame and on the backside of the fairing. Dust, oil, or wax residues create micro-slippery layers that compromise adhesion and complicate the alignment. A mild degreaser and a lint-free cloth are your allies here. Wipe away any surface residue, then dry thoroughly. This is one of those moments where the smallest thing—a stray fiber, a fingerprint, a stray speck of dust—can become a visible spoiler after the paint has cured. Once the surfaces are pristine, re-check that all mounting points, brackets, and threaded holes are free of debris and aligned with the bike’s geometry. It’s not unusual to have tiny misalignments after a layup, especially if the inner structure was still a little flexible during curing. Correcting these before you mount saves you from scrambling later, and it reduces the risk of introducing stress concentrations that could lead to cracking or warping once the fairing is bolted tight. The actual placement begins with a careful dry-fit. Position the fairing, align the pre-drilled holes with the corresponding bolts or brackets, and check the overall symmetry against the existing body panels. A soft rubber mallet can be used to seat the fairing gently into place; the objective is to avoid any forced contact that could crack the resin or deform the edge line. If your build includes multiple sections—an inner shell and an outer shell, for example—follow the ventilation and alignment logic that you planned during the CAD phase. Don’t assume the parts will snap together perfectly without attention. Take the time to verify clearance around the headlamp, radiator ducting, and the steering crown. In this moment, the line between artistry and engineering becomes visible. The next move is to fasten, but in a way that sustains the alignment rather than masking it with tightened bolts. Use a crisscross sequence and progressively snug each bolt in small increments. That approach distributes clamping force evenly and minimizes the risk of warping the fairing or pulling the panels out of alignment. It’s a tiny ballet: tighten one corner, then move to the opposite side, step by step, until every point has a clean, uniform contact without visible stress at the joints. This principle—uniform clamping—extends to every seam and edge, where a sealing adhesive or sealant can help close gaps and prevent water intrusion. The use of a high-quality trim sealant around the edges is not just about aesthetics; it protects the joint from weather and vibration. When selecting sealant, ensure compatibility with both the fairing material and the frame paint so you don’t compromise adhesion or create a brittle edge in cold weather. A well-sealed edge also discourages paint micro-cracking along the seam. If your fairing consists of more than one piece, you’ll want to pay special attention to the interface between sections. The edge mating lines should be consistent, with a tight but not crushed fit. At this stage, it’s easy to fall into the trap of chasing absolute symmetry by force. Resist the urge to over-tighten or force pieces to align where the underlying frame geometry is not perfectly square. The right thing is to adjust the positions slightly using spacers or shims where the mounting points allow, re-checking alignment after each micro-adjustment. It’s also wise to ensure that any electrical harnesses, sensor leads, or cooling lines routed behind the fairing have adequate clearance and aren’t pinched when the panels are in place. A common oversight is a harness that looks fine in a dry, static fit but becomes tight when vibration and the heat of operation are considered. A quiet, careful check at this point can prevent rattles and electrical interference that would spoil the overall experience. As you move toward the aesthetic consolidation, the edge finishing deserves careful attention. If you used a foam-and-fiberglass approach, you’ve already sealed the core; now the external surface should look uniform in texture and color. Lightly sand any transition ridges along the joint lines so they disappear beneath a consistent gloss. A mask and multiple light coats of primer help to reveal any remaining imperfections that the eye will notice under sun or street lighting. When the primer is cured, inspect the surface under natural light, looking for pinholes, waviness, or small deviations in the flatness of the panels. Address these with targeted spot sanding and, if necessary, a light application of filler. The next step blends aesthetics with function: the paint and clear coat. A layered approach—base color, midcoat, and a clear top coat—delivers depth and protection. The choice of clear coat is especially important for a fairing exposed to heat from the engine and sun. A clear that offers UV resistance and good adhesion to the base layer helps minimize yellowing and micro-scratches. After painting, you’ll need a period of curing time. Buffing and polishing the surface brings out the gloss and helps reveal any remaining surface deviations. This is a moment to evaluate the finish under different lighting—sunlight, shade, and artificial light—to ensure uniformity across every panel. The visual result should be smooth enough to reflect the surroundings without pronounced edges catching the eye. A well-sealed outer shell interacts with the bike’s overall silhouette, but it also interacts with movable parts and with rider posture. It’s essential to check the clearance around the handlebars, footpegs, and fairing edges at full steering lock and at the rider’s anticipated seating position. If the fairing is too tight, it will rub under load; if too loose, it will flutter at speed and generate noise. The installation should feel like a snug, purposeful fit, not a fragile assembly. Now comes the practical integration of components such as mirrors, windscreen, and any decorative trim. Mirror stubs or mounting attachments must clear the fairing’s edge without forcing the panel away from its line. If you’re installing a windscreen, verify the alignment with the fairing’s face and the rider’s line of sight. The synergy between windscreen angle and fairing curvature influences buffeting and air pressure; a small adjustment here can create a calmer ride. As you reach the last phase of installation, step back and perform a comprehensive inspection in multiple angles and lighting conditions. Symmetry, gap consistency, edge sharpness, and the absence of interference should be evident. A practical check is the tactile feel along every seam and edge: there should be no sharp protrusions that could snag gear or skin. The overall fit should read as a single, purposeful form rather than a piecemeal attachment. The final aesthetic touches are as much about durability as they are about appearance. If you plan to ride through rapidly changing weather or rough roads, consider additional protective measures such as edge hooding at high-stress joints or a more robust edge sealant. This is where the craft becomes a practical, no-nonsense tool for reliability. In your mind, you’re not just finishing a surface; you’re tuning a surface to meet the demands of wind, vibration, and rider input. The fairing now lives as part of the machine, not a separate object. With that in place, you can perform a cautious test ride to verify that the fairing’s geometry remains stable at speed, that there’s no unintended contact with the tire or suspension, and that the rider’s field of vision is preserved. Any misalignment or unintended contact that emerges during a test ride should be addressed with minor adjustments in the mounting hardware or, if necessary, a careful rework of the panel fit in the area exhibiting the issue. The ride test is a final and practical feedback loop that lets you know whether your finishing work has achieved a professional finish and a functional pairing with the bike’s dynamic behavior. If you’re exploring additional model variations or seeking options for different styling directions, a broader catalog of fairing categories can be a helpful reference. See the fairings catalog for related options and structural ideas that may mirror your own build’s geometry and mounting approach. This is not about copying a design; it’s about understanding how different shapes manage air flow and rider comfort while staying within the constraints of your frame and mounting points. The completion of a fairing project is not a single moment but a checkpoint in a longer relationship with your machine. Regular checks after riding sessions help you catch small issues before they become bigger problems. Re-tighten fasteners as needed, inspect joins for hairline cracks or weathering, and keep an eye on sealants that may need reapplication after a few seasons. This ongoing care is part of responsible customization; it ensures your effort remains sound and your bike remains safe. For those who want to explore related options while staying grounded in the craft, a broader catalog of fairings offers a sense of direction without dictating a single path. If you’re curious about compatible styles or how to navigate fitment across different frame geometries, consider visiting a catalog that presents a curated range of fairings as a reference. The goal is to understand how different shapes sit within the spectrum of performance and aesthetics, not to chase a specific look at the cost of function. As you move toward the next chapter in your build, you’ll carry forward not just the appearance but the discipline you applied to fit, seal, and finish. The skills you developed during finishing and installation—the patient dry-fit, the careful seam work, the measured tightening pattern, and the attention to lighting and optics—will inform every future project. The experience fosters a mindset that balances creativity with engineering: you design for the wind as much as for the eye, you sculpt for resilience as much as for beauty, and you install with a sense of alignment that respects the bike as a single, living system. For official installation guidance and best-practice manuals, consult the manufacturer’s documentation and support resources as you finalize your approach to any specific bike or fairing combination. External resource reference: https://www.h-d.com/warranty
Final thoughts
The journey to creating your own motorcycle fairing is both fulfilling and financially rewarding. By following these steps—from design to installation—you position your business to meet the growing demand for personalized motorcycle accessories. As customers increasingly seek unique modifications for their bikes, your ability to craft high-quality, custom fairings will set your offerings apart in the marketplace. Tap into your creativity and technical skills to engage a passionate customer base eager for uniqueness and performance enhancements.