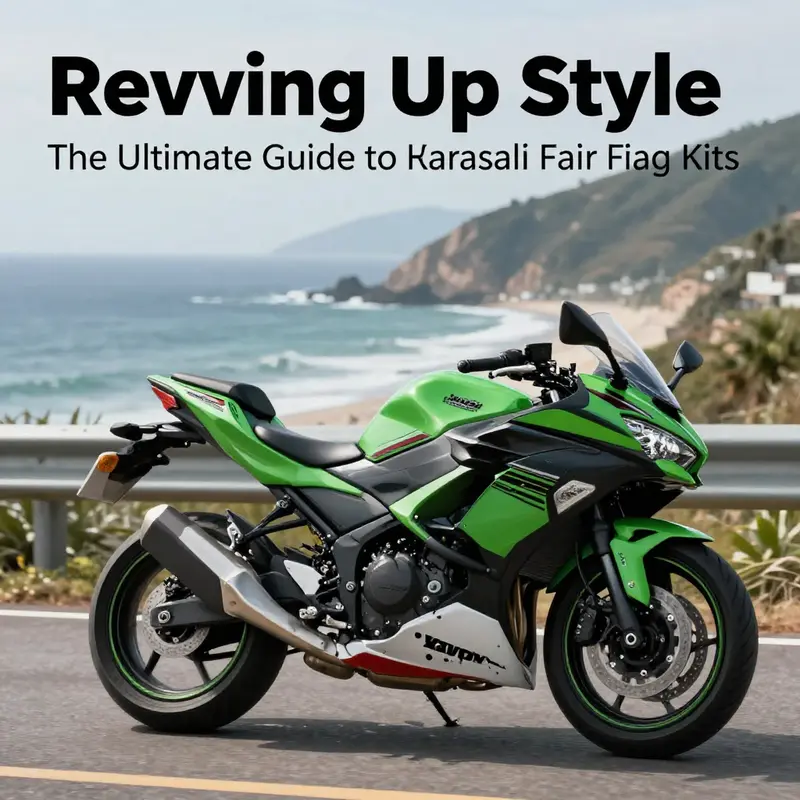
Kawasaki motorcycle fairing kits represent a critical facet of motorcycle customization and performance, appealing widely to both enthusiasts and business owners in the motorbike market. These kits serve not only an aesthetic purpose but also contribute significantly to aerodynamics and protection. Understanding the various types of fairing kits available, their materials, and the nuances of installation and maintenance can position you as a knowledgeable resource in the motorcycle community. This guide delves into each aspect of Kawasaki fairing kits, paving the way for informed purchasing decisions and effective installations, enhancing your business offer to customers looking for upgrades and repairs.
Choosing and Understanding Kawasaki Fairing Kits: Types, Materials, and Real-World Tradeoffs
Kawasaki fairing kits are more than cosmetics; they reshape a motorcycle’s character, protection level, and aerodynamic behavior. For riders who want to restore a damaged bike, refine styling, or chase better performance on the track, picking the right fairing kit requires balancing form, function, and practical realities. This chapter walks through the common kit types, material choices, fitment and installation considerations, and the everyday tradeoffs that determine which option will serve a rider best.
Fairing kits come in a spectrum from full coverage down to modest accents, and each level of coverage targets a different set of priorities. Full kits wrap the front and midsections with pieces that include the headlight cowl, side panels that flank the tank, and usually lower belly panels. They create a cohesive, factory-like appearance and deliver the strongest aerodynamic benefits. This means reduced windblast for the rider, steadier high-speed stability, and often better channeling of airflow for engine cooling. The tradeoff is weight, cost, and installation complexity: full kits tend to be heavier if made from standard plastics, they require precise alignment and matching paint, and maintenance or mechanical access becomes more involved because more panels must be removed.
Mid or half fairings cover the top and upper midsection, typically protecting the headlight area, instrument cluster, and upper forks while leaving the lower engine and frame exposed. They strike a pragmatic balance. For daily riders and sport-tourers, they cut wind fatigue substantially without adding too much complexity to routine maintenance. They also keep the bike lighter and more electrically accessible than full kits. In urban use, where low-speed maneuverability and easy serviceability matter, half fairings often offer the best compromise between protection and practicality.
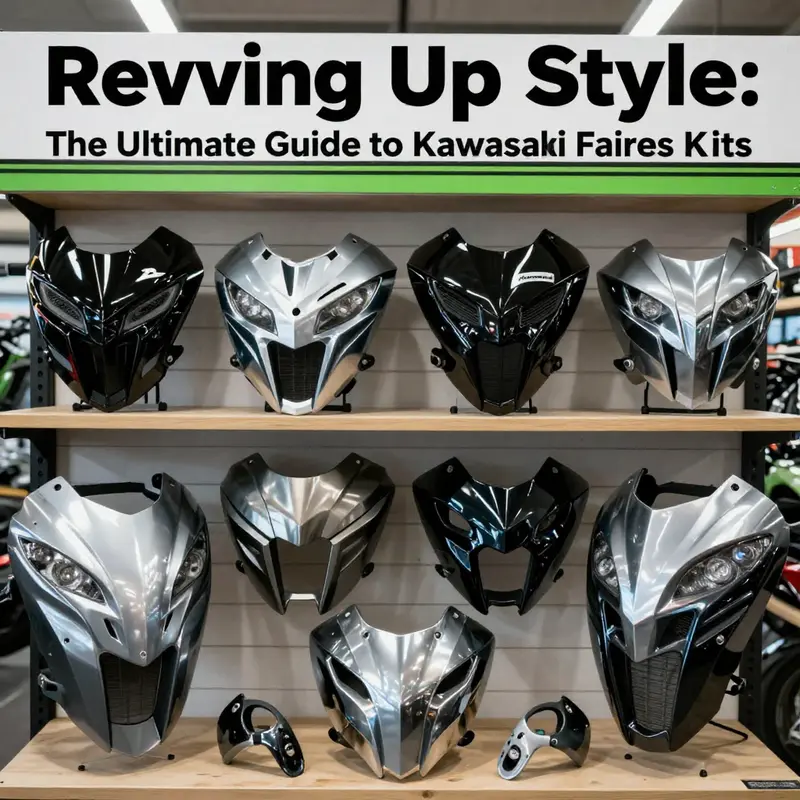
Upper fairings focus purely on the top front area—headlight cowl and windscreen—modernizing the look and improving wind deflection around the rider’s torso and helmet. They are ideal when the objective is to refresh the bike’s face without altering lower sections. Quarter fairings and small cowlings take the opposite approach, emphasizing vintage or café racer aesthetics with minimal coverage. These are primarily stylistic choices and deliver negligible aerodynamic gains, but they keep weight down and preserve the exposed mechanical look many riders prefer.
Race fairings are a distinct category engineered for track performance. Constructed from lightweight composites, they shed weight and smooth airflow, often removing unnecessary mounts and fittings present on street-legal parts. The benefit is meaningful: lighter bodywork improves acceleration, reduces rotational mass, and refines handling at speed. But race fairings typically sacrifice street-legal features such as mirrors, lights, or turn signals and may require different mounting points or bracket modifications. For serious track users, the performance gains are usually worth the additional expense and customization work.
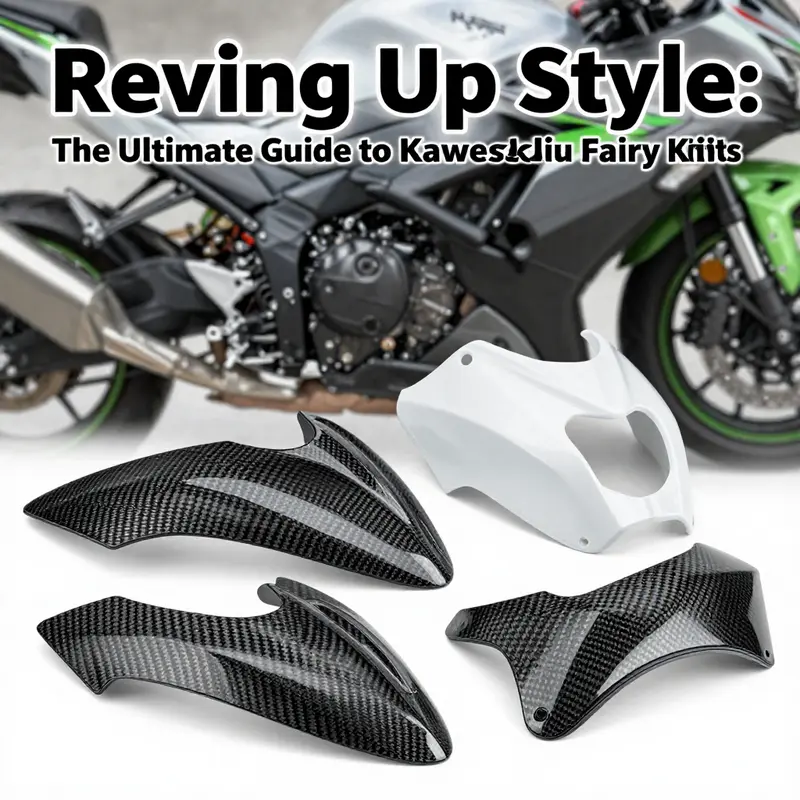
Material choice is central to a fairing kit’s character and cost. Injection-molded ABS plastic is the most common option for aftermarket kits. It offers consistent dimensions, durable impact resistance, and reliable fitment into stock mounting points. ABS can be painted or wrapped to match a machine’s color scheme, and its relative toughness helps it survive small drops and road debris. Dry carbon fiber, by contrast, is chosen for its weight savings and high stiffness. Carbon delivers a premium, performance-driven look and measurably reduces mass, but it costs more and demands higher craftsmanship to ensure flawless finish and fit. Fiberglass can sit between these two: lighter than ABS and cheaper than carbon, but more brittle and prone to cracking on impact if not built with proper reinforcement.
Fitment precision is another crucial consideration. Kits that conform to original mounting points simplify installation and maintain alignment with OEM frames and brackets. Poor fitment causes stress at bolt holes, leads to rattles, and creates gaps that undermine the kit’s aerodynamic benefits. When a kit requires modification—such as trimming, re-drilling, or custom brackets—riders should budget time and possibly professional help. Painting also adds cost and complexity; color-matched paint jobs can transform an aftermarket kit from an obvious replacement into a seamless, factory-quality upgrade, but they require careful preparation and curing.
Practical questions about daily use shape the right choice as much as looks do. For commuting and touring, consider wind protection, splash and debris resistance, and heat management. Lower fairings and belly pans can shield the engine from road spray and pebbles, helping preserve mechanical components and reducing corrosion risk over long miles. Good ducting within full fairings can also channel cool air to radiators and avoid overheating on slow runs. For riders who prioritize easy maintenance or frequent garage work, half or upper fairings allow quick access to filters, spark plugs, and wiring without removing a dozen panels.
Track-focused riders weigh different priorities: the lightest possible bodywork, rapid removal for pit work, and compatibility with race-spec hardware. Many race kits omit unnecessary fittings to save weight and simplify repairs after crashes. These kits often integrate tow points and quick-release fasteners to accelerate pit-side interventions. Street-legal riders contemplating a race kit should be aware that such parts may need additional work to remain road-legal and to support lighting and signaling hardware.
Longevity and repairability should inform material and supplier choices. ABS can be repaired and re-shaped with thermoplastic techniques, while fiberglass repairs require different resins and reinforcements. Carbon fiber repairs demand specialized epoxy and laminating skills; when properly repaired, carbon can be restored, but the process is costlier. Consider how frequently you expect minor drops or track spills and choose a material that aligns with your tolerance for repair cost and effort.
Finally, sourcing reliable kits matters. Choose suppliers who provide clear fitment information for specific Kawasaki models and years. Good vendors include those that list compatibility for Ninja variants and provide photos showing how parts align with common mounting points. For a focused collection of model-specific options and to compare styles designed for sport models, see Kawasaki Ninja fairings collection. When browsing listings, verify whether the kit includes fasteners, brackets, and a windshield, and confirm whether lighting openings are OEM-compatible or require modification.
For further details on wider marketplace availability and completed sales history, consult the linked external resource that aggregates past listings and fitment results: https://www.ebay.com/sch/i.html?nkw=Kawasaki+Motorcycle+%26+Scooter+Full+Fairings+Kits&sacat=0&LHTitleDesc=0&from=R40&sop=10&rt=nc&LHComplete=1&LHSold=1&LHPrefLoc=1
Choosing the right Kawasaki fairing kit is a mix of style goals, practical needs, and honest assessment of budget and mechanical skill. Whether you decide on a full factory-style transformation, a pragmatic half fairing, or a lightweight race conversion, understanding the tradeoffs in materials, fitment, protection, and maintenance helps ensure the finished bike performs and looks exactly as intended.
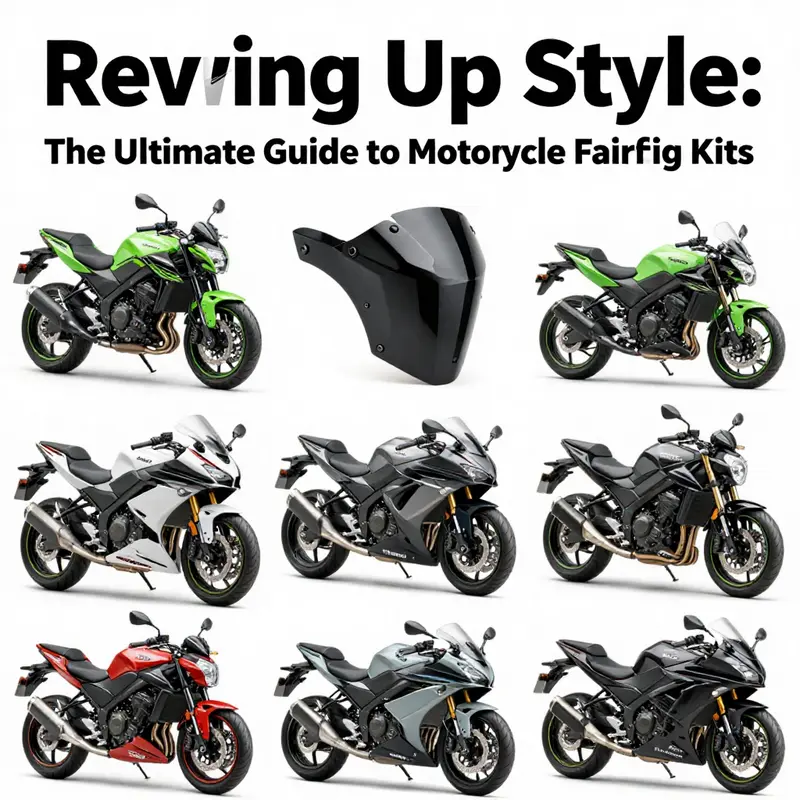
Choosing the Right Kawasaki Fairing Kit: Understanding Full, Half, Quarter and Specialty Options
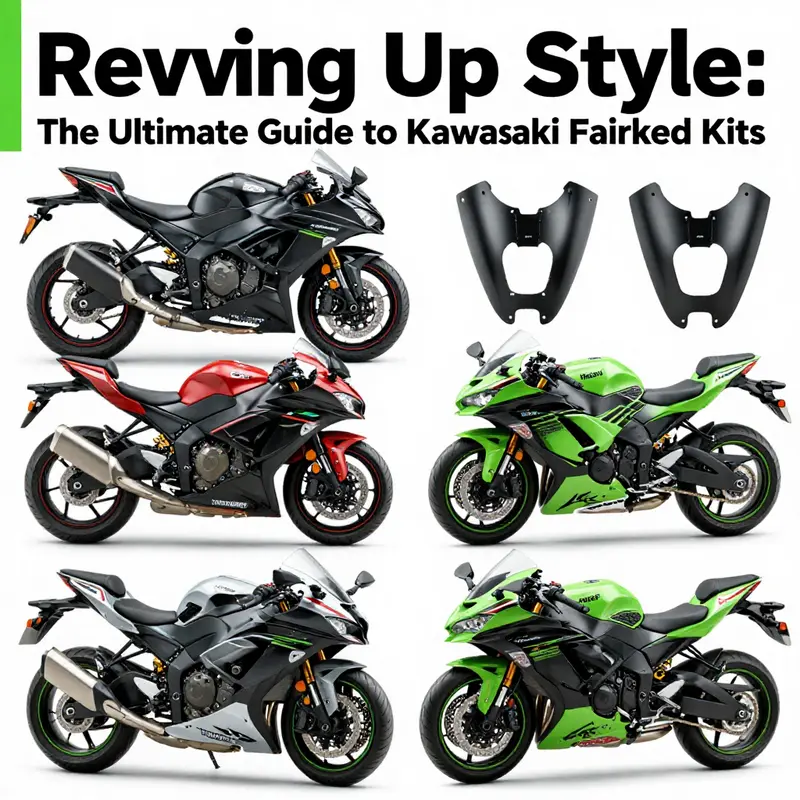
Kawasaki motorcycles wear fairings for many reasons: to slice wind with purpose, to protect delicate components, and to shape the bike’s visual identity. When you shop for a fairing kit, you’re choosing more than a set of panels—you’re selecting a compromise between protection, weight, serviceability, and style. Understanding the differences between full, upper, lower, half and quarter fairings—and the specialty race-grade options—lets you make a choice that matches how you ride, how you maintain your machine, and how you want it to look.
Full fairing kits are the most complete option. They wrap the front, sides and often the lower chassis in a single, cohesive skin. For riders aiming for a factory-finish restoration or a show-ready transformation, full kits deliver the seamless appearance and aerodynamic benefit many seek. Because a full kit covers the headlight cowl, instrument area, tank sides and bellypan, it reduces rider wind blast at speed and streamlines airflow around the engine. That translates to less turbulence, improved high-speed stability, and a clearer visual impression of a race-bred machine.
The trade-offs with full kits are practical. They usually cost more and demand precise fitment. Installation often involves aligning multiple mounting points and may require temporary removal of accessories or trimming for non-standard hardware. Full kits can also make routine maintenance a little more cumbersome; access to the engine or cooling components frequently requires removing panels. For riders who accept those compromises, the material choice becomes vital: injection-molded ABS offers predictable fit and durability, while carbon fiber or fiberglass race panels shave weight and look exceptional but come at a premium and require careful handling.
Upper fairing kits focus attention where it matters most for comfort and style: the headlight area, instrument cluster and upper fork shrouds. These kits upgrade the front visage of the bike, modernize aerodynamics around the cockpit and can incorporate ducts to better manage airflow to radiators or rider exposure. For everyday riders and sport-tourers, an upper fairing offers improved wind protection for the torso and neck without the bulk of a full-body kit. It’s also a practical choice for replacing a damaged front end, because you retain easy access to the engine and lower mechanicals.
Because upper kits are simpler, they often fit more easily and require less painting or modification. They are a go-to for riders who want contemporary sport styling while keeping maintenance tasks straightforward. The upper fairing’s limitation is obvious: the lower engine and frame remain exposed, so the protection and aerodynamic gains at very high speeds are limited compared with a full kit.
Lower fairing kits serve a targeted purpose: protection. Bellypans and lower side panels shield the engine, exhaust headers and lower chassis from stones, road grime and incidental contact. For riders in wet climates or those who frequently encounter debris, a lower fairing protects sensitive components and helps contain fluids in the event of a minor tip-over. Visually, lower panels clean up the bike’s profile by hiding mechanical clutter, which is useful when you want the aggressive, finished look without changing the bike’s upper geometry.
Half fairings—also called mid or 5/8 kits—strike a deliberate balance. They cover the front and upper midsection while leaving the lower engine and many frame elements visible. For riders who want improved wind deflection and a sportier stance without the weight or cost of a full kit, half fairings deliver functionality and style. They are lighter, easier to install and remove, and they simplify routine checks and repairs.
Half kits have been a favorite among riders building café-racer inspired machines or daily commuters who want a sporty feel with practical serviceability. They won’t provide the same high-speed aerodynamic advantage as a full kit, and noise reduction is more limited, but for urban and mixed riding they represent an excellent compromise.
Quarter fairings are the most minimalistic choice. A small cowl around the headlight or a modest flyscreen can change the personality of the bike without altering function much. These are the most cost-effective and quickest to fit, and they impart a retro or race-inspired aesthetic without extensive bodywork. Quarter fairings are popular where the rider’s priority is style or a small degree of wind management rather than comprehensive protection.
Alongside these standard options, race fairing kits deserve separate attention. Engineered for track performance, race kits prioritize weight savings and aerodynamic cleanliness. Constructed from lightweight composites such as dry carbon fiber or thin fiberglass, they can reduce weight substantially. These kits often omit street-legal provisions like turn-signal mounts and headlights to save mass and simplify the bodywork. If you plan to take your Kawasaki to a closed circuit or participate in track days, a race kit can improve acceleration, braking response and aerodynamic behavior—provided you accept the durability and regulatory trade-offs.
Material selection threads through every type. ABS plastic is the most common aftermarket material. It offers consistent fitment with stock mounting points, resilience to impact, and is easier and less costly to paint for color matching. Carbon fiber and high-end composites deliver dramatic weight savings and a premium finish, but they raise costs and can complicate installation due to rigid tolerances and different mounting characteristics. Fiberglass remains a middle ground: affordable, customizable and common in race and custom applications, but more brittle than ABS and heavier than carbon fiber.
Fitment considerations often determine the practical suitability of a kit. OEM-style kits expect precise alignment with factory mounting points; misalignment causes stress on panel tabs and can lead to cracks or rattles. Universal or semi-fit kits offer broader compatibility but may require additional brackets, trimming, or filler panels to achieve a seamless look. Painting is another planning point: pre-painted kits can simplify installation but risk mismatched shades, while unpainted kits demand a paint shop but allow exact color matching and custom graphics.
Choosing between fairing types also depends on how you use your Kawasaki. A rider spending weekends on twisty roads or the track will value aerodynamic efficiency and reduced weight. A commuter wants durability and easier access to service points. A custom builder prioritizes look and may mix components—combining an upper fairing with a lower bellypan to achieve a tailored balance. Maintenance routines, local weather, and storage conditions also inform the right choice; for example, a lower fairing helps protect engine parts from road salt in cold climates.
Finally, sourcing matters. Reputable suppliers offer model-specific kits tailored to popular Kawasaki families; these kits reduce guesswork and usually include fitment guidance. For model-specific selections and a broad catalog of Kawasaki options, explore the Kawasaki fairings collection available from specialized suppliers.
Understanding these distinctions—coverage, weight, protection, material and fitment—lets you match a fairing kit to your motorcycle’s role and your riding priorities. Whether you choose a full wraparound shell for a restoration, a light race set for the track, or a simple upper cowl for everyday comfort, the right fairing kit completes the motorcycle’s function as much as it completes its look.
External resource: https://ultimatemotorx.net/product-category/kawasaki-fairings/
Choosing the Right Material: How Fairing Construction Shapes Your Kawasaki
Choosing the Right Material: How Fairing Construction Shapes Your Kawasaki
Material is the silent architect of any fairing kit. It governs weight, durability, repairability, finish, and ultimately how the bike behaves and looks. For Kawasaki riders, picking the right material means aligning daily needs, riding style, and budget with the engineering trade-offs each material brings. Below, the discussion moves through those trade-offs in a single, integrated narrative so you can match material characteristics to real-world use.
At the entry level sits ABS plastic, the workhorse choice. ABS is prized because it performs reliably under impact and is cost-effective to produce. Its ability to be injection-molded into complex shapes allows for kits that follow factory lines closely, giving a seamless, OEM-like appearance without the price tag of premium composites. For the commuter who wants durability, simple repairs, and parts that fit stock mounting points, ABS is sensible. When dropped at low speed, ABS tends to flex and scuff rather than shatter, and that resilience can translate into lower insurance or repair costs over time. On the downside, ABS can crack under severe force and does not offer the same weight savings as advanced composites. But because it accepts paint and aftermarket finishing well, it remains the default for those balancing aesthetics and practicality.
Stepping up, polycarbonate brings enhanced impact resistance and toughness. This material is frequently chosen where protection from high-energy impacts is expected, such as aggressive street riding or occasional track days. Polycarbonate absorbs energy differently from ABS: it resists penetration and can deform without catastrophic failure. The trade-offs are cosmetic and maintenance-related. Polycarbonate scratches more easily and can develop surface haze without protective coatings. It is also more likely to yellow with prolonged UV exposure unless treated. For riders who demand durability under stress, and who are willing to apply protective films or coatings, polycarbonate makes sense. Its toughness is especially relevant for front-end pieces that encounter debris or close-quarters contact.
Fiberglass occupies a middle-ground favored by custom builders. It offers a good strength-to-weight ratio while allowing hands-on shaping and repair. Unlike molded plastics, fiberglass can be laid up in small batches, which suits bespoke fairings or limited-run designs. The material sands and fills well, enabling fine tuning of fit and finish during installation. However, fiberglass requires more labor. Properly finished fiberglass needs sealing, primer, and paint, and poorly finished pieces show imperfections. For a rider building a one-off look or restoring a vintage-inspired machine, fiberglass lets you realize unique shapes with manageable weight savings and good strength if done well.
Carbon fiber is the aspirational option. It combines the best structural characteristics: exceptional stiffness, low weight, and a distinctive woven finish that signals performance intent. For riders focused on every gram, carbon fiber reduces weight in critical areas, improving acceleration, braking, and handling response. The raw material, though, is expensive, and manufacturing demands skill to avoid defects like air voids or inconsistent resin distribution. Repairs are possible but require specialist techniques. The aesthetic payoff can be high; visible carbon with clearcoat is a popular stylistic choice that communicates purpose. For those who prioritize track performance or want the lightest, most premium look, carbon fiber is compelling—provided budget and willingness to accept higher repair costs align.
Each material also alters the installation and maintenance experience. ABS and polycarbonate parts, being molded to tight tolerances, often align with existing mounting points and can be bolted on with minimal modification. Fiberglass and carbon components, depending on whether they are molded to exact specs or hand-laid, sometimes require shimming, trimming, or custom brackets to achieve perfect fit. Paint adhesion varies: ABS accepts automotive paints easily; polycarbonate may need special primers; fiberglass and carbon require proper sealing and sanding for a durable finish. Consider the time and expense of prepping and painting when choosing a material—what looks affordable on the surface can add up once finishing and labor are included.
Durability in day-to-day riding also depends on environmental exposure. UV stability varies across materials; untreated polycarbonate and some fiberglass resins are more vulnerable to sun damage. Salt, road grime, and fuel exposure can affect resin surfaces and painted finishes differently. Regular washing, waxing, and UV-protective coatings extend the life of any fairing, but material choice changes the type and frequency of care needed. Weight savings from premium materials can translate to perceptible differences in handling, especially on spirited rides or long touring days where wind buffeting and rider fatigue matter.
Budget remains a core decision driver. ABS kits generally offer the lowest upfront cost and comfortable long-term value for everyday riders. Fiberglass sits in the middle, with costs rising due to labor-intensive finishing. Polycarbonate can fall between ABS and fiberglass depending on manufacturing method, but protective finishes add expense. Carbon fiber commands the highest price, not only for materials but for the precision required in manufacturing. When comparing costs, include paint, shipping, and possible fitment work. A cheaper kit that requires extensive trimming and painting might end up costing more in time and money than a higher-priced, well-finished option.
Choosing the right material also depends on intended use. For those focused on track work, the weight savings and stiffness of carbon fiber or purpose-built polycarbonate pieces offer tangible performance gains. Riders who use their machine daily in urban environments will value ABS for its forgiving nature and lower replacement cost. Custom builders aiming for a unique silhouette may prefer fiberglass for its shapability. These choices are not mutually exclusive; some riders mix materials—carbon or fiberglass for visible, performance-critical panels, and ABS for larger structural or lower-impact sections.
Finally, sourcing and compatibility should factor into selection. Look for suppliers who document fitment for your model and provide clear return or warranty policies. A well-made kit in the right material will follow stock mounting points and allow for straightforward installation. For Kawasaki-specific options and to compare available fairings by type and fit, consult a dedicated Kawasaki fairings catalog to ensure you pick compatible pieces and confirm what’s included in the kit.
External reference for deeper comparison and guidance: https://www.motorcycle.com/2023/05/choosing-the-right-motorcycle-fairing-material/
Internal reference for Kawasaki fitment and catalog browsing: Kawasaki fairings
Mastering Fit and Care: Installing and Maintaining Kawasaki Fairing Kits
Installation and Maintenance of Kawasaki Motorcycle Fairing Kits
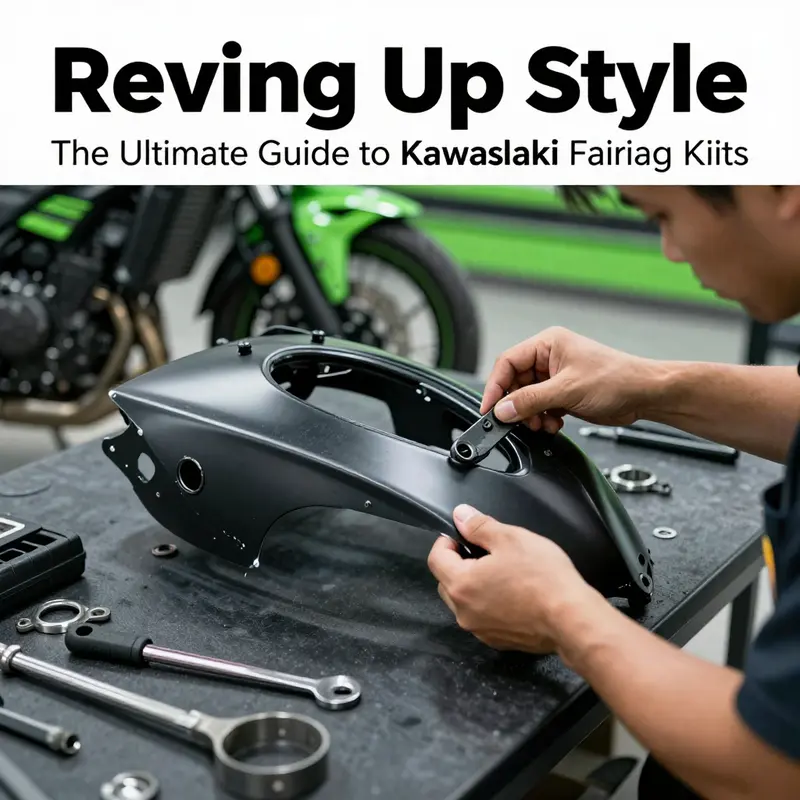
Installing a fairing kit is more than bolting plastic to a frame; it is an exercise in fit, finish, and long-term preservation that affects safety, aerodynamics, and appearance. Whether you are replacing a damaged front end or fitting a race-oriented shell, the same attention to detail will determine whether the kit looks like a factory installation or a makeshift add-on. Start by preparing your workspace: clean, well-lit, and equipped with the right tools. A torque wrench, a set of metric sockets and Allen keys, soft cloths, masking tape, plastic trim tools, and a small container for fasteners are indispensable. A service manual or a reliable fitment guide for your specific model ensures you follow factory torque specs and mounting sequences.
Begin the physical installation by removing the stock panels in a controlled order. Label fasteners and small brackets as you go; many mounting points share similar bolts but have different lengths or thread patterns. Keep delicate components—headlight assemblies, instrument clusters, and wiring harnesses—supported to avoid strain. For kits designed as direct replacements, alignment with the original mounting points should be straightforward. However, even well-molded ABS panels sometimes require slight nudging to sit flush. Use masking tape to protect paint and surfaces while you test-fit panels. This dry-fit step lets you identify interference points, whether from frame tabs, radiator hoses, or aftermarket accessories.
ABS kits benefit from injection-molded precision and a resilience that tolerates modest flexing. When installing ABS components, avoid over-tightening fasteners; snug them to specification and then check alignment before final torque. Stress on clips and screw mounts is the most common cause of cracking during installation. If a clip is distorted, replace it rather than forcing the panel into place. For panels that mate around headlights or instrument clusters, work from the center outward so gaps close evenly and no single mounting point carries excessive load.
Carbon fiber kits demand a different mindset. Dry carbon and thin composite shells save weight but are less forgiving under point loads. Fasteners must be torqued precisely and often require rubber grommets, washers, or backing plates to spread load and prevent localized stress. When panels must be trimmed or holes drilled for fitment, mark slowly and use the correct bits; jagged holes will concentrate stress and increase the chance of cracks. If you are not experienced with composites, consider professional installation. A skilled technician will verify fit and secure panels using vibration-damping hardware that protects composite laminates over time.
Wiring and lighting deserve special attention. Many aftermarket race shells omit turn signal cutouts or stock lamp housings. If your kit lacks provisions for the original lighting, plan wiring modifications and mounting brackets before you finalize panel fitment. Secure loose wiring away from heat sources and moving parts using heat-resistant cable ties or clips. Reinstall any aerodynamic ducts or cooling intakes so airflow to the radiator and brake ducts remains unobstructed; small changes in panel position can alter cooling effectiveness.
Paint and finish are part of installation when color matching is required. Factory color matching often needs professional spray work; panels should be cleaned with a wax and grease remover before being painted or clear-coated. If you prefer to paint at home, lightly scuff glossy factory finishes with fine abrasive and use primer suited to the panel material. Allow painted panels to cure fully before final assembly to prevent smudging or surface damage during bolting.
Maintenance begins with regular inspections. After the first 100 miles, re-check all fasteners; vibration will reveal loose bolts early. Inspect mounting points for stress fractures or hairline cracks, especially around screw bosses and clip locations. Clean panels with a mild soap and water solution and a soft microfiber towel; avoid abrasive pads or aggressive solvents that strip protective clear coats. For painted ABS, a quality automotive wax applied twice a year helps resist UV fading and minor abrasions. Carbon fiber panels benefit from a dedicated carbon-safe cleaner and a gentle polish designed for composite finishes. When using a protective coating, choose formulas that offer UV block and chemical resistance to road grime and fuel spills.
Repair strategies vary by material. Surface chips and scratches on ABS may be filled, sanded, and repainted with relative ease. Cracks in ABS often respond well to plastic welds or reinforced patching from the backside using compatible adhesives and bonding agents. Composite repairs to carbon fiber are best handled by specialists; while small cosmetic repairs are possible at home, structural or load-bearing damage should be professionally restored with proper lamination and resin systems.
Storage and seasonal care extend the life of your kit. Park in shade when possible and use a breathable cover that prevents moisture build-up while blocking UV. If the bike will sit for extended periods, remove panels that trap moisture near electrical connectors and store them indoors where temperature swings are minimal. For long-term projects, keep spare fasteners, clips, and a small repair kit with epoxy and touch-up paint—easy access to these items shortens downtime when minor incidents occur.
For professionals and B2B buyers, modular designs and verified suppliers simplify fleet maintenance. Modular panels that snap or bolt independently allow fast replacement of only the damaged section instead of whole assemblies. When sourcing kits at scale, verify supplier certifications and request technical drawings showing mounting points and material specifications. These documents help maintenance teams prepare custom mounting brackets or reinforcement plates before a build begins, reducing trial-and-error time during installation.
Practical routines keep fairings performing well: a quick fastener check every ride cycle during the first week after installation, then monthly thereafter; regular cleaning to remove road salts and airborne contaminants; applying protective coatings twice a year; and addressing any looseness or damage immediately. Thoughtful installation and consistent care preserve the structural function and visual appeal of Kawasaki fairing kits, whether used for road, track, or custom styling projects. For model-specific replacement parts and options for Ninja fairings, consult a focused catalog of Kawasaki fairings to ensure proper fit and finish: https://ultimatemotorx.net/product-category/kawasaki-fairings/fairings-for-ninja/.
For deeper supplier details and technical specifications referenced during installation and maintenance planning, review the external supplier listing here: https://www.alibaba.com/product-detail/Kawasaki-KLX250-KLX250S-D-Tracker-X-2501600835494757.html?spm=a2700.galleryofferlist.normalofferlist.0.1a5d1b23c0c54c&urlShowTitle=true
Where to Buy and How to Source Kawasaki Fairing Kits: A Practical Guide for Riders and Builders
Finding the right fairing kit for a Kawasaki motorcycle begins with clarity about use, fitment, and material. Whether the goal is a complete restoration, a track-focused weight reduction, or a subtle style update, the buying process is the same: define needs, verify compatibility, evaluate materials, and choose a trusted source. This chapter walks through those decisions in a single, practical narrative so you can source a kit that looks right, installs cleanly, and performs as expected.
Start by defining purpose. Are you replacing damaged panels after a tip-over? Upgrading to lighter race bodywork for track days? Or reshaping the bike for a cafe-style conversion? The intended use guides choices on coverage, material, and budget. Full-coverage kits suit restorations and aggressive sport styling. Mid- or upper-only kits balance wind protection and service access. Minimal quarter or café pieces emphasize looks with simpler installation. Knowing the purpose saves time and prevents costly mismatches.
Compatibility is the non-negotiable first filter. Fairing kits are engineered to interface with specific frame rails, fork mounts, and lighting assemblies. A kit that does not list explicit compatibility with your bike will require trimming, drilling, or custom bracket work. That adds risk, increases cost, and can compromise safety. Always check fitment notes carefully and confirm whether the kit supports original lighting and instrument clusters. If the kit changes headlight or signal locations, anticipate wiring adaptors or modifications.
Material choice shapes cost, weight, durability, and installation skill required. Injection-molded ABS plastic is the standard for aftermarket kits. It offers predictable fit, good impact resistance, and a surface suited to painting. ABS is forgiving during installation and is often the best value for street riders who need a reliable, factory-like look. Carbon fiber, particularly dry carbon, is prized for dramatic weight reduction and a premium finish. It requires expert mounting and careful handling, and it costs significantly more. Fiberglass sits between these two: lighter than ABS, less expensive than carbon, but more brittle and prone to cracking under impact. Consider maintenance patterns and crash risk when selecting materials: daily riders typically benefit from ABS, while track-focused riders or show builds may justify the cost of carbon or fiberglass.
Kit type matters beyond mere aesthetics. Full kits cover the upper and lower chassis, offering the best aerodynamic continuity and protection from road debris. They provide a cohesive look, but they complicate routine maintenance since engine access is reduced. Half or upper-only kits protect the rider from wind and modernize the front end while keeping the lower engine accessible. Lower fairings can be purchased separately to protect the engine or to add a race appearance. Quarter and café-style pieces are quick to install and change the bike’s character with minimal intervention. Race-specific kits for track use often omit lights and mounts for regulatory gear, so they are not street legal without modifications. Match kit type to how the bike will be used daily, and you will avoid frustrating trade-offs later.
Sourcing channels vary in reliability, price, and support. Large e-commerce marketplaces offer broad selection and competitive pricing. They are useful for comparing styles and locating rare or discontinued panels. However, listings vary in quality and fit claims. Read fitment details, seller ratings, and customer photos closely. Specialized motorcycle parts retailers typically provide expert advice, warranties, and easier return policies. They often handle custom paint or trimmed fitment and can recommend installers. Purchasing directly from manufacturers or dedicated brands increases the odds of getting genuine materials and up-to-date tech support, though it can be pricier.
For professionals or B2B buyers, production quality and manufacturing technique deserve extra attention. Injection molding yields the most precise ABS panels and ensures mounting points align with stock brackets. High-end carbon kits demand quality control in layup and finishing; poor resin content or improper curing leads to delamination or warping. Fiberglass must be well layered and finished to avoid brittle sections that will crack under stress. Suppliers that disclose manufacturing methods and provide assembly guides reduce installation risk and downstream warranty claims.
When comparing offers, evaluate what’s included. Full kits may ship as a set of unpainted panels, while others come primed or even pre-painted. Ask whether bolts, brackets, or clip sets are supplied, and whether the kit includes templates or instructions. Some vendors offer paint-matching services, which can save hours of work and deliver a seamless finish. If you plan to paint yourself, inspect the surface finish for pinholes or sanding marks that will show through the final coat.
Price is a major factor, but value beats sticker cost. A cheap ABS kit with poor dimensional control will take longer to fit, may require filler and sanding, and could break prematurely. A high-quality ABS kit from a reputable maker can deliver a near-OEM fit at a moderate price. Carbon and fiberglass offer performance and weight benefits, but factor in the higher installation skill and the potential need for vibration isolation hardware. Consider the cost of paint, hardware, and any required modifications when comparing total expense.
Shipping and returns policies matter for bulky items. Fairing kits are large and can incur significant shipping fees. Verify shipping methods, insurance options, and the seller’s damage policy. Inspect panels immediately upon arrival and document any defects with photos. Sellers who support returns or replacements reduce the risk of ending up with mismatched or damaged parts.
Installation readiness is another practical check. If you lack the tools or experience, plan for a professional installer. Proper alignment requires patience, shims, and sometimes new fasteners. Tolerances matter; even minor misalignments can cause stress on mounting points and lead to cracking. A professional will also ensure lights, vents, and ducting are compatible and functional, and that fairings do not interfere with suspension or steering travel.
Finally, buy from sources that offer transparency. Clear fitment charts, honest material descriptions, and plenty of photos indicate a seller who stands behind their product. Ask questions before purchase: request confirmation of compatibility, shipping dimensions, and whether the kit will arrive primed or painted. Keep records of communications in case of disputes.
For riders seeking a curated selection of Kawasaki bodywork, a dedicated Kawasaki fairings collection is an efficient starting point. Explore Kawasaki fairings collection to view compatible panels, filter by kit type, and compare materials and finishes. For broader marketplace searches and additional inventory options, consult listings on large auction-style platforms to find new and used kits, compare prices, and read buyer feedback. https://www.ebay.com/sch/i.html?_nkw=Kawasaki+Motorcycle+%26+Scooter+Full+Fairings+Kits
Final thoughts
Kawasaki motorcycle fairing kits emerge as integral components for motorcycle customization and performance improvement. As you navigate this sector, understanding the different types, materials, installation processes, and sourcing options can elevate your business in the motorcycle market. Providing customers with reliable, high-quality fairing kits not only enhances their riding experience but also establishes your business as a trusted authority in motorcycle modifications, encouraging customer loyalty and repeat sales.