Hydro dipping motorcycle fairings has emerged as an innovative way for motorcycle enthusiasts and business owners to make their rides stand out. This technique combines artistry with practicality, allowing for personalized designs without the need for extensive bodywork or painting skills. As motorcycle customization becomes increasingly popular, understanding hydro dipping’s process, design options, benefits, and challenges is essential for business owners looking to expand their service offerings. In the chapters that follow, we will delve deeper into how hydro dipping works, the creative design possibilities it presents, its advantages over traditional painting, and the challenges that must be navigated to achieve the best results.
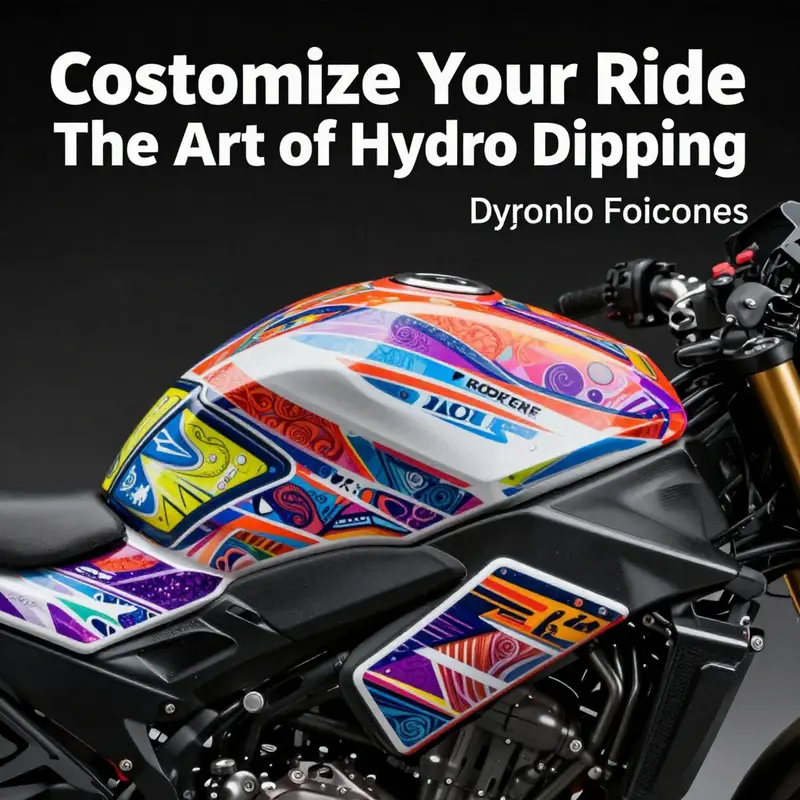
Waves on Plastic: Mastering the Art and Science of Hydro Dipping Motorcycle Fairings
Hydro dipping, or hydrographics, sits at the intersection of artistry and engineering, offering a way to cloak plain plastic or fiberglass with complex patterns that would be hard to achieve with brushes and spray guns alone. On a motorcycle, the fairings are more than shells; they’re canvases that negotiate airflow, heat, UV exposure, and the rider’s eye. Hydro dipping makes it possible to wrap those contours in a seamless finish that looks as if it were molded into the plastic, while still allowing the panel to flex, bend, and take on the bike’s dynamic character. The beauty of the process lies in its ability to reproduce materials like forged carbon, wood grain, or abstract graphics with a depth and realism that can rival traditional paint jobs. Yet beneath the surface gloss lies a precise sequence of steps, each with its own physics, chemistry, and tactile feel that separates a durable, professional result from a brittle or uneven impression. For riders who seek a distinctive look without the expense and downtime of full repainting, hydro dipping offers a compelling balance of customization, durability, and value, especially when the surface is prepared with care and the finishing cocoon is properly sealed against the elements.
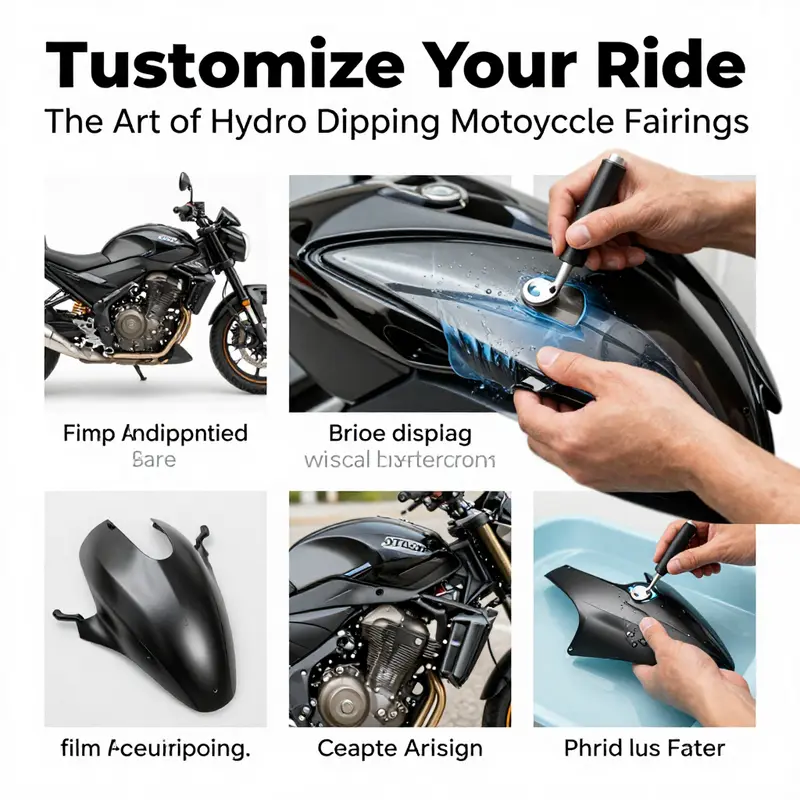
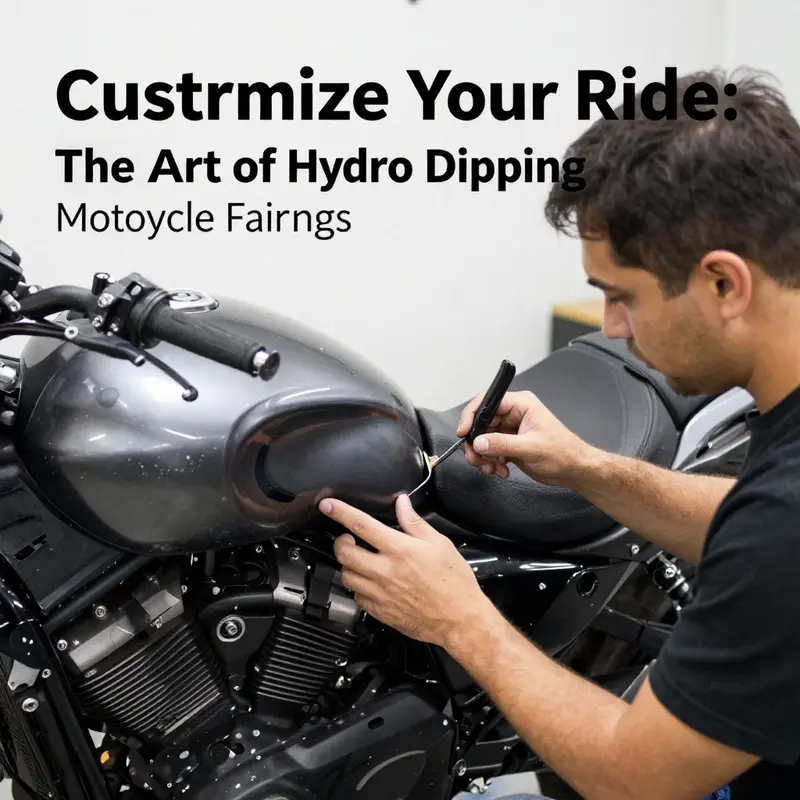
Preparation is the quiet prelude to any hydro dipping project. It begins long before the film touches water. A clean, neutral surface is the foundation for adhesion and homogeneity. Thorough cleaning with a degreaser removes the greasy fingerprints of handling and the faint film of oil that settles on plastics from the factory environment. After degreasing, a careful series of light abrasions with an 800 to 1200 grit paper creates micro-etching that helps the subsequent primers bite in. Any scratches or gouges are repaired with body filler and re-sanded to a smooth, even plane. The goal is not a flawless mirror but a surface that is uniformly receptive to coating, with no ridges or glassy patches that would disrupt the film’s wrap across a curved surface. The fairing’s geometry presents its own challenges. Edges, radii, and transitions will guide how the film behaves during dipping. A fairing that has sharp edges or deep recesses may require masking or masking patterns to ensure the film lays down evenly without tearing. The philosophy here is restraint: create a surface that speaks to the film’s inherent flexibility rather than forcing it to stretch beyond what the substrate can handle.
Priming follows with a purpose that is both practical and aesthetic. A primer coat provides a uniform base color and a predictable surface for the base coat to anchor to. The primer’s role is twofold: it improves adhesion and neutralizes underlying hues that could alter the final appearance. A well-chosen primer also helps control the final tone, since the base color and the printed film will interact with the primer layer during curing and sealing. The base coat, often a solid color or a subtle gradient, is applied once the primer is dry. The base coat doesn’t simply serve visual appeal; it anchors the film’s color palette and helps to prevent any translucency that could reveal imperfections beneath the graphic layer. The base coat must dry completely before the film is laid onto the surface of water. A partially dry base can cause delamination or streaking as the film is transferred and wrapped around the fairing’s complex geometry.
Film selection and setup are the heart of the aesthetic outcome. Hydro dip films come in a remarkable variety: forged carbon, wood grain, camouflage, metallic looks, and custom artwork, among others. The film is laid on the surface of a large, clean water bath. An activator spray dissolves the film into a liquid ink layer that spreads across the water’s surface, ready to adhere to the contour of the fairing as it passes through the film. The choice of film defines the look, but it also shapes how the finish behaves on curved surfaces. The film’s formulation determines how seamlessly it flows over edges, how it wraps around corners, and how resistant it will be to lifting along seams. In practice, the operator must balance film rigidity with the surface’s geometry, calibrating parameters so the pattern preserves its detail without blowouts on sharper radii. The process rewards patience and meticulous alignment; missteps here can lead to repatched patches, blurred lines, or a mismatched grain direction that betrays the wrap.
Dipping the fairing is where art meets physics. The operator submerges the prepared panel into the water bath, guiding the fairing along a controlled path as the film’s liquid layer adheres to the surface through surface tension and contact adhesion. The speed, angle, and depth of immersion are crucial. Too rapid a descent can trap air, creating bubbles or distortions in the pattern. Too slow or too shallow a dip can leave uneven coverage or require post-dip rework. The rider’s fairing, with its curves and complex transitions, acts as an excellent teacher in how the film behaves—edges that curve away from the dip flow of the water will receive less film, while concave sections pull more, sometimes exaggerating grain or texture. A skilled operator will monitor the film’s behavior in real time, using the right combination of tilt, rotation, and stabilization to coax the pattern to wrap cleanly around every contour. This stage is as much about tactile feel as visual outcome; the operator’s hands learn the surface’s response, and patience becomes a measurable variable in success.
Rinsing and drying follow with a quiet ritual. After removal from the water, the panel is gently rinsed with lukewarm water to remove any residual film particles and to prevent water spotting that can mar the finish as it dries. Drying is critical; it must be thorough and organized to avoid contaminating the film’s surface with dust or lint. Any rag or cloth used for drying must be lint-free, and the environment should be clean and free of particulates that could invade the fresh pattern. This is not a stage for haste; the finish is already in a delicate moment, and any abrupt handling can introduce flaws that become visible after sealing. The subsequent clear coating locks in the design, adds depth, and delivers the protective barrier needed to withstand outdoor exposure. A typical sequence is to apply two to three layers of clear coat, each layer building gloss, depth, and UV resistance. The clear coat also helps to even out minor texture variations, smoothing the final photorealistic look that hydro dipping can deliver. Once the topcoat is applied, the panel is allowed to cure, a period that can stretch from 24 to 48 hours in a controlled environment. Rushed curing invites micro-cracking or solvent entrapment, which would undermine both the finish’s clarity and its long-term durability.
The final act, curing and inspection, is the gatekeeper for quality. A fully cured fairing should present a uniform gloss, crisp pattern lines, and no visible pinholes, streaking, or peel‑back along edges. If issues appear, they point to upstream steps—surface preparation, primer compatibility, film choice, or dipping technique. Small defects can sometimes be repaired with a targeted recoat or patch, but large areas often necessitate rework. Professional shops run meticulous inspection checklists and often perform finish tests to confirm UV durability, colorfastness, and adhesion. The intersection of science and craft here matters as much as the initial design: the pattern’s fidelity over a three‑dimensional geometry and the clear coat’s resilience against sun and weather are what keep the look fresh after months of road exposure.
DIY versus professional service is a decision that hinges on environment, scale, and the value placed on long-term durability. Home hydro dipping kits bring the basic workflow into reach, yet the reality of controlled humidity, stable temperatures, cross-contamination prevention, and exhaust ventilation quickly becomes nontrivial. The chemistry involved—activators, solvents, and primers—requires careful handling and storage. For high-value fairings, many riders opt for professional service, not because the DIY path is inherently flawed, but because a shop with industrial tanks, precise timing, and trained technicians can reliably reproduce the film’s depth and the wrap’s edge-to-edge consistency. In addition, experienced shops offer a smoother path to color matching and finish uniformity across multiple panels, essential when a bike’s ecosystem includes side fairings, belly pans, and tail sections that must feel like a coherent design language rather than a patchwork of treatments. Alongside the aesthetic payoff, professionals can also ensure the finish carries a robust clear coat system designed to withstand UV exposure, abrasion from road debris, and humidity, preserving gloss and color integrity for years.
The design choices that steer a hydro dipping project extend beyond the film pattern itself. The base color, the type of finish on the clear coat, and the timing of each layer all influence the final impression. Some riders prefer a bold, high-contrast look where the base color plays a minimal supporting role to the film’s pattern. Others favor a subtler approach, where the base layer touches the film’s edges with a gentle interplay of tones that reveals more texture on close inspection. In either case, the film’s grain or motif is what commands attention—the way it wraps around a shoulder of the fairing, flows along a curvature, and resets at a seam all contribute to a sense of motion even when the bike is stationary. The film’s realism—whether it mimics forged carbon, a wood grain, or a bold abstract—depends on the film’s resolution, the quality of the activator, and the precision of the dipping technique. There is a skill to balancing pattern clarity with the vehicle’s geometry, so the final look remains legible at a glance and legible in motion rather than a stationary, static image.
Attention to surface preparation, coating compatibility, and finishing layers pays dividends in durability. A properly prepared surface that accepts the film and a robust clear coat system will better resist moisture migration, UV degradation, and micro-scratches that can dull the pattern. This is especially relevant for riders who ride year-round, park outdoors, or subject their bikes to frequent washing, dirt, and weathering. Maintenance becomes part of the ongoing design narrative. Gentle washing with non-abrasive cleaners, avoiding harsh solvents that can attack the topcoat, and timely touchups on chips or scratches help preserve the film’s impact. The goal is not only to achieve a striking first impression but also to maintain a cohesive, glossy finish that offers both visual depth and practical protection for years of riding sessions.
For readers seeking further exploration of compatible panel options without losing focus on the hydro dipping story, a practical path is to consider specific fairings that align with the film’s design language. A curated collection of fairings in the relevant catalog can offer panels that visually harmonize with hydro dipped finishes, helping to maintain uniform color and texture across the bike’s silhouette. This approach can be especially effective when integrating multiple panels that must look as if they were designed as a single, continuous wrap rather than assembled from disparate parts. The choice of panels, including side fairings and accompanying components, becomes part of the overall aesthetic strategy rather than a separate procurement step. If this approach resonates, exploring the fairings category can provide tangible options for completing the look with cohesive lines and consistent finishes. Honda fairings category offers a practical example of how a catalog can support a hydro dipped project by supplying compatible panels that maintain the look across the bike’s ensemble. In this way, the hydro dipped finish finds a partner in modular design, where parts from a coordinated line reinforce the visual story you’re telling on the road.
The external dimension of hydro dipping—its environmental footprint and safety considerations—also matters. The chemistry involved requires careful handling of activators and solvents, appropriate ventilation, and proper waste management. Even when performed in a professional setting, operators follow strict procedures to minimize fumes and ensure worker safety. For enthusiasts experimenting at home, understanding these considerations becomes part of respecting the craft. The process is not merely about achieving a striking image; it is about ensuring the finish remains stable under sun, rain, and throttle heat, and that it ages gracefully rather than delaminating or discoloring. The result should feel like a deliberate design choice, not a one‑off experiment. As with any form of customization that interacts with a motorcycle’s performance environment, the best outcomes arise from thoughtful planning, disciplined technique, and a willingness to engage with the craft as a long-term practice rather than a single weekend project. The journey from bare fairing to a finished hydro dipped panel is a sequence of careful choices, each reinforcing the next until the final look feels inevitable—like a natural extension of the bike’s shape, rather than something applied on top.
External resource: https://www.youtube.com/watch?v=examplevideoid
Ink on Water, Style on Wheels: Mastering Custom Patterns for Hydro Dipped Motorcycle Fairings
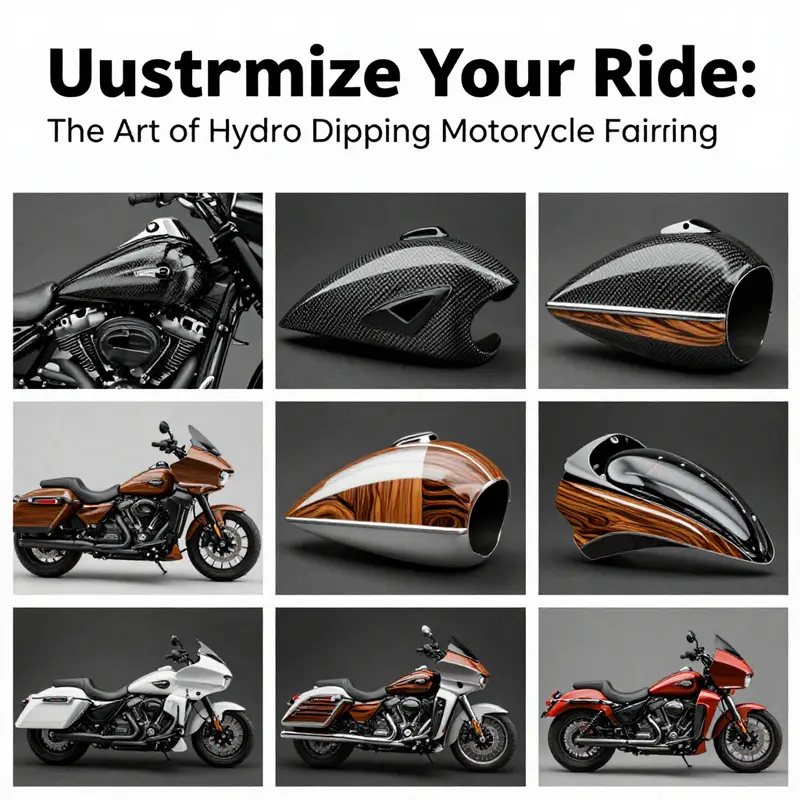
The moment a rider begins to imagine a path toward personal expression on two wheels, hydro dipping offers a language that rides the line between art and engineering. It is a practice that turns a flat sheet of film into a living coating, one that can wrap around the curves and contours of a motorcycle fairing with a fidelity few traditional finishes can claim. The technique hinges on a simple premise: a printed film, submerged in water, detaches from its carrier and, with the right handling, adheres to the complex geometry of the fairing. The result is not merely a color or a pattern but a dynamic visual identity that seems to glow from within the material itself. For riders who crave something more than a single-color coat or a standard decal, hydro dipping offers a door to a spectrum of finishes—from the cool, high-tech look of carbon fiber to the organic warmth of wood grain, or even entirely original artwork. The effect is both cosmetic and practical, a way to tell a story about a bike and its rider in a way that is legible from a distance and rich with detail up close.
The appeal rests as much in the technique as in the outcome. A properly prepared surface provides a canvas that can accept the film with minimal distortion, and the film’s design is crafted to be resilient when it encounters the fairing’s three-dimensional surface. Modern hydrographic films are engineered to stretch and bend over corners and radii, so patterns scale and orient themselves across complex geometries. The illusion of depth—whether carbon weave that appears to recede into the fairing or a wood grain that seems to reveal natural growth rings under lighting—comes from nuanced layering, color gradients, and a clear protective topcoat that seals the work from UV exposure and abrasion.
Designing a hydro dipped finish begins long before the fairing meets water. It starts with vision, then translates into a layout that considers how a pattern will wrap around a curve, where a seam might appear, and how the wrap will respond to light as the bike moves. This planning matters because hydro dipped finishes rely on the film’s ability to stretch without tearing and to settle into micro-edges and crevices without leaving air pockets. The result is a finish that reads as a continuous surface, even when the underlying fairing is peppered with mount points, vents, and brackets. A good designer will think about how the pattern interacts with the bike’s entire silhouette. For example, a diagonal or radial motif can emphasize motion, while a repeating texture might be used to harmonize with the rider’s gear and helmet. It is this attention to composition that elevates hydro dipping from a decorative layer to a cohesive element of the bike’s overall look.
In practice, the process begins with careful surface preparation. The fairing must be clean, dry, and free of wax or silicone residues that could prevent film bonds. Any rough patches or sanding marks are addressed so that the film can lay down smoothly. Priming may be used to enhance adhesion and to create a uniform base color that ensures accurate color reproduction for lighter patterns. Once the surface is prepped, the film is selected. The film itself is a printed sheet that dissolves in water, releasing the pattern as a fine film that can wrap around the fairing’s curves. Submersion activates the design, and during the moment of release, air and water are managed so the film can settle into place with even coverage. Skilled hands guide the film over the highest points and the deepest recesses, so the pattern does not distort or bunch. The operator must watch for air pockets, which can trap moisture and create small dimples that echo through the finish later.
The final appearance speaks to a combination of artistry and technical control. The choice of pattern—whether a carbon fiber look with subtle weave, a wood grain that captures the warmth of natural textures, or a bold abstract design—determines the bike’s personality. Deep, dimensional visuals emerge when the film’s color layers interact with a transparent clear coat. The clear coat is not merely a protective layer; it contributes to the final tactile quality, adding gloss or satin texture and sealing in color stability against sunlight, heat, and fluids. The durability of hydro dipped finishes is enhanced by a multi-layer approach: a base coat that anchors the film, the hydrographic layer with its printed design, a sealing clear coat, and sometimes a subsequent protective top layer for abrasion resistance. This stacking of layers creates a surface that can shrug off the minor scrapes and brushings of life on the road while maintaining the illusion of depth and continuity.
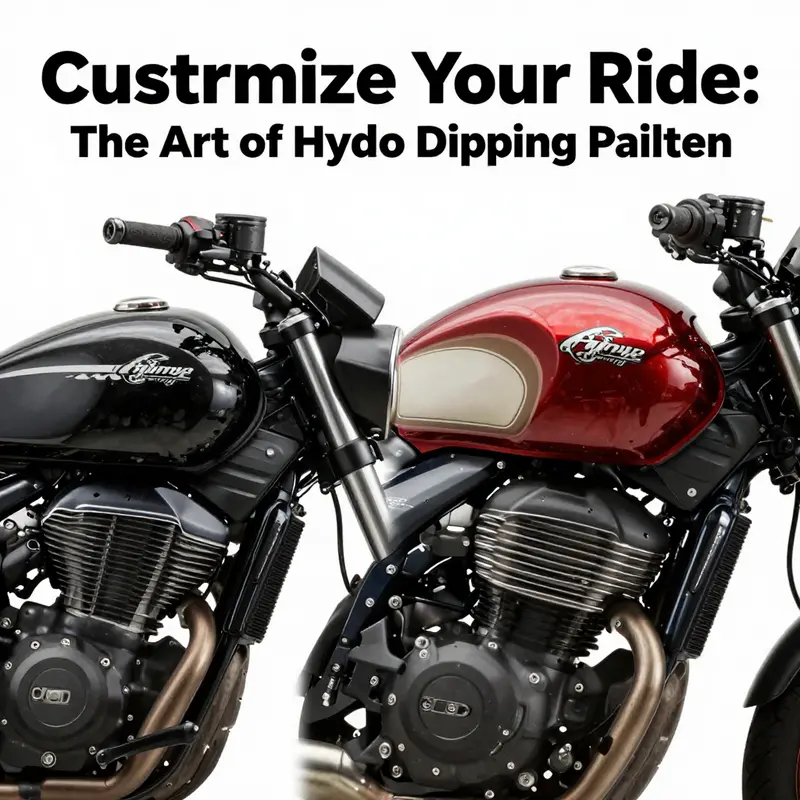
From the rider’s perspective, customization options stretch as wide as imagination allows. The patterns can be tailored to reflect a rider’s experiences, fears, or favorite landscapes, transforming the fairings into a canvas that speaks personally. Patterns can be scaled to suit the geometry of each panel, with careful attention to how the design flows across the shoulder of a fairing where two surfaces meet. A tactical camouflage pattern, for instance, can be adapted to suggest terrain and movement, a nod to off-road or adventure-oriented riders who want their machines to disappear into the environment at a glance. Conversely, a bold, graphic piece—whether a stylized emblem, a kinetic motif, or an artist’s rendering—can become the bike’s signature, a visual shorthand that communicates mood and intention even when the rider is out of sight. The customization process is not only about color or texture; it is about translating the rider’s story into the surface of the machine, so the bike becomes a portable gallery where memory and design converge.
The choice of surface and pattern is also a practical matter. Hydro dipped panels endure various environmental challenges, from heat and sunlight to rain and road grime. Films are engineered to resist scuffing and fading, yet riders understand that any finish on a motorcycle is subject to wear. Therefore, the finishing stage—often involving a clear coat—plays a crucial role in longevity. The clear coat provides UV protection and acts as a sacrificial layer against abrasions that occur during trips or after a drop. Routine maintenance remains essential. Gentle cleaning with non-aggressive cleaners preserves the integrity of the film, while reflections on the fairing’s surface remain crisp. If damage occurs, the repair process can sometimes be localized, with a resurfaced patch or a partial re-dip, ensuring the continuity of the design across the panel. In this way, hydro dipped fairings can be both durable and refreshable, offering riders the opportunity to reimagine their bike’s appearance as easily as they might change a set of accessories.
Beyond the aesthetic appeal, hydro dipping offers a practical pathway for customization that suits riders who seek high visual impact without the heavy labor and cost of traditional spray painting. A skilled technician can achieve a professional-grade finish with less downtime and less risk of bodywork distortion than conventional painting might entail. The film’s ability to conform to complex shapes means even the most aggressive fairing curves, vents, and contours can display uninterrupted patterns. The approach also supports a wide range of design motifs, from subtle textural imitations to intricate artwork. For those who want a more subtle take, a camouflage-inspired scheme can blend with the bike’s lines, while still presenting a conversation piece at street level. With the right combination of design, prep, and finishing, hydro dipped fairings deliver a look that reads as purposeful and polished, a statement that travels as fast as the machine itself.
The market for hydro dipped fairings, while diverse, remains deeply rooted in the rider’s desire to customize without compromising performance. The films used for motorcycle applications often include specialized formulations that resist chemical exposure and withstand temperature swings typical of riding. They are designed to wrap not only around flat panels but around the fairing’s rivets, seams, and mounting points, maintaining a seamless appearance where the eye expects accuracy. A trained technician understands how to align the pattern so that it follows the bike’s geometry and does not appear misaligned when viewed from different angles. This sensitivity to perspective helps ensure the finish remains visually striking whether the rider is stationary or in motion, catching light at a dozen angles as the bike leans through a corner. The end result is not merely a cosmetic change; it becomes part of the bike’s identity, an enduring impression that enhances rider confidence and the experience of riding.
Finally, the broader ecosystem of customization includes opportunities to extend hydro dipping beyond the fairings themselves. Helmets, fuel tanks, and other exposed components can receive complementary patterns to complete the visual narrative. When the design language is consistent across multiple parts, the overall look reads as 하나 coherent system rather than a patchwork of stickers or paint. A rider who embraces this approach often discovers that the relationship between color, texture, and form intensifies the sensation of motion and presence on the road. And while the craftsmanship behind hydro dipping requires skill and patience, the results are refreshingly tangible: a bike that tells a story with every line, every curve, and every glint of light reflecting from its newly transformed surface. For enthusiasts exploring the practical, accessible path to this finish, an accessible entry point might be browsing through dedicated fairing categories that showcase compatible options and styles, such as the Honda fairings collection, which provides a sense of how a cohesive look can be built around existing shapes and lines.
For those who want to understand the science behind the materials that make these finishes possible, a deeper dive into the underlying chemistry and mechanics of water transfer films can be enlightening. The field continues to evolve as new substrates, inks, and clear coats push the boundaries of color fidelity and durability. If you seek a more technical foundation, the study Understanding Water Transfer Paper For Motorcycle: Standards, Properties, and Applications surveys the standards, properties, and cross-industry uses of these films, offering a measured view of how hydro dipping integrates with automotive and protective surfaces. This kind of resource helps riders and practitioners alike appreciate the balance between artistry and engineering that defines hydro dipping on motorcycles. For those who want to explore the science behind the process, this external reference provides a grounded framework for evaluating finishes and planning future projects with confidence.
Wrapped in Depth: How Hydro Dipping Transforms Motorcycle Fairings Beyond Traditional Painting
Riders and builders who chase a look that stands apart know that a fairing’s value isn’t just about color. It’s about a narrative: the way a finish catches light, how it wraps the curves and edges, and how long it endures under sun, rain, and highway dust. Hydro dipping, also called hydrographics, offers a path to a look that traditional painting often struggles to reproduce with equal parts texture and depth. It isn’t merely a different technique; it is a different kind of statement. When a rider slides a fairing into the water bath and a printed film unfurls across its surface, the result is a seamless veneer that can mimic complex textures—carbon fiber, wood grain, or camouflage—that would require hours of meticulous spray work to achieve, and still struggle to wrap perfectly around every contour. The appeal goes beyond novelty. For many enthusiasts, hydro dipping represents a practical marriage of design imagination and real-world constraints: lower cost than a full custom paint job, faster turnaround, and a finish that holds together on weathered open roads just as surely as it does on pristine showroom displays. The success of this approach rests on three intertwined realities—pattern complexity, finish durability, and the precision with which the pattern follows every line of the fairing. A closer look reveals why hydro dipping is becoming a preferred route for riders who want high impact aesthetics without sacrificing practicality. The patterns themselves are the first and most obvious draw. The films used in hydro graphics can reproduce a startling range of textures, from the unmistakable weave of carbon fiber to the irregular rings of a natural wood grain, from bold camouflage motifs to abstract, three-dimensional illusions that seem to tilt and bend with the bike’s silhouette. This is not mere imitation; it is a clever optical effect created by layers of ink and clear coats that interact with light in ways that spray-painted surfaces may struggle to match, particularly on sharply curved surfaces or on sections where panels meet at tight angles. The illusion of depth behind a carbon weave, for example, comes from layers that reflect differently across raised ridges and recessed valleys of the fairing. In practice, these effects translate into a look that feels tactile even when the bike is stationary, a kind of visual texture that engages the eye without the maintenance concerns that accompany genuine materials like carbon fiber. Yet the appeal is not simply about appearances. The durability profile of hydro dipped finishes is a major part of the conversation riders have when deciding how to dress their machines. The film layer, once properly sealed with a clear topcoat, forms a resilient shield against the kinds of everyday hazards a motorcycle encounters. Chips from gravel, UV exposure, and the occasional parking-lot scuff can be mitigated by the protective seal, which reinforces the ink layer and helps preserve the chosen pattern over time. This durability matters because a fairing spends much of its life facing the elements; a color or texture that looks striking in a shop a few feet away can quickly fade if it can’t withstand sun and road debris. The bond between ink, topcoat, and substrate is central to that resilience. When the surface is prepared correctly—cleaned to remove oils, sanded to create a uniform texture, and primed to enhance adhesion—the ink adheres to the base with a uniformity that is hard to guarantee with hand-brush or spray techniques on complex geometries. The water immersion itself facilitates a comprehensive wrap. The film’s matrix is engineered to loosen, contour, and cling to every contour, so the pattern remains continuous across curves, ribs, and gussets that often create misaligned seams in traditional painting. The result is a nearly seamless continuity that can be difficult to achieve when painting across a multi-panel fairing. A seasoned operator can watch the motif travel from the gun ports to the trailing edge and around inside bends with a level of precision that makes the final product look like one monolithic skin rather than a patchwork of painted panels. For riders who crave customization without the traditional monsoon of labor, this consistency is a distinct advantage. It also makes the process more accessible to hobbyists and small studios, who can produce high-quality looks without committing to the full overhead of a custom paint shop. The learning curve is real, but the essential steps are straightforward: surface preparation, film application, water activation, submersion, drying, and sealing. The available kits and tutorials have lowered the barrier to entry, enabling a broad range of enthusiasts to experiment and iterate. The practical implications of this accessibility extend beyond aesthetics. A rider who wants to test a new finish can do so without the risk and cost associated with repeatedly painting a fairing to test a concept. Hydro dipping makes experimentation feasible, which in turn fuels creativity. In this sense, the technique acts as a bridge between artistic ambition and mechanical reality. The broader ecosystem surrounding hydro dipping—films in diverse patterns, accessible dipping systems, and a growing pool of tutorials—adds another layer of value. It’s not merely about applying a glossy film; it’s about assembling a design language that recognizes the fairing as a three-dimensional canvas rather than a flat panel. That recognition is what lets designers exploit the full potential of the shape. When a pattern wraps the surface cleanly, it respects every edge and edge-line transition, from the crown of the nose to the tail’s tailpipe cutouts, offering a cohesion that can be surprisingly hard to achieve with bespoke paint that hasn’t had the benefit of a wrapping-like approach. The sense of cohesion is particularly noticeable on contours that would otherwise challenge a painter’s hand, such as deeply carved air channels or angular molding lines. In those moments, hydro dipped finishes can appear more intentional, even if the base is a standard shape rather than a one-off bodywork project. There is also a practical dimension that attracts riders who want durability without sacrificing speed. Hydrodipping can be faster to apply than a conventional multi-stage paint job, particularly when the design requires intricate details or textures that would take hours of masking, layering, and dry times. This speed translates into lower labor costs and quicker availability for riders who want to ride rather than wait. The cost advantage, of course, will vary with complexity and the chosen film, but the general calculus favors hydro dipping for those who are after striking visuals with a reasonable budget and a faster turnaround. The customization angle is perhaps the most personal aspect of hydro dipping. A rider can move from one film to another and alter the entire mood of the bike without sanding down and reapplying dozens of layers of paint. The ability to switch from a carbon-like pattern to a wood grain, or to switch camouflage motifs to something more abstract, can reflect changes in rider identity, sponsorship considerations, or the season’s mood without dismantling the bike and replacing entire panels. Such flexibility is especially valuable in the hands of smaller shops and hobbyists who may be experimenting with sponsorship decals, vintage-inspired palettes, or racing livery that demands frequent updates. It is worth noting that the breadth of options—the textures, colors, and finishes—helps push hydro dipping from a novelty technique into a dependable workflow. When artists and technicians speak of a “look,” they often mean a combination of depth, realism, and resilience that feels crafted rather than slapped on. Hydro dipping earns that perception because the process, while technically sophisticated, rewards patience and precision. And while it is not a universal replacement for every paint job, it complements traditional methods by offering a pathway to finishes that are either impractical or prohibitively expensive with spray coatings alone. For riders who are weighing this choice, the decision often comes down to balancing the desired aesthetic with the practical realities of maintenance, speed to market, and ongoing wear on the bike’s protective layers. In that light, hydro dipping is not merely an alternative; it is a design language that respects the bike’s architecture. A well-executed hydro dipped fairing does not pretend to replace the material properties of the base shell; rather, it layers a convincing illusion on top while preserving the underlying shape’s integrity and aerodynamics. Designers have learned to read the fairing as a three-dimensional surface with micro-curvatures that interact with the light and the ink in subtler ways than a flat panel would. The result is a finish that can feel bespoke even when it has to be reproduced across several production bodies. This is not to suggest that the process is without its caveats. Surface preparation remains crucial; any dust or grease left behind will show through the film and undermine the illusion of depth. The film’s adhesion also depends on the cleanliness and priming of the substrate, and the subsequent topcoat must be carefully chosen to preserve the color fidelity and gloss over time. A well-executed hydro dip job, especially on a motorcycle fairing, can be remarkably resistant to the kinds of abuse that often punish painted surfaces, provided the right sealant and UV protection are used. That attention to detail—preparation, adhesion, coating, and curing—marks the difference between an eye-catching illusion and a durable finish that holds up under the strain of daily riding. For those who want to explore what is possible, looking into current design options and the latest film offerings can spark ideas that translate into real-world results. If you’re exploring the latest options, you might consider a collection in the 2023new category as a starting point to see what contemporary patterns and textures are accessible today 2023new. This is not about chasing trends for their own sake but about understanding how a portable, repeatable process can empower riders to express personality while maintaining practicality. In a broader sense, hydro dipping represents a shift in how motorcycle customization is imagined. Rather than treating the fairing as a blank canvas to be painted with long, delicate strokes, hydro dipping reframes it as a surface that can host a design with depth, texture, and resilience, a design that feels integrated with the bike’s form rather than applied onto it. That integration is what makes hydro-dipped finishes convincing on the road. They respond to light and shadow the way natural textures do, so the bike reads as a complete object—engine, chassis, seat, and fairing—rather than as a set of separately colored pieces. It is this sense of unity that often tips the scales for riders who are deciding between finishes that appear identical from a distance but diverge under close inspection. The practical economics matter too. When considering maintenance, a hydro dipped surface with a robust topcoat tends to require less frequent repaints to refresh, because the base is protected and the ink layer is sealed against micro-scratches. That translates into fewer disruptions for riders who rely on their bikes for daily transport or for events where time away from the machine is costly. In addition, the ability to coordinate the fairing’s finish with other parts of the bike—dash panels, tank covers, or even accessories—without committing to a full paint scheme creates opportunities for cohesive, modular customization. The art of selecting a pattern and applying it across components becomes more than an exercise in aesthetics; it becomes a strategic choice about branding, personal storytelling, and the rhythm of ownership. The result is a finish that can feel both deliberate and spontaneous—a look that stands up to the scrutiny of fellow riders while remaining adaptable to future updates. As the technology and materials continue to evolve, hydro dipping will likely broaden its range of textures, color fidelity, and environmental resilience, further strengthening its role in the rider’s toolkit. The chapter that follows will continue to map how these finishes fit into contemporary practice, comparing this approach to other methods and exploring the ways in which the technique can be leveraged to tell a story on the road without sacrificing practicality. For a broader perspective, see the external resource that discusses hydro dipping versus traditional painting and the implications for durability and process across industries: Hydrographics Blog.
Riding the Curve: Mastering the Challenges of Hydro Dipping Motorcycle Fairings
To begin with, preparation is not a step that can be rushed or abbreviated without paying a price later. The fairing is a composite of curves, edges, and fastener points designed to be aerodynamically efficient and visually pristine. Any lingering dust, grease, or wax strongly resists the film’s ability to adhere. The surface must be thoroughly cleaned, degreased, and then lightly abraded to present a micro-roughness that encourages the film to grip rather than slide. The decision to sand is not cosmetic; it is about creating a surface texture that the hydrographic layer can lock into. If the base coat is uneven or contaminated, the pattern will magnify these flaws when it flows over the contours after dipping. This is especially true for glossy finishes where reflections can highlight even minute deviations. In practice, the adhesion hurdle is the quiet gatekeeper: without a solid, prepared base, even the most striking pattern will behave like a misfit suit, bunching and peeling where the bodywork is most curved or stressed. The preparation also extends to masking the edges and seams with care, since the edges are often the first place where the film reveals misalignment or air pockets during the submersion process.
From there, the complexity of the contours reveals itself. Motorcycle fairings are not flat canvases. They comprise large, contoured surfaces that meet in tight radii around obscure corners, along rib lines, and at junctions with brackets and vents. The film, once activated by the water bath, must wrap around these forms with continuity. A pattern that looks perfect on a flat sheet can warp as it encounters a pronounced saddle or a sharp bend. This is not merely about distortion; it is about massaging a two-dimensional image into a three-dimensional reality. The dip operator must judge how the film will behave when it first contacts the water’s surface and begins to slide over a curved form. Small miscalculations in dip angle or film orientation can result in noticeable breaks in the pattern, or worse, a pattern that lines up correctly on one panel yet misaligns at a seam. The most persistent challenge, then, is achieving a uniform appearance across the entire surface while preserving the integrity of the design at every angle where the rider will observe it.
Consistency in application, while sounding technical, is the reality check that separates hobby results from professional finishes. Each hydro dipping event is a balance of variables: water temperature, the activation of the film’s inks, the angle of entry, the speed of the dip, and the time spent in the liquid. A few degrees here or there can yield a world of difference in how the pattern warps, wraps, or flattens. The temperature of the water affects how quickly the ink responds to the surface, which in turn impacts how easily the film conforms to sharp radii. The angle of the dip controls the film’s trajectory across the surface; a too-shallow angle can cause stretching and a too-steep angle can trap air and cause micro-bubbles, which, if left unchecked, turn into little craters on the finished finish. These are not cosmetic grievances alone. They alter the visual continuity around a curvature, and that continuity is what riders expect when they look at their machine in the pit or on the open road. Even the film’s orientation—whether the artwork is rotated to accommodate the panel’s natural lines—can affect the final impression. The subtlety of this decision means that a successful job often requires performing test dips on scrap pieces that mimic the actual curvature, so that the operator learns how the film behaves before committing to the fairing itself.
The aesthetic standard in this field is high. Riders often seek finishes that look like factory materials but with a custom twist. A perfect hydro-dipped surface should read as a single, continuous field, free from visible seams, distortions, or irregularities. Achieving that look requires not just skill but a kind of artistic restraint: choosing patterns that can survive the wrap without losing their identity at edges and joints. It also means being ready for the reality that some finishes, especially complex, high-contrast patterns, will reveal imperfections more clearly than solid tones. The finish must be reinforced with a clear coat that seals and protects the film, yet the clear coat itself is a new stage of technique. If applied unevenly, it can create a grainy texture, runs, or orange peel. The end result depends on the operator’s ability to apply a uniform layer while avoiding damage to the delicate underlying film. And because the riders often place their fairings in high-visibility settings—from showroom floors to weekend launches—the bar for perfection remains steep.
Safety is not a secondary concern in this line of work. The chemicals involved in cleaning, priming, and dipping discursive about the art of hydro dipping, are not benign. Proper ventilation, fume control, and PPE are essential components of the process. The preparation room and the dipping area must be organized to prevent exposure to solvents and aerosols. Hands and eyes are particularly at risk; gloves and eye protection are standard in most studios, and masks are common when spraying base coats or applying sealants. The safety dimension extends to the equipment itself. A dedicated dipping tank reduces contamination risks that could ruin a panel. Adequate lighting helps the operator detect surface flaws early, while a temperature-controlled environment ensures more predictable film behavior. These are not optional luxuries but practical safeguards that determine whether the final product will withstand heat, UV exposure, and the wear that comes from regular riding and cleaning.
Cost is another reality that shapes decisions about hydro dipping. While DIY kits and home setups promise affordability, they carry a meaningful risk: the potential to ruin a valuable fairing. A failed dip can distort a panel, cause irrecoverable damage to the base coat, or leave the surface with micro-defects that are impossible to repair without replacing the entire piece. For high-value or structurally compromised fairings, many riders opt for professional services. The economics of this choice hinge on the value of the panel, the complexity of the pattern, and the rider’s tolerance for risk. It is one thing to experiment on a small part or a test piece; it is another to gamble on a full set of fairings that will be in the public eye. The professional path, while more costly upfront, offers a clearer trajectory toward predictable outcomes and often includes a warranty on the work.
The equipment that makes all of this possible is not irrelevant to the discussion. For those pondering a DIY route, the spectrum of tools runs from a proper dipping tank to a spray gun for base coats, and from heat guns to finishing tools for buffing and sealing. The full setup demands not just a purchase but a space and a workflow that can accommodate ventilation, clean surfaces, and a well-controlled environment. The knowledge that accompanies the toolset—how the film adheres, how to avoid air pockets, how to maintain the integrity of the pattern through edges—needs to be built over time. Experience matters here as much as equipment. This is why a decision framework often ends up as a balance: is the rider aiming for a one-off personal project or a repeatable, high-quality serviceable finish across a fleet of fairings? The answer will steer toward either professional collaboration or a disciplined DIY practice with ample practice pieces.
In practice, the journey from concept to finished look is not a single leap but a sequence of calibrated moves that respect both the object and the observer. The base safety and prep step begins the chapter, while the curvature and consistency steps shape the narrative of the pattern as it travels along a three-dimensional surface. Aesthetics become measurable through lighting, reflections, and the eye’s perception as the film meets the fairing’s contours. The clear coat then takes center stage, serving as the final sculptor that can either preserve or ruin a design’s legibility. These stages are not isolated; they inform one another. Every choice—how aggressively you sand, which angle you dip, how you space the seams, what pattern you select—is part of a chain that ends with the rider’s first glance at the bike after it’s assembled. And because a rider’s first reaction is driven as much by how the eye travels over the line of the fairing as by the bike’s geometry, the process demands patience, discipline, and a willingness to revisit steps if a result falls short of the envisioned effect.
For readers seeking practical, actionable options beyond the do-it-yourself horizon, there is a logical alternative that preserves autonomy while reducing risk. The decision to source ready-made or pre-fabricated fairings in certain styles can provide a stable foundation for hydro-dipped finishes. This approach gives riders the chance to apply a custom pattern to a surface that already has the geometry handled by professionals. It also opens a path to experimentation with finishes that complement the overall colorway or branding while maintaining a reliable baseline for fit and durability. If you’re exploring this route, one relevant avenue is the Honda fairings category, which gathers a range of compatible panels and shapes for various models. This is not a plug for a product line, but a practical way to anchor your planning with realistic fit considerations and design possibilities. Honda fairings can serve as a starting point to imagine how a chosen hydro-dip design might work on real panels and how panel geometry influences pattern continuity across joints and edges.
Ultimately, the choice between DIY and professional service hinges on the rider’s goals, budget, and tolerance for trial-and-error. The challenges outlined above—preparation quality, contour management, application consistency, high aesthetic expectations, safety, cost, and equipment readiness—are not deterrents. They are a map of the terrain. They help a rider anticipate where the land might rise or fall and decide how to approach each section. The best outcomes come from acknowledging these realities early and building a workflow that respects both the physics of film on water and the art of finishing on curved, high-visibility surfaces. As the field evolves, new film formulations, more forgiving adhesives, and improved sealing techniques will continue to lower the barriers. Meanwhile, the present practice suggests a practical maxim: a thoughtful blend of meticulous prep, controlled dipping technique, and careful post-dip sealing yields the most reliable, striking, and durable hydro-dipped motorcycle fairings. For the curious rider, that means starting with a clear plan, testing small, and respecting the curve that gives the bike its character. External resources can deepen understanding of the underlying process, including the fundamental mechanics of hydrographic dipping, which informs how each surface responds and how finishes can endure time and heat. For a deeper technical overview, see the resource on how hydro dipping works: https://www.hydrographics.com/hydro-dipping-process/.
Final thoughts
Hydro dipping motorcycle fairings represents a modern approach to bike customization, offering numerous benefits that appeal to both riders and business owners. The unique designs achieved through this method not only enhance the aesthetic appeal but also provide a cost-effective solution to traditional painting techniques. However, as with any creative process, challenges exist and require careful consideration. By understanding the complete hydro dipping process, from design to execution, business owners can better cater to the growing market of personalized motorcycle accessories and set themselves apart in the industry.