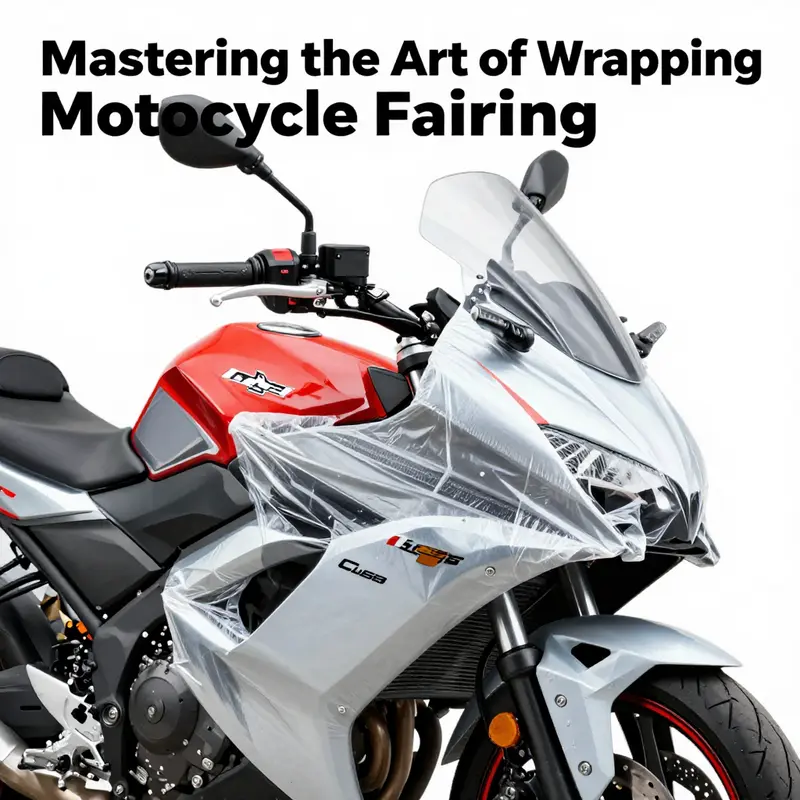
Wrapping and protecting motorcycle fairings is crucial for any business involved in transport or sales of motorcycles. A well-wrapped fairing not only avoids physical damage but also maintains aesthetic appeal, which is vital for resale value. This guide covers essential steps from thorough preparation and material selection to a detailed wrapping process and extra protective measures during transport, ensuring every motorcycle fairing arrives safely and looking pristine. The chapters that follow will provide business owners with the knowledge needed to protect their products effectively, enhance customer satisfaction, and prevent costly damages.
From Dust to Durable: The Essential Prep and Cleaning Before Wrapping a Motorcycle Fairing
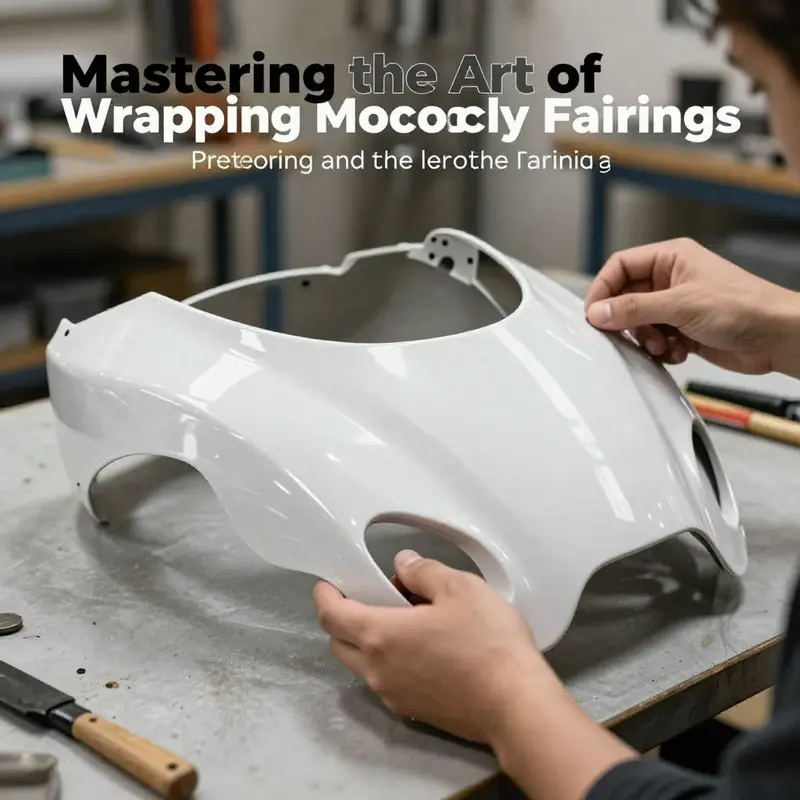
Preparing a motorcycle fairing for wrap starts long before the first strip of film touches the surface. It begins with a commitment to the quiet, meticulous work of cleaning, inspection, and environmental control. In a way, this stage is the hinge on which the entire wrapping project rests. If the surface isn’t clean, dry, and free of contaminants, even the best wrap will fail to cling where it should, wrinkle where it shouldn’t, or peel away at the edges as soon as the bike faces a spray of rain or a gust of highway grit. The goal is not flashy perfection but durable fidelity: a wrap that adheres consistently, resists micro-movements, and protects the paint during transport and storage just as effectively as it will enhance its appearance in daily use. This chapter walks through the core practices that turn a dirty, oily, or dusty fairing into a canvas that the wrap can trust for the long haul, while keeping the tone practical and focused on real-world outcomes rather than theoretical ideals.
The initial step is straightforward, yet surprisingly consequential: a thorough wash with mild soap and water. Strong cleaners, abrasive scrubs, or solvent-based detergents can strip wax, degrade delicate plastics, or alter the finish in ways that compromise adhesion. A gentle formulation that lifts road grime, oil, and grease without attacking the surface gives the wrap a clean, uniform profile to grip. Drying follows immediately. A microfiber towel is more than a preference here; its fine fibers pull away moisture with minimal friction, reducing the risk of residual water spots that can disrupt the bond between the adhesive layer and the surface. This is where timing matters. Wet patches or lingering droplets can carry minerals that later leave halos under the film once heat and pressure are applied during the wrap installation.
Once the visible dirt is gone and the surface is dry, the fairing should be inspected with a careful, almost clinical eye. Look for scratches, cracks, or any imperfections that already exist and that a wrap’s own stretch might exaggerate. Mild surface flaws do not necessarily bar wrapping, but they require consideration. Minor scratches might be tolerable if the wrap bridge over them is sufficient to prevent further abrasion. More serious divots or structural issues, especially on impact-prone edges and corners, may need remedies such as body filler or gentle sanding before proceeding. The key is to balance remediation with the fairing’s integrity; aggressive modification at this stage can invite future trouble, particularly if the repair creates a new surface that is harder for the film to anchor to or forms an uneven plane under the wrap.
With the surface visually sound, a second cleaning phase ensures that residual oils, waxes, or polishing residues do not undermine adhesion. A dedicated prep solvent is what this step calls for. Isopropyl alcohol or a specialized automotive wrap cleaner can break down the last film of oils left by cleaners and polishes. The solvent is applied with a lint-free cloth in a deliberate, methodical motion, then wiped away thoroughly. It is essential to give the surface a chance to air-dry completely after this final wipe; moisture trapped under the wrap can create a pushback effect or uneven contour adherence once heat and tension are introduced during wrapping.
Beyond the surface itself, the workspace plays a pivotal role in achieving a bubble-free, durable finish. Wrapping requires a clean, dust-free environment, ideally indoors with minimal airflow that could sweep particles into the tacky adhesive or cause micro-dust inclusions under the film. A controlled setting reduces the risk of trapped dust creating bumps or micro-pockets that mar the aesthetic and compromise longevity. The principle here is simple: the cleaner the air, the cleaner the adhesion. If a professional workstation isn’t available, improvise with a calm, well-lit room, close doors and windows during the wrap, and employ a basic air filtration strategy to minimize debris.
The preparation phase also benefits from practical forethought about how the fairing will be treated in the immediate hours ahead. If the plan is to transport the bike with the fairing on, the wrap is most likely to encounter jostling and handling that could stress corners and edges. A thoughtful approach to the edges—reinforcing with extra layers of cushioning material around the most vulnerable zones—can pay off in the long run. Some technicians even opt to remove the fairing from the bike for wrapping; by working on a flat or more stable surface, they gain control over edge alignment and tension. This reminder aligns with a best-practice mindset: if you’re transporting the entire motorcycle, consider removing the fairing first and wrapping it separately. This approach allows for more precise protection and easier reinstallation later.
As the final steps of this preparatory phase, it is worth recognizing that certain fairings, such as those associated with different rider preferences or specific models, may present contours that deserve extra patience. The goal is complete coverage with no exposed surfaces, including the underside or recessed sections that might trap moisture or dust if left unaddressed. In practice, this means planning for a controlled sequence of application. Start from a central face, extend coverage outward, and ensure deliberate overlap where each layer overlaps the previous one by at least half its width. This approach prevents gaps and creates a uniform, resilient layer that deflects small impacts during transit and handling. Yet the method never supersedes the need for patience. Rushing through this step undermines the surface’s readiness and invites costly mistakes when the wrap is finally applied.
The preparation narrative would be incomplete without touching on the broader context of how this foundation supports the wrap’s subsequent stages. A well-prepped surface reduces the risk of adhesive failure, helps the film lay down smoothly, and minimizes the likelihood of air bubbles that could harbor moisture or degrade over time. It also complements transport and storage considerations. If the bike is in motion or stored in a variable climate, the wrap’s long-term performance depends on the initial bond being as solid as possible. This is why the prep solvent, the dry time, and the environmental discipline all matter as much as the film choice itself. When done correctly, the surface becomes a stable plane that responds predictably to heat and manipulation, yielding a finish that remains aligned with the fairing’s contours rather than fighting against them.
For those who work with specific lines of fairings, there is practical value in navigating toward relevant resources that gather model-specific nuances. If you’re preparing Honda fairings, for example, a targeted category can guide expectations around typical contours, fasteners, and panel gaps. You can explore the Honda fairings category to understand how different shapes and edges influence prep and wrap strategy. Honda fairings category.
The arc of preparation is grounded in a simple philosophy: the better you prepare, the more forgiving the wrap becomes of human error during installation. Clean surfaces exchange adhesion for confidence, dry surfaces exchange speed for certainty, and a dust-free atmosphere exchanges a flawless appearance for a lasting, professional finish. The narrative of this chapter has aimed to translate that philosophy into practical steps you can follow. It is not merely about keeping the fender and fairing pristine before a wrap; it is about creating the conditions that will let the wrap do its job with resilience and longevity, protecting the original paint and preserving resale value while delivering a crisp, finished look when the project is complete.
External resource: For industry-standard guidance on packaging and protecting delicate automotive components during transport, see ISTA’s guidelines. ISTA guidelines
Armor for the Ride: Selecting Materials for Wrapping a Motorcycle Fairing
Material choice for wrapping a motorcycle fairing is about protection, durability, and how the surface will age with time and weather. Vinyl wraps give the broadest range of colors and textures and they can be applied without removing the original paint. A high quality motorcycle specific vinyl, properly prepped and edge sealed, will resist moisture and UV exposure and can be removed later with minimal risk to the finish. The key is clean preparation, careful heat management, and patience at complex curves.
Carbon fiber wraps deliver a premium look and a performance vibe, but they demand careful alignment and surface prep. The weave pattern must flow across panels, and the film requires precise tension control to avoid distortion. They tend to cost more and installation takes longer, but they can provide a durable, low glare finish that mimics a real composite.
Protective films (clear or tinted) shield the finish from chips and abrasions, especially on high wear zones such as leading edges and near wheel arches. They preserve visibility through the wrap and help maintain resale value. They are a good complement to color or texture wraps in a multi layer scheme.
In practice, most riders opt for a layered approach: a color wrap for style, with protective film at the most exposed regions, and careful edge sealing to prevent moisture ingress. For best results, align with the fairing geometry, consider heat management during installation, and weigh professional vs DIY options based on budget and comfort with the process. Finally, choose materials from reputable manufacturers and ensure the chosen film is rated for exterior motorcycle use and adheres to the curves and contours of the bike.
Wrapping a Motorcycle Fairing: A Practical Guide to Protection and Reinstallation
Wrapping a motorcycle fairing is a careful process that protects a valuable component during shipping, storage, or a move. A good wrap cushions against drops, dust, and moisture while preserving the paint finish and preparing the part for quick reinstallation. The approach combines preparation, material selection, and proper technique into a reliable safeguard.
Preparation is the foundation. Start with a thorough cleaning using mild soap and water. Dirt and oil can reduce adhesion. Dry with a lint free microfiber to prevent water spots. Inspect for cracks, chips, or loose panels and address them before wrapping. If you plan future customization, degrease the surface so vinyl or film adheres evenly. The goal is a flat, clean surface that reads as smooth to touch.
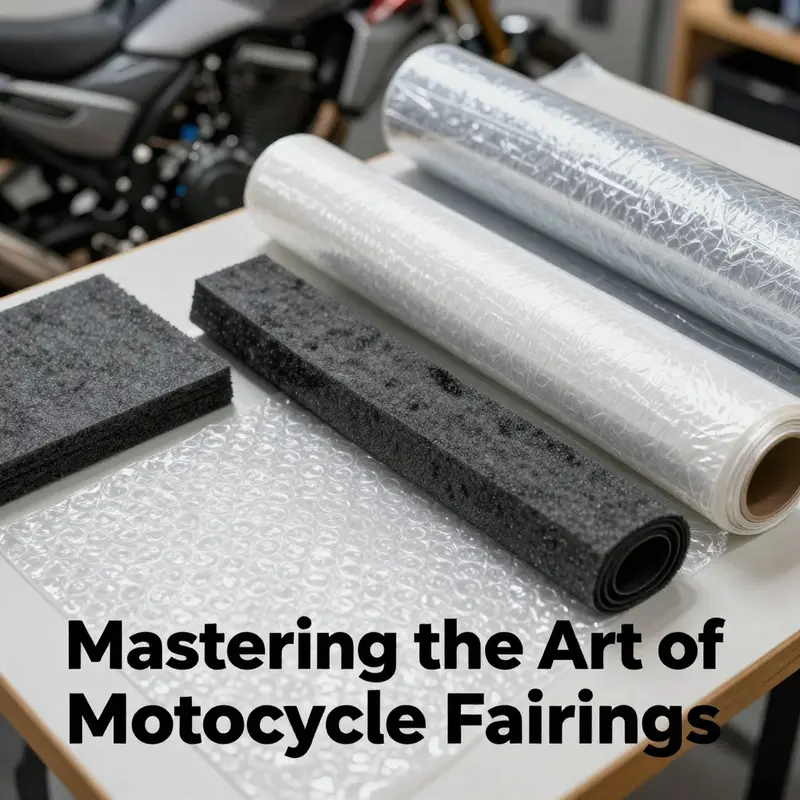
Material choice follows. For general protection during transport, choose bubble wrap with medium to large bubbles and a foam sheet for rigidity around edges. Then wrap with stretch film to secure the layers and add a moisture barrier. If longer term protection or a finished look is desired, apply a vinyl or protective film layer. Use automotive grade films designed for curved surfaces, with attention to heat and edge sealing.
Application technique. Use a center out approach; start at the center of the most prominent curve and move outward. Overlap each layer by about half to ensure coverage. Smooth with a soft tool to push air toward edges and avoid bubbles. When you reach edges and corners, add extra cushioning and reinforcement.
Securing and finishing. Use low tack tape to secure the ends, avoiding adhesive residues on finished paint. Consider double sided foam tape for a stronger bond at the perimeter. Do a final audit for wrinkles and air pockets, press them out from center to edge. For transport, place the wrapped fairing in a suitable crate with padding to minimize shifting.
Reinstallation mindset. If possible, remove the fairing from the bike for transport and wrap separately to gain access to all surfaces. When reinstalling, expect fewer surprises with misaligned mounts and adhesive residues. The result is a smooth reintegration and minimal downtime on the road.
Conclusion. The decision between protective wrap and cosmetic vinyl wrap depends on transit demands and how much alteration you want. A layered bubble foam and stretch wrap solution offers solid protection without changing surface. A proper vinyl wrap provides a cosmetic option with professional heat shaping and edge sealing. The core advice is consistent technique, careful surface prep, and disciplined securing of every seam. With patience, wrapping a fairing becomes a practical, repeatable craft that preserves both function and value.
Wrapped for the Long Haul: Mastering Transport-Ready Protection for Motorcycle Fairings

Protecting a motorcycle fairing during transit is less about a single trick and more about a deliberate, layered approach. The goal is to create a protective cocoon that absorbs shocks, resists abrasion, and shields the surface from moisture and sun, all while allowing the fairing to arrive as close to showroom condition as possible. A well-executed wrap begins long before the crate is closed and continues well after the bike is loaded. It’s a discipline that blends careful preparation, smart material choices, and thoughtful containment, with an eye toward the moment of reassembly as much as the journey itself.
Preparation is the quiet foundation of success. Start by giving the fairing a thorough cleaning with a mild soap and water solution to lift away dirt, oil, and road grime. Rinse and dry completely with a microfiber cloth to prevent water spots or residue from affecting the wrap’s adhesion. Next, inspect the surface with a critical eye. Look for microcracks, chips, or any loose fragments that could be aggravated by shifting during transport. Address these issues before wrapping; even small imperfections can become focal points for damage when the fairing is boxed and moved repeatedly. If a crack or loose section is present, stabilize it with appropriate repair techniques before you proceed. The point is to create a clean, sound canvas that the wrap can cling to without hiding underlying problems that will surface later.
Material selection is where the practical meets the tactical. Bubble wrap remains the backbone of protection, but not all bubble wrap is created equal. Choose medium to large bubbles—roughly 1 inch in diameter—to cushion both broad surfaces and complex contours. This size distributes energy more evenly and resists puncture more reliably than thinner varieties. For edges and corners, where impact tends to concentrate, layer in rigid foam sheets cut to size. Foam acts as a structural friend, filling gaps and shaping itself to the fairing’s curves, so pressure from external handling is spread across a broader area rather than pressing directly into a small point.
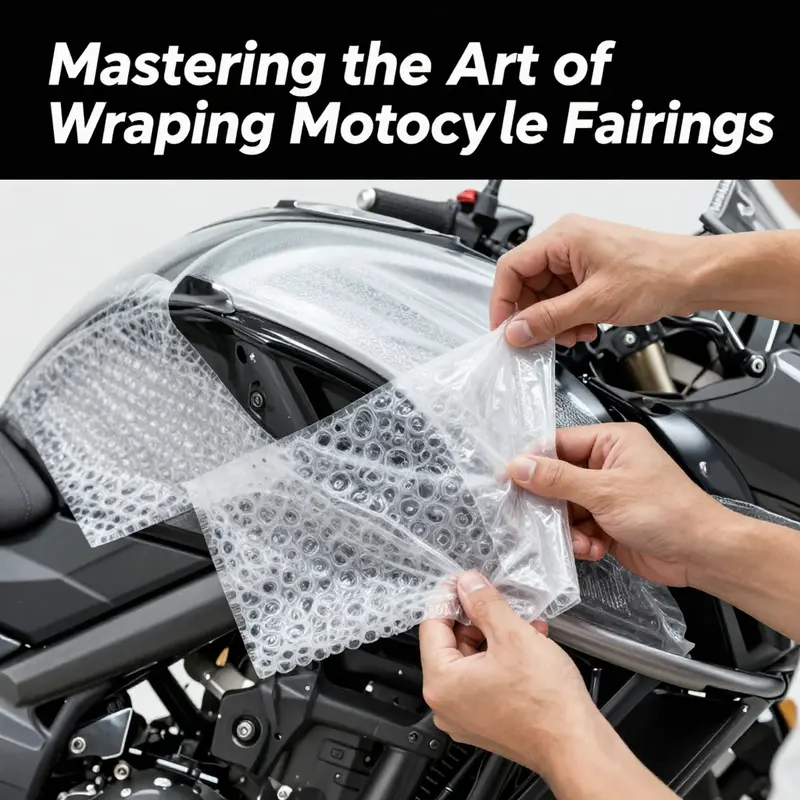
After the bubble and foam layers, add a polyethylene or polyolefin stretch wrap to hold everything in place and add a moisture barrier. The wrap should be applied with even tension, overlapping each pass by roughly half the width of the wrap. This overlay strategy creates a dense, continuous shield while preventing gaps that could trap moisture or shed dust into the layers beneath. In cases where the wrap has to endure longer storage or more extreme handling, consider wrapping with an additional protective film layer over the top. Clear vinyl or polyethylene sheeting can shield the surface from UV degradation and minor scuffs during handling, especially if the wrap will be exposed to sun or dusty environments during transit.
The wrapping technique itself deserves mindful execution. Begin wrapping at the center of the most exposed surface, such as the front face or a central panel, then work outward toward the edges. Center-first wrapping helps maintain balance as you add layers and reduces the chance of seams pulling toward a vulnerable spot. If you’ve ever watched a pro wrap a curved surface, you’ve seen the art of tension management: too tight can cause stretch marks or warping; too loose invites shifting. The aim is steady, uniform pressure across the surface, with every layer overlapping the previous by about 50 percent. Gaps are the enemy here; they invite moisture intrusion, grit ingress, and surface movement during handling.
Special attention should be paid to the edges and corners. These are the most common points of impact during loading, unloading, and rough handling. Extra padding—more bubble wrap, snug foam borders, or additional foam sheet reinforcement—helps maintain rigidity at the seams and prevents the wrap from buckling when the fairing is moved or stacked. If you anticipate contact with any hard surfaces, a small, strategically placed foam cushion along the edge can dramatically reduce the risk of edge cracking or scuffing. The wrap should cover every visible surface—sides, front, back, and every recess or undercut—so there is no bare plastic exposed that could collect moisture or dust.
Taping is a delicate step. Use low-tack masking tape or painter’s tape to secure the ends of the wrap. Avoid standard duct tape or any adhesive that can leave residue on painted surfaces. Tape should act as a temporary fix, not a static adhesion solution. If you need to anchor the wrap at a joint or fold, do so with a small dab of tape placed on the underside of a foam pad or along a hidden seam where it will not mar visuals once unpacked. The aim is a clean exterior that reveals nothing but the wrapped shield when the crate is opened.
Brand-specific nuances can influence padding choices and cut lines. It may help to consider a brand’s fairings as a family of forms with distinct contours around air intakes, mounting points, and undercuts. For readers who want to explore a brand-specific range and understand how forms influence protection needs, the Honda fairings category provides a practical reference for shape and feature awareness. It serves as a reminder that contours and edge geometry dictate where padding goes and how many layers are required to preserve alignment and fit upon reinstallation. Honda fairings category.
With the wrap complete, attention turns to containment. A rigid, custom-fitted container—such as a wooden crate or a reinforced plastic case—with internal padding is the second shield in the chain. The crate should be slightly larger than the wrapped fairing to allow for buffer material without creating a loose, sloppy fit that can rattle the contents. Inside, high-density foam or purpose-built corrugated inserts cradle the fairing’s contours, especially along edges and curves where stress concentrates. This cradle prevents shifting during transit and distributes pressure evenly so the wrap remains intact.
When possible, place an additional inner layer of anti-static bubble wrap against the wrap before securing it inside the crate. This thin, protective skin adds an extra line of defense against minor abrasions and helps dampen vibrations that would otherwise transmit through the packaging. If the journey is long or the handling will be extensive, a final protective film over the wrap inside the crate can shield the surface from UV exposure and scuffs during handling. The goal is to keep the wrap pristine until the moment you unpack and reinstall.
Securing the fairing within the crate requires restraint that does not harm the wrap. Use straps or ratchet bands that thread through pre-drilled anchor points in the crate. Padding where the straps contact the wrap is essential; this avoids pinching, indentations, or surface scratches. Avoid adhesive tapes on the wrap’s exterior during securing. The objective is to hold the fairing firmly enough that it cannot shift, yet without compressing or distorting the wrap itself.
Sealing and labeling complete the protective cycle. Waterproof or weatherproof tape helps seal against moisture during loading or weather changes en route. Clear labeling amplifies handling clarity for logistics personnel: “Fragile,” “This Side Up,” and “Do Not Stack” suffice to communicate critical care instructions. When the shipment involves long distances or international travel, including identifiers for the model and relevant handling notes can prevent confusion at busy hubs and ensure proper orientation during unloading and reassembly.
The strategic choice to remove the fairing from the motorcycle for transport deserves emphasis. If possible, remove the fairing and wrap it separately. This approach provides more precise protection for each piece and greatly simplifies reinstallation. A single, continuous wrap on a complex composite can hide minor imperfections or misalignments that only become obvious after removal and reassembly. Separating parts reduces risk and makes post-transport checks and fitment faster and more predictable.
Beyond the practical packing steps, it’s prudent to think about the broader handling ecosystem. For long-distance or high-value shipments, collaborate with a carrier experienced in specialty automotive components and verify that the shipment is insured for full replacement value. Documentation, declared value, and contents orientation all contribute to smoother claims and fewer disputes should damage occur. The protective choices discussed here align with a broader safety framework that testing and certification bodies advocate for protecting delicate components during transit.
The journey of a wrapped fairing through loading bays, crates, and trucks is a test of foresight as much as it is of materials. A disciplined wrap, combined with a well-fitted container and careful handling, pays dividends not only in the condition of the piece on arrival but also in the efficiency of reassembly and resale value should circumstances require it. Scratches, dents, and UV fade are not inevitable if we respect the surface, layer padding with intention, and secure the convoy with restraint and awareness. The wrapped fairing is not just a shield against the road; it is a carefully engineered envelope that preserves the artistry of the finish and the precision of the mounting geometry.
External resource: For standards on packaging automotive components during transport, see ISTA. ISTA packaging guidelines
Wrapped to Withstand the Road: The Art and Science of Protecting a Motorcycle Fairing
Protecting a motorcycle fairing is about more than keeping paint pristine. It is a careful choreography of preparation, material choice, and technique that turns a fragile exterior into a sacrificial shield against dirt, moisture, impact, and rough handling. The fairing, typically made from lightweight ABS plastic or fiberglass, looks sturdy at a glance but is surprisingly vulnerable to micro-scratches, chips from road debris, and the cumulative wear of exposure to sun and weather. A well-applied wrap acts as a protective second skin. It absorbs scuffs and minor abrasions, shields the underlying finish from UV fade, and helps retain the bike’s resale value by keeping the surface looking newer for longer. This protective layer also simplifies transport, storage, and even occasional maintenance, because you can remove or replace it without disturbing the original paintwork. Rather than treating wrapping as a one-off quick fix, think of it as an extension of your bike’s armor, designed to endure the bumps and jostles of real-world riding and shipping alike. The aim is not to obscure beauty but to preserve it, to allow the fairing’s lines to stay crisp and the color to stay true, whether you are moving a single piece through a warehouse or rolling off a truck at a destination far from home.
The preparation phase sets the tone for everything that follows. Begin with a thorough cleaning. A mild soap-and-water solution works well to remove surface grime, oil, and fingerprints, after which you should dry the surface completely with a microfiber cloth. Any moisture left on the surface can trap dirt and create bubbles beneath the wrap, undermining adhesion and finishing. Then, inspect the fairing for any damage that could become worse once wrapped. Small cracks, chips, or loose pieces need attention before you begin wrapping. A cracked area may telegraph through the wrap, and a loose panel can shift under pressure, causing ripple or peel later on. The goal is a fairing that is clean, dry, and as structurally sound as possible before you apply any protective layer.
Choosing the right materials is the next decisive step. The recommended approach involves multiple layers designed to cushion, rigidify, and seal the surface. Start with bubble wrap that has medium to large bubbles; this creates a cushion that behaves like a spring under impact, reducing the chance of a sharp blow denting the surface. High-quality bubble wrap is worth the extra cost because thin, puncture-prone wraps can fail when confronted with corners or heavy contact during transport. For edges and corners, rigid foam sheets or foam boards cut to size can provide added rigidity and impact resistance. They help prevent shape distortion where the fairing bends most and where angles meet, such as around the radiators or vent housings. After the bubble and foam layers, add a top layer of stretch wrap, the plastic film that holds everything in place and adds a moisture and dust barrier. Together, these layers form a composite protective envelope that spreads localized stress across a wider area and minimizes the risk of pressure marks or moisture intrusion.
The wrapping process itself should be deliberate and patient. A center-out approach tends to yield the most uniform results. Start at the center of the most prominent surface, such as the front face, and work outward toward the edges, letting the layers overlap by at least half their width. That 50 percent overlap is crucial; it prevents gaps where moisture or debris can creep in and ensures that every inch of the surface receives continuous protection. When you reach edges and corners, add extra material and more overlaps. These locations are the most vulnerable to impact, so reinforcing them with additional bubble or foam plating helps maintain the wrap’s integrity throughout handling and loading.
A detail that makes a real difference is how you handle complex features like air intakes, undercuts, and curves. These contours tend to trap air and create tension points that can lead to bubbles or loosening if not addressed with care. Work slowly to mold the wrap around curves, using your hands or a soft squeegee to press the material into every crease and ensure full contact with the surface. Smooth, deliberate movements help avoid creases that could wear through over time. The wrap should stay tight and conform to the fairing’s geometry, much like a tailor fitting fabric to a body.
As you progress, ensure that every visible surface—the front, sides, and even the lower portions that might be tucked under the bike during storage or transport—receives coverage. The goal is a seamless finish with no bare plastic exposed. Where you have a seam or joint, treat it as you would a seam on a suit: overlap generously, press firmly, and secure with low-tack tape to prevent edges from lifting. Avoid using conventional tape directly on painted surfaces, since adhesive residue can mar the finish when the wrap is removed. If you need to secure ends, use tape designed for temporary restraint or masking tape; it’s easier on both the wrap and the paint when it comes time to remove.
Even with meticulous application, a wrap loses some of its protective edge if the fairing is transported in isolation without a matching enclosure. For longer journeys or international shipments, consider placing the wrapped fairing inside a custom-fitted wooden crate or a sturdy cardboard container with internal padding. Internal fillers—foam inserts, crumpled paper, or inflatable air cushions—should fit snugly to prevent shifting during movement. When the fairing is transported separately from the bike, these precautions become even more important because movement inside a box can cause rubbing and impact where the wrap might be thinnest. Labeling the package clearly with “Fragile” and “This Side Up” helps ensure that handlers treat the load with care. If there’s a model-specific fit or a rare curve, document its orientation so you can reinstall with confidence when it arrives.
The material choice also informs the wrap’s longevity. A high-quality, purpose-built wrap resists environmental factors such as sun exposure, moisture, and temperature fluctuations. It remains flexible in cold weather and maintains adhesion in heat, minimizing the risk of peeling or cracking. A well-applied wrap protects not just from scratches but also from light chemical exposure and dust. Because the wrap acts as a barrier between the paint and the outside world, it can reduce the need for frequent polishing or repainting after transit or storage. This is especially valuable for riders who plan to resell or trade their bikes, since the original finish stands a better chance of looking fresh after months in storage or after being shipped to a new owner.
For riders who are thinking about the broader context—the shape and contours of a fairing across different bike models—the Honda fairings category offers a useful window into how variations in design influence wrapping technique and fit. Seeing how different curves, vents, and edge radii respond to the same protective layers can inform your own process and help you anticipate trouble spots before you begin. You can explore the broader catalog at Honda fairings to compare how various shapes might affect the wrapping approach while keeping the overall objective in view: a tight, resilient shell that keeps the surface beneath pristine and ready for another season of riding.
Beyond technique, the decision to remove the fairing from the motorcycle for separate wrapping can simplify the process and yield a more precise result. When you wrap the entire surface independently, you can focus on corners, undercuts, and internal surfaces without encountering the interference of adjacent components or hardware. This approach also simplifies reinstallation, because you can reattach the fairing with clean alignment once the protective layer has settled. The time invested in careful removal and separate wrapping pays off in a finish that is uniform across all planes and sections. It also minimizes the risk of marring any freshly painted areas by allowing you to address each surface with the attention it deserves.
In sum, wrapping a motorcycle fairing is a practical practice grounded in preparation, material science, and meticulous technique. It protects the aesthetic and structural integrity of the bike, reduces the costs and downtime associated with transport damage, and preserves resale value by maintaining the finish in near-original condition. The wrap is not merely a plastic shell but a protective strategy that travels with the bike, offering peace of mind during loading, transit, and unloading. A thoughtful approach—cleaning the surface, choosing layered cushioning, applying with center-out precision, and finishing with secure containment—translates into a durable barrier capable of withstanding the occasional mishap on the road or in a crate. For the serious rider, it is a small investment that yields a quiet return: fewer scratches, less downtime, and a bike that looks as good when it reaches its destination as when it left the shop. And if you want to see how fairing varieties influence wrapping decisions, a quick look at the Honda fairings category can illuminate how different shapes respond to protective layers, reminding us that a well-wrapped fairing is a careful balance of protection, fit, and finish. To learn more about wrap materials and general guidance on protecting vehicle surfaces, explore resources from leading wrap standards and providers, such as this overview of vehicle wrap solutions: https://www.3m.com/motorvehicles/en_us/products/vehicle-wraps/.
Final thoughts
Wrapping motorcycle fairings may seem like a simple task, but it has profound implications for businesses in the motorcycle industry. By following the steps outlined in this guide—from meticulous cleaning and material selection to effective wrapping techniques and transport precautions—business owners can safeguard their products against damage during transit. This not only elevates customer satisfaction but also upholds the credibility of the business. Remember, investing time and resources into proper wrapping is an investment in your brand’s reputation and future sales.