
Maintaining the aesthetic and functional integrity of motorcycle fairings is vital for any business owner in the motorcycle industry. Whether you are a dealership, a repair shop, or a motorcycle rental service, understanding how to effectively touch up fairings can enhance your service offerings and increase customer satisfaction. This guide explores essential methods for touching up motorcycle fairings, including surface preparation, filling minor dents and chips, and matching and applying paint. Each chapter will provide business owners with the knowledge necessary to deliver quality repairs that uphold the reputation of your brand.
Surface Preparation: Laying the Groundwork for Flawless Motorcycle Fairing Touch-Ups
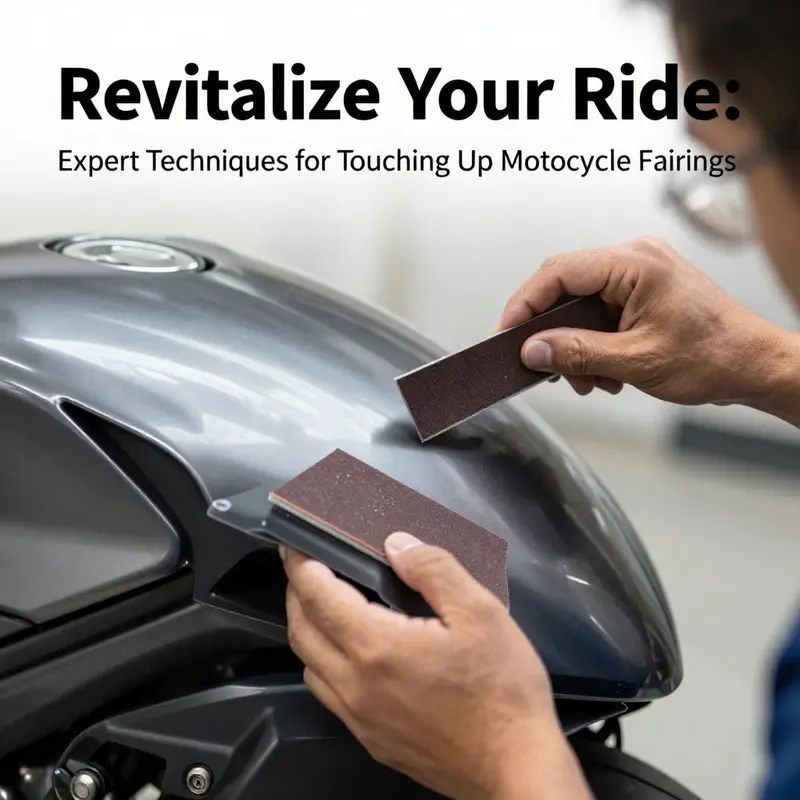
Surface preparation is the quiet, often overlooked craft that makes the difference between a repair that merely hides damage and one that looks truly seamless. When a fairing has scratches, chips, or weathered discoloration, the instinct might be to rush into color matching and spraying. Yet the truth is simple: without a clean, properly textured, and chemistry-friendly surface, even the best paint job will fail to adhere well, peel later, or show through as a dull oval of mismatch. Think of surface prep as laying a foundation for a wall. If the foundation is clean, dry, and prepared for bonding, the finish can be smooth, durable, and vibrant. If any telltale contaminants remain, the paint will bite unevenly, thin out in high-stress zones, or develop micro-cracks around edges that betray the repair every time the sun hits the panel at the wrong angle. This chapter walks you through a careful, methodical approach to prepping motorcycle fairings for touch-up, emphasizing technique over shortcut and caution over guesswork, so that the final result remains resistant to UV chalking, washing solvents, and the daily toll of road grime.
Begin with a clean canvas because the most stubborn contaminants are dirt, grease, and wax that cling to plastic surfaces. Start by selecting a dedicated plastic cleaner or a mild degreaser rather than a general-purpose solvent. The goal is to dissolve and lift residues without attacking the plastic itself. Apply the cleaner generously to the damaged area, working with a microfiber cloth or a soft sponge in gentle, circular motions. Rinse thoroughly with water, ensuring that all cleaner traces are washed away. It is equally important to remove any wax that may have migrated to the surface, as wax acts like a barrier that blocks adhesion. After rinsing, allow the area to dry completely before moving on. A clean, dry surface is the first line of defense against adhesion failure.
Once the area is dry, the next step is to create a micro-roughness that invites new coatings to bite properly. Sand the damaged region as well as a surrounding margin with progressively finer grits. The recommended range for this task is 1000 to 2000 grit. This level of abrasion creates tiny, uniform scratches that serve as anchors for the primer and paint. It’s essential to maintain control; under-scrubbing can leave glossy patches that resist bonding, while over-sanding risks thinning the plastic and altering the edge geometry of the fairing. Move the sanding block evenly, with light pressure, and check your progress frequently. You should see a subtle, matte finish that feels slightly rough to the touch. If you see gouges or deep lines that don’t align with the original texture, back off and re-evaluate the area before continuing.
After sanding, dust is the next foe to defeat. Dust particles, when trapped between coatings, can cause texture inconsistencies, fisheyes, or adhesion threads that later peel away. A clean prep site and meticulous dust removal are non-negotiable. Begin with a thorough wipe-down using a lint-free cloth dampened with isopropyl alcohol. Wipe from edge to edge, ensuring you lift dust particles rather than dragging them along the surface. Do a second controlled pass to ensure the surface is completely free of residues. Let the alcohol evaporate fully, leaving the surface ready for primer. This wipe-down with isopropyl alcohol is a small step with outsized influence on final gloss and color uniformity.
An often-overlooked but critical step in modern plastic repair is the application of an adhesion promoter designed for automotive plastics. This promoter, when used correctly, acts as a chemical bridge between the plastic and subsequent coatings. It improves long-term adhesion, helps prevent peeling at the edges, and can reduce the risk of paint lifting under temperature cycling and UV exposure. Apply the promoter in a light, even spray or wipe according to the manufacturer’s instructions, and allow it to dry fully before proceeding. As with all plastic coatings, the exact drying time will depend on the formulation and ambient conditions, but giving it ample time to set pays dividends in the durability of the finish. The promoter’s role is not optional; it is a safeguard that keeps your repair from failing at the first rain or after a few washings.
With the promoter dry, you’re ready to apply primer. Use a compatible 2K primer that is suited for plastic substrates. The primer serves as a dense, level base that fills micro-scratches, creates a uniform color across the repaired area, and provides a compatible surface for the subsequent topcoat. When applying primer, follow the instructions for thinning, if required, and ensure a uniform coat that covers the area without sagging. A good primer layer should dry to a slight, firm tack that resists fingerprinting but remains workable for sanding if you need to address any pinholes or unevenness. Depending on the product, you may need to spray multiple light coats rather than a single heavy application. Allow each coat to dry as directed before applying the next, and don’t rush the process. Patience here is what preserves the integrity of the finish later on.
Color matching is a delicate art, especially when dealing with fairings that are often baked under sunlight and weathering. The best practice is to use a plastic-specific paint that pairs with automotive plastics and adheres well to 2K primers. When possible, practice on a scrap piece of the same plastic before committing to the actual panel. This test lets you gauge color accuracy under the same lighting conditions you typically see on the bike and in natural daylight. The distance and spray technique matter: spray light, even coats from about 12 inches away, letting each coat dry before applying the next. Layering is the key; you want thin, controlled builds that gradually build color without pooling or creating a heavy texture. If color mismatches occur, allow the paint to cure and then apply a very thin touch-up layer to fine-tune shade and opacity. It’s a careful balance between pigment density and the base you created with the primer, and it rewards patience more than improvisation.
When you’re satisfied with the color match and the film builds evenly, it is time to seal the finish with a clear coat that is compatible with plastics. The clear coat acts as a shield against UV rays, chemical cleaners, and everyday wear. Apply multiple ultra-thin layers rather than one thick coat to avoid runs and orange-peel texture. Between coats, observe the recommended drying times. A well-applied clear coat not only protects the color but also adds depth and a glossy finish that helps the repair blend into the surrounding fairing. The goal is a layer that is durable enough to resist washing abrasion and minor rain exposure without sacrificing the surface’s smooth, glassy look. Remember that temperature and humidity affect how the clear coat levels and cures, so work in a climate-controlled environment if possible.
After the clear coats have fully cured—often a day or two, depending on the product and conditions—you’ll typically reach the stage where you can begin refining the surface to make the repair disappear into the original finish. Polishing and buffing are the steps that transform a repaired patch into a seamless part of the fairing. Start with a mild polishing compound designed for plastics, and use a microfiber cloth or a dual-action polisher to avoid creating heat buildup that could melt or warp the surface. Work in small sections, using light pressure and steady, overlapping passes. The aim is to erase micro-mistiness, improve clarity, and restore a uniform sheen. If you notice any dull spots or slight haze, you can re-wipe with a cleaner, re-polish, and then re-check the finish under various lighting angles. The polishing phase is not just cosmetic; it’s a diagnostic process that reveals any remaining low spots or texture differences that a final coat or additional sanding can address. In many cases, you might find that the repaired panel looks superb on the bench but benefits from a final, faint final buff after the entire bike has been washed and dried, as this can reveal small color or texture variations that weren’t visible in isolation.
The discipline of surface preparation also demands vigilance against steps that undermine durability. Do not substitute household glues or general-purpose adhesives for any repairs on plastic fairings; these compounds do not bond well to plastic and can degrade over time, especially with exposure to heat from the engine bay or sunlight. Never attempt to repair structural components or areas adjacent to critical systems such as air intakes or mounting points without a professional assessment. For deeper cracks, large damaged areas, or panels that have structural compromise, consider panel replacement or professional refinishing rather than attempting a DIY fix. A well-prepared surface is a foundation, but it must also be respected in terms of its limitations. If a panel is cracked through or the plastic has become brittle, the integrity of the entire repair can be compromised, and the results may not be durable in the long run.
If you’re exploring options for model-specific parts or replacements, you can explore the Honda fairings category to gauge available panels and compatibility with your bike’s bodywork. Honda fairings category offers a focused view of options and can help you plan whether you’re patching, repainting, or replacing a damaged section. This internal link is a practical resource when you’re working through the decision matrix of touch-up versus replacement, helping you keep the project aligned with both aesthetics and function.
For readers who want a broader, step-by-step reference that complements the principles discussed here, a detailed external guide on plastic preparation and paint application provides further depth on techniques, nuances, and product considerations. A comprehensive resource on how to prep motorcycle plastic for paint walks through similar steps with additional images and notes on best practices for achieving consistency across different plastics and finishes. You can consult that guide to reinforce the fundamentals described in this chapter and to gain confidence in translating these techniques to your own bike’s fairings: How to Prep Motorcycle Plastic for Paint: A Practical Guide.
Filling Minor Dents and Chips: Crafting Seamless Touch-Ups for Motorcycle Fairings
Minor dents and chips on a fairing tell stories of close encounters with grit, curb rash, or a momentary misjudgment in a parking lot. Yet these flaws don’t need to ruin the visual harmony of your bike, nor should they threaten the integrity of the plastic shell. The goal of a touch-up isn’t to erase every mark in a single step but to guide the repair through a careful, layered process that respects the material’s behavior. When approached with method, the repair becomes a predictable sequence rather than a leap of faith. The surface prep, the meticulous filling, the color matching, and the protective clear coat all work together like a small, controlled restoration project. You’ll not only restore the look but also fortify the finish against future UV exposure and weathering.
Begin with surface preparation, the quiet hinge on which the rest of the repair depends. Start by cleaning the damaged area thoroughly. Dirt, grease, and wax act like barriers to adhesion. A degreasing solution or a soap-and-water wash will remove surface oils, while a thorough rinse ensures no residue remains. But washing alone isn’t enough. The next step is to abrade the surface lightly to create a mechanical key for whatever repair material you plan to apply. The recommended range is 800 to 1500 grit, a balance between creating enough tooth for adhesion and not cutting too deep into the plastic. Sand gently and evenly, keeping the motion consistent to avoid creating ridges. After sanding, wipe down again, taking care to remove the fine dust. The final wipe with isopropyl alcohol is essential to evaporate any remaining solvents and to leave the surface utterly clean and dry before you start repairing. Any trace of grease or wax can sabotage adhesion and lead to a finish that looks cloudy or uneven long after you finish.
If the damage is minor, and the underlying concern is a scratch that spared the base layer, you can sometimes achieve a surprisingly good result with simple, low-tech methods. For very shallow scratches that have not penetrated to primer or base color, the toothpaste technique is a handy stopgap. The mild abrasives in standard white toothpaste can smooth the surface enough to make the scratch less noticeable when followed by a wax polish. Apply a small dab to the scratch, rub in a circular motion with a soft cloth for 30 to 60 seconds, and wipe away with a damp cloth. It’s a quick, inexpensive trick, but it’s not a substitute for more robust repairs if the base color is exposed. If the area still shows light blemishes after this treatment, a more thorough approach is warranted.
Deeper scratches or chips that break through the paint to reveal primer or base color require a more deliberate process. Begin again with cleaning to remove any dust that might interfere with adhesion. Then prepare the edges around the damaged zone with progressively finer sanding, usually starting with 400 to 600 grit. The aim is to create a subtle bevel around the chip or scratch so that the subsequent repair material sits flush and does not form a noticeable ridge. Always sand in one direction to minimize cross-hatch marks, and keep the surrounding paint protected with masking tape or film. The goal is not to remove paint but to create a clean boundary that accepts filler material smoothly.
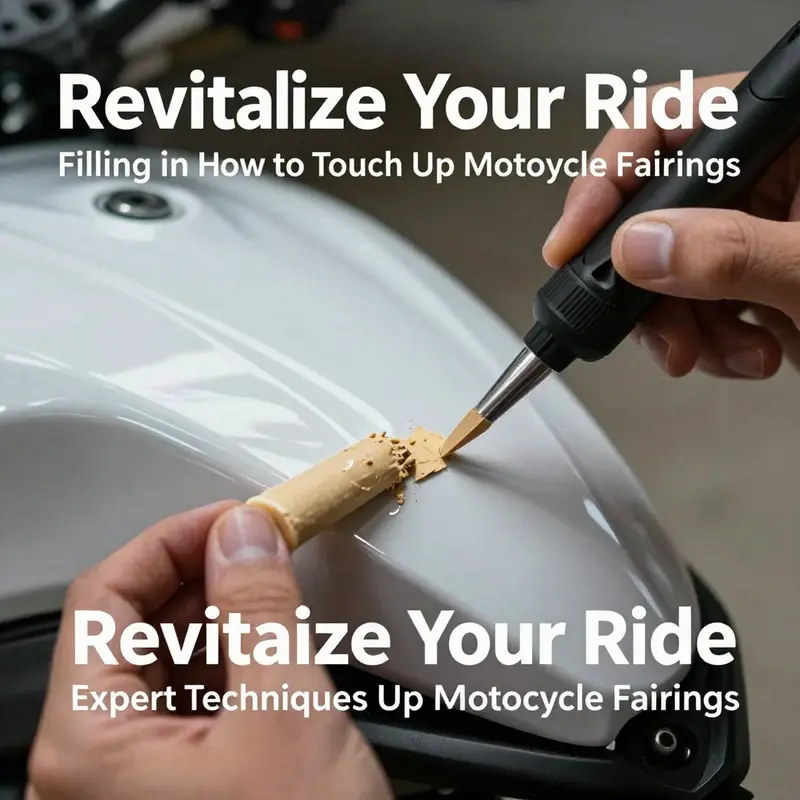
Choosing a filler material is the next key decision. For ABS or other common motorcycle plastics, a plastic body filler or an epoxy putty designed for plastics is a practical option. Mix the putty according to the manufacturer’s instructions, then apply it with a plastic spreader or an old credit card. Overfill slightly to account for shrinkage during curing, then allow the filler to cure fully. Rushing this step can lead to a sagging patch or an uneven surface that becomes apparent after painting. When the filler has hardened, begin the careful process of sanding it flush with the surrounding surface. Start with 800 grit to remove the bulk of the excess material and progress to 1000 and 1500 grit as you approach the final contour. Wet sanding helps keep dust down and gives you a better sense of how flush the repair is relative to the rest of the fairing. You’re not aiming for perfection on the first pass, but you should see the difference as the repair becomes less noticeable.
At this point, a thin coat of primer becomes a valuable ally. Priming is optional, especially if the finished area is small and you’re confident in your color match, but it remains a best practice for durable adhesion and an even paint surface. A neutral plastic primer helps the new color coat adhere uniformly and reduces the risk of blotching or uneven tint. Apply in a light, even layer and allow it to dry according to the product guidelines. If you’re aiming for a professional finish, a primer can provide a controlled surface that makes color matching more predictable. The primer also reduces the risk that any remaining filler will show through the final paint layer.
Color matching is the most nuanced portion of the process and demands patience. Plastic-compatible paints—such as acrylic enamel or urethane-based formulations—offer good wear resistance and flexibility on flexible, temperature-fluctuating plastic. When color matching, spray in light, even coats from roughly 12 inches away. Multiple thin coats beat one thick blast that can cause runs and sags. Always allow each coat to dry before applying the next. The order of operations matters: you want a smooth, uniform color that sits atop the primer and filler, not a layer that looks different or uneven around the edges. A practical tip is to test color on a scrap piece of similar plastic, if possible. It’s not always feasible to replicate the exact curves and texture of a fairing, but it gives you a useful baseline for how the color will look when applied to the actual panel.
To protect and unify the finish, the clear coat is essential. The clear coat functions as a shield against UV exposure, moisture, and minor scrapes, and it provides the glossy sheen that makes a repaired panel visually indistinguishable from the rest of the fairing. Use a plastic-safe clear coat and apply in several very thin layers. Permit each layer to dry fully before applying the next, and keep the spray or gun at a steady distance to prevent orange-peel texture. The cure time can vary, but a full cure typically occurs within 24 to 48 hours, during which you should avoid washing or exposing the surface to heavy abrasion. A well-applied clear coat seals the edge where the paint meets the base surface and minimizes the risk that sanding or polishing reveals a faint, dull line around the repair.
After the clear coat has set, polishing becomes the final refinement. Polishing compounds, applied with a microfiber cloth or a dual-action polisher, smooth any minor imperfections and bring the repaired area to a glossy finish that blends with the rest of the fairing. This is the moment where visibility diminishes and the eye starts to accept the patch as part of the overall form. You’ll want to approach polishing with care, using light pressure and overlapping passes to avoid creating a swirl pattern or burning through the new paint. If you’re generous with the polish but cautious with the pad speed, you can coax a near seamless transition that makes the repair vanish from casual glance. The more you practice this sequence, the more confident you’ll become at detecting high spots before they become an issue.
There are also important cautions to consider as you work. Regular household glues and general-purpose adhesives should be avoided for plastic repairs; they often fail under heat, moisture, and flexing. The repair areas near critical features such as air intakes, mounting points, or structural seams require careful assessment, and in some cases, professional evaluation is wise. If the damage is beyond what you can repair with filler and paint, or if there are large cracks or deep structural separations, replacing the panel or seeking refinishing services is prudent. The aim is not simply to cover the damage but to preserve the integrity of the fairing, including its mounting points and attachment surfaces, which bear the loads of wind and vibration during rides.
For deeper or broader problems, a more robust plan begins to come into view. You might find that the dent is too deep for a fill-and-sand approach, or the corner of a fairing has been bent so that it won’t sit flush with adjacent panels. In those cases, you may choose to replace the panel or take the fairing to a professional refinisher who can reconstitute the original shape with heat-forming or resin-based repair processes. The aim remains clear: a repair that a rider would be proud to show off, with the least possible evidence that damage occurred in the first place. A successful repair has four practical hallmarks: it sits flush with surrounding surfaces, it reflects the same gloss level as the adjacent areas, it resists chipping and peeling in the months that follow, and it remains securely attached to the bike without bending or loosening at any mounting points.
If you want a compact, practical roadmap that emphasizes outcomes, here is the core sequence distilled. Clean and degrease the area; lightly sand to create a good bonding surface; apply filler and let it cure; sand the repaired patch flush; prime if chosen; paint with thin, even coats and allow drying between coats; apply a protective clear coat; and finish with careful polishing to blend the repaired zone with the rest of the fairing. The steps are simple in concept, yet they require patience and attention to detail. The reward is a fairing surface that looks nearly flawless and that will continue to resist the elements as you ride across roads and weather.
For those who still feel uncertain about tackling a repair themselves, there is value in seeking professional help, especially for panels that bear mounting or aerodynamic effects. Even a small misalignment can generate wind noise or alter the aero profile, and pushing ahead with a DIY fix when the underlying backing is compromised can lead to more extensive repair requirements later. In such cases, you can use the experience gained from smaller repairs to inform more ambitious refinishing projects, eventually building a robust practice that includes color matching, finishing, and protective coatings. The overarching message is that minor dents and chips, when approached with a disciplined process, can be repaired to look nearly original, preserving both the aesthetics and the resilience of your motorcycle’s bodywork.
As you consider your options and plan the repair, it’s helpful to imagine the finished surface not just as a static image but as part of a larger system of care for the bike’s appearance. Regular washing and careful storage protect the paint and plastic from UV damage and micro-scratches. A well-tended finish resists chalking and dulling over time and retains its depth of color deeper into the bike’s life. This longer-term perspective helps explain why the touch-up process is more than a one-off task; it is an ongoing practice of maintenance that rewards the rider with a bike that looks fresh and ready for the road, even after thousands of miles.
If you’re curious about broader color and finish considerations or want to explore related panels and fairings for different makes, you can explore Honda fairings as a helpful reference point for textures and color behavior on a variety of plastics. Honda fairings This provides a practical context for matching plastics and finishes when dealing with various models and textures. Remember that consistency in technique translates into consistency in results, and the more deliberate you are with sanding angles, coat thickness, and drying times, the closer you’ll get to a factory-like finish.
In the end, the cure for a scratched or dented fairing is a blend of careful preparation, patient execution, and thoughtful finishing. The steps described here emphasize a measured approach rather than a rushed fix. The aim is to harmonize the repaired area with the rest of the fairing, preserving both the look and the feel of a motorcycle that has clearly seen miles but still rides with pride. With practice, you’ll be able to assess damage more quickly, select the appropriate materials with greater confidence, and apply color and protection with a steadier hand. A well-executed touch-up will not only restore the visual integrity of the fairing but also reinforce the horse-sense of ownership that makes motorcycling such a satisfying pursuit.
External resource: For a comprehensive, photo-supported guide that expands on these techniques, see BikeBandit’s Motorcycle Fairing Repair Guide: https://www.bikebandit.com/blog/motorcycle-fairing-repair-guide
null

null
Final thoughts
In conclusion, business owners in the motorcycle sector can enhance their offerings and build customer loyalty by mastering the art of touching up motorcycle fairings. Proper surface preparation, filling minor damage, and expertly matching paint are key techniques that ensure repairs maintain the high standards expected in the industry. Investing time in learning these skills not only preserves the visual appeal of the motorcycles but also upholds their resale value, providing long-term benefits for your business.