
Maintaining the structural integrity and aesthetic appeal of motorcycle fairings is crucial for any business dealing with motorcycle repairs. This guide provides actionable insights specifically tailored for business owners on how to repair plastic fairings effectively. Understanding the different types of damages, from cracks and small breaks to larger blows and surface wear, is vital for providing excellent service while ensuring customer satisfaction. Each chapter dives deep into the specifics of these repair methods, enabling business owners to enhance their skills and offer comprehensive services.
Restoring Hairline Cracks and Small Breaks: A Practical Path to Motorcycle Plastic Fairings
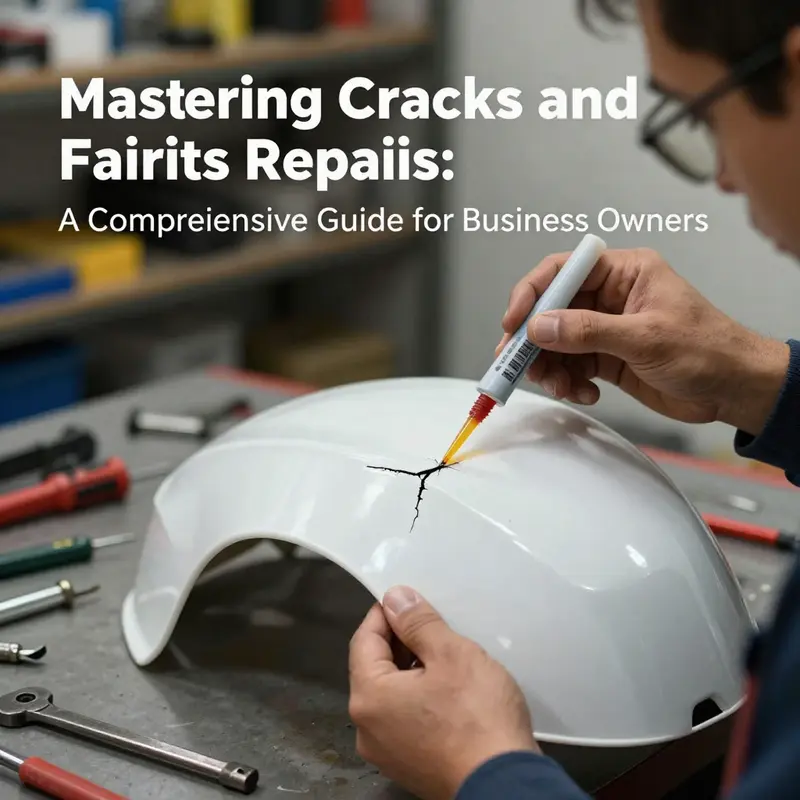
Hairline cracks and small breaks in motorcycle plastic fairings are a common, almost inevitable part of riding. They rarely announce themselves with dramatic splits; more often they begin as subtle lines that widen with vibration, a telltale sign of stress, impact, or temperature cycles. The goal in repairing these imperfections is not merely to restore cosmetics but to preserve the panel’s structural integrity and its ability to shield components, channel airflow, and resist UV exposure. A well-executed fix can traverse the line between a visible blemish and a durable repair that stands up to road grime, weather, and the next ride. This chapter journeys through the practical approaches a rider can take for cracks and small breaks, emphasizing method selection, careful preparation, and disciplined finishing so the repair remains invisible enough to be worthy of the ride and robust enough to outlast it.
When you encounter a hairline crack or a small break, the first step is assessment. Is the crack shallow or does it penetrate the surface and start to open along the seam? Is there any peel or delamination around the area that would undermine a bond? These questions matter because adhesive fixes rely on clean, uninterrupted surfaces and a solid substrate. For small cracks that fit tightly, an adhesive bond can be surprisingly strong. The simplest path is a two-part epoxy or a specialized plastic adhesive that cures to a rigid, high-strength bond. The process begins with meticulous surface preparation. Clean the area with isopropyl alcohol to remove oil, dust, and wax, then let it dry completely. Any residual moisture or grease can interfere with adhesion and lead to a repair that peels away under the next heat cycle. Lightly scuff the adjacent surfaces with a fine abrasive to create a micro-keys for the adhesive. The idea is not to gouge the plastic but to present a slightly roughened plane that the bonding agent can bite into. With the crack clean and dry, apply the chosen adhesive along the crack line, pressing the pieces together with steady, even pressure. Hold or clamp the joint until the adhesive begins to set, and if possible, add a small backup reinforcement. A common approach is to lay a tiny patch of fiberglass mesh or a strip of copper wire mesh over the joint before the adhesive cures. The mesh acts as a scaffold, distributing load and helping prevent micro-movements that could reopen the crack under vibration. Use only enough reinforcement to secure the joint without creating a lump that affects surface smoothness. This method has the virtue of being straightforward and cost-effective, making it a practical first option for many riders.
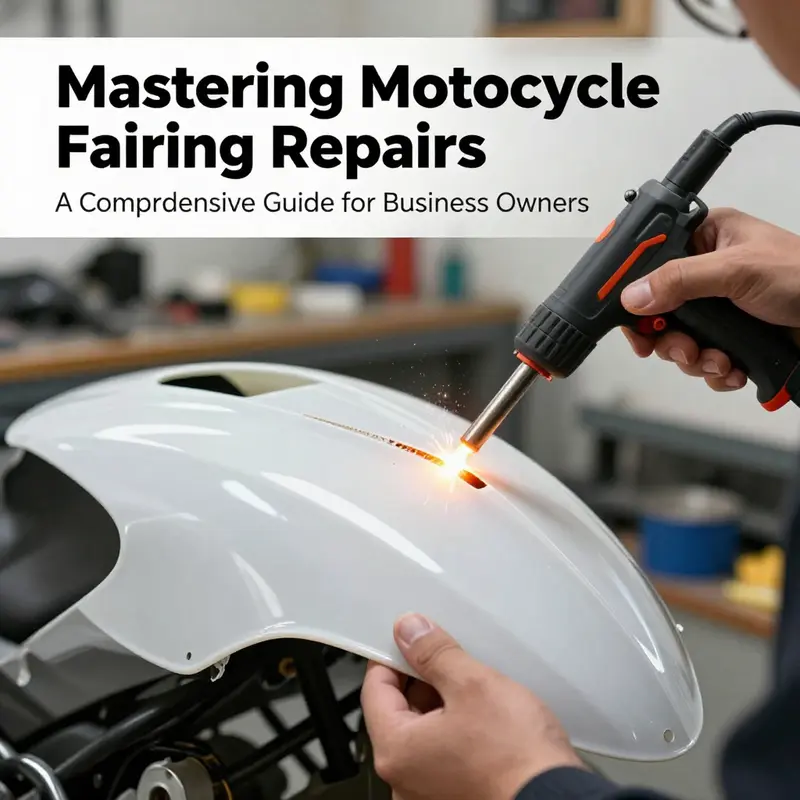
The benefits of adhesive repair lie in its speed and ease. It is well suited to narrow fissures that do not distort the fairing’s shape and when the surrounding material is intact. Yet there are tradeoffs. Even the strongest epoxy or cyanoacrylate-based adhesives will not restore the full strength of the original plastic, and a visible seam can remain, especially on lighter colors. If the crack runs along a seam where two pieces meet, the adhesive bond may not be enough to bear any significant load or impact. In such cases, a more robust technique becomes attractive: plastic welding. Plastic welding uses heat to fuse the broken edges by melting them together, creating a bond that can be nearly as strong as the surrounding material when done correctly. It is a technique that rewards patience and precise temperature control. The process begins with cleaning and aligning the pieces as you would for an adhesive fix, but the next step is to introduce heat with a plastic welding tool. The kind of tool depends on the materials involved; ABS and polycarbonate, which are common in fairings, require a compatible welding rod and careful heat management. The aim is not to melt the entire panel but to soften the edges just enough for the material to flow and fuse. As you approach the crack, gently feed the welding rod into the joint, tracing the seam with a steady hand and maintaining a slow, uniform travel. The rod should bond with the plastic, creating a continuous bead that seals the crack from the inside of the material rather than simply bridging it from the outside. It is crucial to watch for discoloration or excessive sagging, which indicate overheating. A short pause to check the seam and then a second pass can help establish a stronger, uniform bond. In practice, plastic welding produces a seam that is both functionally robust and aesthetically smoother than an adhesive alone, particularly for cracks that would otherwise compromise the panel’s rigidity.
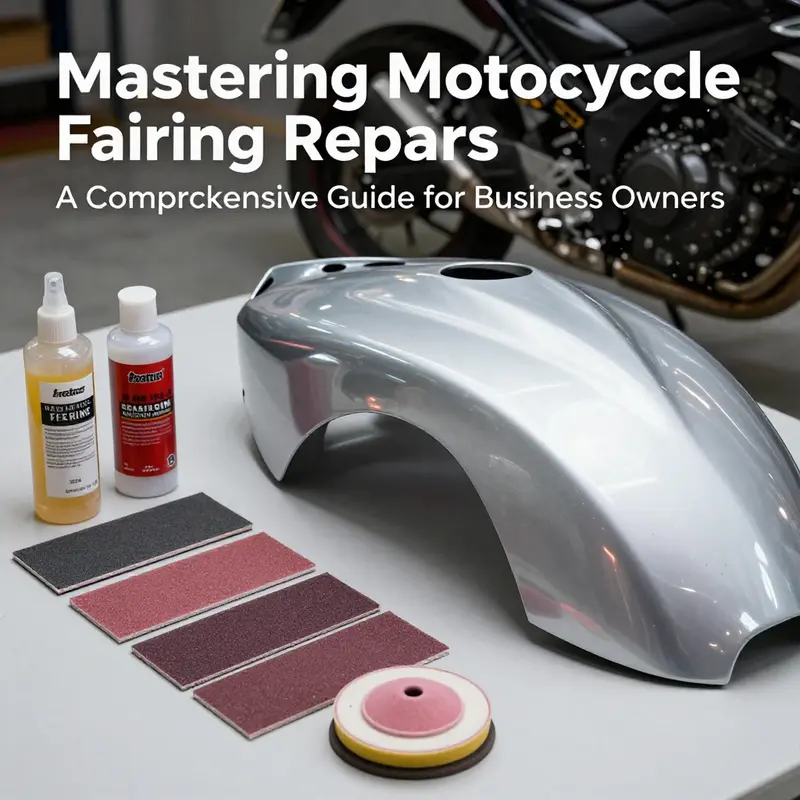
Even with adhesive or welding, there are times when the crack is too irregular or the surrounding area has been weakened by impact, making a structural fix impractical or unsafe. In these instances, a filler repair can restore shape and provide a ready surface for finishing. A body filler designed for automotive plastics can be applied in thin layers to fill dents, gouges, or shallow areas surrounding the crack. The secret of successful filler work lies in layers and cure time. After cleaning and preparatory sanding, apply a thin, feathered layer that extends slightly beyond the damaged region. Allow the filler to cure fully according to the product’s instructions, then sand it with progressively finer grit paper. Start with a medium grit to reduce high spots and gradually move to a fine grit to achieve a surface flush with the surrounding fairing. This approach lets you reshape the panel so that the repaired area is barely noticeable once painted. It is important to note that filler repairs add another layer to the fairing and can require additional priming and painting to achieve a seamless finish. The tradeoff is the ability to correct not only cracks but also irregularities that could otherwise trap moisture or start new cracks under stress.
After these repair methods, the question of color and gloss inevitably arises. The color match is essential for a repair to blend with the rest of the fairing, especially on models with solid, bright, or metallic finishes. Even the most careful repair can appear off if the base color and clear coat do not align with the factory finish. The finishing sequence generally begins with a light sanding of the repaired area to create a uniform key for the subsequent coatings. A plastic primer helps subsequent paint adhere more evenly and reduces the risk of solvent-induced hazing. With a proper primer, you apply thin, even coats of paint in multiple passes, allowing a brief flash-off period between coats. Patience is key here; several light coats are preferable to a single heavy application, which can result in runs or orange-peel texture. Once the base color is dry, a clear coat seals the finish, adds depth, and provides UV protection. The clear coat should be applied in light, even layers to minimize orange peel and to encourage a uniform gloss across the entire panel. In the end, the repaired area should reflect a consistent sheen and color with the surrounding surface, making the repair difficult to detect at normal inspection distances.
There are a few practical considerations that shape the repair path. First, the type of plastic matters. ABS and polycarbonate respond differently to heat and adhesives. ABS tolerates solvent bonding and moderate heat better, while polycarbonate can warp more easily if overheated. A quick way to gauge the material is to check a section of the fairing that is not highly stressed; warmth during installation may darken or soften the surface slightly, hinting at the underlying plastic type. If you can identify the material, you can choose a method with higher odds of success. Second, ventilation and safety cannot be neglected. Plastic work often involves solvents, fumes from warm plastics, and fine particulates created during sanding. Work in a well-ventilated space and wear protective gloves and a mask. Third, test a small area first. This is especially important for paint and primers, which can react differently on plastic than on metal or fiberglass. Finally, be mindful of heat sources and tools. A high-temperature heat gun can cause scorching or bubbling if held in one spot too long. Move the heat source smoothly along the seam to distribute warmth evenly and prevent distortion. These safeguards help preserve the fairing’s profile and prevent new flaws from appearing after the repair.
In some cases, professionals are worth considering for larger or more complex repairs, particularly when a crack is near a mounting point or a seam integral to the fairing’s structural performance. A seasoned technician can assess the panel, confirm the best repair approach, and blend the finished work with the surrounding surface, ensuring the repair remains durable and visually coherent. That said, many riders handle small repairs themselves with a measured mix of adhesive bonding, welding, and filler work. The satisfaction of a neat, nearly invisible fix—coupled with the knowledge that the repair will hold up to wind, rain, and vibration—can be quite rewarding. If you are exploring options beyond DIY, you can explore fairings for Honda CBR models to consider potential replacements or perfect-fit components that offer a fresh canvas while preserving the aesthetic and aerodynamic intent of your motorcycle. Fairings for Honda CBR models.
Beyond the immediate repair, preparation for ongoing maintenance helps extend the life of the fairing and keeps future repairs manageable. After reassembly and curing, inspect the area periodically for signs of new cracking or aging around the repair. Check for color fading, resin softness, or minor warping after hot days. If any of these signs appear, address them promptly. A light polish over the repaired region after painting can help blend the surface with the adjacent areas, enhancing the overall appearance and reducing the chance of dirt retention at the repair seam. In the long run, the aim is to keep the fairing resilient as a single, continuous shell that protects internal components and maintains the bike’s overall silhouette. For those who want to widen their understanding of repair strategies, a broader reference guide on motorcycle fairing repair offers a comprehensive overview of related techniques and considerations. External resources such as established repair guides provide additional context and practical tips for more challenging repairs. See an established repair guide for further details and perspectives on different plastic types and techniques.
In sum, repairing hairline cracks and small breaks in plastic fairings requires a careful choice of method based on the crack’s characteristics and the surrounding material. Adhesives can deliver quick, clean fixes for tight cracks, while plastic welding offers a more robust seam for better longevity. For irregular areas or deeper gouges, fillers can restore the surface contour, preparing the panel for a color-matched finish. The final cosmetic result hinges on thorough preparation, progressive layering, and controlled finishing. With patience and attention to detail, a repaired fairing can look almost like new and continue to perform in the rigors of the road. For broader context and supplementary ideas, refer to external guidance on motorcycle fairing repair.
External resource: https://www.revzilla.com/blog/motorcycle-fairing-repair-guide
null
null
From Scuffs to Shine: A Practical Path to Restoring Surface Damage on Motorcycle Plastic Fairings
Surface damage on motorcycle plastic fairings often starts as a small nuisance—a shallow scratch, a dull patch, or a slight dent that seems harmless. Yet those marks can compound over time. Dirt sticks in micro-scratches, UV exposure grays the surface, and even routine cleaning can worsen microabrasions if the wrong products are used. The goal of restoration is twofold: restore the visual appeal and restore the fairing’s functional integrity where needed. Restoring surface damage is a measured, patient process. It begins with careful assessment, then a sequence of conservative steps that match the level of damage. The approach is not just about making it look new; it is about preserving the plastic and ensuring the repair will hold up to road use, vibration, and temperature changes. In this chapter, we weave together the practical methods that let most riders salvage their fairings without jumping straight to dramatic fixes. The emphasis is on a methodical craft, where preparation is the backbone and patience the ally. As with any repair, testing on an inconspicuous area first is a simple but powerful habit, and it keeps the repair from turning into a new problem. For riders who own or repair Honda machines, the path is equally relevant, and you can explore the broader category of Honda fairings to understand compatibility and replacement options when a full swap becomes the smarter choice. The same careful mindset applies to any brand, with the specifics of color and finish adjusted to the oval of your bike’s original look.
The most common form of surface damage is a shallow scratch or a collection of tiny marks that dull the gloss. For these, a gentle, non-destructive approach is warranted. A time-honored trick is to begin with a mild abrasive and a soft cloth. A non-gel toothpaste, applied sparingly, can act like a mild polish. The technique is simple: apply a small amount of toothpaste to a clean, soft cloth and rub the scratch with soft circular motions. The idea is not to scrub deeply, but to micro-match the surface by removing a trace amount of the superficial layer. Then wipe clean with a dry, lint-free cloth and inspect. This approach is appropriate only for very light, surface-level abrasions. It is not a repair for gouges or cracks, and it should not be used as the sole method on a damaged area that shows through to the base plastic.
When scratches bite deeper, yet the surface remains intact, the repair becomes more involved but remains within the realm of DIY care. Start by thoroughly cleaning the area with a mild detergent solution and a soft brush to remove accumulated grime. Rinse and dry completely. The next step is to prepare the surface for adhesion and paint by lightly abrading with fine-grit sandpaper—roughly 1000 to 1500 grit. The goal is not to gouge the plastic but to create a microtexture that gives any subsequent filler or paint something to grab onto. Work carefully, keeping the sanding motion uniform and, if possible, in a single direction to minimize visible sanding marks. After sanding, remove all dust with a clean cloth or a tack cloth.
If the scratch is deep enough to expose bare plastic, a two-part plastic body filler, sometimes called atom putty, is used. Mix the filler per the manufacturer’s instructions, then apply it in thin coats over the scratch, feathering the edges so it blends with the surrounding surface. Allow the filler to cure fully. Once cured, sand the area smooth with progressively finer grits, back toward 1000-1500 grit, until the repaired patch is flush with the rest of the fairing. The goal here is a seamless transition, not a visible repair line. After achieving a uniform surface, apply a plastic primer designed for use on automotive plastics. This primer improves paint adhesion and helps prevent future peeling or flaking. Let the primer dry as directed by the product’s instructions.
Color and finish are the next frontier. Match the color as closely as possible to the surrounding area. Use high-quality automotive-grade plastic paint and apply in thin, even coats. A distance of about 25 centimeters (roughly 10 inches) is a practical working distance. Use a light, sweeping motion and overlap each pass slightly in a “Z” pattern to avoid drips and maintain even coverage. Allow each coat to dry for at least 30 minutes before applying the next. Typically three to four coats yield a durable, professional finish. Once the color layer is dry, seal it with a clear topcoat. The clear coat protects against UV damage, improves gloss, and adds an extra layer of resistance to minor abrasions. Apply several thin coats rather than one heavy one, and let each coat cure fully before handling the panel.
If the damage extends beyond the surface to a dent or if the plastic has a visible fracture, the repair logic shifts toward structural rehab and, in some cases, replacement. For cracks that are not severe, you can still pursue a repair that preserves the fairing. Begin by securing the break with a temporary, non-permanent material such as aluminum foil tape to prevent movement during subsequent work. Clean the edges and feather them with a small air-powered grinder or a precision sander to create a gentle slope toward the surrounding area. A reinforcing element can be placed into the crack to give the epoxy something to grab onto. A small washer or a cut piece from thin aluminum can be inserted into the crack and then melted into the plastic with a heat source such as a soldering iron or a hot air gun. This step creates an internal bond that adds rigidity to the joint. In lieu of metal reinforcement, you can carefully deposit a paste of baking soda and cyanoacrylate glue into the crack. The baking soda helps the glue fill and harden into a porous, firm joint that won’t easily reopen. After the repair cures, grind smooth and apply body filler if needed, then re-prime and re-paint as described above.
Crack repairs benefit from a conservative approach. It’s easy to overshoot with heat or to overbuild with filler, which can lead to warping or a visible blob where the crack once existed. The machine-like precision most riders crave rarely translates to a perfect fix on the first attempt. Patience and incremental work are the most reliable partners here. If the crack is large, if the fairing has separated into multiple fragments, or if the structural integrity feels uncertain, the safer course is to replace the affected fairing section or the entire fairing assembly. Replacement, while more costly, ensures that the ride is safe and the cosmetic finish is flawless, especially if the original color and texture must be matched precisely to achieve a factory-like appearance.
Color and gloss restoration after any repair bears repeating. The final appearance hinges on the paint’s adhesion, the smoothness of subsequent sanding, and the evenness of the clear coat. The process should be approached in layers, with ample dry time between coatings. Adequate drying time is critical in bridging the repair to the rest of the panel. An uneven paint laydown will show up under light as us seeing through to the repair; a uniform, consistent shade hides work better and lasts longer when exposed to sun and rain.
Beyond the mechanics of the repair, environmental control matters. A clean, dust-free, well-ventilated space minimizes the risk of contaminants settling on the surface during paint and clear coat application. A slightly warm, stable temperature accelerates curing and helps achieve a smooth, consistent finish. Wearing gloves and a mask is a prudent safety choice whenever you work with adhesives, filler, or paint. Personal safety is not merely about avoiding a chemical burn or inhaling fumes; it is also about protecting the workmanship. The better the working conditions, the less likely you are to end up with an imperfect repair that calls out to sunlight and spectators in the form of a visible repair seam or a dull spot.
As you move through repairs, you’ll notice that the most durable outcomes come from disciplined preparation and honest assessment. If the damage is minor, a lightweight approach can restore the look quickly and keep costs down. If the damage is more significant, the same principles apply, but the steps must be performed with more control and patience. The aim is always to preserve the metal-plastic interface and to ensure the fairing remains resilient under vibration, heat, and road spray. This philosophy threads through every repair decision, whether you’re tackling a small scratch on a common fairing or addressing a larger, brand-specific panel that requires color matching and precise finish work. The overarching lesson is that restoration, when done with care, can recover both form and function without resorting to a full replacement.
For riders who want a professional result without the risk of damaging their bike, consider seeking a licensed automotive detailing or body shop. Experts bring precision color matching, climate-controlled paint booths, and a workflow that minimizes risk while delivering a factory-like finish. A professional touch is especially valuable when a repair location is visible from multiple angles or when a color match is critical for the overall look of the bike. And while professional services come at a cost, the peace of mind they provide—knowing the repair will hold up to the rigors of daily riding—can be worth the investment. The decision between DIY restoration and professional service depends on the damage severity, the rider’s skill level, and the importance placed on flawless color accuracy. In the end, the right path is the one that keeps you confident when you ride and proud when you park.
A final reminder: surface restoration is not merely about eliminating scratches. It is about returning the fairing to a protective, aesthetic shell that can withstand the elements and the everyday wear of riding. If you start with solid preparation, test your materials in inconspicuous spots, and work in controlled conditions, you dramatically improve your odds of a long-lasting result. This approach also leaves room for future touch-ups, should the bike encounter more scrapes or UV fade. The cycle of care becomes a habit rather than a one-off fix, preserving the integrity of the fairing and the visual harmony of the bike for miles to come.
To continue your exploration of plastic repair and alignment with the broader ecosystem of fairings, you might also investigate related options for different brands and styles. The right selection can influence repair strategy, color matching, and the ultimate finish. If you’re curious about specific models or want to compare finishes across brands, a broader look at fairings in the market can illuminate your choices and refine your approach to future maintenance.
External reference for deeper technical guidance: For a deeper, step-by-step reference that consolidates many of the ideas discussed here, see RevZilla’s Motorcycle Plastic Repair Guide. The guide covers a wide range of scenarios, tools, and techniques, and it serves as a practical touchstone when you’re weighing options for repair, refinishing, and color matching. https://www.revzilla.com/blog/motorcycle-plastic-repair-guide
Final thoughts
Repairing plastic fairings on motorcycles not only restores their physical condition but also enhances the overall value of your services. By equipping your business with the right knowledge and techniques for addressing cracks, large breaks, and surface damage, you position yourself as a reliable expert in motorcycle maintenance. This not only improves customer satisfaction but also fosters loyalty, ensuring repeat business and referrals. Implement these strategies and reap the benefits of well-maintained motorcycle fairings.