Repairing fiberglass motorcycle fairings is an essential service that can enhance the aesthetics and longevity of motorcycles, crucial for business owners in the automotive sector. This guide will provide vital insights into evaluating damage, preparing for repairs, and applying effective techniques to restore fiberglass fairings. Understanding how to adequately assess damage ensures that customers receive honest evaluations that can help them make informed decisions. Preparation techniques are paramount to the repair process, as the right steps lay the groundwork for a high-quality finish. Finally, mastering application techniques is critical for delivering durable and aesthetically pleasing results, ensuring customer satisfaction and repeat business.
null
null
Preparation for a Durable Fiberglass Motorcycle Fairing Repair
Repairing fiberglass motorcycle fairings begins with careful preparation. This opening phase sets the stage for a durable repair by ensuring access, cleanliness, masking, and materials are handled properly. Assessing the damage, clearing access, degreasing, roughening the surface, and protecting surrounding components create the foundation for strong adhesion and a smooth finish. Selecting the right resin and reinforcing cloth, following the manufacturer’s mixing ratios, and layering the cloth in controlled steps build the repair’s strength. After curing, shaping and sanding refine the surface, then filler and primer create a uniform base for paint. Finishing coats, proper curing times between layers, and final polishing deliver a repair that blends with the original fairing in appearance and performance. Ventilation, personal protective equipment, and adherence to safety guidelines ensure a professional result. For complex shapes or large damage, seeking professional help or considering a replacement panel can be more economical in the long run. External references include manufacturer documentation on vehicle parts and, for comparison, catalogs of fairing options to guide fitment and color strategies.
Between Fiber and Finish: A Comprehensive Journey Through Repairing Fiberglass Motorcycle Fairings
Fiberglass fairings sit at the intersection of performance, form, and function. They are light, rugged enough for the rigors of riding, and capable of shaping the bike’s silhouette with precision. Yet their very strength comes with brittleness. When fiberglass fails, it often cracks rather than bends, a reminder that speed and impact can stretch material limits in unexpected ways. Repairing a fiberglass motorcycle fairing is not merely patching a hole or a dent; it is a careful reconstruction of the fairing’s structural integrity and its visual integrity. The best repairs honor both roles. They restore the stiffness that keeps fairings stable at high speeds and the gloss that makes a bike look as cutting as it performs. In practice, a successful repair blends an understanding of the material’s properties with disciplined technique, a blend that requires patience, attention to surface condition, and respect for the materials involved. The aim is to recreate a seamless transition from the original panel to the repaired area, so that the final result can withstand the next ride as well as the next look in the mirror. This chapter treats repair as a unified craft. It moves from diagnosing damage to delivering a renewed finish, all while keeping the process organized, predictable, and safe. It is a narrative of method, not a series of isolated tricks. It recognizes that each fairing carries its own contours, mounting points, and finish, and that these must guide every decision about reinforcement, shaping, and color. The road to a durable repair begins with honest assessment, continues through deliberate material choices and layering, and ends in a finish that resists the sun, the rain, and the inevitable micro-movements of road vibration. In this journey, you will find not only steps but a philosophy: the repair should respect the original geometry, preserve weight, and return the surface to a state where UV exposure no longer accelerates degradation. This is the essence of repairing fiberglass fairings for motorcycles, and it begins with a clear-eyed assessment of what the damage really is and what the repair must achieve.
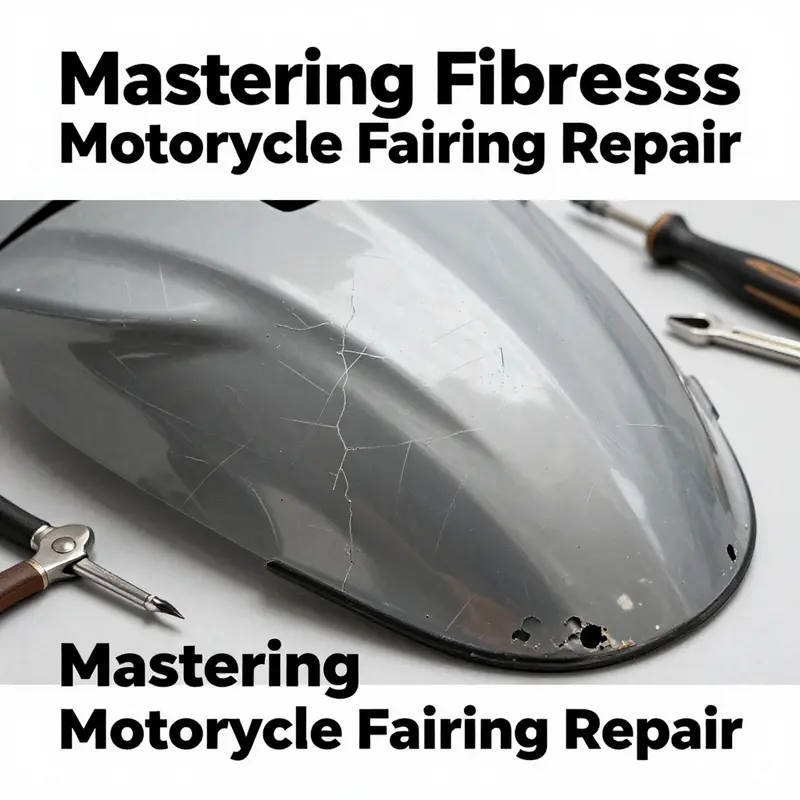
The first question is always about the severity and the scope of the damage. A superficial mark, a scratch, or a small chip might only require smoothing and a touch-up of color. A crack, a broken tab, or a missing chunk calls for a more involved rebuild that reestablishes both the panel’s stiffness and its shape. The determination shapes the entire plan. If the damage is cosmetic, the aim is to conceal and blend. If the damage is structural, the goal is to recreate the strength and the edge geometry that keeps the fairing in register with adjacent panels, the headlight fairing, and the mount points that anchor it to the bike. When you begin, consider the fairing’s role in the machine as a whole. It is not merely a shell; it is part of the aerodynamic system, a control surface that contributes to stability and handling. A repair that neglects this broader responsibility risks creating a patch that looks right but performs poorly in high-speed conditions or in the face of heat and vibration.
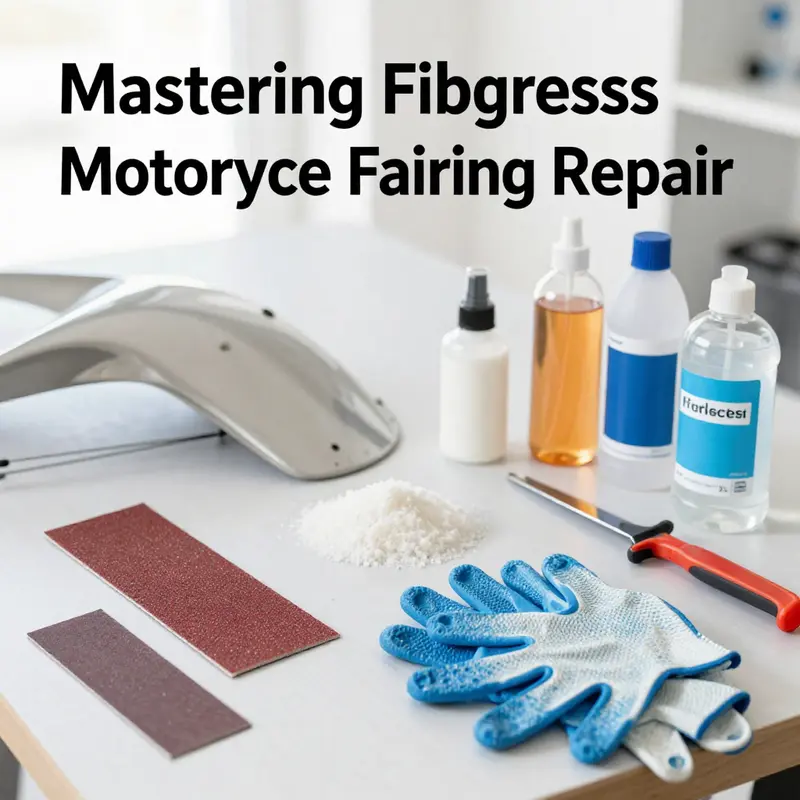
With damage assessed, the next phase is preparation. The repair environment matters as much as the repair approach. Clean the damaged area thoroughly. The goal is to remove grease, wax, silicone, and other residues that might impede adhesion. A common approach is to use a degreasing agent followed by a thorough wipe with a clean cloth. Some practitioners choose to use a solvent like acetone for its fast evaporation and evaporative cleanliness. Others prefer a milder cleaner and then a wipe with an isopropyl alcohol solution to ensure compatibility with the resin system you plan to use. The method should reflect both the resin system you intend to employ and the time you have available for cure. After cleaning, the edges of the crack or break should be shaped to provide a rough surface for bonding. A light sanding with 80 to 120 grit paper creates a microprofile that grabs resin and resin-impregnated fabric more effectively. The key here is to avoid rounding or widening the crack beyond the original geometry. The feathering of the edges—where you blend the repaired zone back into the surrounding material—begins here. Dust removal is essential. A tack cloth or compressed air helps ensure the area is free of particulates that could create weak spots or surface imperfections later. The preparation stage is the quiet work that defines the possible outcomes of what follows. If this stage is done well, the later steps become predictable rather than speculative.
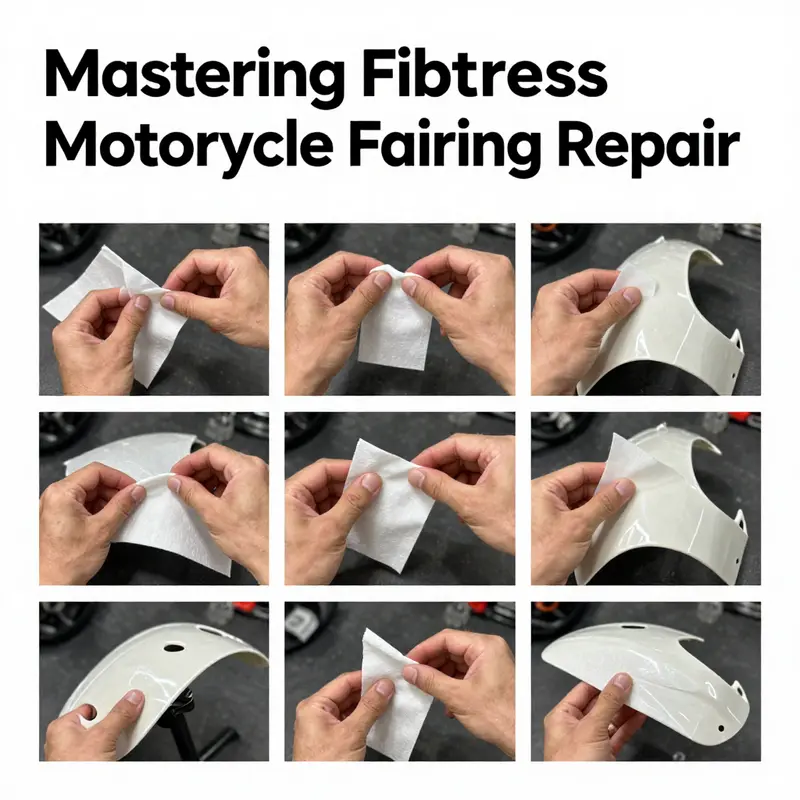
At the heart of the repair is the resin application. Fiberglass is a composite: glass fibers embedded in resin. The resin serves as the matrix that binds the fibers and transfers stress. The common choices are epoxy or polyester resins, each with its own cure characteristics, heat tolerance, and environmental resistance. A catalyzed resin system that combines resin and hardener in precise ratios offers stronger bonding and better resistance to heat and moisture, which matter when a fairing spends time near the engine and the sun. Mixing resin properly is vital. Use a disposable container and a stir stick. Follow the manufacturer’s ratio instructions to avoid a resin that cures too quickly or too slowly, creating conditions for poor bonding or incomplete curing. The idea is to develop a homogeneous mixture with no unmixed pockets, as those pockets can become weak points under load. The process of resining begins with a thin first layer. A light coat of resin is brushed or spread on the sanded area to create a wet bed for the fabric. The fiberglass cloth is then cut to fit the damaged area with a margin beyond the edges to ensure coverage. The cloth is laid over the resin and soaked through. The key maneuver is to press with a plastic spreader or squeegee to remove air pockets and to ensure the resin saturates the fabric fully. The small return on air bubbles cannot be tolerated, because air voids compromise strength and can show up as pinholes later in the finish. The first layer should cure partway before adding additional layers. Typical guidance suggests a partial cure window of about 15 to 30 minutes, depending on temperature and resin system. Each subsequent layer adds strength. For larger repairs, two to three layers are common, with each layer saturated and the previous one allowed to move toward a stiff state before adding the next. The goal is to reach a thickness that matches the original fairing in rigidity and dimensional accuracy. It is possible to overbuild, which adds unnecessary weight and can alter the fairing’s fit against adjacent panels. Precision is essential, so measure and compare with the surrounding fabric regularly to prevent off-axis build-up that would distort the line of the bike’s profile.
Once the layers have cured, the shape and surface begin to take on a more familiar form. Curing time can vary with temperature, humidity, and the resin system. In a typical setting, a fully cured patch will take roughly a day, though the surface may be sanded and worked with sooner as long as it remains stable. The shaping stage involves progressive sanding with increasing fineness. Start with 120 grit to remove the roughness and establish a smooth transition from the repaired area to the surrounding fairing. Move to 220 grit to begin refining the curvature and edge feathering. A final pass with 400 grit will prepare the surface for filler and primer. Each step should be careful and measured to avoid digging the surface or creating new low spots. Feathering the edges is critical; it ensures the repair does not show a hard boundary when the paint is applied. If an abrupt step remains, it will reflect light differently and undermine the illusion of a seamless repair. This is where patience is decisive: rushing the sanding increases the likelihood of scuffing the fairing’s original texture or leaving a visible seam that defeats the objective of an integrated finish.
After the sanding comes the fill and prime stage. Minor depressions or undulations often remain after the initial resin build-up; these require a body filler or filler putty to fill dips that catch the eye. The goal is not to create a perfectly flat surface but to recreate the fairing’s even curvature while preserving the contour that the eye reads from a distance. The filler should be allowed to dry fully before a subsequent sanding. Then a layer of primer designed for plastics or fiberglass is applied. Primer is more than a color base; it is a bonding layer that improves the adhesion of the paint system and helps identify any lingering imperfections. A careful inspection under good lighting will reveal where fillers or sanding marks remain, providing a clear map for touch-up work. The primer coat also acts as a barrier to moisture and aids the prevention of delamination in the finished surface. In some cases a second primer coat is worthwhile to ensure uniform color and to maximize adhesion, especially when repairs are larger or involve complex contours.
Color and finish come next, and this phase is where the repair begins to resemble a complete, newly installed fairing. Automotive grade paints, matched to plastics or fiberglass, are applied in multiple thin coats. The principle here is steady, controlled layering rather than thick, abrupt applications. Curing time between coats is essential; waiting too long or not enough time between coats can cause sagging, dry spray, or poor color alignment. A clear coat is applied to provide UV protection and gloss. The clear coat not only deepens color and gives a showroom finish but also guards the finish from the hazards of sun exposure, abrasion, and the heat of nearby exhausts. A final light buff after the clear coat has cured yields a high-gloss, durable finish that can stand up to the environment and the soil and grit of road use. Buffing should be cautious and controlled; excessive heat can soften the clear coat and degrade the adhesion of later layers. The objective is a uniform, glassy surface that invites reflection rather than showing the patchwork beneath.
A successful repair also depends on thoughtful assembly and reinstallation. Before reattaching the fairing, verify that mounting points align with the bike’s frame and brackets. Mounting a repaired panel incorrectly can reintroduce stress and cause microcracks at the edges, a risk that undermines the repair’s integrity. The reinstallation is a moment to re-check gaps, lines, and flushness with adjacent panels. After the fairing is secured, a protective sealant or wax can be applied to guard the finish from minor abrasion and to ease future cleaning. The wax must be compatible with the paint system and not interfere with UV protection, adhesion, or the underlying filler. The overall objective is not merely a cosmetic restoration but a durable, reliable finish that can endure hours of exposure to wind, heat, rain, and the careful but demanding life of a motorcycle on the road.
Throughout the repair process, a set of practical guidelines helps keep the work predictable and safer. Work in a well-ventilated area to manage fumes from resin and solvents. Wear gloves and safety goggles to protect skin and eyes from splashes and dust. Colors should be tested on a scrap piece or an inconspicuous area before committing to a visible surface; this ensures the hue, intensity, and undertone match the rest of the bike. If the repair seems especially complex or if the panel is large or has critical mounting features, do not hesitate to seek professional advice or consider a repair kit that is specifically designed for motorcycles. The domain of composite repair is nuanced; it benefits from standard practices and a careful adherence to the manufacturer guidelines and safety standards established for composites and vehicle components. Accelerated curing and unusual strategies may yield faster results, but they can also lead to weak bonds, delamination, or surface defects that undermine the repair later. When in doubt, treating the work as a precise re-creation rather than a quick patch pays dividends in the long run.
For those who want to see how these steps translate into real-world practice, a closer look at the options available for specific makes and models can be useful. If the repair you are undertaking resembles a Honda fairing style or if you want to compare contours and mounting considerations across common models, you can explore Honda fairings on the internal shop page at Honda fairings. This link provides a sense of the typical geometry and attachment locations that influence how a repair should be shaped and structured, especially when you are creating a patch that must sit flush with a neighboring panel and maintain proper alignment with turn signals, mounting brackets, and windtunnel-inspired lines. It is not a substitute for a direct repair protocol, but it can help you anticipate the curvature and edge transitions you will eventually reproduce. The objective remains the same: to preserve the fairing’s aerodynamics and the rider’s confidence in the bike’s handling after a repair has been completed.
As you close the loop on the repair, consider how the surface will age. The environmental demands on a motorcycle are relentless. UV exposure, temperature fluctuations, and road debris all conspire to degrade even a pristine finish over time. A durable repair will anticipate these forces, offering a finish that resists yellowing and micro-scratches and a resin system that remains stable under heat and moisture. The final finish should feel cohesive, with no visible seam lines, no sharp reliefs where the repaired area meets the original shell, and no color mismatch that catches the eye from more than a short distance. The best repairs are not only strong but nearly invisible to the casual observer, a testament to careful workmanship and sound materials.
In the broader context of repair practice, it is helpful to anchor your approach in established guidelines and safety standards. Recurrent notes from the Motorcycle Industry Council and OEM-certified manuals emphasize that repairs should preserve impact resistance, avoid delamination, and maintain the structural integrity of the fairing assembly. The Society of Plastics Engineers offers extensive technical standards and best practices for composite repair in automotive and motorcycle applications, providing a framework that can guide both novices and professionals toward more reliable results. For those who wish to study these standards in depth, the external reference remains available at https://www.4spe.org/. These resources help keep the practice aligned with professional expectations and ensure that the repair you undertake not only looks correct but also performs correctly under the stresses of riding and time. The aim is a repair that is as durable as the original, and perhaps even more resilient, given a renewed attention to proper bonding, surface preparation, and finishing techniques. A thoughtful and disciplined approach to fiberglass fairing repair yields a result that is more than a temporary patch; it yields a renewed surface that can take on the road with renewed confidence and a sense of getting it right the first time.
In sum, repairing fiberglass motorcycle fairings is both a science and an art. It requires recognizing the difference between cosmetic damage and structural damage, choosing the appropriate resin system and layering strategy, and executing each step with patience and precision. When done well, the process reestablishes the panel’s strength, preserves its geometry, and restores a seamless look that makes it hard to tell that a repair was ever made. It respects the material’s properties while acknowledging the realities of riding life. It treats the fairing not as a disposable cover but as a high-value component that contributes to the bike’s aerodynamics, balance, and aesthetic. And it is in this philosophy that the repair becomes more than a fix; it becomes a responsible practice that extends the life of the bike and honors the craft of fiberglass work.
Final thoughts
Repairing fiberglass motorcycle fairings is a valuable skill for business owners in the automotive industry, creating opportunities for enhanced customer loyalty and satisfaction. By diligently assessing damage, preparing correctly, and applying the right repair techniques, businesses can effectively restore fairings to their original condition. A commitment to high-quality repairs will not only improve the aesthetic appeal and longevity of motorcycles but will also position your service as a trusted choice for motorcycle enthusiasts.