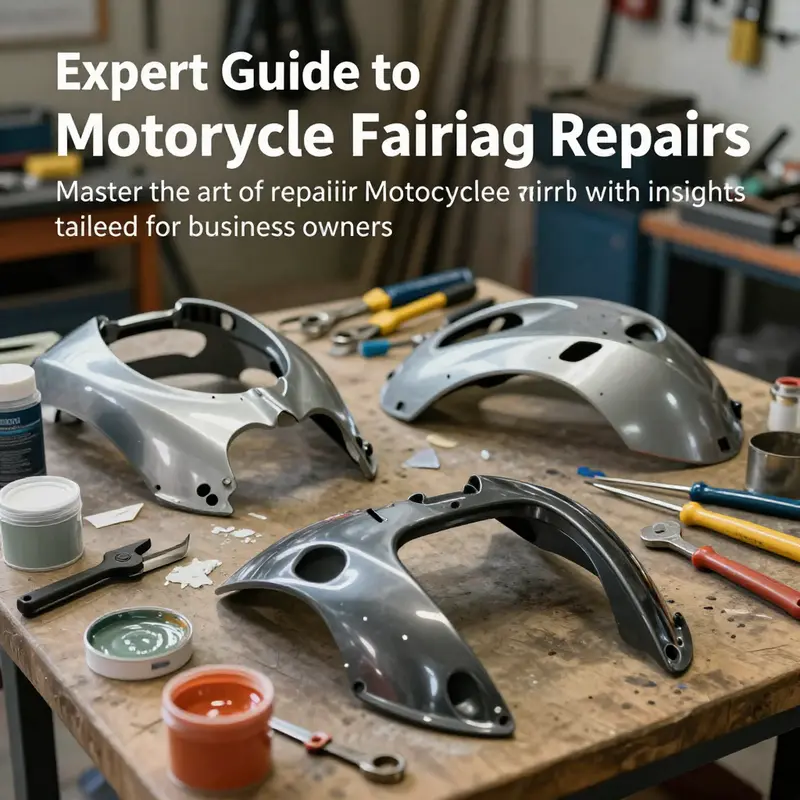
Understanding and addressing fairing damage is crucial for maintaining the aesthetics and performance of motorcycles. As business owners in the motorcycle industry, your expertise in fairing repairs can enhance customer satisfaction and loyalty. Each chapter will guide you through the essential steps, starting with damage assessment, effective plastic repairs, advanced carbon fiber techniques, and temporary fixes for emergency situations. By mastering these methods, you can deliver quality service and ensure that your customers are back on the road safely and efficiently.
Reading the Cracks: A Thorough Assessment of Motorcycle Fairings Before Repair
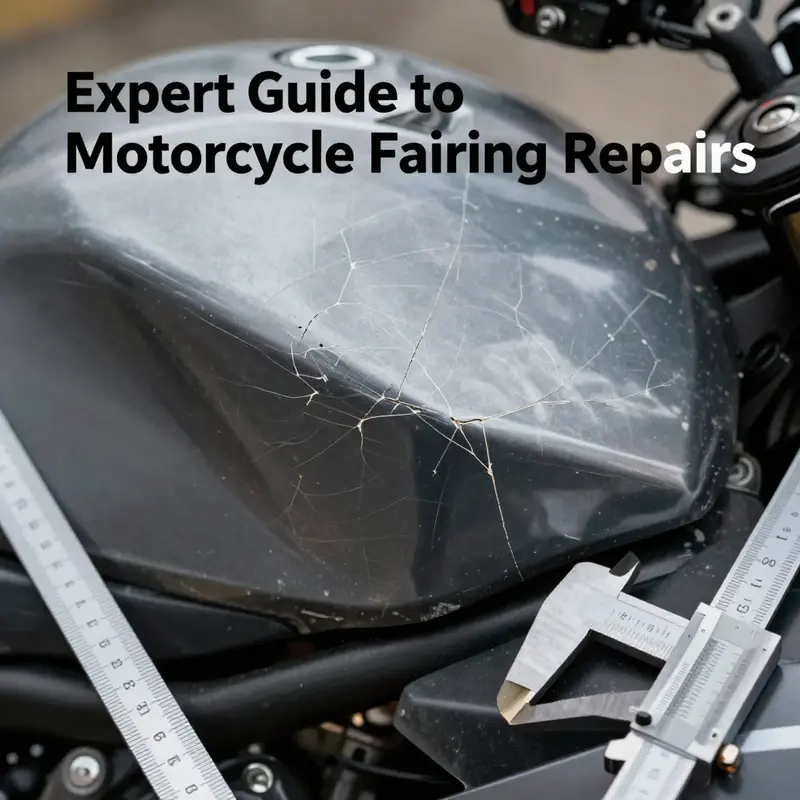
Damage to motorcycle fairings is rarely a single event with a single outcome. It is more like a warning signal that travels through the bike’s aerodynamics, protection, and even rider comfort. A careful assessment, done before any repair plan is chosen, sets the foundation for whether you can fix what remains or if replacement is the safer path. The fairings on sport and touring motorcycles serve more than cosmetic purposes. They shape airflow, influence cooling, reduce drag, and contribute to rider safety by guiding the rider away from hot or moving engine components. When a crash, slide, or mishap occurs, those benefits can be compromised in ways that aren’t always obvious at first glance. Plastic fairings—often made from high-impact polycarbonate or ABS—are prized for their resilience, but their response to damage is nuanced. Carbon fiber, prized for strength and stiffness, introduces another layer of complexity because damage can hide within layers, and the structure can fail without obvious surface cracks. Assessing damage thus becomes more than judging whether a scratch is visible. It is about understanding how the damage travels through the material, how it affects mounting points, and how it might influence airflow and rider protection going forward. A systematic approach helps riders avoid overestimating repair potential or underestimating a latent fault that could surface at speed. The first question is how the damage presents itself on the surface. Superficial scratches, chips, or small cracks often respond to repair strategies that focus on abrasion, filler, and refinishing. Deeper cracks, perforations, or a loss of mounting tabs, on the other hand, suggest more serious issues. Yet even a surface flaw can indicate something worse beneath. When a fairing layer has started to delaminate or a carbon fiber panel shows internal fractures, the layup’s integrity can be compromised. In such cases, a repair might restore appearance but leave the structure vulnerable to future impact. This is precisely where the decision to repair or replace begins, and it hinges on a careful appraisal of the material type, the extent of damage, and the role the particular fairing plays in the bike’s overall performance. A crucial facet of this evaluation is not only the visible damage but also the mounting points and fasteners. Damaged tabs or misaligned interfaces alter how the fairing seats against the bike, which can disturb aerodynamics and even expose wiring or sensors. If a damaged area sits close to critical channels for airflow or near electrical connectors, the stakes rise significantly. The assessment becomes an inventory: what is damaged, what remains sound, and what risks are introduced by attempting a repair. The materials themselves guide what is feasible. Plastic fairings, particularly ABS and polycarbonate, have forgiving properties when repaired correctly. They can be sanded, filled, and refinished, and with proper primer and compatible paint, the result can be visually seamless. The process, however, must consider the flexibility and thermal behavior of plastic. Filler types, adhesion promoters, and the sanding regime are selected to maximize bonding and minimize future cracking. Carbon fiber fairings demand a different calculus. The material is stiff and strong, yet the resin system and the fiber layup can be compromised by heat, improper curing, or insufficient consolidation. Delamination, microcracks, and resin-rich pockets are not always obvious but can dramatically reduce rigidity. Repairing carbon fiber often requires more controlled processes, including patching with matching carbon cloth and carefully measured resin and hardener ratios. Even when a DIY repair seems to go right, unseen voids may undermine long-term performance. That is why a close assessment of the damage’s depth and spread is essential. One way to approach this is to visualize the fairing not merely as a shell but as a composite that can distribute loads in a specific way. A small crack near a mounting point can act as a focal point for stress, and any attempt to bend or flex the panel during reinstallation can extend the damage. In practice, that means looking for cracks that travel along the contour of the part, examining the edges where the fairing meets the frame, and checking for any shift in alignment when the bike is reassembled. A practical reality emerges: the material’s condition dictates the repair strategy. If there is visible melting or warping after a high-speed slide or friction with the road, that is a red flag. It suggests thermal or mechanical overload. Such signs warrant caution, because they reveal that the material has been pushed beyond its normal operating envelope. When the damage is localized to a small area, the assessment may proceed with a more conservative mindset. Minor surface scratches and shallow cracks can often be treated with a standard bodywork approach. This involves careful cleaning, light abrasion to promote adhesion, filler or putty to fill the defect, a smoothing sand, and a staged paint process. The aim is to restore a uniform surface that blends with the surrounding area while preserving the fairing’s shape and fit. The color-matching step is an essential part of this. An accurate color match prevents the repaired patch from standing out as a blemish when the bike sits in daylight. Here, the color test is quietly essential: spray a sample card and hold it next to the existing finish in natural daylight to compare. The color perception under neon or shop lighting can distort judgment, so daylight becomes the deciding factor. The color match test is a small discipline that pays large dividends, because even a flawless repair can appear off if the shade is misinterpreted. A note in practice is worth the moment of caution it costs. If a fairing is part of the aerodynamic envelope, color fidelity may matter less than structural integrity, but even here aesthetics carry an understated interest in how the bike is perceived and how it holds together visually at speed. For riders who want an internal reference, it is worth knowing that the repair decision should align with the fairing’s function. A quarter fairing or half fairing reduces weight and often improves engine access, but it also provides less coverage and, in some cases, concentrates impact risk on a smaller, potentially more brittle area. If the damage has reached those lighter sections, the assessment must consider whether remaining material can still perform its protective role, whether it can support the loads that ashore, and whether aerodynamic balance is affected. The decision to repair or replace is not purely technical; it is a risk calculation. If the damage is extensive, especially around mounting points or along the edge where alignment governs airflow, replacement may often be the safer, more economical choice in the long run. The cost of repeated repairs, the time involved, and the potential for hidden damage can stack up quickly. In those moments, replacing a damaged fairing—or a substantial portion of it—may be the most prudent choice, preserving not only aesthetics but also the bike’s handling characteristics, cooling efficiency, and rider protection. As this decision unfolds, documentation becomes a practical companion. Photographing the damage from multiple angles, noting measurements of cracks, and recording the location of any deformation helps when discussing options with a shop or evaluating a DIY plan. Photos also become a useful reference should future maintenance reveal new issues. It is also sensible to map out the repair’s sequence before starting. Decide what surfaces will be sanded, which edges require protection, and how the repair will be smoothed into the surrounding finish. That forward thinking reduces the likelihood of missteps that could compromise a repair’s appearance or durability. A reader may wonder how to incorporate brand-specific considerations without becoming constrained by the myriad aftermarket options. For those who want to explore availability of replacement pieces or compatible panels, a practical route is to browse through the relevant fairing category for the motorcycle’s make. For example, if you’re dealing with a Honda fairing, you can explore the Honda fairings category to understand what replacement panels or patterns exist and what degree of compatibility you may expect. This single, targeted lookup can help calibrate expectations about fitment and finish, and it underscores the broader principle that the assessment should be followed by a plan tailored to the bike’s design. A broader takeaway is that the assessment should never be rushed. The stakes are not merely cosmetic. Poorly approached repairs can introduce drag, noise, or instability at speed, or even compromise rider protection if mounting points are weakened. The careful practitioner will balance the desire to restore form with the necessity to preserve function. When to seek professional help becomes a natural conclusion of this balance. If carbon fiber or composite repair feels uncertain, or if the damage touches wiring, sensors, or critical mounting interfaces, consultation with a professional is warranted. Shops that understand fairing structures can assess heat tolerances, adhesive behavior in plastics, and the nuances of bonding to carbon fiber. Even for those who are comfortable with cosmetic repairs, a professional opinion can confirm whether the repaired panel will remain robust through road vibrations, temperature cycles, and impacts typical of riding. The overarching aim remains safety and performance. A well-executed assessment leads to a repair plan that aligns with the bike’s design philosophy and the rider’s expectations. It honors the bike’s original engineering while acknowledging the realities of age, impact history, and material behavior. In the end, the assessment is the moment where intention meets reality: it decides not only how a surface will look, but how the machine will behave when the wind picks up and the throttle opens. For readers who want a practical pathway through the material realities described here, a deeper dive into brand-specific options can be helpful, such as exploring the Honda fairings category for compatible panels and fitment guidance. Honda fairings can serve as a reference point when considering what replacement or compatible pieces exist and how they may integrate with a repaired panel. Maintaining focus on the material, the mounting points, and the aerodynamics will keep the assessment anchored in safety and performance. The pathway from assessment to action is scaled by the severity of the damage, the type of material, and the bike’s design. When a crack extends into the edge or a mounting tab, the conversation shifts toward replacement. When the surface shows only superficial marks, a careful repair and refinishing can restore the appearance with a durable, road-ready finish. Either way, the chapter on damage assessment converges on a single, practical truth: knowledge gathered at this stage is what makes the rest of the repair process reliable, repeatable, and safe. External reference for further guidance and visuals on fairing damage and repair processes can be found here: External reference: Motorcycle.com repair guide
From Fractures to Finish: A Practical Guide to Repairing Plastic Motorcycle Fairings
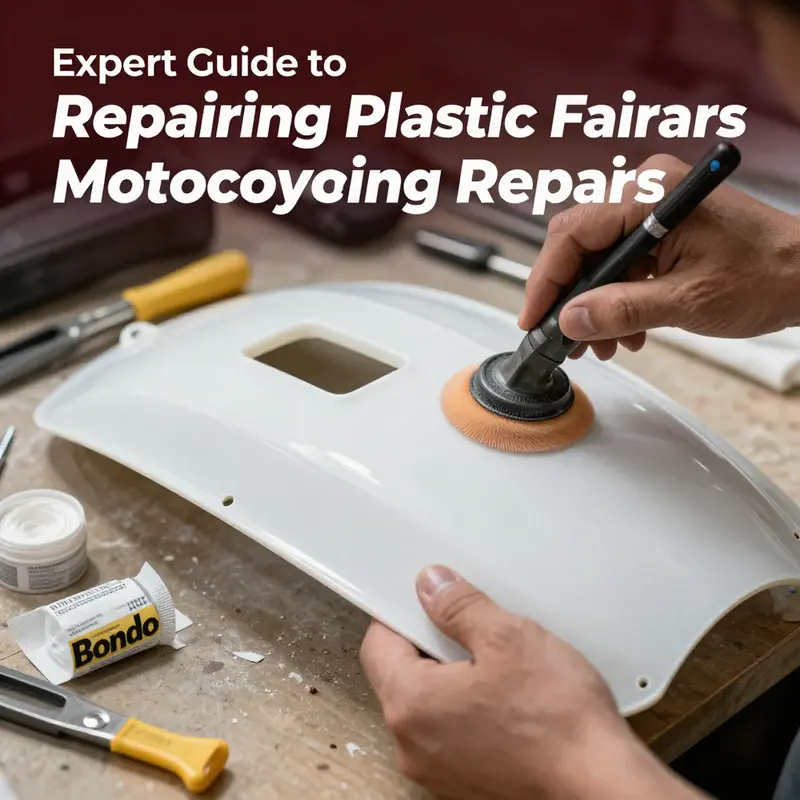
Motorcycle fairings are more than just showpieces; they are protective shells that shield the rider from wind, debris, and the road. When they suffer damage, the urge to rush into a quick fix can be strong, but the best repair begins with a clear assessment of the damage and an honest assessment of the material beneath. Plastic fairings come in a few common forms, with ABS and polycarbonate being the usual suspects in modern bikes, while some aftermarket or older bikes might use polypropylene blends. Each material responds differently to impact, heat, and solvents, so the repair plan must align with what the part is made of. Minor surface scratches and small chips have a straightforward path back to appearance and function, but deeper cracks, holes, or warped shapes demand a more deliberate approach. The principle is simple: preserve the structure first, then restore the surface, and finally protect the finish against future UV damage and weathering. If the damage is extensive enough to compromise aerodynamics or safety, replacement isn’t a sign of defeat; it’s a prudent decision that preserves handling and stability at speed. In the long run, the most cost-effective repair may be a careful blend of techniques rather than a single method. A well-planned repair begins with a thorough inspection, a clear choice of method, and patience through curing and finishing stages that demand steady hands and disciplined timing.
Don’t overlook the diagnostic step. Start by distinguishing superficial damage from anything structural. A scratch, a small crack, or a shallow dent is often repairable, but a crack that runs through a mounting tab or a large section with missing material could create alignment issues or failed air management at speed. For carbon fiber fairings, delamination or internal fractures can exist beneath the surface, and those are not the same problem as a simple plastic crack. This chapter focuses on plastic fairings, the most common and often the most forgiving to repair with accessible DIY methods. If you discover a crack that runs deep into a mounting point or a large chain of fractures that weakens the panel, the safest option may be replacement or professional repair. A fairing that can no longer maintain its aerodynamic shape can rob performance as surely as a loose bolt on the wheel. As you decide between repair and replacement, weigh the value of the part, the cost of materials, and the potential risk of a subpar repair affecting handling or rider safety.
For minor to moderate damage, a practical framework guides the process: choose the right repair path for the material, prepare the surface, apply the repair material, shape and smooth, prime, paint, and seal. The most common and cost-effective approach begins with a careful cleaning to remove oil, wax, and dirt. A simple acetone or isopropyl alcohol wipe prepares the surface and reveals the true extent of the damage. After cleaning, the next move is to roughen the surface slightly to improve adhesion. Beginning with a relatively coarse sandpaper—around 80 to 120 grit for rough divots and larger flaws—you can create a matte profile that accepts filler and primer. The trick is not to gouge or over-sand; you want a uniform transition between the damaged area and the surrounding panel. This step is crucial because a poor foundation will show through the finish—even with multiple paint coats.
When damage is localized, filler-based repair is a straightforward option. Plastic filler or epoxy putty is pressed into cracks or holes, then shaped to flush with the surrounding surface. It’s essential to follow the filler’s cure time exactly, as under-curing can lead to pinholes or a brittle finish later. After curing, the area is sanded again with progressively finer grits until it sits flush with the surrounding plastic. This finely tuned sanding process may require several passes, but the goal is a seamless blend, where the repaired patch is indistinguishable from the original panel to the naked eye. The next step is priming with a plastic-specific primer. A good primer improves paint adhesion and blocks any residual staining from the repair material. When you apply color, thin, even coats are the rule. Dense, heavy coats risk runs and uneven coverage. Allow each coat to dry fully before laying down the next, building up color in a controlled manner. Finally, a clear coat seals the color, adds UV resistance, and gives the fairing a shield against the sun and road grime. The finish should be uniform and glossy, with no visible ridges where the repair meets the original surface.
For slightly more involved damage or if the texture is compromised, plastic welding is a robust option. This technique melts filler material into a crack, fusing the surrounding material together with heat. It requires specialized equipment and a steady hand, but when done correctly, it creates a durable bond that restores structural integrity. Temperature control is critical; overheating can burn the plastic or weaken the surrounding area, while underheating may leave the repair porous and weak. After the weld, the area is ground and feathered to remove excess material, then primed, painted, and clear-coated as described above. The finishing work after welding matters just as much as the welding itself. A smooth transition from repaired to original surface is essential for both aesthetics and aerodynamics. A cautionary note: improper plastic welding can create microcracks that propagate under vibration, so if you’re uncertain, seek out a hand with experience. In some cases, especially with high-stress panels, a professional repair may yield a more predictable result.
Sanding and repainting provide a reliable fallback for surface-level damage. If the scratch is only skin-deep, the repair may be completed with careful sanding through the grit spectrum, from roughly 80 or 120 for the initial leveling to 400–600 for a refined base. Dust must be removed completely before primering. The paint system should be chosen to match the original color as closely as possible, often with a color code from the owner’s manual or a trusted body shop. After base color is laid, a clear coat protects the finish and gives it that showroom shine. The process is meticulous, but it remains one of the most accessible ways to restore the look of a fender, side panel, or upper fairing without replacing the entire panel. When color matching, a smart move is to bring a sample of the existing paint to a shop to ensure the shade aligns with the rest of the bike, especially if the bike has aged or the panels were painted a decade ago.
Replacement is sometimes the simplest long-term answer. Severe damage, warping, or major material failure may render a panel beyond practical repair. In those cases, OEM or high-quality aftermarket fairings offer a superior fit and finish, ensuring safe alignment with the bike’s aerodynamics and mounting points. The decision to replace should consider the availability of an exact match, the cost of a repair versus a new part, and the potential for hidden damage behind the visible surface. A misaligned fairing can alter airflow, introduce wind noise, or compromise shedding of debris at high speed, so ensure the replacement part integrates with the bike’s existing hardware and mounting geometry. If you pursue a replacement, use the opportunity to check mounting points and ensure hardware integrity, replacing any bent or fatigued fasteners along the way. The integration of a new panel isn’t just cosmetic; it’s about preserving the machine’s integrity and the rider’s confidence.
Material considerations can steer decisions. ABS is generally straightforward to weld and paint, and it tends to be more tolerant of repairs than PP in many scenarios. ABS’s interplay with solvents and paints is forgiving, making professional-grade finishes more predictable. Polypropylene blends, on the other hand, can present adhesion challenges. They often require specific adhesion promoters or surface preparation strategies to ensure the repair sticks and lasts. If you encounter a PP component with cracking or poor adhesion, replacement tends to be a cleaner, longer-lasting route unless you’re prepared to invest in specialized primers and adhesion promoters and to test compatibility thoroughly. The aim is to avoid a repair that looks good for a week or two but then shows cracks or peeling under heat or sun. Treat each material with respect, and tailor your approach to its chemistry rather than applying a one-size-fits-all solution.
For those moments when you’re stranded and the bike must be back on the road, temporary fixes exist but are strictly for emergencies. A high-strength two-part epoxy can seal small cracks or hold broken tabs enough to get home or to a shop. It should be used with precision and allowed to cure for the recommended time before riding. Such fixes are not substitutes for proper repair and should be removed and repaired properly as soon as possible. These are tools of necessity, not of permanence. A rider’s careful judgment is crucial here: temporary fixes save time and money only when used judiciously and followed by a proper repair at the earliest opportunity.
The decision to seek professional help should not be viewed as failure but as prudence. Aerodynamic components, especially those in the front fairing that influence airflow, demand precise tolerances. If you’re unsure about handling carbon fiber or epoxy, if you’re dealing with electrical wiring embedded in the fairing, or if the damage is near critical mounting points, a professional service can save you more in the long run by avoiding misalignment, electrical hazards, or further structural compromise. Many shops offer fairing repair and paint-matching services. If you decide to explore options, consider a shop that can handle both the structural repair and the finish so you maintain a consistent appearance and performance across all fairing panels.
A practical tip that helps at every stage is to document the repair process. Take photos before disassembly, during each step, and after the final finish. This not only helps you reverse steps if you need to reassemble, but it also creates a reference for future maintenance. Keeping a record of the exact materials used, cure times, and any deviations from the standard process helps you replicate or adjust a repair in the future. It’s a small habit that pays large dividends when the bike comes out of storage after a season of riding. Finally, as you complete a repair, inspect the entire body for other potential issues—small hairline cracks elsewhere, loose fasteners, or signs of heat damage near exhaust outlets. Addressing those preemptively is a hallmark of conscientious maintenance.
If you want a structured path to follow, a steady approach rooted in the material’s nature will guide you well. Start with a thorough assessment, then choose between filler-based repair, plastic welding, or, if necessary, replacement. Proceed with careful sanding, priming, and paint work, with attention to the finish and UV protection. Close the loop with a clear coat that resists weathering, and, if possible, add a final polish to bring back the panel’s luster. Even when a repair doesn’t look perfect at first, patience, precision, and the right materials can deliver a result that’s functional and visually cohesive. The goal is a fairing that not only looks good but maintains the bike’s integrity and performance, so you can ride with confidence and pride.
For a broader catalog of OEM and aftermarket parts, you can explore options like the BMW fairings catalog to gauge what’s available for replacement or compatibility with your bike. This kind of reference helps you weigh the balance between repairing and replacing, particularly when a panel is discontinued or when color-matching demands careful sourcing. This chapter has aimed to present a coherent, practical path through the repair process, with emphasis on techniques that produce durable, well-finished results. Whether you settle on a precise plastic weld, a carefully layered fill and repaint, or a thoughtful choice to replace a panel, the practicalities of material behavior, surface preparation, and finish quality govern the outcome more than any single technique.
Further reading and a broader skills base can be explored through reputable repair guides that cover plastic fairings in depth and offer visual demonstrations of welding and finishing. As you develop proficiency, you’ll find your process becomes more efficient, the results more consistent, and your motorcycle’s appearance and aerodynamics preserved for many rides to come. By embracing a disciplined, material-aware approach, you turn what starts as a setback into an opportunity to refine your craft and extend the life of your machine. In the end, the repair isn’t just about salvaging a panel; it’s about sustaining the rider’s connection to the bike and keeping performance uncompromised on every road you ride.
Internal link reference: For a catalog that can help you source appropriate fairing panels by brand, consider exploring the BMW fairings collection relevant to your model.
External resource: For a comprehensive external guide that complements this chapter, see RevZilla’s Motorcycle Plastic Fairing Repair Guide.
From Delamination to a Streamlined Surface: Mastering Carbon Fiber Fairing Repairs on Motorcycles
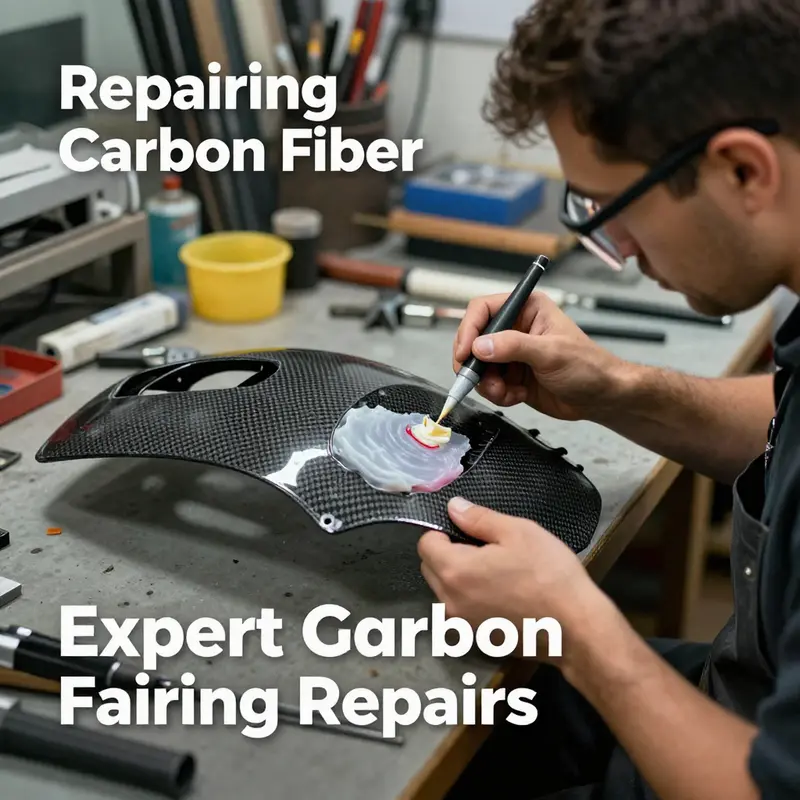
Carbon fiber fairings sit at the nexus of performance and aesthetics on modern motorcycles. They are exceptionally strong for their weight, yet the very structure that gives them their advantage also makes repairs a meticulous craft. Repairing carbon fiber fairings demands a precise assessment of damage, an understanding of material behavior, and careful control of the environment during curing. When approached with patience and discipline, a damaged wing can be restored to function and appearance, sometimes even exceeding the threshold of a quick cosmetic fix, but the process must be tailored to the nature of the injury. The journey begins with a careful diagnosis, because superficial scratches can be treated very differently from delamination or structural cracks. A rider who misreads the severity may either waste time on inadequate fixes or, worse, compound the damage by applying the wrong repair strategy. In the realm of carbon fiber, there is no one-size-fits-all cure; each case demands a bespoke plan that honors the fabric’s unique weave, resin uptake, and curing behavior.
The assessment starts with a close look at the surface and the edges where the wing meets the surrounding structure. If the surface reveals only light abrasion that does not penetrate the weave, the path toward restoration is relatively straightforward. The weave remains intact, and the goal is to restore the gloss and protect the finish from future wear. If delamination is suspected—where the layers of carbon fiber have separated from each other or from the resin—the repair becomes more complex, because the bond between plies controls both strength and stiffness. Internal voids, even if not immediately visible on the exterior, can undermine impact resistance and fatigue life. When cracks extend into the edge or mounting areas, the repair must address not just the aesthetic continuity but the load paths that transfer aerodynamic and dynamic forces during riding. In the rare but critical case of a deeply damaged structural section, a scarf repair or a full inlay patch becomes the more robust option, because it reestablishes a tapered, gradually transitioning bond that resists crack propagation and maintains the original contour.
In practical terms, the first step is to distinguish the three broad categories of damage: superficial surface scratches, delamination or internal voids, and structural damage. Superficial scratches, if isolated to the top surface without fiber exposure, can often be repaired with resin-filled touch-ups and careful polishing. Delamination manifests as a hidden failure that may not be immediately obvious to the eye; you can sometimes hear a hollow sound when tapping along the edge, or feel a soft give when pressing near the suspected area. Structural damage includes deep cracks, material loss, or crushed sections where the fabric’s load-bearing capability has been compromised. In any case, temperature and humidity during curing become a central concern. Carbon fiber resins cure best under controlled conditions, typically with moderate room temperature and low humidity, where solvents can escape and resin can fully laminate the ply structure without bubbles or incomplete bonds. These environmental controls are not mere niceties; they determine the longevity and performance of the repair.
For those who prefer a repair that balances performance with practicality, superficial scratches are an ideal entry point. Begin with a thorough cleaning to remove any oils, wax residues, or dust that might interfere with adhesion. A mild solvent such as isopropyl alcohol used with a lint-free cloth helps break the bond of surface contaminants from the resin and the weave. Light sanding follows, using a fine grit to feather the edges beyond the scratch so the repaired area blends with the surrounding surface. The objective is not to remove material but to create a micro-profile that accepts resin and promotes a seamless transition once cured. Then apply a high-quality carbon fiber repair compound or an epoxy-based filler specifically chosen for composites. After curing, a careful sequence of sanding brings the area flush with the existing contour. The next steps involve a plastic or composite-curing primer, followed by a two-stage color system: primer, base coat, and clear coat. The finish should be smooth, with an even sheen that matches the bike’s overall appearance while offering UV resistance against sun exposure that could degrade the resin over time. When color matching, a practical approach is to bring a sample to a color-matching shop or rely on a code from the owner’s manual. The final gloss coat protects the repair from micro-scratches and helps the surface resist moisture and ozone in the environment. Throughout this cosmetic work, the weave integrity must remain uncompromised, and care must be taken not to overheat the panel during sanding or painting, which could cause micro-cracking in the resin matrix.
Delamination or internal voids introduce a different set of challenges. The repair path here requires a method that can reintegrate the layered structure and reestablish the resin-rich bond across the affected area. The recommended technique uses a vacuum infusion approach. The process begins by drilling small injection and vent holes along the delaminated edge to create controlled access points for resin replacement while the surrounding surface remains intact. The area is then sealed within a vacuum bag to create a consistent pressure environment, typically at a moderate vacuum level that reduces air entrapment and promotes resin flow into the voids. A low-viscosity epoxy resin is injected through the port, with resin front advancing under vacuum until the vent holes show resin bleed, indicating that the voids and gaps are filling. Once you stop injecting, you seal the ports and allow the resin to cure. Curing may occur at ambient room temperature or can be facilitated with heat as recommended by the resin system’s guidelines, but it is essential to keep the temperature within a safe range to avoid exothermic heat spikes that could compromise the layup. After curing, remove the vacuum bag, inspect the repair for uniformity, and perform careful sanding to bring the surface back to the original contour. The goal is a smooth, continuous surface without low spots that could trap moisture or cause irregular airflow. In practice, successful vacuum infusion restores structural continuity and reduces the risk of future delamination by reconstituting the resin-impregnated fabric’s interlaminar strength.
Structural damage enters a realm where a scarf repair or an inlay patch becomes the most prudent course. A scarf repair involves removing the damaged portion with a tapered, stepped profile—commonly a taper ratio around 1:8 to 1:10—so that the new fabric can overlap the existing edge smoothly. This profile lowers stress concentrations and offers a robust path for the new carbon fiber to bond with the remaining structure. After grinding away the compromised region to create the scarf, the surface is cleaned and degreased to remove any contaminants that would hinder adhesion. Cut a piece of carbon fiber fabric that matches the original weave and orientation, ensuring it covers the scarfed area with adequate overlap. The fabric is then impregnated with epoxy resin and placed into the prepared pocket. A vacuum bag applies pressure during curing to minimize air pockets and to pull the patch into intimate contact with the host skin. Curing conditions follow the resin system’s instructions, and once cured, the surface is sanded progressively to restore contour and a factory-like finish. Polishing and, if needed, a final clear coat bring the repair to a near-seamless appearance. The scarf approach is demanding and demands precision, but it is the most reliable method for restoring load paths and maintaining the aerodynamic surface that was designed into the fairing from the start.
Throughout all these repair pathways, temperature and humidity control play a starring role. Resin systems respond to environmental conditions; too much humidity can introduce porosity, while low temperatures can slow cure times and reduce the strength of the final bond. A comfortable work environment—ideally around 20 to 25 degrees Celsius with humidity kept below about 60 percent—helps ensure consistent curing and minimizes the risk of micro-bubbles. Personal safety remains non-negotiable: wear gloves, eye protection, and a respirator when dealing with resins and solvents. Work in a well-ventilated area, away from open flames or heat sources that could accelerate curing or cause accidental burns. The discipline around handling resin is not merely about comfort; it is central to the durability and reliability of the repair, particularly when the fairing is exposed to temperature swings and vibration during operation.
If the damage is extensive, if the fairing is part of the aerodynamic design that guides airflow toward critical engine or rider-cooling interfaces, or if there is any doubt about the integrity of mounting points, seeking professional help is prudent. Some shops offer specialized composite repair services that include diagnosis, technique selection, and color-matching with skilled finishing. In the pursuit of restoring performance, you may also consider replacement parts when repair would compromise safety or longevity. Replacement fairings are commonly available in a range of shapes and finishes, including OEM-style options that preserve original geometry. For riders considering replacement, OEM-grade variants—and particularly those that preserve the original contour and mount points—are the most straightforward path back to peak aerodynamics. If you decide to source replacements, you can explore available options such as BMW S1000RR fairings to suit the bike’s model and year. BMW S1000RR fairings can serve as a reference point for fit, color, and mounting considerations as part of a broader decision-making process.
In the broader context of maintenance and repair, it helps to have a mental map of when to push forward with a repair and when to step back. Cosmetic blemishes, light surface scratches, and even minor delamination that does not threaten structural cohesion can be worth fixing, particularly for riders who value their bike’s aesthetics and resale value. By contrast, a crack that travels through the layers or a damaged mounting flange is a red flag. In those cases, a scaf or patch repair may be possible, but the economics and risk should be weighed against a replacement fairing, especially if the damaged area is near critical mounting points or affects the bike’s aerodynamic performance. The decision to repair versus replace is not purely cosmetic; it implicates safety, handling, and long-term reliability. When in doubt, consult with a professional who can perform a damage assessment, advise on the most appropriate repair method, and help ensure that the final finish aligns with the bike’s color, texture, and aerodynamic expectations.
As this chapter moves toward a close, the practical philosophy remains simple: approach carbon fiber fairing repair with respect for the material’s strengths and its vulnerabilities. Treat delamination and structural cracks as potential structural defects, not mere surface problems, and treat superficial scratches as opportunities to practice the art of resin work and finish quality. The techniques described—feathered repair on scratches, vacuum infusion for delamination, and scarf repair for deeper structural damage—embody a continuum from minor aesthetic restoration to rigorous structural rehabilitation. They reflect the dual nature of carbon fiber: astonishing stiffness and excellent fatigue life when the resin bonds stay intact, and a vulnerability to improper bonding and moisture ingress if the cure is compromised. With patience, precise technique, and appropriate curing conditions, a carbon fiber fairing can return to its former strength while preserving the bike’s silhouette and performance.
For readers seeking to broaden their knowledge, a deeper dive into professional-grade approaches is available in an external resource that consolidates best practices for carbon fiber repair in motorcycles. This guide outlines tools, materials, and safety protocols used by technicians and includes step-by-step methods for scarf repairs and vacuum infusion techniques, providing a useful benchmark for the more technically inclined reader. While the methods here emphasize at-home feasibility, the external resource can serve as a reference point for manufacturing-grade standards and more rigorous inspection criteria. By cross-referencing the techniques described with trusted professional guidance, riders can calibrate their expectations and choose the repair path that best suits their bike, their skill set, and the mission profile that the machine serves.
In sum, repairing carbon fiber fairings is less about chasing a flawless cosmetic patch and more about restoring a continuum of strength, aerodynamics, and appearance. The careful separation of damage types, the selection of an appropriate repair strategy, and the disciplined adherence to curing conditions all contribute to a result that feels engineered rather than improvised. The end of the process is not merely a smooth surface; it is a restored structural integrity that enables the rider to push the bike back toward its original performance envelope with confidence. If the repair succeeds, the rider not only saves money but preserves the sense of precision that carbon fiber embodies on two wheels.
External reference for further study: Motorcycle Carbon Fiber Repair Guide – Motorcycle.com. This resource details professional techniques including scarf repairs and vacuum infusion, offering a broader technical perspective on the repair strategies discussed here.
Temporary Fixes that Keep You Rolling: Safe, Practical Field Patches for Motorcycle Fairings
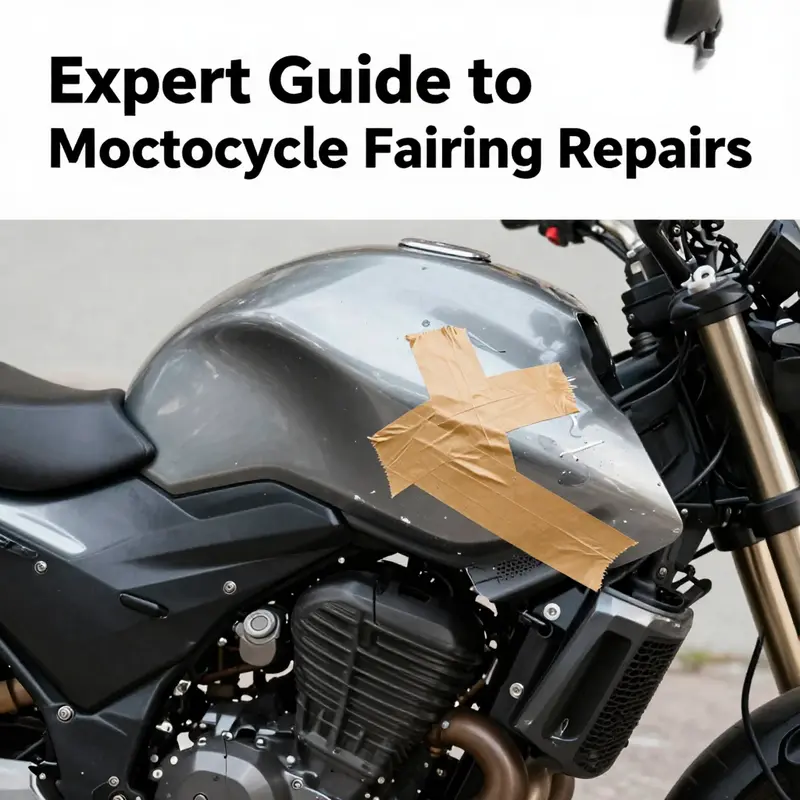
A ride can go from serene to stressful in a heartbeat when the fairing takes a hit. The plastic shells that shape the bike’s aerodynamics and protect delicate internals are surprisingly forgiving, but they are not indestructible. Temporary fixes exist for those moments when you are stranded, running late, or simply want to ride home before you schedule a proper repair. They are not substitutes for real repairs, yet they can buy time, preserve alignment, and prevent further damage if applied with care. The philosophy behind temporary fixes is simple: stabilize the damaged area, maintain as much of the original surface as possible, and avoid creating new hazards while you arrange for a permanent solution. The approach differs a little depending on whether the fairing is a common plastic shell—ABS or polycarbonate—or a carbon fiber piece. For most riders, the immediate options revolve around plastic-based repairs, which are more forgiving and widely accessible. Carbon fiber repairs, while feasible at home, require stricter discipline, exact ratios, and more caution because the structural integrity of the laminate matters. In any case, the first step is always to assess. If you can safely move the bike and the damage is cosmetic or a small crack with no structural failure, a temporary field fix can be appropriate. If the damage touches critical mounting points, wiring, or a large chunk of the fairing is missing, the safer course is to avoid riding and arrange for a proper repair or replacement. The goal in a temporary fix is not perfection but protection, alignment, and the ability to ride to a workshop or home base without further damage. The materials you reach for depend on the damage pattern and the material of the fairing. ABS and polycarbonate shells respond well to plastic weld techniques and fast-setting adhesives, while carbon fiber requires careful resin work if you decide to do it yourself. The practical reality is that you often won’t be able to achieve a flawless cosmetic finish on a temporary fix. The aim is to hold the pieces together and keep the surface from razor-sharp edges or loose fragments that could snag clothing or gear. With that mindset, you begin by cleaning the area thoroughly and choosing a method that suits the damage and your tools. If the damage is minor, such as hairline cracks or small chips, a plastic welding approach is a strong candidate. Using plastic welding rods that match the fairing’s material, you can heat the crack and the rod with a heat gun. The trick is to apply steady heat and feed the rod into the crack as the surface melts. You’re effectively fusing the damaged edges with a pliable plastic that bonds with the surrounding material. Keep the heat moving to avoid scorching the plastic, and apply the rod from the back side if possible to minimize surface blemishes. Once a strand of fused material fills the crack, smooth the surface with a gloved finger or a flat-edged tool while it is still pliable. After cooling, the repaired area should be shaved back to flush with the surrounding surface using finer sandpaper. This method can restore enough stiffness to resist re-cracking during a normal ride, but you should still plan a more durable fix when you reach a shop. For more extensive cosmetic cracks or areas where the surface has pulled away from the back mount, a high-strength plastic adhesive can be a reliable second line of defense. A two-part epoxy designed for plastics, or a polyurethane-based adhesive, can bond flaps and chips back into place. You must first clean the surface so the adhesive can bond to a clean, dry, and grease-free area. After applying the adhesive and pressing the pieces together, clamp or tape the pieces to hold them in alignment as the adhesive cures. A careful note: many adhesives cure with heat and require time to achieve full strength. Following the manufacturer’s directions is essential to avoid a weak repair that fails at the next pothole or speed bump. If you’re dealing with a larger gap or a missing piece on the backside, you can consider adding a backing patch. Cut a small patch from a spare piece of the same plastic or a strong, compatible substitute. Apply a generous amount of adhesive to the patch and press it behind the crack so it shares the load. Then seal the front with a flexible sealant or epoxy to prevent moisture intrusion. The patch provides a stabilizing halo that can reduce crack propagation and give you a solid surface to rest your hand on when handling the fairing. In many emergency or field contexts, riders also employ masking tape to prevent the crack from widening and to keep the patch from flaking during a ride. The tape should be applied from the outside over the patch and from the back with a backing plate if needed. The idea is to create a simple shield that keeps water and debris out of the crack and helps preserve the rest of the fairing until a permanent repair is performed. It is important to note that this approach is only a stopgap. A flimsy tape fix on a front fairing or a high-stress wing is not reliable for high-speed riding or long trips. If you can avoid aggressive handling and keep speeds moderate, the temporary patch will work as intended, but you should replace it with a permanent repair as soon as you can. For added protection, some riders wrap the exposed area with a lightweight protective film or even a thin layer of clear tape to shield the repair from minor abrasion and UV exposure. It’s a practical step to minimize visible wear and reduce micro-scratches, especially when the fairing’s color or gloss is already damaged. When you find yourself in an environment without specialized tools, these field fixes become even more valuable. A heat gun, a roll of plastic welding rods, and a good plastic adhesive can go a long way. The critical caveat is to avoid making a patch that interferes with the fairing’s mounting points or air channels. The aerodynamic function of a fairing is not something to improvise around; even minor misalignments can change airflow and generate flutter or drag. If the damage involves carbon fiber, the temptation to improvise is strong, but the consequences of an improper cure can compromise strength. Carbon fiber repairs require careful resin application, precise curing conditions, and sometimes a vacuum or heat-environment to avoid delamination. Within a temporary field context, you might seal a small fracture with an epoxy resin and a backing strip of carbon fiber cloth to bridge the gap, followed by a careful sanding and a light gelcoat or sealant to protect the patch’s surface. This is a technique that demands accuracy, patience, and a controlled setting to prevent overheating or improper setting. When you are using any resin, wear proper PPE and ensure adequate ventilation. Carbon-based repairs should generally be kept to those who have some experience with resin systems, because mis-curing can create weak spots that fail under load or heat. The practical realities of the road require balancing speed with safety. The principles of a good temporary fix remain universal: clean, roughen, bond, align, and protect. The order matters because each step builds on the previous. Cleaning removes oils and waxes that defeat adhesion. Roughening creates microscopic anchors for the adhesive or filler to bite into. Bonding provides the actual strength that keeps the pieces together. Aligning ensures the repaired area sits flush with the rest of the panel so it does not snag or deform under wind pressure. Protecting ensures UV and moisture do not degrade the repair as the cure hardens and as you wait for a permanent fix. In practice, this means you should avoid rough handling, avoid heavy rain or aggressive rides, and treat the repair as you would a broken brake line or a loose fastener—address it quickly, but with care. If you must ride to a shop or back home, set expectations: keep speeds modest, avoid aggressive acceleration, and monitor the area for signs of movement or new cracks. The balance between getting home and risking more damage is delicate, but a well-executed temporary fix can be a lifeline. For riders who want to be practical about long-term outcomes, it helps to know the limits of these field repairs. A temporary patch can restore function and prevent further damage for weeks or even months in mild climates or with light use, but it will rarely match the durability, fit, and finish of a professionally repaired fairing. A professional repair involves precise surface preparation, proper resin systems, and paint matching that restores both appearance and structural integrity. If the fairing forms part of the aerodynamic envelope or carries significant mounting loads, a professional fix is almost always the safer choice. The entire idea behind temporary fixes, then, is not to replace the value of a solid, permanent repair but to preserve the bike’s integrity enough to ride to a workshop or to complete a trip without creating new hazards. As a final note, documentation can be invaluable. Take photos before initiating any repair, during the repair, and after the patch cures. This record helps technicians understand what you did and why, facilitating a smoother transition from field patch to permanent restoration. It also aids in identifying recurrent points of damage so you can address them in future maintenance, such as reinforcing mounting points or selecting more protective film to shield high-wear areas. If you want to explore how model-specific parts might influence a temporary repair, you can browse the Honda fairings category to see the typical shapes and attachment methods used on popular bikes. For a broader reference on field repair techniques and temporary fixes, see the Motorcycling repair guide referenced in trusted online resources. External references provide additional context on the science of adhesion, curing, and long-term maintenance. External resource: https://www.motorcyclecruiser.com/2025/09/17/how-to-repair-a-cracked-motorcycle-fairing/. Internal reference: Honda fairings. These pointers reinforce the idea that temporary fixes are a practical bridge to professional restoration, not a substitute for it. By treating temporary fixes as part of a disciplined repair plan, riders can stay safe, protect their investment, and keep the ride moving until a definitive solution is implemented.
Final thoughts
In conclusion, understanding how to assess and repair motorcycle fairings is vital for any business owner in the motorcycle industry. Whether dealing with plastic or carbon fiber, knowing when to use temporary fixes or permanent solutions will not only enhance safety but also foster trust with your clients. By mastering these techniques, you can provide exceptional service, increase customer satisfaction, and distinguish your business in a competitive market.